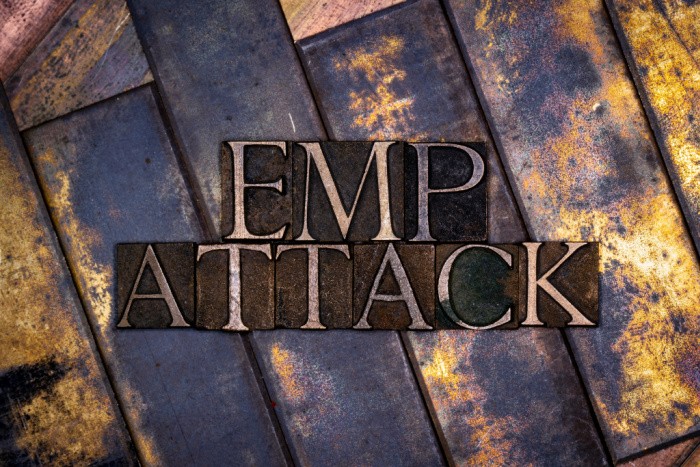
Let’s discuss surviving an EMP encounter and what that might entail. If you’re a prepper, then I’m sure you’re familiar with the concept of an EMP attack (Electromagnetic Pulse) and its significant threat to us. Without a doubt, it’s one of the world’s most dreaded disaster scenarios that would make Hiroshima and Nagasaki look like child’s play in comparison.
Experts have suggested that it would send a country clear back to the dark ages while wiping out 90% of its population in less than a year. Unfortunately, there are a few countries that have this weaponry capability, and they’re not considered our allies.
Just a single EMP event set off miles above the Earth would be enough to entirely wipe out all three power grids in the United States. It would sever all forms of communication, commerce, and transportation to our country within a single hour. Please obtain the book “Lights Out” by Ted Koppel if you don’t already have it.
Grocery shelves would be empty in less than a day, planes would fall from the sky, and you’d be left with no way of communicating with your loved ones. Pretty scary, huh? But that’s not the worst of it. It’s the people around you and how poorly they would react should a situation like this ever happen. Here are critical tips on how to survive an EMP encounter.
Food Production Supplies
Let’s be honest for a minute. If an EMP event were ever to occur in our country, it could take one or two years before power (this is way too optimistic for me) is restored in your region (I believe 15 years, but I will leave it at that). Eventually, your stockpile of non-perishable food and your stash of MREs will run out. About that same time, game and other wild animals will probably be hunted to near extinction. How will you then provide for your family?
It will be vital that you have land that you can use, along with the knowledge of how to grow your crops. This includes having the seeds already on hand, along with the experience before this type of event takes place. Livestock would be another important asset that you would need. Chickens would be able to supply you with eggs and cattle for meat, but you would have to know more about livestock breeding. Meat rabbits would be a great option as well.
Lighting
You’ll need to have several good-quality flashlights and a large arsenal of batteries to see your way around in the dark. Candles are another lighting option, but they’re dimmer and not favorable in windy conditions if you’re outdoors.
Camping lanterns, as well as oil lamps, will also do the trick during an EMP, but you’ll need thousands of hours’ worth of oil to keep them going. You will need solar lighting or hand-crank flashlights, at the very least.
With no electricity for your power tools and kitchen appliances to cook your meals, you’ll need a couple of different manual tools to get you by. Here are a few of them:
ManualCan Opener: Please remember that one is none and two is one. I think that’s the slogan.
Solar Oven: Use the sun to cook and boil your food when you’re unable to have a fire (please note: do not buy one unless you have at least 300 days of sunshine per year).
Meat Grinder: This unit is ideal for grinding meat to make hamburgers or sausages.
Solar-Powered Flashlight: This flashlight provides excellent illumination and is available in a two-pack.
Multi-tool: Carrying all the necessary tools can be cumbersome, but not with this 12-in-1 tool.
Items You Can Barter
Since you will no longer be able to depend on cash and credit cards to buy what you need, people will resort to the bartering system, reminiscent of the good old days. Think about what items people would consider valuable following a long-term power outage. Batteries, flashlights, lanterns, and canned food would be like gold.
Gasoline, ammunition, blankets, hygiene products, cigarettes, and alcohol would also be excellent supplies to stockpile for bartering. Even chocolate, board games, and playing cards for entertainment wouldn’t be a bad idea.
Build a Faraday Cage
If you were to build a Faraday cage, you’d be able to protect your electronics from an electrical pulse. You’d want to put your walkie-talkies, shortwave radios, electrical parts for your car and generator, and essential medical equipment in them so that they’d still work afterward. As it turns out, they’re very easy to build, while some preppers even use an old microwave oven to create one. Here’s how. You may wonder if I’m building or buying one; no, I’m not.
The bad thing is that if your “stuff” that can be damaged is not in the Faraday cage, it will be fried. I can’t picture putting my laptop, cell phone, etc., in a Faraday cage each night. It’s not going to happen. I admire those who may do it. I won’t do it.
Your cell phones will be of no use to you following an EMP attack, so you’ll need alternative communication options ready and stored in your Faraday cage. You’ll want to get your hands on a CB or ham radio for longer distances, and a pair of walkie-talkies for closer communication. That way, you can stay in touch with your loved ones who live within a reasonable distance, as well as your own family if you are separated for some reason.
Home Defense
I know for some of you reading this that you feel strongly against owning, let alone bringing, guns and other types of weapons into your home. I get it. But an intruder isn’t going to feel sympathetic to your beliefs, especially when they realize that your home has everything that they need to sustain them.
Chances are, there will be numerous visitors who come a-knockin during this time. You’re going to need arms to defend yourself, whether you decide on a handgun, shotgun, or rifle that you can also use to hunt wild game. You certainly don’t want to go light on ammunition.
Having a dog will also be helpful, as they can alert you to anyone lurking on your property in the dead of night. Homemade booby traps, strategically placed around your home, could also serve as a deterrent.
Survival Skills
Being prepared for an emergency by stockpiling food, water, and supplies will be necessary, but you can’t survive for an extended period on these alone. You’ll need a handful of survival skills to know how to collect fresh water, build a fire or a shelter, cook outdoors, and gather your family’s next meal, along with hunting. This is an essential step in surviving an EMP encounter.
Draw Less Attention
Following an EMP encounter, you don’t want to paint a big red target on your back so that people start to become curious. By this point, many of them would turn brutal towards humanity and would closely resemble characters from The Walking Dead.
I would encourage you to use the least amount of light at night and as little noise as possible so that you aren’t drawing attention to yourself. A bug-out location that’s further away from civilization would be a necessity if you’re living near a highly populated area. Please note that I do not have a designated bug-out location, and I will be staying in my home. It’s how I roll, I have everything I need right here.
An EMP encounter is just one more thing we need to prep for. No one reads this information to scare themselves, but rather to be more aware and thus better prepared. Make sure you are trying your best to prep for even the scariest scenarios. What tips would you add to this list of suggestions to help you survive an EMP encounter? May God bless this world, Linda.
Copyright Images: EMP Typeset AdobeStock_345352887 by IHX , EMP AdobeStock_89387314 by refresh(PIX), Tactical EMP Attack AdobeStock_376264314 By IHX,
The threat of a nuclear strike and total nuclear war is something most of us have hoped never to experience, but given the current political climate, it’s a possibility we can no longer ignore. Tensions are escalating globally. On one hand, the war between Russia (a nuclear power) and Ukraine doesn’t appear to be anywhere […]
According to AccuWeather, 2025 is going to have a very active hurricane season with 13 to 18 named storms, 7 to 10 hurricanes, and 3 to 5 major hurricanes. Meanwhile, FEMA has been cut by 30%, and recent budget cuts are making weather forecasts worse.
If you live anywhere a hurricane could strike, you need to start preparing right now. Most people wait until there’s a hurricane warning before they stock up on supplies, but as someone who lives on the Gulf Coast, I can assure you that this is a bad idea.
As soon as the local weatherman mentions a possible hurricane or even a tropical storm, people rush to the stores and buy all the bottled water, toilet paper, and canned goods they can get. You don’t want to find yourself driving from store to store, hoping to find some supplies that everyone else happened to overlook.
This guide might not cover everything you need for your particular situation, but it will give you a foundation on which to build. Take these ideas and modify them as necessary to create a hurricane preparedness plan that suits you and your family.
Hurricane Dangers
Hurricanes bring all sorts of dangers, from high wind speeds to widespread flooding. Once you understand the dangers, you’ll be in a better position to safely handle or even avoid them. Here are some of the most common dangerous associated with hurricanes.
Storm Surge
Storm surge occurs when vast amounts of water are pushed inland due to the powerful nature of a hurricane. The surge and accompanying rainfall will collect inland and create flood zones. These flooded zones will not recede until the hurricane has passed.
Storm surge is what caused so much damage during Hurricane Katrina. Even though the coast of Mississippi received higher winds, the storm surge in New Orleans brought the entire city to a standstill and left thousands dead.
High Winds
According to the National Hurricane Center and Central Hurricane Center, hurricane winds can range from 74-157 mph or higher. Getting wind speeds over 100 mph is like having a tornado come through, only affecting a much larger area. Hurricane winds are more than capable of ripping off rooftops, blowing structures over, knocking down trees and powerlines, and moving or even flipping vehicles over.
Utility Dangers
Due to the effects of high winds and storm surges, power lines are often knocked to the ground, and gas and water lines can be ruptured. A power outage is easy enough to handle (unless it’s extremely hot outside), but power lines that are lying on the ground but still live can be deadly.
Ruptured gas lines could potentially cause asphyxiation or even an explosion. And if water lines are broken, you’ll need to boil or purify your water in some other way to make sure it’s safe to drink.
Power Outages
You may be able to survive a short-term power outage during a hurricane, but keep in mind that outages could last days or even weeks. Some of the critical aspects of a home that require power include refrigeration, HVAC systems, communications, and any necessary medical devices.
Access to clean water will also be affected due to power loss in an area because pump stations and water treatment plants may not be operating.
Flood Waters
Other than the obvious risk of drowning, flood waters have many hazards to be aware of. They can carry dangerous debris above the water and conceal hazards below the surface. Flood waters can wash out roads, collapse bridges, and carry away vehicles. It only takes about a foot of water to start carrying an average vehicle away.
Some of the other unseen dangers within flood waters are active power lines, as well as hazardous materials such as fuel, oils, chemicals, and sewage, not to mention any dangerous wildlife.
Preparing Your Home
In this section, we’ll talk about various things you can do to help protect your home from a hurricane.
Get Good Insurance
One of the first things you should do is to get insurance for your home and the items within it. Most homeowners already have homeowner’s insurance, but they might not have flood insurance. Remember, if the insurance companies decide your home was destroyed by a flood and not a hurricane (even though the hurricane caused the flood), they would refuse to pay unless you have a separate flood insurance policy.
If you don’t own your home, at least get renter’s insurance. As much of a pain as it is to replace items, most of them are replaceable. Being insured will help alleviate the emotional and financial stress of how to replace damaged property.
Window Protection
Windows are a weak point in any home, and they will certainly be susceptible to the high winds and flying debris generated by a hurricane.
The cheapest way to cover up windows is with plywood. Purchase as many sheets as necessary and custom-fit them to each window. Be sure to have plenty of screws, nails, a hammer, or a screwdriver.
A second option is to install hurricane shutters on the outside of your home. These durable shutters can be left on year-round and shut when needed.
Utility Shut Offs
It’s important to know where your home’s gas, water, and electrical shutoffs are located and how to operate them. If you decide to evacuate, you can turn these before you. If you don’t have one already, be sure to get a gas shutoff wrench.
Stage Furniture
Furniture, or anything that sits on the floor, should be raised and covered to help protect them from flood waters. Raising items can be done by using something as simple as cinder blocks, which will provide roughly a foot of clearance. Large tarps or sheets of plastic can then be used to cover the top of the items.
Water Proofing
Any important, valuable, or irreplaceable items such as birth certificates, deeds, medical information, family photos, etc., should be stored in hard, waterproof containers. This is also true of any emergency supplies. An affordable way to do this is to purchase plastic totes and duct tape their lids shut.
Walk Around
Walk around the exterior of your home and look for things that need to be put away or secured. Store or secure items like toys, tools, chairs, lawn decorations, bicycles, etc. Any outdoor structure, like a shed, should be anchored to the best of your ability. Think about trimming any large trees that could pose a risk to your home or nearby power lines.
Evacuation and Sheltering in Place
Some people choose to evacuate before a storm makes landfall, some choose to wait until an evacuation order has been issued, and some will choose to ride out the storm by sheltering in place. In the following sections, we will briefly cover what to do if you choose to evacuate and if you choose to shelter in place.
Evacuation
Leaving before a storm makes landfall is the safest option and when possible, preparations should be made days beforehand. When you decide to leave is a personal choice, but the sooner you do it, the safer and easier it will be.
It is generally not advised to evacuate once a hurricane has hit because it is much more dangerous. Below is an evacuation checklist.
Make sure you have reliable transportation.
Fill up your vehicle’s fuel tank and have as much spare fuel as possible.
Have multiple evacuation routes planned out ahead of time.
Have an emergency vehicle kit as well as other necessary emergency supplies.
Have some emergency supplies in a bug out bag in case you have to leave your vehicle behind
Along with GPS devices, have physical maps in your vehicle.
Inform friends and family of your intended evacuation route, the destination, and approximate timetables.
Sheltering In Place
Should you decide not to evacuate, here is a checklist of items to go over when sheltering in place.
Make sure your home is prepared as outlined in the previous section.
Ensure you have adequate emergency supplies as outlined in the next section.
Find the sturdiest room in your home and designate that as your safe room. Make sure your emergency supplies are in there before the storm hits.
Inform friends and family that you will be sheltering in place and check in with them as often as possible.
Emergency Supplies
The list of emergency supplies below is meant to highlight some of the most important items to have and may not include everything that could go into a hurricane emergency kit. Modify and add to the list as needed until you feel you are properly prepared.
Light Sources
It's highly likely that the power will go out during a hurricane, and being in the dark is not safe. Having a few different types of light sources will give you more options and safety.
Every emergency kit should have candles, but due to their safety risks, they should only be used as a last resort and only if you know there isn’t a gas leak.
A smartphone is going to be a person's go-to communication device. But during or after a bad storm, these phones may not work. Consider getting a power bank and a solar panel to keep it charged.
If cell service is down, texts might still go through. If they don’t, it would be great to have a satellite phone or a HAM radio set and a license to use it. At a minimum, you should have an emergency radio. While this won’t allow you to communicate with someone, it will provide information on the status of the hurricane.
Batteries, Chargers, Power Generation
Make sure you have plenty of extra batteries for devices that require them and spare charging cables for rechargeable devices.
You also need to give some thought to your power needs and what level of power generation you want to invest in. Something small and portable like a SunJack can power small devices, whereas a power bank like a Jackery or a fuel generator can power items as large as appliances.
Hygiene and Sanitation
A lack of power and access to clean water will pose a risk to hygiene and sanitation. Here are some items to have on hand that will help you to stay clean and safe.
Hand sanitizer will help you to keep your hands clean without using extra water.
Extra water that is specifically designated for cleaning purposes.
With as much water as a hurricane brings, it may seem odd to think about fires, but they’re still worth preparing for. During Hurricane Sandy, a gas leak led to an explosion and subsequent fire that burned down over 100 homes.
Store as much potable water as you can with a minimum of two to three gallons of drinking water per person per day in mind. You will also want to stock up on water filters in case your water supply runs out. You can choose from filtered water bottles or a handheld filter like the Sawyer Mini.
You should also have water purification methods that can include, non-scented bleach, water purification tablets, and a heat source for boiling water. Lastly, if you have to make potable water, you will most likely need a container for transporting it and storing it. Something like a collapsible water jug is easy to store and allows you to set up a clean water source wherever you like.
Food
Since it is likely that you won’t have power during or after a hurricane, you’ll want to stock up on non-perishables such as canned goods and other foods with a long shelf life. The amount of food you can store is limited to how much space you have. If you want to dig deeper, check out this article.
Can Opener
If canned food is in your emergency supplies, then you are going to need a can opener that is non-electric. An old reliable opener is the P-51, but if you want something more familiar then get a modern can opener.
Off-Grid Cooking Tools
Since the power will probably be out, you’ll need a way to cook food without electricity. A great option is to simply build a fire in your backyard and cook with a cast-iron skillet or Dutch oven.
However, the aftermath of a hurricane, when debris is everywhere, may not be the best time to build a fire. Especially if it’s hot outside.
A better option is a camp stove such as this Coleman tabletop stove. It’s easy to use and sturdy. Be sure to have a few bottles of fuel as well.
Disposable Plates and Utensils
When the power is out and clean water becomes limited, you don’t want to be doing dishes. Disposable plates and utensils will be useful to have.
Trash Bags, Tarps, Plastic Sheeting
Trash bags, tarps, and plastic sheeting have a lot of different uses. They can be used for temporary fixes (broken windows), waterproofing, water collection, solar stills, sanitation purposes, etc.
Duct tape is such a phenomenally versatile material that you should have several rolls of it in your emergency kit.
Bug Spray and Sunblock
Hurricanes tend to happen in areas that are warm and moist. When there is a lot of outside work to do after the storm, bug spray and sunblock can be very useful.
First Aid Kit
A lot of emergency kits tend to only have minimal first aid kits with band-aids and such in them. Those are fine to have, but they won’t help if you seriously injure yourself and first responders aren’t able to reach you.
Along with a minimal first aid kit, be sure to pack in a trauma kit for serious injuries. Also, make sure you know how to use it.
Knives and Multitool
No emergency kit would be complete without a knife and a multitool. Which ones you choose are a highly personal choice, but a quality pocket knife that doesn’t take up much space is the Buck 110, and a good multitool to have is the Leatherman Wave. Another good option that combines both tools would be a Swiss Army Knife.
Ponchos
If you have to go outside or your home is breached, a poncho will help to keep you dry.
Tools
Other than a knife and multitool, some other tools to have available include:
It's inevitable that some people will take advantage of the chaotic situation and lack of law enforcement to steal whatever they can. Shore up the security measures in and around your home and know how to help deter criminals.
It also wouldn’t hurt to have a firearm for self-defense.
Flotation Devices
Given that flood waters are a very real danger during and after a hurricane, it would be a good idea to give some thought to having some life vests in your kit and even an emergency raft, especially if you’re in an area that’s prone to flooding.
Emergency Signaling
A flashlight can be used as an emergency signal device, but two other items to include are an emergency whistle and a signal mirror.
Important Documents
As mentioned earlier in the guide, all important documentation, i.e. deeds, birth certificates, social security cards, medical history and conditions, pet documentation, insurance papers, tax documents, licenses, etc. should be kept in a watertight and secure container.
To help keep all this stuff organized, it’s a good idea to create an emergency binder that has everything you need in waterproof sleeves.
Pet Supplies
If you have a pet, then any supplies it uses should also be stored with your emergency supplies. You can even go a step further and put together a pet survival kit.
Entertainment
Riding out a hurricane or any disaster can be a stressful situation. A couple of entertainment items in your emergency kit can help to pass the time and take your mind off the situation. This is especially true for little kids. Some items to consider are:
As mentioned earlier, hurricanes can cause widespread power outages that can last for days, weeks, or longer. Any stores that open afterward will most likely only accept cash as payment. It’s a good idea to have a few hundred dollars in small bills and coins at your disposal.
Personal Items
Any personal items that you need such as medications, eyeglasses, contact cleaning solution, etc. should also be a part of your emergency kit.
What To Do After a Hurricane
It’s human nature to want to go out and wander around after a storm to survey the damage. Initially, this should be limited to only your property and maybe that of your neighbors to check on their safety.
Remember, after a hurricane there will be a lot of hazards, some of which you won’t be able to detect. Trying to get around in a vehicle or even on foot is only going to clog up roadways further and hinder the efforts of utility workers and emergency crews.
After a storm, you should check on your property first. If there is utility damage, then turn the mains off if you feel comfortable doing so. If you smell gas, leave the area immediately and report it to fire crews and the gas company.
Inform friends and family of your situation and that you are okay.
Before cleaning up any damage to your property, it is a good idea to take as many photos of the damage as possible. This will later help you out with insurance claims.
You should also protect yourself during any cleanup efforts by wearing PPE (personal protective equipment) This includes items like hard hats, eye protection, masks, gloves, joint pads, and proper footwear.
If you are capable, volunteer your time to an organized emergency crew that could use help. After hurricanes, resources will be stretched thin, and putting a community back on its feet takes a lot of effort.
Conclusion
Everything I wrote about above is standard advice for preparing for and surviving a hurricane, so it’s easy to gloss over most of it. Please don’t. Remember, hurricanes are going to become more frequent and far more powerful in the coming years.
Within the next decade, we will likely see some of the most powerful hurricanes in recorded history thanks to record-high ocean temperatures. Don’t wait until the last minute to prepare. Be prepared to bug out if need be, and have a plan for sheltering in place. Your survival may depend on it.
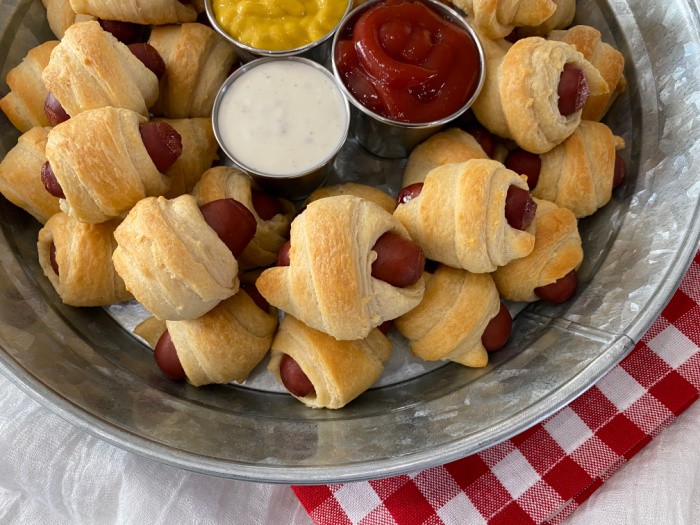
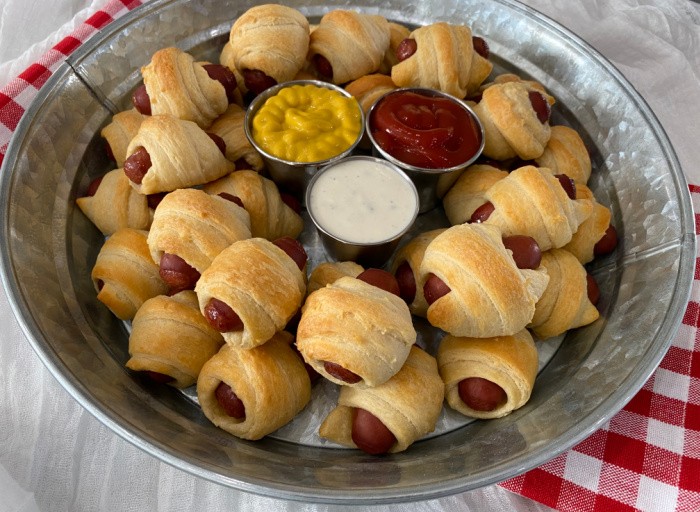
You will love this Little Smokies Pigs In A Blanket recipe! Oh my gosh, my family fell in love with these because they are so good! I wish we had made more for a recent family get-together because we ran out of them. They would be great for July 4th picnics!
These Little Smokies Pigs In A Blanket are a little crunchy on the outside and so flavorful on the inside. We found that dipping them in mustard, ketchup, or ranch dressing enhanced the flavor.
It’s funny because I had Mark count the links in one bag. There were 55 of them, so that means we consumed a lot of these! We’ll definitely be making this dish in the future as an appetizer for holidays, family reunions, or neighborhood guest parties.
An interesting note that I wasn’t aware of is that April 24 is National Pigs in a Blanket Day! Who would have guessed that was a thing, right? Well, it is.
Little Smokies: These little smokies are delicious little smoked sausages made from a variety of meats, such as beef, pork, chicken, meatballs, or turkey, and herbs and spices. They are typically served as a snack or an appetizer. They are so delicious and a great source of protein!
Crescent Dough Rolls: This light and buttery dough is made of flour and butter and rolls out into a sheet of triangular-shaped slices. When the triangles are rolled from the largest end to the skinniest, the final cooked product is a flaky and soft crescent roll. Pillsbury Crescent Rolls have been a favorite for countless families over the years.
Little Smokies Pigs In A Blanket
Step One: Gather the Ingredients
What I love about this recipe is that it has only two ingredients! You can store a few packages of the Little Smokies in the refrigerator or freezer and make them whenever you want a little snack. If frozen, just thaw the links in the refrigerator the day before you plan to use them. The crescent rolls are typically good for about a month in the refrigerator (check the dates on the cartons).
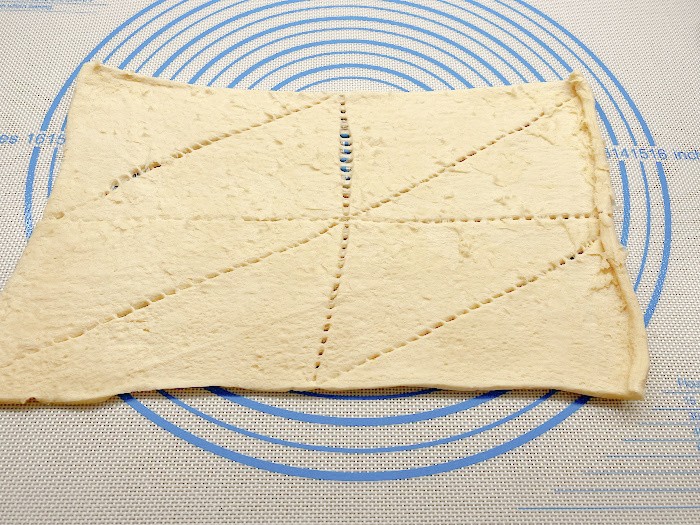
Preheat your oven to (375°F) = (190°C). Place some parchment paper on your cookie sheets, making the clean-up more manageable. You can also place the pigs in a blanket on an ungreased cookie sheet. Unwrap the packages of crescent rolls. Spread them out, and you should have 16 triangles. (8 triangles in each package of crescent rolls).
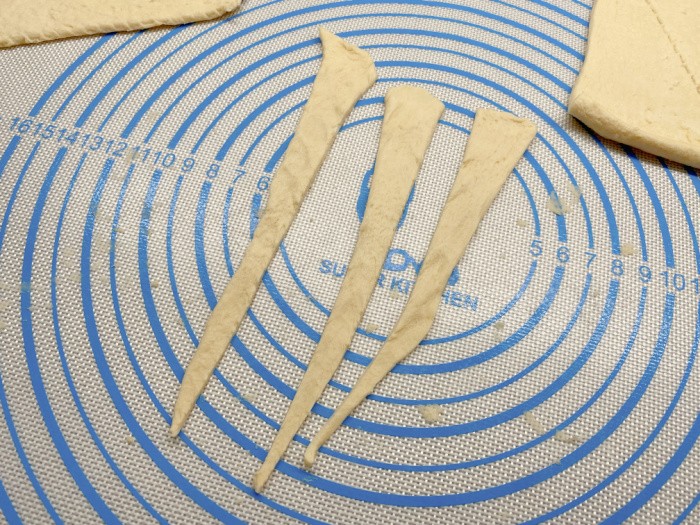
Step Three: Cut the Dough into Narrow, Long Triangles
Cut each triangle lengthwise into narrow, long triangles. I tried using a pizza cutter and decided that a sharp knife cut dough better. Please note that you should keep the dough chilled. Use one carton and keep one in the refrigerator. Then after doing the first batch, take the other carton out of the frig to use it.
Step Four: Place the Sausage Link on the Wide End – Then Roll the Pigs in a Blanket – Tuck the End
Place a little smokie on the widest end of each triangle. Then, start rolling the pigs in a blanket to the skinny end of each triangle. Tuck the end under and place the seam-side down on the cookie sheet.
Step Five: Place the Pigs in a Blanket on the Cookie Sheet
Be sure to space them far enough apart on the cookie or baking sheet so they have room to puff up a little as they cook.
Step Six: Bake for 12-15 Minutes
Bake for 12-15 minutes, or until golden brown.
Finished Product
Serve these little smokies pigs warm from the oven with the classic ketchup, mustard, ranch salad dressing, or your favorite dipping sauce. Enjoy.
Gather the Ingredients. I love that their are only 2 ingredients in this recipe!
Preheat your oven to (375°F) = (190°C).
Place some parchment paper on your cookie sheets, it makes the clean-up so much easier. You can also place the pigs in a blanket on an ungreased cookie sheet.
Unwrap the packages of crescent rolls. Spread them out, you should have 16 triangles. (8 triangles in each package of crescent rolls). Cut each triangle lengthwise into narrow long triangles.
Place a sausage link on the widest end of each triangle. Then start rolling the pigs in a blanket to the skinny end of each triangle. Tuck the end under and place seam side down on the cookie sheet.
Be sure to space them far enough apart so they have room to puff up a little while cooking. Bake for 12-15, or until golden brown.
Serve warm out of the oven with ketchup, mustard, ranch salad dressing, or your favorite dipping sauce. Enjoy.
How do I store these?
We never have leftovers, but if we did, I would store them in an airtight container in the fridge for up to three days.
Can I reheat them?
Yes, you can. Place them on an ungreased cookie sheet covered with some foil. Bake at (325°F) = (162°C) for about 5 – 10 minutes or until heated through.
Can I freeze them?
Yes, you can freeze them. Place them in a freezer baggie, place them on a cookie sheet, and freeze them. When ready to heat them, put them on an ungreased cookie covered with foil. Bake at (325°F) = (162°C) for about 15 minutes or until heated through.
Where did the name Pigs in a Blanket come from?
I bet most people would say this treat was invented in the 1950s or 1960s. The term started in the 1600s when the field or farmworkers took meat cooked in the dough to work.
Can I use regular hot dogs instead?
Yes, you can. Choose your favorite ones and cut the hot dogs into 3 or 4 pieces. Then, follow the recipe, substituting the links for the cut hot dogs.
What variations can I make to this Little Smokies – Pigs in a Blanket recipe?
Replace the little smokies with cocktail-sized hotdogs.
Use puff pastry instead of crescent roll dough.
Brush the top of the pigs in a blanket with egg wash or melted butter and sprinkle with sesame seeds before baking.
Add cheese to the inside of the pastry before rolling up the little smokies.
Use flavored crescent rolls for extra flavor.
Wrap the little smokies in bacon instead of pastry dough.
Use different types of mustard for dipping sauce instead of ketchup or BBQ sauce. Honey mustard sauce would be delicious!
Sprinkle herbs on the dough before wrapping around the little smokies, such as Italian seasoning, oregano, thyme, bagel seasoning, garlic powder, or any herb you love.
Make mini versions by cutting the dough and smokies into smaller sizes.
What can be served with Little Smokies?
Serve with ketchup, ranch dressing, barbecue sauce, mustard, or another favorite sauce
Over 128 million of these are consumed over the Christmas holidays each year! Betty Crocker had a kid’s cookbook published by a US firm in 1957. I have to be honest; I had never heard of them or had not had them until one Halloween party at my house. A neighbor brought them, and they were so popular that I had to get the recipe from her. I LOVE these!
Looking to serve some other delicious appetizers? Check these out!
I hope you try my Little Smokies Pigs In A Blanket recipe. Please let me know how it went at your home. They are the perfect party appetizer for friends or family get-togethers! You’ll want to share these mini pigs in a blanket on your Facebook, Instagram, and Pinterest pages. They are so fun and delicious!
Boy, both the kids and adults in my family love these. Keep teaching your kids and grandkids how to cook from scratch, mainly if it’s as easy as this recipe. May God Bless this world, Linda
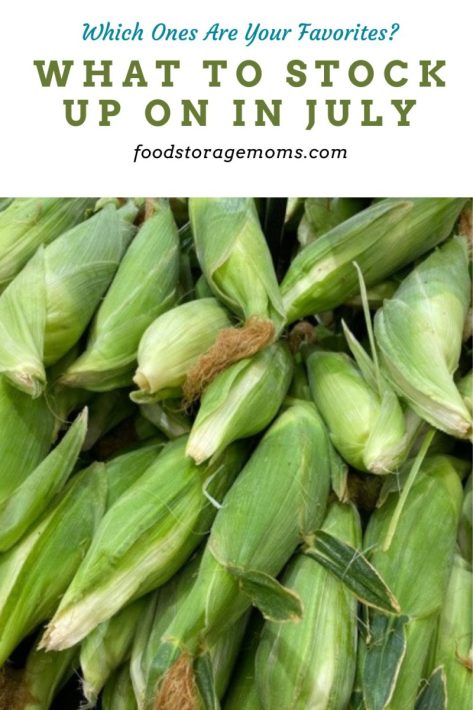
It’s all about what to stock up on in July today. This post is part of my ongoing monthly savings plan. We can save money on those items we need, or want if we are aware of the month they are at the lowest price possible. I realize prices on everything are going sky-high right now, but we may still be able to watch for markdowns on these items.
Seasonal Fruits and Vegetables
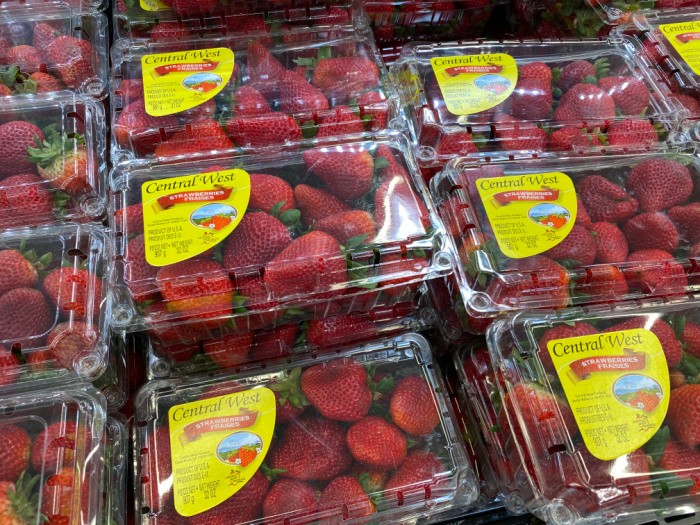
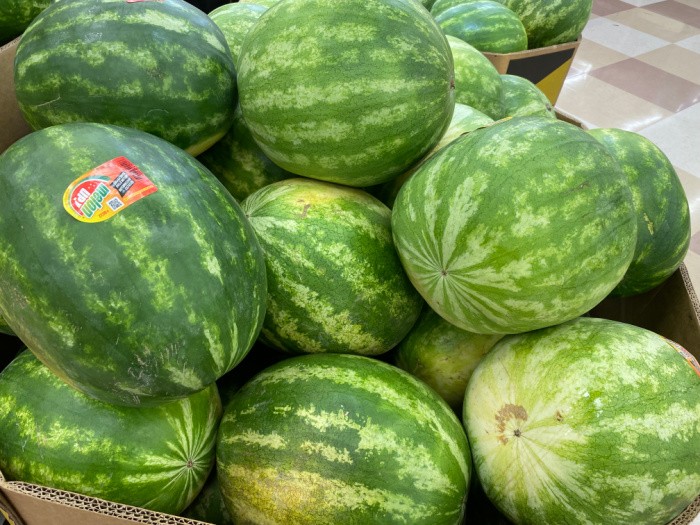
The summer is hot and fruits and vegetables are plentiful this month. Corn, cantaloupe, blueberries, strawberries, plums, peaches, and watermelon are all in season right now.
Watch for coupons and really good buys, even at stores like Target. I bet you can almost taste those fresh strawberries, right? Be sure and grab some whipping cream, and plan to make some shortcake! Watermelon slices are the best!
Fireworks
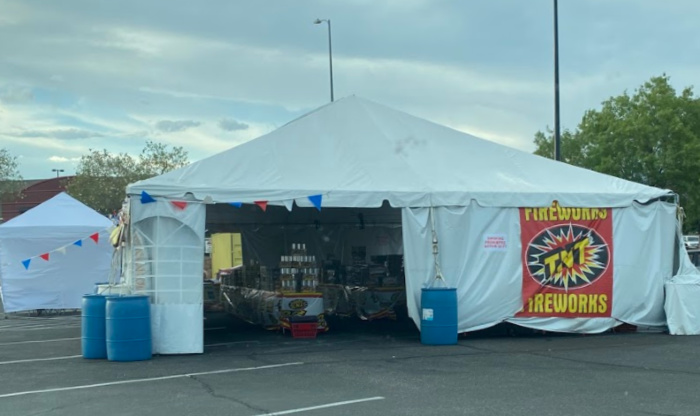
If your community allows fireworks, you already know July is the month to buy the leftover fireworks after the holiday to use for New Year’s celebrations, or to hold over until next year’s July 4th fun. If you live in Utah, you can use any leftovers to help celebrate the July 24th holiday, if fireworks aren’t restricted in your area. You can store fireworks in a safe, secure, and dry place and pull them out to welcome in the New Year or other holidays.
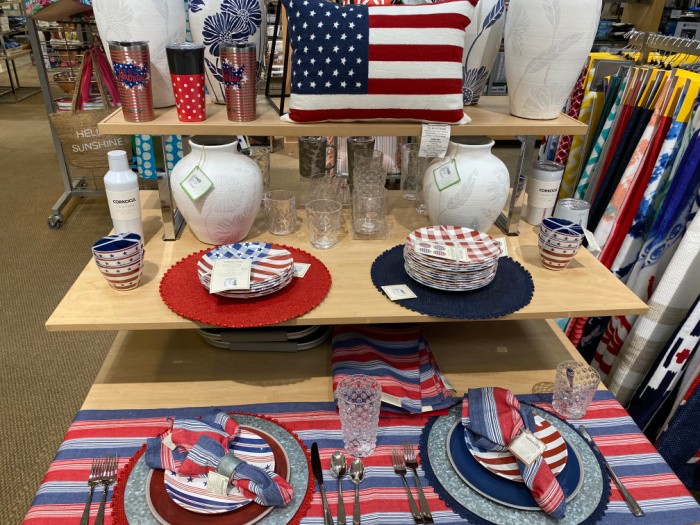
July 4th Decorations
I love, love, love the colors, red, white, and blue. These colors bring out the best in everyone in the USA! I usually use plastic plates on July 4th, but this display at a local store caught my eye, so I took a picture of it. Life is so good!
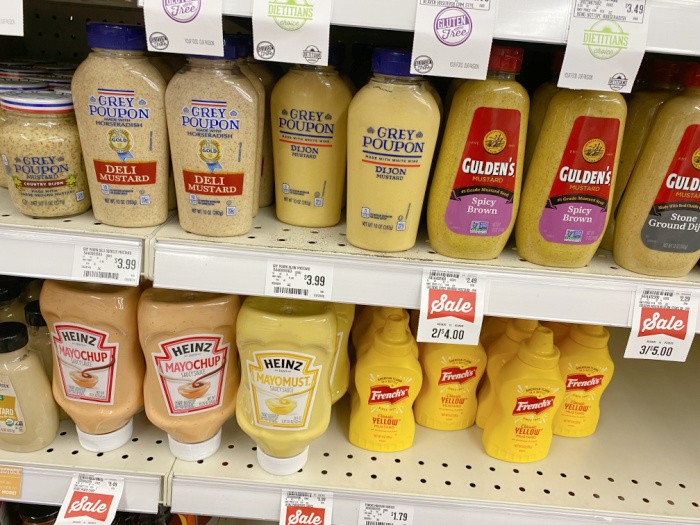
Condiments for Barbecues
It’s a great month for stocking on up mustard, mayonnaise, and ketchup. Watch for your favorite barbecue sauce to be on sale as well. There may also be some savings on relish and pickles too.
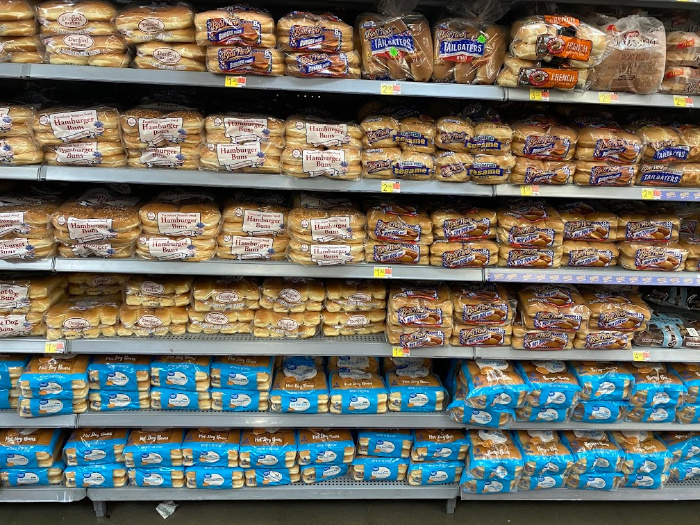
Hot Dog and Hamburger Buns
Most grocery stores stock up for that 4th of July barbecue and they don’t want to run out of the hot dog or hamburger buns. It’s a perfect time to stock your freezer with all kinds of buns for the fall and winter months. Condiments will be drastically reduced too. As mentioned above, it’s a great time to stock up on mayo, mustard, and other goodies to go along with the hot dogs and burgers. This is the month to stock up on paper plates, cups, and napkins for picnics and possible emergencies.
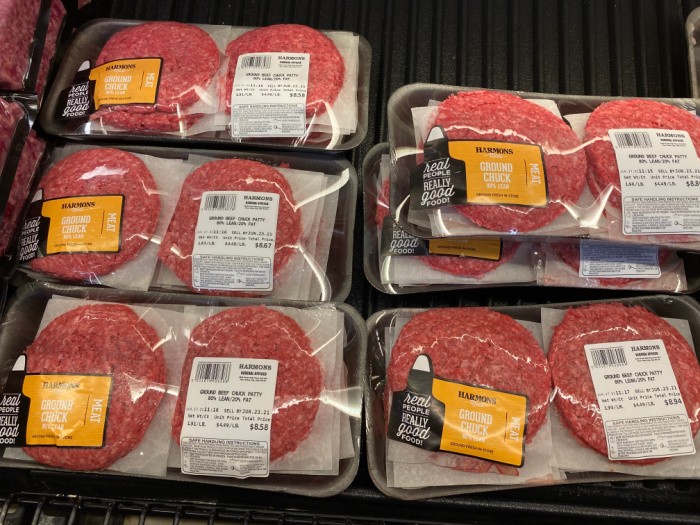
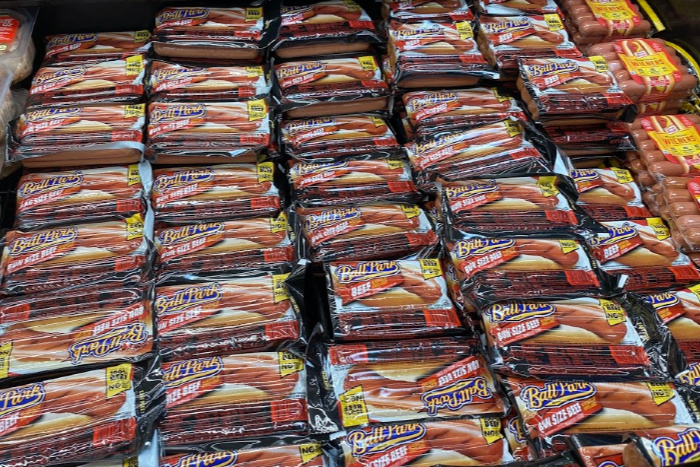
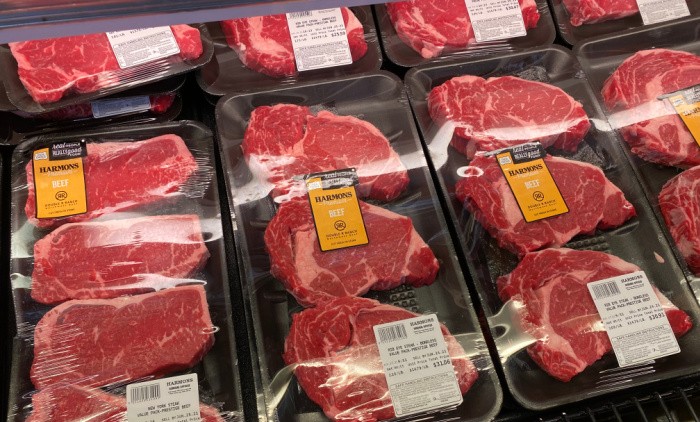
Meat To Barbecue
It’s a great month for having a barbecue! Watch for sales on hamburger meat, hot dogs, and steaks. Meat products as a group are pretty expensive right now. Consider trying other options like ground turkey or beef substitutes. Also, consider pork options, pork seems to be on the cheaper side.
Can’t you just smell the barbecue right now?
Here’s the deal with meat in the summertime, grocery stores stock up big time hoping to sell a lot of meat for those barbecues! You will see some discounting, but don’t expect to see pricing as we’ve had in the past. If you do find some good buys, it could be the time to stock your freezer with hot dogs, hamburger meat, and steaks. As we’ve all seen, meat prices have been going up the past few months, so I’d suggest looking for deals during the holiday period now before you see them go up even more.
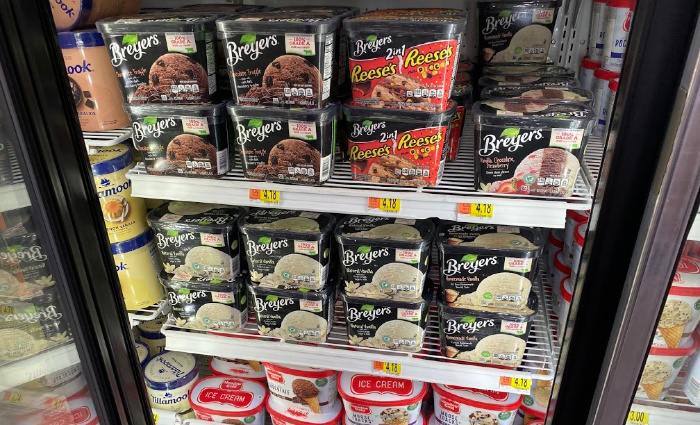
July Is National Ice Cream Month
Ice cream in every form will be on sale this month. I have seen some significant discounts in July, and I stock up on all the ones we love the most. Don’t forget to watch for coupons at your local stores, and even the pharmacies. Our local Smith’s store often has great deals on various brands of ice cream, particularly their house brand. What a fun way to help deal with those hot days, and enjoy a treat at the same time!
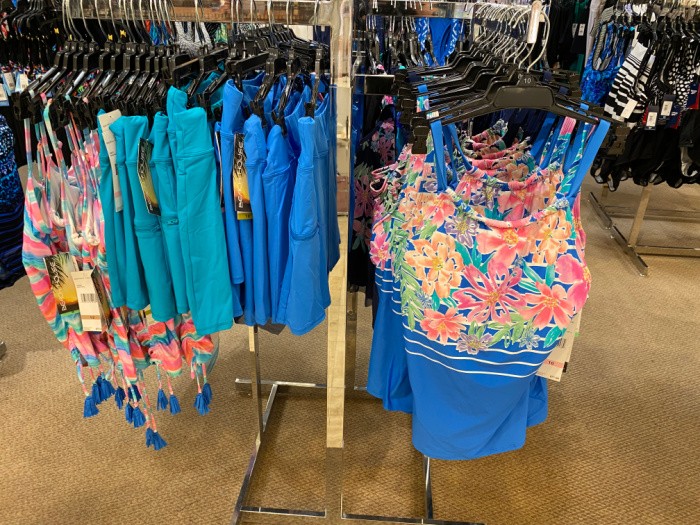
Swimwear
July is a great month to find that swimsuit you have been looking at that was maybe too pricey. I bet it is on sale, if it’s still available. You will see 40%-60% off swimsuits, beachwear, beach towels, floating devices, goggles, and pool toys.
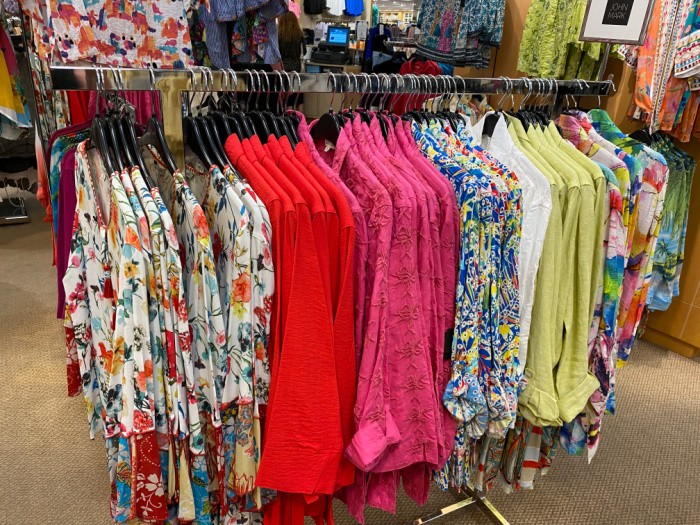
Designer Clothing
If you like to buy designer clothing, July is a great month because Nordstrom’s and Dillards typically have their half-year clearance sales going on with drastically reduced prices. Just be prepared to possibly stand in line, just giving you the heads up.
The stores are gearing up for the fall clothing lines and back-to-school stuff coming in and they need to unload their summer items. Don’t forget to look for great buys on sandals, summer shoes, and designer flip-flops.
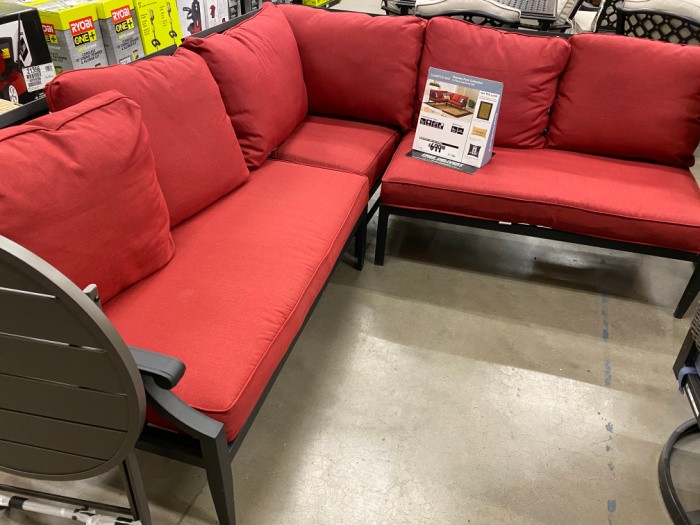
Garden and Patio Items
This is a great month to pick up an outside table and chairs set or those outside rocking chairs you have been wanting. These could be about 40%-50% off the original price. The stores are looking to clear out the summer fun items and getting ready to stock space heaters and fireplace inserts.
Tools
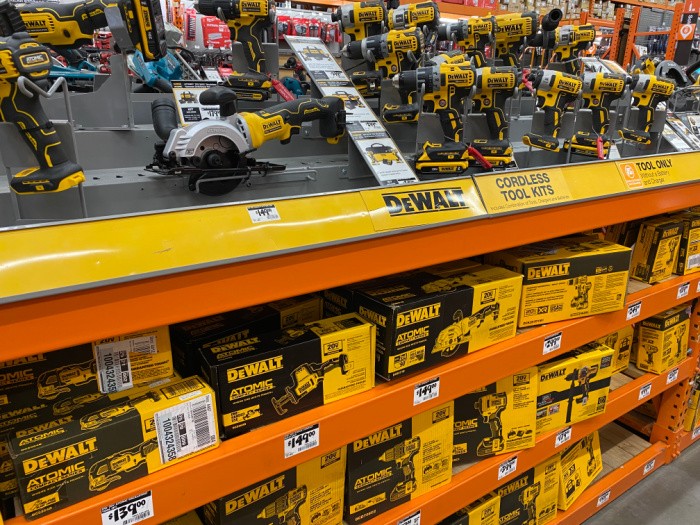
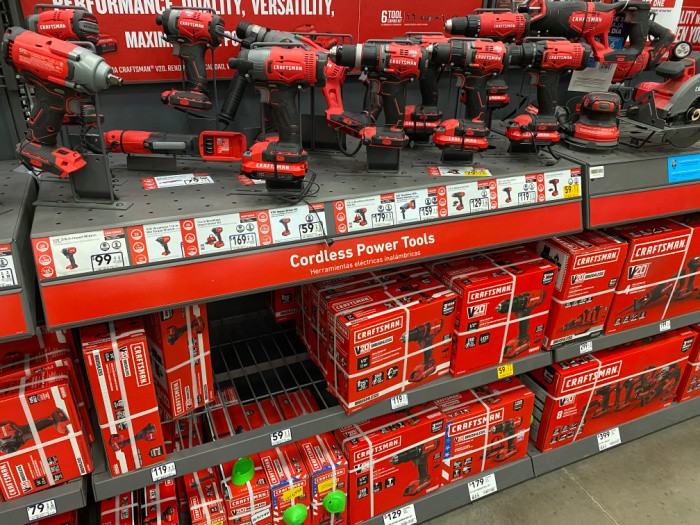
Because Father’s Day was in June, you will now see specials on the tools the stores have stocked up on and didn’t sell as expected. Grab those tools you need to start that project you have been needing to do. Mark and I saw the Craftsman tool display, boy did that bring back some good memories. We helped build out many basements for family and friends with Craftsman and DeWalt tools over the years.
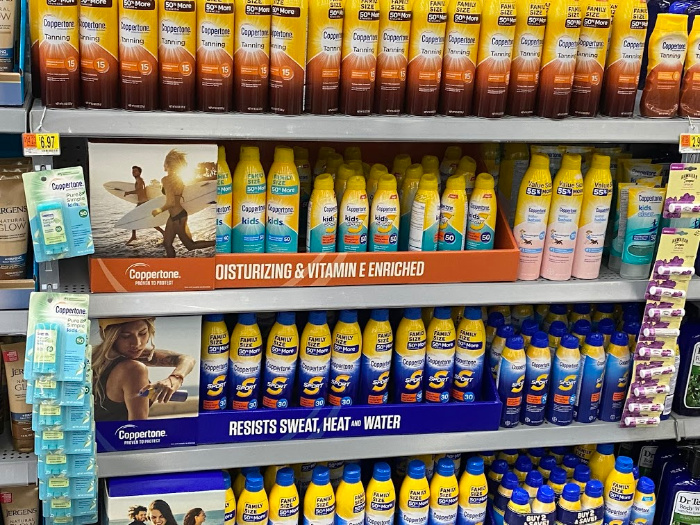
Sunscreen
You probably know how expensive sunscreen can be. I stock my hall closet big time for family and guests. Every once in a while I see it for 30%-50% off the retail price. Because we used to live in Southern Utah (the desert), I had plenty of sunscreen in my pantry since I didn’t want anyone getting sunburned. I’ve always felt it’s critical to have several containers on hand. Check your mailbox for coupons to Target and other local stores. My favorite brand is Aveeno 50 SPF. I go right to the section where it’s marked down every July.
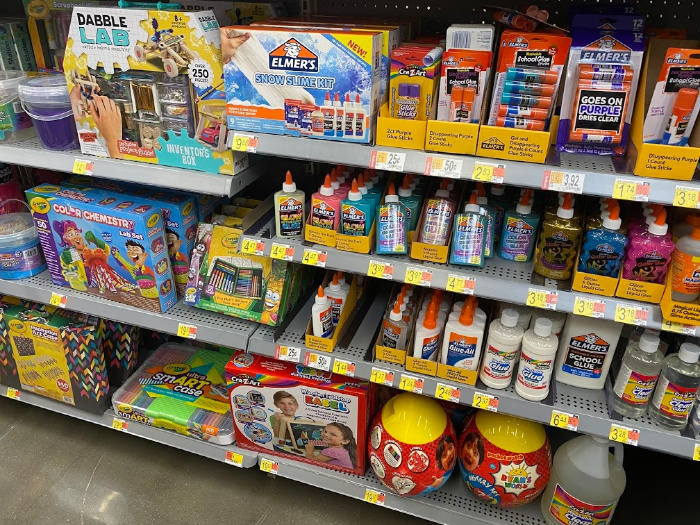
School Supplies
If you have kids going back to school, July is the first month to stock up for school while the best supplies are fully stocked on the store shelves. You will see rock-bottom prices on items you need to fill those backpacks. The prices will go back up the closer it gets to the first day of school because the supplies will be depleted. It’s all about supply and demand.
You will see binders, calculators, pencils, pens, paper, pencil boxes, etc. They will also have glue, glue sticks, and other necessary items on sale!
I hope today’s post helps you with what to stock up on in July. It’s a great time to buy those items we need at the very lowest price available this time of the year. May God bless this world, Linda
Copyright Images: Shopping Basket Deposit photos_51821091_xl-2015, Hands with pink piggy bank Deposit photos_32884157_s-2019