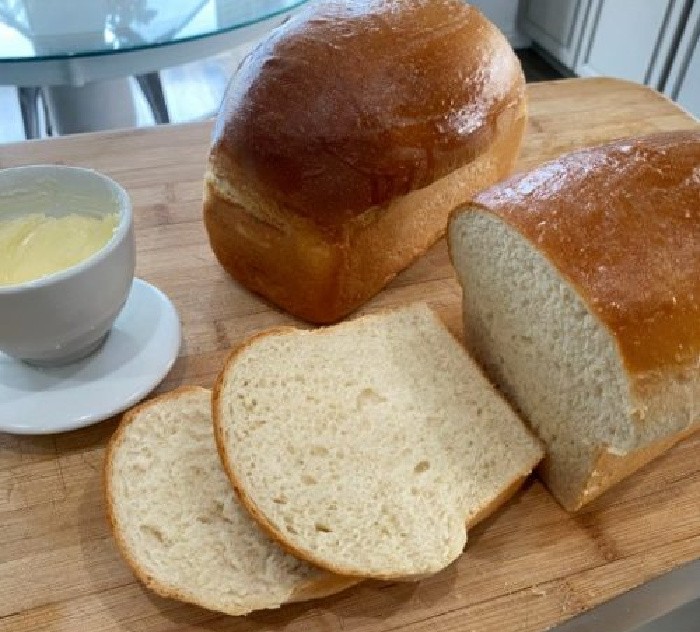
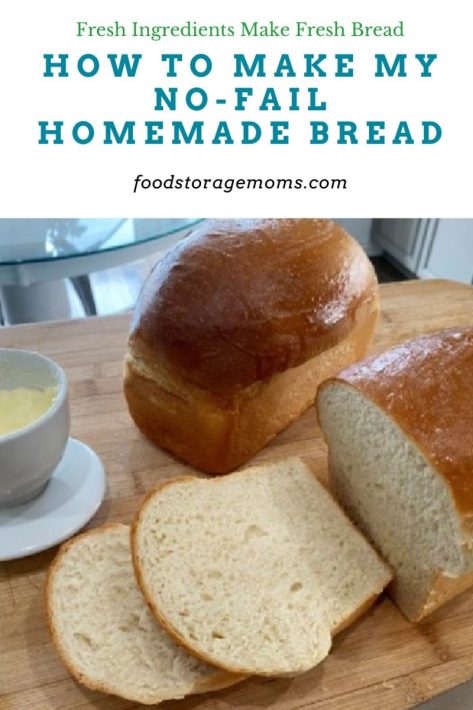
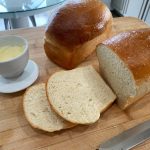
I’m sure you know by now that I love making my no-fail homemade bread and teaching people how to do the same. There is something about feeling the dough in your hands, punching the dough down, and then molding the bread into loaves.
My mom taught me how to make bread, and I can still remember the smell of baking bread in our home. I also loved watching my daughters sit on the kitchen counter or bar stools and making bread with me.
Now I get to make bread with my grandkids. Who doesn’t love watching a child mold a piece of dough into a masterpiece?
In every neighborhood where I have lived, I have taught my neighbors how to make bread if interested. I have taught people how to make bread in really nice kitchen stores (Bosch). I understand when people have no desire to learn how to make bread.
Maybe it’s because they didn’t grow up with homemade bread. Also, sometimes people tell me they “can’t” make bread. I get it. I do.
I couldn’t make bread without fresh ingredients. I promise you that if I teach you today how to make bread, you will be successful.
How To Make Bread:
These are some tips for those who need a little help learning how to make bread. I jotted them down one by one as I thought of them.
Use only fresh ingredients. Here’s the deal, if your yeast package has been sitting on your pantry shelf for a month or more rather than being kept in the freezer or frig you may need to throw it out. It will probably not work.
I keep my excess SAF yeast in the freezer, and the amount I use monthly is in my refrigerator in an airtight container. I only use SAF yeast. That may sound a little snotty, but my bread turns out 99.9% of the time. I buy Saf Instant Yeast, 1 Pound PouchMark, and bread flour to use when I make white bread, cinnamon rolls, dinner rolls, breadsticks, or croissants. I buy the bread flour in 25—or 50-pound bags.
I store the flour in plastic buckets with a red Gamma lid. I buy only the white flour I can use in 9-12 months. After that, it will become rancid, and my bread will not turn out as it should.
The Gamma Seal Lid, Red . You can buy the Gamma lids at stores like Walmart for about $18.00, give or take, plus tax, of course. I purchase red Gamma lids for my wheat and flour.
I color-code all of my buckets. Blue is for sugar, yellow is for pasta, and green is for laundry products. I use other colors in the garage for fuel, like charcoal, pinecones, etc. I will talk about that another day.
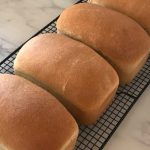
Decide on the bread pan size that works for your family. I like to make one-pound loaves, but I only make bread for myself and my husband. Of course, I take a few loaves to special neighbors as well. Here is one that is similar to what I use: Fat Daddio Bread Pans
My bread dough can be frozen, but I use it within four weeks. I grease a gallon-size bag and place some of the dough I want to use later, AFTER the rising/proofing stage. Be sure to leave some room for expansion in the freezer.
When I want to use it, I put the frozen bag in the refrigerator the night before. Once I’ve pulled it from the fridge, depending on the room’s temperature, I let it thaw until about noon the next day. I then grease the pans I want to use and mold the dough into bread, rolls, breadsticks, or whatever.
Cover the Dough With Plastic Wrap or a Wet Towel
I cover the dough with greased plastic wrap or a wet towel while it rises. I remove the plastic wrap or damp towel before baking. Bake according to the directions on my recipe.
I always bake mine at 350°F = 176°C degrees. One-pound loaves will bake in about 27-30 minutes, while larger loaves will take 35-45 minutes.
Yes, you can use a thermometer, but I don’t. When first learning to bake bread, you may want to use one. The inner temperature at the bottom of the loaf after baking should be around 190 degrees.
If the bread dough has eggs, butter, and milk, the temperature should be around 205 degrees after baking at the bottom of the loaf.
Hearty/rustic bread should be baked until the temperature is 205 to 215 degrees, after baking in the bottom of the loaf. You can see there is quite a spread in temperatures.
It’s all about practicing with your oven, your recipe, and the temperature in your house. If the air conditioner blows on your dough, it will probably not rise or take forever. Here is a bread thermometer: Bread Thermometer
Freeze your bread the day you make it, except for the loaves you consume within a day. Our homemade bread has zero preservatives and will go moldy quicker than commercially made bread.
The refrigerator makes the bread go stale and dry (it dehydrates it, not in a good way). Bread is better if left on the counter in bags. I use bread bags like these: Bread Loaf Bags, Pack of 100 with Free Twist Ties. You may want a hot loaf of bread for dinner at the last minute. You can reheat it in the oven at (350°F) = (76°C) degrees for 15 minutes, wrapped in foil, serve warm with butter.
Bread Cutting Board:
It’s critical that we have a good bread cutting board. Here’s the deal: You will ruin your very good bread knife or ceramic knives if you cut or slice with them on marble, granite, or tile countertops.
I prefer a bamboo cutting board with legs like this one: BOOS Bread Cutting Board. I buy these for all my daughters when they get married. They last for years. You can sand them lightly if needed and oil them with mineral oil to keep them in great shape.
Bread Knife:
Here’s the deal: You need a really good serrated bread knife. I always say buy right the first time. I have two bread knives, so when one is getting sharpened locally, I have another ready for use.
Here is a good one: Cutco Bread Knife
One thing to consider is that ceramic knives cannot be sharpened, so you are better off getting an excellent metal bread knife.
Now, let’s discuss how to care for those excellent knives we have in our house. They should never be put in the dishwasher, and we do not want the blades sitting in water.
Please hand-wash and dry them quickly. If taken care of properly, they will last you for many years.
Wheat:
You will want to store your freshly ground wheat in the freezer until you can use it. I would use it within a month. Only grind what you need in that period. The whole wheat flour at your local supermarkets is typically hard red wheat, and it is not fresh because who knows how long it’s been sitting on the shelves?
I prefer to use hard white wheat, and yes, I grind it myself. If you buy whole wheat berries and grind the grain, you will pay for your wheat grinder very quickly, depending on how many loaves of bread your family eats. The real bonus is knowing what’s in the bread you make.
Hard White Wheat (the only kind I buy):
I buy mine from Costco when it goes on sale in 6-gallon buckets. The brand is Lehi Roller Mills. I also purchase hard white wheat in #10 cans. I like to store my wheat in more than one way. Please ensure wherever you buy your wheat is clean and at least triple-washed.
I called Lehi Mills and was told their wheat goes through seven cleaning processes to clean it properly. You can see why I buy Lehi Roller Mills Wheat. The Lehi Roller Mills website says, “Our Hard White Storage Wheat differs slightly in color and flavor from our Red Storage Wheat, with just a little less protein, but it remains excellent for storage.
Our Hard White Storage Wheat comes in ready-to-store buckets and lasts 30+ years in storage. We use only hand-selected wheat sourced, graded, and evaluated at our mill.
Hard Red Wheat:
I quote from Lehi Roller Mills: “Our Hard Red Storage Wheat is specially grown for Lehi Roller Mills. We’ve worked directly with seed breeders to develop this wheat to enhance its baking quality and flavor.
Lehi Roller Mills independently sources, grades, evaluates, and cleans the wheat. When stored correctly in a cool, dry place, it can last 30+ years.”
Soft White Wheat:
Soft white wheat has a shorter shelf life; therefore, I rarely buy it. It’s mainly used for pastries.
Wheat Gluten:
This product makes my whole wheat bread softer. I only use one brand: All-Natural Vital Wheat Gluten.Other Key Issues to Consider:
Bread pans cannot touch each other in the oven or the oven walls because they will not bake evenly and may even overbake your bread.
Sunshine: It must be sunny on the day I am going to make bread. Now, is this an old wives’ tale, you ask? I don’t know, but if the clouds are dark and it’s raining, my bread will not rise.
Nope, it will not. So there you have it. I only make bread on sunny days.
Grease your pans very well. After baking, tap the bottom of the pan; if it sounds hollow, the bread is done. Place the bread on a cooling rack and freeze it after it cools. As stated above, do this by placing the loaves in plastic bags.
Thumb Test
The thumb test is one way to ensure that the dough is ready to be molded into loaves. Push your thumb into the dough as it has risen in a bowl or pan. Look for the thumb imprint.
If it stays indented, the dough can be punched down and molded for baking. If the imprint bounces back, let the dough rise a little longer. I let my bread rise twice because I like fluffy bread. See the “test/proofing” discussion below for more details.
Never Let It Rise More Than 2-3 Hours
Never let the dough rise for 2-3 hours, or the bread will taste yeasty. I never put my bread dough in the refrigerator overnight because it will taste like yeast.
Bread should be sticky, but not too sticky. Adding too much flour will make the bread dry and tough. No worries. You will get the hang of it, and you really will. It may take a few tries, but the result of your cooking adventures will be well worth the time and effort!
Use A Dough Scraper
Use a dough scraper. I use this OXO Good Grips multi-purpose stainless steel scraper to cut my dough into loaves and scrape the excess dough off the counter.I learned this when I taught bread-making at a Bosch store. Wow, my mom would have loved this tool!
Wash the dough off your hands with cold water; warm or hot water will start to “cook” the dough and make it stick to your hands even more.
Some people sprinkle flour on the countertop, and I spray vegetable oil on the counter. Everyone makes bread a little differently, and that’s okay.
Test your bread dough. I’m not a scientist, but this is what I do know:
Proofing your dough means letting it rest and then rising before baking it.
- Push your thumb into the dough; if it disappears, then the dough is over-proofed (not ready to bake)
- Push your thumb into the dough. If it dents about halfway back out, it’s perfect (ready to bake)
- Push your thumb into the dough; If it stays pushed in, the dough is over-proofed (oops! It’s still suitable for fried bread)
You will learn this proofing technique through trial and error. Trust me, we have all had some loaves that did not bake exactly right. It’s okay; it still tastes fabulous!
Practice, practice, practice, and never give up. I promise you will make the perfect loaf of bread for your family.
Final Word
These are all the recipes I have made for years, and they are no-fail recipes! Each post shows you how to make the bread of your choice, whether it be whole wheat bread, white bread, cinnamon rolls, dinner rolls, or French bread.
I even have a YouTube video that shows you HOW I make bread, from start to finish. May God bless you in your efforts to get back to basics by making bread. May God bless this world, Linda
Whole Wheat Bread by Food Storage Moms
White Dill Bread by Food Storage Moms
Dinner Rolls by Food Storage Moms
French Bread by Food Storage Moms
Food Storage Moms Bread Making YouTube
No-Fail Homemade Bread Recipes
White Bread Recipe-No-Fail
Ingredients
- 4 cups warm milk
- 8 tsp. SAF Instant Yeast
- 4 eggs
- 1/2 cup Oil (I use Olive oil)
- 8 teaspoons dough enhancer (optional)
- 3 tsp. Sea Salt
- 1 cup sugar
- 1 cup warm water
- 13-14 cups white bread flour
Instructions
-
I start with a Bosch Mixer although you could make this in a bowl. I put the yeast, warm water, salt, oil, and sugar in the bowl.
-
I then add the eggs and lightly mix them in the Bosch so the eggs do not “cook”. Then I add the warm milk and flour slowly.
-
I continue to add flour until the bread dough pulls away from the sides of the Bosch bowl.
-
I knead for about 7-8 minutes.
-
I place the dough in a greased bowl and cover with plastic wrap.
-
I let the dough rise until it is double in size.
-
I punch down the dough then cut the dough into seven pieces, mold them, and place these in greased pans.
-
I let it rise once again (using the same plastic wrap) until it doubles and then I bake them at (350°F) = (176°C) degrees for 27 minutes. I lightly butter the tops of each loaf after baking while cooling on wire racks.
-
I store the loaves in bags and freeze the other loaves we will not eat in 3-4 days. Remember this bread has zero preservatives so it will go bad within 3-4 days.
Whole Wheat Bread For Two
Ingredients
- 1 1/2 cups warm water
- 2 tablespoons olive oil
- 1/4 cup or so of honey
- 1/2 tablespoon salt
- 1/2 tablespoon SAF instant yeast
- 1/2 tablespoon dough enhancer
- 1/2 tablespoon wheat gluten
- 1/2 tablespoon lemon juice
- 3-1/2 to 4 cups whole wheat flour
Instructions
-
Start adding the ingredients in the order shown above with one exception into your mixing bowl…start with 2 cups of flour and slowly add more flour until the dough pulls away from the sides of the bowl. I use a Bosch Mixer.
-
I grew up making bread without a mixer. It can be done by hand. I grew up letting my bread rise twice so I still do that. Old habits are hard to break!
-
I mix it for 10 minutes in my Bosch. Cover with greased plastic wrap until it doubles in size.
-
Punch down and form dough into two one-pound loaves. I let the dough rise one more time with greased plastic wrap.
-
Remove the plastic wrap Bake the bread at (350°F) = (76°C) degrees for 27-30 minutes. If your pans are larger you will bake your bread longer. You will love making whole-wheat bread, I promise!!
Final Word
These are all the recipes I have made for years, and they are no-fail recipes! Each post shows you how to make the homemade bread of your choice, whether it be whole wheat bread, white bread, cinnamon rolls, dinner rolls, or French bread.
I even have a YouTube video that shows you HOW I make bread, from start to finish. May God bless this world, Linda.
The post How To Make My No-Fail Homemade Bread appeared first on Food Storage Moms.
from Food Storage Moms
No comments:
Post a Comment