Estimated reading time: 4 minutes
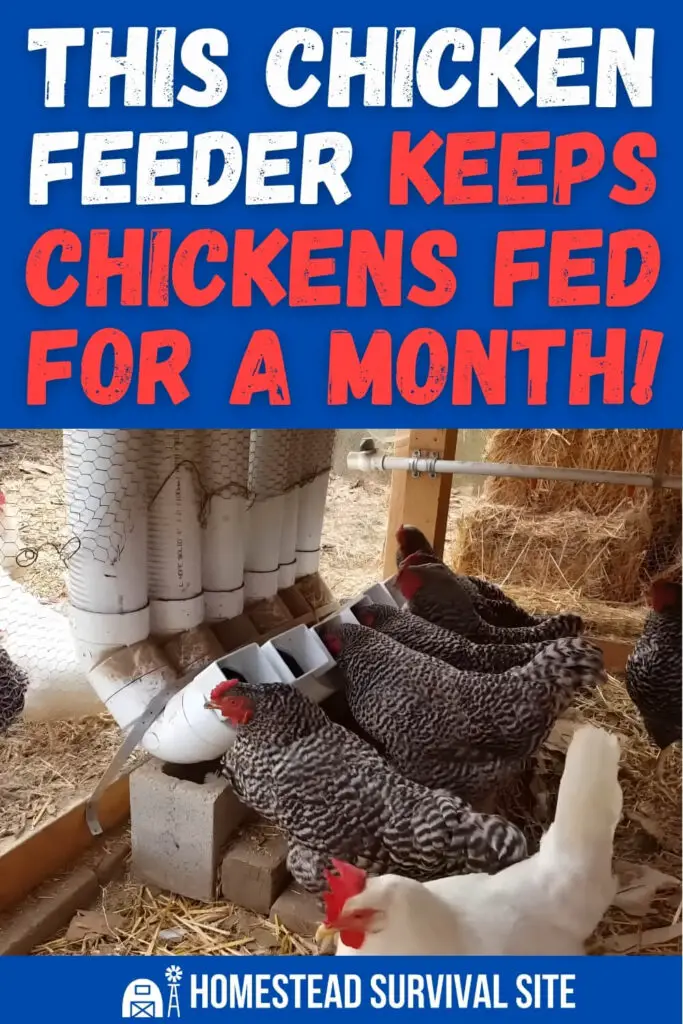
This is hands-down one of the most clever DIY chicken feeders I've ever seen. The genius of this feeder is that it's fairly easy to make and it holds so much chicken feed, it will last a month before you have to feed your chickens again. Plus, it has virtually zero waste and no pest problems.
It's called a candy cane chicken feeder, and I found it in this video from the Youtube channel, Nature's Always Right. This feeder is easy to build with common PVC parts, keeps feed dry and secure, and prevents chickens from spilling or scattering the grain. And as long as you seal it properly, it will protect the feed from rain and mold.
You can watch the video below to see how to make it, but I typed up the instructions for those who prefer to read.
Want to save this post for later? Click Here to Pin It On Pinterest!
Materials Needed for 1 Feeder
- 4″ diameter drainage pipe (length as needed, usually ~3 ft)
- 45-degree PVC elbow (4″ diameter)
- 90-degree PVC elbow (4″ diameter)
- Downspout adapter (NDS 2″ x 3″ rectangular type)
- Hanger straps for securing pipe (optional)
- PVC glue
- Gloves (for safety when handling PVC glue)
- Soap, water, and vinegar (for cleaning before assembly)
Note: One feeder typically supports 4 chickens. Calculate how many feeders you need based on your flock size and feed volume.
Step-by-Step Instructions
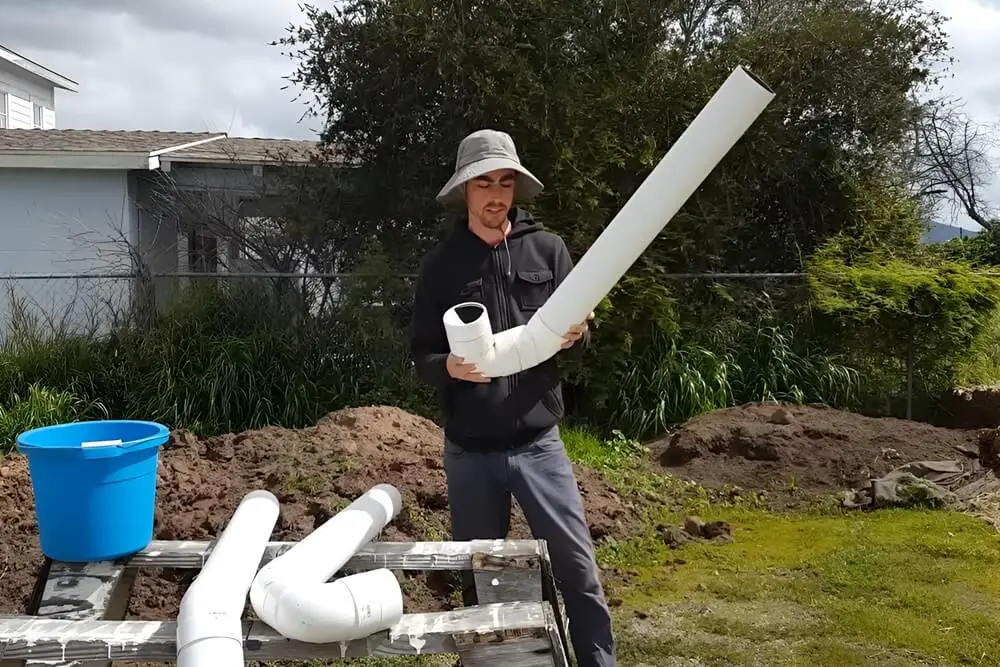
1. Pre-Assemble
Dry-fit all your pieces together first. Connect the 90-degree elbow to the top of your vertical pipe. Then attach the 45-degree elbow, and finally, connect the downspout adapter at the feeding end.
The “candy cane” shape allows gravity to keep feed moving toward the opening, making it accessible for the chickens.
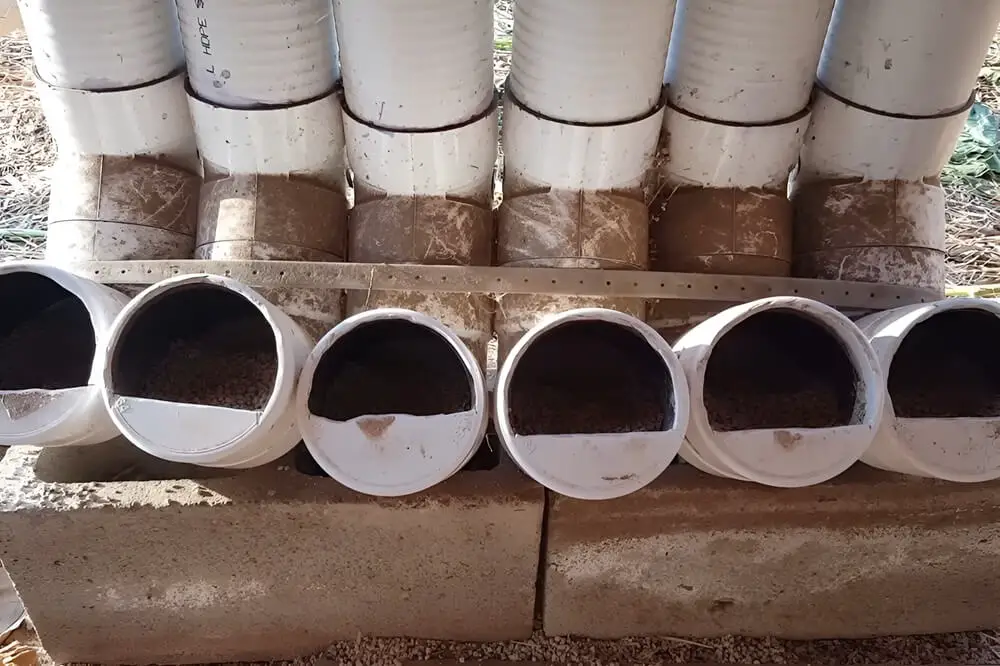
2. Prepare the Feeding Port
Be sure to use a rectangular downspout adapter. This minimizes feed spillage since chickens can’t pull feed out easily.
Face the downspout opening slightly upwards to further reduce spillage.
3. Clean and Prep for Sealing
Wash all PVC pieces with soapy water and vinegar. Allow everything to dry completely. This ensures the PVC glue bonds well.
4. Glue all Joints
Wear gloves when using PVC glue. Apply the glue to all connecting surfaces and assemble the feeder.
This watertight seal prevents moisture from entering and molding the feed.
5. Mount your Feeders
You can secure the feeders under your coop or along a wall using hanger straps for extra stability.
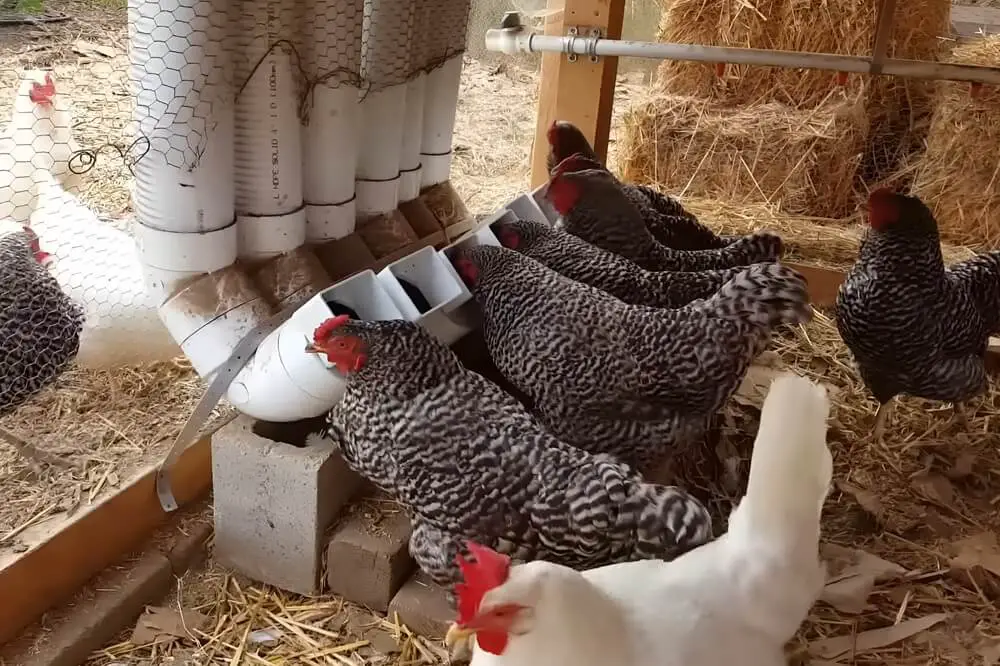
6. Add a Platform (optional)
Build a small platform under the feeding ports so the chickens can comfortably reach the food.
Feed Capacity
- A 3-foot 4” pipe holds roughly 452 cubic inches of feed.
- 50 lbs of feed is around 2165 cubic inches, so you’ll need about five 3-ft tall feeders to store that much.
- Adjust the height and number of feeders depending on your storage goals and flock size.
With this system, you’ll have a reliable automatic feeder that lets you leave your chickens for weeks without worrying about daily refills or wasted feed.
Like this post? Don't Forget to Pin It On Pinterest!
You May Also Like:
The post This DIY Chicken Feeder Keeps Chickens Fed for a Month appeared first on Homestead Survival Site.
from Homestead Survival Site https://ift.tt/2VU0m9G
No comments:
Post a Comment