Estimated reading time: 6 minutes
When the grid goes down or fuel becomes scarce, food preservation doesn’t stop being important. In fact, it becomes more important than ever. Whether you’re facing a long-term collapse scenario or simply living off-grid with limited power, finding ways to make your harvests and foraged food last is critical.
Dehydration is one of the oldest and most reliable preservation methods, and it doesn’t require canning lids, freezers, or electricity. A solar-powered dehydrator lets you use nothing but sunlight and airflow to preserve fruits and vegetables. Plus, the food you dry takes up less space, lasts longer, and is easy to rehydrate for cooking.
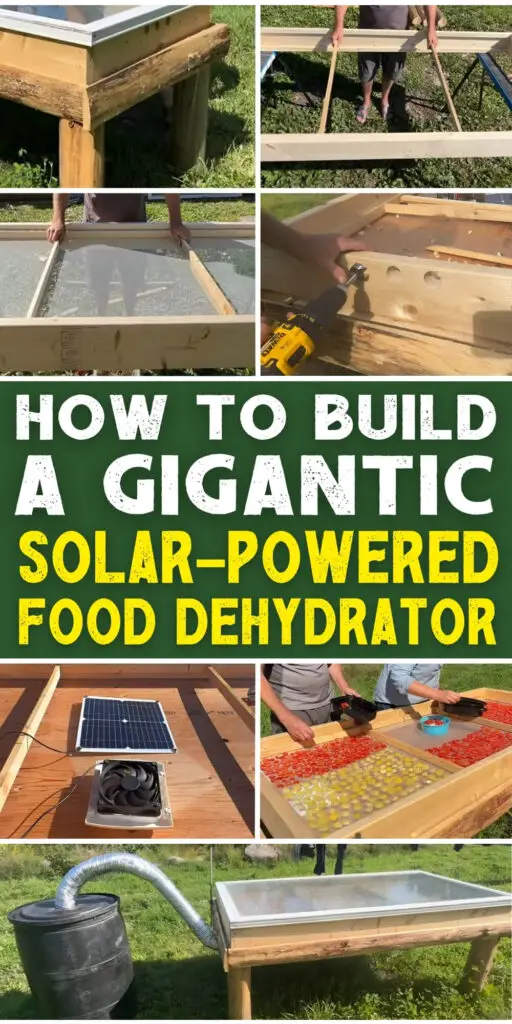
In this video, Amanda explains how they built a gigantic solar-powered food dehydrator. It’s large enough to process big harvests, runs on free solar energy, and can reach temperatures high enough to dry even dense foods like blueberries and tomatoes.
Want to save this post for later? Click Here to Pin It On Pinterest!
I first discovered this project on the YouTube channel Wilderstead, and their design is practical, scalable, and perfect for any homestead.
Materials You’ll Need
- Cedar posts or salvaged wood (for base legs)
- Slab wood from a sawmill (for base frame)
- 2×6 SPF lumber (for the main frame)
- 1×2 SPF lumber (for inner tray frame)
- Wire mesh (for tray bottom)
- ½-inch plywood sheet (4×8) (cut to fit base)
- 12-volt solar-powered fan
- Small solar panel (to power the fan)
- Dryer vent (to direct airflow)
- Repurposed patio door with glass panes (for airtight lid)
- Black bucket or black box (to preheat incoming air)
- Telescoping pole + clips (to hold solar panel at proper angle)
- Basic tools: saw, drill, screws, hole saw, staple gun

Instructions
Step 1: Build the Base
- Cut your cedar posts to length for sturdy legs.
- Construct a rectangular base frame using salvaged slab wood.
- This base raises the unit off the ground and provides stability.
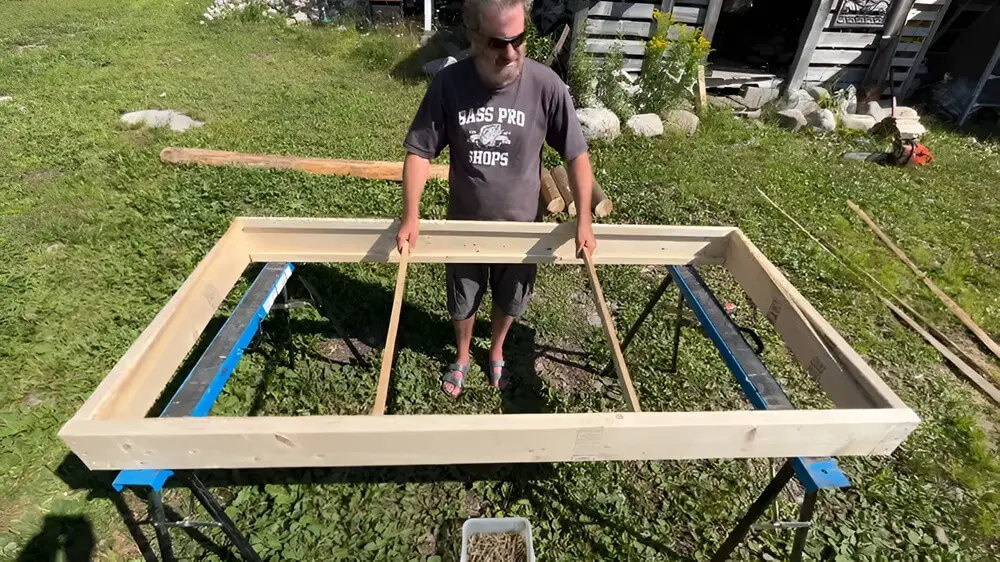
Step 2: Build the Main Frame
- Assemble the main dehydrator box using 2×6 SPF lumber.
- Inside this frame, install an inner frame made from 1×2 lumber.
- This inner frame is designed to hold the drying tray securely.
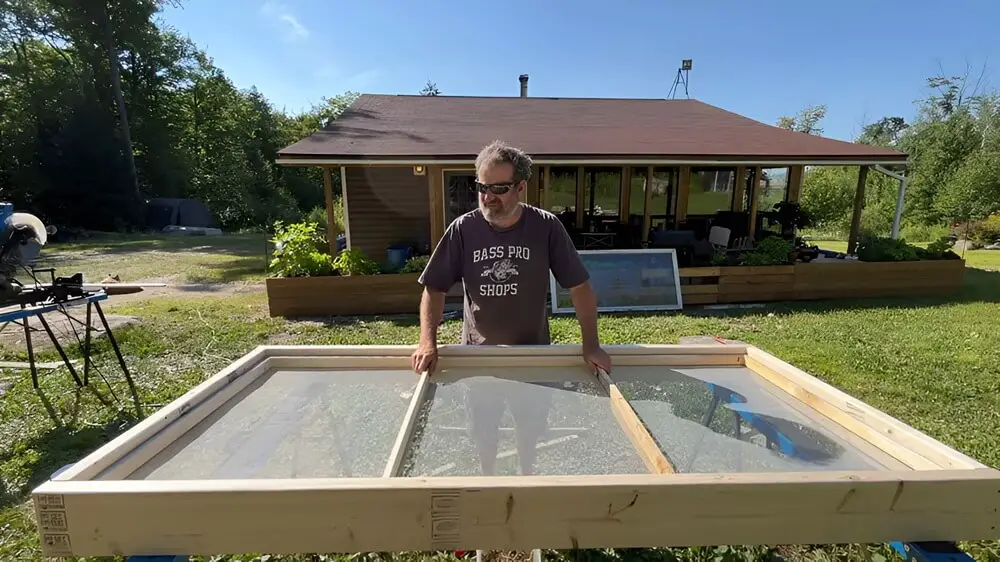
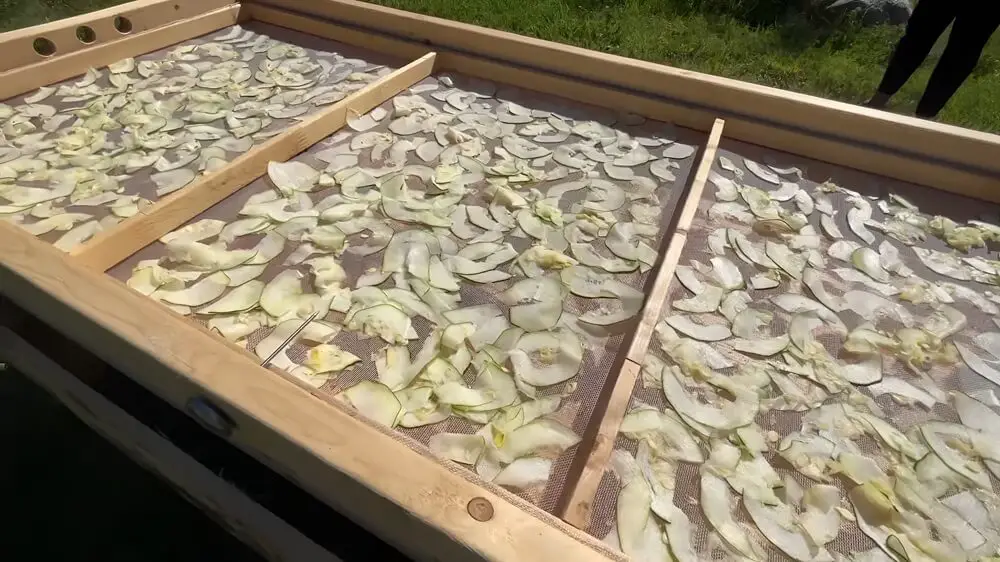
Step 3: Make the Tray
- Build the tray the same size as the inner frame (1×2 lumber).
- Stretch and staple wire mesh across the frame to form the bottom.
- This creates a breathable surface for food to dry on.
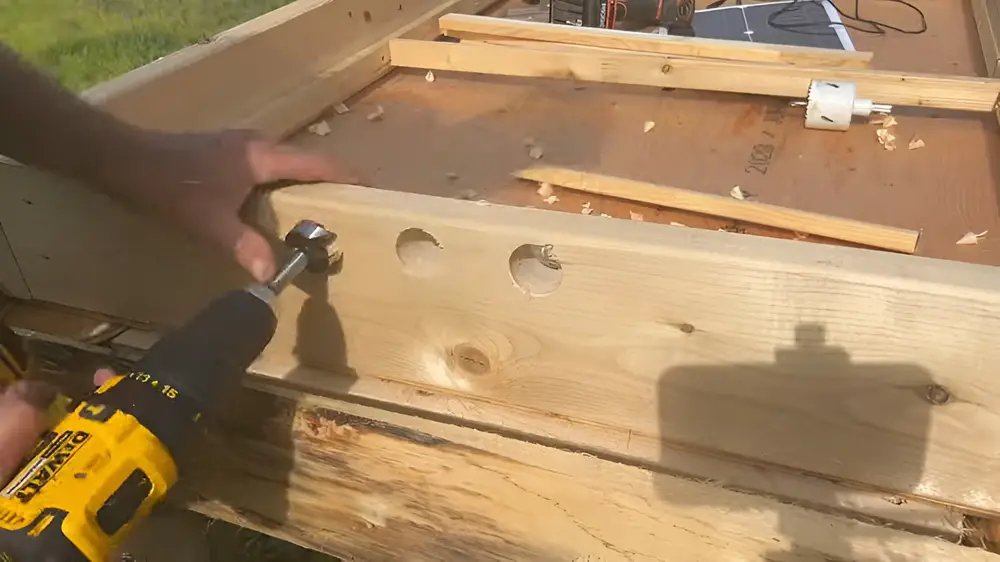
Step 4: Add the Base and Ventilation
- Cut a ½-inch plywood sheet to fit snugly as the unit’s bottom.
- Drill three 1.5-inch ventilation holes into one end of the box.
- These holes allow fresh air to be pulled through the unit.
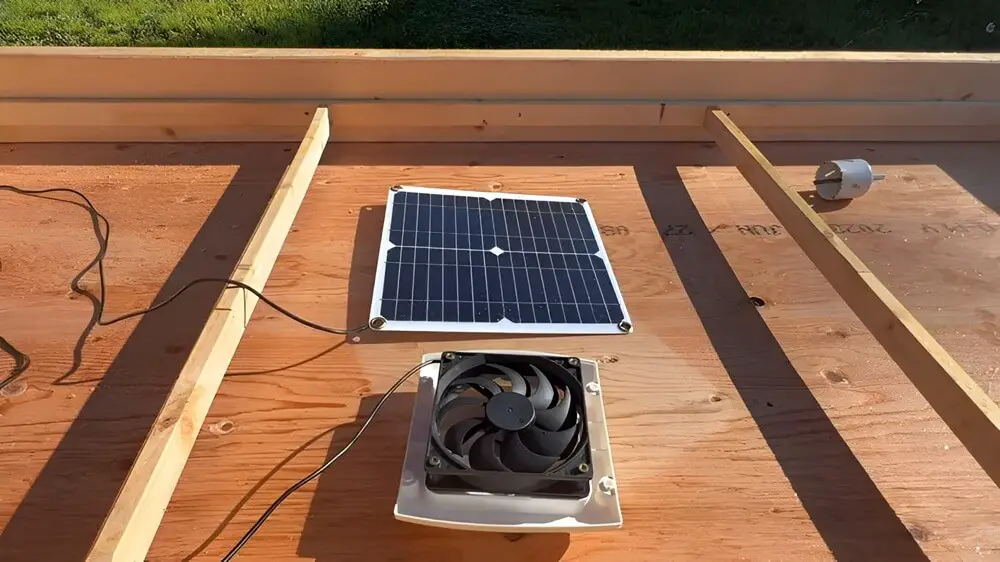
Step 5: Install the Fan and Airflow System
- Mount a 12-volt fan on the opposite end of the ventilation holes.
- Connect the fan to a small solar panel for power.
- Use a dryer vent to direct the airflow across the food trays and out the ventilation holes.
- This airflow prevents mold and speeds up drying.
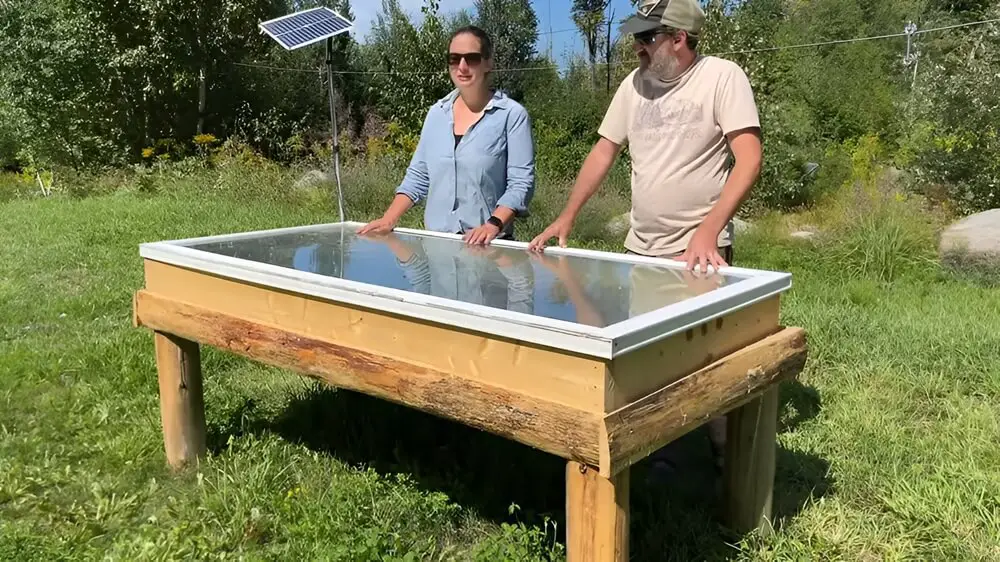
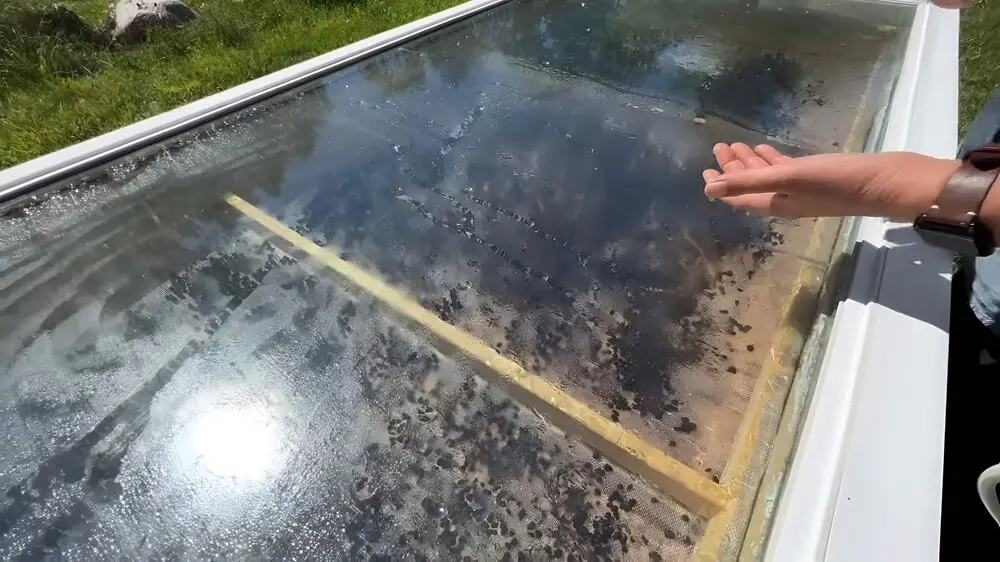
Step 6: Add the Glass Lid
- Repurpose a heavy glass patio door as the lid for the dehydrator.
- The weight of the glass provides an airtight seal, keeping heat inside.
- This creates a greenhouse effect, trapping solar energy to raise the temperature.
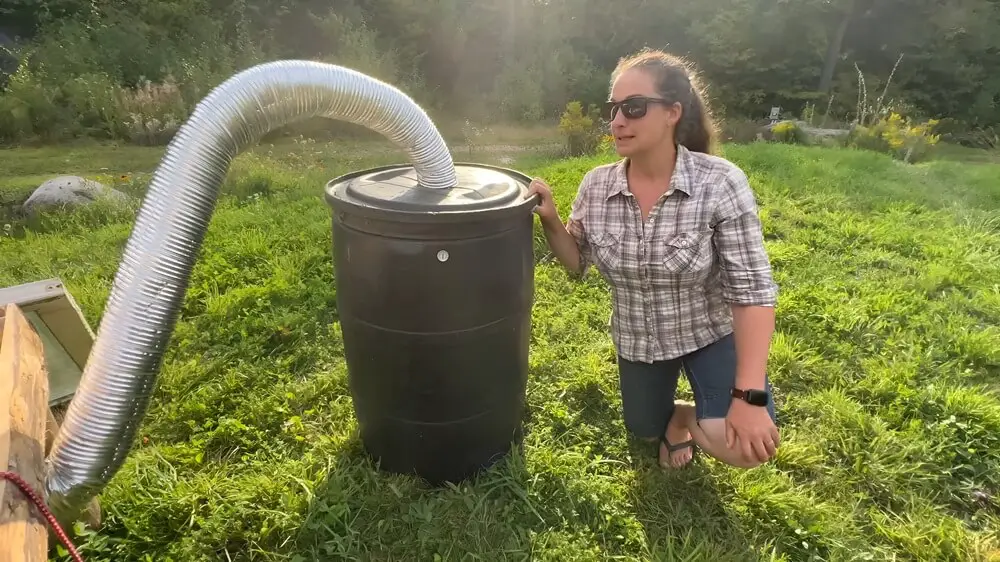
Step 7: Build the Primary Heater (Optional for High Heat Foods)
- Place a black bucket or black box at the intake end of the fan.
- Connect it with a short pipe so that air passes through the black container first.
- The black surface absorbs heat from the sun, preheating the air before it enters the dehydrator.
- This setup maintains higher, steadier drying temperatures.
Step 8: Test and Adjust
- Set up the solar panel on a telescoping pole, angled toward the sun.
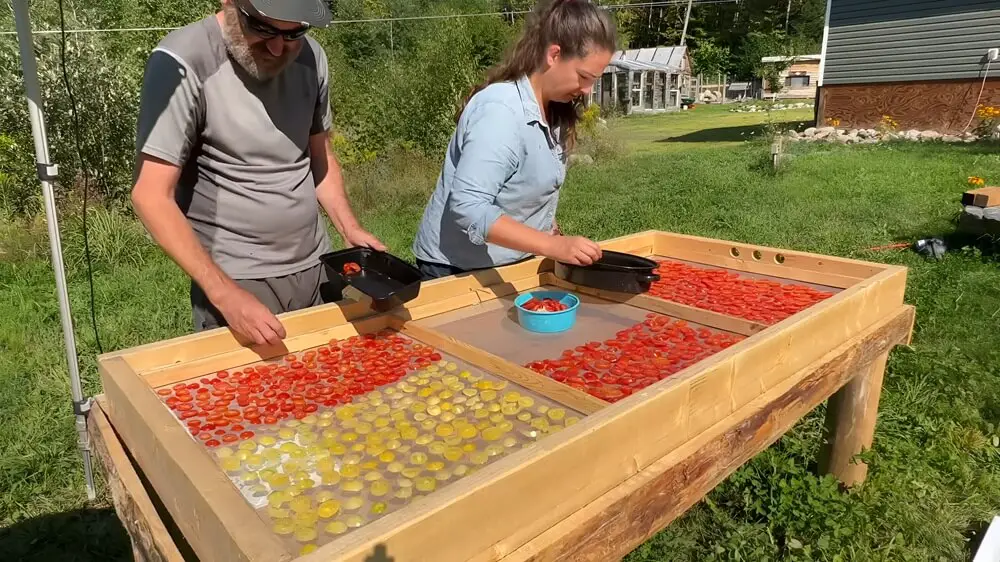
- Load your tray with sliced fruits or vegetables.
- Check the temperature inside with a thermometer — it should reach up to 170°F (75°C) in strong sun.
- Rotate trays or flip food slices as needed for even drying.
What You Can Dehydrate
This solar dehydrator works for:
- Blueberries → dry in ~36–48 hours.
- Zucchini → ~16 hours (grind later into zucchini flour).
- Tomatoes → ~20 hours for sun-dried tomatoes.
Note: Herbs don’t do well in direct sun; use a traditional dehydrator or hang-dry them instead.
Final Thoughts
With this design, you can preserve large batches of food using nothing more than sunlight and airflow. It’s simple, low-maintenance, and completely independent of the grid. In good weather, it works as efficiently as an electric dehydrator — without adding heat to your home or draining your energy supply.
Whether you’re preparing for uncertain times or simply trying to live more sustainably, a solar dehydrator is one of the best tools you can add to your homestead.
Like this post? Don't Forget to Pin It On Pinterest!
You May Also Like:
The post How to Build a Gigantic Solar-Powered Food Dehydrator appeared first on Homestead Survival Site.
from Homestead Survival Site https://ift.tt/cE7iQD3
No comments:
Post a Comment