Estimated reading time: 6 minutes
If you have a bunch of canned foods, you already know what a hassle they can be to store. Cans that are theoretically stackable end up sliding all over the place. And when you buy new cans that you need to put in the back, good luck sliding everything forward without causing an avalanche.
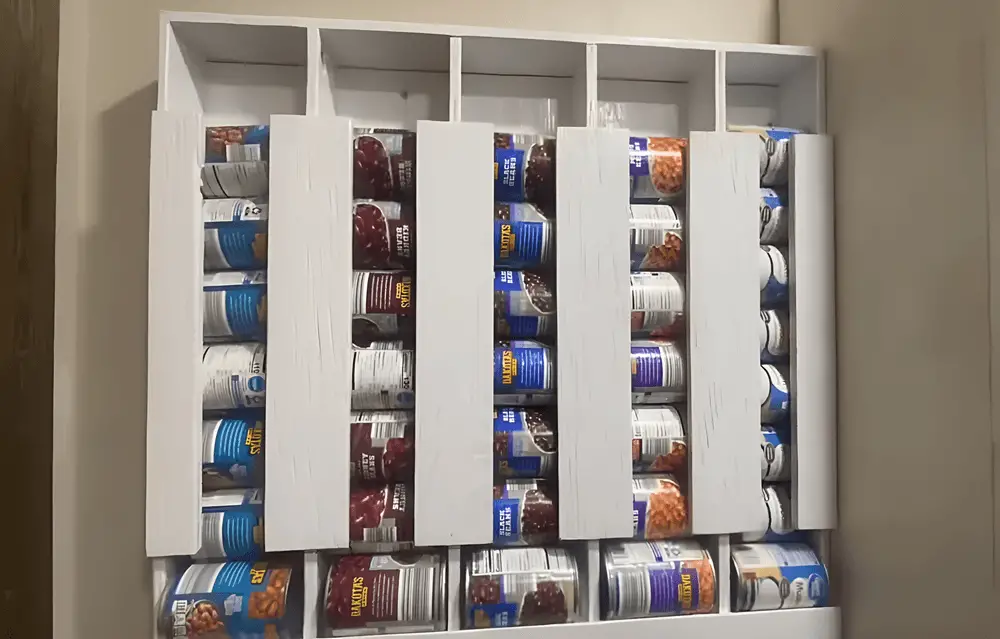
That’s exactly why you need to check out this DIY canned food storage. It’s incredibly space-efficient, cheap to build, and doesn’t require any fancy tools. With just a few materials and some basic woodworking skills, you can turn unused wall space into a vertical can dispenser.
This particular dispenser comes from the Youtuber, DIY Man. It only takes about four inches of wall depth, it’s sturdy enough to hold lots of weight, and it even accommodates smaller cans thanks to a custom gap at the bottom.
Whether you’re prepping for emergencies or just trying to make your kitchen more functional, this canned food storage rack is the perfect weekend project. You can learn how to make it by watching the video below, but I also typed up the instructions for those who prefer to read.
Materials Needed
- 1 pc 2×4 at 4 ft
- 1 pc 1×2 at 4 ft
- 1 pc 4×4 sheet of ½” plywood
Tools Recommended
- Drill/impact gun
- 18-gauge brad nailer
- Table saw
- Circular saw
- Miter saw
- Sander
- Wood glue
- Wood filler
- Paint (optional)
Step-by-Step Instructions
Step 1: Cut the Plywood Frame
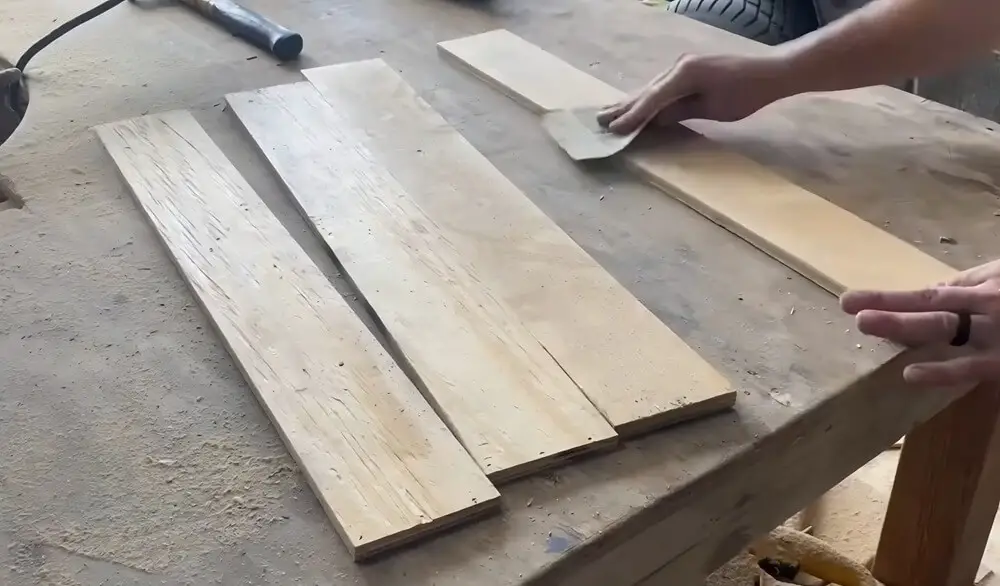
- Cut four 3″ wide strips of ½” plywood, each 24″ long.
- Cut two 3.5″ wide strips at 25″ long, and two at 26″ long.
- Lightly sand all boards before assembly.
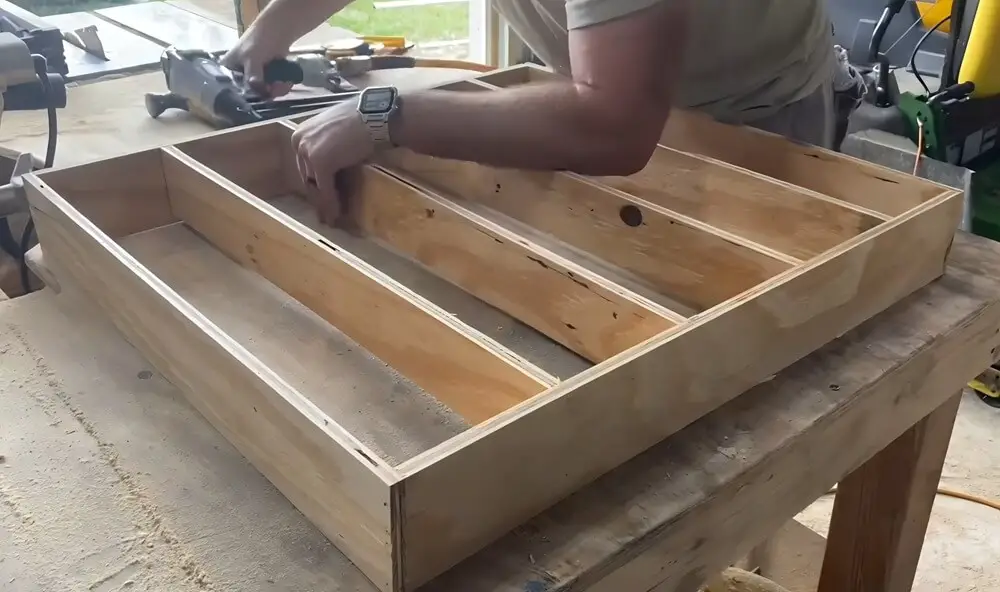
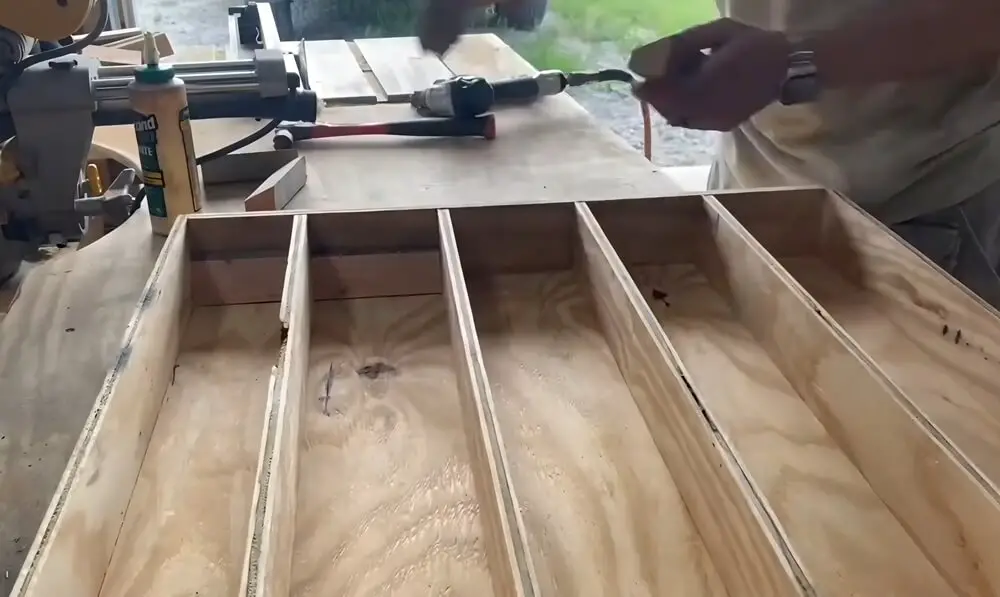
Step 2: Assemble the Frame
- Attach the 26″ boards flush to the top and bottom of the 25″ boards using wood glue and finishing nails.
- Flip the frame over and install the 3″ x 24″ boards across the middle with 5″ gaps between them, except the bottom one, which has a 4″ gap for smaller cans.
- Ensure the tops of these shelves are flush with the top edge of the outer frame.
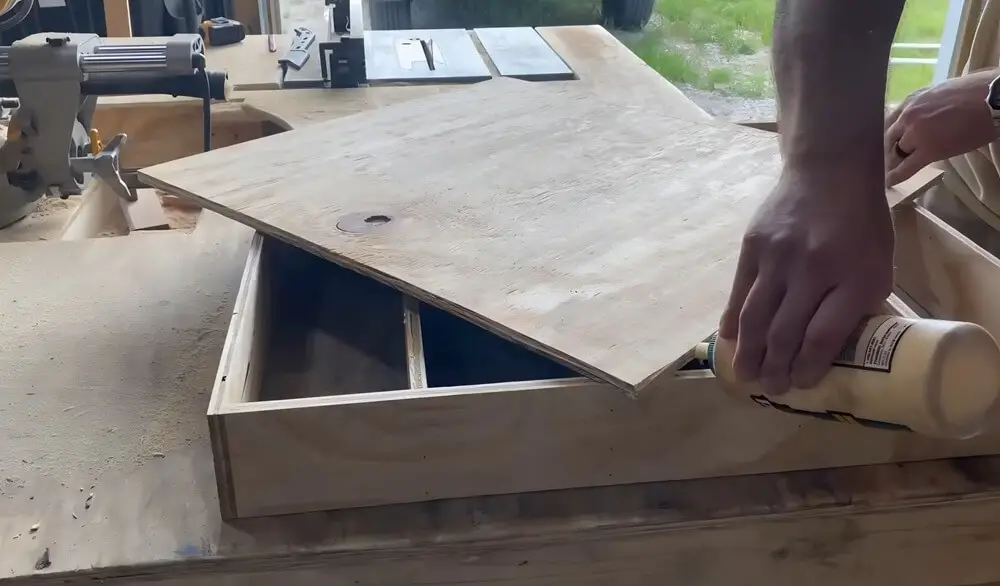
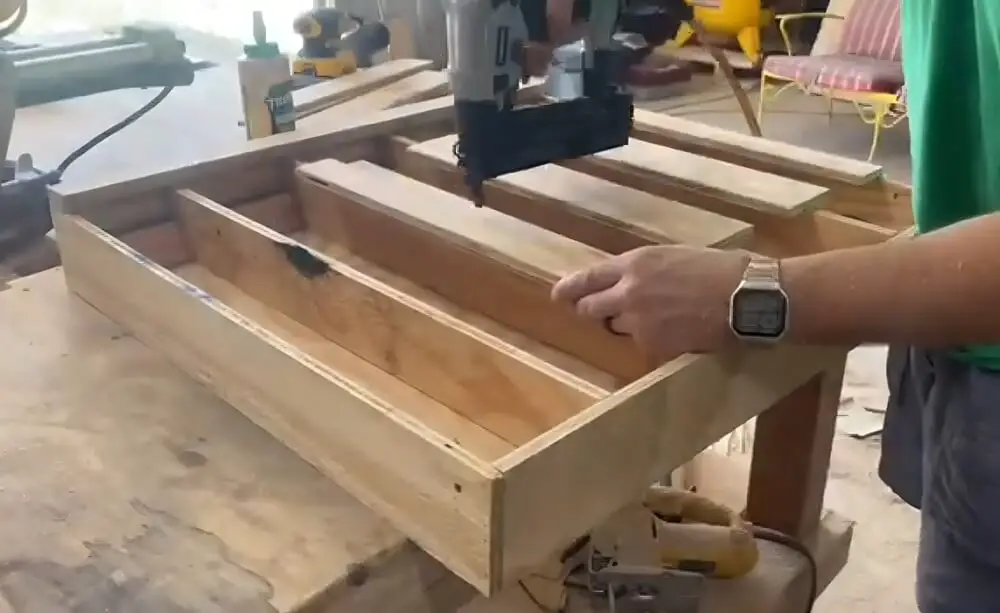
Step 3: Add the Backing
- Cut a back panel from ½” plywood measuring 26″ x 24″.
- Mark the center of each shelf to avoid missing with the nail gun.
- Attach the backing with wood glue and nails into the center of each board.
Step 4: Create and Attach the Angled Base
- Set your table saw blade to ¾” from the fence at a 30° angle.
- Cut a 2×4 at this setting and then chop it into four 5″ pieces and one 4″ piece.
- Attach these angled pieces to the bottom with glue and nails.
Step 5: Build the Bottom Lip
- Reset the table saw blade to 1″ from the fence at 30°.
- Cut a 1×2 laid flat on its side, then cut it to 27″ long.
- Attach it to the bottom front edge of the rack.

Step 6: Install Internal Supports
- Cut six more pieces of plywood:
- 4 pcs at 16.5″ x 3″
- 2 pcs at 16.5″ x 1.25″
- Measure 4″ down from the top and attach:
- Narrow strips flush left and right
- Wider pieces centered between them
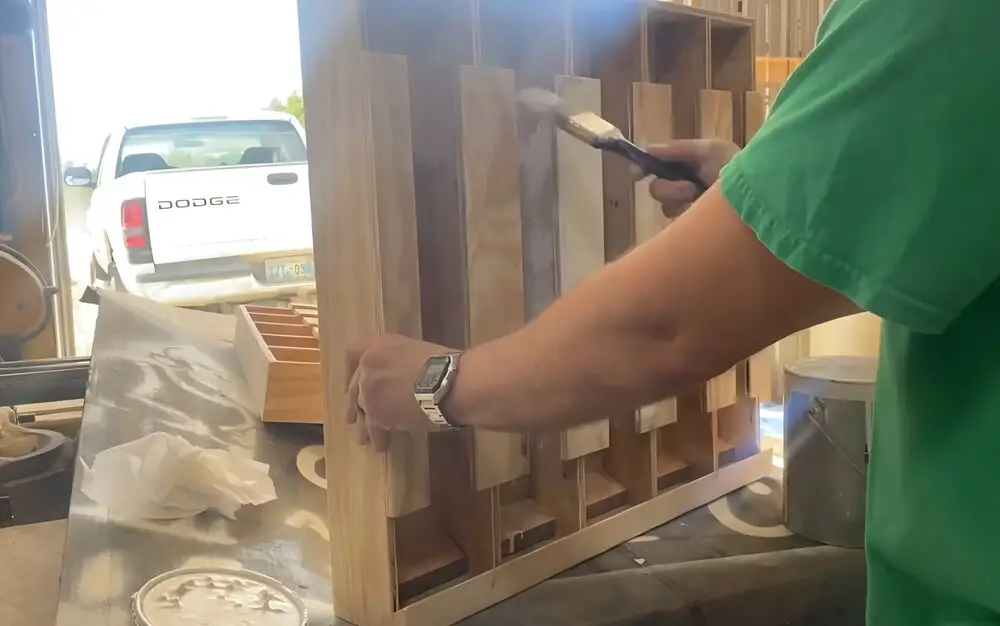
Step 7: Finishing Touches
- Fill any nail holes or gaps with wood filler.
- Sand it down.
- Test fit cans to ensure everything slides correctly.
- Paint if desired. He used a white oil-based paint.
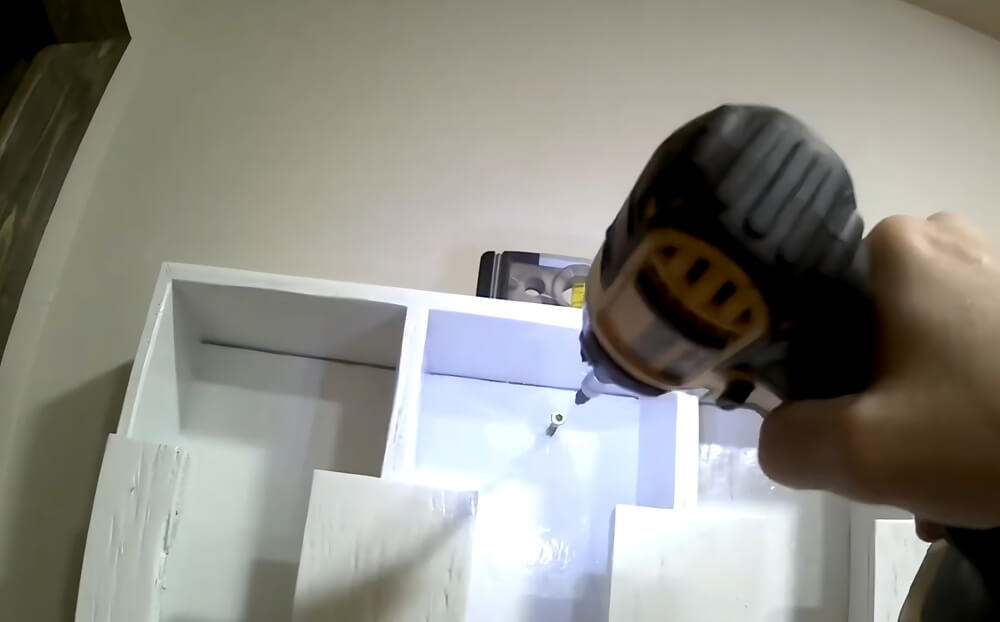
Step 8: Mount to Wall
- Secure the rack to the wall into studs for proper support.
- The rack is designed to hold heavy cans, so hitting studs is critical.
This rack is perfect for pantries, prepper closets, or small kitchens. Each one takes up only about 4 inches of wall space, making it ideal for narrow spots where traditional shelving won’t fit.
You May Also Like:
The post Build a DIY Canned Food Storage Rack appeared first on Homestead Survival Site.
from Homestead Survival Site https://ift.tt/n9lpxz2
No comments:
Post a Comment