Submissions     Contact     Advertise     Donate     BlogRoll     Subscribe                         

Thursday, July 31, 2025

40 Survival Uses for WD-40

Estimated reading time: 11 minutes

40 Survival Uses for WD-40

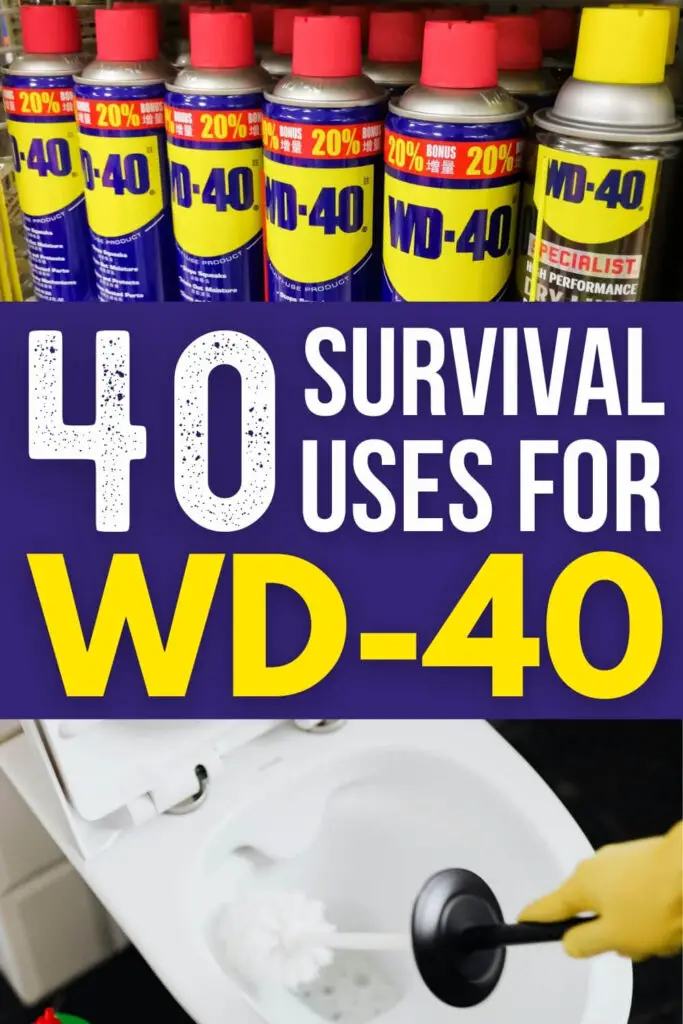
WD-40 can be found in just about every household. But if you’re a prepper, you might want to get a few extra cans so you'll have plenty on hand for all kinds of applications and projects. 

Keep in mind that there are many types of WD-40. In this article, we’ll be looking at survival uses for the original WD-40, also known as WD-40 Multiuse. You can find more information on the different types of WD-40 at their website

Of course, it’s important to use the right tool for the job, so let’s look at some uses for the original old-favorite, WD-40.

1. Degreaser

WD-40 is an excellent all-purpose degreaser. Use it to remove built-up grease from your hands, tools, car parts, or even work clothes. Simply spray it on, let it sit for a few minutes, then wipe or wash away. On fabrics, apply directly to the greasy spot, wait a few minutes, and wash as usual. Always spot test first—WD-40 may darken some materials.

2. Remove Rust from Tools

Don’t toss out rusted tools. Spray the rusted areas with WD-40, let it penetrate for 10–15 minutes, then scrub with steel wool or a wire brush. It dissolves surface rust while leaving a protective coating that helps prevent future corrosion.
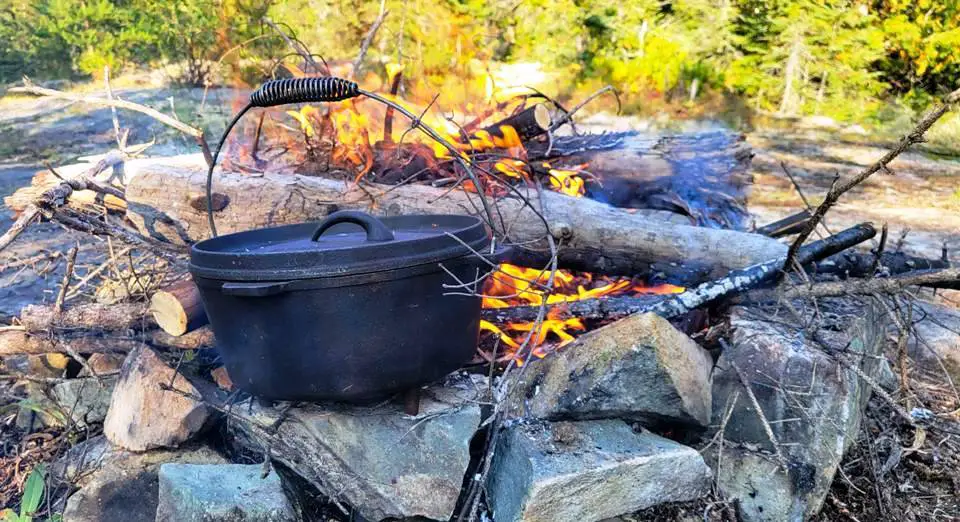
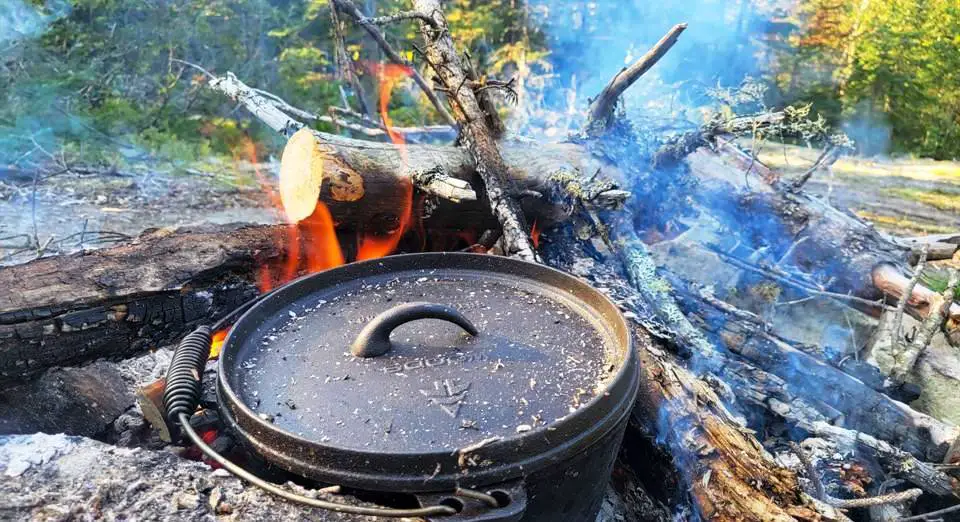
3. Firestarter

Saturate cotton balls or dryer lint with WD-40 and store them in a zip-top bag. When you’re ready to build a fire, place one under your kindling and light it—it’ll catch quickly and burn longer than dry tinder, even in damp conditions.

4. Stop Squeaks

Whether it's a creaky door hinge, gate, or cabinet, a quick spray of WD-40 can silence the noise. Spray the hinge, open and close it a few times to work in the lubricant, and wipe away any excess.

5. Fix a Stuck Zipper

If a zipper’s stuck or won’t slide smoothly, spray a little WD-40 onto a cotton swab and carefully apply it to the zipper teeth. Work the zipper back and forth gently until it loosens. Avoid direct spray on fabric to prevent staining.

6. Remove a Stuck Ring

Swollen fingers and tight rings don’t mix. If soap and water aren’t working, spray a little WD-40 around the base of your finger and gently twist the ring back and forth while pulling. The lubricating action helps the ring slide off easily—but be careful near any open wounds or cuts.

7. Remove Adhesive Residue

Leftover duct tape gunk or sticker residue? Spray the area with WD-40, let it sit for 5–10 minutes, and then wipe clean with a rag or plastic scraper. It breaks down the adhesive without damaging most surfaces—including glass, metal, and plastic.

8. Remove Tree Sap

Tree sap sticks to everything—skin, tools, car paint. WD-40 softens hardened sap so it can be wiped away without damaging the surface underneath. Spray it on, let it sit for a few minutes, and scrub gently with a soft cloth.

9. Remove Gum

Got gum stuck in carpet, on a shoe, or even in hair? Spray the gum with WD-40 to break down its sticky properties. Wait a minute or two, then pull or scrape it off gently. In hair, work it out slowly with your fingers or a comb.

10. Loosen Stuck Nuts and Bolts

Rust, grime, and dirt can lock nuts and bolts in place. Spray WD-40 generously onto the stuck fastener, give it 10–15 minutes to penetrate, and then use your wrench or pliers to twist it loose. Works even better if you tap the bolt lightly to help the solvent work in.

11. Clean Toilets

Surprisingly effective in the bathroom, WD-40 can break down rust stains and mineral buildup in toilets. Spray it directly on the inside of the bowl, let it sit for a few minutes, then scrub with a toilet brush and flush. It's especially helpful in hard water areas.

12. Remove Rust From Firearms

Rust on a firearm isn't just unsightly—it can be dangerous. Apply WD-40 to any rusted metal surfaces, let it soak in, and gently scrub with a soft brush or steel wool. Be sure to wipe down thoroughly and reapply proper gun oil afterward.

13. Remove Surface Rust From Tools

For tools with light surface rust, a quick spray of WD-40 followed by a wipe with a clean rag is often enough to restore them. For heavier buildup, use a wire brush or steel wool after the spray has soaked in for a few minutes.

14. Remove Grease and Grime From Tools

Tools accumulate all kinds of grime over time. Spray WD-40 onto dirty pliers, wrenches, or sockets, let it soak in, then wipe away grease and oil with a rag. It also leaves a thin protective layer that helps prevent future buildup.

15. Improve Shoveling

Digging in clay or wet soil? Spray the blade of your shovel with WD-40 to keep dirt from sticking. The slick surface lets soil slide off more easily, making every scoop smoother and reducing the effort needed to dig or move heavy soil.

16. Keep Rubber Seals and Weather-stripping Soft and Pliable

Rubber seals around doors, windows, and vehicles can dry out and crack over time, especially in harsh climates. Spray a light coating of WD-40 on weather-stripping and rubber gaskets, then wipe off the excess. It helps condition the rubber and creates a moisture barrier, keeping them soft and effective longer.

17. Clean and Shine Stainless Steel

Forget pricey stainless steel cleaners—WD-40 works just as well. Spray a small amount on a soft cloth and buff your stainless steel appliances, sinks, or fixtures. It removes fingerprints, smudges, and water spots, leaving a polished, streak-free shine.

18. Prevent Grass from Sticking to Blades on Your Lawnmower

Grass clippings can clog up mower blades and reduce performance. Spraying WD-40 on the underside of the mower deck and on the blades before mowing creates a slick surface that prevents buildup and makes cleanup easier.

19. Keep Nails Rust-Free

If you store nails, screws, or bolts in a shed or garage, moisture can cause rust. A quick mist of WD-40 over the contents of your fastener bins will create a protective coating that keeps rust at bay—even in damp environments.

20. Spray On Arrows

When practicing archery, pulling arrows from dense targets can be a chore. Lightly spraying the shaft of your arrows with WD-40 can help them slide out more easily. Just be careful not to overdo it—you don’t want slippery fingers while shooting.

21. Clean Bike Chains

WD-40 works well to clean dirt, grime, and old lubricant off bike chains. Spray it directly on the chain and scrub with a brush or rag. After cleaning, be sure to rinse or wipe off excess and apply proper bike lubricant before riding—WD-40 is a cleaner, not a long-term chain lube.

22. Use On Gardening Shears

Keep your garden shears and pruners in top shape by spraying the hinge and blades with WD-40. It helps remove sap and plant residue while keeping the tool moving smoothly. Just avoid spraying if you're trimming edible plants—wipe thoroughly before use.

23. Keep Locks Working Smoothly

WD-40 can displace moisture and remove grime from padlocks, deadbolts, and other locking mechanisms. Spray into the keyhole and around moving parts, then work the key in and out to distribute the lubricant. This helps prevent sticking and freezing in cold weather.

24. Use On Electrical Equipment to Drive Out Moisture

WD-40 stands for “Water Displacement, 40th formula”—and that’s exactly what it does. Use it to drive moisture out of electrical connectors, terminals, and battery compartments (like in flashlights or radios) to prevent corrosion. Just be sure the power is off before spraying.

25. Use On Your Car or Bugout Vehicle

WD-40 can help keep your vehicle running in emergencies. Spray spark plugs, ignition wires, battery terminals, and moving linkages to repel moisture and prevent corrosion. It can even help start a damp engine by displacing water from ignition components.

26. Lubricate Hinges on Animal Traps

If you're relying on animal traps for food or pest control, the last thing you want is a jammed hinge. A quick spray of WD-40 on the trap’s moving parts ensures smooth, silent operation. It can also help prevent rust, especially if the trap is exposed to moisture.

27. Keep Leather From Cracking

WD-40 can help maintain the softness and flexibility of leather items like boots, belts, gloves, or tool pouches. Spray a small amount onto a cloth and gently rub it into the leather. It conditions the surface and creates a water-resistant barrier—but test on a small spot first, as it may darken lighter leathers.

28. Use As a Makeshift Waterproofing

Caught in a downpour with untreated boots or gloves? WD-40 can provide temporary water resistance. Spray it directly onto boots, jackets, or backpacks and let it sit for a few minutes before heading out. It won't replace proper waterproofing products, but it's a handy short-term fix.

29. Remove Lime Buildup

Lime and hard water stains can clog plumbing fixtures and reduce efficiency. Spray WD-40 onto faucets, showerheads, or toilet rims where buildup occurs. Let it sit for several minutes, then scrub with a brush or cloth. It breaks down mineral deposits for easier removal.

30. Keep Slugs Away From Vegetable Plants

WD-40 can act as a barrier to slugs and snails in container gardens. Spray a light ring around the base of pots or planters—not directly on the soil or plants. The slick, oily surface makes it difficult for slugs to climb into your containers and snack on your greens.

31. Split Firewood More Easily

If your splitting maul or axe keeps getting stuck in dense or knotted logs, a spritz of WD-40 on the blade can help. The reduced friction makes the blade slide through wood more easily, saving time and effort—especially in cold or wet conditions.

32. Remove Glue From Fingers

Superglue on your fingertips? WD-40 breaks down the bond without harsh scraping. Spray a small amount directly onto the glued area, wait a minute or two, then gently work the glue off using your fingers or a soft cloth. Wash your hands thoroughly afterward.

33. De-ice Locks

When temperatures drop, exterior locks can freeze solid. Spray WD-40 into the keyhole and around the locking mechanism to help melt the ice and prevent it from freezing again. Keep a small can in your car or bugout bag during winter months for emergencies.

34. Lubricate Snow Shovels

Wet snow can stick to your shovel and double your workload. A quick spray of WD-40 on the shovel blade creates a slick surface that helps snow slide off more easily. It’s a simple hack that makes snow removal faster and less frustrating.

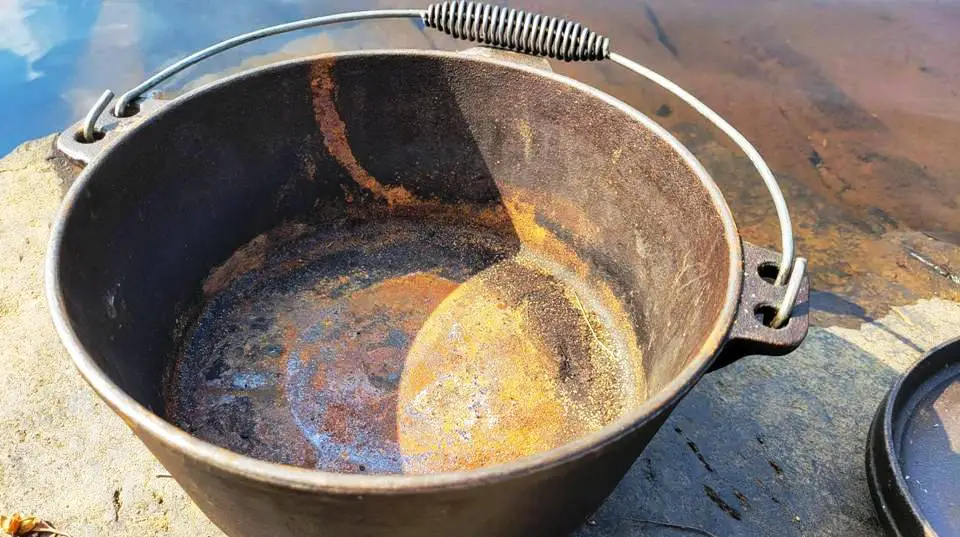
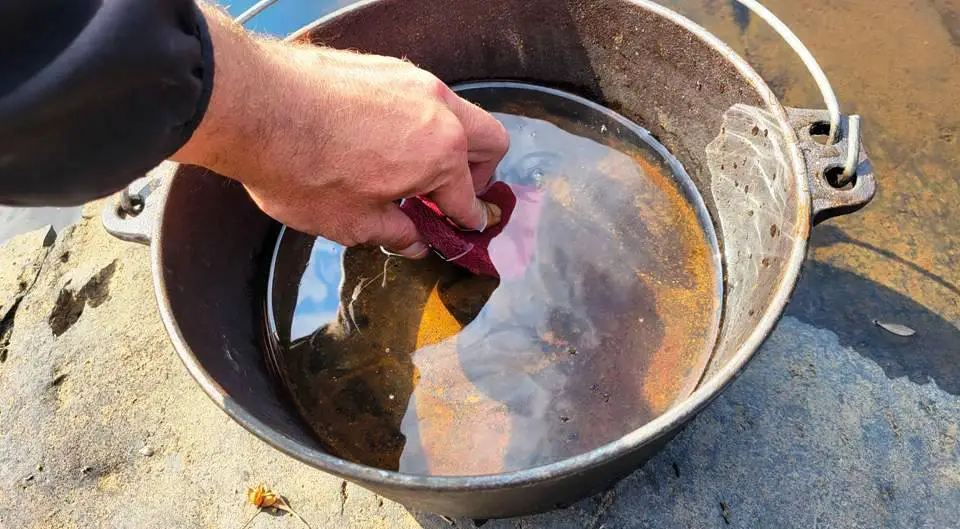
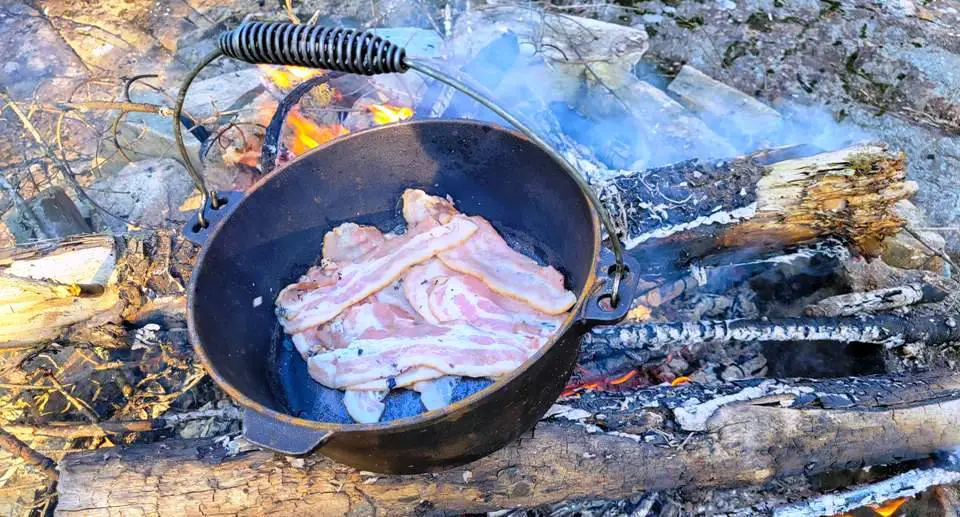
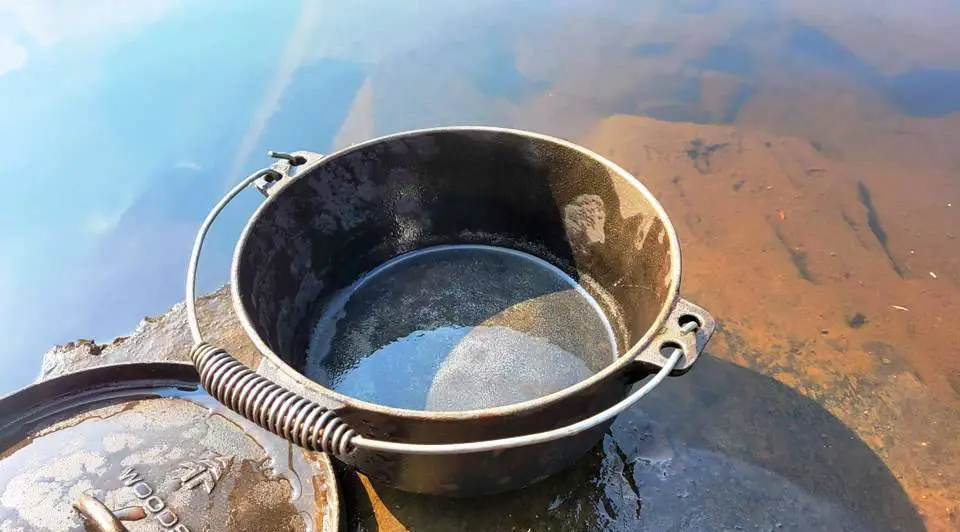
35. Remove Rust From Cast Iron

Cast iron tools and cookware are prone to rust if not properly maintained. Spray WD-40 onto the rusted surface and let it sit for 10–15 minutes. Then scrub with steel wool or a stiff brush to remove the rust. Wash thoroughly and re-season if it's a cooking item.

36. Protect and Clean Wood

WD-40 can be used to clean and protect untreated or weather-exposed wood in a pinch. Spray it onto a rag and wipe down wood handles, fence posts, or outdoor furniture to remove grime and add a light layer of protection against moisture. It’s not a wood polish, but it’s useful when you don’t have better options on hand.

37. Clean and De-gunk Scissors

Sticky residue from tape, glue, or food prep can cause scissors to jam. Spray WD-40 directly onto the blades and hinge area, then open and close the scissors several times to work it in. Wipe off with a clean rag. For food-related scissors, follow up with a soap and water wash.

38. Lubricate Saw Blades

If your handsaws or circular saw blades are getting bogged down during cuts, apply a light coat of WD-40 to reduce friction. It helps the blade move more smoothly through wood or metal and also protects against rust buildup when storing tools in damp conditions.

39. Remove Ice from Car Windows

Tired of scraping thick frost off your windshield? Spray your car windows the night before a hard freeze to help prevent ice from sticking. You can also spray WD-40 directly onto icy glass in the morning to help melt frost faster—just be careful not to get it on the wiper blades.

40. Protect Fish Hooks from Rust

Fishing gear gets wet—it’s inevitable. To keep hooks, lures, and even tackle boxes rust-free, spray them lightly with WD-40 before storing. It displaces moisture and coats metal with a thin barrier that helps prevent corrosion over time.

As you can see from the list, the original formula WD-40 is great to have on hand for both every day uses and for emergency and SHTF situations. Make sure you stock up and keep plenty of cans on hand so you will always have some when you need it.

While the shelf life of this product is technically considered to be 5 years, this refers more to the mechanism of the can than to the actual product itself. If stored properly, your WD-40 should last for many years. 

You May Also Like:

The post 40 Survival Uses for WD-40 appeared first on Urban Survival Site.


from Urban Survival Site

Watergate Cake Recipe

How Far Can a Drone Fly? (And Why That Should Terrify You)

Most folks look at a drone and think, “Cool toy,” or maybe “That’d be fun to get aerial shots of my backyard chickens.” What they don’t think is, “How far can that thing go?” or “Who else is using this tech to watch, track, or control?” That’s the real question — because once you know […]

The post How Far Can a Drone Fly? (And Why That Should Terrify You) appeared first on Ask a Prepper.


from Ask a Prepper https://ift.tt/ipbJ5uB

EMP-Proofing Your Home: Affordable Hardening Against a Massive Solar Flare or Grid Attack

EMP-proofing your home isn’t some paranoid niche prepper fantasy anymore, it’s a necessary conversation rooted in hard evidence and decades of ignored warnings. Let’s get this straight: electromagnetic pulses (EMPs) are not theoretical. We’ve already had real-world brushes with these events, and next time we might not be so lucky. The most famous historical example ... Read more...

from Prepper's Will

The 14 Best Chicken Breeds to Free-Range

One of the best things you can do for your chickens is simply to let them free-range. Letting them wander around your yard or property getting some exercise, fresh air, and of course, delicious, choice bits of food in the form of grass, seeds, bugs and more will do wonders for their health and well-being. ... Read more

The 14 Best Chicken Breeds to Free-Range can be read in full at New Life On A Homestead- Be sure to check it out!


from New Life On A Homestead

10 Household Items You Can Use to Communicate Post-EMP

An electromagnetic pulse from a strategic attack or a coronal mass ejection from the sun will instantly cause communication infrastructure to collapse. Cell towers will be fried, the internet will crash, and most forms of digital communication will be inoperable. The only working radios will be the ones that were shielded in a Faraday cage. […]

The post 10 Household Items You Can Use to Communicate Post-EMP appeared first on Ask a Prepper.


from Ask a Prepper https://ift.tt/4fC027v

EMP Survival Guide: Your First 15 Steps & a Complete Plan

[…]

The post EMP Survival Guide: Your First 15 Steps & a Complete Plan appeared first on The Survival Mom.


from The Survival Mom https://ift.tt/Nx8oFDj

Wednesday, July 30, 2025

50 Cattail Uses and Recipes

Estimated reading time: 11 minutes

50 Cattail Uses and Recipes

Cattails might just be a prepper’s dream plant. If you are a survivalist, prepper, homesteader, or history buff, you’ll want to learn about cattails. But if you have to bug out or find yourself lost in the woods, finding a cattail colony means you have found some essential items that will help you to survive: food, shelter, water, and heat. 

There are dozens of uses for the humble cattail. They can be used as food, to build an emergency shelter, make fires, baskets, twine, and so much more. If you are going to consume a cattail, make sure you can positively identify it, so you don’t ingest a toxic look alike. 

In this article, we’ll talk about cattails and their many uses. We’ll look at how to use cattails for food, to make baskets and other textiles, and how to use them to start fires and make torches. But first, we’ll look at what a cattail is and how to identify them.

I loved to pull apart the brown, hotdog-shaped cattails and throw the fluffy stuff into the wind as a kid. I didn’t know back then that those brown catkins were the hallmark identifier of a cattail.

Known by a myriad of nicknames like bulrush, water torch, corn dog grass, and of course, cat-o-nine tails, these tall plants in the grass family are easy to identify if you know what to look for. 

Identifying Cattails

Cattails (Typha species) are one of the easiest wild plants to identify. If you live in the Northern Hemisphere and can find a body of water like a lake, pond, marsh, wet ditch, or even just soggy soil, you’re likely to find cattails growing nearby. They thrive in saturated ground and often grow in dense colonies.

Key Features to Look For

  • Blade-like Leaves: Cattail leaves are long, flat, and blade-like, resembling oversized grass. They typically grow between 5–8 feet tall and have a soft, almost waxy texture. The leaves rise vertically in fans from the base and can be easily separated by hand.
  • Cigar-shaped Flower Heads: The most distinctive feature of the cattail is its brown, cylindrical flower spike (the “cattail”). This dense, sausage-like head grows at the top of a stiff central stalk and is completely unique to the plant. When mature, the flower heads burst open and release a thick mass of fluffy seeds.
  • Rhizomes and Roots: If you pull one up, you’ll find long, starchy rhizomes that grow horizontally through the mud. These rhizomes are what anchor the plant and serve as its main carbohydrate reserve.
  • Tender Inner Stalk (Cattail Heart): Just above the root, hidden under the outer leaves, is a tender white stalk known as the “heart.” It has a mild, cucumber-like flavor and is edible raw or cooked. When peeled, the inner layers can reveal a clear, jelly-like sap that acts as a natural antiseptic.

Common Look-Alikes and Safety Note

Young cattail leaves can resemble other marsh plants, especially blue flag iris, which is toxic if ingested. However, irises lack the signature flower head. To safely confirm a cattail patch, look for the brown cigar-shaped seed heads, no other plant has them. If you’re harvesting early in the season before the heads appear, use caution and only harvest from known patches.

Harvest Considerations

Because cattails are natural water filters, they absorb toxins from the soil and water around them. While this is great for the ecosystem, it means you should never harvest cattails from stagnant or polluted water, roadside ditches, or urban runoff areas. Always choose clean, remote wetlands or ponds for foraging.

If you want, you can grow cattails yourself in any swampy area, even in a container if the soil is wet enough. There are many ways that you can use cattails around the house for prepping and for survival purposes. Here are just a few. 

Cattails as a Food Source 

Cattails make an excellent and highly versatile food source. All parts of the plant can be eaten. Of course, ripe catkins are full of fluff which might not be too tasty! 

Cattails produce more edible starch than rice or potatoes, making them a good source of calories. The fresh shoots have a flavor similar to peppery cucumbers. This supermarket plant can be eaten in a variety of ways.

  1. Cattail “Cobs” in Season – When the green male flower spike matures but is still soft, it can be boiled or steamed and eaten much like corn on the cob. It has a nutty, slightly cucumber-like taste and is rich in protein.
  2. Roots – Roots provide plenty of starchy carbohydrates and can be harvested any time of year. You’ll find them buried in mud and wet soil, so be prepared to get muddy. 
  3. Rhizomes – The starchy rhizomes can be dried and pounded into flour or boiled. 
  4. Hearts – The heart of the cattail is located just above the rhizome. Early in the season, it can be cooked and eaten similarly to a Jerusalem artichoke. As the plant matures, though, this part might become to fibrous to eat.
  5. Shoots – New shoots are full of vitamins and can be eaten raw or cooked. 
  6. Seeds – Cattail seeds can be ground up to make a substitute for flour. 
  7. Flowers – Young cattail flowers can be cooked and eaten similarly to corn on the cob. 
  8. Cattail Pollen – Cattails produce large amounts of pollen, which can replace some or all of the flour in recipes for an excellent source of protein, vitamins, and minerals. 
  9. Cattail Jelly – While not as common, cattail pollen and starch can be mixed with fruits like wild berries to create nutrient-dense survival jellies. The pollen helps thicken and add protein to the jelly.
  10. Tea From Roots – The roots can be chopped, dried, and steeped into a light tea that may offer mild antiseptic and diuretic properties. While not especially flavorful, it’s a resourceful wilderness beverage.

For cattail recipes, check out the farmer’s almanac

Cattails as a Textiles Source 

Cattail leaves and stalks are sturdy and versatile, making them a resource for crafting and weaving. The fluffy catkins are highly absorbent and insulating, as well. 

  1. Diapers – The fluffy flower pods are highly absorbent and have been used as diapers for this reason. 
  2. Feminine Hygiene Products – These absorbent flowerheads are also used in a similar way to menstrual pads. 
  3. Insulation – Sleeping bags and comforters can lose their fluff over time, but you can give them a little extra life by filling them back up with the fluff from cattails. Check out just how much fluff cattails can make in this video here. During WW2, children collected cattails to stuff life jackets and sleeping bags because of their insulating power. 
  4. Shoes and hats – If you are caught in the cold, you can keep your hands and feet a little extra warm by lining your shoes and gloves with dry cattail fluff. You could even line your clothes and coat, if needed. 
  5. Stuffing – The fluffy seeds can also be used to stuff pillows, mattresses, and other craft items. Just make sure it is completely ripe and dry first for the best amount of fluff. 
  6. Baskets – The stalks of cattails can be woven together to make baskets for storage and transporting items. The stems and leaves are strong and fibrous, which will give support to your items. 
  7. Twine and Survival Rope – This tough, fibrous material can be twisted into a twine or rope in a pinch, which you can use for fishing, making tools, or building a survival shelter.
  8. Mats – Just like baskets, the stalks can be woven into sleeping mats or placemats for comfort. Allow the leaves to dry completely, then soak them for a short time to make them more pliable. 
  9. Hats – If you need some shade in the hot sun, you can weave dried cattail leaves together to make a primitive and cooling hat.  
  10. Paper Making – Dried cattail leaves and stalks can be processed into pulp and turned into rough paper, useful for note-taking, wrapping, or fire-starting material.
  11. Windbreak Panels – Weave cattail leaves between wooden poles or branches to create windbreaks or primitive walls for temporary structures.
  12. Sleeping Bags or Pads – Bundle and tie cattail fluff in tight cloth sacks or old clothes to create primitive sleeping bags or cushions. It's not modern insulation, but it helps keep body heat in during a survival situation.

Cattails for Heat and Light 

  1. Firestarter – The fluffy seeds are easy to light, making them an excellent Firestarter for cold nights. 
  2. Torch – The dried stalks can be used as torches when you light the tip of a dried seed pod. 
  3. Kindling – If you need a quick fire, you can burn dried stalks as kindling. 
  4. Candle Wick Material – The fluffy seed heads can be twisted and dipped in tallow or wax to make primitive candle wicks. They burn well and are easy to craft in the wild.
  5. Oil Lamp Wick – Similar to candles, a cattail stalk or fluff-twist can be soaked in oil (like rendered animal fat or plant oil) and used as a wick in a basic container lamp.

Cattails for Medicinal Use

  1. Antiseptic – Two forms of antiseptic can be derived from a cattail. First, ashes from burned cattail leaves and sap droplets from the plant base can be applied to wounds to prevent infection. 
  2. Toothache Reliever – The sap from this plant can be used to relieve the pain of a toothache. 
  3. Cotton Balls – The fluff from the seeds can be used like cotton balls to stop bleeding. 
  4. Poultices – Poultices can be made from crushed roots to use on small wounds, stings, and burns. 
  5. Stomach Issues – It is said that cattail seeds can be used to stop diarrhea. 
  6. Burn Dressing – Cattail fluff can be applied directly to minor burns as a dry, sterile covering. Its absorbent nature helps keep wounds dry while reducing infection risk.
  7. Crushed Leaf Bug Repellent – Crushing and rubbing the leaves on your skin can offer a mild bug-repelling effect, especially against gnats and no-see-ums. Not as strong as DEET, but useful in a pinch.
Cattails Next To Lake

Other Uses for Cattails 

  1. Emergency Shelter – If you’ve found cattails, you’ve also found an emergency shelter. Create a teepee-shaped dome with cattails. Tie several cattail stalks together at the top to create a teepee shape, and then continue layering them until you’ve reached the desired thickness. This will provide some shelter from wind, rain, and cold. You can insulate the bottom and sides of the teepee with dried stalks and cattail fluff. 
  2. Fishbait – The cattail is home to beetle grubs that make excellent fish bait. Look underneath the lower leaves near the stalk to find them. 
  3. Chopsticks – If you need utensils, the stiff stalks of the cattail can be fashioned into safe chopsticks. 
  4. Arrow Shafts – The stiff stalks make study shafts for arrows. 
  5. Hand Drills – The stalks are stiff and sturdy enough to be fashioned into primitive tools, such as hand drills. 
  6. Erosion Control – Erosion can happen quickly in swampy areas. Planting cattails can help hold in the soil. And cattails can be the first step in turning a soggy area into a usable, dryer location as they hold in soil that can build up over time. 
  7. Waterway Cleanup – Cattails are known for their ability to bioaccumulate toxins from water and soil. As a result, they can remove chemicals such as arsenic, phosphorous, methane, and even explosives. 
  8. Crop Protection – Farmers will sometimes plant them in boggy areas between roads and fields to reduce pollution and crop contamination. 
  9. Privacy Screen – These tall, grassy plants can be thickly planted in containers to create a privacy screen to shield you from the view of neighbors and passersby. 
  10. Cattails for Decorating – These pretty brown flower heads are often used in flower arrangements and wreath making. The flower heads will last indefinitely. 
  11. Glue – The stalks can be used to make a type of glue.
  12. Fireworks – The pollen of the flower is sometimes used as a coloring agent in fireworks. 
  13. Livestock – The dried stalks can be used as bedding for your homestead animals, and the young shoots can be fed to goats as a supplemental feed. 
  14. Water Filtration Pre-Filter – In survival scenarios, cattail fluff and roots can act as a basic pre-filter to remove sediment before boiling or purifying water. It won’t kill bacteria, but it helps clear debris.
  15. Navigation Marker – Use bundles of cattail stalks to mark trails or signal locations. The tall, distinctive shape stands out in brush or wooded terrain.
  16. Cushioned Footwear – In cold weather or rugged terrain, stuffing cattail fluff into your shoes can help insulate your feet and prevent blisters from rough materials.

Whenever you forage for food, you need to be entirely sure that you correctly identify an edible plant. And although the young leaves are easily confused with other plants that are not safe to eat, you can tell a cattail by its brown, cigar-shaped flower. Always do your research, so you are confident in your ability to use this fantastic and versatile plant.

You May Also Like:

The post 50 Cattail Uses and Recipes appeared first on Homestead Survival Site.


from Homestead Survival Site https://ift.tt/BIqWTD3

11 Foods To Buy On A Cheap Budget

11 Foods To Buy On A Cheap Budget

I have a post discussing 11 affordable foods to buy on a tight budget. Mark and I went to Costco yesterday and nearly choked over the price of steaks. We went there for other items, but people grabbed those packaged ribeye steaks like no tomorrow.

Yes, they were probably going to barbecue them for the weekend—I get it—but the price for three steaks was $91.00. They were beautiful and marbled throughout, but I couldn’t believe they were over $21.00 per pound.

I could almost feel my cholesterol going up just looking at those beauties! There is nothing better than a juicy, tender barbecued steak.

Unless it costs $30.00 or less per package and I get to cook it myself, it won’t happen. So, today, let’s get real, my friends. Unless we have a cow, a pig, or some chickens in our yard, we may need to cut back on meat.

I applaud those of you who raise your meat. I would love to do that, but it’s not realistic in my current stage of life and location.

11 Foods To Buy On A Cheap Budget

There are still options to properly feed our family, slash our grocery bill, and eat healthy at the same time. Of course, having a garden is a bonus. Then, we can supplement our grocery budget with fresh vegetables right out of our back door.

I love my Aerogarden and now have four of them. In case you missed this post, Growing Fresh Lettuce Indoors Year-Round, I still have lettuce growing in the unit, and we eat a salad almost every night with tomatoes from our garden or the local farmer’s market.

My Favorite Pans for These Items

11 Foods To Buy On A Cheap Budget

1. Rice

Do you love a bowl of sticky rice? Mark and I eat rice almost every night because we love it. It’s easy to make a big batch ahead of time and bag the leftovers into a few meals for the week. We make fried rice and rice bowls with vegetables, topping them off with teriyaki sauce. Open a can of mandarin oranges; that rice will be even better with those small oranges.

This week, we made a chicken and broccoli casserole and served it over rice. With the chicken breast meat, broccoli, and white rice, we had enough food for three dinners and a lunch. A meal full of protein, nutrition from the veggies, and rice to make you feel full. I call that a budget-friendly approach to planning meals for the week.

Note that I cook with white rice. Brown rice tastes great, but it doesn’t have the long shelf life of the white option.

You can make burritos with rice and beans for breakfast, lunch, or dinner. That’s why I always stock salsa, lots of it. Tacos are excellent, especially when paired with some rice added to the beans. It will stretch your budget, and your family will enjoy a different flavor.

2. Beans/Lentils

I love beans, whether they’re dry or in cans. My favorite beans are pinto beans, followed by black beans, and lentils taste great in soups and stews. We can make lentil tacos, bean tacos, or a combination of beans and lentils into tostadas. If you missed this post, Lentils: Everything You Need to Know.

Beans are one of my pantry staples. I buy more in bulk when they go on sale during case lot sales at my local grocery store. That seems to be held most often in the last summer or early fall. Other canned foods are also available during these sales, which helps save on food when you’re on a tight budget.

3. Oats

We can use oats for a bowl of hot oatmeal, add some of our dehydrated fruits, and our bellies will be full! I used to add oatmeal to my hamburgers to stretch the patties further. And who doesn’t love oatmeal muffins, right?

Most whole grain foods are fairly inexpensive, have a decent shelf life, are flexible for meal preparation, and are healthy for your family. Legumes are also a healthy and budget-friendly option.

4. Pasta

Pasta is another staple you’ll find in my pantry. When I had kids at home, we had spaghetti once a week, pasta salad another night, and casseroles with pasta. My homemade soup always had pasta in it. It would have been elbow macaroni, spaghetti noodles, or lasagna back then. Life was good with pasta, spaghetti sauce, and grated cheese.

When you think of all the varieties of pasta available on the shelves when grocery shopping, they are a great choice for meal planning and a cost-effective way to get many of the vitamins and minerals we all need.

Pasta for Food Storage

5. Bananas

If there was ever a great deal on fruits, it’s bananas, right? Mark and I pile them high weekly when we pick up milk at the grocery store for his cold cereal. I’m sure people wonder why we buy so many, but I also like them in smoothies and on ice cream. Life is good with a bowl of ice cream and bananas. They’ve got to be one of the cheapest fruit options out there.

Costco, Walmart, and Smiths sell them for about $.49 per pound all year long. We love apples of all kinds, but most of those start at $1.59 and above, when in season. It seems like an apple costs about $1.00 each or more. Bananas are our go-to fruit, providing valuable fiber and its related health benefits. They make a great snack, especially compared to candy or calorie-laden crackers.

6. Spinach

The great thing about spinach is you can get a HUGE container of organic baby spinach for about $3.00 – $4.00, which goes far. We like it in soups, quiches, salads, and smoothies. Just think of all the nutrients in that spinach!

I understand that some people on blood thinners can’t have spinach, at least that’s my understanding. This is my very favorite spinach salad, The Best Spinach Salad

7. Eggs

Mark and I grew up eating bacon and eggs for breakfast. There wasn’t a lot of bacon, but we had more eggs, and our breakfasts were excellent. I’m unsure when it changed, but now it’s scrambled eggs or quiches with some leftover ham or bacon. Or it may be no meat—just homemade bread with butter that works with scrambled eggs.

We used to pay $12.00 for the five dozen package at Costco, that’s less than $.20 per egg to get all the health benefits of this great product. So many recipes call for eggs, so you can buy a very inexpensive recipe ingredient and know you’re stretching your food budget dollars in healthy ways.

Now, I buy eggs from my neighbor for $5.00 a dozen, and they are the freshest eggs on the planet. Or I trade my lettuce for her eggs; either way, we both win!

Eggs Fresh From Rebekah

8. Peanut Butter

What’s better than a peanut butter and jam sandwich? Did you notice I didn’t say peanut butter and jelly? I like jams with chunks of fruit; that’s how I roll. We’ve started buying smaller jars of peanut butter and jam since our family has shrunk to two people, and we want the jams to stay fresh once the container is opened.

I remember raising our girls, and we bought #10 cans of peanut butter; I miss those days. I wonder if they still sell #10 cans of peanut butter these days.

Peanut Butter and Jelly

9. Canned Meat

Do you love tuna or chicken salad sandwiches? We add mayo or Miracle Whip to the can of drained meat and mix it up. If you have bread and butter pickles, it’s the best meal ever. We usually add some of our favorite chips, too. Mark loves those with a BBQ flavor!

Canned meats have a decent shelf life and can be cost-effective when purchased as part of the case lot sales event. Tuna is great for us, and we avoid the more expensive canned seafood options like salmon. If you haven’t tried this tuna that Harry recommended, you need to. By signing up for their newsletter, you’ll get access to great sales and the best tuna I have ever tasted. Natural Catch Seafoods

Canned Tuna and Chicken

10. Frozen Vegetables

It’s awesome when I see the mid-week ads in the mailbox show frozen vegetables for $1.00 a bag. You can keep them in the freezer or dehydrate them if you have a dehydrator.

They are great as side dishes or when the dehydrated veggies are added to a pot of soup or stew. One of my favorite frozen vegetables is chopped onions. When I want to make tacos, sloppy joes, or soup, the chopped onions are ready to go—no slicing, chopping, or watery eyes.

11. Flour

Today, I want to ask people to teach their kids and grandkids how to make bread, biscuits, tortillas, pancakes, and even sourdough bread or pizza. I promise that life is good when you can make your bread and related food items.

I prefer bread flour over all-purpose flour. I make bread most often, and it works in other recipes calling for flour. If you have wheat and a wheat grinder, you can also make your own flour and save money.

All of my recipes are no-fail. If you have fresh ingredients, YOU CAN MAKE bread! In case you missed this post, How To Make My No-Fail Homemade Bread

Flour In Bucket

11 Foods To Buy On A Cheap Budget

Final Word

I hope you enjoyed today’s 11 foods to buy on a cheap budget. Let me know if you have any ideas, and I’ll add them to this post. It’s scary how much food prices have risen, and we need to help each other save money whenever possible.

Is it the weather? Is it because the farmers lack people to pick the produce? Is it a water shortage (drought) or the truckers who cannot deliver the goods? I’m still not sure why we are seeing prices spike right now.

It’s all about teamwork. If we have a broken link, the food chain and everything else become ineffective. Please keep stocking up and teaching your kids and grandkids to cook from scratch. It’s a much-needed skill. May God bless this world, Linda

The post 11 Foods To Buy On A Cheap Budget appeared first on Food Storage Moms.


from Food Storage Moms

Top Tips for Securing Homes: Ensure Safety and Peace of Mind

Looking to secure your home? This guide offers actionable steps to enhance your home’s security, focusing on securing home effectively. Learn how to identify vulnerabilities, choose the right security systems, and utilize smart technology. Key Takeaways Regularly assess your home’s security vulnerabilities and reinforce weak points to prevent potential break-ins. Invest in a comprehensive security […]

The post Top Tips for Securing Homes: Ensure Safety and Peace of Mind appeared first on Ask a Prepper.


from Ask a Prepper https://ift.tt/82cpuyt

Tuesday, July 29, 2025

How to Use a Camp Oven

Estimated reading time: 12 minutes

How to Use a Camp Oven

A Dutch Oven or camp oven can be a culinary lifesaver during a power outage. These versatile cooking vessels are not just for camping trips; they also offer an alternative way to prepare meals when your regular appliances are unavailable.

From baking bread to simmering stews, these ovens can handle it all with a little practice. This article will guide you through the basics of using a dutch or camp oven without electricity.

Dutch Oven vs. Camp Oven: Understanding the Differences

While both Dutch Ovens and camp ovens are great for outdoor cooking, there are a few differences to consider. Generally, a Dutch Oven is a thick-walled cooking pot with a tight-fitting lid, often made of cast iron. It's versatile and can be used both on a stove and in an oven.

On the other hand, a camp oven, also known as a “campfire oven,” is designed specifically for outdoor use, usually over an open fire. It usually features legs for stability over coals.

Camp Oven Legs

Here are the main ways you can tell them apart:

  • Look for legs. Camp ovens usually have legs to stand over coals, while Dutch ovens do not.
  • Check if the lid on the oven can also serve as a skillet. This is a common feature of camp ovens.
  • Consider the weight and thickness of the walls. Dutch ovens typically have thicker walls and are heavier.
  • Examine the material of the oven. If it's made mostly of cast iron, it's likely a Dutch oven.
  • Think about where you intend to use it. If it's outdoors over an open fire, then it's likely a camp oven. However, if it can be used on a stove or in an indoor oven, it's probably a Dutch oven.
Camp Oven Lid

In terms of portability, the camp oven is more suitable due to its specific design for outdoor settings. However, the Dutch Oven's versatility gives it an edge in terms of functionality, as it can be used virtually anywhere.

Both offer similar cooking and baking capabilities, but if you had to choose one, consider your needs. For strictly outdoor cooking, a camp oven might be more convenient, but for versatility in various settings, a Dutch Oven may be the better choice.

Camp Oven On Fire

Choosing the Right Material and Size for Your Oven

Dutch Ovens and camp ovens are typically made from either cast iron or enameled cast iron. Cast iron is the classic choice, known for its excellent heat retention and even heating. They're perfect for slow-cooking dishes and baking bread. However, they require consistent seasoning and careful cleaning to prevent rust.

Enameled cast iron, on the other hand, features a vitreous enamel glaze which eliminates the need for seasoning. They're also easy to clean and come in a variety of vibrant colors. However, they can be more expensive than their non enameled counterparts and are not as suited for outdoor cooking due to the risk of the enamel chipping.

When it comes to size and capacity, consider your cooking needs. For solo campers or small families, a Dutch Oven or camp oven of 2-4 quarts should suffice. But for larger groups or those who love leftovers, consider a size of 6 quarts or larger.

Look for Dutch Ovens or camp ovens with sturdy handles for safe and easy transport. Many models also come with a thermometer notch for precise temperature control. Another useful feature is a flanged lid—this allows you to place coals atop the oven, enabling heat from all sides for even cooking.

Camp Oven Cooking

Cleaning and Seasoning a Cast Iron Dutch or Camp Oven

The process of seasoning a cast iron Dutch or camp oven is crucial for several reasons. It not only creates a natural, non-stick cooking surface but also prevents the oven from rusting. Moreover, a well-seasoned cast iron oven enhances the flavors of your food.

Cleaning your oven after each use ensures its longevity and performance. Here are some tips on how to clean a cast iron oven:

1. Remove food residue or rust: Before and after cooking, remove any food residues and use using a spatula or steel wool

Rusty Camp Oven

2. Clean with Water: Rinse the oven with water while it's still warm. Avoid using soap or harsh chemicals which can strip away the seasoning. Use some sand, coarse salt, or steel wool if you need some abrasive help.

Oiling Camp Oven

3. Dry Completely: Dry the oven thoroughly after cleaning to prevent rust. You can place it over low heat to evaporate any remaining moisture.

Bacon in Camp Oven

The golden rule of cast iron care is to never leave it wet. Always dry your oven thoroughly and give it a quick oil rub before storing. This simple routine will keep your cast iron Dutch or camp oven in optimal condition, ready for your next culinary adventure.

Seasoning cast iron refers to the process of applying a layer of oil to the surface of the cookware and heating it until it forms a hard, protective coating, which acts as a non-stick surface and prevents rusting.

 Here are some simple steps to season your oven:

  1. Clean the Oven: Begin by washing your oven with warm, soapy water. This is the only time you should use soap on your cast iron oven. Rinse and dry thoroughly.
  2. Apply Oil: Next, apply a thin layer of a neutral, high-smoke point oil like grapeseed oil or olive oil over the entire surface, inside and out. Don't forget the lid!
  3. Bake the Oven: Place the oven upside down in a regular kitchen oven set to 375 degrees Fahrenheit (190 degrees Celsius). Bake for about an hour. Once completed turn the oven off and let the cast iron cool while still in the oven.

If you have access to an open flame or if it's a particularly hot, sunny summer day, you can season your cast iron Dutch or camp oven outdoors. Here's how:

Seasoning Over An Open Fire

Start a fire using hardwood which will produce less soot than softwood. Place a grill grate over the fire and put your cast iron oven on top. Apply a thin layer of oil, similar to the indoor seasoning process.

Allow the oven to heat slowly over the fire. Avoid direct flames and instead focus on using the heat from the hot coals.

Once it's hot enough, the oil will start to smoke, indicating that it's bonding with the metal to form a protective layer. Let it cool slowly, and repeat this process a few times in a well-seasoned oven.

Seasoning on a Sunny Day

This method relies on the natural heat from the sun. Just like the other methods, clean your oven and apply a thin layer of oil. Place the oven in a spot where it will receive direct sunlight for the majority of the day.

You'll need temperatures to be above 100 degrees Fahrenheit (37.8 degrees Celsius) for this method to be effective. Let the oven sit in the sun and heat for several hours. The heat will help the oil to polymerize and create a non-stick layer. Remember to flip the oven every once in a while to get even seasoning.

The key to a well-seasoned oven is multiple light layers of oil, rather than one thick one. So don't be afraid to repeat these steps until you get the perfect patina.

Camp Oven Oiled

Cooking Methods for Dutch Ovens and Camp Ovens

Dutch ovens and camp ovens are renowned for their superb heat retention properties, which stem from their heavy-duty cast iron construction. This excellent heat retention not only ensures a consistent cooking temperature but also allows for longer cooking periods without the need for constant reheating, making these ovens ideal for slow-cooked dishes and baking.

Propane

One preferred way to cook in a cast iron oven during a power outage is by using a propane stove. It provides a steady heat source and is easy to regulate. When cooking with propane, ensure good ventilation to prevent the build-up of harmful gases. Always keep a fire extinguisher nearby.

Fire

Cooking over an open fire allows for both direct and indirect heat methods, perfect for your cast iron oven. Hot coals can be piled on the lid of a camp oven surrounding it with heat. Be cautious of unstable flames and popping embers. Keep water or dirt nearby to douse any unwanted flames.

Butane

Butane stoves are compact and portable, which makes them ideal for use during a power outage. Butane burns clean and doesn't leave a residue on your oven. However, butane is highly flammable, so store it safely away from the cooking area and keep it out of reach of children.

Propane and butane stoves provide steady and relatively easily controlled heat but require a well-ventilated space and proper storage of fuel. On the other hand, cooking over an open fire offers an authentic camping experience, albeit with a little more unpredictability. This method calls for constant monitoring to adjust the heat and to ensure safety.

Lid on Camp Oven

Delicious Recipes to Try in a Dutch Oven or Camp Oven

A Dutch Oven or camp oven is a versatile cooking tool that opens up a world of possibilities for tasty, comforting meals, even during a power outage.

Here are some recipes you can try that don't require electricity to whip up:

Easy Chili

  1. Brown 1lb ground beef, then remove and drain.
  2. Saute 1 chopped onion and 2 minced garlic cloves until translucent.
  3. Add the beef back in, along with 1 can of diced tomatoes, 1 can of kidney beans, 2 tablespoons of chili powder, and salt to taste.
  4. Simmer for 30 minutes.
Camp Oven Chili

Easy Dutch Oven Bread

  1. Mix 4 cups of flour, 2 teaspoons of salt, 2 teaspoons of sugar, and 1/2 teaspoon of yeast.
  2. Slowly add 2 cups of warm water, mixing until a shaggy dough forms.
  3. Cover and let rise for 8-24 hours.
  4. Heat the Dutch oven, then add the dough. Bake covered at 450°F (or when it's too hot for you to hold your hand over it) for 30 minutes. Check it after 20 minutes to make sure it's not burning. You'll know it's done when it is golden brown all the way around and has a nice crispy shell.

Easy Soup

  1. Saute 1 chopped onion, 2 chopped carrots, and 3 minced garlic cloves until soft.
  2. Add 4 cups of chicken broth, 1 cup of chopped chicken, and 1/2 cup of pasta.
  3. Simmer until the pasta is cooked.

These recipes demonstrate the versatility of the Dutch oven, allowing you to cook a wide variety of dishes using simple ingredients and methods, even during power outages.

Tips for Successful Dutch Oven Cooking

Control Temperatures

Learning to control the temperature of your Dutch oven is key. For low heat, keep a few coals on the lid and beneath the oven. For medium heat, spread an even layer of coals underneath and on top. For high heat, pile extra coals on top and below.

Layering Ingredients

Start with the ingredients that take the longest to cook at the bottom of the pot, like meats and root vegetables. Softer vegetables and spices can be added later to prevent overcooking.

Adjust Cooking Times

Remember, Dutch and camp ovens hold heat very well. If a recipe says to cook for an hour, check it at 45 minutes to prevent burning.

Pre-Heat the Oven

Just like a regular oven, pre-heating your Dutch or camp oven can help ensure even cooking. This can be done by placing it over the fire or coals for a few minutes.

Rotating the Dutch Oven

For even cooking, try rotating your Dutch or camp oven every 15 minutes or so. This helps to evenly distribute the heat and prevent hot spots.

Avoid Boiling Water in Regular Cast Iron

It's important to note that boiling water in a regular cast iron Dutch or camp oven is not recommended. The prolonged exposure to water can lead to rusting and damage to the seasoning.

If your Dutch oven has an enamel coating, boiling water is perfectly fine. The enamel provides a protective layer that prevents any reaction with the cast iron.

Dutch and camp ovens are exceptionally forgiving cooking implements so don't be afraid to experiment with different recipes, temperatures, and cooking times.

Dutch Oven Camp Oven

Conclusion

Dutch or camp ovens are versatile and robust cooking tools perfect for any scenario, including power outages. Their ability to retain and evenly distribute heat allows for flexible cooking times and a broad range of dishes.

Despite their minor differences, both types of ovens are designed for success in outdoor cooking. Every kitchen should have one as it will serve your family for generations.

You May Also Like:

The post How to Use a Camp Oven appeared first on Urban Survival Site.


from Urban Survival Site

What To Plant In August

What To Plant In August-Zones 1-10

Have you been wondering what to plant in August? Can you believe the price of groceries? They keep going up. We should cultivate a garden to produce at least some food, with the goal of increasing our yield each year. I like to update my monthly series of posts every year. I’m still planting seeds in my Aerogarden since I do not have a garden in my new tiny yard. Hopefully, next year.

What To Plant In August

What to Plant In August

Please keep in mind that the climate has changed in all zones. We can no longer count on the correct zones for planting. We must pay attention to the weather channel or our outdoor thermometers.

We can do this, I promise. You can produce some of your food if you have acres, a small lot like mine, or pots.

I’m thankful I taught myself how to hand-pollinate my Zucchini Plants and Cucumber Plants.

If you have bees, you may not need to do this, but in my area, bee populations have been very limited for the past few years. I purchase all of my garden seeds from this company: SeedsNow.

I highly recommend these for CowPots and Organic Seedling Soil: this way, you can plant your seeds and place the CowPots in your garden when the temperatures are correct.

My goal is to grow some vegetables throughout the late fall and winter. We will have to see if I can get my garden set up.

I’ll eventually have to cover my raised garden beds to protect them from freezing (when they get built here in my new yard).

Check here to find your Planting Zone. It’s easy; all you do is add your zip code. I love it!

How I store my garden seeds: 

Plastic Photo Container and Label Maker

Garden Seed Container

Soil Amendments

Before we get started with the vegetables you can plant, let’s be sure your soil is ready. Here are my tips for soil; I do this every Spring and Fall.

We first need to pull any weeds that have come up since the last time you turned over the soil.

Dig out any leftover crops you missed the last time you harvested. Turn the soil several times and add the following amendments if you need them:

Azomite Micronized Bag, 44 lb

Organic Coco Coir Block

Earthworm Castings Organic

Organic Compost

Organic Vermiculite

Soil pH Levels

What Does The Term pH Level Mean?

Are you wondering what the term pH level means when gardening? Each plant prefers a different level of acidity to grow the very best harvest. The level of acidity desired varies between plants.

Therefore, you can adjust the pH of your soil by adding lime or sulfur to bring it up or down, depending on what your soil needs. You can have your soil tested, possibly by your state extension service, or try to do it yourself with a soil tester. pH Tester Tester Strips

What to Plant in August by Zone

Usually, I talk about what to grow each month based on my zone, but in this section, I want to share with you the different plants you can grow in each zone. You can find it here if you’re unsure of your zone. USDA PLANTING ZONE. The climate has changed in so many areas; I’m not sure these are as accurate. Each year, we experience either a drought or excessive rainfall.

Zone 1

In your fall garden, here are the plants that do best in zone 1:

  • Artichokes (Globe)
  • Chinese Cabbage
  • Kohlrabi
  • Lettuce (leaf only)
  • Peas
  • Spinach
  • Turnips

Zone 2

You can still plant quite a bit in Zone 2 during August. Here is a list of seeds you can plant:

  • Artichokes (Globe)
  • Broccoli
  • Chinese Cabbage
  • Endive
  • Kohlrabi
  • Lettuce (leaf only)

Zone 3-4

As the weather changes in zones 3-4, you won’t be able to plant everything, but you can still plant several veggies. Here is what you can plant in zones 3-4 in August:

  • Kohlrabi
  • Lettuce (head only)
  • Radishes
  • Spinach
  • Turnips (early August

Zones 5-6

There are a lot of fall plants you can start in zones 5-6. Here is what you can plant in August:

  • Beets
  • Broccoli
  • Brussels Sprouts
  • Carrots
  • Kale
  • Peas
  • Peppers (early in August)
  • Radishes
  • Spinach
  • Squash
  • Turnips

Zones 7-8

This is my area, and I enjoy planting a variety of things in August. Here are just a few things you can plant in zones 7-8 in August:

  • Beans
  • Beets (after the 15th)
  • Brussels Sprouts
  • Cabbage
  • Carrots
  • Cauliflower
  • Corn (early)
  • Cucumber (early)
  • Kale
  • Lettuce
  • Onions (early)
  • Peppers (early)
  • Spinach
  • Squash
  • Tomatoes (early)

Zones 9-10

Again, August is still a great time to plant your fall garden in these zones. Here is what you can plant in zones 9-10 in August:

  • Broccoli
  • Cauliflower
  • Celery
  • Cucumbers (Zone 9 only)
  • Eggplant (Zone 10 only)
  • Okra (10 only)
  • Peas (9 only)
  • Peppers (early)
  • Pumpkins
  • Squash (summer and winter)
  • Tomatoes (9 only)
  • Turnips (9 only)
  • Watermelon (early)

What To Plant In August

1. Carrots

Carrots like smooth, loamy soil with nutrients added, as shown above. I like to moisten the soil slightly, sprinkle the seeds over the soil, and cover them with compost.

Keep the rows about 3 inches apart and stagger, planting the seeds over two to three weeks to have an abundant harvest for the season.

Be careful if you live in intense heat, as carrots don’t like to dry out. If you water them by hand for two to three weeks after planting the seeds, you will soon see the little sprouts.

This is when you will fertilize with some Miracle-Gro Fertilizer and thin the carrots as needed. Use mulch to cover them if you live where the summers are sweltering.

pH level for Carrots: 5.5 – 7.0

2. Lettuce

Add the amendments above to the soil where you plant your lettuce seeds. The nice thing about lettuce is that it’s so easy to grow and sprouts up quickly. Just make sure the soil is loosened, loamy, and well-drained.

Lettuce loves nitrogen and potassium, so watch the leaves as they grow. Work in a lot of organic matter or compost. Lettuce matures in 55 to 60 days. Romaine takes longer, and so do head lettuce varieties.

Plant the seeds about 1/4 inch deep, tamp them into the soil, and water them. Easy and simple. Read the package to space according to the lettuce variety you choose. Seeds will not germinate in soils above 80 degrees F. or warmer.

You can start some seeds indoors and transplant the seedlings into a shady spot if the weather is too hot outside when starting. You may want to choose heat-resistant varieties if you live where the temperatures get very hot in the summer.

It’s better to pick early than late because the leaves become bitter.

pH level for Lettuce: 6.0 – 7.0

3. Radishes

I like the radish called Red Champion because it’s larger and has bright red skin. They grow in small areas, and the days to maturity are 25-30 days.

Another one I like is called Pink Beauty because the white flesh is crisp and mild. They grow well in pots or containers. Their days to maturity are 25-30 as well.

I sprinkle the seeds over the soil, cover them slightly, and then sprinkle with water. If you stagger the planting days, you will have several days of freshly picked radishes when it’s time to harvest.

pH level for Radishes: 6.0 – 7.0

4. Spinach

I plant New Zealand spinach seeds because they can withstand the heat of Southern Utah. It’s a large, growing plant, but I make salads and smoothies, and I also freeze a lot of spinach for the year.

This spinach variety grows from spring to fall without any issues. The more I cut it back, the more it grows. It takes 75 days to mature.

Again, ensure your soil has the amendments above, and you need to turn over the soil repeatedly. Plant the seeds at least one foot apart and the rows two feet apart.

pH level for Spinach: 6.0 – 7.5

How Do I Keep My Vegetables From Freezing?

You’ll likely need a way to protect your vegetables when the weather starts to dip and freeze. I have used these over seedlings and individual plants in the winter. Garden Cloches

Please Check Out What To Plant Each Month:

Final Word

I only eat the lettuce from my Aerogarden indoors. In case you missed this post: Growing Fresh Lettuce Indoors Year-Round

Let me know what you plan to plant in August. We can do this, my friends, I promise. May God bless this world, Linda

Copyright Images:

The post What To Plant In August appeared first on Food Storage Moms.


from Food Storage Moms