We all know that not every survival food is created equal. Calories and shelf life matter, of course, but experienced preppers understand that sustaining health over time requires more than just anything that won’t spoil. It’s easy to lean on traditional favorites because of their reputation, but reputations don’t always tell the whole story. I […]
If I told you I could build an outdoor stove/fireplace in less than 20 minutes, you probably wouldn't believe me. It sounds like a complicated project, but it really isn't. In fact, you can build one without using any concrete, mortar, or tools. All you need are some cinder blocks, cap blocks, and a couple of oven grates.
This DIY outdoor stove looks great in any backyard, and it's perfect if you want a reliable way to cook food during a blackout or if you're just living off grid. I found this particular setup on the Youtube channel, M.D. Creekmore, and had to share it.
You can watch the video and read the instructions below.
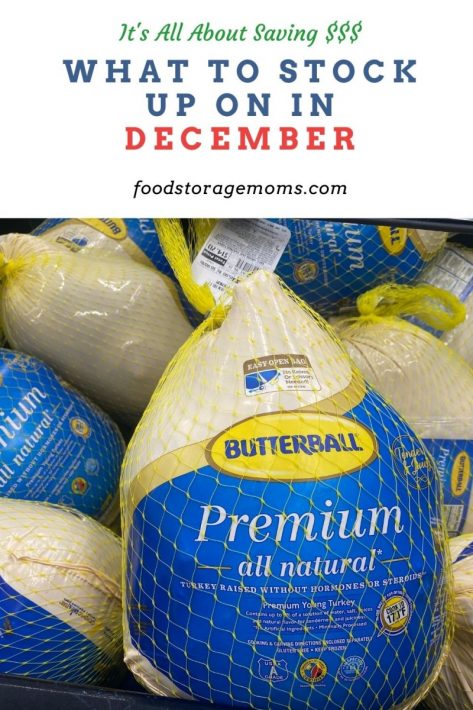
Today, it’s all about what to stock up on in December. Oh, how I love saving money on items I need to keep our home running smoothly.
December is a great month to stock up on so many items we all need. Let’s get started saving money right now. Some things are in short supply; I have seen that myself.
It’s interesting to note that most businesses have over half their annual sales from October through December. So, they need to unload some items to be ready for the new items coming in January and the rest of the first quarter.
What To Stock Up On In December
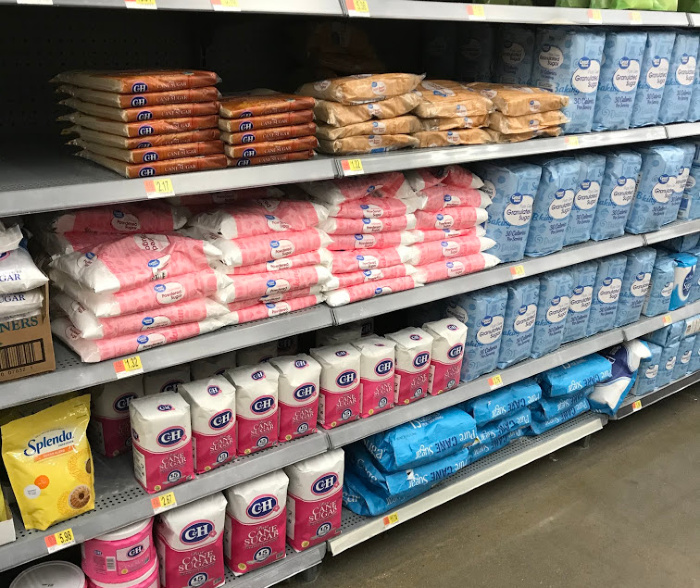
Baking Items
Be sure to look for some baking items you need to stock your pantry. The two top items that will be cheaper this month are flour and sugar. Please only buy the flour you can use in 12 months or so. That’s the safest shelf-life for white flour.
Sugar will last indefinitely if it stays dry in an airtight container. I know a lot of us are cutting back on sugar, but if we have a long-term grid down, sugar will be our new best friend.
We can bake cookies, cakes, bread, and so much more that we can sell or barter with, besides knowing we have the food to keep our family full.
In some areas, watch for clearance on flour and sugar because once the temperatures get too hot, some people stop baking altogether. This is a great time to stock up on baking items.
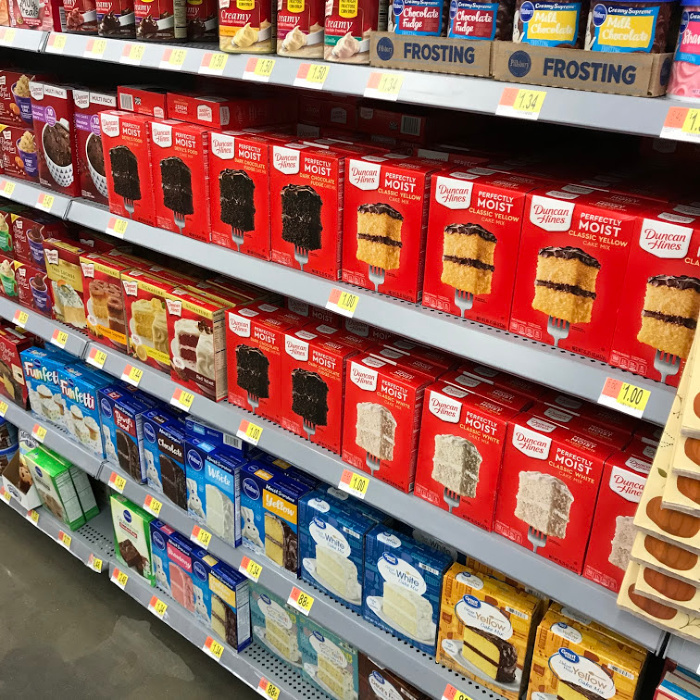
Cake Mixes
My favorite cake mix is Duncan Hines. I use them as a base and add some really good stuff to add flavor and texture to the cake. If you haven’t made my chocolate cake you may want to try making it.
Plus, my mother taught me a secret on how to make your cakes really moist. I love a moist chocolate cake.
I have seen my favorite cake mixes for .75 to .95 cents for each box. This is a great time to stock up on your favorite ones. Here’s the deal, you can volunteer to take a cake to a party because you’ll already have the mix ready to go on your pantry shelf.
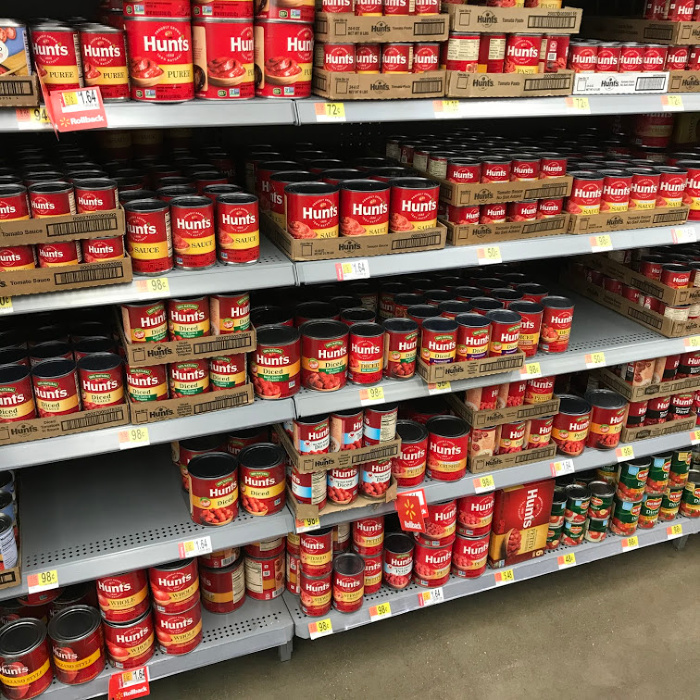
Canned Food
Let’s make it a point to fill our pantry with some canned food items you and your family will enjoy all year long. If by chance you see you won’t use them up before they expire, you can donate them to your local food bank.
Some of the basic ones are vegetables and fruits. It’s nice to have a few cans of food we can save money on and eat right out of the can if we need to. Be sure and keep a few can openers on hand.
Our local Kroger/Smith’s store is running some case lot sales right now. I usually see them earlier in the fall, but they’ve been running theirs for a longer period.
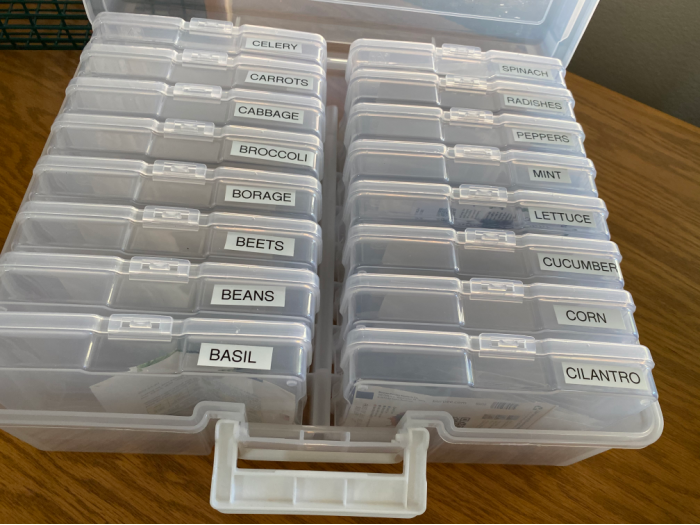
Garden Seeds
I want to encourage you to stock up on garden seeds anytime you have a little extra money. My heart and gut are telling me we must produce more of our own food. We don’t need several acres to grow food, yes, it would be nice. Mark and I have used 4-foot square raised garden beds. I raise potatoes in large pots. It doesn’t matter how much food there is; it’s the quality. We can grow food in pots, bags, or any container with drainage. We all need to keep garden seeds so we can grow our food.
If you’re big into playing board games, watch for games that go on sale. My favorite game is Clue, and it was sold out. But there were plenty of other choices the day I checked.
It’s a great month to stock up on stocking stuffers at the lowest prices available. Just think about small tubes of toothpaste, toothbrushes, deodorant, shampoo, and conditioners.
We may as well fill those stockings with valuable items over things we’ll toss out two days later because they’re broken or food items that spoil.
Watch for paper plates, cups, and tablecloths with a holiday theme for both Christmas and New Year’s Day. You’ll see them drastically reduced at the beginning of the month, so buy them when they’re on sale.
The closer we get to the actual day, the higher the prices go because they are in short supply.
After Christmas, you’ll see significant markdowns, but the choices will be limited. So, if you have your heart set on a particular theme, snatch it with the first markdown.
Keep your eye on marked-down crackers just in time for greeting friends and family on Christmas and New Year’s Day. Serve the dips you make or the ones you buy along with the crackers; it’s a win-win.
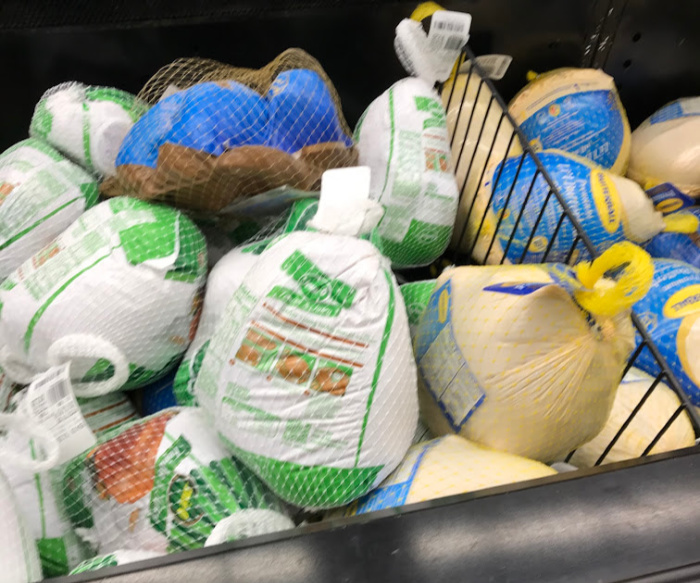
Thanksgiving Leftovers
You’ll see all those Thanksgiving turkeys on sale because most people want ham or prime rib for Christmas. This is a great month to watch for a spiral ham or a regular ham, which will also be cut in price.
Just think, you could make a ham dinner, ham sandwiches, and ham soup. You gotta love the options.
You can also stock up on some turkeys for your freezer. Last year, I saw them go down to below 50 cents a pound. If you have room in your freezer, you may want to grab some.
Instant Potatoes
Check the instant mashed potato aisle, as well as the refrigerated ready-made mashed potatoes. I stocked up on StoveTop stuffing; it’s one of my favorites. They are super cheap this month.
Christmas Trees/Decorations
Last week I saw some Christmas trees marked down 40-50%. For some reason, people have been putting their trees up early. I’m guilty of that this year.
When I went to Target a few weeks ago, there were so many trees, but now there are only a few choices. I’m not sure we’ll see many artificial trees left after Christmas, at least where I live, which is 70-80% off.
You can get so many decorations right now at 40-50% off, and it’s only December 1st! If you buy in December, you’ll find so many great buys on Christmas decorations of all kinds.
The Christmas lights are marked way down, put them in your emergency stash if they are 60-70% off, right?
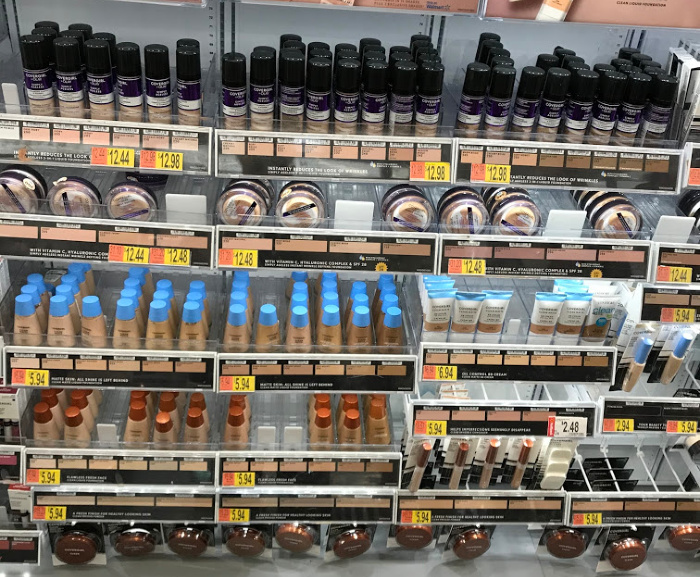
Cosmetics
I’m not big into cosmetics, but I know a lot of people are, and you may as well save money on them. Look for those buy-one-get-one-free coupons this month.
I’m talking about eyeliners, mascara, blush, and lipstick. Take a friend and split the cost. Or stock up on the ones you use the most. Some companies are giving away free items even with the buy-one-get-one-free offer.
Some of the more expensive cosmetics that don’t usually go on sale will offer discounts of 30-40%. This may be to entice people to dress up for the upcoming holiday party.
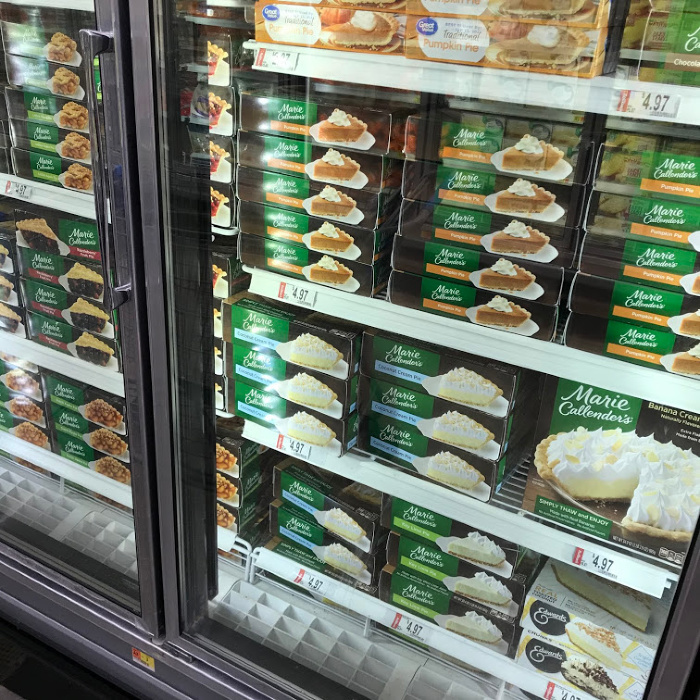
Frozen Pies/Pie Crusts
Oh my gosh, I saw some pies today that were frozen, and all you do is serve them after thawing. There were some that you do need to bake. How easy is that? I may have to go back and get one of those Key Lime pies.
Thank goodness, whipping cream will start going down in price. I picked up a pint of organic whipping milk, and it was $5.49. Yep, I put it back and went for the non-organic. Eventually, I hope all products will become organic.
I’m a massive believer in organic. Don’t get me wrong, I’ll buy regular items when the organic version is twice the price. I have to think again before paying the higher price. Luckily, now the whipping cream will be cheaper, and I can pick up some organic for less than $3.00 a pint, fingers crossed.
Kitchen Items
Kitchen items are definitely my weakness, probably because I seem to spend most of my day in the kitchen. This is a great month to pick up a new hand mixer, toaster, coffee maker, can opener, pressure cooker, or whatever you need to complete your kitchen stash.
They’ll all be on sale, so grab some for gifts. Not just Christmas gifts, but for wedding and birthday gifts as well. Or if you have a child or grandchild going off to school, they may need a hand mixer or a toaster.
Toys
On the first of the month, many of the stores will have coupons. Often, emails are sent letting you know about discounts on toys in the toy department. You may even see coupons for buy one, get one free, with toys of equal or lesser value.
Be sure to sign up for emails from your favorite retail stores, because sometimes you’ll hear about pre-sales that the rest of the world doesn’t know about.
You may even be able to save an additional 10% if you sign up for your favorite retail stores’ apps. Some stores give you a discount if you order an item online, pay for it ahead of time, and pick it up at their customer service counter. It’s a win-win for saving money and time.
Wrapping Paper
December is a great month to stock up on wrapping paper. Yes, you’ll find a lot of Christmas designs, but it’s also a good time to pick up plain colors for other holidays. Here are some containers for wrapping paper storage.
You may not see pastels this time of year, but you will see white, red, and shades of green. White wrapping paper is excellent for wedding and graduation gifts.
If ribbon goes on sale, stock up on Tulle, since it pairs well with those paper bags with handles. It’s also perfect for dressing up a gift box with plain-colored wrapping paper.
Unique December Holidays
December 1: Eat a Red Apple Day
December 2: National Fritters Day
December 3: National Roof Over Your Head Day
December 4: Wear Brown Shoes Day
December 5: Bathtub Party Day
December 6: Mitten Tree Day
December 7: Pearl Harbor Day
December 8: National Brownie Day
December 9: National Pastry Day
December 10: Nobel Prize Day
December 11: National Noodle Ring Day
December 12: Poinsettia Day
December 13: Ice Cream Day
December 14: Roast Chestnuts Day
December 15: National Lemon Cupcake Day
December 16: National Chocolate Covered Anything Day
December 17: National Maple Syrup Day
December 18: Bake Cookies Day
December 19: Oatmeal Muffin Day
December 21: Humbug Day
December 23: Festivus
December 24: Christmas Eve
December 25: Christmas Day
December 27: National Fruitcake Day
December 28: Boxing Day
December 29: Pepper Pot Day
December 30: Bacon Day
December 31: New Year’s Eve
Final Word
Let me know what you find this month at clearance prices. Also, let me know what items you feel should be included in my “What to stock up on in December” post today. If you see some other bargains, I will add them.
Please keep prepping and take stock of your food storage. Thanks again for being prepared for the unexpected. May God bless this world, Linda
Copyright Images: Deposit photos_95115104_m-2015, December Christmas Calendar AdobeStock_234388405 by MagicalKrew, December Calendar AdobeStock_300721018 by New Africa
How Long Are Thanksgiving Leftovers Safe To Eat? Thanksgiving leftovers deserve their own spotlight. They’re comforting, budget-friendly, and incredibly versatile, but they can also be confusing. How long do they really last? Can you refreeze something once it’s thawed? Why does gravy spoil faster? And what’s the best way to store everything without losing flavor?
In this complete food-safety breakdown, you’ll learn how long Thanksgiving leftovers last, the best ways to store them, what you can freeze, and smart tips to keep your family safe. Please note, when in doubt, throw it out.
Thanksgiving leftovers are one of the best parts of the holiday season. There’s nothing quite like a plate of reheated turkey, creamy mashed potatoes, savory stuffing, and that last slice of pie. But while leftovers make life easier after a big holiday meal, they don’t last forever. If you’ve ever stood in front of the fridge wondering, “Is this still okay to eat?”—this guide is for you.
Not all leftovers are created equal. Each dish has its own shelf-life because ingredients, moisture levels, and acidity affect spoilage differently. Here’s a closer look:
Turkey
Refrigerator: 3–4 days
Freezer: 2–6 months for best quality
Turkey is a lean protein, which means it dries out easily. Store it with a splash of broth to preserve moisture.
Stuffing (Dressing)
Refrigerator: 3–4 days
Freezer: 1–3 months
Stuffing is high in moisture, especially when cooked inside the bird, so it spoils faster if not chilled quickly.
Gravy
Refrigerator: 1–2 days
Freezer: 1–2 months
Gravy is one of the fastest foods to spoil because it often contains meat drippings. Reheat thoroughly to 165°F.
Mashed Potatoes
Refrigerator: 3–4 days
Freezer: Up to 2 months
They freeze surprisingly well when made with butter and cream, which protects the texture.
Casseroles
Refrigerator: 3–4 days
Freezer: 2–3 months
Casseroles usually contain a mix of dairy, vegetables, and meat, so follow the 4-day rule.
Cranberry Sauce
Refrigerator: 7–10 days
Freezer: 1–2 months
Its sugar and acidity help preserve it longer than most holiday dishes.
Pies (Pumpkin, Pecan, Fruit)
Refrigerator: 3–4 days
Freezer: 1–2 months
Fruit pies last slightly longer due to natural acidity.
How Long Are Thanksgiving Leftovers Safe To Eat?
Thanksgiving leftovers are delicious, but they don’t last long! Here’s how long you can safely keep them:
Refrigerator (40°F or below): 3–4 Days
Most cooked Thanksgiving foods, such as turkey, stuffing, mashed potatoes, gravy, casseroles, and pies, are safe in the fridge for up to 4 days.
Thanksgiving Thursday: Safe through Monday
After that, the risk of foodborne illness increases.
Freezer (0°F or below): 2–6 Months
Leftovers freeze beautifully.
Turkey: 2–6 months
Stuffing & casseroles: 2–3 months
Gravy: 1–2 months
Mashed potatoes: Up to 2 months
Food stays safe in the freezer indefinitely, but quality declines after these time frames.
How Long Do Thanksgiving Leftovers Last?
Refrigerator (40°F or Below): 3–4 Days
According to long-trusted food-safety guidelines, most Thanksgiving dishes can be kept in the refrigerator for up to 4 days.
This means food cooked on Thanksgiving Thursday should be eaten or frozen by Monday.
Everyday items and their fridge lifespan:
Turkey (light or dark meat): 3–4 days
Stuffing: 3–4 days
Mashed potatoes: 3–4 days
Gravy: 1–2 days
Green bean casserole: 3–4 days
Cranberrysauce:10 days (it lasts a bit longer due to its acidity and sugar)
Pumpkin or fruit pies:3–4 days
Dinner rolls: 5–7 days
Important Safety Tips
1. Refrigerate Within 2 Hours
Anything left out longer than 2 hours is no longer safe to eat.
2. Reheat to 165°F = (73°C)
When reheating turkey, stuffing, gravy, or casseroles, make sure the food reaches 165°F= (73°C) throughout.
3. Store Small Portions
Divide leftovers into shallow containers so they cool quickly and evenly.
4. Don’t Rely on Smell
Leftovers can be unsafe long before they smell “off.”
General Rule-of-Thumb
If you’re not sure when you cooked it… Throw it out, not up!
How To Properly Store Thanksgiving Leftovers
Storing food properly keeps it fresher longer and reduces the risk of foodborne illness.
Use shallow containers
Deep dishes trap heat, allowing bacteria to grow. Choose wide, shallow containers so food cools faster and more evenly.
Separate leftovers into meal-sized portions
This makes reheating easier and prevents waste.
Avoid stacking containers while they are still hot
Stacking traps heat. Let containers cool slightly with the lids cracked open, then stack them in the fridge once chilled.
Label and date each container
This helps you keep track, especially when you have multiple dishes stored at once.
How To Reheat Leftovers Safely Without Drying Them Out
Leftovers must always reach165°F= (73°C) throughout, but reheating doesn’t have to ruin the texture. Here’s how to do it right:
Turkey
Add a splash of broth or gravy.
Cover with foil or a lid to trap moisture.
Heat low and slow.
Mashed Potatoes
Add cream, milk, or butter to restore creaminess.
Stir halfway through heating.
Stuffing/Dressing
Spread in a thin layer on a baking sheet.
Add a bit of broth before reheating to keep it moist.
Gravy
Heat in a saucepan, whisking to maintain texture.
If it separates, whisk vigorously to recombine.
Freezing Tips for Thanksgiving Leftovers
Freezing leftovers is the best way to get the most out of your food budget—especially after a large holiday meal.
Best Practices
Use freezer-safe bags or airtight containers.
Remove as much air as possible to prevent freezer burn.
Freeze items in flat layers (like turkey slices in individual bags) for faster thawing.
Label everything clearly.
Foods That Freeze Exceptionally Well
Turkey (shredded or sliced)
Stuffing/Dressing
Mashed potatoes (with added dairy)
Turkey soup or stock
Dinner rolls
Pumpkin puree
Cranberry sauce
Foods That Don’t Freeze As Well
Lettuce or fresh salads
Cream-heavy desserts like custard pie
Gravy thickened with flour (make it thinner before freezing, then thicken after reheating)
Creative Ways To Use Leftovers (Beyond the Usual Sandwich)
Want something more exciting than reheated turkey and mashed potatoes? Try these:
Savory Ideas
Turkey Shepherd’s Pie: Turkey, veggies, and leftover mashed potatoes baked until golden
Stuffing/Dressing Muffins: Press stuffing into muffin tins and bake for crispy, individual portions
Leftover Turkey Alfredo: Turkey, pasta, and a creamy sauce
Thanksgiving Hash: Turkey, stuffing, and potatoes crisped in a skillet
Turkey Chili: Perfect for freezing
Breakfast Ideas
Stuffing Waffles: Crispy, savory, perfect with gravy
Turkey Omelet: Protein-packed morning meal
Cranberry Yogurt Parfait: Sweet, tangy, and refreshing
Lunch Ideas
Turkey Salad Sandwich: Like chicken salad, but holiday flavored
Mashed Potato Soup: Creamy and comforting
Thanksgiving Quesadillas: Turkey, cheese, and a spoonful of cranberry sauce
Thanksgiving leftovers can last several days, but their safety depends on how quickly they’re cooled, how they’re stored, and how they’re reheated. When stored properly, you can enjoy your leftovers in countless ways, whether you want traditional comfort meals or creative new recipes. May God bless this world, Linda
Let’s talk today about 50 Low-Cost Recipes: Budget-Friendly Meals! When you’re trying to save money on groceries, the best solution is simple: cook meals that are delicious, filling, and inexpensive to make. This list of 50 low-cost recipes features pantry staples, budget-friendly ingredients, and simple meal-prep techniques anyone can follow. Whether you’re feeding a family, meal prepping for the week, or stretching your dollar a little further, these affordable recipes help keep your budget on track without sacrificing flavor.
This blog post includes breakfasts, lunches, dinners, soups, sides, casseroles, and quick skillet meals—everything you need for cheap, wholesome, home-cooked food.
Table of Contents
Low-Cost Breakfast Recipes
Budget-Friendly Lunch Recipes
Cheap Dinner Recipes
Low-Cost Soups & Stews
Easy Casseroles
Pasta & Rice Meals
Meatless Budget Recipes
Final Thoughts
1. Low-Cost Breakfast Recipes
1. Oatmeal with Cinnamon & Brown Sugar
Cook oats in water, then stir in cinnamon, brown sugar, and a splash of milk, and you’ll have a cheap, warm, and filling dish.
2. Scrambled Eggs & Toast
Butter a skillet, scramble eggs with salt and pepper, and serve with toast.
Ground beef, rice, taco seasoning, and corn are all cooked together.
Where Can I Shop To Save Money on Groceries? The Best Places for Budget-Friendly Food
Groceries are one of the easiest household expenses to reduce—if you know where to shop. Certain stores consistently offer lower prices, better bulk options, or strong discount loyalty systems that stretch your dollars further. Below is a curated list of the best places to shop when you want to save money on groceries.
1. Discount Grocery Stores (Deepest Savings)
Aldi
One of the top places to save big.
Low prices
Store-brand focus
Simple shopping experience
Great for produce, snacks, and pantry staples
Lidl
Similar to Aldi, but with more weekly deals.
Low-cost bakery items
Fresh produce & meats
Seasonal savings
Grocery Outlet
A “treasure hunt” discount chain selling overstock and closeout products.
40–60% off name brands
Organic & specialty deals
2. Big Box Stores (Low Everyday Prices)
Walmart
Consistently low prices
Large selection
Great for canned goods, cereal, and basics
Target (with Circle deals)
Weekly grocery coupons
Significant markdowns on clearance perishables
3. Wholesale Clubs (Best for Bulk Savings)
Costco
Bulk savings on meat, cheese, and produce
Gas discounts
Excellent store-brand quality (Kirkland)
Sam’s Club
Very competitive bulk pricing
Rotating “Instant Savings” offers
Digital coupons and “Buy-5-Save-5” offerings equal significant savings.
Meijer
Consistent weekly promotions and low-cost produce.
8. Local Options That Save Money
Farmers Markets (End of Day Deals)
Vendors often discount produce before closing.
Co-ops
Bulk bins are great for grains, flour, and spices.
Butcher Shops
Often cheaper for bulk meat than supermarkets.
Bakery Outlets
Discounted bread from major brands.
Extra Tips to Save More (No Matter Where You Shop)
Compare unit prices since bigger isn’t always cheaper
Buy store-brand items
Use digital coupons (Kroger, Safeway, Target, etc.)
Stick to a list to avoid impulse buys
Shop seasonal produce
Buy meat on sale and freeze it
Check markdowns early in the morning
How to Teach Kids to Cook from Scratch: A Simple Guide for Parents
Teaching kids to cook from scratch is one of the most valuable life skills you can give them. Not only does it boost confidence and independence, but it also helps them understand nutrition, develop creativity, and appreciate the effort that goes into homemade meals. Whether your child is a curious toddler or an independent teen, learning to cook from scratch can be fun, safe, and rewarding with the right approach. Here’s how to get started.
1. Start With the Basics
Kids thrive when instructions are simple. Begin with easy, no-fail tasks such as:
Washing produce
Measuring dry ingredients
Stirring batter
Cracking eggs (messy but fun!)
Spreading butter or peanut butter
Adding toppings
These small responsibilities build the foundation for more advanced cooking skills.
2. Teach Kitchen Safety Early
Before turning on a stove or touching a knife, kids need to understand the rules:
Wash your hands before and after cooking
Keep hair tied back
Turn pot handles inward
Never touch a hot pan without a mitt
Use knives only with permission and supervision
For older kids, teach knife basics: holding the handle correctly, curling fingers, and cutting slowly.
3. Choose Kid-Friendly Scratch Recipes
Pick recipes that use simple steps, whole ingredients, and minimal prep. Great starter ideas include:
Homemade pancakes or waffles
Scrambled eggs
Simple pasta dishes
Homemade pizza with a basic dough
Stir-fries
Fresh fruit salad
Muffins, biscuits, or simple bread
Scratch cooking helps kids learn how real foods come together, and not just opening a box or packet.
4. Let Them Explore Ingredients
Encourage kids to smell spices, feel dough textures, and see how ingredients change as they cook.
Let them:
Taste raw vegetables
Experiment with seasonings
Pick a vegetable at the store
Stir soups and sauces
Watch bread rise
Hands-on learning makes cooking exciting and memorable.
5. Teach One Skill at a Time
Break cooking into skills kids can master gradually:
Mastering one skill builds confidence and encourages kids to try more complex recipes later.
6. Involve Kids in Meal Planning
Let them help choose recipes for the week. This teaches responsibility, creativity, and budgeting.
Have them:
Help write a grocery list
Take them shopping with you
Pick a dinner night, and they get to cook
Choose ingredients for lunchboxes
Plan a themed meal (taco night, breakfast for dinner, etc.)
Meal planning turns cooking from a chore into something kids look forward to.
7. Make Cooking Fun
Kids learn best when they’re enjoying themselves. Try:
Playing music while cooking
Turning tasks into games (“Who can measure fastest correctly?”)
Picking theme colors or shapes for ingredients
Letting them customize their own meals
The more fun they have, the more they’ll want to keep learning.
8. Celebrate Their Progress
Kids love praise—especially when they’ve created something from scratch.
Celebrate by:
Taking pictures of their creations
Giving them a “chef of the day” moment
Letting them name their dish
Serving their food proudly at the table
Confidence grows with every homemade meal.
Final Word
Teaching kids to cook from scratch isn’t just about making meals; it’s about building lifelong skills. When children learn how to prepare food using real ingredients, they develop independence, healthier eating habits, and a deep appreciation for homemade cooking. Start small, be patient, and have fun in the kitchen together. Over time, your kids will gain the confidence to create delicious meals from start to finish, and you’ll enjoy the memories you made along the way.
Saving money on groceries doesn’t have to be complicated—it’s all about knowing where to shop, what to buy, and how to make every dollar count. By choosing budget-friendly stores, focusing on low-cost ingredients, and planning meals around sales, you can dramatically cut your food budget without sacrificing quality. Whether you shop at discount grocery stores, bulk warehouses, ethnic markets, or online delivery services, there are countless ways to stretch your dollars and still enjoy delicious, home-cooked meals. Use these tips to shop smarter, reduce your grocery bill, and create affordable meals that keep your family happy and well-fed. With the right strategies, saving money on groceries becomes simple, sustainable, and achievable for any household. May God bless this world, Linda
Goat milk, for some of us, takes a little bit of getting used to. It definitely doesn’t taste like cow’s milk. If I’m being honest, some of us will never get used to it! I’ve heard it described as too tangy, too rich, too funky, and even skunky. I know, hardly appealing. But what you ... Read more
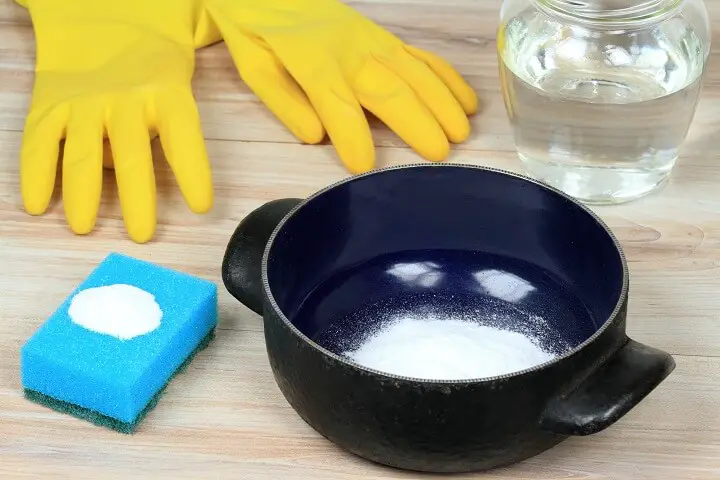
Is there a small orange box lurking in the back of your fridge? If there is, you're familiar with the use of baking soda as a refrigerator deodorizer.
The Arm & Hammer brand, which dates all the way back to 1846, has cornered the baking soda market with its bright carton and its familiar logo featuring the Roman god Vulcan's arm. Even some knock-off brands use that recognizable orange color. But what's in that small box exactly, and why should you have way more of it on hand?
Baking soda, also known as sodium bicarbonate or bicarbonate of soda, is a chemical compound (NaHCO3) that is crystalline in its natural form in nature but is ground to a fine powder for commercial use. Sold in most supermarkets for around $1 for an 8-oz box or in bulk quantities online, baking soda is one of the most versatile and economic supplies you can have on hand.
1. Air Freshener – Add a few drops of your favorite essential oil to a small container or bowl of baking soda. Place several through your home to absorb odors and make your rooms smell better.
2. Baby Bottles – Clean and soak baby bottles in a solution of baking soda and water to neutralize odors and loosen stuck-on milk residue. Use about 2 tablespoons of baking soda per quart of warm water, let them soak for a few hours, then rinse thoroughly before sterilizing.
3. Bugs – Sprinkle baking soda along windowsills, doorways, or wherever insects seem to be entering your home as a deterrent. Oftentimes, pests will turn around and go somewhere else.
4. Carpet Deodorizer – Sprinkle rugs and carpet with baking soda and let it sit overnight so it can absorb odors. Vacuum it up in the morning.
5. Chrome – Polish chrome by making a thick paste of baking soda and water, then applying it with a soft cloth or sponge. Gently rub the surface to remove spots or tarnish, then buff it dry with a clean cloth and rinse with water for a shiny finish.
6. Closets – Place an open container or small box of baking soda on a shelf or in a corner of the closet to absorb moisture and odors. Replace it every 1–2 months to keep the space smelling clean and must-free.
7. Coffeemaker – Clean your coffeemaker by adding ¼ cup of baking soda to a full reservoir of water and running it through a brew cycle. Follow up with one or two cycles of plain water to rinse out any residue.
8. Cutting Boards – Clean and deodorize kitchen cutting boards by sprinkling baking soda directly on the surface, then scrubbing with a damp sponge or brush and hot water. This helps lift food particles and neutralize lingering odors without harsh chemicals.
9. Dishcloths – To refresh smelly or stained dishcloths, soak them in a solution of 1 cup of baking soda mixed with 2 cups of hot water. Let them sit for several hours or overnight before rinsing and washing as usual.
10. Dishwasher – Sanitize and freshen your dishwasher by sprinkling 1 cup of baking soda across the bottom and running a hot water cycle without dishes. This helps remove odors and residue from previous washes.
11. Grease Fire – Quickly smother a small grease flare-up by sprinkling a generous amount of baking soda directly over the flames. It releases carbon dioxide, which helps cut off the fire’s oxygen supply. But only use this on small stovetop fires, and never use water.
12. Fireplace and Woodstove – Once the ashes are fully removed and the area is cool, sprinkle a generous layer of baking soda in the hearth or firebox. Leave it for a few hours or overnight to absorb smoky odors, then vacuum or sweep it out before your next fire.
13. Floors – For a gentle but effective floor cleaner, dissolve ½ cup of baking soda in a bucket of warm water (about a gallon). Mop tile or linoleum floors with the solution, then follow up with a plain water rinse to remove any residue and leave a clean finish.
14. Flowers – To help fresh flowers last longer, add 1 teaspoon of baking soda to the water in the vase. It can help balance pH and reduce bacteria growth, keeping the stems healthier and the blooms fresher.
15. Garbage Can – Scrub the inside of the can using a mixture of ¼ cup of baking soda to 1 quart of warm water to remove stuck-on grime and eliminate odors. After rinsing and drying, sprinkle a layer of dry baking soda in the bottom to absorb future smells.
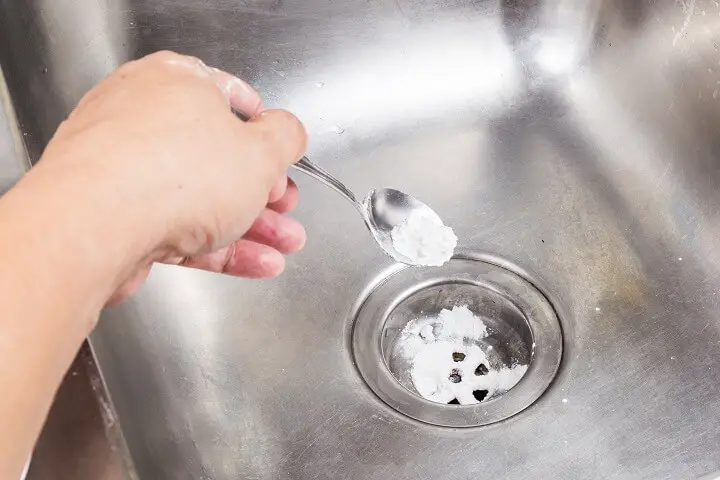
16. Garbage Disposal – To clean a garbage disposal, pour about ½ cup of baking soda directly into the drain. Let it sit for 10–15 minutes, then pour in 1 cup of white vinegar to help break down buildup and neutralize odors. After the fizzing stops, flush with hot water or run the disposal with hot water for 30 seconds.
17. Drains – Pour about ½ cup of baking soda down kitchen and bathroom drains once a week to prevent buildup and control odors. Let it sit for 10–15 minutes, then flush with hot water to help keep pipes clear and smelling fresh.
18. Grout – Make a thick paste of baking soda and water, then scrub dirty tile grout using a toothbrush or small scrub brush. Work in small sections, let it sit for a few minutes if needed, then rinse with clean water for brighter grout lines.
19. Hamper – Sprinkle a few tablespoons of baking soda in the bottom of each laundry hamper to absorb moisture and neutralize odors from dirty clothes. Refresh the baking soda weekly for best results.
20. Houseplants – Mix 1 teaspoon of baking soda into 1 quart of water, then dampen a soft cloth or sponge with the solution to gently wipe down dusty or dirty plant leaves. Avoid getting it in the soil—this is for cleaning the leaves only.
21. Laundry Detergent – Make a simple homemade laundry detergent by combining grated bar soap (like Ivory or Castile) with baking soda. Use about 1 part soap to 1 part baking soda, and store in an airtight container. Use 2–3 tablespoons per load.
22. Laundry Deodorizer – For extra-odorous laundry like pet bedding or cloth diapers, add 1 cup of baking soda along with your regular detergent. It helps neutralize stubborn smells and softens water for better cleaning.
23. Lunchboxes – Scrub vinyl or plastic lunchboxes with a paste of baking soda and water to lift stains and remove food odors. Rinse with a damp cloth and leave open to air dry.
24. Marble Counters – Gently clean marble surfaces by mixing 3 tablespoons of baking soda into 4 cups of warm water. Wipe down with a soft cloth, rinse thoroughly, and dry to prevent dulling or streaking.
25. Mattress – Sprinkle baking soda liberally across the surface of your mattress to absorb odors and moisture. Let it sit for at least 2 hours (or overnight), then vacuum it up using a clean upholstery attachment.
26. Microwave – Dip a damp sponge or cloth into baking soda and wipe down the inside and outside of your microwave. It removes food residue and deodorizes without scratching surfaces.
27. Mugs – Make a paste using equal parts baking soda and water, then use a sponge or cloth to scrub away coffee or tea stains from the inside of ceramic mugs. Rinse thoroughly.
28. Oven – Clean a lightly soiled oven by mixing 2 tablespoons of baking soda into 1 cup of warm water. Apply the mixture to the interior surfaces, let sit for 15–30 minutes, then wipe clean with a damp cloth.
29. Refrigerator – Place an open box or small bowl of baking soda on a shelf in the fridge to absorb food odors. Replace it every 1–2 months for best results.
30. Shoe Deodorizer – Sprinkle 1–2 tablespoons of baking soda into each shoe and let it sit overnight to absorb odor and moisture. Shake it out the next morning before wearing.
31. Shoe Cleaner – Make a paste of baking soda and water and use it to scrub the fabric or rubber parts of athletic shoes with a cloth or brush. Rinse and let them air dry.
32. Silver – Mix baking soda with a few drops of water to form a paste, then gently rub it onto tarnished silver using a soft cloth. Buff off the residue with a clean dry cloth to restore shine.
33. Stainless Steel – Use a baking soda paste to clean and polish stainless steel sinks or appliances. Rub gently with a soft cloth or sponge, then rinse well and dry to avoid water spots.
34. Sinks – Sprinkle baking soda directly into sinks, tubs, or showers and scrub with a damp sponge or brush. It works as a gentle abrasive to lift grime and soap scum without damaging surfaces.
35. Toilet – Pour ½ cup of baking soda into the toilet bowl and let it sit for at least an hour to neutralize odors and soften stains. Scrub with a toilet brush and flush clean.
36. Upholstery – Sprinkle a light layer of baking soda over upholstered furniture and brush it in gently. Let it sit overnight to absorb odors, then vacuum thoroughly the next day.
37. Plastic Containers – Scrub stained or smelly plastic food containers with baking soda and water, then soak them in a solution of 4 tablespoons of baking soda per quart of warm water for a few hours before rinsing.
38. Pots and Pans – Sprinkle baking soda on greasy or burnt cookware and scrub with a damp sponge or brush. Let stubborn spots soak in hot water with baking soda for easier cleaning.
39. Vacuum – Add a few tablespoons of baking soda to your vacuum cleaner bag or directly into the canister if it’s bagless. As you vacuum, the baking soda helps neutralize odors and leaves your home smelling fresher.
40. Vinyl – Sprinkle baking soda onto a damp sponge and gently scrub vinyl surfaces like shower curtains, tablecloths, or seat cushions. It lifts grime and mildew without damaging the material. Rinse with a clean, damp cloth.
41. Water Rings – Make a paste using baking soda and a few drops of water, then apply it to the water stain on wood furniture using a soft cloth. Gently rub in a circular motion until the ring fades, then wipe clean and buff with a dry cloth.
Health Uses
42. Antiperspirant – Dab a small amount of baking soda under your arms using a powder puff or cotton ball to help absorb moisture and neutralize odor. If you have sensitive skin, test on a small area first, as baking soda can sometimes cause irritation.
43. Bites and Stings – Mix baking soda with just enough water to form a thick paste and apply it directly to insect bites, bee stings, or itchy spots. Let it sit for 10–15 minutes before rinsing to relieve itching and reduce swelling.
44. Bad Breath – Stir ¼ teaspoon of baking soda into a glass of warm water and use it as a mouthwash. Gargle for 30 seconds, spit it out, and rinse with plain water. It helps neutralize mouth acids and freshen breath.
45. Body Aches – For sore muscles or general body aches, add 1 cup of baking soda and 1 cup of apple cider vinegar to a warm bath. Soak for 20–30 minutes to help reduce inflammation and relax muscles.
46. Canker Sores – Mix ½ teaspoon of baking soda with a pinch of salt in a small glass of warm water. Gargle the mixture, focusing on swishing it over the sore area, to help reduce pain and support healing.
47. Chickenpox – To ease itching from chickenpox, add ½ cup of baking soda to a warm bath and soak for 15–20 minutes. Pat skin dry afterward with a soft towel, being careful not to irritate the skin further.
48. Cold and Flu Congestion – Make a homemade saline rinse by mixing ½ teaspoon each of salt and baking soda into 1 cup of warm distilled or boiled water. Use it in a neti pot or nasal rinse bottle to help clear out nasal congestion and soothe sinus pressure.
49. Combs – Clean combs and brushes by soaking them in 4 cups of hot water mixed with ½ cup of baking soda for at least an hour. This loosens buildup from oils and hair products. Rinse thoroughly and allow them to air dry.
50. Cradle Cap – Make a gentle paste with baking soda and water and apply small amounts to your baby's scalp to help loosen flaky patches. Leave on for a few minutes, then rinse carefully with warm water, avoiding the eyes.
51. Dandruff – Wet your scalp and massage ¼ cup of baking soda directly into your hair. Let it sit for a couple of minutes, then rinse thoroughly. Skip shampoo to let the baking soda work without interference.
52. Dentures and Retainers – Soak dentures or retainers overnight in a cup of warm water mixed with 3 tablespoons of baking soda. This helps deodorize and remove light stains. Rinse well before using again.
53. Diaper Rash – Make a mild paste of baking soda and water and apply it to the affected area to soothe diaper rash. Alternatively, add 1–2 tablespoons to your baby’s bath to calm irritation during soaking. Always rinse well and pat dry.
54. Dry Shampoo – Sprinkle a small amount of baking soda onto your scalp and brush it through your hair to absorb excess oil and deodorize. It’s a quick way to freshen up between washes.
55. Electrolytes – To make a basic rehydration drink, mix 1 teaspoon of baking soda, 1 teaspoon of salt, 1 packet of unsweetened drink mix, and sugar to taste into 2 quarts of lukewarm water. Stir well and sip as needed to restore hydration.
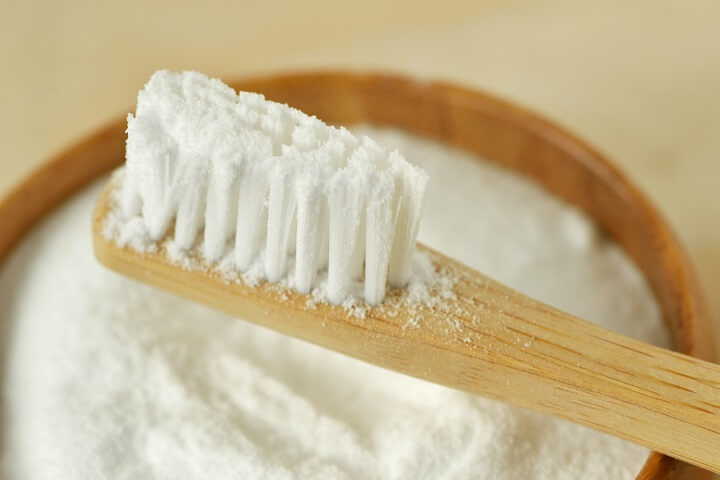
56. Toothpaste – Combine baking soda with just enough water to make a thick paste and use it to brush your teeth. It gently scrubs away surface stains and helps freshen breath. Use it a few times a week to avoid over-abrasion.
57. Feet – Soothe tired, aching feet by soaking them in a basin of warm water mixed with three tablespoons of baking soda. Soak for 15–20 minutes to relieve soreness, soften calluses, and deodorize at the same time.
58. Handwash – To eliminate strong odors like garlic, fish, or chemicals from your hands, sprinkle baking soda on damp skin and rub thoroughly before rinsing. It works as a mild abrasive and neutralizer.
59. Hair Conditioner – To remove product buildup and chemical residue, add one teaspoon of baking soda to a cup of your regular hair conditioner. Mix well and apply after shampooing, then rinse thoroughly for cleaner, lighter-feeling hair.
60. Heartburn – For occasional heartburn relief, stir one teaspoon of baking soda into about four ounces of warm water and sip slowly. It helps neutralize stomach acid but should only be used sparingly due to its high sodium content.
61. Hives – While showering, gently rub a small amount of baking soda onto areas affected by hives. It may help reduce itching and inflammation temporarily. Rinse thoroughly and avoid scrubbing sensitive skin.
62. Indigestion – To ease discomfort from indigestion or excess stomach acid, mix one to two teaspoons of baking soda in a glass of water and drink it slowly. Use occasionally, and avoid if you’re on a sodium-restricted diet.
63. Ingrown Hairs – Make a paste with one tablespoon of baking soda and enough water to apply to the skin. Gently scrub the area to exfoliate and help release the trapped hair. Rinse thoroughly and repeat as needed.
64. Jellyfish Sting – To soothe a jellyfish sting, apply a thick paste made from baking soda and water to the affected area. Let it sit for a few minutes, then rinse with seawater—not fresh water, which can trigger more stinging.
65. Mouthwash – Mix ¼ cup of baking soda with warm water and add a couple of drops of food-grade peppermint oil. Use as a mouth rinse to neutralize bad breath and freshen your mouth without alcohol or artificial ingredients.
66. Poison Ivy and Poison Oak – To relieve itching and inflammation, make a paste with baking soda and water and apply it directly to the rash. Let it dry on the skin before rinsing off gently with cool water.
67. Skin Softener – Add ½ to 1 cup of baking soda to your bathwater to help soften rough skin and soothe minor irritation. Soak for 15–20 minutes, then rinse and pat dry.
68. Splinter – To help remove a splinter, soak the area in warm water mixed with one tablespoon of baking soda. Do this once or twice a day to soften the skin and draw the splinter closer to the surface.
69. Sunburn – For mild sunburn relief, make a thin paste with one teaspoon of baking soda and a little water, then gently apply it to the burned skin. Alternatively, add ½ cup of baking soda to a cool bath and soak for 15–20 minutes.
70. Facial Cleansing – Combine one part baking soda with two parts ground oatmeal and mix with enough warm water to form a paste. Massage into damp skin, leave on for five minutes, then rinse with warm water for gentle exfoliation.
71. Workout Boost – Some athletes drink a mixture of water and one teaspoon of baking soda before a workout to help buffer lactic acid and reduce fatigue. Use caution, as it may upset your stomach; start with small amounts and consult a doctor if unsure.
Cooking Uses
72. Beans – To help reduce gas and bloating caused by beans, soak dry beans overnight in four cups of water with one cup of baking soda. The baking soda helps break down some of the complex sugars that cause digestive issues. Drain and rinse the beans thoroughly before cooking.
73. Chicken – To loosen feathers on freshly butchered poultry, dip the bird in a pot of boiling water with one tablespoon of baking soda mixed in. This helps loosen the follicles. After a few seconds, transfer the chicken to cold water to stop the cooking process and make plucking easier.
74. Eggs – For extra fluffy scrambled eggs, add ¼ teaspoon of baking soda for every three eggs. Whisk well before cooking. The baking soda reacts with the egg proteins to create a lighter, airier texture.
75. Fish Deodorizer – To reduce the strong smell of raw fish, soak the fillets in two cups of cold water mixed with ¼ cup of baking soda for about three hours in the refrigerator. Rinse thoroughly before cooking.
76. Fruits and Vegetables – To clean produce and remove pesticides or wax, fill a sink or large bowl with cold water and mix in one cup of baking soda. Soak fruits and vegetables for a few minutes, then scrub gently and rinse well.
77. Meat Tenderizer – For tough cuts of meat, rub a thin layer of baking soda directly onto the surface. Let it sit in the fridge for 15–30 minutes to soften the fibers, then rinse thoroughly under cold water before cooking.
78. Tea – To clear up cloudy iced tea, add just a pinch of baking soda to a gallon of freshly brewed tea. Stir well. It helps balance the acidity, which prevents cloudiness and smooths the flavor.
79. Tomatoes – To lower the acidity when cooking with fresh or canned tomatoes, stir in a small pinch of baking soda. It neutralizes excess acid and reduces bitterness without affecting the flavor too much.
80. Wild Game Flavor – To mellow the strong, gamey flavor of wild meat, soak it in a mixture of four cups warm water and one cup of baking soda for about three hours. Rinse well before cooking to avoid any lingering taste of the soda.
Pet / Animal Uses
81. Dog Care – To freshen up a smelly dog between baths, lightly sprinkle baking soda onto the fur and brush it through to absorb odors. You can also make a simple dog-safe toothpaste by mixing baking soda with a bit of water to form a paste. Apply it to a dog toothbrush or your finger and gently brush their teeth to help reduce plaque and freshen breath.
82. Litter Box – Mix a generous layer of baking soda into the bottom of the litter box before adding clean litter. This helps neutralize odors and can extend the life of the litter. You can also sprinkle a little more on top between changes for added freshness.
83. Skunk Odor – If your pet gets sprayed, mix one cup of baking soda, one tablespoon of dish soap (like Dawn), and one quart of 3% hydrogen peroxide. Use gloves to apply this mixture to your pet’s coat, avoiding the eyes and mouth. Let it sit for 15–20 minutes before rinsing thoroughly with warm water. Repeat if needed.
84. Stall Freshener – Sprinkle baking soda in livestock or pet stalls and pens to help absorb moisture and reduce ammonia odors. You can reapply weekly or as needed to keep the area smelling fresh.
Outdoor Uses
85. Driveways and Concrete Walkways – To remove stains and grime from concrete, sprinkle baking soda directly onto the surface, then scrub with a stiff brush and a bucket of water. Rinse thoroughly with a hose when finished.
86. Grills – After grilling, sprinkle baking soda directly onto the grate or other greasy parts. Use a damp scrub brush or scouring pad to scrub away charred residue and grease. Rinse or wipe clean with a damp cloth.
87. Paint Brushes – Restore stiff or crusty paint brushes by soaking them in a solution of warm water and a few tablespoons of baking soda. Let them sit for a few hours, then rinse and reshape the bristles before drying.
88. Patio Furniture – Clean plastic, metal, or resin outdoor furniture by sprinkling with baking soda and scrubbing with a damp sponge or brush. Rinse thoroughly with a garden hose to remove all residue and let air dry.
89. Pillows – Clean plastic or vinyl patio pillows by scrubbing them with a solution of 1 tablespoon of baking soda mixed into a quart of warm water. Rinse and air dry completely before storing. When putting them away for winter, seal them in a plastic bag with a small open container or sachet of baking soda to absorb moisture and prevent musty odors.
90. Sidewalks – Baking soda provides traction and helps melt thin layers of ice. Sprinkle it liberally over icy sidewalks as a non-toxic alternative to salt, which can be harsh on concrete and harmful to plants and pets.
91. Tools and Equipment – Remove dirt, grease, and rust from tools by scrubbing with a paste of baking soda and water. Use a stiff brush or old toothbrush to work the paste into crevices. Rinse and dry thoroughly to prevent future corrosion.
Automotive Uses
92. Battery – Keep car battery terminals clean by applying a paste of 3 parts baking soda to 1 part water using a damp cloth or brush. Gently scrub the terminals, then remove any residue with a clean, dry rag. Be sure the car is off and wear gloves when doing this.
93. Mats and Floors – To freshen car mats or indoor rugs, sprinkle baking soda over the surface and let it sit for a few hours or overnight. Vacuum thoroughly to remove odors and any trapped dirt or grime.
94. Seats – Sprinkle baking soda on cloth car seats to absorb odors from pets, smoke, or food. Let it sit for at least 15 minutes, or overnight for strong smells, then vacuum thoroughly. You can also place an open container of baking soda under a seat to passively neutralize odors over time.
95. Windshield – Combine 1 cup of baking soda with 2 cups of water to create a windshield-wiping solution. Apply it with a soft cloth and buff gently. It helps repel rain and can also reduce fogging when used regularly.
Garden Uses
96. Aphids – Sprinkle a light layer of baking soda around the base of plants or mix with water and a drop of dish soap to spray directly onto aphids, spider mites, and scale insects. Test a small section of the plant first to check for sensitivity.
97. Birdbath and Birdfeeders – Clean birdbaths and feeders using a scrubbing paste of baking soda and warm water. This removes grime and neutralizes odors without using harsh chemicals. Rinse thoroughly to keep your feathered visitors safe.
98. Compost Smell – Sprinkle baking soda over your compost pile occasionally to help control strong odors, especially if you're composting a lot of kitchen scraps. Use in moderation so it doesn’t interfere with the composting process.
99. Compost Tools – Clean and deodorize your compost bin tools like shovels, pitchforks, or buckets with a paste of baking soda and water. Scrub thoroughly, then rinse to remove lingering smells and residue without using chemicals that could affect your compost.
100. Mildew and Fungal Disease – Mix 1 tablespoon of baking soda with 1 quart of water and spray onto the leaves of plants affected by mildew or fungal disease. This can help prevent the spread of spores and is especially useful on squash, cucumbers, and roses.
101. Slugs – To deter slugs and snails, sprinkle baking soda directly along garden beds or around the base of vulnerable plants. It dehydrates these pests on contact, making your garden less inviting to them.
102. Tomatoes – For sweeter tomatoes, lightly sprinkle baking soda around the base of the plants (not on the leaves). This reduces soil acidity and can subtly improve the flavor of the fruit as it matures.
103. Weeds – Sweep baking soda into the cracks of sidewalks, driveways, or garden edges to prevent weed growth. It won’t harm established plants but can suppress small weeds trying to sprout in tight spaces.
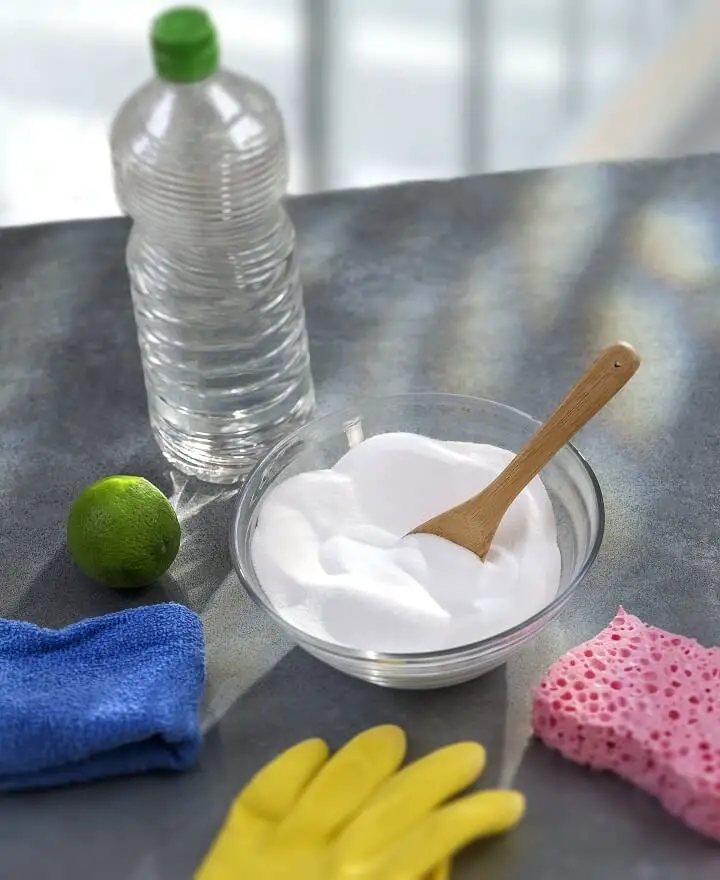
Whew! We made it. As you can see, having a large bag or two of baking soda on hand for use in and around your home is a good idea. It's inexpensive, easy to store, biodegradable, and nontoxic. Just think of all the other products you can do without by using this amazing compound instead.