Will wheat be in short supply this year? My gut is telling me yes. My research backs it. If you’ve been watching grocery prices creep up, you aren’t imagining things. Wheat, one of the most basic ingredients in our kitchens, is facing a genuinely tight year, and it’s worth understanding why before you decide how to prepare your own pantry.
Types Of Wheat
Hard White Wheat: This is the only kind I buy. It makes soft and fluffy bread. It’s lighter in color and has a moderate protein content.
Hard Red Wheat: This is what I was raised on; I called the loaves bricks. Hard red wheat has a stronger flavor, a heavier bread texture, and higher protein content.
Soft White Wheat: This wheat is designed primarily for pastries; it makes pastries flaky and light. This wheat is shorter and plumper and works great for making cakes, cookies, sweet breads, and muffins. It has more starch, less gluten, and lower protein content compared to hard white wheat.
The 2026 wheat harvest in the United States is shaping up to be one of the smallest in generations. This year’s Hard Red Winter wheat crop, the variety that makes up most of America’s wheat production and exports, is forecast to be the smallest since the 1957 to 1958 growing season. Major wheat-producing states across the Great Plains have been hit by a severe drought, which has lowered yields and led farmers to abandon more acres than usual.
The numbers get more striking when you look at planted acreage. Total wheat planted nationwide dropped to 42.7 million acres in 2026, six percent below the previous year, and the harvested area is expected to fall to around 32 million acres, the lowest level in about a century and a half. Texas alone is expected to plant close to 4 million fewer acres than last year, with Oklahoma and Kansas not far behind.
The reasons behind this are layered. Consecutive years of heat, drought, and disease pressure have eroded yields, and rising fuel and fertilizer costs have squeezed farmers financially. Wheat experts don’t expect a quick rebound either, with acreage likely to remain at these record-low levels or shrink further into 2027.
National Supply
National supply estimates confirm the tighter picture. Total wheat production for the 2026 to 2027 marketing year is projected at 1,561 million bushels, down 424 million bushels from the prior year, and projected ending stocks are 18 percent lower than last year. The projected season average farm price for wheat has climbed to 6.50 dollars per bushel, a full 1.50 dollars higher than the year before.
Globally
Globally, the picture is a bit more reassuring, but not by much. Global wheat production for 2026 is projected at 806.5 million tonnes, down 4.3 percent from last year. World wheat stocks are still expected to grow slightly by the end of the season, so this isn’t a story of empty grain silos worldwide. It is a story of a smaller harvest, higher prices, and a supply chain with far less cushion than in years past.
For families who care about being prepared, that combination of smaller harvests, rising farm prices, and reduced stockpiles is exactly the kind of signal worth paying attention to. Wheat prices tend to work their way into flour costs and bakery products over time, even if the full effect doesn’t reach the grocery shelf for a while.
Why it’s critical to store wheat now
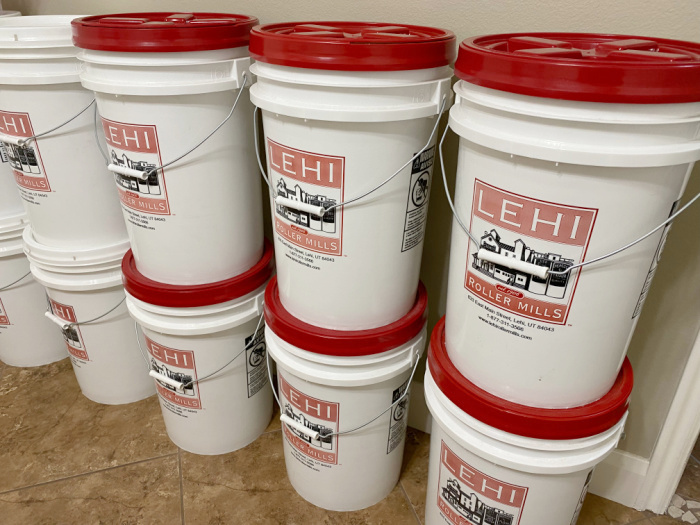
Wheat is one of the most stable foods you can store. Properly sealed in food-grade buckets with oxygen absorbers, whole wheat berries can last twenty years or longer. Unlike flour, which loses freshness and nutrition over time because the wheat germ has already been exposed to air, whole wheat berries protect the grain until you’re ready to grind it.
Storing wheat now, while it’s still available and before prices climb further, means your family will have a reliable source of flour no matter what happens with future harvests. A little bit set aside every month adds up quickly, and wheat takes up relatively little space for the amount of food value it provides.
Why a wheat grinder belongs in your kitchen
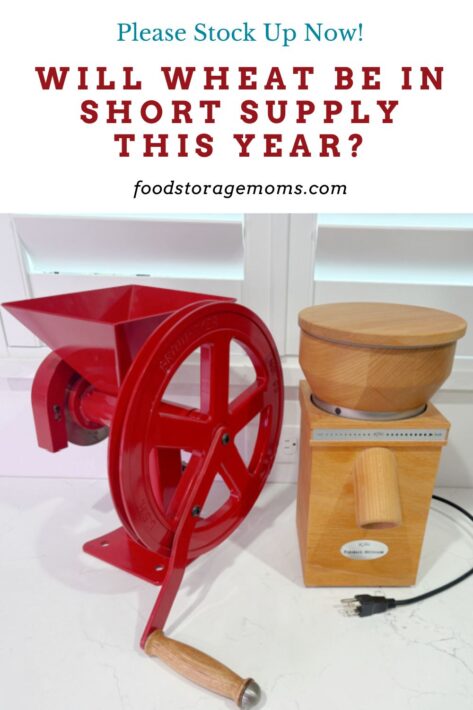
Storing wheat only helps if you can turn it into flour when you need it. A good wheat grinder, whether it’s a hand crank model for power outages or an electric mill for everyday baking, is what makes your stored wheat usable. Freshly ground flour also has more nutrition and flavor than flour that’s been sitting on a store shelf for months, so a grinder isn’t just a preparedness tool. It’s a way to improve the food you make every day.
If you already store wheat but don’t own a grinder, now is a good time to close that gap. A pantry full of wheat berries with no way to grind them is a bit like storing gasoline with no car to put it in.
Why knowing how to make bread matters
Grinding your own flour is only half the equation. If your family doesn’t know how to turn that flour into bread, biscuits, or tortillas, you’re still missing a key skill. Bread baking is a skill that improves with practice, and it’s much better to learn it now, in a calm kitchen with time to experiment, than to try to learn it for the first time during an emergency.
This is exactly why I want to share some of my own tried-and-true bread recipes with you. Once you have wheat stored and a grinder ready to go, the final piece is knowing what to do with the flour once it comes out of the mill. Stay tuned, because I’ll be walking you through my favorite recipes so you can practice now and feel confident later.
My No-Fail Whole Wheat Bread Recipe
You MUST use fresh ingredients, or your bread may not turn out the way you want.
Start adding the ingredients in the order shown above with one exception into your mixing bowl…start with 2 cups of flour and slowly add more flour until the dough pulls away from the sides of the bowl. I use a Bosch Mixer.
I grew up making bread without a mixer. It can be done by hand. I grew up letting my bread rise twice so I still do that. Old habits are hard to break!
I mix it for 10 minutes in my Bosch. Cover with greased plastic wrap until it doubles in size.
Punch down and form dough into two one-pound loaves. I let the dough rise one more time with greased plastic wrap.
Remove the plastic wrap Bake the bread at 350°F (177°C) for 27-30 minutes. If your pans are larger you will bake your bread longer. You will love making whole-wheat bread, I promise!!
Combine all of the ingredients in a bowl and whisk until smooth. These take a bit longer to cook because of the whole wheat, but it’s worth it, I promise. These are delicious!
Wheat berries are far more versatile than most people realize. Beyond grinding them into flour for bread, they can be cooked whole and added to soups and stews for a hearty, chewy texture. They make a wonderful base for grain salads when boiled until tender and tossed with vegetables and a simple dressing. Sprouted wheat berries can be used in salads or blended into recipes for added nutrition, and cracked wheat berries can be cooked into a warm breakfast cereal similar to oatmeal. Some people even use wheat berries to make homemade wheat sprouts for sandwiches and wraps. Whether you grind them, boil them, sprout them, or crack them, wheat berries offer a simple, affordable way to stretch your food storage into many different meals.
1cupuncooked whole wheat berries, rinse with water in a fine strainer
3cupswater
1/4teaspoonsalt
Instructions
Three Ways To Cook It
SLOW COOKER: cook all the ingredients listed above for 8-9 hours on low in a slow cooker.
STOVE TOP: add the rinsed wheat and salt to three cups of boiling water and cook uncovered on the stove for one hour or until tender.
PRESSURE COOKER: add all of the ingredients above into your electric pressure cooker and cook on high for 30 minutes. You will use “natural release," let the pressure come down naturally.
Wheat is facing one of its tightest years in decades, driven by drought, shrinking harvests, and rising costs. That doesn’t mean panic is the answer. It means preparation is the answer. Store your wheat, invest in a good grinder, and learn to bake your own bread. These three steps together give your family real food security, not just for an emergency, but for everyday life. May God bless this world, Linda
Copyright Images: Pancakes From Mother Depositphotos_119341884_S
A pantry without protein is a weak pantry. Rice, beans, flour, oats, pasta, and cornmeal all have their place. They are cheap, filling, and worth storing deep. But when a real crisis hits, a family needs more than calories. They need strength. They need meals that satisfy. They need food that can be opened fast, […]
Most prepper gardening advice assumes you’ve got a quarter acre and a tiller. That’s not reality for a lot of us. Whether you’re on a rental property, working with a small backyard, or keeping a low profile on purpose, container growing is one of the few food production methods that scales down to almost nothing and still puts real calories on the table. Potatoes are the single best crop to run through that system, and this guide covers exactly how to do it right.
Why Potatoes Earn a Spot in Your Container Garden
Not every crop is worth the space it takes up when your priority is calories, not variety. Lettuce and herbs are nice, but they won’t keep anyone alive through a bad stretch. Potatoes are different. A single well-managed container can produce several pounds of food, and potatoes hold up in storage for months without any processing, canning, or dehydrating equipment. That combination of calorie density and storage simplicity is exactly what a prepper garden should be optimized for.
A typical potato plant produces somewhere in the range of three to five pounds of tubers under decent conditions, which translates to over a thousand calories per plant. Run the math across a handful of containers on a porch, patio, or small yard, and you’ve got a meaningful calorie contribution from a space that most gardening guides would write off as too small to bother with.
Choosing the Right Container
Container size matters more with potatoes than almost any other vegetable, because everything they produce grows beneath the soil line. University of New Hampshire Extension recommends a container that’s about 2 to 3 feet tall with a 10 to 15 gallon capacity. Avoid going taller than that. Tall containers dry out at the top long before the bottom does, which either leaves your plants thirsty near the surface or waterlogged and rotting at the base.
Almost anything that holds soil and drains works: five-gallon buckets, food-grade barrels, garbage bins, grow bags, stacked tires, or purpose-built potato towers. Whatever you use, drill or punch enough drainage holes in the bottom that water actually moves through, not just pools. If you’re working with buckets specifically, keep it to one or two seed potatoes per five-gallon container so the plants aren’t fighting each other for root space.
Picking Seed Potatoes and Varieties
Skip the grocery store bin entirely. Commercial potatoes are routinely treated with sprout inhibitors specifically to keep them from doing the one thing you need them to do. Buy certified seed potatoes from a garden center, farm supply store, or seed catalog instead. Certified seed stock has been screened for the diseases that can wipe out a season’s harvest and spread into your soil for years afterward.
For containers specifically, skip the big russet baking varieties. They need more room than a pot can offer and won’t size up properly. Mid and late-season varieties tend to outperform early types in containers because they keep forming tubers over a longer window instead of finishing all at once. Red Pontiac, Yukon Gold, and fingerling varieties are all solid, reliable choices for container growing.
Prepping Seed Potatoes Before Planting
Large seed potatoes should be cut into pieces roughly one to two inches across, with at least one healthy eye per piece. Small seed potatoes, about the size of a golf ball, can go in whole without cutting. Once you’ve cut your seed potatoes, don’t plant them immediately. Let the cut pieces sit out at room temperature for one to two days so the cut surfaces callus over. Planting freshly cut pieces straight into damp soil is one of the fastest ways to lose them to rot before they ever sprout.
Planting and the Hilling Method
Fill your container with about six to eight inches of a light, well-draining potting mix, not garden soil. Garden soil compacts hard in a container, drains poorly, and can carry weed seeds or soil-borne disease straight into your setup. Set your seed potato pieces on top of that base layer, cut side down, spaced a few inches apart, then cover with another several inches of soil. The University of Maryland Extension explains that potatoes form above where the original seed piece was planted, which is exactly why the hilling technique works: as the plant grows, you keep adding soil around the stem, and each new layer gives the plant room to produce more tubers along the buried stem.
As shoots emerge and reach six to eight inches tall, add more soil or straw to bury all but the top couple inches of leaves. Repeat this process every time the plant regrows past that height until the container is full. This single technique is the difference between a handful of potatoes and a genuinely productive container.
Watering and Feeding
Keep the soil consistently moist without letting it turn soggy. Check by pushing a finger about two inches into the soil; if it comes out dry, it’s time to water. Containers dry out faster than garden beds, especially in direct summer sun, so check daily during hot stretches. Potatoes are heavy feeders, particularly for nitrogen, phosphorus, and potassium, so working a balanced fertilizer into the soil every couple of weeks during active growth will noticeably improve your yield.
The Greening Problem You Need to Take Seriously
This is a food safety issue every prepper needs to know before their first harvest. When potatoes are exposed to light, either while growing too close to the surface or during storage, they develop a green tint from chlorophyll, and that green coloring is associated with a toxic compound called solanine. University of Maryland Extension advises cutting away and discarding any green portions of a potato rather than eating them. Keeping your hilling consistent throughout the growing season, and storing harvested potatoes somewhere dark, is the simplest way to avoid this problem entirely.
Harvesting Your Containers
One of the biggest advantages of container growing shows up at harvest time. University of Illinois Extension notes that instead of digging through garden soil, you can simply tip the container over, loosen the soil, and the potatoes roll right out. There’s no forking through beds and risking spearing a tuber you can’t see.
Watch the plant itself for your harvest signal. Once the foliage yellows and starts dying back, the plant has stopped producing and it’s time to harvest. Handle the tubers gently since fresh-dug potatoes bruise easily, and a bruised potato won’t hold up in storage nearly as long as one that was handled carefully from the start.
Curing and Storing for the Long Haul
Freshly harvested potatoes need a curing period before long-term storage. Keep them somewhere around 50 to 60 degrees Fahrenheit with high humidity for about ten to fourteen days. This lets small cuts and bruises heal over, which prevents storage rot down the line. After curing, move potatoes to a cool, dark location, ideally in the 40 to 50 degree range, in a ventilated container like a mesh bag or a box with airflow. Don’t wash them before storage, and don’t store them anywhere near onions, which release gases that shorten potato shelf life.
Want to Grow More Food in Less Space?
If this guide showed you how much food you can produce from a few containers, imagine what else is possible. Self Sufficient Backyard is packed with practical, space-saving gardening strategies, DIY projects, and homesteading tips designed for real people—not just those with acres of land.
Whether you’re growing on a patio, in a suburban backyard, or on a small homestead, you’ll find step-by-step guides to help you produce more food, save money, and become more self-reliant.
Container growing removes almost every excuse for not producing at least some of your own calories. No acreage, no tiller, no raised beds required, just a handful of containers, certified seed potatoes, and consistent hilling through the season. In a genuine food security situation, a porch full of potato containers can mean the difference between stretching your stored food and running out early. Start this season, not after you need it.
Some of us really love bacon, but unfortunately, it has a shelf-life. A common storage option is to freeze it, and that works fine… for about a month. That’s the tough thing about storing bacon. You can only keep it in the fridge for a couple of weeks, and the longest you can extend that is a month in the freezer.
One alternative that some people like is bacon-flavored TVP or textured vegetable protein. It does add a bacon flavor to food as a topping, and it can last up to 10 years, but it’s not really bacon. It’s soy protein dyed brown and artificially flavored to taste like bacon.
Fortunately, there are a few ways to preserve real bacon that can make it last for 10 years or more—and that’s without refrigeration. In case the grid goes down, or if you are planning to go off-grid on your own, it’s good to know how to preserve food. And for some of us, that includes bacon.
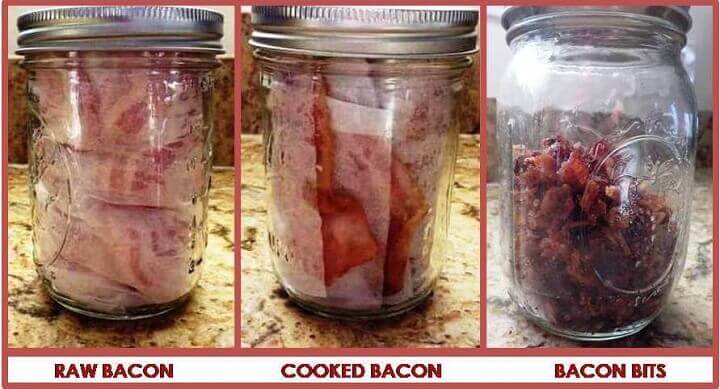
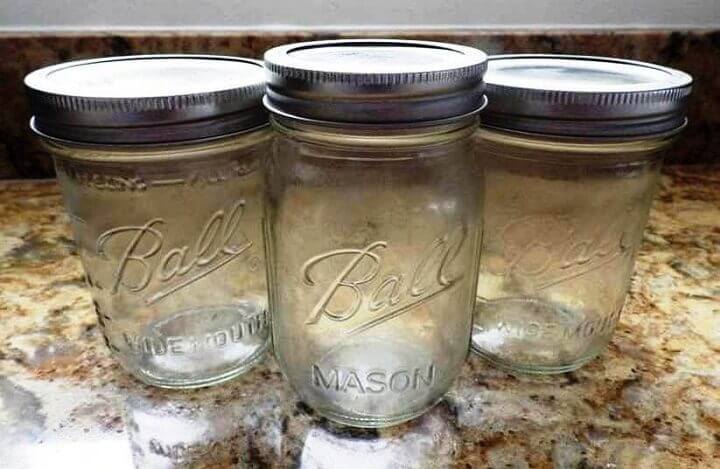
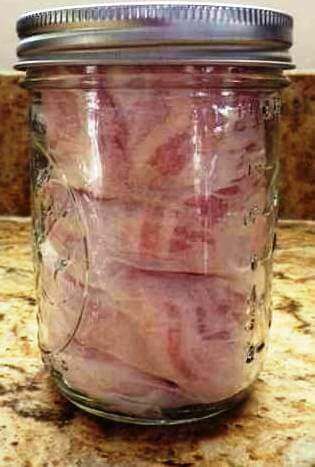
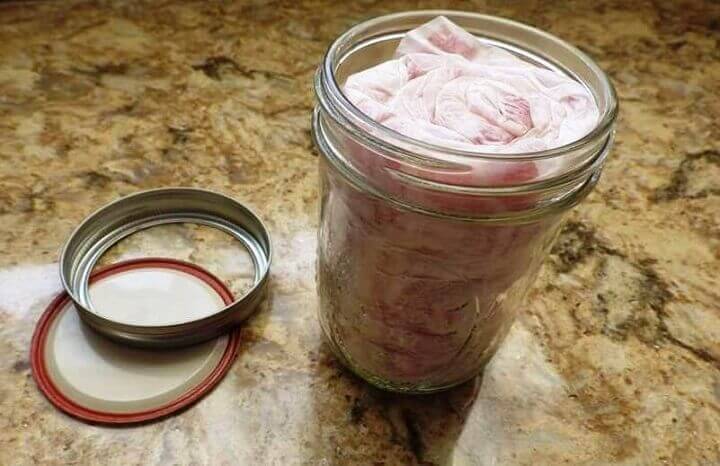
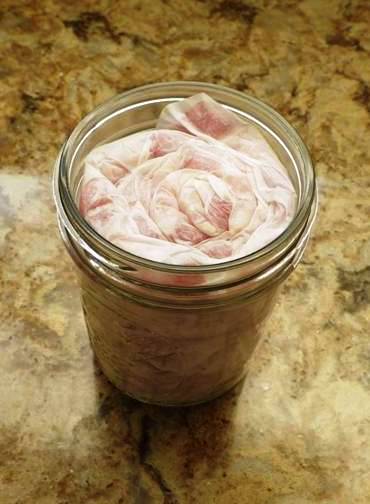
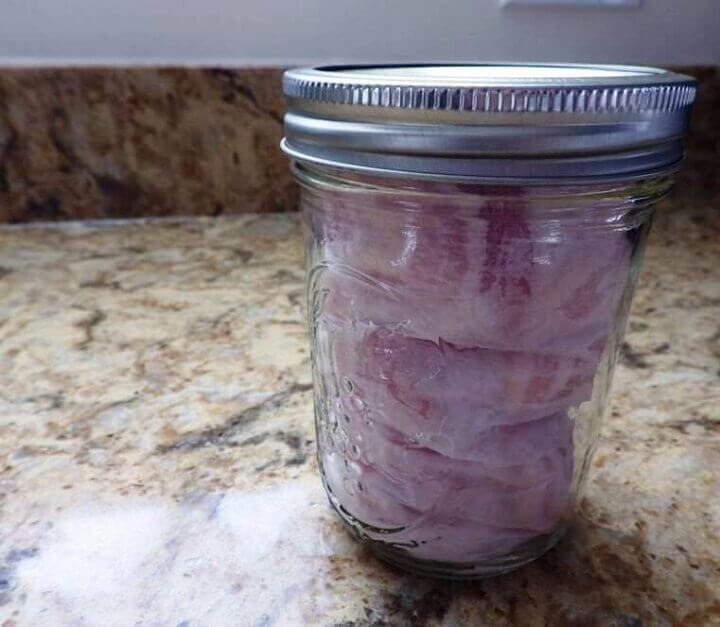
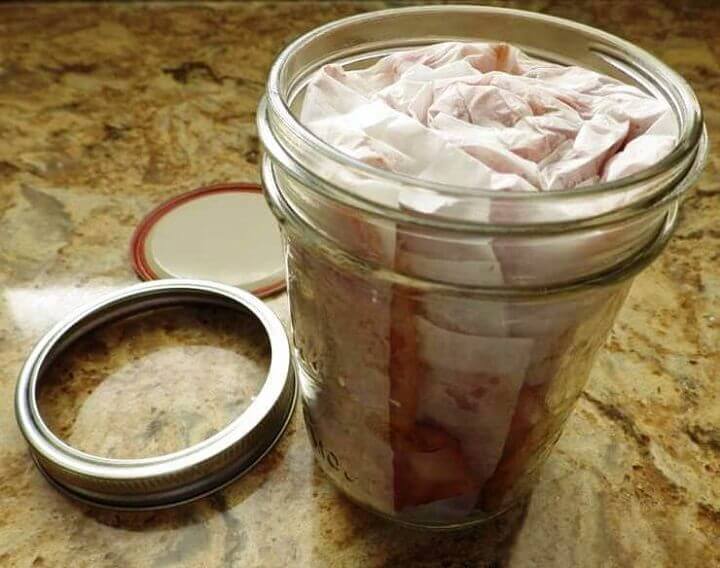
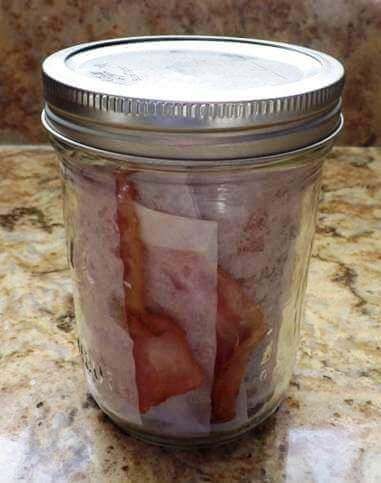
The ideal storage containers are glass mason jars with lids. Nothing needs to be added to the jars other than the bacon, but there’s a trick to successfully getting the bacon into the jars.
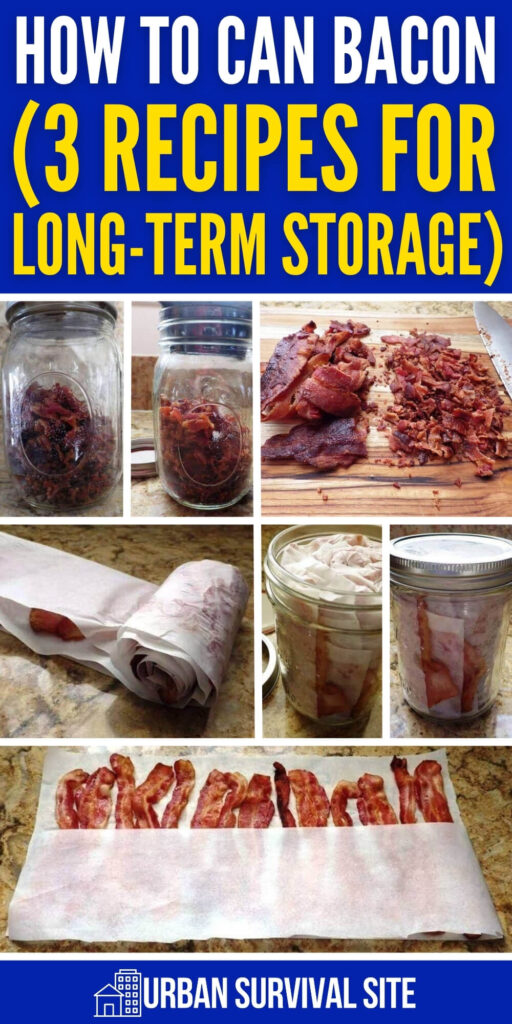
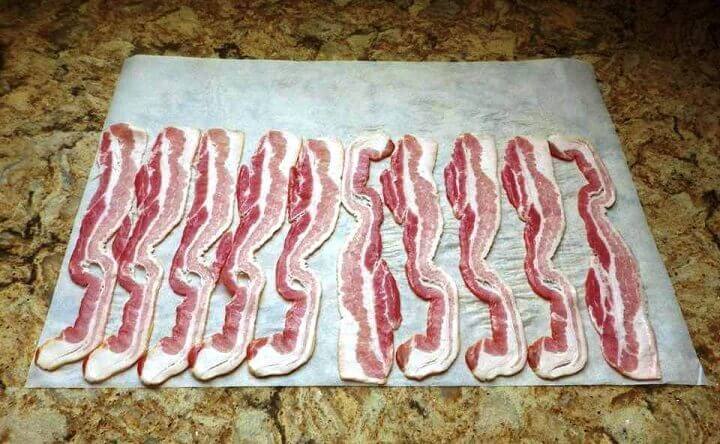
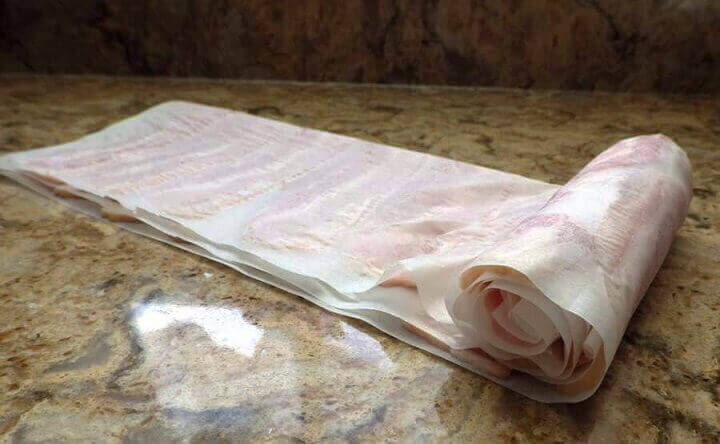
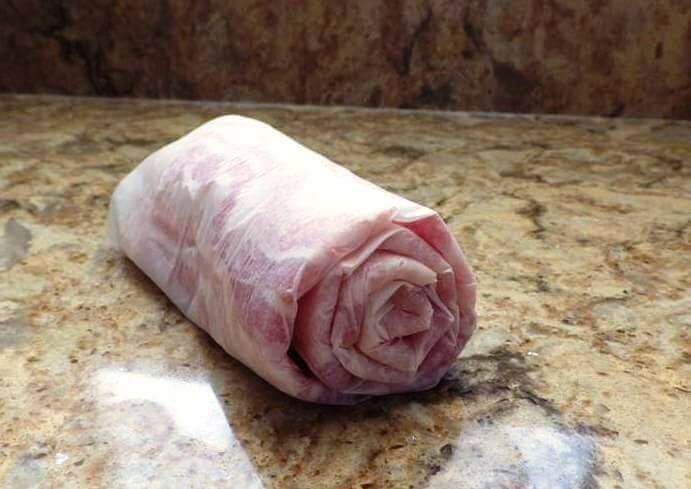
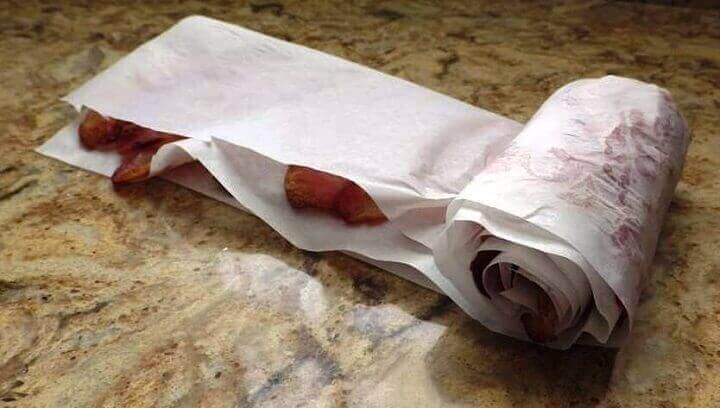
What you’ll need to do is layer the slices of raw bacon onto unwaxed parchment paper and then carefully roll it up. We’ll go through the process step by step in addition to other approaches using cooked bacon.
Preserving Cooked Bacon
Cooking the bacon first will make things a bit easier when it’s time to eat. All you’ll need to do is reheat it slightly, but you could also eat it straight from the jar.
Preserved Bacon Bits
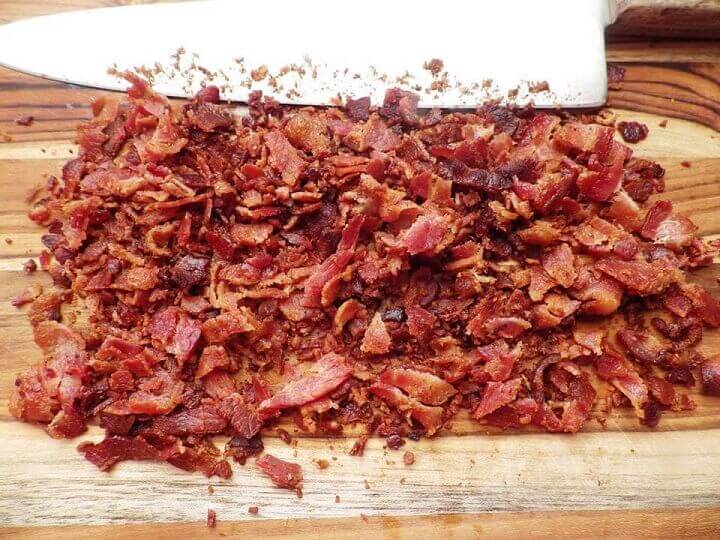
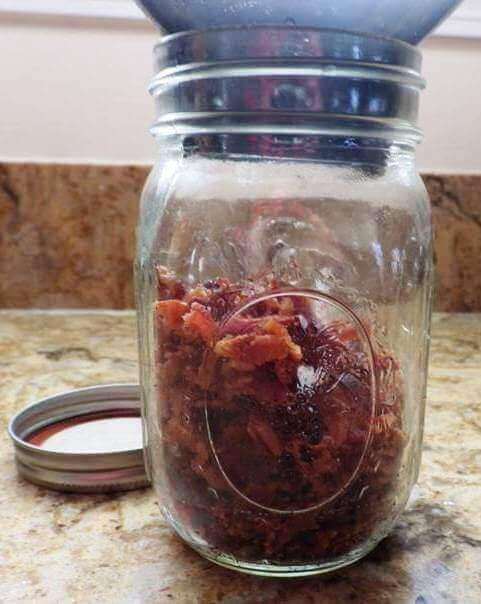
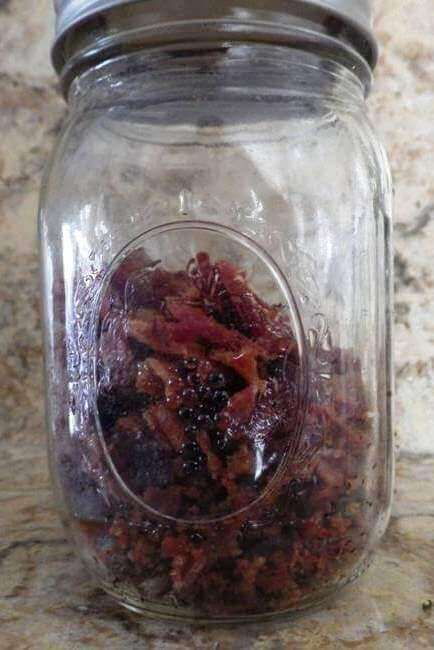
You can also cook your bacon and chop it into bits. When you do it this way, you don’t have to roll the bits up in parchment paper; you simply spoon them into the jar and process them.
Bacon bits make everything easier as a topping or garnish, and you could just sprinkle them onto some bread or toast and have an instant bacon sandwich.
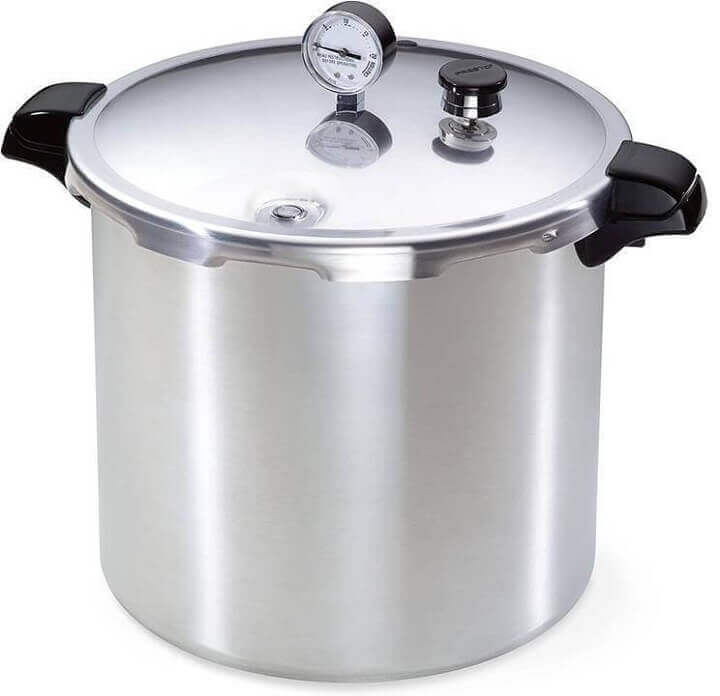
Pressure canning is by far the most reliable long-term method, but it's worth knowing what the other options are and why they fall short for serious long-term storage.
Freezing is probably the most common approach, but as mentioned earlier, it only buys you about a month, and it's completely dependent on the grid staying up. If the power goes out for an extended period, your freezer full of bacon is on a clock.
Vacuum sealing can extend the shelf life of bacon somewhat. Refrigerated, vacuum-sealed bacon can last a few weeks longer than bacon in its original packaging. But without refrigeration, you're still looking at a matter of days before it goes bad. Vacuum sealing really just slows the oxidation process; it doesn't address the bacterial growth that makes meat unsafe.
Salt curing is actually how bacon was preserved for centuries before refrigeration existed, and it's still a legitimate option. The salt draws moisture out of the meat, creating an environment where bacteria can't thrive. Properly salt-cured bacon can last for months at room temperature when stored correctly. The trade-off is that it requires a significant amount of salt and results in an extremely salty product that often needs to be soaked in water before cooking.
Smoking is another traditional method that adds some preservation value, but it's really more about flavor than long-term storage. Smoked bacon still needs to be refrigerated or frozen for anything beyond a short-term shelf life.
The bottom line is that if your goal is long-term, grid-independent bacon storage, pressure canning is the method you want to know.
Pressure Canning 101
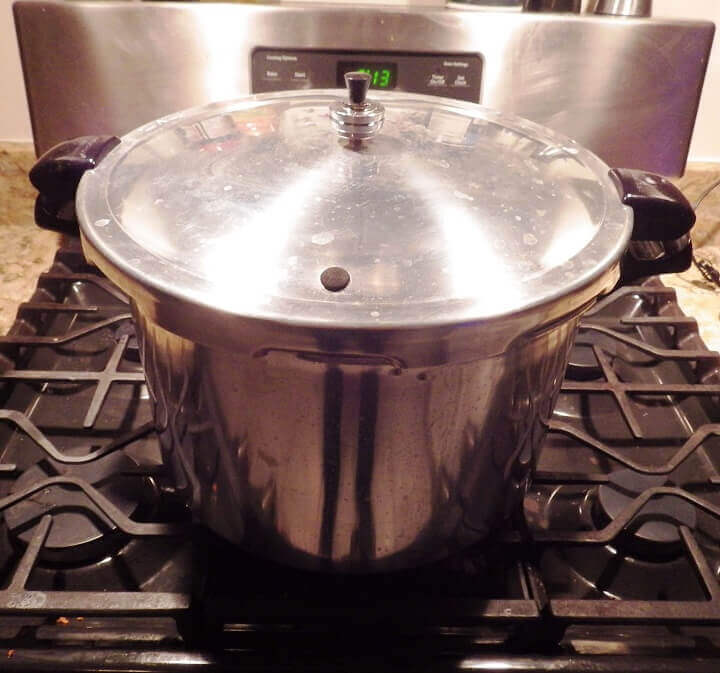
Water boils at 212 degrees Fahrenheit. Interestingly, water pretty much maintains that temperature as it boils because excess heat is released as steam.
It never goes much higher, even when there’s a loose lid on the pot, and that’s a problem with canning some foods because they require a higher temperature than 212 degrees plus pressure to kill bacteria.
This combination of high temperature and pressure effectively kills all microbes that could invade food and pretty much guarantees an effective barrier against bacteria, viruses, and fungi. But there are other important factors including time and the amount of pressure.
Here’s a chart that can give you an idea of the ideal times and pressures for various foods including bacon.
Pressure Canner Processing Chart
Product
Pounds of Pressure
Style of Pack
Pints
Quarts
Bacon
10
Hot or Raw
75 minutes
90 minutes
Beef
10
Hot
75 minutes
90 minutes
Chicken
10
Hot or Raw
65 minutes
75 minutes
Chili Con Carne
10
Hot
75 minutes
Not recommended
Pork
10
Hot
75 minutes
90 minutes
Rabbit
10
Hot or Raw
75 minutes
90 minutes
Venison
10
Hot
75 minutes
90 minutes
Source: USDA
This chart also identifies the “style” of pack. A hot pack means the product is cooked before being placed in the canning jar and is often in a liquid or solution. A raw pack is just that: raw. It’s an uncooked product dropped into the jar.
However, it’s worth noting that the timing does not change for bacon whether it is packed raw or hot, and you never need to add a liquid of any kind.
The Altitude Factor
Another factor affecting pressure canning is altitude. The higher your altitude, the more pressure you need in your pressure canner. Many pressure canners have dial gauges while others have weighted gauges that can be dropped onto a steam vent on the lid to adjust the pressure.
Here’s a chart to adjust for your altitude:
Pressure Canner Altitude Adjustments
Altitude in Feet
Weighted Gauge
Dial Gauge
1 to 1,000
10
11
1,001 to 2,000
15
11
2.001 to 4,000
15
12
4.001 to 6,000
15
13
6,001 to 8,000
15
14
8,001 to 10,000
15
15
Source: USDA
If you’re not sure about your altitude, many smart phones come with a compass app that also uses GPS to determine your exact altitude.
And now that we’ve got some of that pressure canning homework out of the way, we can get into the recipes.
Recipe #1: Preserving Raw Bacon
This is the most basic approach using sliced bacon right out of the package or sliced off the rind.
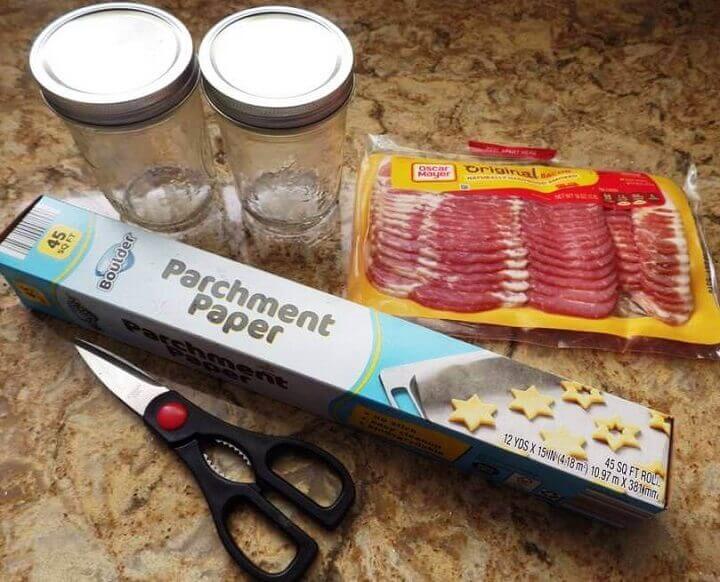
Supplies
1 roll of un-waxed parchment paper. (You want un-waxed parchment because the high heat of pressure canning will melt any wax into the bacon.)
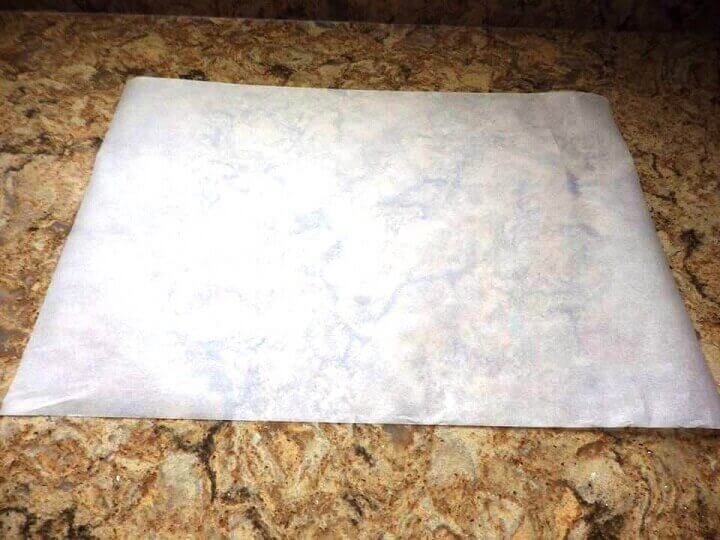
1. Cut a 24-inch length of parchment paper and lay it out on a flat surface.
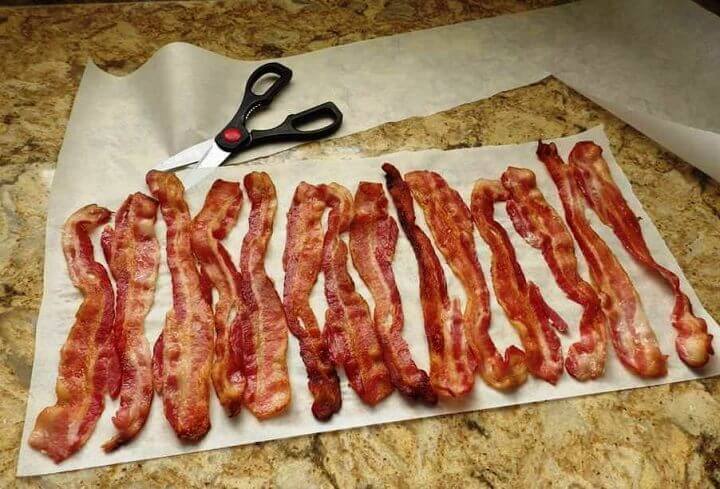
2. Arrange the strips of bacon along the length of the parchment paper. The slices should barely touch and should not overlap each other.
3. Trim the parchment paper around the perimeter of the bacon slices.
4. If using thin sliced bacon, you’ll want to lay out about 10 to 12 slices.
5. If using thick sliced bacon, you'll want to use 8 to 10 slices. This has to do with your ability to get all of the bacon into your jar. It may take a bit of experimenting to get the proportions and slice count right.
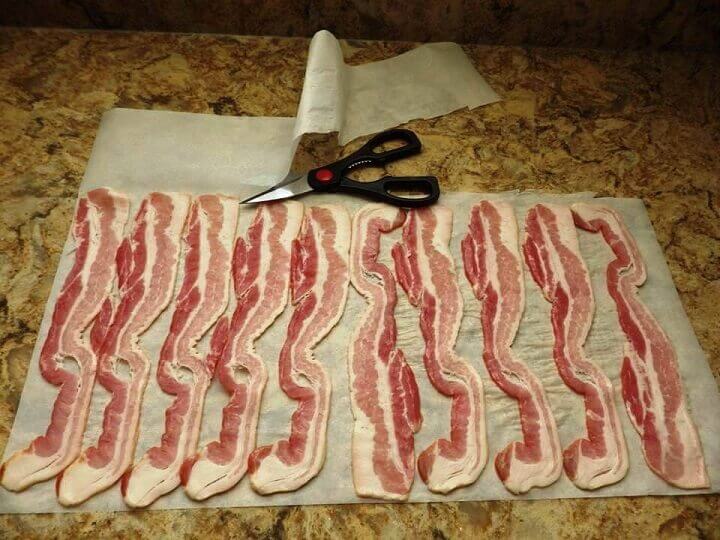
6. Cut another 24-inch length of parchment paper and then cut it in half along its length.
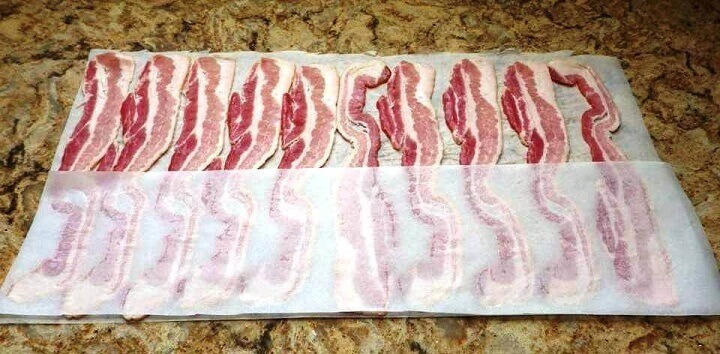
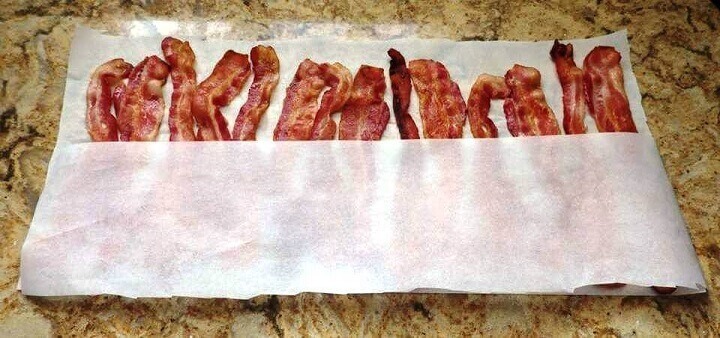
7. Place this second sheet of parchment paper along the bottom of your bacon slices, leaving the top half of the slices exposed.
8. Carefully fold the parchment paper up and over the bacon where the top of your second sheet of parchment paper meets the exposed bacon slices.
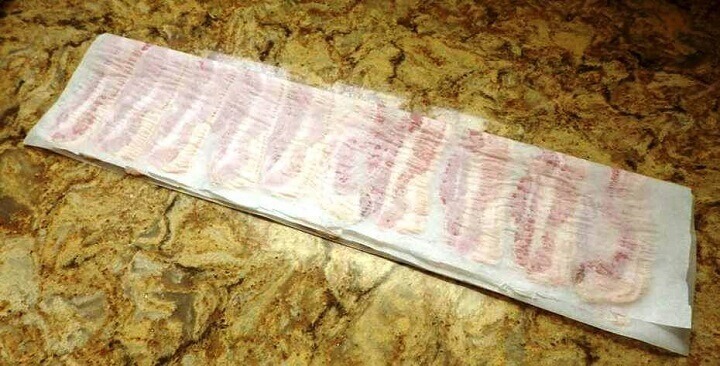
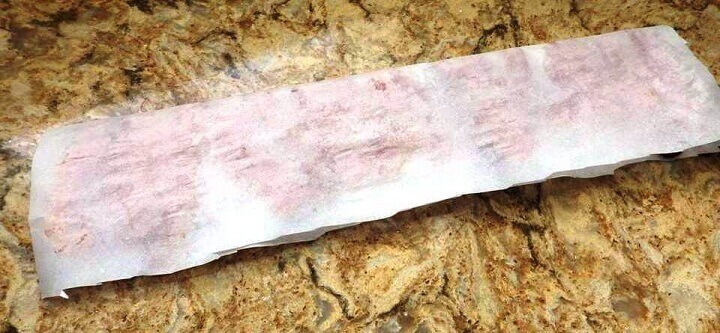
9. Turn the bacon and parchment sideways and gently but tightly roll up the bacon in the parchment paper.
10. Use the scissors to trim off any additional excess parchment paper at the top and bottom of the roll.
11. Gently twist and insert the parchment/bacon roll into your sterilized mason jar. If using larger, 1-quart jars, roll a second parchment sheet of bacon around the first roll.
12. Leave 1 inch of head space in the jar. You may need to press down on your bacon to get that 1-inch.
13. Tighten the lids and place in the pressure canner.
14. Fasten the pressure canner lid and begin to boil the water.
15. When the gauge reads the proper pressure for your altitude, begin timing the process.
16. Always release the pressure and allow it to fully decompress before removing the lid. ALWAYS!
17. Wipe and dry the jars and date the top of the lid with a permanent marker.
18. Store in a cool, dark place.
Recipe #2: Preserving Cooked Bacon
You don’t need to cook your bacon, but pre-cooking before preserving can allow you to fit more bacon in a single jar, and it’s easier to prepare a meal from the preserved bacon if it has already been cooked.
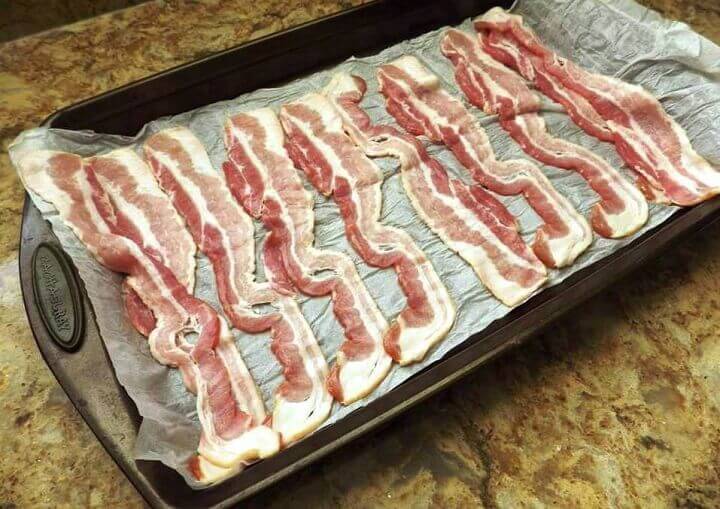
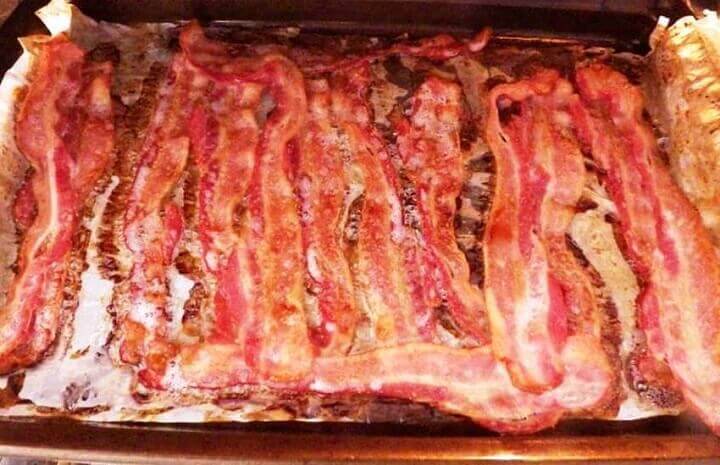
One of the methods for cooking bacon involves placing a sheet of parchment paper on a baking sheet and laying the slices on the parchment in a 400 degree F. oven for 18 to 20 minutes.
The result will be straight and fairly flat strips of crispy bacon.
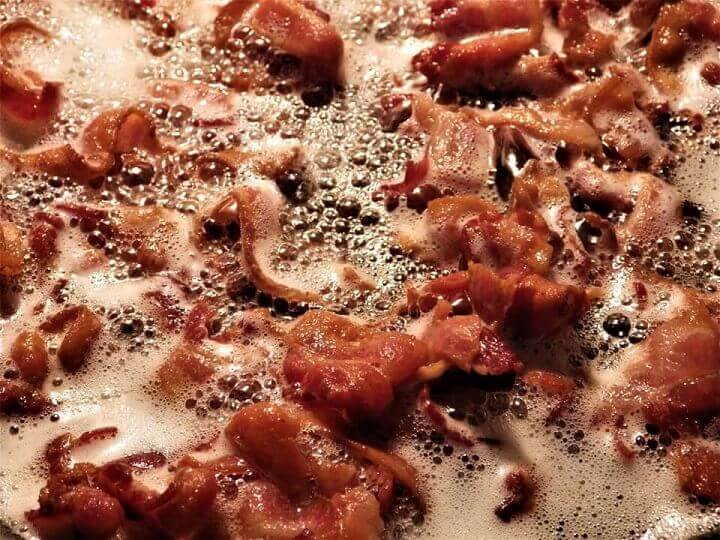
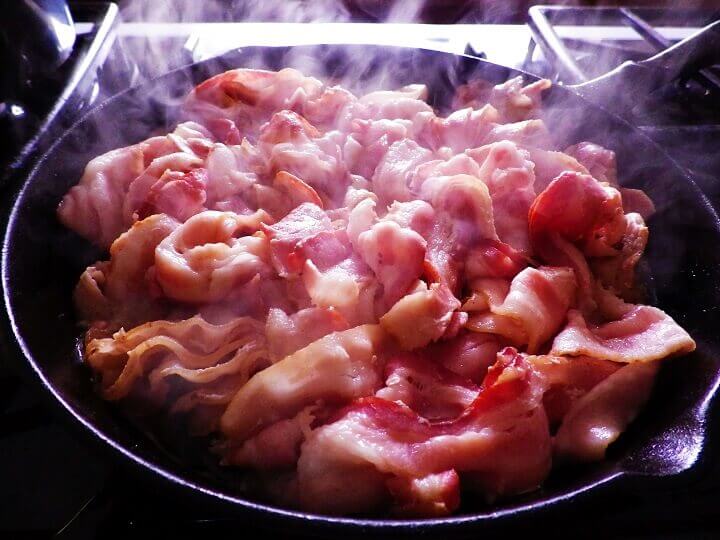
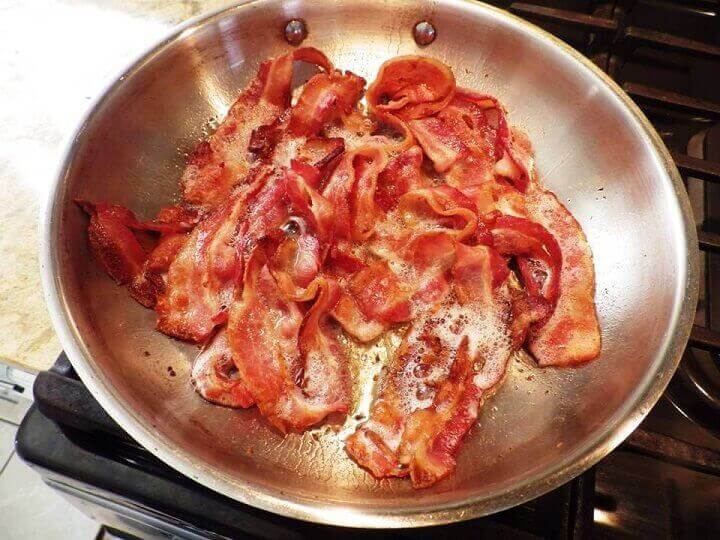
1. Cook the bacon. You can either fry it, microwave it, or bake in the oven.
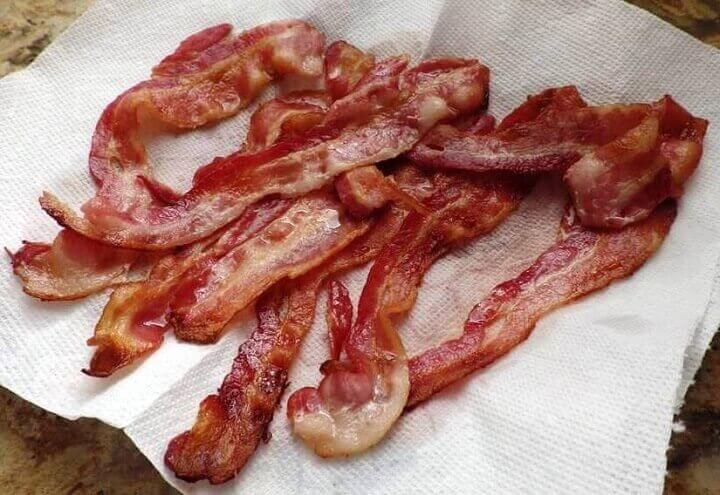
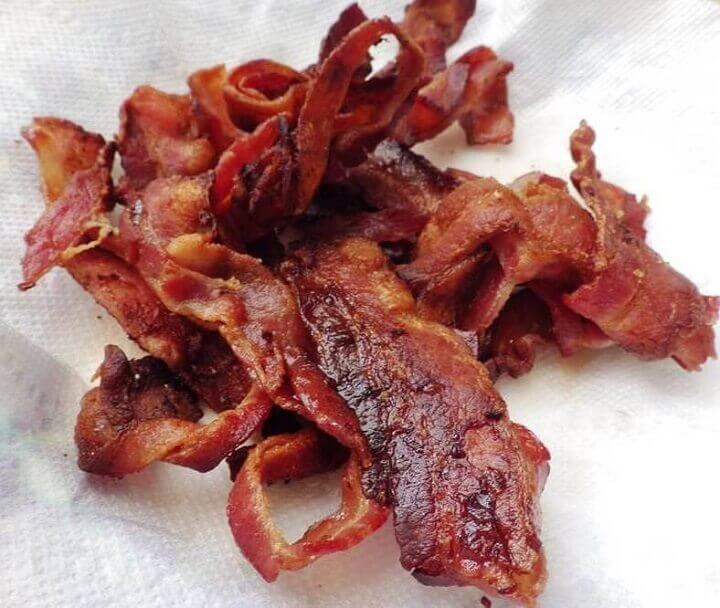
2. Once it’s cooked, drain the bacon on paper towels.
You can cook the bacon crisp or leave it a little fatty. A lot depends on how you like your bacon cooked and how you plan to eat it after you take it out of the jar. If you want to reheat your preserved bacon in a frying pan, cook it fatty. If you just want to quickly heat it up or eat it right out of the jar, cook it crisp.
3. Start with a 24-inch sheet of parchment paper and arrange your cooked, crispy slices down side by side.
You can probably add more slices of cooked bacon, so figure 16 to 18 slices of crispy/thin sliced bacon and 12 to 14 slices of crispy/thick sliced bacon.
If you’re cooking your bacon so it’s still fatty, figure on placing the same amount of bacon on the parchment that you would for raw bacon.
4. Repeat the process for raw bacon by covering the bottom half of the bacon with a second sheet of parchment paper cut in half the long way.
5. Fold the parchment paper in half as you would do for raw bacon.
6. Roll the parchment into a compact roll. (Be gentle if you are rolling crispy bacon.)
7. Place the bacon roll in the canning jar leaving 1 inch of headspace.
8. Tighten the lid and place in the pressure canner.
9. Fasten the pressure canner lid and begin to boil the water.
10. When the gauge reads the proper pressure for your altitude, begin timing the process.
11. Always release the pressure and allow it to fully decompress before removing the lid.
12. Wipe and dry the jars and date the top of the lid with a permanent marker.
1. Cook the bacon until crisp. Frying is best for crispy bacon. You don’t want to use partially cooked, fatty bacon for bacon bits. The remaining fat will just congeal in the jar. You want very crispy bacon. You’ll still get some congealed, fat but most of it will be at the bottom of the jar.
2. Drain the bacon on paper towels and pat the tops of the slices dry with more paper towels. Let the crispy bacon cool for a few minutes.
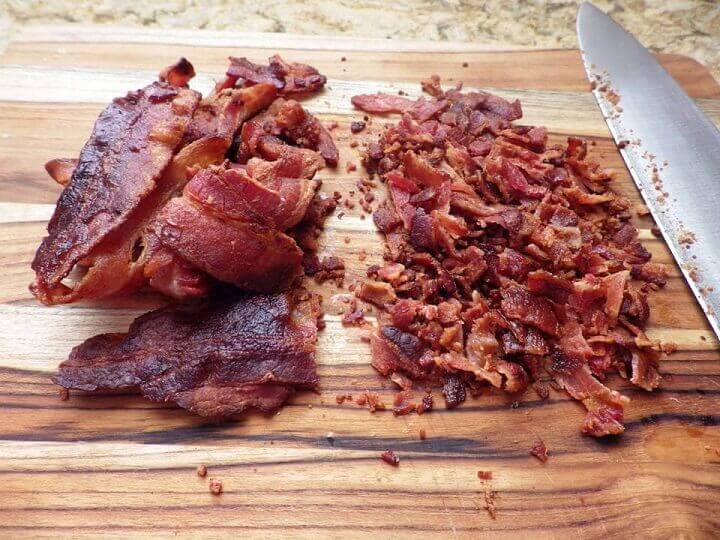
3. Crumble the bacon either with your hands or with a knife on a cutting board. Some people use a food processor.
4. Spoon the bacon bits into a sterilized canning jar. A 1-pint jar is probably best unless you have a lot of bacon to fill a 1-quart jar.
5. Tighten the lid and place in the pressure canner.
6. Fasten the pressure canner lid and begin to boil the water.
7. When the gauge reads the proper pressure for your altitude, begin timing the process.
8. Always release the pressure and allow it to fully decompress before removing the lid.
9. Wipe and dry the jars and date the top of the lid with a permanent marker.
10. Store in a cool, dark place.
Recipe Suggestions for Preserved Bacon
We’re not going to get too complicated with recipes here, but there are some things you should keep in mind when using pressure-canned bacon for meals. This will ensure you’re making the best use of your preserved bacon.
When you remove raw bacon that has been canned and preserved for a long period of time, the bacon strips will have lost some of their structural integrity. You might not be able to peel off a full strip of bacon from the parchment paper. The pressure canning process subjects the bacon to high heat, and the bacon slices may stick to the parchment, causing them to come off in pieces rather than nice, long slices.
There’s no problem with the bacon from a food safety or taste standpoint, but you’ll probably be cooking small pieces of bacon rather than long, full slices. Here’s a link to a YouTube video where a Bacon canning expert demonstrates what this looks like.
Your preserved bacon can be used any way you would traditionally use bacon, whether it’s on some toast or part of a recipe. What’s worth considering is which type of preserved bacon will work best for any specific recipe combination: raw bacon, cooked bacon or bacon bits?
Raw, preserved bacon can be used any way you like because you’re simply going to be cooking bacon. Its primary benefit is that it still has a high fat or lard content, so you can use the rendered lard as a frying base for other ingredients. Lard also adds flavor to recipes. You could also use the raw, preserved bacon to top a turkey or anything else you need to slow roast in the oven but want to keep moist.
Crispy, preserved bacon is great for sandwiches whether it’s a BLT, bacon burger, or just as an added topping for grilled cheese. What’s great about those recipes is that adding the bacon while cooking the grilled cheese or burger will reheat it. Then again, fully cooked and crispy bacon can go right out of the jar onto a slice of bread, or you can just give it a quick chew.
Preserved bacon bits are great when added to soups, mac and cheese, a salad, and as a great flavor accent to baked potatoes, rice, or a savory and salty addition to dips, cheese, and even bacon butter.
Fatty, preserved bacon is a matter of taste for many people. In Asia, all bacon is served fatty and there are actually designations on hotel menus in Asia that offer an “American style” option for bacon which simply means “crispy.” If you like your bacon fatty, all you need is a way to gently reheat and you’re good to go. You could also add it to recipes to impart some fatty flavor or eat it as is with the knowledge that it has been at least partially cooked.
It’s important to know when the bacon is bad. In spite of your best efforts, some home canning and preservation methods can go wrong. Time is the biggest enemy, and while properly preserved bacon can last for a decade or more, stuff happens. Here’s what to look for after you open any jar of preserved food:
Does it look right? Is it close to the color you would expect? Is there anything about the texture that looks unexpected? You should be prepared to see some congealed fat, but is the fat a healthy white or at least a bit yellow, or is it showing colors like blue or green which you wouldn’t expect to see?
Does it smell right? This may be the biggest clue. Does it smell like bacon? Any off odors from mildew to sewage or anything else that makes you shake your head and wince is a pretty good clue that something’s gone wrong. Follow the old prepper’s adage: if in doubt, throw it out.
Does it taste right? Even if it’s passed the previous tests, if it just doesn’t taste right, you probably want to toss it. Don’t wait for your stomach and intestines to tell you that your taste buds were right.
Storage of Your Canned Bacon
Here’s the good news. You can store your canned bacon in a pantry or anywhere else you store canned foods. It doesn’t need to be refrigerated. The ideal storage location is the proverbial cool, dark place. Just remember to date your jars so you can track and rotate them as you add to your food storage over time.
Storage After Opening
At this point we’ve come full circle. Once you’ve opened your jar of carefully preserved bacon, we’re back to square one. You can refrigerate leftovers in your jar for up to 2 weeks or freeze it for a month. Bacon bits will last a little longer because they have less fat that can go rancid, but raw bacon out of the jar has the same shelf-life realities of raw bacon before it went into the jar.
How Much Bacon Should You Store?
That's going to depend on how much your household actually eats and what role you see bacon playing in your food storage plan. But here are a few things worth considering.
A pound of raw bacon fits into roughly a 1-pint jar. If you cook it first, you can fit a bit more per jar since the strips shrink down. Bacon bits are the most efficient in terms of storage density. A pound of cooked, crumbled bacon packs down surprisingly well into a pint jar.
A good rule of thumb for preppers is to store what you eat. If your family goes through a pound of bacon a week normally, that's roughly 52 jars to cover a year's supply, which sounds like a lot until you realize that's also a year's worth of morale, flavor, and cooking fat. Bacon grease rendered from your preserved raw bacon is itself a valuable resource, useful as a cooking oil, a seasoning base, and even a fire starter in a pinch.
If you're just getting started, there's no need to go all-in at once. Start with a case of jars and a few pounds of bacon, get the process down, and build from there. The skills you develop are just as valuable as the stored food itself.
Should You Do This?
That depends on a lot of factors. If for some reason you have more bacon than you can give away, it makes sense to take some steps to preserve it for a long time. The most common reason people do this is to store bacon for a time when the grid may be down following a disaster.
Maybe the best reason to try this is to just have the experience and the knowledge of how it’s done. It’s really not that hard to do, and if you do it right, you’ll always have some bacon on hand.