Submissions     Contact     Advertise     Donate     BlogRoll     Subscribe                         

Tuesday, December 31, 2024

How to Prep Your Home for Allergy Season

How to Prep Your Home for Allergy Season

Want to know how to prep your home for allergy season? While I’m always very excited about the arrival of spring along with the beautiful sunshiny weather, there is one thing I’ve never looked forward to every year… the dreaded allergy season. Ugh, it can be the worst! The amount of pollen flying rampant in the air causes irritating side effects that can sometimes be downright awful.

Spring allergies could include an itchy, runny nose, watering eyes, uncontrollable sneezing, and a scratchy throat. This can drive even the strongest of people crazy.
How to Prep Your Home for Allergy Season

Prep Your Home For Allergy Season

But while these negative symptoms may seem completely unavoidable, I have some good news for you! Besides taking allergy medications every day throughout the season, there are several other things that you could be doing around your house to help keep it allergy-free. That’s right! Here’s how to prepare your home for the upcoming allergy season.

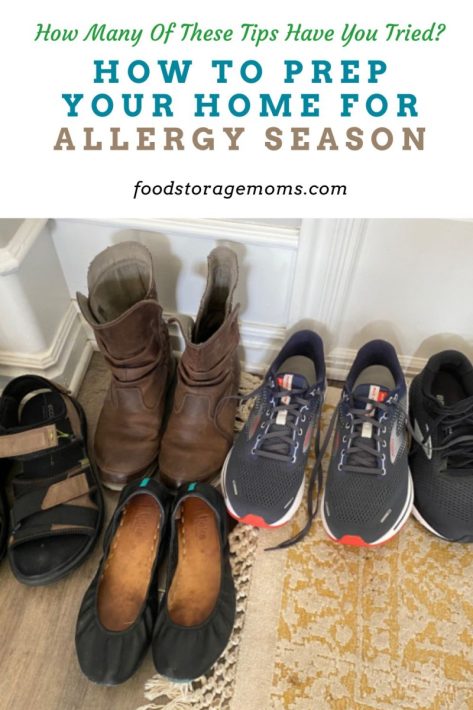
Take Your Shoes Off

Instead of tracking in countless allergens across the floor of your home, make it a point to have your family take off their shoes at the door before heading inside. Or you could even take it a step further and keep everyone’s shoes in their cubbyholes out in the garage so there’s even less risk of allergens making their way inside. Forget Your 72-Hour Bug-Out Bag You Need More.

Over the years, some of our homes had what we called a “mud room” between the garage and the rest of the house. We asked our kids to remove their coats, hats, boots, scarves, gloves, etc. in that room. It stopped the occasional mud marks on the carpet and hardwood floors and kept those allergens at bay. It also kept the house better organized since I didn’t see all those items left on kitchen chairs, couches, or countertops or dropped on the entry floor.

Take Your Shoes Off

Keep Your Windows Closed

As tempting as it might be for you to keep your windows open on a nice warm day during the spring so you can get a refreshing breeze in the house, I’d strongly encourage you not to. While that nice breeze may feel absolutely incredible and refreshing after being cooped up and stuffy all winter long, you’d also be welcoming in pollens and other allergens to your home. But if you refuse this bit of advice, at the very least, make sure that you place tight screens outside or wedge air filters in each of your windows to help limit the number of allergens that find their way into your home. 12 Ways to Reuse Broken Household Items

Cut the Clutter

Getting rid of clutter that’s lying around in your home has several advantages besides having a neat and orderly home. Not only does decluttering make you feel better both physically and emotionally, but it also cuts back on the number of objects that dust and allergens can cling to. And that’s a pretty big deal! How to Declutter Your Home. I have to confess, I HATE dusting, I wish I loved dusting, but this is why I have very few knick-knacks. There I said it. LOL!

Dust and Vacuum Often

Keeping up with the dusting and vacuuming in your home is always a good idea, but during the allergy season, it’s even more important. This helps get rid of any dust and dirt that may have accumulated throughout your home from being inside all winter long. But make sure to use a vacuum cleaner with a HEPA filter if possible so as to capture those tiny particles of dander and pollen that can be found in hard-to-reach places!

Also, use a damp or microfiber cloth for dusting so that you aren’t just spreading dust particles everywhere. Saharan Dust Storm: Everything You Need to Know

Change Your Air Filters Regularly

The air quality in your home is extremely important, regardless of whether it’s allergy season or not. Why’s that? Because your family’s health could be at stake if you don’t keep up with changing out your home’s air filter on a regular basis. A clean air filter has a much better chance of trapping any airborne particles or allergens before they reach you. It’s best to change your home’s air filter monthly if you’re prone to allergies, but at least every 2 to 3 months.

Your heating, ventilation, and air conditioning (HVAC) system runa more efficiently if serviced each year. Use HVAC filters that fit your needs based on how clean you want the air to be. That highest rated filters do a great job, but they can be more costly to replace. The higher rated ones also need to be changed more often since they collect more stuff during the filterin process.

If possible, have your air furnace ducts cleaned out professionally. You would be surprised how much junk gets built up in them while a home is built, let alone when your home is 20 years old. We had our cleaned a few years ago, and while the workers were at it they made sure all the connections we still intact, particularly where the duct meets the air return and the registers on the floor or ceiling. This is to make sure no air is escaping through leaks in the system.

If you have old radiators or electrical radient heat, be sure to dust them off or use the blower feature in you vacuum to be sure areas that collect dust and dirt are cleared.

Change Your Clothes After Being Outside

A lot of people don’t give it much thought, but after spending time outside, it’s best to change out of the clothes you were wearing immediately the moment you come inside. Because God only knows how much pollen has attached to your clothing in the meantime, and if you sit down in a chair or sprawl out on the sofa, it’s game over. If you have the time, take a shower to get any allergens off you and change into something else. 12 Quick & Easy Tips for Washing Clothes

Wash Your Bedding Weekly 

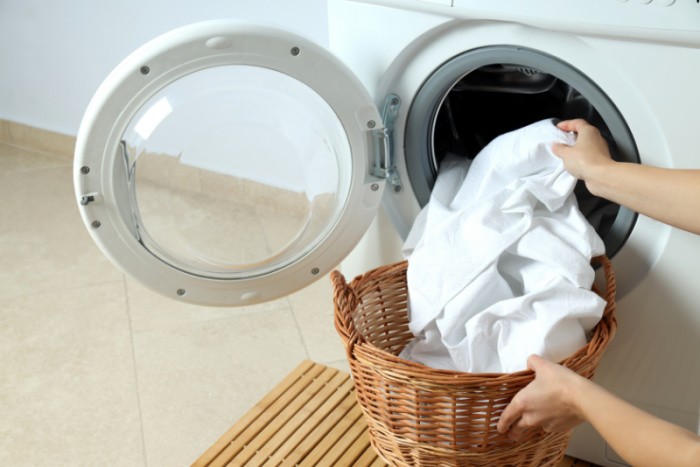
Are you someone who suffers from allergies and can’t seem to catch a break? As strange as it may seem, the answer to your problem may be found in your bed. The truth is, we spend a lot of time in our beds and those microscopic allergens that you and I can’t see may be doing the same thing. In fact, they can thrive in places like your bed mattress, box springs, the top quilts, and on your sheets. This is why during the allergy season, you should be washing your bedding in hot water at least once a week. Learn How To Wash Clothes During An Emergency

Do you love clean sheets as much as I do? We change ours every Friday, without fail. If I had more strength, I would wash them twice a week, but once a week is still awesome!

From time to time you should also try to shake the dust and dirt that have settled to the mattress and box springs. Once the sheets and mattress cover are removed, take a bat, tennis raquet, or other stiff item and beat the surface to loosen what may have accumulated there. Then you can take a vacuum to the surface to pull away the unwanted debris.

While you’re busy cleaning, be sure to pay attention to the curtains in all the rooms. Depending on the type of fabric, they can be like a magnet when it comes to allergens and dust. Hopefully, you have some curtains that can be washed at home, but you probably have some that will need special treatment at the local dry cleaners. I’d suggest you do the washing and dry cleaning each year.
Change Your Sheets Weekly

Keep Your Bathroom Free From Mold

If not properly cleaned, your bathroom can become a breeding ground for mold and mildew, and even more so if you live in an area with a high humidity level. I’ve even heard alarming stories of mushrooms growing in people’s bathrooms. Disgusting! That’s because when the shower is used, it creates a warm and humid environment that leads to the growth of these types of allergens.

So make sure to wipe away any water from your tub and walls after each shower you take. Also, keep the exhaust fan running or the window open for about 20 minutes to help reduce any additional moisture in the air. How To Love Cleaning Bathrooms

With all the stuff being washed down the drain, sinks can be a catchall for some pretty nasty stuff. Be sure to schedule some time to pull out the drain stopper occasionally and clean out any captured hair and other goodies that cling there.

Wear a Mask While Cleaning

If you love to get dirty when it comes to cleaning around the house or while doing yard work, I highly recommend that you consider wearing a mask when doing any of these tasks. Doing so will help keep your mouth, nose, and even eyes from being exposed to dust or pollen particles in the air.

It’s also best to leave your home for a few hours after cleaning because it will limit your exposure to the dust and allergens that may be in the air. The Pros and Cons of Wearing a Mask Long-Term This is especially true if you are subject to hay fever or asthma. Always have histamine handy if you start to feel the effects of the dust or pollen in the air.

If you feel you are always putting your immune system to the test, you may want to visit an immunology specialist. It could be that you’d really be helped with some allergy shots or other treatments based on various test they can administer.

Get a Dehumidifier

When your home starts to get humid, that’s when allergens are more likely to creep in and make their presence felt. One of the best tips that I have concerning your home and allergies is to purchase a dehumidifier. Trust me, it’s an investment that will make a world of difference in your home. To put it blatantly, mold, allergens, and other air particles simply won’t stand a chance, and that’s kind of the point.

What else can cause allergies?

Pets, dust mites, pollen count, carpet, your mattress, pillows, pet dander, a rug, poor indoor air quality, and so much more. Allergies can make you have a stuffy nose, cough, inflammation, nasal congestion, and watery eyes. Sometimes you need to take antihistamines to ensure the allergies stay at bay! The right medications can help you manage your allergy symptoms.

Final Word

Allergy season may be well on its way, but that doesn’t mean that your family has to suffer through it this year! By implementing some of these preventable measures around your home, you’ll be well on your way to having an allergy-free spring and summer. Can you think of any other helpful tips that would help someone battle allergies in their home? I’d love to hear from you! May God Bless this world, Linda

Copyright Images: Clean Sheets AdobeStock_470074388 by Atlas, Seasonal Allergy AdobeStock_279030542 By Amarievikka

The post How to Prep Your Home for Allergy Season appeared first on Food Storage Moms.


from Food Storage Moms
How to do a soil analysis before starting a garden

To grow a garden, whether indoors or outdoors, you essentially need three things besides seeds or seedlings: soil, water, and sunlight. While water and sunlight are easy to source, good-quality […]

The post How to do a soil analysis before starting a garden appeared first on Survivopedia.


from Survivopedia

Cowboy Candy Pickled Eggs

I still have the photo of our first egg. We keep chickens in a suburban backyard, and we fought for the right to do that. The photo is of my son holding a single egg in his two little hands. All these years later the humble egg has become one of my favorite foods. It’s […]

The post Cowboy Candy Pickled Eggs appeared first on Ask a Prepper.


from Ask a Prepper https://ift.tt/msZOEvI

Monday, December 30, 2024

Herbalism for Beginners: How to Get Started

Estimated reading time: 16 minutes

Herbalism for Beginners: How to Get Started

Herbs have long been the backbone of traditional medicine systems, helping people worldwide address common ailments and maintain wellness. 

But here's something that might surprise you – according to the World Health Organization, about 80% of the global population still relies on plant-based medicine to support their health. 

Whether you're curious about healthier alternatives, looking to deepen your connection to nature, or just want to add something useful and green to your home, herbalism is a brilliant place to start.  

Want to save this post for later? Click Here to Pin It On Pinterest!


What is Herbalism?

At its core, herbalism is the study and use of plants to promote health and treat minor ailments. Think of it as nature’s pharmacy, using the leaves, flowers, roots, and seeds of plants to create remedies that benefit your body, mind, and soul. 

Where modern medicine often works to combat specific illnesses, herbalism takes a broader, more holistic approach, focusing on supporting your body’s natural healing systems and overall well-being. 

Herbalism is nothing new. It’s been practiced for centuries and is deeply ingrained in traditional systems of medicine. For example:

  • Ayurveda (a traditional practice from India): Known for its use of herbs like turmeric, ashwagandha, and neem to address everything from digestion to mental clarity. 
  • Traditional Chinese Medicine (TCM): Incorporates herbs like ginseng and licorice root to balance energy or “qi” in the body. 
  • Western Herbalism: Common herbs like chamomile, lavender, and peppermint have centuries-old roots in European traditions and are still widely popular today. 

No matter the system, herbalism bridges the gap between ancient wisdom and modern science by offering natural ways to care for your health. 

The Importance of Herbalism in Modern Times

With so much technology and a whole host of pharmaceuticals you can turn to, why exactly is there a resurging interest among health enthusiasts in age-old plant remedies? Because herbalism complements modern medicine without replacing it. 

Instead of focusing only on treating symptoms, herbalism helps support long-term wellness while reducing reliance on synthetic drugs. 

Modern consumers are much more conscious of what they’re putting in and on their bodies. When you look at a plant-based remedy, you can identify the ingredients – no mysterious additives, no unnecessary fillers. Plus, using herbal remedies supports agricultural sustainability and reduces your environmental footprint. 

Some of the most common herbs, like chamomile (for stress relief), ginger (for soothing an upset stomach), and holy basil (for supporting energy levels), provide simple solutions to your everyday struggles in ways that feel accessible, safe, and approachable. Many herbs can even bring about emotional or mental clarity without significant side effects. 

Getting Started With Herbalism

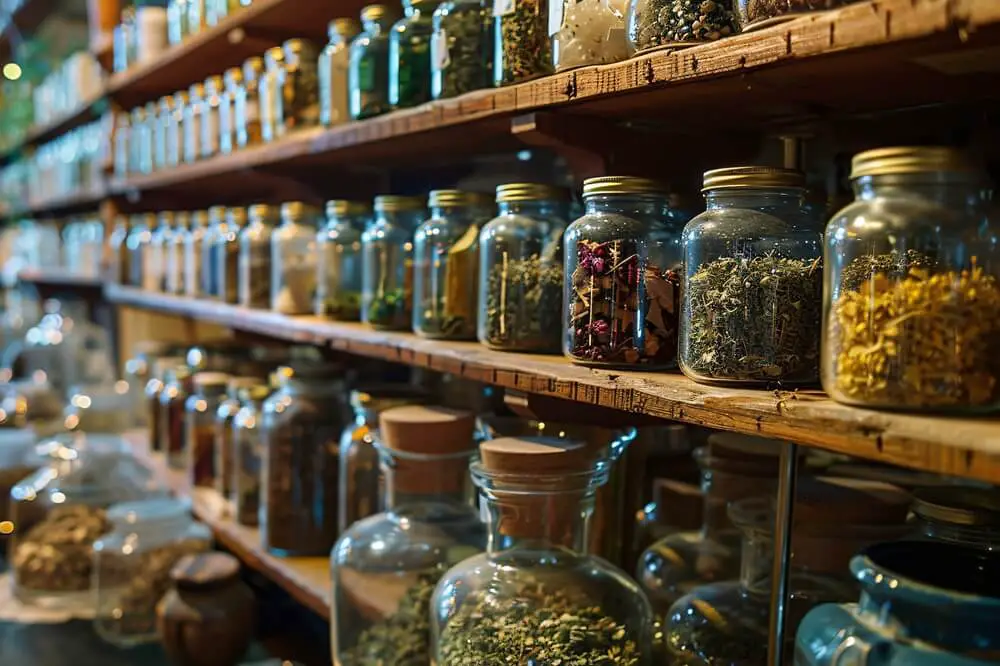
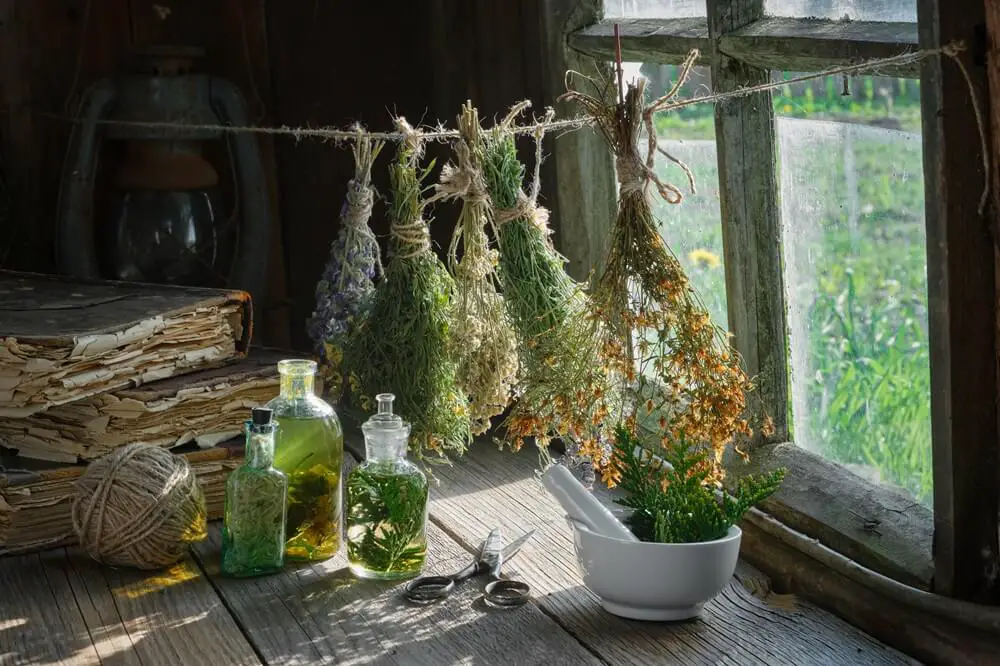
Dried Herbs and Infusion Bottles

Starting with herbalism doesn’t have to be overwhelming. You don’t need to memorize hundreds of plants or become an expert overnight! Instead, work your way up with these simple steps:

1. Begin with Easy-to-Use Herbs 

Start small by incorporating beginner-friendly herbs that are versatile and widely available. We’ll give you a more comprehensive list below, but some excellent options to consider as you’re first getting started  include:

  • Peppermint for digestion and headaches 
  • Chamomile for relaxation and better sleep 
  • Ginger for nausea and circulatory health 
  • Lavender for calmness and skin irritation 

These herbs are easy to both find and use, making them perfect for beginners who are just learning the ropes. 

2. Invest Time in Research 

Not all advice is created equal, especially in the world of herbalism. Stick to trusted sources like published books, accredited online courses, and reputable herbalists. Avoid falling into the trap of social media myths where misinformation often spreads quickly. 

3. Try Herbal Teas First 

Herbal teas are one of the easiest and safest ways to explore the world of herbal remedies and get your feet wet. There’s no intimidating process – just steep herbs in hot water and enjoy! 

Many herbs, including mint, chamomile, and hibiscus, are widely available as tea bags or loose-leaf blends. You can start experimenting to get an idea of the ones you like before making your own remedies.

4. Craft a Home Herb Garden 

Why not grow your own healing supply? Starting a small herb garden is not only rewarding but also practical. You don’t need a massive backyard to do this – a small windowsill or balcony works perfectly.

Grow beginner herbs like basil, thyme, and parsley since they’re easy to care for and double as cooking ingredients! 

5. Connect With Professionals 

Although herbalism is a natural practice, it’s important to remember that some herbs may interact with medications or cause allergies. Working with a trained herbalist or taking a formal course is well worth the investment to make sure you’re using herbs safely and effectively. 

6. Take It Slow and Be Patient 

Like any new habit, learning herbalism takes time. Rather than rushing to try dozens of remedies at once, start with a few herbs and slowly build your knowledge. 

Track your experiences in a journal, noting how certain plants work for you. Over time, you’ll build a practical skill set and a deeper appreciation for the plants around you. 

Tools and Supplies You’ll Need

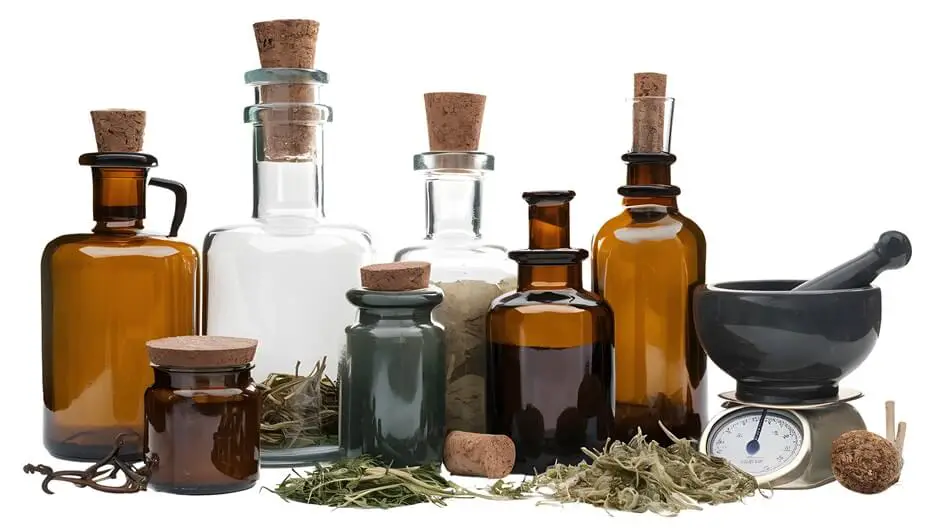
Apothecary Supplies

Before you jump into your first project, gathering your tools and supplies ahead of time will make the entire process go smoother. Here’s a list of the basics:

  • Cooking Pot & Double Boiler: A small to medium-sized pot paired with a double boiler is perfect for making herbal preparations like infusions or infused oils. A 2-cup version works well for crafting small-batch herbal remedies. 
  • Heatproof Glass Measuring Cups & Metal Spoons: Precision matters when you’re measuring out your herbs and oils. Heatproof glass cups will ensure safety, while a complete set of metal measuring spoons will give you accurate measurements.
  • Cheesecloth for Straining: Cheesecloth is an invaluable tool for separating plant matter from liquid when you’re making tinctures, syrups, or infused oils.
  • Mixing Bowls and a Hand Mixer: If you plan to whip up more elaborate products, like body butters or creams, these will come in handy.
  • Funnels & Spatulas: Stainless steel funnels make bottling products easy, and rubber spatulas ensure you don’t waste a single drop of your formulations.
  • Containers: You’ll need glass jars, tins, or upcycled containers to store your finished products. Avoid plastic, as contaminants can leach into your finished herbal remedies.

Top 15 Herbs to Add to Your Apothecary

Once your tools are ready, it’s time to stock up on some herbs. These 15 beginner-friendly herbs are versatile, effective, and easy to use in a variety of preparations.

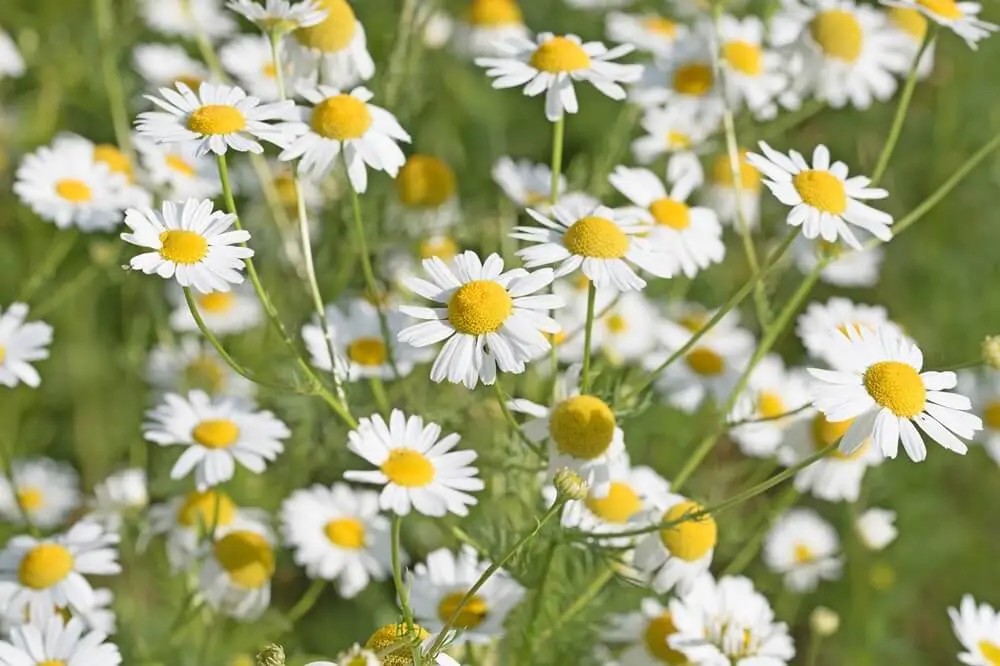
1. Chamomile 

Chamomile Flowers

Known for its calming properties, chamomile is a go-to for soothing anxiety, promoting better sleep, and even easing digestive discomfort. It’s perfect for teas, infused oils, or even a gentle skin toner. 

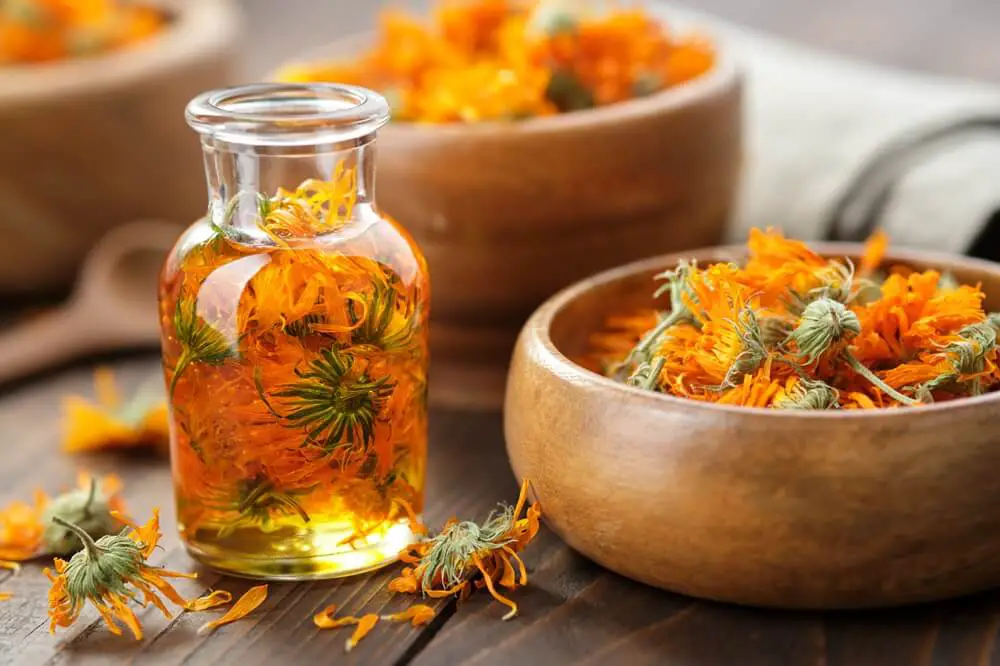
2. Calendula 

Calendula Flowers and Oil

Calendula is a skin-loving herb famous for its anti-inflammatory and antimicrobial properties. Use it in salves to soothe cuts, burns, or irritated skin, or infuse it into oils for a multipurpose base. 

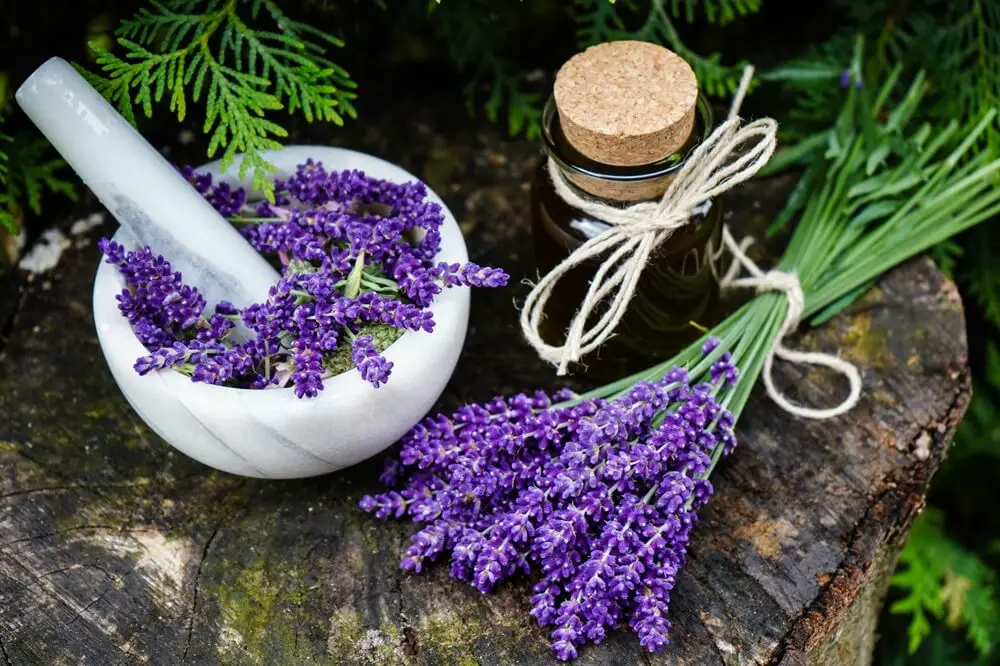
3. Lavender 

Lavender Dried Flowers

Lavender’s relaxing aroma is just the beginning. It’s also antifungal and calming for the skin. You can add dried lavender to bath salts, or use it in soothing balms and DIY sachets. 

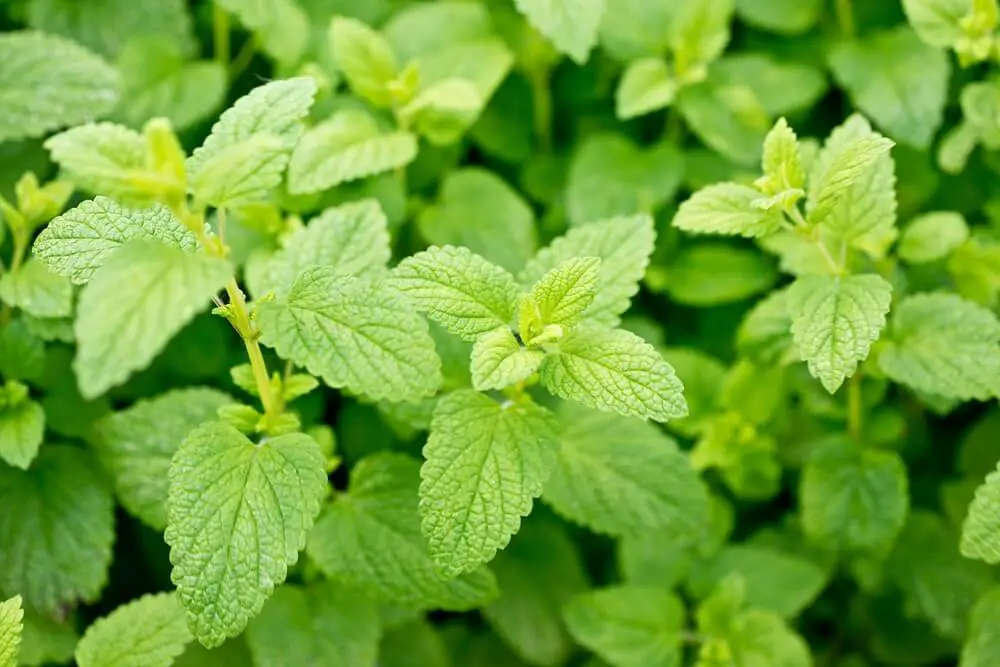
4. Lemon Balm 

Lemon Balm Herb

A mood booster and stress reliever, lemon balm also holds antiviral properties. Brew it as a tea for its uplifting effects, or include it in salves designed to tackle cold sores. 

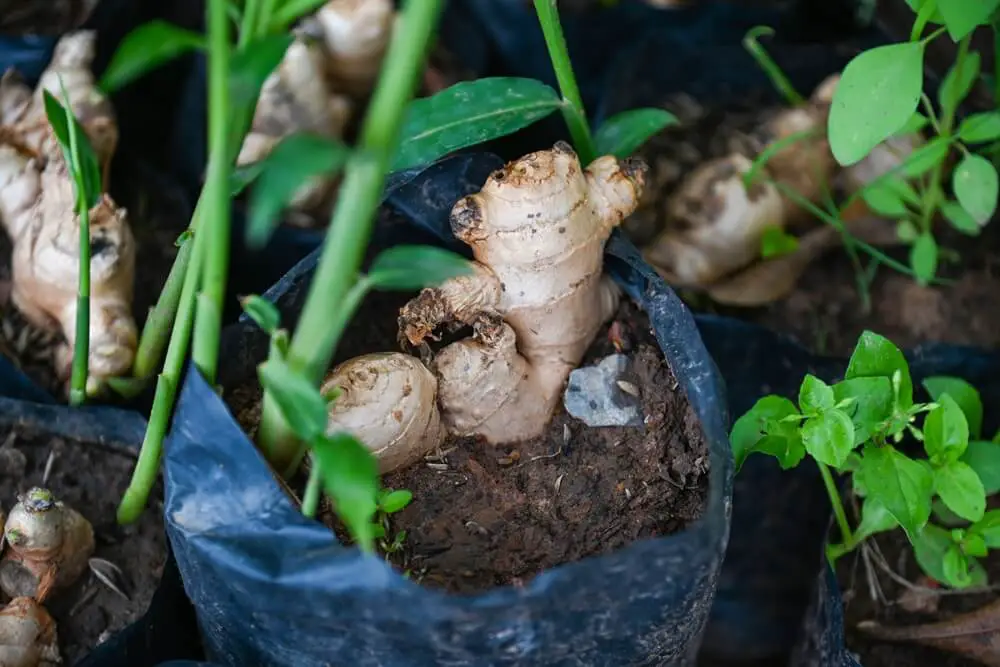
5. Ginger Root 

Ginger Root in Grow Bag

Ginger root is packed with anti-inflammatory and digestive-boosting benefits. Turn it into tea for an upset stomach, or infuse it with honey for a sweet and spicy immune booster. 

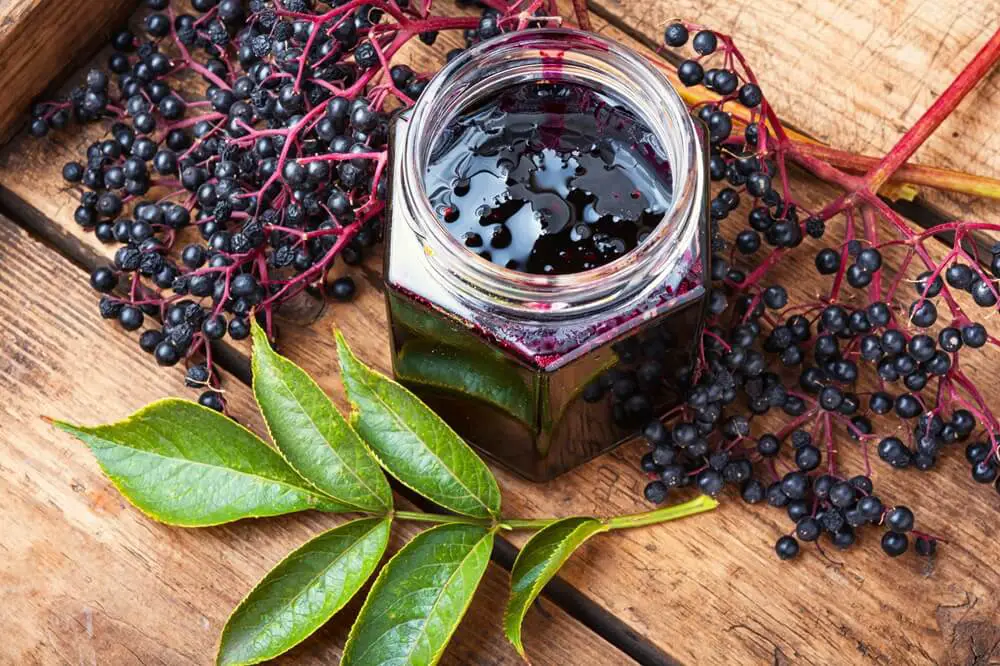
6. Elderberry and Elderflower 

Elderberry Jam in Jar

Elderberry is renowned for bolstering the immune system, while elderflower offers relief for sinus congestion. Both can be used in syrups or teas to keep colds at bay. 

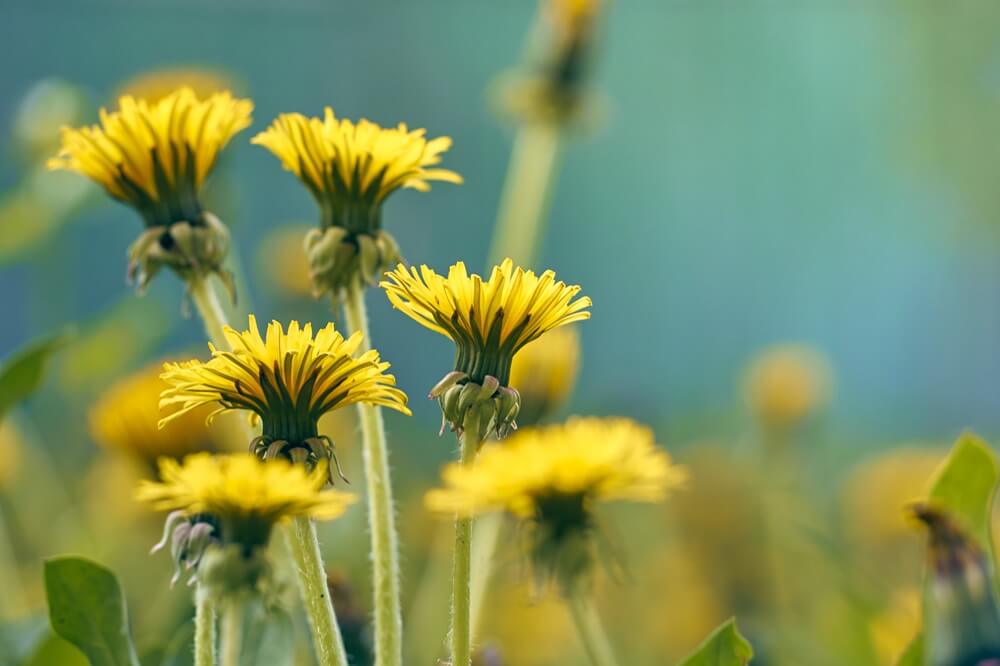
7. Dandelion (Leaf and Root) 

Dandelion Flowers Up Close

Don’t underestimate this backyard plant. The leaves support liver health and work wonders in salads or teas. The roots shine in detoxifying teas or roasted to mimic a coffee substitute. 

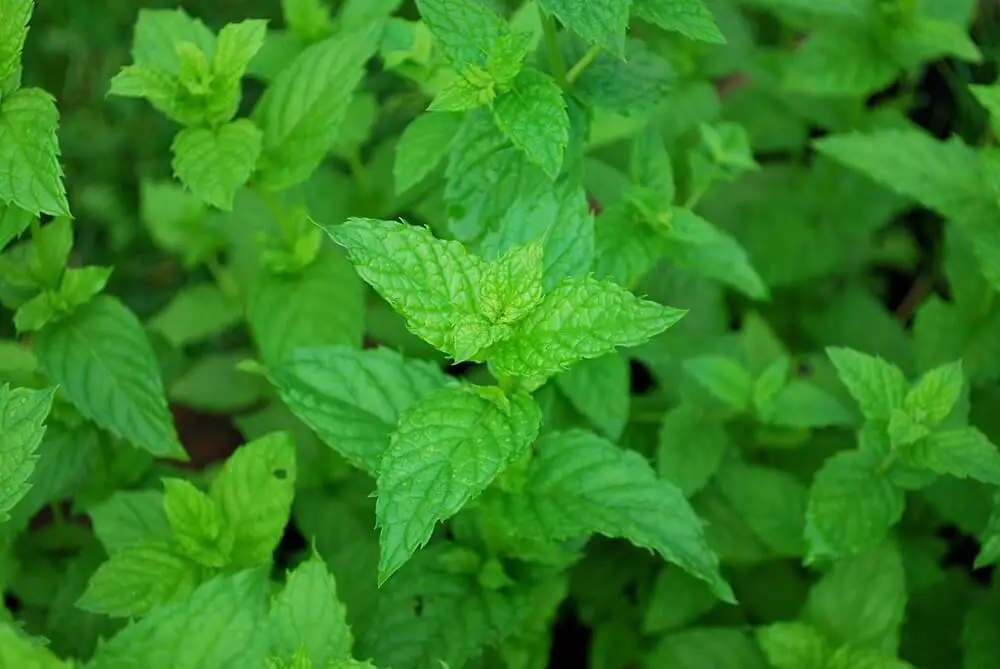
8. Peppermint 

Peppermint Growing in Garden

Peppermint is your digestive system’s best friend, alleviating bloating and nausea. Brew it as a tea or integrate it into a salve for a refreshing cooling effect. 

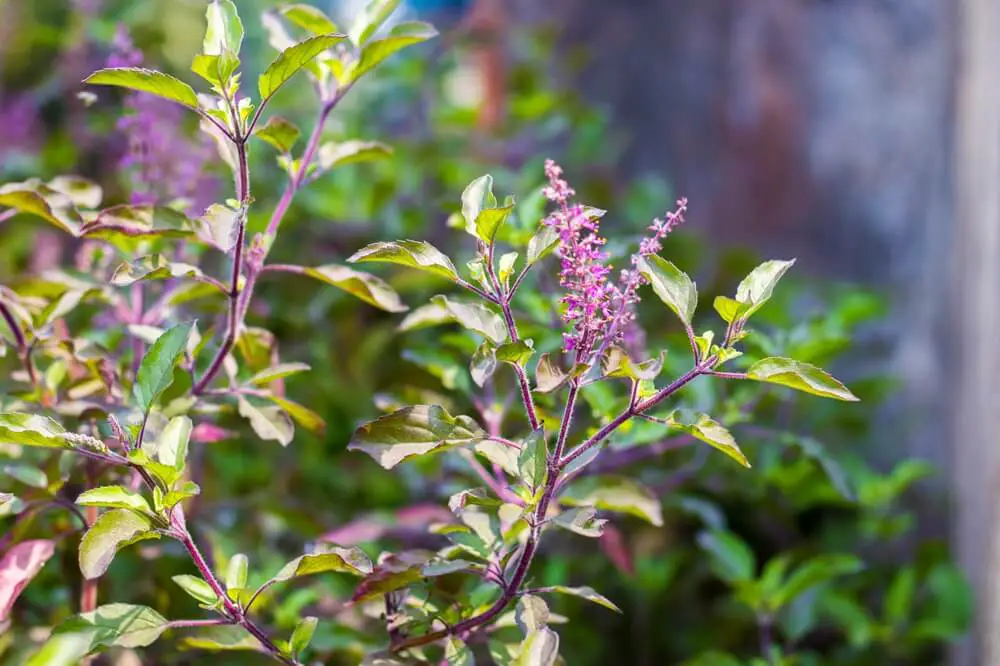
9. Holy Basil 

Holy Basil Tree Up Close

Also called Tulsi, holy basil brings adaptogenic properties, helping your body adapt to stress. It’s great in teas, tinctures, or even in culinary dishes. 

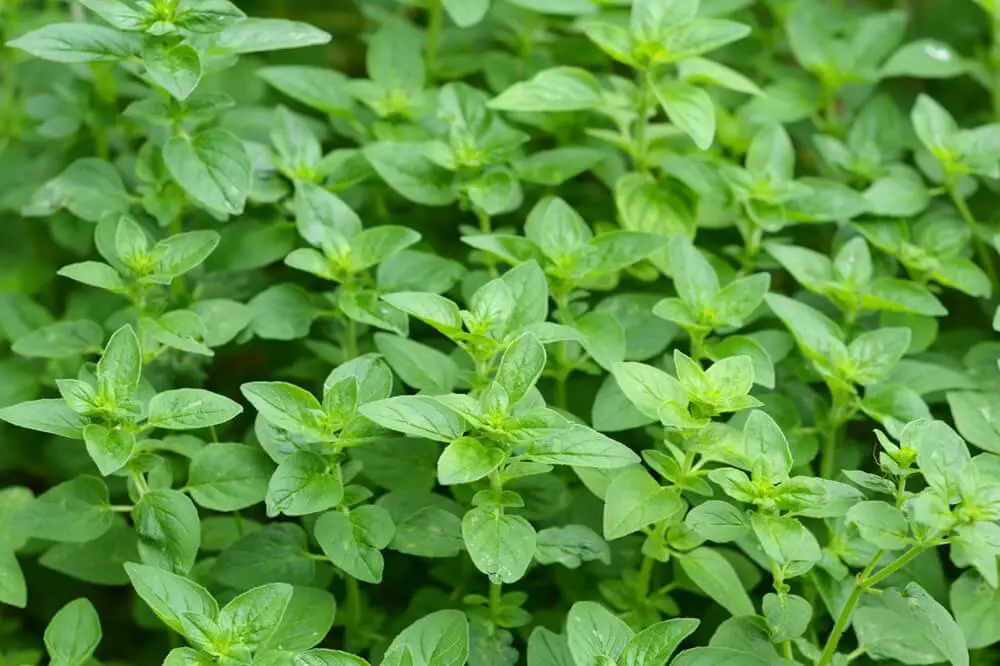
10. Oregano 

Oregano Leaves

A kitchen staple and a medicinal powerhouse. Oregano is antibacterial and antiviral, making it ideal for a steam inhalation or a herbal-infused honey. 

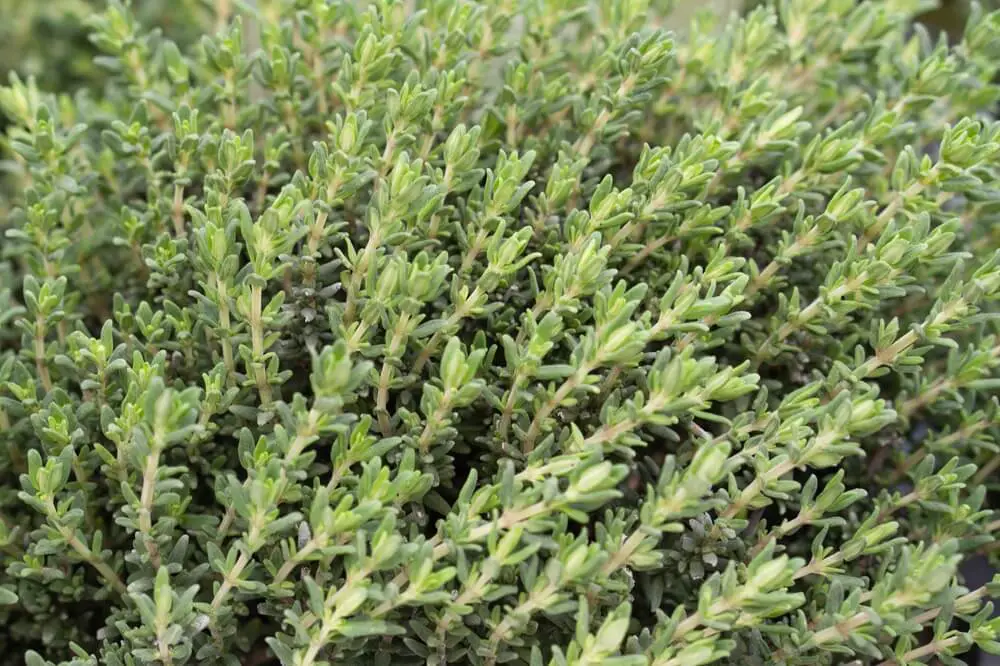
11. Thyme 

Thyme Plant Leaves

Thyme is excellent for respiratory health and has antiseptic properties. Use it for teas, in cooking, or as an infused oil for chest rubs. 

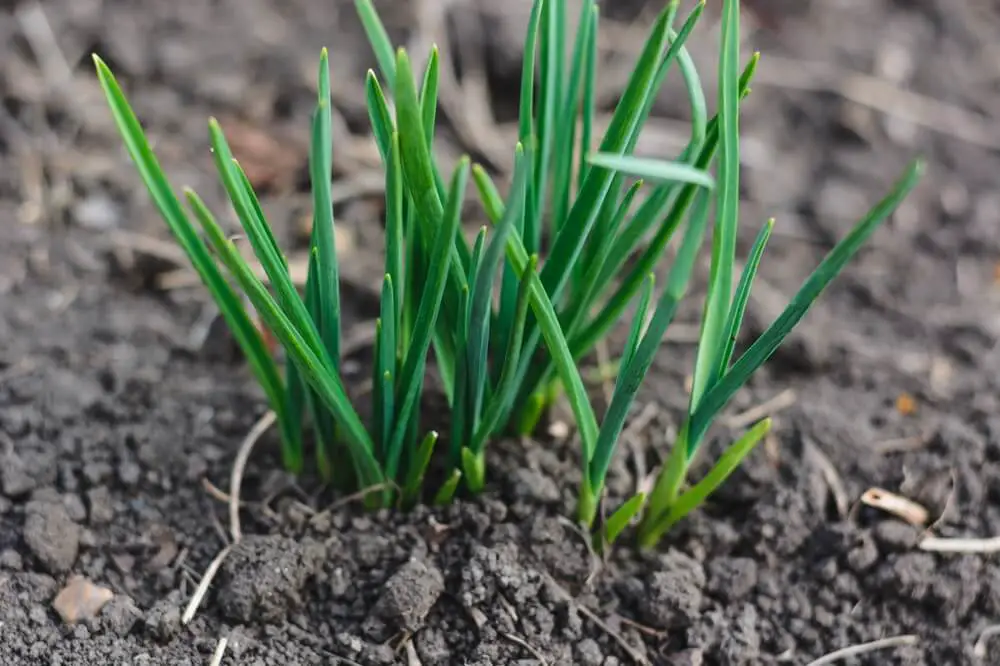
12. Garlic 

Garlic Plant in Garden

This pantry hero is packed with immune-boosting and antimicrobial properties. Create herbal-infused oils, medicinal syrups, or incorporate it fresh into your meals. 

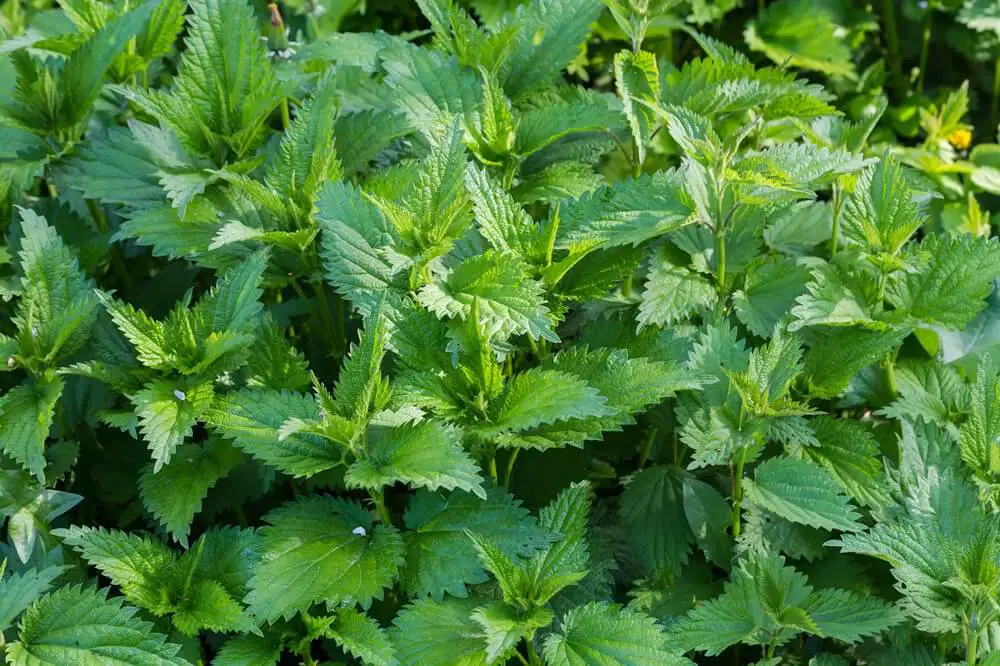
13. Nettles 

Nettle Stems in Garden

Full of vitamins and minerals, nettles are particularly valued for supporting fertility and bone health. Enjoy it as a tea, or use it in soups for added nutrition. 

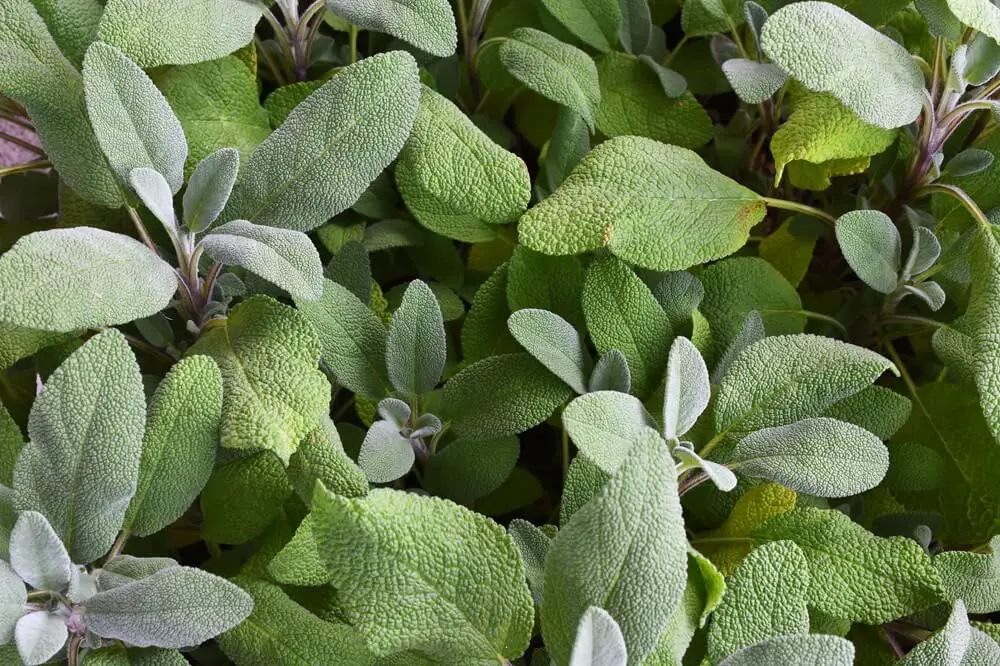
14. Sage 

Sage Plant Up Close

A natural antimicrobial, sage is great for warding off colds or as a digestive aid. Make it into a tea or use dried leaves as a smudge stick. 

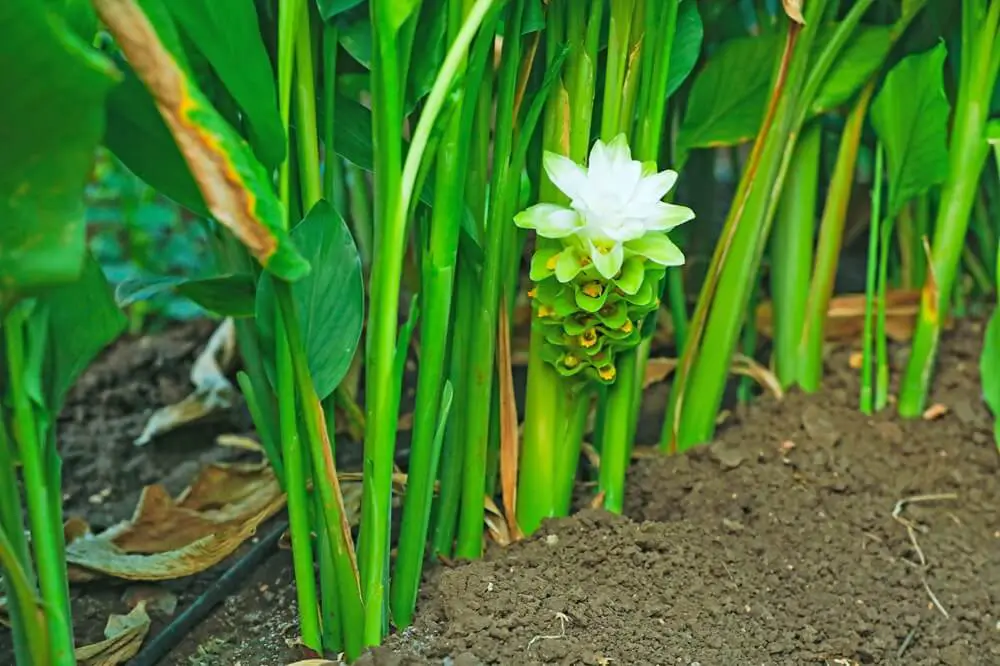
15. Turmeric 

Turmeric is famous for its anti-inflammatory benefits. Use it in teas, “golden milk,” or infuse it into oils for topical use. 

Best Herbal Remedies to Make

Here are a few popular methods you can start with:

Salves

Salves are an excellent starting point for herbalism. They’re essentially ointments made by infusing herbs into oils and then adding beeswax to create a soothing topical application.

For example, a calendula salve is perfect for dry or irritated skin. Simply infuse dried calendula flowers in olive oil, strain, and then mix with melted beeswax. Store it in a small tin or jar, and it’s ready to apply wherever needed.

Infusions

An infusion is similar to tea but often involves steeping herbs for a longer period to extract their full benefits. Start with herbs like chamomile, nettle, or peppermint. 

Add a tablespoon of dried herbs to a cup of hot water, steep for 10-15 minutes (or longer for stronger infusions), strain, and enjoy. Infusions are great for relaxation, boosting energy, or easing digestion, depending on the herb.

Poultices

Poultices are soft, moist herbal pastes applied directly to the skin to help with swelling, bruises, or minor wounds. 

To create a poultice, crush fresh herbs (like comfrey or plantain) and mix them with a small amount of warm water to form a paste. Apply it directly to the affected area and cover it with a clean cloth. This simple remedy has been used for centuries and is incredibly effective in providing localized relief.

Safety Tips for Herbalism

Before you start clipping away in your herb garden or bulk-order dried herbs, you need to keep safety in mind – it’s not something to relegate to the back burner! 

Here are a few tips to make sure your herbalist experience is both effective and risk-free.

Know Your Herbs 

Study your herbs before using them. Not all plants are safe for internal or external use, and some may even be toxic. Look for reliable resources, such as herbal medicine books or trusted websites, to learn about the properties and uses of specific plants. 

When in doubt, consult an experienced herbalist for guidance.

Start Slow 

It’s tempting to experiment with all your newfound herbal knowledge at once, but starting slowly is key. Begin with one or two herbs at a time to see how your body reacts. This also helps you clearly identify which herbs are most beneficial for your needs.

Check for Allergies 

Just like with foods, herbs can cause allergic reactions in some people. Perform a patch test before applying a remedy to your skin for the first time. For teas or infusions, start with a small amount to ensure no adverse reactions.

Use Quality Ingredients 

Choose high-quality, organic herbs free from pesticides and chemicals. Whether you grow them yourself or purchase them from trusted suppliers, quality matters when it comes to creating effective herbal remedies.

Be Mindful of Dosages 

Herbs are powerful and should be used responsibly. Follow recommended dosages and avoid overusing any one herb, as this may lead to unwanted side effects. Remember, more is not always better.

Understand Interactions 

If you’re taking medications, note that some herbs can interact with them. For instance, St. John’s Wort can interfere with certain medications like antidepressants and birth control pills. If you’re unsure, consult with a healthcare provider to avoid potential complications.

Practice Proper Hygiene 

When making herbal remedies, cleanliness is crucial. Sterilize containers and tools, wash your hands, and store your preparations properly to prevent contamination.

7 Mistakes to Avoid on Your Herbalism Journey

Apothecary Jars

While herbalism is an enjoyable and rewarding practice, beginners can stumble into common pitfalls. Avoid these mistakes to make your experience more successful.

1. Relying on Hearsay 

It’s easy to fall for informal advice or claims about an herb’s benefits, especially on social media. Always double-check information with well-researched sources or trusted experts. What works for one person might not work for another, so base your practice on reliable evidence.

2. Using Too Many Herbs at Once 

It’s a common mistake to overload your remedies with too many ingredients, thinking it will enhance their effectiveness. Instead, focus on simple, single-ingredient remedies or a minimal combination to better understand how each herb works for you.

3. Neglecting to Identify Plants Properly 

If you’re harvesting your own herbs, ensure you can correctly identify them. Some plants have toxic look-alikes that could cause harm. Invest in a good field guide or take a plant identification course to sharpen your skills.

4. Not Considering Sustainability 

While it’s wonderful to use nature’s gifts, some herbs are at risk of overharvesting. Be mindful of your impact by sourcing from sustainable suppliers, growing your own plants, or choosing alternatives when necessary.

5. Ignoring Expiration Dates 

Even dried herbs and homemade remedies have a shelf life. Using old, stale herbs may reduce the potency of your remedies. Label your creations with the date they were made and follow proper storage guidelines to keep them as fresh as possible.

6. Forgetting to Keep Records 

Maintaining a herbalism journal is invaluable. Record the herbs you’ve used, the recipes you’ve tried, and how they’ve worked for you. This habit not only helps you refine your practice but also prevents you from repeating mistakes.

7. Overlooking Guidance 

While trial and error is part of learning, don’t shy away from seeking expert advice. Whether it’s a professional herbalist, a workshop, or an online course, tapping into experienced knowledge will help you avoid unnecessary errors and expand your understanding.

Final Thoughts

Getting started with herbalism is about more than just taking chamomile tea before bed. It reconnects you with traditions that have supported human health for centuries. You’ll gain a deeper respect for natural remedies, develop a slower, mindful approach to wellness, and expand the tools at your disposal to care for yourself and your family. 

Herbs have been quietly offering their support for generations. With just a little effort, you can unlock their benefits and welcome a wealth of health and harmony into your life. 

Whether you’re sipping peppermint tea for digestion or growing lavender on your windowsill, the world of herbalism invites you to take that first step. Who knows? It might just be the most rewarding habit you’ll adopt this year. 

Like this post? Don't Forget to Pin It On Pinterest!

You May Also Like:

The post Herbalism for Beginners: How to Get Started appeared first on Homestead Survival Site.


from Homestead Survival Site https://ift.tt/217HTOY

What to Plant in January

What to Plant in January-Zones 1-10

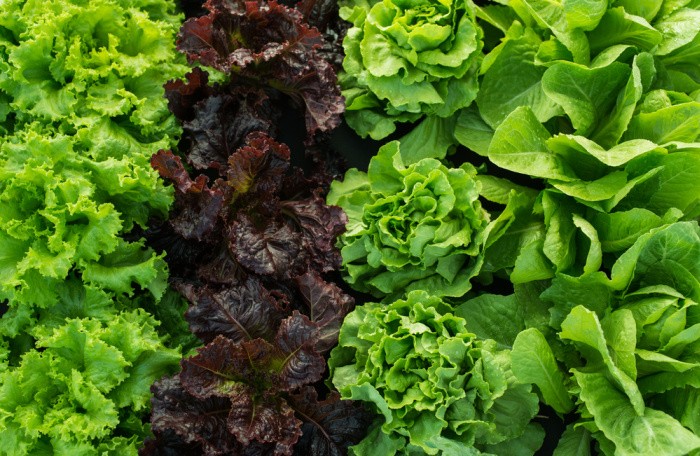
I know what you are thinking: Who plants things in January?! January isn’t considered a prime planting and gardening month, but gardeners in frost-free zones know this is the perfect time for cool-season vegetables. Knowing what to plant in January is the key. In case you missed this post, What Flowers to Plant in January

If you live in an area with frost, you can always plant indoors and move your stuff outdoors as the season warms up. I highly recommend these for seedlings: CowPots and Organic Seedling Soil; this way, you can plant your seeds and place the CowPots in your garden when the temperatures are correct. Where I buy my garden seeds: SeedsNow

It’s been harder to determine the time to plant outside the last few years because the weather has changed, unlike any time in history. I believe regular planting zone times will have to be changed very soon due to the uncertainty of the weather.

What to Plant in January

What to Plant in January

When gardening, it is essential to know what zone you live in. Check here to find your zone. All you need to do to find your zone is type in your zip code. Below, you will see what you can plant in your zone in January!

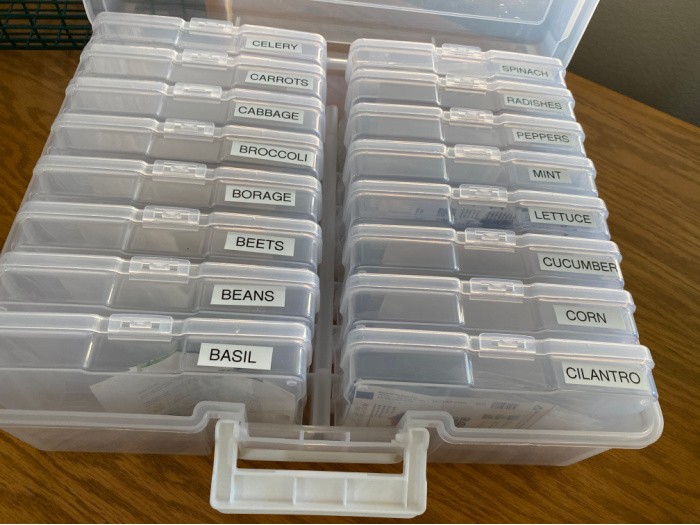
How I store my garden seeds: 

Plastic Photo Container and Label Maker

Garden Seed Container

What to Plant in January 1-5

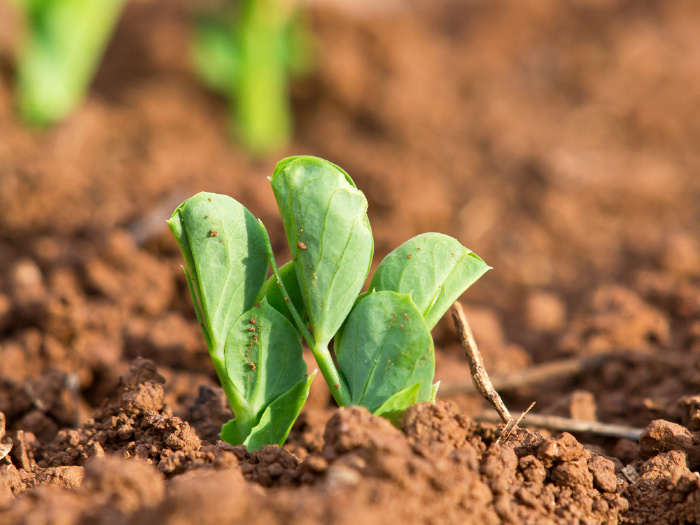
Planting Peas In The Garden

If you live in zones 1-5, it’s cold outside in January. This means that you must stick to growing things indoors.

Some vegetables, called microgreens, can be planted indoors and harvested when they are young. In addition to microgreens, here are some other plants you can try:

  • Arugula
  • Beet greens
  • Mizuna
  • Pea shoots

Zone 6

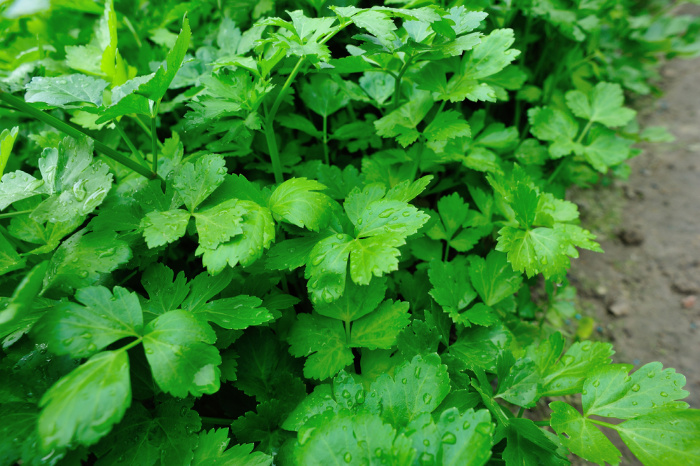
Growing Celery In The Garden

In zone 6, you can start your plants inside because you can transplant them outside in 8-10 more weeks. You have more options in this zone than in zones 1-5. Some seeds you can start inside to transplant later include:

Zone 7

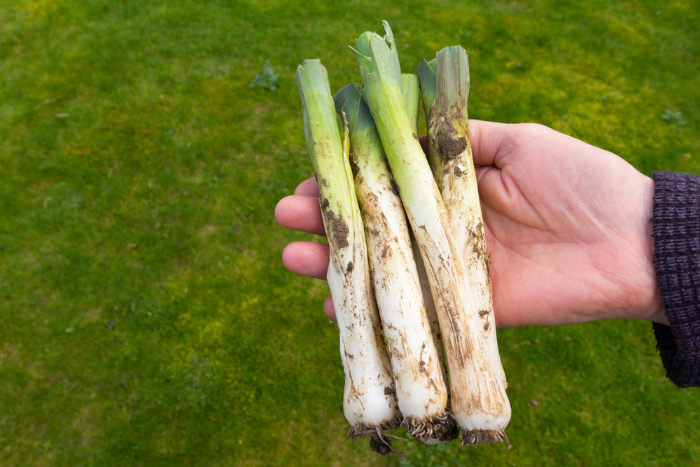
Freshly Picked Leeks From The Garden

You know how tricky the weather is to predict if you live in Zone 7. However, in this zone, you can plant things inside and transplant them outside when the weather warms up. Some things that do well inside Zone 7 include:

Start these at the end of the month:

  • Broccoli
  • Cabbage
  • Cauliflower
  • Kale
  • Lettuce

What to Plant in January in Zone 8

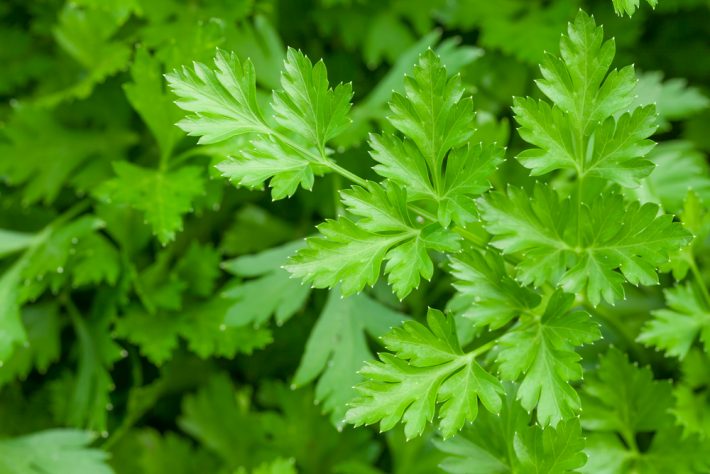
Growing Parsley In the Garden

If you live in Zone 8, you are in luck because you can plant things indoors and outdoors. Many indoor seeds can be transplanted in 8-10 weeks. Here is what you can plant both indoors and outdoors in Zone 8:

Indoors

Plants you can start indoors in January include:

These will need extra time to grow indoors before being transplanted outside. Start them early in the month. 

Outdoors

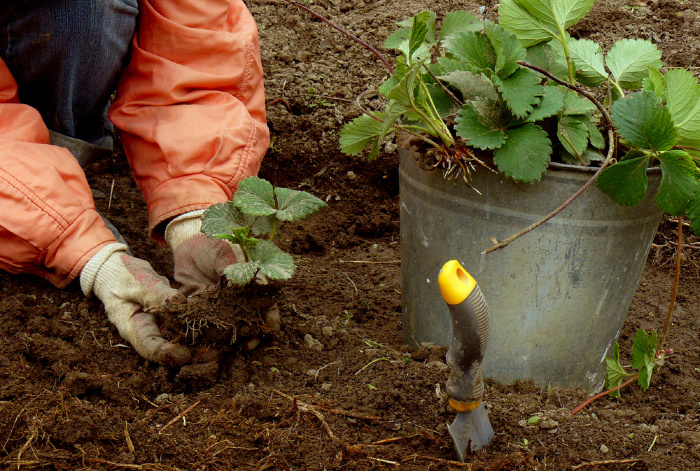
Getting ready to plant strawberry plants

Before planting outdoors, you want to check your soil and make sure it can be worked. If it is, then you can plant the following outside in January:

If the ground is not still saturated from winter, you can also plant the following:

  • Beets
  • Bok Choy
  • Carrots
  • Radishes
  • Peas

Zone 9-10

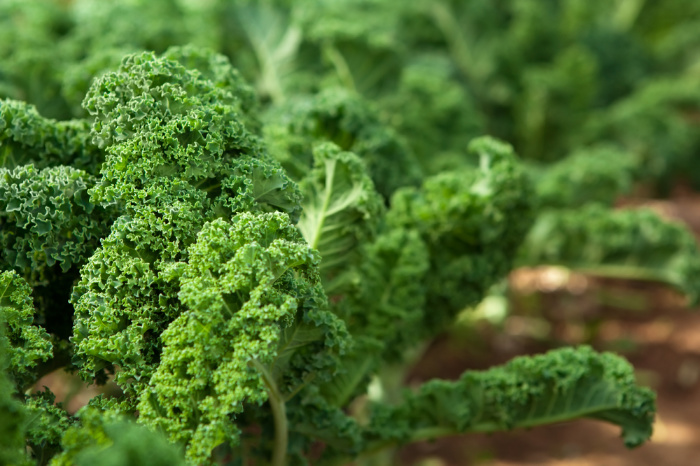
Growing Kale In The Garden

If you want to know what to plant in January in Zones 9-10, remember that gardening is in full swing for Zones 9-10.

The incredible growing season is ideal for many herbs and vegetables indoors and outdoors. If you live in these zones, you have a lot of possibilities. 

Indoors

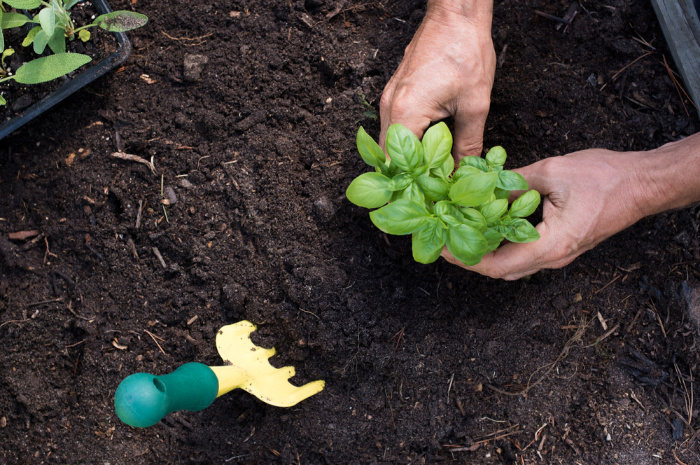
Planting a small basil seedling

In January, you can start seeds of vegetables and herbs inside and transplant them outside later. Here is what you can start:

  • Eggplants
  • Kale
  • Lettuce
  • Melon
  • Peppers
  • Squash
  • Tomatoes
  • Basil

As the weather heats up, these seedlings can be transplanted outside. 

Outdoors

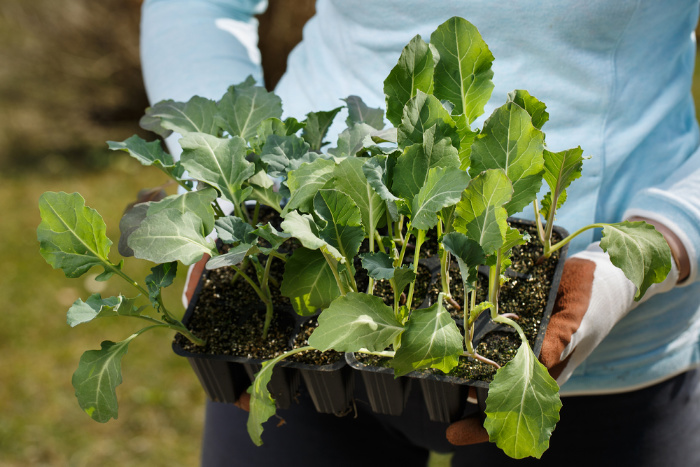
Broccoli seedlings ready to plant

In Zones 9-10, you also have quite a few options for what to plant outdoors. Here’s what you can transplant outdoors:

  • Broccoli
  • Cabbage, cauliflower
  • Chard
  • Asian Greens

Here is what you can direct sow outside during January:

  • Arugula
  • Cabbage
  • Carrots
  • Kale 
  • Lettuce
  • Onions
  • Peas
  • Radishes
  • Spinach
  • Turnips
  • Chives
  • Cilantro
  • Parsley

How to Start Seeds Indoors

Because most zones in January are still cold, you may have to start many of your plants indoors.

Some plants, such as tomatoes, eggplants, and peppers, require much longer growing seasons than your zone may offer. To ensure healthy growth, many gardeners will start their plants off inside.

If you are new to gardening, you may not know the best way to do this. Follow the instructions below to learn how to start your seeds indoors!

Buy Your Seeds

Before you begin, the first thing you have to do is to buy your seeds. You don’t want to buy any old seeds, however.

You want your seeds to be provided by a trusted source. Fresher, higher-quality seeds have a higher germination rate.

This means you will have more seeds sprouting, giving you a head start in growing deliciously nutritious veggies.

Pot Seeds with Seed-Starting Mix

The seed-starting mix isn’t soil. However, it provides near-perfect conditions for sprouting seeds. It does this by providing a good balance of drainage and water-holding capacity while minimizing disease.

Most garden soil is unsuitable for starting seeds because it doesn’t drain well and may contain plant disease spores. 

Use Pots with Drainage Holes

You can plant your seeds in whatever you want if you poke some holes in the container to allow water drainage. Without water drainage, you can drown your plants or cause the roots to become diseased. Here are some pot ideas you can try:

Plant Your Seeds Deep Enough

One thing that many tend to do is plant their seeds too deep. If you plant them too deeply, they won’t sprout. The rule of thumb is to plant your seeds 2-3 times as deep as the seed is wide. For example, a bean would be sewn about an inch deep.

Place Seeds in a Warm Location

After you sow your seeds, you will want to place the pots in a warm location. Some good ideas would be on the refrigerator or near a radiator. 

Keep Seed Starting Mix Moist

Your seedlings will need both air and water. Therefore, you should keep the mix moist but not completely saturated. To do this, think of a damp sponge containing air and water. 

Place Sprouts in a Bright Spot

You will want to move your seedlings to a bright or sunny location as soon as they begin to sprout. You can place them in a sunny window.

However, if you aren’t getting a lot of sunshine, adding consistent light from supplemental fluorescent lights does the trick. Be sure to suspend the lights an inch or two over the plants. 

Fertilize Weekly

Once your seedlings have sprouted one or two sets of leaves, it is time to start fertilizing. Use a half-strength fertilizer. Organic fertilizers are the best choice because they provide nutrients and micronutrients your plants need to thrive. 

Make Sure You Only Have 1 Seedling per Pot

You may notice two or more seedlings popping up. You only want one seedling per pot. Then, choose the healthiest and strongest-looking seedlings to keep. Cut the other seedlings off in the soil and discard them. 

Planting and growing your seedlings is a fun and rewarding way to kick off the gardening season. 

How To Hand Pollinate If You Need Too

Hand Pollinate Flowers

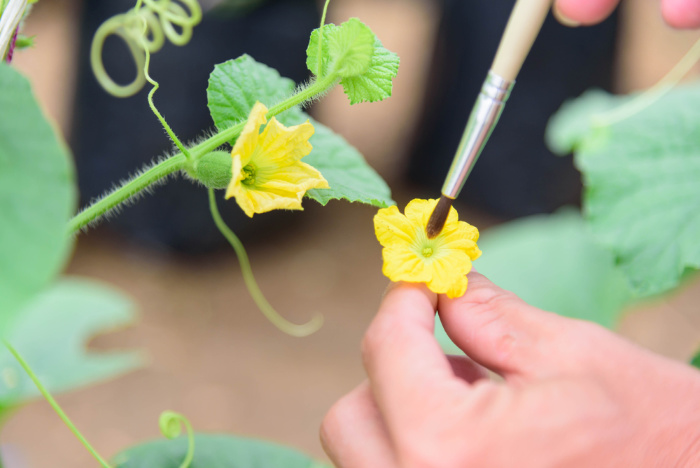
All you need is a paintbrush or cotton swab (see above). If you need to hand pollinate because you are not seeing any fruit develop, here is something you may want to try. You do this by removing the male blossom (male blossoms do not have fruit behind them).

They produce pollen, leaving the center covered in the pollen to collect with the brush or swab. Use a brush or swab to apply the pollen you collected to the center of the female flower. This works for squash, melons, and cucumbers every time.

Please Check Out What To Plant Each Month:

Garden Gloves

These are my favorite garden gloves: DIGZ Garden Gloves . They come in different sizes, which I love the most. These are the best rose bush gloves: Rose Bush Garden Gloves. I have to get a large size for my hands. These are awesome!

Final Word

As you can see, what you plant in January depends on the zone in which you live. If you live in zones 9-10, you have many more options for planting in January than those in zones 1-5. Check out our other posts to find out what to plant each month of the year! May God bless this world, Linda

Copyright Images: Lettuce Deposit photos_229581018_s-2019

The post What to Plant in January appeared first on Food Storage Moms.


from Food Storage Moms
Is the US on the Brink of Collapse

It’s a question that many of us are afraid to ask but can’t ignore any longer. Is the United States on the verge of a massive collapse? Signs are all around us, whispering — or even shouting — that something is about to give. The nation that once prided itself on being a beacon of […]

The post Is the US on the Brink of Collapse appeared first on Ask a Prepper.


from Ask a Prepper https://ift.tt/YmhId5X

Sunday, December 29, 2024

How to Turn Fat and Ashes Into Soap

Estimated reading time: 13 minutes

How to Turn Fat and Ashes Into Soap

The fundamental recipe for soap is a combination of lye and fat. The fat can be an animal fat or vegetable-based oil, but those are the two primary ingredients. 

When the proper amount of fat and lye is heated it causes the molecules in the fat to bond with the lye molecules, and when allowed to cool it hardens. That hardened combination is what we commonly think of as soap.

It’s unusual for someone to go out and buy some lye and fat to make soap. But in extreme times, you might want to at least know how to make your own. Fat and ashes are common and if you know a bit about how to put them together, you can make soap for general bathing to laundry to just doing the dishes.

Want to save this post for later? Click Here to Pin It On Pinterest!

A Bit of Science

Reducing Lye

Lye is the key to soap making. And it’s dangerous. It has a pH of 13. If you don’t know what that means, it's all about the pH scale. It runs from 0 to 14 and measures the acidity and the alkalinity of everything. 

Hydrochloric acid is at the 0 end of the scale. It’s scary stuff. But lye lands at the 13 end of the pH scale. It’s just as toxic and dangerous as hydrochloric acid!

Lye is the active ingredient that gives soap its cleaning properties. There are two types:

1. Sodium Hydroxide (NaOH)

The lye that is purchased commercially from a store or online is known as sodium hydroxide. It is a potent chemical and can cause severe burns if it comes in contact with skin, and blindness if it splashes into the eyes and is not immediately treated.

2. Potassium Hydroxide (KOH)

The lye from wood ash is known chemically as potassium hydroxide. It’s less caustic than sodium hydroxide but can still cause injury to both the skin and eyes.

As we get into this process, we’re going to detail how to extract lye from wood ash and then concentrate it. Be careful, and we’ll detail how to do this safely.

As far as the fat component is concerned, things get a little simpler. Pick your fat: bacon fat or lard, beef fat or tallow, and any assortment of oils from olive oil to corn oil. If it has fat molecules, it will properly bond with the next and most important process step.

About Saponification

Combining Lye and Fat to Saponify

Saponification is what converts lye and fat into soap. It’s a simple process where the fat and lye are slowly and carefully heated over a period of time. The saponification process binds the fat molecules to the lye. The result is a hard bar of solids that we call soap. We’ll go step by step through the whole process.

Urban Soap Making

Soap making seems like a primitive, pioneer exercise. But anyone can do it. If you have any access to ash and fat, you can make soap. It can be more of a challenge in an urban environment, but if you can burn something to ash (especially wood), you’ll have a fighting chance. 
Ash sources vary but generally the ash from oak, maple, hickory, and even ash trees make the best source of ash for soap making.

If you have a pellet stove, you’re really in luck. The white ash from a pellet stove which is the result of burnt hardwood pellets is one of the best ash sources for soap making.

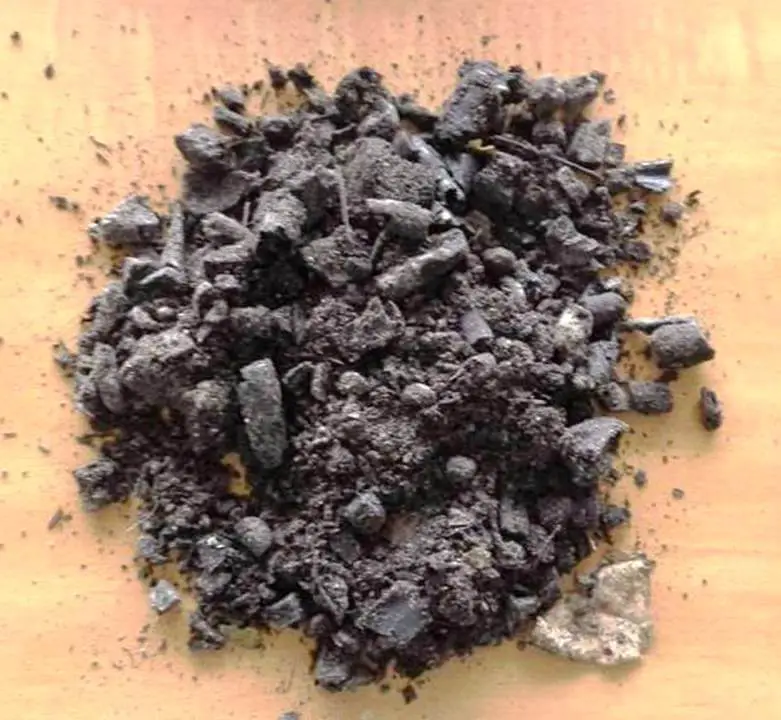
If you’re depending on ash from a wood stove or fireplace, you have some work to do. You’ll have to run it through a screen to clear out the large bits of charcoal.

In an urban environment you could also use lumber, but don’t use any treated wood. The chemicals won’t completely burn off, and the last thing you want is a bar of soap saturated with harsh, water-repelling chemicals.

In a real pinch, you could even burn newspapers and magazines to create a source of ash.  It may take longer to concentrate the lye derived from paper sources to get to a pH of 13, but if it’s all you have, it can work.

Ash 101

Wood Ash Pile

You don’t want chunks of charred wood or charcoal in your ash harvest. You want pure, white ash and nothing more as much as possible. What you’re eventually going to do is percolate water through the white ash to draw out the lye in the ash. 

Do what you can to pulverize the ash and filter it through a screen.

You can buy lye online, but in desperate times, it’s wise to know how to make your own.  But be forewarned that lye is highly toxic, and as you distill and concentrate the lye from your ash collection, it will become a somewhat dangerous distillation.

Regardless of where you harvest your ashes, it’s best to screen them. Use a wire mesh or screen. You’re just trying to get rid of those clumps and lumps of charcoal and bits of cold coals. You just want powdery, fine ash.

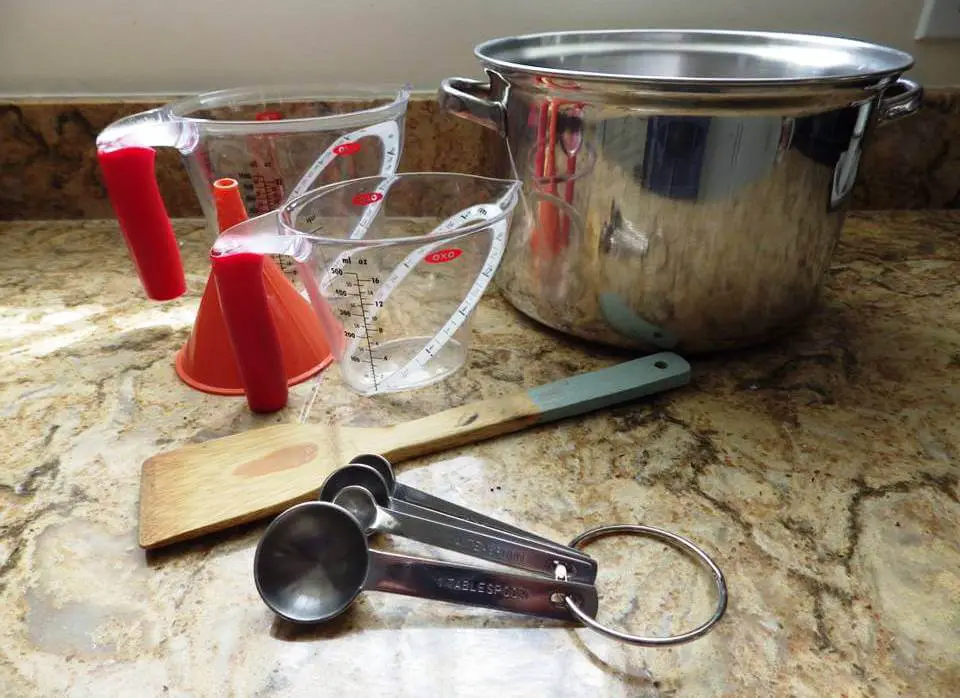
Basic Equipment, Tools and Supplies

Soap Making Equipment

There are various steps to the process requiring a basic collection of equipment, tools and supplies. 

Equipment:

Tools:

  • A drill with a 1/2 -inch drill bit
  • A large ladle for pouring the soap into molds

Supplies (ingredients):

  • A large bucket of ash preferably from a hardwood fire and ideally from a pellet stove.
  • Fat or oil. You could render pork fat into lard, beef fat into tallow, or use any type of vegetable or seed oil. 
  • Gravel and straw to keep the ash from mixing into the lye while it percolates through the bucket
  • Soft water with few or no minerals. Rainwater is best.
  • Kosher salt (optional). Adding salt makes a harder bar of soap and coarse kosher salt will act as an exfoliant if added towards the end of the process.
  • Parchment paper to wrap your soap bars or aluminum foil.

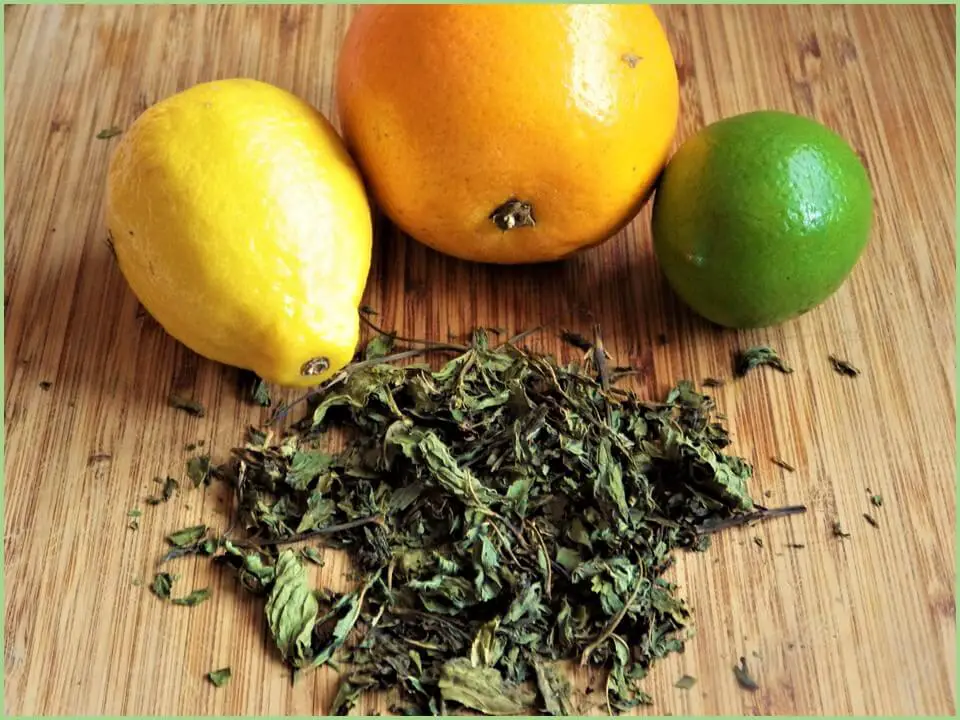
Adding Herbs, Fragrances or Essential Oils

Orange Lemon Lime Herbs
  • Many soaps have a fragrance, and you can create your own using either herbs; rinds from lemons or oranges and fragrances derived from essential oils. 
  • You’ll want to chop the fresh herbs or zest the rinds from the oranges. With essential oils a few drops will do. 
  • Lemons, limes and oranges are popular citrus rinds for adding fragrance to soap, and lemon balm, mint, lavender, rosemary and thyme are the most commonly used herbs. 

The Ash to Lye Distillation Setup

Ash to Lye Distillation Setup

This isn’t hard to do. All you’re trying to accomplish is creating a setup to allow water to slowly percolate through ash and release a weak lye solution into a pot.

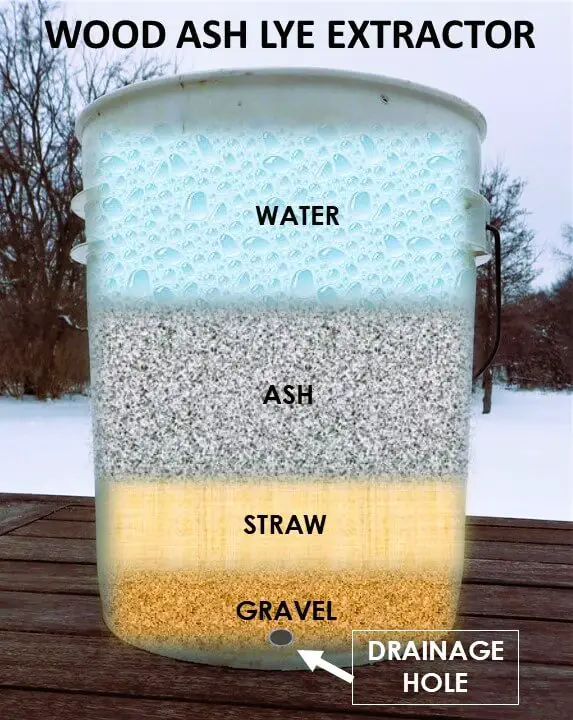
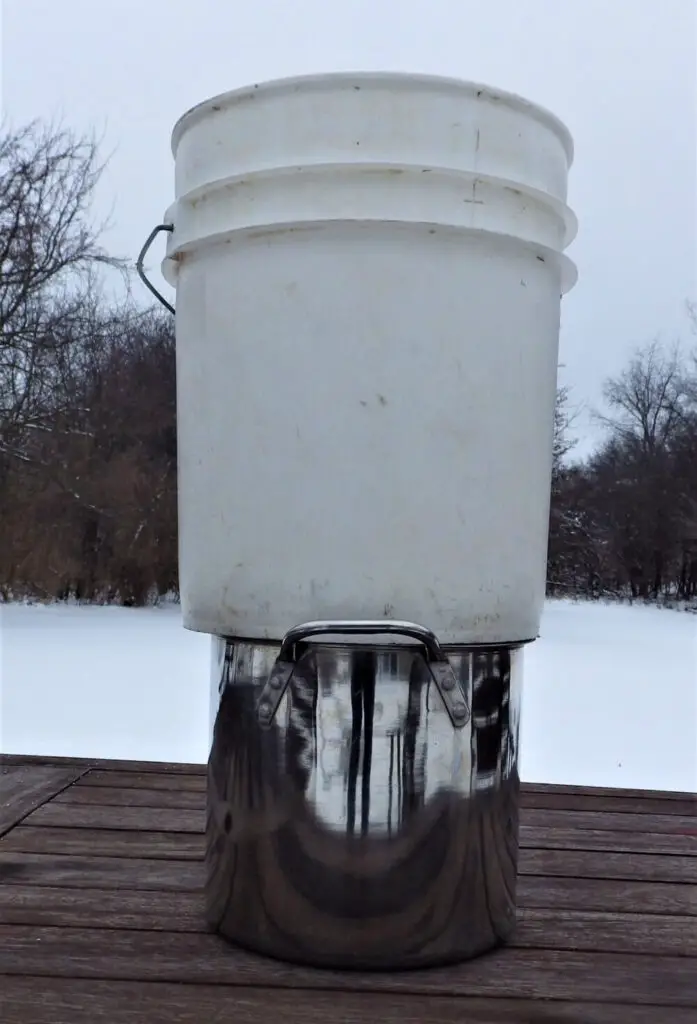
It starts with a 5-gallon bucket with a hole drilled in the bottom about the diameter or your thumb. This 5-gallon bucket is then set on top of a large stainless-steel pot. 

Lye Extractor Setup

Don’t use an aluminum pot! The lye will erode the aluminum. It has to be stainless steel, although our pioneer ancestors sometimes used cast-iron. Use what you have, but just don’t use an aluminum pot.

There are some layers to put into your 5-gallon bucket. Start by putting some straw at the bottom topped with some gravel. Layer some more straw or dry grasses over the gravel about 3 inches thick. You then fill the bucket with your ash but leave about 3 to 5-inches of headspace at the top.

You then pour boiling water into the top of bucket over the ash. As the water percolates through the ash, continue to add more boiling water. Be patient. This can take hours and even days. Continue to leach the lye out of the ash until your stainless steel pot is about half full. You’re now ready to concentrate the lye.

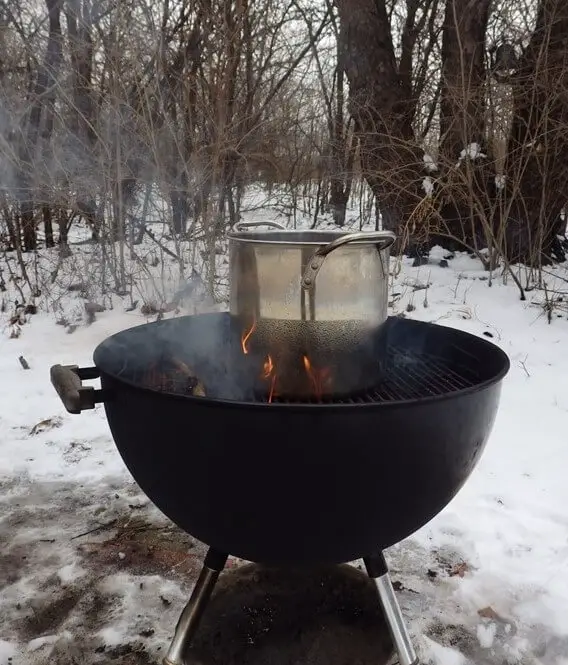
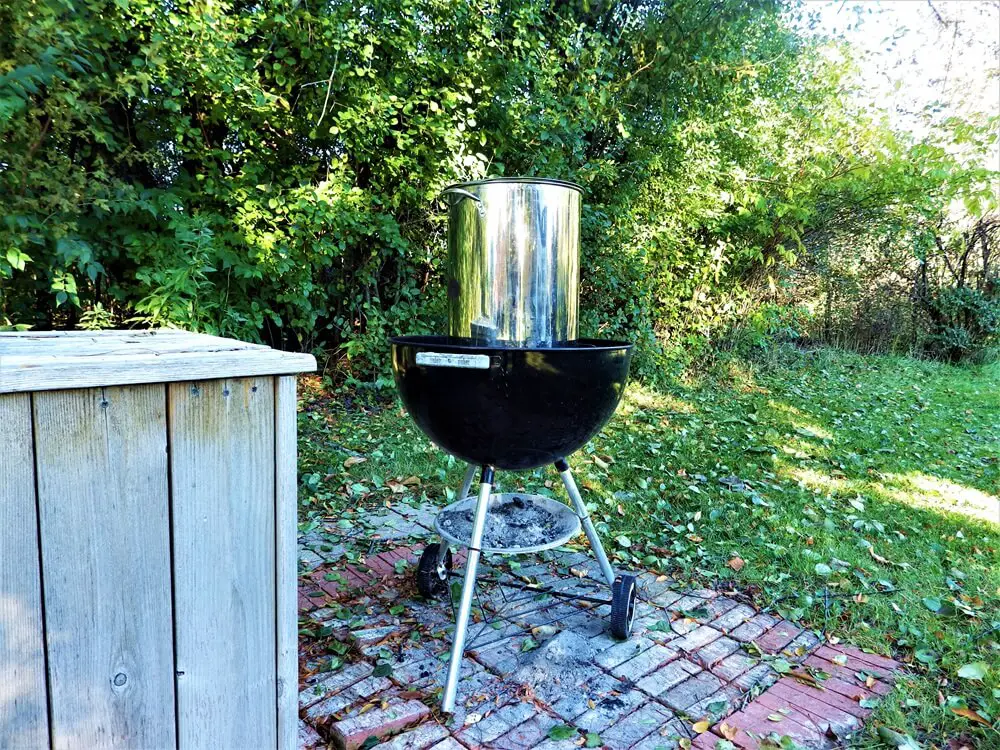
Reducing the Lye

Concentrating Lye Over a Fire

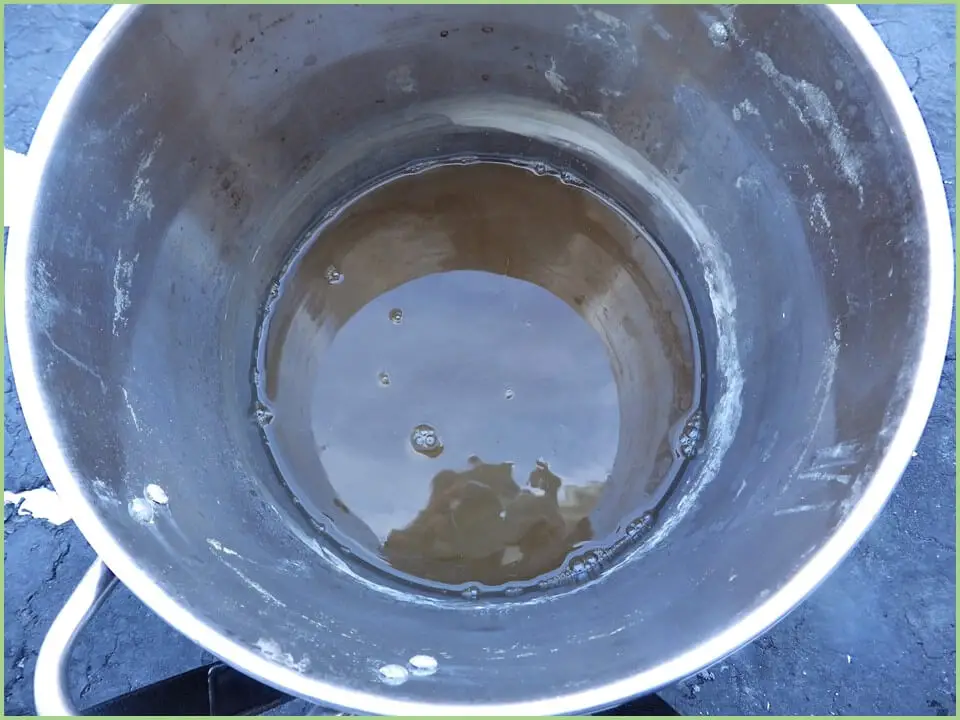
This is where things get a bit dangerous. You want a low and slow fire. You don’t want a pot of bursting and bubbling lye. The idea is to evaporate the water carefully and reduce the lye to a pH of 13. 

Make sure you wear eye protection, leather gloves, a long-sleeve shirt or jacket, and a face mask is also a good idea. As the lye concentrates, it will become more corrosive.

When you get to a pH of 13 with your concentrated lye, remove the pot from the heat and let it cool completely. Stay cautious. Even when cool, the lye can cause blisters or worse. 

Saponification 101

Outdoor Setup for Soap Making

To start the soap making process, you need to start with an empty 5-gallon stainless steel pot. Here are the specific steps and proportions:

  1. For 2 bars of soap, measure 1 cup of hot fat and set aside.
  2. Bring 3/4 cup of the concentrated lye to a medium boil in a stainless-steel stockpot and slowly add the fat stirring as you go. To make more soap, scale up the amounts of lard and fat proportionately and use a larger pot.
  3. DON’T ADD THE LYE TO THE FAT. It will splatter. Always add the fat to the lye.
  4. Add a ¼ teaspoon of salt if you want a harder soap.
  5. Continue to boil the mixture stirring constantly for 3 minutes until thick like porridge with no chunks.
  6. Reduce the heat to keep warm around 100 degrees Fahrenheit.
  7. Stir the mix for a minute and then let the mix sit for 10 minutes and stir again.
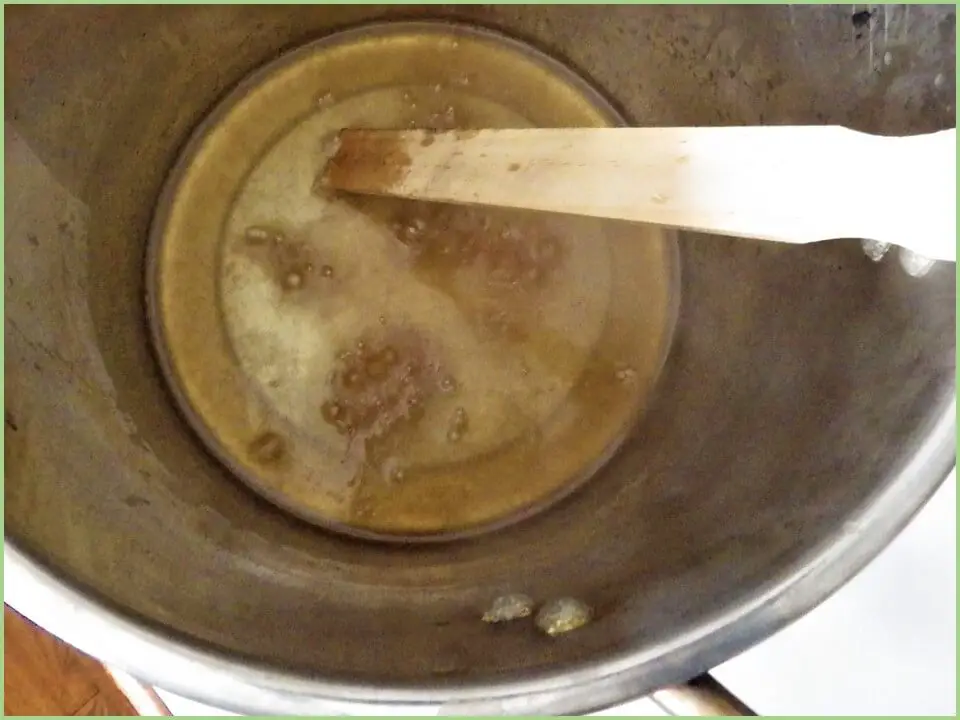
  8. Repeat this gradual heat and stir every 10 minutes until the soap batter turns a golden brown. The color can vary depending on the type of fat and the purity of the ash you used for the lye. This part of the process can take hours so be patient. It can also happen faster.
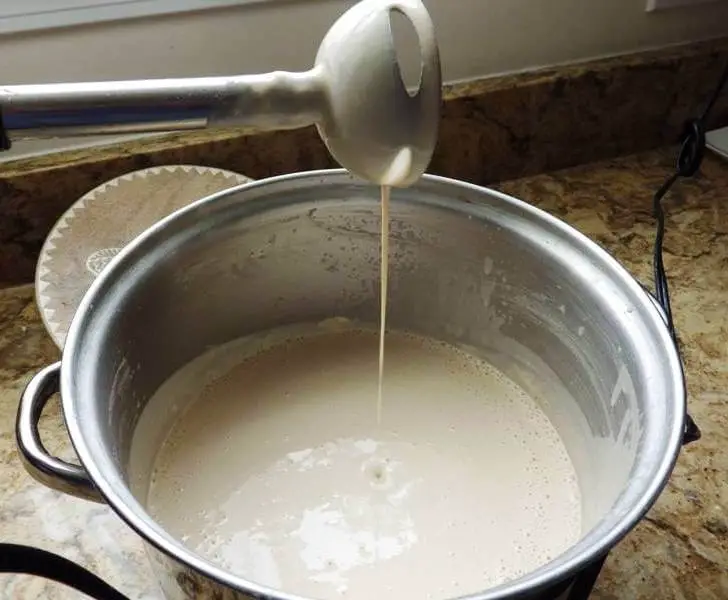
  9. To determine doneness, lift the soap solution from the pot with a ladle and look for a long, steady stream. This is called a “trace test” and is a good indication that saponification has occurred.  
Soap Trace Test
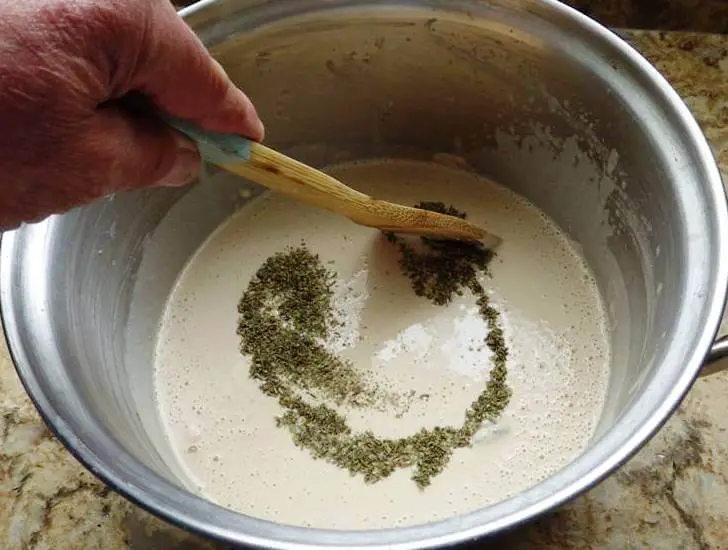
  1. At this point you can mix in your chopped herbs or citrus rings or essential oils to lend a fragrance and exfoliant properties.
Stirring Herbs Into Soap

This is also when you could add coarse kosher salt to act as an exfoliant.

Creating the Soap Bars

Wood Ash Soap Curing

Once your soap has fully saponified and after you’ve added any fragrances, you’re ready to make your soap bars.

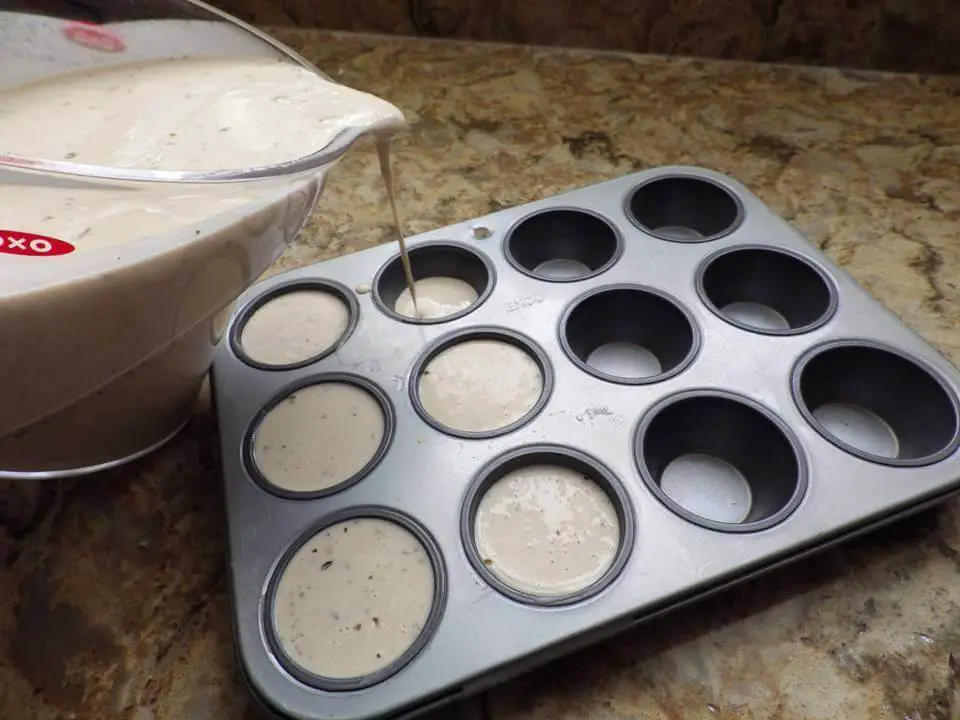
Filling Cupcake Tin With Soap

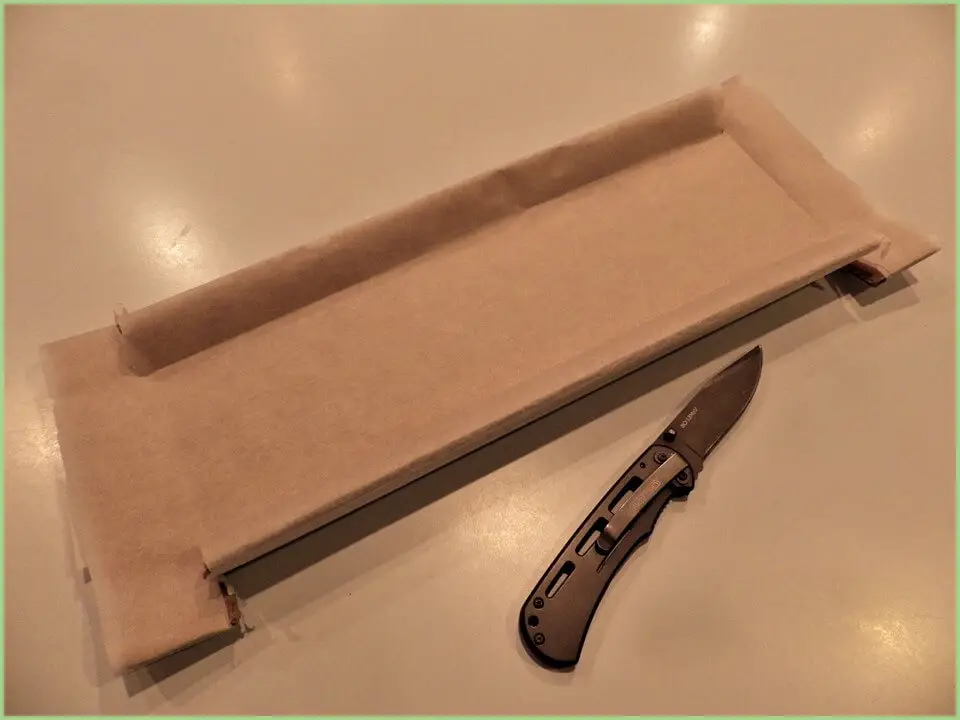
Cupcake tins are an easy option but if you want a bar of soap that actually looks like a bar or soap, you can make a mold out of cardboard or buy the molds on Amazon. 

Cardboard Soap Mold

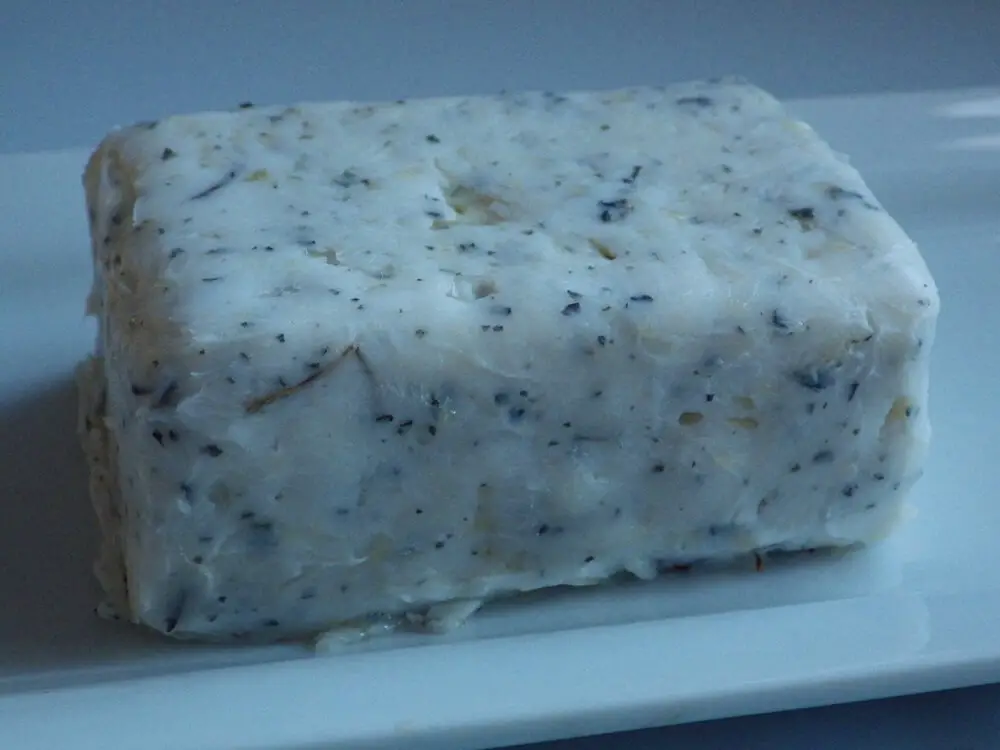
The cardboard mold will essentially give you a large brick of soap as long and deep as your mold. Once it has hardened, a large chef’s knife can be used to simply slice the brick into the sizes you want. 

Curing the Soap Bars

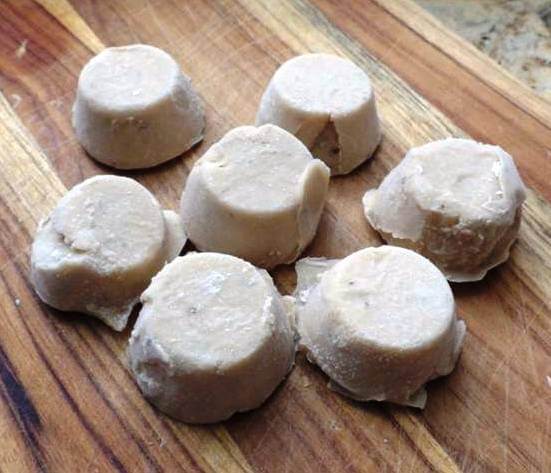
Soap Bars Curing

Homemade soap bars need to harden and cure. This usually takes a week or two. The bars should be placed on a tray or board lined with parchment paper and left to dry or cure in a protected space like a closet or pantry shelf. The garage can work in a pinch, as long as they’re not exposed to the sun or rain. 

Soap Packaging

The easiest way to package your homemade soap is to wrap the bars in parchment paper or aluminum foil. You could also store them in plastic bags or even plastic containers with lids. All you’re trying to do with packaging is preventing any ambient humidity from degrading the soap.

Homemade Soap Shelf Life

Soap generally has a long shelf-life if properly packaged and stored. Figure you’re homemade soap will be stable for 2 to 3 years. Maybe longer. 

As time goes on, you may find it gets a bit hard around the edges, but water in a bath or shower goes a long way to keeping soap sudsy and stable. If you find it’s not working like it once was, start a fire and find some fat. After that, you’ll know what to do.

Like this post? Don't Forget to Pin It On Pinterest!

You May Also Like:

The post How to Turn Fat and Ashes Into Soap appeared first on Urban Survival Site.


from Urban Survival Site