If you think of meat with a long shelf life, what do you think of first? I’ll bet you’re probably thinking of spam, canned tuna or chicken, or some other home-canned animal protein. All good answers, to be sure, but what you might not know is that long shelf life meat is hardly a modern ... Read more
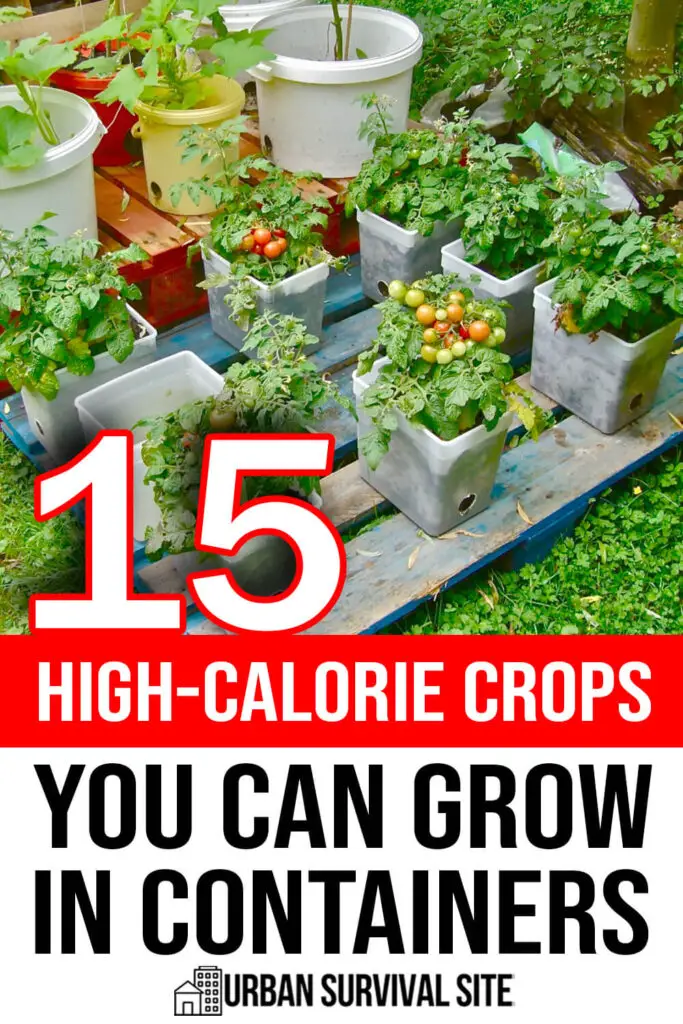
Container gardening may not seem like the ultimate in survival gardening; but for some preppers, it’s the only way to go.
Preppers who live in apartments can either choose container gardening or give up on gardening altogether. Considering that they typically don’t have enough storage space for a good stockpile, choosing not to container garden just shortens the time till they run out of food.
But is container gardening even a viable alternative? Can you grow enough calories to keep you going? With salads and veggies basically being “diet food”, it might not seem like it’s possible to do much with a container garden.
But that’s far from the truth. While leafy vegetables are low in calories, root vegetables are some of the highest-calorie foods we eat. It’s all about making the right choices.
That includes making the right choices in which containers you use. Don’t forget, container gardening can refer to any size containers, even big ones.
While it may not seem practical to grow larger plants in containers, people actually do so all the time. They even grow trees in containers, although about the only trees that most of us could grow indoors would have to be dwarf fruit trees.
The biggest challenge in growing any plant indoors is them getting enough light. Your home only has so many windows, and you’ll probably end up having plants in front of each of them.
Another option you might want to consider is using LED grow lights. These are energy-efficient enough that you can power them off of solar panels when the power is out. You’ll want those solar panels to be charging a battery, so that you’ll have power for your grow lights when the sun is down or on days with a lot of cloud cover.
For watering purposes, you want to make sure that all your grow containers have drain holes in the bottom to eliminate the risk of overwatering. Put some sort of catch tray there, so that any water coming out of the bottom of your plant pots doesn’t end up destroying your flooring.
With all that in mind, let's take a look at some high-calorie crops that grow well in containers.
Avocado
Avocado trees offer a substantial amount of calories thanks to the high fat content of the fruit. Dwarf varieties of avocado trees are best. They need deep pots to accommodate their root systems along with plenty of sunlight and regular, deep water. You'll need to be patient as production might take a few years, but the nutritional benefits are worth it.
Beans of all Sorts
Beans are a classic survival food, being high in both protein and calories. Actually, they’re even higher in calories than potatoes. However, you don’t get as much volume of edible vegetable from a bean stalk as you do from a potato plant. So, there’s a tradeoff there to consider.
Beans can be planted fairly close together, with individual plants being 2 to 4 inches apart. However, they usually say to plant them in rows that are 30 to 36 inches apart, to provide room for the leafy part of the plant.
Looking at that another way, some say to plant 4 to 6 plants per “hill.” We can equate that hill to a planting pot, putting several plants together in one pot.
Beets
Beets are high in sugar, adding to their calorie count. You can even up the calorie count more by pickling them. Typically, cooked beets have 75 calories to the cup, but pickled ones have more than 100. Beets are also a good vegetable to grow because the greens can be eaten. While those greens are not high in calories, they are high in nutrition.
Beets can be planted close together, keeping in mind that they are more spherical than carrots. I used to intersperse rows of beets in with my carrots, planting five rows of carrots, then one of beets. I planted them 2” apart, although they can be planted as close as 1.5” apart.
Bell Peppers
There’s a lot in common between growing bell peppers and growing tomatoes. Both take up about the same amount of room; both grow to be large garden plants; and both keep giving you fruit until the fruit freezes.
As far as overall amount of food that you can get per plant, bell peppers and tomatoes are a couple of the best choices you can make.
Carrots
While nowhere near as energy dense as potatoes, carrots have one major advantage for container gardening over other vegetables. That is, they don’t need a lot of horizontal space. You can plant individual seeds one inch apart and still grow healthy carrots.
The trick here is that the soil needs to be 12 to 16 inches deep. That can be problematic for most containers, but you can plant them in five-gallon buckets or make a container by cutting the top off a five-gallon water jug. Carrots also grow fairly quickly, coming to maturity in 60 to 80 days.
Corn
Believe it or not, corn can be grown in containers, although it requires a bit more space and care than some other crops. The great thing about corn is that it's high in calories, useful in any number of dishes, and can easily be dried and stored for later use.
For successful growth, choose a large, deep pot for each corn stock so there's plenty of space for the roots. Corn is a heavy feeder and requires regular watering and fertilization. You'll also want to grow several plants close together for proper pollination, which is vital for developing the ears.
Fruit Trees
I mentioned fruit trees in the introduction to this article. Dwarf fruit trees make excellent house plants. While their root system needs a good-sized pot, that really isn’t a problem.
Place that pot at the end of the sofa, and build a lid for it, with a hole in the center. That way, it can serve as an end table, as well as a place for your dwarf fruit tree to grow.
Melons
Some types of melons, such as cantaloupe and watermelon, can be planted in containers. These melons grow on creeping vines, so they can be planted in a good-sized pot and you can train the vine to grow behind the furniture, around the perimeter of the room, where it will be out of the way.
Just make sure you keep track of where the melons are growing, so that you can keep them from getting trapped underneath the furniture, where they will become deformed.
Olives
Olives are especially good for gardeners in warmer climates or the ability to provide plenty of sunlight even indoors. Olive trees are known for hardiness and ability to adapt to a variety of conditions, but they do best in deep containers with well-draining soil and full-sun exposure.
While olive trees take several years to produce fruit, the caloric value of olives—especially when pressed into olive oil—makes it worth the wait.
Parsnips
These vegetables are a close relative of the carrot, although one which packs more calorie density into the root. They can be used as a potato substitute or cut up and put into soup. If you’re growing them outdoors on the patio, they don’t die when the first frost comes along. In fact, many people say that they need that first winter frost to taste sweeter.
The root part of parsnips needs about the same amount of space that carrots do, but the leafy part of the plant needs much more. So, you’d probably be best off planting them along with other vegetables, even carrots, to maximize your planting space.
Potatoes
Of all the things you can grow, potatoes provide the most calories, contributing largely to the obesity problem here in the United States, thanks to the fast-food industry. But you’d be surprised how little space you need to actually grow potatoes.
Typically, the rows are spaced 24 to 36 inches apart, with only 15-25 inches between individual plants. The starters only need to be 6 to 8 inches deep, so if you can find a wide, shallow pot, you can grow them in a container.
One thing to consider here is building your own container, much like a raised bed, with a bottom. Give yourself 12 inches of soil depth, so that there’s plenty of room for the potatoes to grow.
Squash
Squash, including varieties such as acorn and butternut, is great for container gardening. They'll need large containers for their sprawling vines, and they prefer well-drained soil and plenty of sunlight. Be sure to use a trellis and train the vines to grow up it. This will save space and stop the fruits from resting on the soil where they can rot.
Strawberries
Growing strawberries in hanging pots has almost become a cliché, it has become so popular. Not only that, but you can grow the plants upside-down out of the drain hole in the bottom of the pot, making it possible to get twice the number of strawberries per pot.
As with the tomatoes and bell peppers, once strawberries start giving fruit, they will continue doing so. They’ll continue growing for three years, but after that, the plants need to be replaced.
Sweet Potatoes
While not quite as high in calories as white potatoes, sweet potatoes are still packed full of calories, while tending to be more nutritious. They need roughly the same amount of room as white potatoes do, so if you can find space for one, you can find space for the other.
Both white and sweet potatoes are a great choice to put down on the bottom if you’re going to be doing any container gardening. The leaves will grow up and around the other plants to get the sunlight they need, while the weight of the dirt forms a solid foundation for whatever sort of container holder you build.
Tomatoes
People have grown tomatoes indoors for years, with many people in colder climates starting their tomatoes indoors every year, before moving them outdoors to plant. But they can be kept indoors, in their containers as well. They need a lot of light, so you’ll want to place them in a window.
One nice thing about growing tomatoes is that once they start to bear fruit, they’ll continue bearing fruit until the first freeze. Of course, if you’ve got them indoors, they won’t feel that freeze, so they’ll continue bearing fruit. You can get a lot of tomatoes off of a plant or two, but the plants take up a fair amount of space.
For any prepper, the easiest and safest option for nutrition in a SHTF scenario is a MRE, or Meals, Ready to Eat. But have you ever wondered what the effects on your body would be if you ate only MREs for 30 days? I did. So, I did it. This article is all about that […]
If you’d like to become prepared for the unexpected, you may want to begin canning and storing different foods to create a stockpile. As a prepared family, having a food supply for emergencies is beneficial. Some foods include canned meats, vegetables, fruits, and spreads, with items you can add to your freezer and keep fresh for months or years.
Before prepping, you must invest in the best food storage supplies. The right supplies will preserve the freshness of your food for extended periods, making it worth all the effort you’ll put into maintaining it. One of my favorite kitchen gadgets: Best Funnel Ever
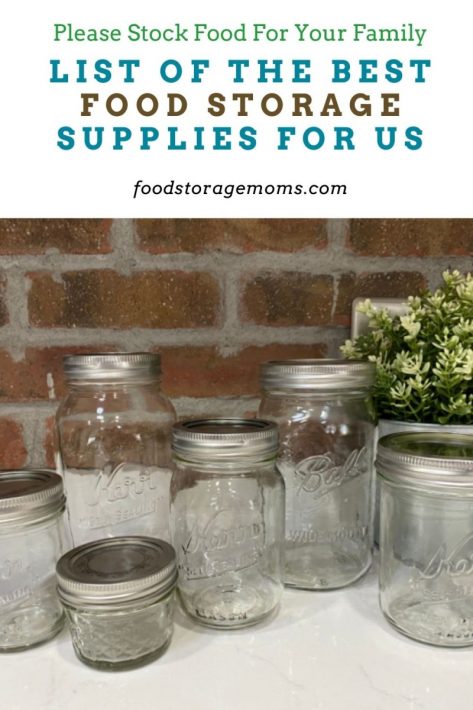
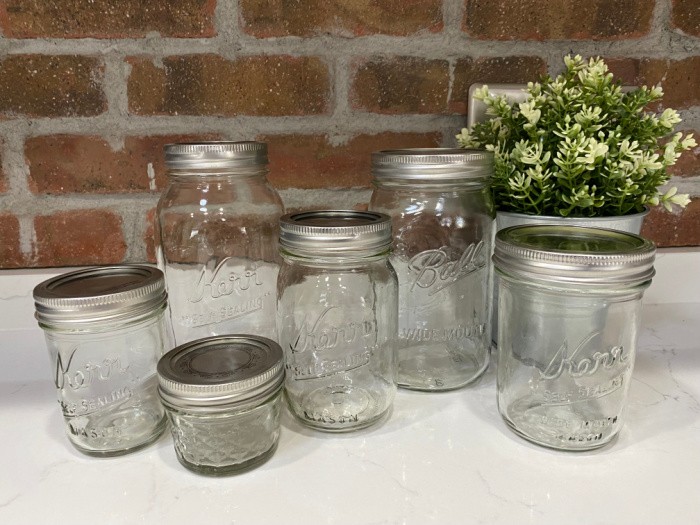
Best Food Storage Supplies
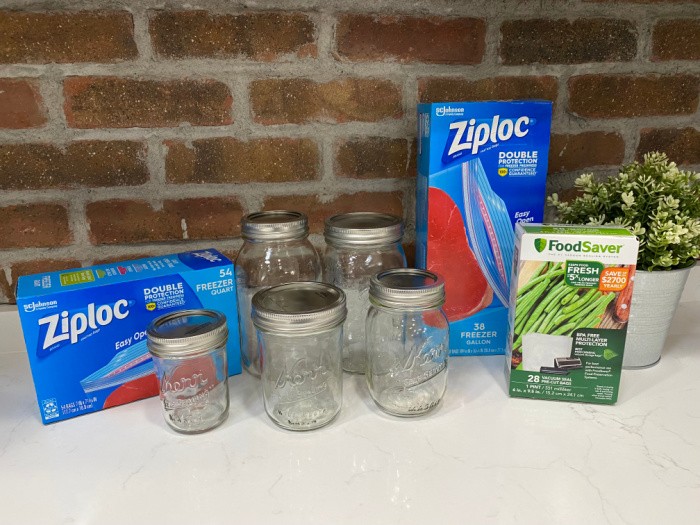
Quart and Pint Mason Canning Jars
Quart and pint mason canning jars are preppers’ most crucial food storage supplies. If you’ve ever used a traditional mason jar for anything, you know that they are perfect for preserving our food.
You can use smaller canning jars for jams and other spreads. However, you’ll need quart- or pint-size containers when canning chunks of fruit, vegetables, and even prepared meats.
So, what better way to ensure your food is adequately stored than to use large mason jars? You can find these jars in different sizes, including one gallon and 64 ounces (please don’t can/process food in these jars. It’s not safe to do so).
While you can find these large canning jars in many stores, Amazon has a broad selection. You’ll find precisely what you need to store your favorite foods easily. They are great for oatmeal, rice, pasta, quinoa, etc. Walmart has started stocking more supplies as well.
When buying these larger canning jars, ensure they come with airtight lids. You’ll need to seal the jars using these airtight lids to keep the preserved food fresh for as long as possible. If, by chance, you see cases of Ball or Kerr canning mason jars, please pick up a few boxes. Trust me, you’ll want to buy the right brands.
Leak-Proof Containers in Different Sizes
Besides getting large canning jars that offer plenty of space for the food you’re storing, you’ll also need leak-proof containers in different sizes. One of the worst things to do is to keep food in something that leaks.
You’ll feel like your hard work and effort were for nothing if the ingredients you’ve prepared and added to a container start leaking out after a few weeks or months. If you want to make sure you’re not wasting your time and money, invest in high-quality leak-proof containers that come in different sizes.
While searching for the right leak-proof containers, choose BPA-free options to keep toxic chemicals out of the food you’re storing. It’s also important to select long-lasting containers and lids.
As you start looking at some of the different leak-proof options available on other websites, you can read reviews to get an idea of what people like and dislike about these products. Use that information to make wise buying decisions.
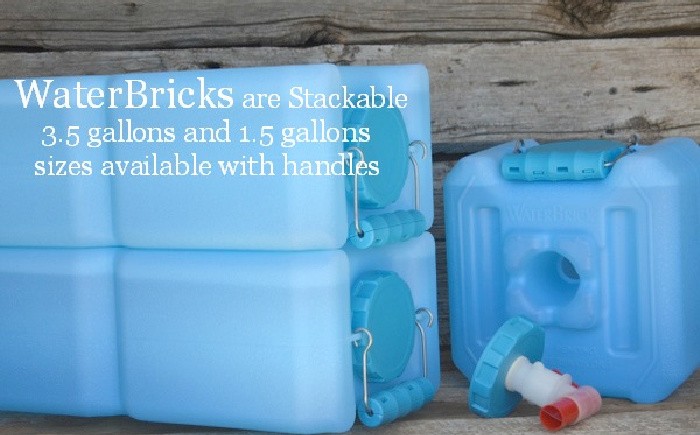
You can use WaterBricks for water or for food storage. WaterBricks Not only can WaterBricks hold water they are great for food as well.
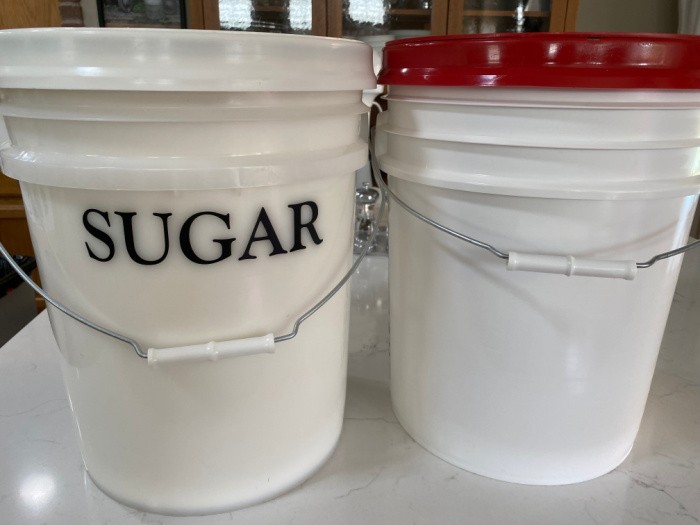
5-Gallon Buckets
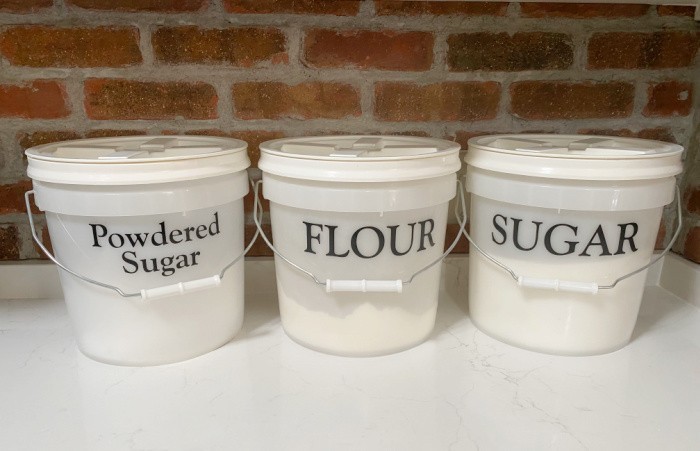
When you need to store your dry food, 5-gallon buckets come in handy. These buckets are large and heavy when filled with different foods, but they offer plenty of extra storage space for the ingredients that you need to store. I use Gamma Lids on my buckets. I know people use Mylar bags with Oxygen absorbers, but I don’t. It’s a personal preference.
Some of the foods you can add to 5-gallon buckets include:
Dry Pasta. You can stock up on pasta while it’s on sale or while you have coupons for it. You can get different pasta, such as elbow macaroni, rotini, or spaghetti. Instead of keeping the pasta in the box, open the boxes, pour the pasta into a 5-gallon bucket, and seal it shut until you need it.
Rice. Having a stockpile of rice will come in handy in emergencies. You can buy rice in bulk to get the best deal possible and then pour the bags of rice into these containers to keep it fresh for extended periods.
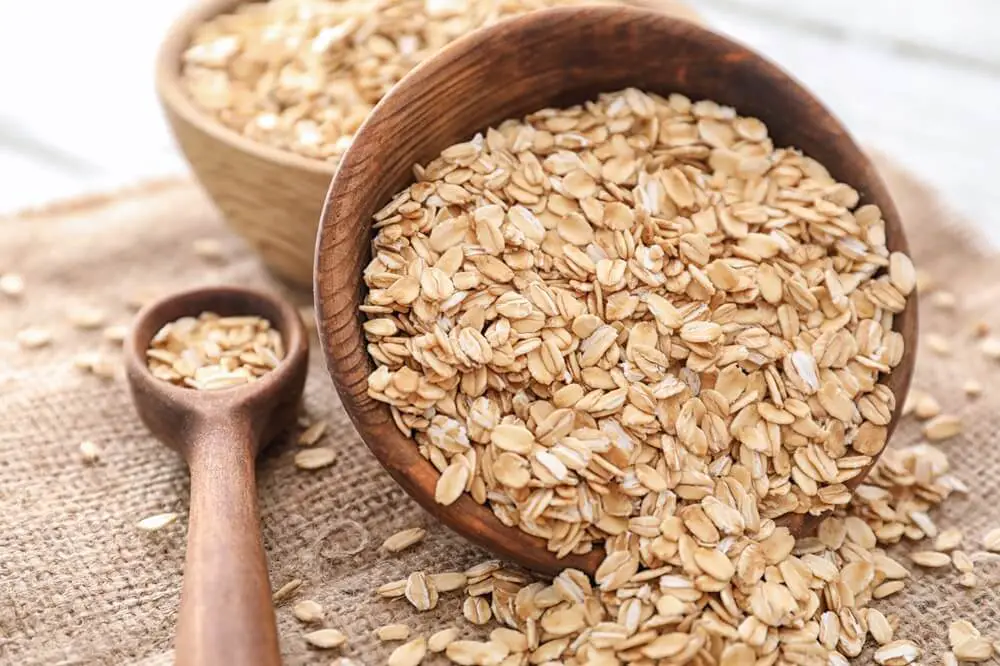
Rolled Oats. You can do a lot with rolled oats, such as preparing fresh oatmeal, porridge, oat cookies, or overnight oats with milk and fresh fruits. If you buy the oats in bulk while they’re available at discounted prices, you can save money and make sure you have plenty of oats available when you need them.
Flour. Stocking up on flour is a good idea because it’s a key ingredient in many recipes. You can use it as a base to create waffles, pancakes, fried chicken, and even homemade gravy. Because it’s such a beneficial ingredient, stock up on it! Please remove it from the bag and pour it into a 5-gallon bucket to keep it fresher for 12-18 months. Some people put their bags in the freezer. I can’t fit a 25-pound bag of flour in my freezer, so I put it directly into a 5-gallon bucket with a red Gamma Lid. Yes, I color-coded everything. Please only store the amount of flour you will use in 12-18 months since it tends to go rancid over more extended periods. Fresh is best.
You can store plenty of different dry foods in these large containers to extend their shelf life, and these are just a few that you might want to store for as long as you can.
The perfect way to store such large containers in the basement is to place them on shelving units or on wood planks so they are off the floor (critical they are at least 2 inches off the ground). You can line the wall to keep them out of the way. Below, you will see 2-gallon buckets and the larger 5-gallon buckets in the middle.
If you are new to my blog, I color code all of my food storage buckets or at least my Gamma Lids. White Gamma Lids are for sugar and Red is for flour and wheat. Yellow Gamma Lids are for pasta, Orange Gamma lids are for beans. Green Gamma Lids are for detergent, and DIY washing machines.
I can see at a glance where each bucket is, that’s how I roll. Gamma Lids. Here in Utah, some Walmarts sell the lids, but they sometimes have been warped, so I put them back on the shelves and look elsewhere for what I need. Please look through the lids to be sure you are getting grade A ones. Is it just me?
5-Gallon Buckets with Gamma Lids
2-Gallon Buckets With Gamma Lids
Zipper-Sealed Food Storage Freezer Bags
Use zipper-sealed food storage freezer bags and gallon bags for anything that you plan on storing in your freezer. You might have a deep freezer to have extra space for storing meats when buying them in bulk to save money. Instead of leaving meats in their original packaging to take up more space in the freezer, remove them from the packaging and put them in freezer bags.
You can remove the extra air from bags before sealing them shut. When sealed properly, you can keep food fresher and longer in the freezer. Don’t skimp on the quality when buying zipper-sealed food storage freezer bags for meats, slow cooker meals, and other ingredients.
If you’d like to start saving money and have a stockpile for emergencies, you’ll need to invest in the best food storage supplies. If you use the right supplies, you can conveniently store all kinds of foods, including rice, flour, meats, vegetables, fruits, and more.
It’s best to have various food storage containers to use, including large buckets for dry ingredients, freezer bags for items going in the freezer, and large canning jars that hold more. You can find all these supplies online and in some department stores, such as Target and Wal-Mart. Once you’ve bought the supplies, you can start storing foods so you’re ready to go when the items to be stored are available at the price point you want! May God Bless this world, Linda.
Now, more than ever, the world is showing us that our future is hard to predict, with natural disasters occurring all over the globe and the economy slowly declining, reminiscent of 2008.
Fathers hold a special place in our hearts, shaping our lives with their wisdom, love, and support. Celebrating the father in your life, or a special father figure, is an opportunity to show gratitude and appreciation for all they do. Father’s Day is an important holiday, and celebrating the father in your life is more important than ever! I want to share these 20 thoughtful ideas with you.
I was blessed to have two fathers in my life. My parents divorced when I was young, and I didn’t see my birth father for about nine years. Years ago, to call someone was costly. I never received a birthday card or any holiday cards in the mail. When I was 16 years old, I saved my money and bought a plane ticket to go down and meet with my birth father, who lived in California. As I grew up and married, I wanted my husband and daughters to meet him. We had a great visit.
I was lucky to have a stepdad. Even though I never viewed him as a stepdad, he raised me and loved me like his own. I feel grateful I had two fathers, even though I didn’t see my birth father for so many years.
I wish I’d had a chance to give my birth father some Father’s Day gifts over the years. I’m not sure there’s a perfect present, no matter how close we may be our father or grandpa we want to honor and show love. I’ve always thought some of the best gifts are those that generate memories, or remind us of memorable times together. No more of those wardrobe goodies like ties, socks, or shirts. Let’s think of things we can do together or that he’ll especially remember for years to come.
Celebrating the Father in Your Life: 20 Thoughtful Ideas
1. Personalized Gifts
Personalized gifts such as engraved watches, custom-made photo albums, or monogrammed accessories add a unique touch. These keepsakes serve as lasting reminders of your appreciation and love. Every time they look at them they’re reminded of you and the special bond you have.
2. Handwritten Letters
A heartfelt handwritten letter can be incredibly touching. Express your gratitude and share fond memories, letting your father know how much he means to you. So much communication takes place on an electronic device these days. Mark’s mom was a great letter writer and the recipient knew the thoughts expressed for sure came from her heart.
3. Weekend Getaway
Plan a weekend getaway to his favorite destination. Whether it’s a serene countryside retreat or an adventurous mountain hike, spending quality time together away from the daily grind can rejuvenate. Great gifts can include quality time together and making new memories.
4. Movie Marathon
Organize a movie marathon with his favorite films. Prepare some popcorn and comfy blankets, and enjoy a relaxing day or evening of cinema at home. You can also plan a visit to a local theatre where one of the latest blockbusters is showing. Some locations even serve a nice meal to enjoy during the movie while sitting in those fancy rocking seats.
5. Home-Cooked Meal
Cook his favorite meal or try a new recipe together. Sharing a home-cooked meal is a simple yet meaningful way to show love and appreciation. Often we look to our dads to be the grill master and have them cook a great BBQ meal. It shows a unique love if you take the time to plan, prepare, and serve a meal catered to his culinary pleasures.
6. Brewery or Winery Tour
If he enjoys beer or wine, take him on a local brewery or winery tour. It’s a great way to learn more about his favorite drinks and spend quality time together. Most dads have a brew they favor over others. Find out what that is and make sure it’s on the list of drinks available.
7. Sports Event
If he’s a sports fan, get tickets to a game of his favorite team. The excitement of the live atmosphere will make the day unforgettable. There’s nothing like “being there” to make the special occasion even more meaningful. If you’re trying to get close to a “new dad,” what better way than to sit in the bleachers cheering for a school or professional team he loves?
8. Fishing Trip
For fathers who love fishing, plan a fishing trip. Whether a day at the lake, stream, or a deep-sea adventure, it’s a perfect way to relax and bond. How to Select the Perfect Bait for Fishing Our kids still talk about a trip to Island Park, ID where they caught their first fish after learning how to bait the hook, effectively cast the line, and reel it in. Learning how to clean the fish is another matter. LOL
9. DIY Projects
Start a DIY project together. Whether building furniture, gardening in the backyard, or fixing something around the house or garage, working on a project can be a rewarding way to spend time together. Many dads have hobbies you can explore together and bond as you create the next masterpiece.
10. Outdoor Adventure
Plan an outdoor adventure like hiking, biking, or camping. If your father loves the outdoors, this can be a refreshing and exciting way to celebrate. Usually, June is the perfect month to get out of the house, it’s not to cool or too hot. The state campgrounds are opening up, providing a fun and convenient way to spend quality time without breaking the bank.
A fun new adventure vehicle I see all over is e-bikes. These battery-powered bikes provide a chance to see a lot of territory without worrying about being in great shape. Check out where and how to rent them so you can experience this new source of fun and exercise.
11. Book Club
If your father is a bookworm, start a mini book club. Choose a book to read together and have discussions about it. This can lead to deep conversations and shared experiences.
12. Tech Gadgets
Gift him the latest tech gadget he’s been eyeing. Whether it’s a new tablet, smartwatch, or headphones, tech gifts are practical and exciting. A World Without Technology: A Glimpse into the Unplugged Life There are also new virtual reality game units that can be exciting to watch and play.
13. Cooking Class
Sign up for a cooking class together. Learning new culinary skills can be fun and you can enjoy delicious food. Both of you can learn to upgrade your cooking skills while laughing together and possibly learning how to cook more age-friendly healthy meals out of the proper ingredient essentials.
14. Golf Day
Plan a day at the golf course. Whether he’s a seasoned golfer or enjoys the occasional game, it’s a great way to spend time together and enjoy the outdoors. It’s one of the few sports you can participate in while you ride together, chat about daily activities, and laugh as that golf ball shows it has a mind of its own.
15. Family History
Research and document your family history together. This can be a meaningful project that connects you to your roots and provides a lasting legacy for future generations.
16. Art Experience
Take him to a gallery or museum, or try an art class together. Appreciating or creating art can be a wonderful way to connect and share new experiences.
17. Fitness Challenge
Set a fitness challenge or join a local run/walk event. Encouraging each other in fitness goals can be both motivating and rewarding. Fitness for Survival
18. Musical Event
Attend a concert or music festival of his favorite band or genre. The energy and excitement of live music can create lasting memories.
19. Volunteer Together
Spend a day volunteering for a cause he cares about. Giving back to the community together can be a fulfilling and bonding experience.
20. Memory Lane Trip
Take a trip down memory lane by visiting places with special significance for your father. Whether it’s his childhood home, favorite park, or any meaningful location, this journey can evoke cherished memories and create new ones.
I hope all of you get to spend time with your father this Father’s Day! There are many ways to begin celebrating the father in your life. These tips will help you out so much as you search for the best Father’s Day gift ever! May God Bless this World, Linda
Copyright Images: Fathers Day Card with Coffee Mug AdobeStock_106425785 By Nys, Fathers Day Concept with Gift AdobeStock_253293809 By Anaumenko
Powdered milk is one of those pantry staples that everyone has, but if I’m being honest, I feel like most people don’t know how to use it. It’s nice to have just in case, but when’s the last time you actually reached for it? When was the last time you made it and drank it? ... Read more
Our current iteration of SHTF proves that there are always people out there ready to take things of value that do not belong to them. You needn’t scroll very far on social media these days to see either a smash and grab or a flash mob looting a department store. Of course, we are expected […]
Imagine you’re lounging on a sunny Caribbean beach or relaxing by the pool on your much-deserved break. The last thing you want is the worry of thieves breaking into your home, searching for money and valuables to ruin your peace of mind. When you’re away, an unoccupied house becomes an easy target for burglars. According ... Read more...
Maintaining a clean carpet not only enhances the appearance of your home but also contributes to a healthier living environment. I can’t stand looking at carpet that looks really gross from stains and debris. I HAVE to have ways to clean it and I wanted to share those ways with you! Check out these 20 tips for keeping your carpet clean!
20 Tips for Keeping Your Carpet Clean
1. Regular Vacuuming
The Importance of Vacuuming
Regular vacuuming is the cornerstone of carpet maintenance. It removes dirt and debris that can wear down carpet fibers and cause premature aging. There are various types of vacuum cleaners from portable hand-held units to heavy duty uprights. As with all the purchases I suggest, take the time to buy right the first time after some research and testing/tryouts and the store.
The type of carpets to be cleaned will influence the best kind to buy. If you have thick shag carpet vs short commercial types, the amount of suction required will be different. Area rugs might not allow for high-pressure suction like a carpet secured to the floor. Again, try them out and pick one that is versatile and suitable for your home.
Frequency Matters
Aim to vacuum high-traffic areas daily and other areas at least once a week. This routine prevents dirt from settling into the carpet.
2. Use Doormats
First Line of Defense
Place doormats at all entrances from the outside to catch dirt particles, dust, and moisture before they reach your carpet. This simple step can significantly reduce the amount of dirt tracked inside.
Clean the Mats
Regularly clean these mats to ensure they are effective. Shake them out, vacuum them, and occasionally scrub and then wash them to keep them in top condition.
3. Remove Shoes Indoors
A No-Shoe Policy
Implement a no-shoe policy inside your home to keep outdoor dirt and grime off your carpets. Provide a shoe rack or a designated area for shoes near the entrance.
Slippers and Indoor Shoes
Offer guests and family members indoor slippers or socks to wear around the house.
4. Prompt Stain Treatment
Act Quickly
Address spills and stains immediately. The longer a stain sits, the harder it is to remove. Blot the stain with a clean cloth instead of rubbing, which can spread the stain.
Use the Right Cleaner
Always test a carpet cleaner on a small, inconspicuous area first to ensure it doesn’t damage or discolor your carpet. Some of my readers have suggested white vinegar as a cleaning solution for that stained area needing attention. There are also powders that come as dry powder and wet versions where the powder is mixed with water. The type of powder depends on the type of carpet, with wool needing a gentle powder and synthetic carpets able to handle stronger powders and solutions. Check with your carpet manufacturer for any specific instructions for the most effective way to safely clean tough-to-get-out carpet stains.
5. Deep Cleaning
Professional Cleaning
Consider having a professional cleaning service clean your carpets at least once a year, depending on the amount of traffic your carpets experience. Families with kids and pets with related pet hair may require more frequent cleaning. Professional cleaning methods, such as steam cleaning with hot water extraction, reach deep into the fibers and remove embedded dirt and allergens, besides stubborn carpet stains. 20 Easy Spring Cleaning Tasks You Can Do Today
DIY Deep Cleaning
If professional cleaning is not an option, consider renting a carpet cleaner and using it according to the manufacturer’s instructions.
6. Protect High-Traffic Areas
Use Rugs and Runners
Place rugs and runners in high-traffic areas like hallways and entryways. These coverings protect your carpet and can be easily cleaned or replaced.
Rotate Rugs
Rotate these ugs periodically to ensure even wear and to prevent one area from becoming more worn than others.
7. Pet Maintenance
Regular Grooming
Regularly groom your pets to reduce the amount of hair and dander they shed. This reduces the amount of debris from the pets that settles into your carpet. What to do With Your Pets in an Emergency
Clean Pet Paws
Wipe your pet’s paws before they come inside if the weather is wet outside to prevent dirt and mud from being tracked onto your carpets.
8. Use Carpet Protectors
Furniture Coasters
Use furniture coasters under heavy pieces of furniture to prevent them from leaving dents and marks on your carpet.
Protective Sprays
Consider applying a carpet protector spray that repels dirt and stains, making it easier to clean spills.
9. Maintain Your Vacuum
Clean the Filter
Regularly clean or replace your vacuum’s filter to ensure it operates at maximum efficiency. A clogged filter can reduce suction and leave dirt behind.
Empty the Bag or Canister
Empty the vacuum bag or canister routinely or when it’s about two-thirds full to maintain optimal suction power.
Use carpet deodorizers to eliminate persistent smells. Choose products that are safe for your specific carpet type. Again, if you have long-haired dogs in your home they tend to leave a unique smell in carpets, particularly if the pet runs around outside, gets wet, or sweats a great deal.
11. Avoid Carpet Soaking
Minimal Water Usage
When cleaning your carpet, use as little water as possible. Excess water can lead to mold and mildew growth and damage the carpet’s backing.
Drying Techniques
After cleaning, ensure the carpet dries quickly by using fans, opening windows and doors, or turning on the furnace or air conditioning to help circulate the air.
12. Blot, Don’t Rub
Proper Blotting Technique
When dealing with spills, blot the area with a clean cloth or paper towel. Rubbing can push the stain deeper into the fibers and cause it to spread.
Gentle Pressure
Apply gentle pressure while blotting, starting from the outside of the stain and working your way inwards.
13. Invest in Quality Cleaning Products
Choosing the Right Products
Invest in high-quality carpet cleaning products that are appropriate for your carpet type. Avoid products with harsh chemicals that can damage the fibers.
Eco-Friendly Options
Consider eco-friendly cleaning products that are safe for the environment and your family. Your local carpet store has various options to chose from after considering their input.
14. Regularly Move Furniture
Prevent Indentations
Move your furniture periodically to prevent permanent indentations in your carpet. This also allows you to clean areas that are usually covered and to pay attention to higher-use areas like in front of the couch or easy chair.
Light Rearranging
Even slight adjustments in furniture placement can help distribute wear more evenly across your carpet.
15. Use a Carpet Rake
Fluff and Lift Fibers
A carpet rake can help lift and fluff carpet fibers that have become matted down. This can give your carpet a fresher appearance and help loosen dirt before vacuuming.
Regular Use
Incorporate carpet raking into your regular cleaning routine for best results.
16. Avoid Direct Sunlight
Prevent Fading
Direct sunlight can cause your carpet to fade over time. Use blinds, curtains, or UV-protective window films to protect your carpet from excessive sunlight.
Rotate Furniture
Rotating your furniture and rugs can also help prevent uneven fading and wear.
17. Control Humidity
Use Dehumidifiers
High humidity can promote mold growth in carpets. Use dehumidifiers to maintain an optimal indoor humidity level, especially in basements and other damp areas.
Ventilation
Ensure proper ventilation in areas with carpeting to reduce moisture levels and improve air circulation. Make sure you change your furnace and air conditioner air filters often. Leaving a dirty filter means the appliance is working too hard and you may be just pushing the dirt around your rooms.
18. Educate Household Members
Carpet Care Awareness
Educate everyone in your household about proper carpet care techniques, such as removing shoes and promptly addressing spills.
Involve Everyone
Make carpet maintenance a shared responsibility to ensure that everyone contributes to keeping the carpet clean.
19. Choose the Right Carpet
Durable Materials
When choosing a new carpet, consider materials that are known for their durability and stain resistance, such as nylon or polyester.
Appropriate Colors
Opt for carpet colors and patterns that are less likely to show dirt and stains, especially in high-traffic areas. Going with really light colors may brighten up the rooms, but it sure takes more to keep them clean!
20. Keep Cleaning Supplies Handy
Ready Access
Keep essential cleaning supplies like stain removers, paper towels, and a portable vacuum easily accessible. This ensures you can quickly address spills and messes as they occur. 20 Items For Emergency Cleaning Buckets
When you follow these 20 tips, you can ensure that your carpet remains clean, fresh, and in excellent condition for years to come. Regular maintenance is the key to having clean carpets. I hope you’re able to use some of these tips! May God Bless this World, Linda
Copyright Images: Carpet Samples Stacked Up Depositphotos_11942603_S By Offscreen, Carpet Collage of Samples Depositphotos_183454200_S By Belchonock
Prepping as a lone wolf is a much different experience than prepping with a family. A lot of the time, it’s having a family that brings the importance of prepping to light.
The trouble is that your spouse and kids aren't watching political or global news and don't realize how important prepping is. That why you should spend time together doing activities that can help the whole family be better prepared. The trick is to keep it simple so they're having fun while learning skills.
Here are some activities that will help your the rest of your family prepare for disaster without even realizing it. When the SHTF and the lights go out, they'll already some basic survival knowledge and skills so they can contribute.
Camping is a great starter because in camping, there are tons of exceptions. Your daughter might love camping but only if she has a blow-up mattress.
Your wife might love camping but only if there is a shower and clean bathroom at the campground. Although you probably want to pretend to be Rambo out there, you must understand your family’s needs and make those exceptions.
Camping should include things like fire, tents, hammocks, hikes, cooking over fire, lights, and radios. All these kinds of things are easy to integrate into your trip without creating something an intrusive, drill sergeant style camping trip.
When you camp with your family you will learn so much about how far you can go with the rest of your prepping and survival family activities.
2. Shooting Culture
Shooting culture is a concept. It’s a concept that is much larger than gun culture. People might have mixed feelings about gun culture and kids, but shooting culture is a very different thing. My family shoots guns, but we shoot lots of other things, too.
My 12-year-old son has spent his last two birthdays running and gunning with his family and friends at paintball. We shoot gel blasters at home, bows, and arrows at targets, and we threaten to play archery tag every other month. We shoot steel targets outback with airsoft, and we shoot old coke cans with BB guns.
Shooting things is fun! It’s not just about bullets and rifles. Behind VR headsets and controllers, we also play first person shooters and have a blast with that. I have defined our activities as shooting culture. We like to shoot things together, and it’s a blast!
3. Video Games
There is no denying that my kids’ earliest lessons on the subject of survival came from Minecraft.
Long before you ever want to talk to kids about any kind of doomsday or apocalypse, you can cozy up on the couch in Minecraft survival mode and teach your children about the importance of hunting, gathering fuel for fire, managing important resources, and even things like lighting and perimeter security.
You learn very quickly the value of shelter, gardening for food, and even Murphy’s Law as your pickaxes and swords can break over time, and if you are away from the crafting table then you are just SOL. However, if you live by 2 is 1 and 1 is NONE, then you can survive in Minecraft.
The best part about Minecraft is that it’s multiplayer fun for everyone. If you can find games like this, then you can introduce a ton of prepping and survival concepts to your family. Here are some titles to try out together.
Ark Survival
Don’t Starve Together
Minecraft
Raft
Sea of Thieves
Terraria
4. The World of Ready
If your children would prefer a magical adventure to another world, you should introduce them to The World of Ready. In these books, children are faced with a preparedness or survival problem, and the fastest way to fix it is a trip to The World of Ready to meet Ooda.
In this strange world, the young reader is confronted by a variety of creatures, each with their own ability to help the main character with their emergency preparedness. They will meet the elvish red-haired craftsman Kit who wears a purple dress and a tan apron with many pockets. The children are taken to Kit because she makes the kits.
The World of Ready is for children up to about 8 years old with bright and impactful illustrations. It is a great book to read together with kids or grandkids. Each book also comes with a project at the end that the whole family can participate in.
The Scouts is still a legitimate means of getting out into the world of the wilderness and focusing on a variety of skills that are otherwise lost on the world. The Scouts is also a serious opportunity for your entire family to get involved in the same thing. Meetings are usually weekly, and everyone in your family can be involved.
The camping adventures, service days, and other planned events are also a great opportunity for families to connect and expand their communities. If you can find yourself the right Scouts group, then it can be a huge benefit to your overall preparedness and instill skills in your children that will last a lifetime.
If you can’t find the right scout group then you can always start one!
6. Fishing
Patience is an important part of fishing, but we gotta do some catching to keep the family coming back. Let’s be clear, we are raising the TikTok generation. The attention span is short, so we need some action.
I use a very special rig when it comes to fishing with kids. I like to use size #10 hooks with a bobber and worm or minnows. I rig this all on an ultralight setup so we can make a day of catching everything from 4lbs bass to quarter pound bluegill. Even small fish can be very fun to catch on the right rig.
When the bobbers are going under, kids are having fun. When the kids are having fun, the family is having fun. It is really that simple!
7. Travel
You don’t have to break the bank on airline tickets to travel. It always surprises me that we are in such a rush to get out of the nation on a plane. There is so much in your own state to be explored. Travel doesn’t have to be prepper related in order for it to add value.
There are a couple aspects of travel that are absolutely priceless. One is the packing of bags. Each family member learns about their own needs when packing to go away.
The next thing is understanding a new area and learning how to travel safely in new places. Integrating and acclimating to a new area is very important, too. You don’t wanna look too much like a tourist.
What is more exciting than a treasure hunt? If you are not familiar with geocaching, it is a worldwide community of people hiding and finding small boxes with notebooks in them. These things are hidden all over and with the Geocaching app you can gain access to all of them.
When the weather is nice you have a great opportunity to get out and search for these caches. It’s a great time to talk about navigation, get into the woods, and even talk about other types of caches that would be good to hide.
Conclusion
Prepping and survival are not foreign skill sets to the human race. In fact, they are as much a remembered skill as they are to be learned. We have lived with basic survival skills for a very long time; longer than we have lived with electricity and modern convenience.
As the leader of the family, you need only bring them to the water, per se. Show your family the path and let them know you will walk it with them.
When things start to go wrong, it’s easy to get upset and ruin the trip for everyone. We are leading them to the campsite and then letting the chips fall where they may. Enjoy your life.
There has been much said, at one time or another, about bartering in a post-disaster world. Some preppers go so far as to build a stockpile of extra supplies, over and above their family’s needs, specifically for the purpose of bartering them.
No matter what kind of chickens you have, no matter how many, and why you’re keeping them, they’ve got one thing in common with every other flock: they’ve got to have a home! And the home your chickens need is a chicken coop, of course! No problem, just mosey on down to your local farm ... Read more
Disclaimer: I am not a medical doctor and nothing in this article should be taken as medical advice. Please talk to your doctor before using any of the herbs and remedies mentioned in this article.
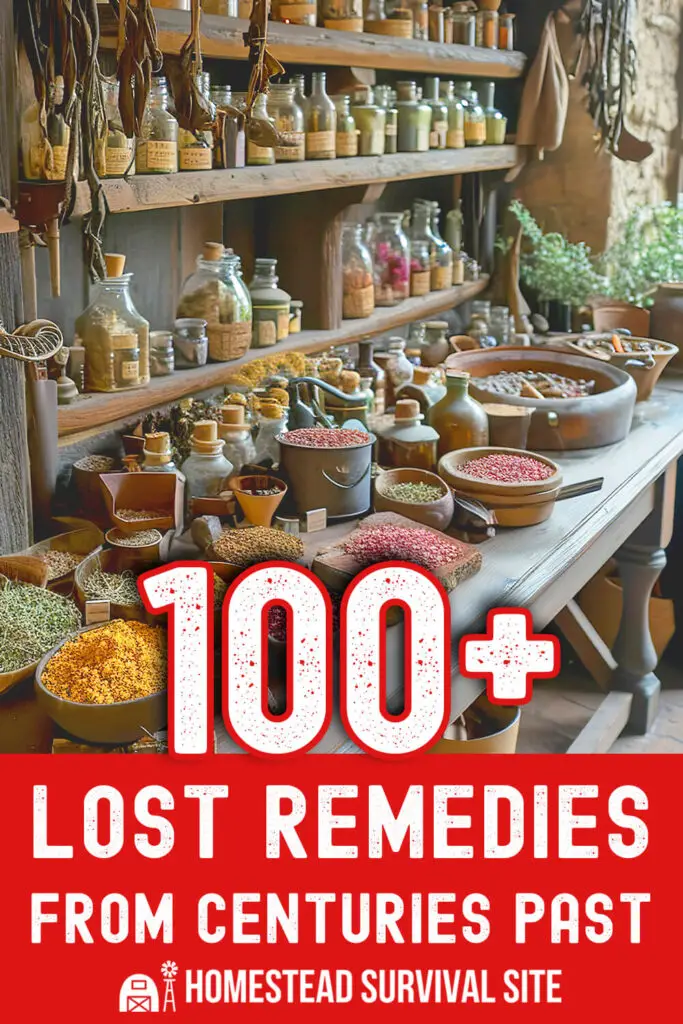
Long before the constant buzz of smartphones and the neon glow of pharmacy signs, our ancestors relied on the wisdom of nature to treat their ailments. This wisdom was passed down through the generations, offering remedies that rival or even surpass many of today's over-the-counter medications.
Early healers used the power of Earth's bounty by blending herbs and household items to create oils, salves, teas, tinctures, poultices and more. Not only do many of these remedies work better than modern OTC items, they don't come with synthetic additives or harmful side effects.
Although these remedies have been forgotten by most people, you'll find that many of the ingredients are still lurking in your kitchen or garden, just waiting to reveal their medicinal properties. In this article, we'll teach you about 100 lost remedies our ancestors uses for everything from minor burns to sleepless nights.
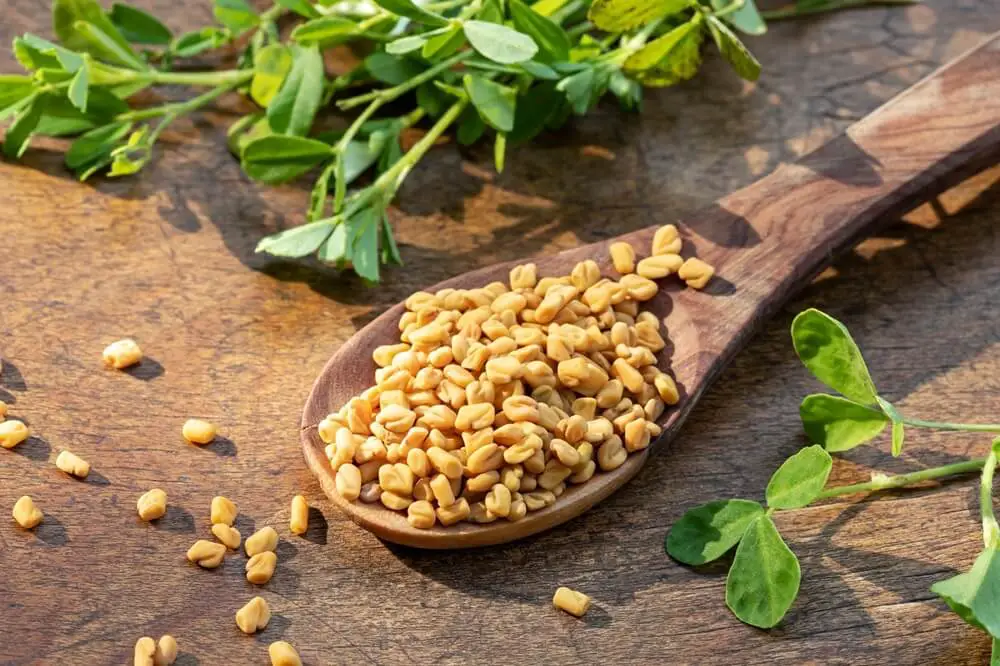
Now on to the remedies! For your convenience, I divided them into 19 categories, one each for a different ailment.
Congestion
Horseradish
Horseradish Tea:
Chop or grate a small piece of horseradish root.
Add it to a cup of boiling water and let it steep for about 10 minutes.
Strain and drink the tea. You can add a little honey or syrup if you like.
Horseradish Paste:
Put horseradish root into a blender or food processor to make a fine paste.
Mix 1 teaspoon of the paste with a bit of honey to make it more palatable.
Consume this mixture as needed to clear up congestion.
Inhalation:
Place grated horseradish in a bowl.
Lean over the bowl and cover your head and the bowl with a towel to trap the vapors.
Breathe deeply.
Warning: Try to keep your eyes closed as the vapors can irritate them.
Lemon
Lemon and Salt Water Gargle:
Mix the juice of half a lemon with a teaspoon of salt in 1 cup of warm water.
Gargle with this as needed. It can help clear the throat of mucus and relieve throat congestion.
Lemon and Honey Mixture:
Mix the juice of half a lemon with a tablespoon of honey.
Drink 1-2 tablespoons of the mixture as needed. In addition to reducing mucus buildup, this mixture can soothe a sore throat.
Inhalation:
Add a few drops of lemon juice to a bowl of hot water.
Lean over the bowl, cover your head and the bowl with a towel, and inhale the steam.
Cough
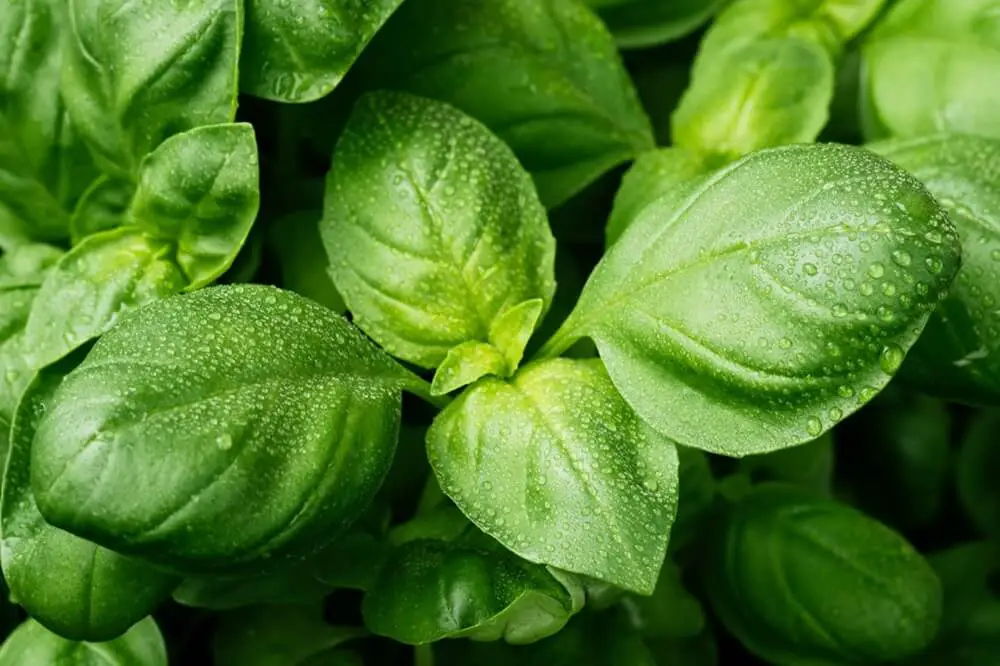
Basil
Simply chewing some fresh basil can help treat a dry cough.
Honey
Honey and Cinnamon
Add a pinch of cinnamon to a tablespoon of honey.
Take several times per day and before bed.
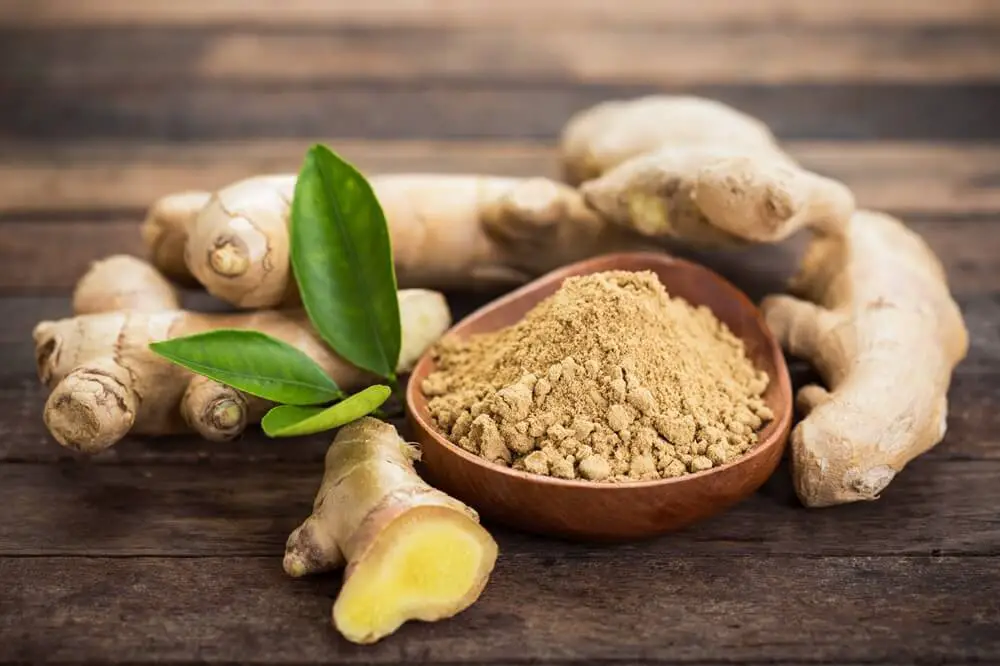
Honey and Ginger Tea
Grate a small piece of ginger root.
Boil in a cup of water for about 10 minutes.
Strain out the ginger and mix 2 tablespoons of honey into the tea.
Drink 2-3 times per day.
Lemon
Heat a cup of water until it's warm.
Add 2 tablespoons of lemon juice and 1/2 a teaspoon of salt. Stir.
Gargle a mouthful at a time until it's all gone.
Pine
Pine Needle Tea:
Get a handful of pine needles (make sure it's not a poisonous species).
Rinse and chop them up.
Add them to a cup of boiling water.
Reduce heat and simmer for 10-15 minutes.
Strain and drink while the tea is still warm.
Pine Syrup:
Rinse and chop a cup of fresh pine needles (again, make sure they aren't poisonous).
Briefly boil in 2 cups of water, then reduce heat and simmer for 20-30 minutes.
Remove from heat strain the liquid through fine mesh sieve or cheesecloth.
Add 1 cup of sugar to the liquid. Stir.
Simmer 10-20 minutes while stirring until it thickens into a syrup.
Cool and store in a refrigerator.
Take 2 teaspoons as needed to ease your cough.
Cuts and Scrapes
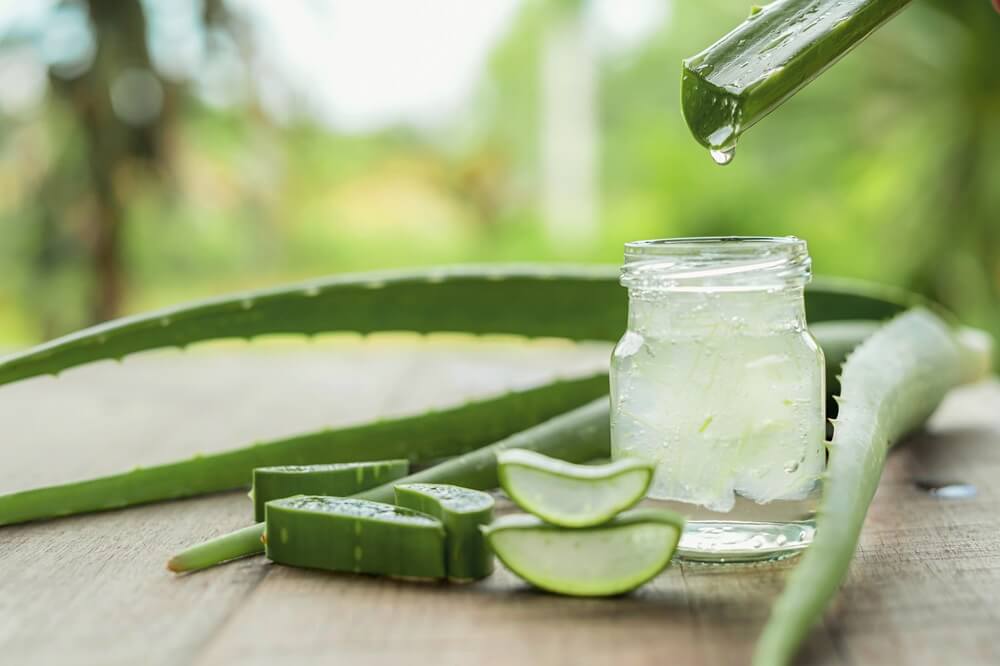
Aloe Vera
Cut a lower leaf from an aloe vera plant.
Use a spoon to scoop out the gel.
Apply directly to minor cuts (be sure to clean the cut first).
Cover with a bandage.
Banana Peels
Wash the minor cut or scrape.
Gently rub it with the inside of a banana peel.
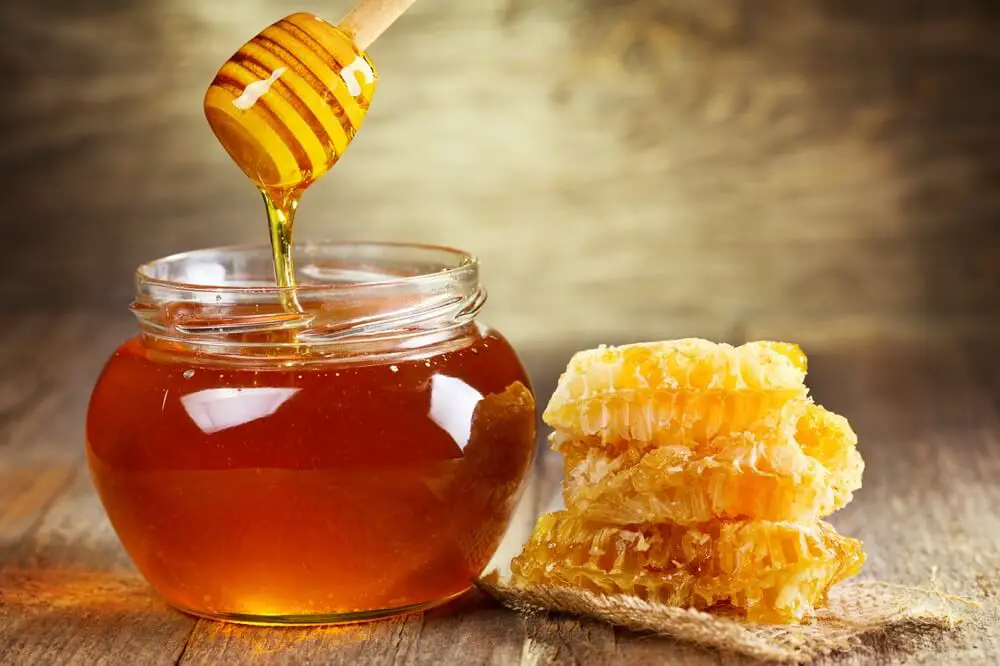
Honey
Apply a thin layer of raw, unpasteurized honey directly to the cut or scrape.
Cover with a clean bandage.
Lavender Essential Oil
Dilute a few drops of lavender essential oil in a carrier oil (like coconut or almond oil). To do this, add no more than 2 drops of essential oil per teaspoon of carrier oil.
Apply the mixture to the cut or scrape. Avoid using essential oils directly on the skin without diluting them first.
Bruises
Apple Cider Vinegar
Soak a piece of bread in apple cider vinegar.
Apply direct to your bruise help it heal faster.
Use a bandage to hold it in place.
Parsley
Wash a handful of fresh parsley leaves.
Crush in a mortar and pestle.
Cover bruised area with a layer of crushed parsley.
Use a bandage to hold it in place.
Allow to sit for several hours, or better yet, overnight.
Bug Bites and Stings
Baking Soda
Put a tablespoon of baking soda in a small bowl.
Add a few drops of water at a time while stirring until you form a thick paste.
Apply direct to the bite or sting. Leave for 15 minutes.
Rinse it off with cool water.
Onion
Apply a freshly-cut slice of onion to the bite or sting.
Hold in place for 15-20 minutes.
Rinse with cool water.
Sage
Crush fresh sage leaves in a mortar and pestle.
Apply directly to the bite or sting.
Hold in place for 15-20 minutes.
If irritation persists, rinse with cool water and start over.
Tea Bags
Press a used tea bag against the sting until the itching stops.
Dizziness
For this one, it really depends on what's causing the dizziness. Sometimes you might simply be anxious, dehydrated, or lacking in iron (in which case, iron-rich foods like spinach could help). The following remedies could help with dizziness, depending on what the cause is.
Almonds and Pumpkin Seeds
Soak a handful of almonds and pumpkin seeds overnight.
Grind into a paste and mix with a glass of warm milk.
Drink daily to treat chronic dizziness.
Lemon
Mix the juice from half a lemon with a cup of water.
Add a pinch of salt and stir.
Drink as needed.
Earaches
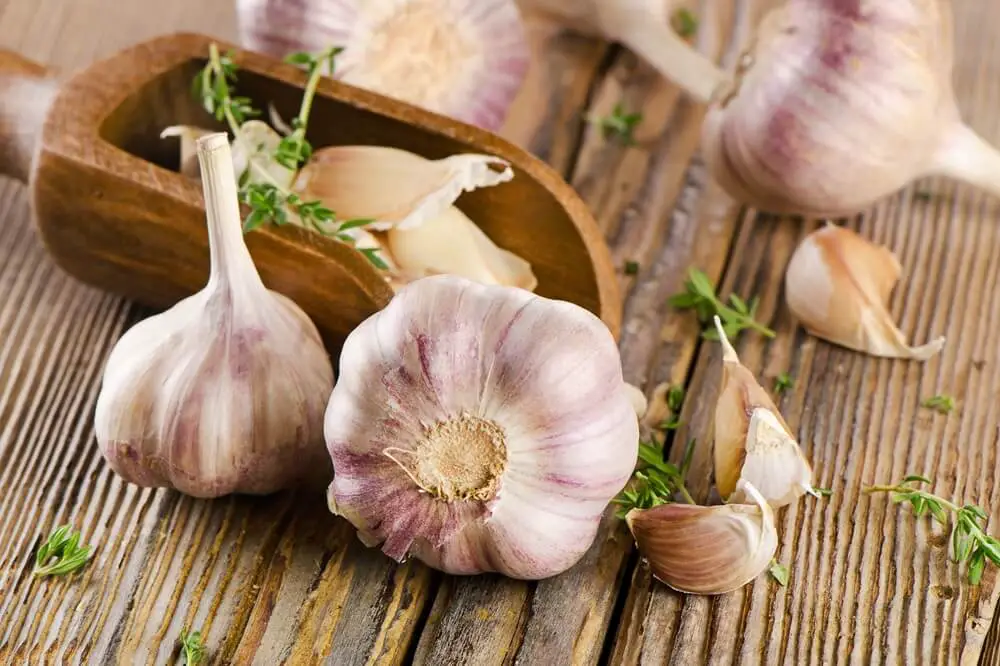
Garlic Oil
Crush a 2-3 cloves of garlic.
Add to 2-3 tablespoons of olive oil.
Simmer over low heat for 10-15 minutes.
Allow to cool.
Strain through a fine mesh sieve or cheesecloth.
Use a dropper to put a few drops in the affected ear.
Lie on your side with the affected ear facing up for several minutes.
Tea Tree Oil
Dilute tea tree oil in a carrier oil such as coconut oil (about 3-5 drops per ounce of carrier oil).
Put a few drops of the mixture into the affected ear.
Lie on your side with the affected ear facing up for several minutes.
Eye Irritation
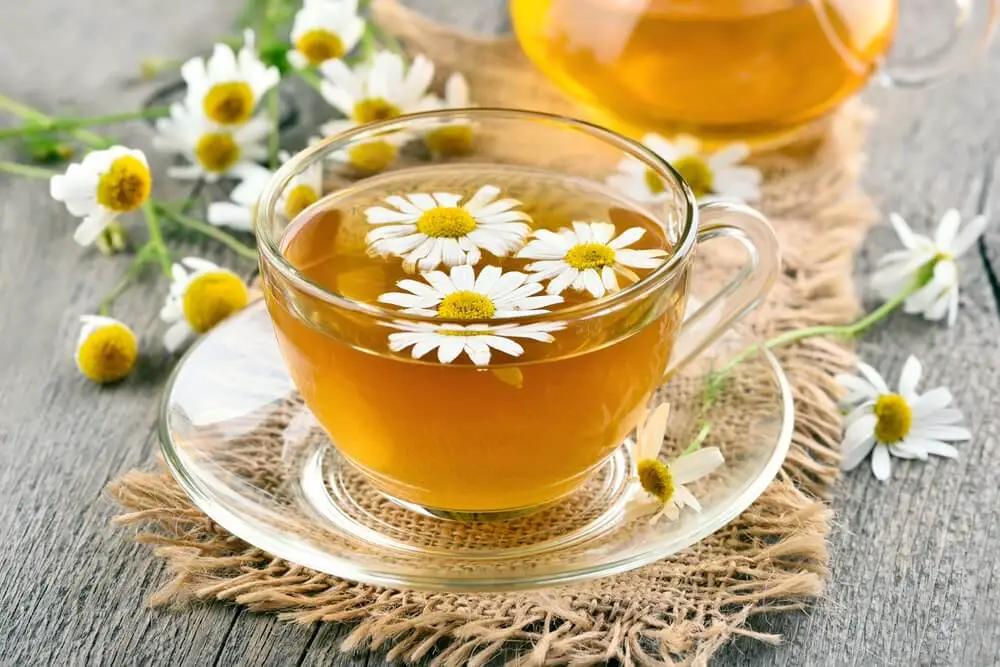
Chamomile Tea Bags
Place a used chamomile tea bag in the refrigerator.
Once it's cold, place it on your closed eye for 10-15 minutes.
Cucumber Slices
Slice a fresh cucumber into thin slices and place them in the refrigerator.
Place the chilled slices on your closed eyes for 10-15 minutes.
Saline solution
Saline solution can help wash away allergens and irritants from the eyes. You can get store-bought saline solution, or you can make your own:
Dissolve 1 teaspoon of salt in a cup of boiling water.
Let it cool completely before using.
Fever
Apple Cider Vinegar
This is an “old wives' tale.” It sounds crazy, but may people swear by it.
Drink a cup 2-3 times a day, and especially after meals.
Insomnia
Chamomile Tea
Chamomile contains apigenin, an antioxidant that binds to receptors in the brain that can promote sleepiness. Simply drink a cup of chamomile tea before you go to bed.
Cherries
Tart cherries, especially Montmorency cherries, are a great source of melatonin and tryptophan, both of which help the body sleep. Simply eat some cherries or drink tart cherry juice before bedtime.
Lavender
Lavender is known for its calming properties and ability to reduce anxiety, which often causes insomnia. There are two ways to use it:
Gradually add a tiny bit of water while stirring until you form a paste.
Apply the paste directly to the rash.
Let it sit for 15-30 minutes before washing off.
Walnut Leaves
Chop up a handful of fresh walnut leaves.
Place in a pot with 1 cup of water.
Bring the mixture to a boil.
Reduce heat and simmer for 15-20 minutes.
Strain out the leaves and allow mixture to cool to room temperature.
Soak and clean cloth in the liquid.
Apply to rash for 10-20 minutes.
Repeat several times a day.
Sore Throat
Garlic
Simply chew on a clove of raw garlic. If you can handle the taste, it can be very effective at easing a sore throat.
Ginger Tea
Peel 1-2 inches of ginger and slice thinly.
Add to 2 cups of boiling water.
Reduce heat and simmer for 10-15 minutes.
Strain the tea.
Add 2 tablespoon of honey and stir.
Sip while it's still warm.
Honey
Mix a tablespoon of water with warm honey or tea and drink as needed.
Salt Water
Dissolve half a teaspoon of salt in a cup of warm water. Gargle for a few seconds. Repeat as needed.
Stress
Ashwagandha
Ashwagandha has become very popular in recent years thanks to its ability to reduce anxiety and help the body resist stressors. It can be consumed in pill form or as a tea.
Chamomile
Chamomile is well-known for its ability to calm people down. Just drink some chamomile tea as needed.
Lavender
Lavender is also well-known for its calming effects. Simply add some lavender essential oil to a diffuser and enjoy the scent.
Passionflower Tea
Passionflower tea is good for generalized anxiety disorder and can also treat insomnia. Here's how to make it.
Pour boiling water over the leaves and allow to sit for about 10 minutes.
Remove tea infuser or strain the tea through a fine mesh strainer.
Let the tea cool to room temperature.
Use as a mouthwash for several minutes as needed.
Final Thoughts
We've covered a lot in this article, and yet there are still thousands more home remedies out there! The MVPs are chamomile, garlic, ginger, lavender, and peppermint, so if you at least have those on hand, you're in good shape. What other plants did I forget? Leave a comment and let me know!