Submissions     Contact     Advertise     Donate     BlogRoll     Subscribe                         

Friday, January 31, 2025

The Emergency Bucket Gift You Need

The Emergency Bucket Gift

The emergency bucket gift is something you can give to anyone you know and love. Here’s the deal: it doesn’t cost a lot to fill these, and you can fill them with things you and your family use every day, week, or month.

If your family is like mine, you must fill them, or they may never get filled. They may sit empty on a basement floor. Or they may not even make it into the house. This is where I buy my Colored Buckets and Gamma Lids.

But, if the emergency bucket gift is filled to the brim, or even partially, they may make it to the car. Just think how useful these buckets will be if a family is in the car and hits a snag in traffic.

The Emergency Bucket Gift You Need

The Emergency Bucket Gift

Here is a picture of the three buckets in the back of my car. I have a small Honda CRV, and they fit perfectly in the back. These can be secured with a bungee cord to keep them contained.

The Emergency Bucket Gift

First Aid Supplies

Medical handbook – What if you need to look up an emergency medical procedure? Get this book!

Anti-Diarrhea – No one likes the word diarrhea, but you need to be prepared.

Bandages – You never know when you’ll need a bandaid.

Bandage Scissors – Not something you may think of, but you need it!

Bee Sting Kit – You must be prepared with a bee sting kit.

Benadryl – Did you know Benadryl can be used for many different things?

Iodine swabs – Make sure you grab some of these swabs!

Bug Spray 100% Deet – You must protect yourself from the bugs.

Burn Gel – If you get a burn, you must have burn gel on hand!

Butterfly bandages – The next best thing to stitches! You will want these available.

Calamine Lotion – If you get itchy, you will be glad you had calamine lotion.

Chapstick/lip balm – If you have dry lips on a regular day, your lips will hurt in an emergency.

Contact case with saline – You won’t want to get caught without a contact case and saline!

Cough lozenges – You won’t be able to find cough lozenges anywhere after an emergency. Stay prepared.

Cough syrup – Again, you won’t be able to find cough supplies in an emergency, so stock up.

Ear Loop Masks (N-95), all sizes – Yes! You can never have too many of these on hand. The N-95 masks can make a difference from other masks. I still feel strongly we need these in case of a fire or dangerous gas leak.

Essential oils – Emergencies will make people more dependent on natural remedies, like essential oils.

Fever Reducers – You will want to have fever reducers in an emergency.

Flashlights w/batteries – You can’t go wrong with having extra flashlights! Don’t forget the batteries.

Gauze Pads (sterile and non-sterile) – We need gauze pads after a disaster or unforeseen emergency.

Gloves (non-latex) – You need gloves in case of an emergency! Just think about contamination.

Headlamps are great for adults and kids. We need to see where we’re walking for safety reasons. Handcrank radios/flashlights are great as well.

Heat packs- Heating pads – There may come a time when you need heat packs, mainly if you live in a cold climate. Hot Water Bottles are fantastic as well.

Hemorrhoid Ointment/Suppositories – Although no one wants to think about it, hemorrhoid ointment and suppositories are essential.

Lotion/cream – If you have dry hands like me, you’ll want some lotion on your hands in case of an emergency.

Multi-task knife – We can use one of these every day, right?

Nail Clippers – You can’t exist in an emergency without nail clippers.

Pepto Bismol Chewables – You will find that the chewable ones are awesome to have on hand.

QuickClot – You will want to have QuickClot on hand; it could save your life.

Scissors – You never know what to cut in an emergency.

Tweezers – Oh yes, don’t forget the tweezers!

Matches– If we need to start a fire, having a few matches in the bucket is critical.

First Aid Supplies by Linda

Personal Hygiene

Toilet paper – You can’t go wrong with having toilet paper in your hygiene kit.

Paper Towels– you can never have too many paper towels, right?

Hand sanitizer – I always carry hand sanitizer with me, especially in this kit.

Garbage bags 10-gallon and 33-gallon size – You can’t leave the house without garbage bags in your kit.

Duct tape – There is just something extraordinary about carrying duct tape with you! You can do anything with it.

Menstrual pads – You never know when or where emergencies could happen; always carry menstrual pads in your hygiene kit.

#10 can with car toilet supplies Emergency Car Toilet Kit – You will need these car toilet supplies with you!

Tampons – If you prefer to wear tampons, make sure you put these in your kit.

Diapers – Diapers are a must if you have little ones!

Baby Wipes – I carry baby wipes in this kit because everyone can benefit from having them with them in many “sanitation needed” situations.

Mylar blankets – Staying warm needs to be a priority, which is why you need these blankets in your kit.

Food and Water

Water

This is my favorite water source, and I store it in my home, garage, and car. Please remember that storing in temperatures up to 145 degrees is safe. I store water in several ways; you can never store enough water, right? Be careful in the winter; the cans will freeze.

In the desert, heat can dampen what you store safely. Of course, I can use the water stored outside in my 55-gallon barrel to wash dishes and for personal hygiene.

Drinking water is what I’m talking about today, and it is stored in these buckets. My favorite drinking water is called BlueCans. If you can find a distributor near your home, you will save a lot of money on shipping costs.

You can also order them from Brownells (currently out of stock-see the coupons in their emails). If you sign up for their newsletter, they sometimes offer free shipping, so get on their list. Don’t forget also to have a few water filters in those buckets.

These do not leak and have a shelf-life of 50 years. Please be carefulthese can freeze just like any other water product. Do not store these in your car if you live in areas where the temperatures are freezing. Any water product will freeze; we all know that.

The Emergency Bucket Gift

Food

Granola -bars are so easy to eat on the go and in an emergency.

Popcorn is something in your body when you are hungry or in an emergency.

Gum– While it’s not food, it may help us forget hunger.

Hardtack – I will show you how to make this recipe, and it’s worth making at least once in your life.

Packaged Snacks – These are so easy to bring with you.

Jerky – You are going to need some protein in case of an emergency.

Store Them Easily In The Garage

They are easy to store in the garage if you haul stuff in your car around town. Put the emergency gift bucket gift back in your vehicle when you return. These make great gifts for college students and weddings.

A Kit For Your Car

The Emergency Bucket Gift

Final Word

Whenever we can have emergency supplies in our homes, in the car, or at work, a sense of peace helps us relax, knowing we are prepared for the unexpected.

Please let me know if the emergency bucket gift can be used in your home, as a wedding gift, or to give to a college student. It’s all about being ready for whatever comes our way. May God bless this world, Linda

The post The Emergency Bucket Gift You Need appeared first on Food Storage Moms.


from Food Storage Moms

13 Herbs Every Homesteader Should Grow

Estimated reading time: 14 minutes

13 Herbs Every Homesteader Should Grow

Disclaimer: I am not a medical doctor and nothing in this article should be taken as medical advice. Please talk to your doctor before using any of the herbs and/or remedies mentioned in this article.

You probably already know that, in addition to adding flavor to food, many herbs have abundant medicinal properties. However, as we have come to rely more and more on the medical community to treat common physical ailments, many of us have forgotten how to use these plants to promote healing in our bodies.

Since most herbs are easy and inexpensive to grow in your garden, on your patio, or on your windowsill, let’s dig deeper into how you can use them to help your family stay healthy.

Here are 13 herbs every homesteader should grow.

Want to save this post for later? Click Here to Pin It On Pinterest!

1. Basil

Fresh Basil Leaves

Fragrant basil comes in a wide variety of types and sizes, but holy basil is the type best known for its healing benefits. Every part of the plant is helpful; its roots, leaves, stems and even seeds have been made into essential oils.

Basil works as an anti-inflammatory and anti-bacterial agent in the body and can protect the body from illness and infection. It can serve as an antiseptic for scrapes and cuts, and it can offer tension headache relief because of its muscle relaxing qualities.

Here are ways to use fresh basil for healing:

  • Make a medicinal tea. First, add two tablespoons of chopped basil to boiling water and then let it steep for about five minutes. Strain. You may sweeten the tea with honey if you like and then sip it slowly to ease digestion or to soothe a cough.
  • To help sore throat pain, brew a tea the same way but without adding honey. Let the tea cool and then use it as a gargle.
  • For headache relief, add about five basil leaves to boiling water and let boil for a few minutes. Let cool and then sip slowly. Some people who suffer from migraines report that they have experienced some relief by chewing a basil leaf at the first signs of a migraine.
  • Break up congestion due to a cold by adding a few chopped basil leaves to boiling water. Remove from heat and breathe in the steam to help with congestion. (Take care not to get too close to the steam as it can burn.)
  • Ease an insect bite or sting by applying crushed basil to the painful area. It helps to draw out the poison while helping the lessen the itch.
  • Improve your concentration and possibly your mood and mindset by simply sniffing fresh basil.

Here is a video that shows a recipe for basil tea and here’s a video that shows you how to dry your summer crop of basil for later use.

2. Bergamot

Bergamot Flowers

Bergamot (also known as Oswego or bee balm) is an aromatic herb that has a spicy, citrusy flavor in tea. You also can add bergamot leaves to salads for extra flavor and nutrition.

Bergamot also has medicinal uses. It can help lower a fever and aid in digestion and offer headache relief. Additionally, fresh bergamot leaves applied to the skin can help heal pimples and other blemishes.

Here’s how to make bergamot tea:

  1. Place a handful of bergamot herb leaves and flowers into a teapot.
  2. Pour at least two cups of boiling water over the herbs and cover the pot.
  3. Steep for five minutes.
  4. Add a little honey (if desired) and serve while still hot.

Here is a helpful article on bergamot.

3. Calendula

Calendula Flowers and Oil

Calendula, also known as pot marigold, is a vibrant, golden-yellow flower with a long history of medicinal use. Its anti-inflammatory, antifungal, and antimicrobial properties make it a valuable addition to any homesteader's herb garden. Calendula is especially effective for skin issues such as minor wounds, burns, rashes, and insect bites.

Here’s how to use calendula for healing:

  • Calendula Salve: Infuse dried calendula flowers in olive oil for two weeks, then strain and mix the infused oil with melted beeswax. Use this salve on cuts, scrapes, and dry skin.
  • Calendula Tea: Steep two teaspoons of dried calendula petals in a cup of boiling water for 10 minutes. Strain and drink to help soothe an upset stomach or reduce inflammation.
  • Soothing Compress: Brew calendula tea, let it cool, and soak a clean cloth in it. Apply the compress to irritated skin or minor burns for relief.

Calendula is also a great companion plant in your garden, helping to deter pests while attracting pollinators.

4. Chamomile

Chamomile Flowers

In addition to its well-known calming properties, chamomile can help relieve an upset stomach and can help heal skin irritations and acne scars. Chamomile is a gentle way to calm colicky babies.

Here's how to make your own chamomile tea:

Ingredients:

  • 3 to 4 TB fresh chamomile flowers
  • 1 small sprig of fresh mint
  • 8 oz boiling water

Directions:

  1. Place fresh flowers and mint in a mesh bag or strainer and place them in a teapot.
  2. Pour eight ounces of boiling water over the chamomile flowers and mint and let steep for five minutes.
  3. Strain as needed and serve while hot.

Here is an article on how you can use chamomile to heal acne scars.

5. Clove Tree Flower

Clove Tree Flower

Most people don't think of this one, but it's extremely important. Cloves, which are the flower buds of the clove tree, are the perfect numbing agent for tooth pain.

If you have a dental emergency but you're living off the grid, you will need a way to deal with the pain. The solution is cloves or clove oil. Apply the juice or oil to the area where you feel tooth pain and it will feel better almost immediately.

Another reason cloves are good for people with dental problems is because of their antibacterial properties. They are also known to reduce fevers, but there is no hard evidence of that yet. Here is how to make clove oil.

6. Echinacea

Echinacea Flowers

Echinacea, commonly called coneflower, is a well-known immune booster. It is frequently used to reduce the duration and severity of colds and other infections. Its roots, leaves, and flowers are all medicinally useful.

Here’s how to use echinacea:

  • Echinacea Tea: Use one teaspoon of dried echinacea (leaves, flowers, or roots) per cup of boiling water. Steep for 10 minutes, strain, and drink. This tea is most effective when consumed at the onset of symptoms.
  • Tincture: Fill a jar halfway with dried echinacea and cover with 80-proof vodka or apple cider vinegar. Let it sit in a cool, dark place for 4–6 weeks, shaking occasionally. Strain and store in a dark glass bottle. Take a few drops diluted in water to boost immunity.

Echinacea thrives in most gardens, requiring minimal maintenance while offering maximum benefits.

7. Lavender

Lavender Flowers

The lovely fragrance of lavender is known to help people relax and feel calm. Lavender also can work as a topical antiseptic for the skin, and it can ease digestive problems and headaches. It also can help induce sleep.

You can use lavender as part of an essential oil or in dried form. Here are some options:

  • Herbal Tea – Mix with mint leaves or chamomile to make a soothing herbal concoction. Just steep the dried leaves in boiling water five minutes. Strain and add honey if you wish.
  • Dandruff Remedy – You can use cooled lavender tea as a scalp rinse to help get rid of dandruff and an itchy scalp. Or place the cooled tea in a spray bottle to use an after-sun spritzer.
  • Nighttime Mask – Place dried lavender in a sleep mask or inside a pillowcase to help promote sleep.
  • Facial Scrub – Combine dried lavender flowers with oatmeal to create a gentle and sweet-smelling scrub for your face.

Here is a video that shows how to make lavender oil.

8. Lemon Balm

Lemon Balm Herbs

Lemon balm is a versatile and easy-to-grow herb that has been used for centuries to treat insomnia, wounds, and digestive problems. The Greek physician Dioscorides wrote about using this citrusy herb for stings and dog bites.

Here are a few ways to use lemon balm as a medicine.

  • Lip Balm – You can infuse lemon balm in almond oil and then add some beeswax to make a lip balm that helps soothe cold sores.
  • Lemon Balm Infused Oil – Mix one cup of olive oil with a half cup of fresh lemon balm. Let the mixture stand for four to five days at room temperature. Then strain out and discard the herbs. Place the oil in a clean jar, which you can store in the refrigerator for up to six months.
  • Lemon Balm Tea – Use two tablespoons of fresh lemon balm leaves or one tablespoon of dried leaves for each cup of boiling water. Let steep for about an hour. Strain and add honey or lemon (if desired) before sipping the tea.

Here’s a helpful video on how to use lemon balm on your homestead.

9. Oregano

Oregano Leaves

Often used in Italian cooking, this flavorful and aromatic herb has many healing properties. Oregano can help treat muscle pain, nausea, toothache, headaches, digestive issues, and menstrual cramps.

To make oregano tea, place three teaspoons of fresh oregano leaves (or one teaspoon of dried leaves) in one cup of boiling water. Steep for about five minutes. You can add some honey or another sweetener to counteract the bitter taste.

Oregano oil is useful for treating insect bites and burns. Breathing in the scent of oregano and oregano oil can help open up nasal passages. Here is a helpful article that explains how to make oregano oil.

10. Peppermint

Peppermint Growing in Garden

Peppermint is sometimes called “the world’s oldest medicine.”

Simply inhaling the smell of peppermint can help alleviate nausea and vomiting symptoms that are associated with motion sickness. Sipping peppermint tea can calm nerves and reduce headache pain. Peppermint also promotes dental health and can help fight bad breath.

Drinking peppermint tea can reduce a fever gradually and gently.

Here is how to make a homemade peppermint tincture.

Ingredients:

  • 1/2 cup peppermint leaves
  • 1/2 cup diced ginger root
  • 1/4 cup dried fennel seeds
  • 1 1/2 cups boiling water
  • 1 1/2 cups rum or vodka (drinkable varieties with minimum 40 percent alcohol content)
  • Quart glass jar with airtight lid

Directions:

  1. Put peppermint, ginger, and fennel in a jar and pour boiling water over them until herbs are just covered.
  2. Fill the remainder of the jar with food-grade vodka or rum and close jar with lid.
  3. Store jar in a cool dark place for two to six weeks, shaking the jar on a daily basis.
  4. Strain out herbs with a mesh strainer or cheesecloth.
  5. Store liquid store in small jars or vials.

This video explores the uses and benefits of peppermint.

11. Thyme

Thyme Plant Leaves

Thyme is known to help ease cold symptoms, such as coughing and congestion, and indigestion. Thyme also can be used in a poultice to reduce throat pain, as a gargle to treat mouth sores and a sore throat, and as a tea to ease nerves and stomach upset.

To make thyme tea, you will need about three thyme sprigs for each 1 1/2 cups of boiling water. If you have a tea ball infuser, chop the thyme sprigs before steeping.

You can drink thyme tea as is or sweetened with a slice of lemon or ginger or by adding a bit of honey to your tea. Here is an interesting article on thyme and its healing benefits.

12. Wooly Lamb's Ear

Wooly Lamb's Ear Close Up

This plant is also known as “Nature's Band-aid.” That's because you can put the soft leaves on minor cuts and scrapes in order to slow down or stop the bleeding. Even better, the leaves have antibacterial properties, making it less likely that your wounds will get infected.

In addition to treating cuts and scrapes, you can also use wooly lamb's ear leave for rashes and bug bites–it will reduce the pain and swelling. Also, if you have an upset stomach or diarrhea, try making some tea with it. You'll feel better before you know it.

13. Yarrow

Yarrow Flowers

Yarrow is a versatile herb known for its ability to stop bleeding and support wound healing. In addition to its styptic properties, yarrow is a natural anti-inflammatory and antiseptic. Its feathery leaves and clusters of small flowers also add beauty to your garden.

Here’s how to use yarrow for medicinal purposes:

  • Wound Powder: Dry yarrow leaves and grind them into a fine powder. Sprinkle the powder directly onto wounds to help stop bleeding and prevent infection.
  • Yarrow Tea: Brew a tea with one tablespoon of dried yarrow per cup of boiling water. This tea can help reduce fever, ease menstrual cramps, and support digestion.
  • Poultice: Crush fresh yarrow leaves and apply them to cuts, bruises, or bug bites to reduce swelling and promote healing.

Yarrow is hardy and grows well in most climates, making it an ideal herb for self-sufficient living.

Bonus: Aloe Vera

Aloe Vera Gel and Jar

Many people would argue that this isn't actually an herb, which is why it didn't make the top ten. However, it's so useful that I thought it worth mentioning anyway.

The gel inside aloe vera leaves is very good at reducing pained caused by burns, cuts, scrapes, and sunburns. This is especially true of sunburns, which is probably a common occurrence if you work outside on your homestead all day. The gel will also help your skin heal faster.

Conclusion

Having your own herb garden in your yard or patio or even on your windowsill can reduce your reliance on certain routine over-the-counter medications. In many ways, you can save money and help your family heal in more natural ways.

If you are pregnant, nursing or have a health condition, it is wise to check with your medical practitioner before using any herbal remedies.

Like this post? Don't Forget to Pin It On Pinterest!

You May Also Like:

The post 13 Herbs Every Homesteader Should Grow appeared first on Homestead Survival Site.


from Homestead Survival Site https://ift.tt/uwBen93

Survival DIY Capability

I like to say that survival is the king of DIY pursuits. Could you adapt the resources in your environment to meet your survival needs? I bet you could if […]

The post Survival DIY Capability appeared first on Survivopedia.


from Survivopedia

EMP Movies That Do More Harm Than Good

Electromagnetic Pulse (EMP) events have long been a staple in disaster and action films, captivating audiences with visions of sudden societal collapse and technological blackouts. While these movies are undeniably thrilling, they often prioritize dramatic effect over scientific accuracy, leading to dangerous misconceptions about EMPs and their real-world implications. For preppers and those interested in […]

The post EMP Movies That Do More Harm Than Good appeared first on Ask a Prepper.


from Ask a Prepper https://ift.tt/ALznPRt

Thursday, January 30, 2025

17 Surprising Uses for Sugar

Estimated reading time: 1 minute

17 Surprising Uses for Sugar

You use it to sweeten your coffee and iced tea. It’s an important ingredient in most cookie and cake recipes. It has a place of honor in its own lidded bowl in your kitchen, and you’ve probably got a bag of it on your pantry shelf right now.

It’s sugar, the generic name for the sweet-tasting, soluble carbohydrates we find in many recipes and ingredient labels. Made entirely or mostly from sucrose, sugar comes from plants such as sugarcane or sugar beets and is used as a sweetener and preservative in many foods and beverages.

But did you know you can use sugar for many other purposes around your home and property? We’ve put together a list of surprising uses for sugar, and we’re hoping some of them are new to you.

1. De-greaser

It’s not unusual to come away with grease-stained hands after working in the garden, garage, or kitchen. Sugar’s abrasive nature can help get rid of that stubborn grease. Here are two options.

Add a bit of sugar to your liquid hand soap and scrub. Or, combine sugar with some olive oil and work the mixture into your hands to dissolve grease. Then, rinse with water.

2. Fresh Flower Preserver

Make your own version of those little freshener packets that come from the florist. Stir three teaspoons of sugar and two tablespoons of apple cider vinegar together in a vase of warm water.

Add freshly trimmed flowers. The sugar helps feed the stems, and the vinegar inhibits bacteria growth. Find out more here.

3. Grass Stain Remover

Every parent knows how hard it can be to get rid of grass stains from their children’s clothing. Here’s a tip. Make a thick paste of warm water and sugar.

Apply it directly on the stain, allowing it to set undisturbed for about an hour before washing the garment as usual. Repeat as needed. The sugar has enzymes to break down the chlorophyll in the grass stain.

4. Cheese Mold Preventer

It can be so disappointing and distasteful to find mold growing on your favorite cheese. Next time, place a sugar cube inside an airtight container along with your cheese to help prevent the molding process.

5. Body Scrub

Did you know you can make your own skin exfoliator with sugar and just a few other ingredients? Combine one part coconut oil or olive oil with two parts sugar to use as a body scrub. Read how easy it is to make this DIY scrub here.

Another idea is to sprinkle sugar on a lemon half to use on rough skin patches, including elbows. Twist the lemon half back and forth to ease dryness and discomfort.

6. Lip Balm

In a similar way, you can use the above body scrub on chapped lips. Just rub more softly on sensitive lips than you would on other parts of the body. This video shows how easy it is to make sugar lip balms.

7. Lawn Care

Whether it’s your own dog or a neighbor dog’s fault, those yellow grass stains can really take away from the appearance of your lawn. Try dropping a handful of sugar on the yellow spot.

The sugar works to decompose the urine, which aids in new grass growth in that spot. However, experts warn to use this method sparingly. 

8. Garden Nematode Prevention

Another way you can use sugar in the garden is to get rid of the pesky garden worms called nematodes. Sprinkle the affected plants and surrounding with sugar to create a hostile environment for nematodes and encourage beneficial organisms to grow.

This article suggests that small doses are the key to success with this method.

9. Spicy Food Helper

You may know that drinking milk can help reduce the scorch in your mouth you can experience when you eat spicy food. However, sugar may be easier to access in many cases.

Try placing a pinch of sugar (or a sugar cube) directly on your tongue to alleviate the discomfort. This method also works when you singe your tongue on a bite of too-hot pizza or take a quick gulp of a too-hot beverage,

10. Wound Antiseptic

When you don’t have access to antibiotic ointment, you can sprinkle sugar on minor skin wounds or ulcers before bandaging to help kill bacteria and aid in the healing process. 

11. Glassware Smudge Remover

Remove stubborn lipstick stains on glassware by rubbing some sugar onto the wet glass. The abrasive nature of sugar (or salt) helps the stain disappear.

12. De-icer

You may think of salt when it comes to de-icing your walkways and steps during the winter. However, if you’re out of salt, sugar also can do the trick. Both substances lower the freezing point of water.

13. Wasp Trap

When a wasp nest has invaded your outdoor space, try using sugar in a DIY trap. Here are the steps to follow. 

  • Cut off the top of a two-liter bottle
  • Place sugar in the bottom part and fill partway with water. 
  • Fit the top part upside down into the bottom, creating the appearance of a funnel and duct tape the two pieces together. 
  • Use a hole punch and wire to hang the trap.

Attracted by the sugar solution, wasps will fly in but be unable to fly out. Check out this article for photos and more information.

14. Fire Fuel

Although sugar does not work well as a fire starter fuel since it burns readily, it can help you keep a fire going. For example, try throwing a sprinkling of sugar on your grill when the flames start dying out instead of re-using starter fluid.

For more information, watch this video that demonstrates starting a fire with sugar and potassium permanganate.

15. Butterfly Food

If you’d like to attract more butterflies to your garden, you could try this recipe from Matthew Tekulsky’s book The Butterfly Garden.

Ingredients:

  • 1 pound sugar
  • 1-2 cans stale beer
  • 3 mashed overripe bananas
  • 1 cup molasses (or syrup)
  • 1 cup fruit juice

Mix all the ingredients well and apply the mixture with a paintbrush to tree trunks, rocks, fence posts, or stumps. Another option is to hang a sponge soaked with the mixture from a tree limb in the area where you’d like to see more butterflies.

16. Make Rock Candy

It’s easy to make old-fashioned rock candy, and it’s a fun project to do with kids. You only need granulated white sugar, hot water, some skewers or string, Mason jars, and some patience. Here are the instructions. Or watch this video.  

17. Coffee or Spice Grinder Cleaner

You can use sugar to clean out residue and odor from your hand-held grinders. It’s a simple and easy task. Pour about a quarter cup of sugar into the grinder. Grind the sugar into a fine powder. Then, dump out the powder and wipe the grinder with a clean damp towel.

If you’re motivated to try some of these uses and are considering buying a new supply of sugar, a pound of C&H Pure Cane Powdered Sugar currently sells for $1.83 on Amazon. That’s 11 cents per ounce.

You May Also Like:

The post 17 Surprising Uses for Sugar appeared first on Homestead Survival Site.


from Homestead Survival Site https://ift.tt/VEcC0lg

Cattails – The Little Known Survival Superfood

Estimated reading time: 11 minutes

Cattails - The Little Known Survival Food

Cattails are an often overlooked survival food. These nutrient-rich wild edibles grow throughout the United States and are generally easy to find. Cattails boast a high percentage of vitamins A, B, and C, phosphorous, manganese, and potassium.

Not only can you eat cattails, you can also harvest the pollen from the foraged plant and use it as a shelf-stable substitute for flour. They have a slightly starchy yet mild flavor.

To harvest the pollen from a cattail plant, just shake the stalk into a paper sack to release it. Always store the pollen in an airtight container as any air or moisture will decrease its shelf life.

Because a single acre of cattails can potentially offer a yield of nearly 6,500 pounds of flour, cultivating this wild edible to supplement the diets of soldiers during World War II was common.

Types Of Cattails

In North America, two species of cattails commonly exist. These nearly look-a-like classes of cattails both grow in marshy areas.  These are probably the easiest of all foraging items to identify. However, you must learn to tell them apart to determine when to harvest them and how to prepare them to avoid becoming severely ill.

There are two distinct species of cattails, and both grow in marshy areas: Typha angustifolia (narrowleaf cattail) and Typha latifolia (broadleaf cattail).

The first part of the species name, Typha, is a Greek root word and translates to “marsh.” The horrific and deadly disease of typhoid stems from the same Greek root word. In fact, the phrase “Typhoid Mary” stems from the scientific name for these two species of cattails.

The second part of the species name refers to the width of the plant. Typha angustifolia has narrow leaves and grows in deeper water along ponds, creeks, and rivers. Typha latifolia has wider leaves and thrives in more shallow water areas. Both varieties of cattails have been known to crossbreed.

Here's a picture of Typha angustifolia (narrowleaf cattail):

Typha angustifolia (narrowleaf cattail)

And here's a picture of Typha latifolia (broadleaf cattail):

Typha latifolia (broadleaf cattail)

Cattail Identification

  • Cattails usually grow to about 9 feet in height.
  • The leaves on the wild edibles have a leather strap-style appearance and are spongy on the inside but stiff on the outside.
  • Cattail leaves are brown cigar-shaped or rounded on the back and form together at the base – appearing as if to flatten on the bottom – without truly losing their oval design.
  • In the spring, cattails grow both flowers and spikes while filling up with pollen.
  • When a cattail plant is blossoming, it is densely filled with tiny flowers. The flowers are green spies initially but then turn a bright shade of yellow as the pollen content on the plant builds.
  • The roots on cattails form in a horizontal pattern. This portion of the plant is best eaten during the spring or fall seasons.
  • Leaves on cattails are very erect and flat and boast a “D” shaped cross-section. About 15 leaves grow from each shoot on the plant. The thick and ribbon style leaves are a green to pale gray in color.
  • Cattail flowers have two parts, a male and a female portion. The top of the cigar-shaped area of the plant is the male yellow spike male that is surrounded by the small female pistillate flowers.
  • Both types of flowers become visible from May through July. In the early fall, the brown cigar-shaped flower heads open up to expose the puffy seeds inside.
  • You can tell the difference between male and female plants easily by the “T” split between the “gender” specific portions of the plant – unless it is a typha latifolia species.
  • The leaves of edible cattail plants will be stiff yet have a spongy texture on both the inside and the outside.
  • Cattails should have no distinctive odor at all – with the exception of the mud smell that accompanies them immediately after they are pulled from murky ground.

Seasonal Changes in Cattails

Cattails undergo noticeable transformations throughout the year.

  • In early spring, they emerge as tender shoots, which are ideal for harvesting as raw vegetables or for cooking.
  • By summer, the flower heads mature, turning green and eventually golden brown as they accumulate pollen.
  • In late fall, the roots become starch-rich, making them perfect for survival food preparation.
  • In winter, the above-ground portions die off, but the roots remain viable, although they may be harder to access due to frozen ground.

Understanding these seasonal changes ensures efficient harvesting year-round.

What Part Of Cattails Are Edible?

When eaten raw, the white lower part of the stem tends to taste like cucumbers. If you cook the lower cattail stem, the flavor resembles corn on the cob. This portion of the plant is best harvested during the summer months.

  • The bottom white stalks.
  • Rootlets (young roots)  – these look a lot like spaghetti noodles and can be used as a pasta substitute in recipes.
  • Roots
  • Young tips
  • Leaves
  • Main Root Spurs

Also during the hot weeks of late summer, you can eat the green flower heads from the cattail plant and once again enjoy the taste of corn on the cob. The roots of cattail plants should be harvested in the fall.

Cattail leaves can be eaten raw to make a wild salad. The stems of young plants are especially tasty when boiled, but can be eaten raw. Young shoots must be cooked thoroughly before becoming tender and taste a lot like asparagus.

Roasting the flowers on cattail plants, as noted, above, taste delicious and like corn on the cob. I often add a pinch or two of cattail pollen to pancakes when camping to infuse more nutrients into the morning meal.

Nutritional Benefits

Each edible part of the cattail offers unique nutritional advantages.

  • The pollen is high in protein and serves as a rich source of essential amino acids.
  • The roots are packed with carbohydrates, making them a valuable energy source.
  • Young shoots and stalks contain significant amounts of vitamins A and C.
  • The leaves and tips offer dietary fiber.

This balanced nutrient profile makes cattails a perfect wild superfood, especially in survival situations.

How To Harvest Cattail Starch

There are two ways to harvest starch from a cattail – the peeling method and the water method.

Starch Peeling Method

  1. Harvest and then rinse the stalk of the cattail in cold water.
  2. Peel the “flesh” from the exterior of the cattail while it is still wet.
  3. Chop or chunk the cattail root into small pieces and place them in a bowl.
  4. Use a mortar and pestle or a mallet to pound the roots into tiny bits or a powder.
  5. Simply scoop the starch out of a bowl and prepare in a cattail recipe as desired or store in an airtight container.

Starch Water Method

  1. Harvest and then rinse the cattail roots in cold water.
  2. Crush the roots with a mallet.
  3. Soak the crushed cattail roots in cold water for about five minutes. During this time, the starch will release and then settle in the base of the bowl.
  4. Slowly pour the water out of the bowl, careful not to dislodge the released starch from its bottom. Do not pitch the roots, you are not done with them yet.
  5. Scoop out the starch with a butter knife or spoon.
  6. Repeat steps three and four at least twice to ensure all of the cattail starch has been released and gathered before pitching the roots.

Storing and Using Cattail Starch

Once harvested, cattail starch should be dried completely to extend its shelf life.

Spread the starch in a thin layer on a baking sheet and allow it to air-dry for several days, or speed up the process in an oven on the lowest heat setting. Store the dried starch in an airtight container in a cool, dark place to prevent moisture from degrading it.

This versatile starch can be used as a thickening agent in soups and stews or as a substitute for wheat flour in baking recipes like pancakes and bread.

Cattail Root Preparation Tips

Although cattail roots are typically considered a safe wild edible in their raw state, doing so often gives folks a pretty uncomfortable stomach ache due to the high level of starch they contain.

The roots of cattail plants can be harvested, washed, and then roasted over a campfire. When prepared in this manner, the roots will have a rather spongy consistency and blacken.

Toss the cattail roots onto a BBQ grill or into a smoker to prepare them for eating. The grilled or smoked roots can be eaten alone or used in a recipe after being heated.

You can also boil the roots just as you would if making potatoes.

Cattail Recipes

Scalloped Cattails

Ingredients:

  • 1 cup of scalded milk
  • 2 cups of cattail tops – chopped
  • ½ cup of butter – melted
  • 2 eggs – beaten
  • ½ teaspoon of black pepper
  • ½ teaspoon of sugar
  • ½ teaspoon of nutmeg

Directions:

  1. Combine the black pepper, sugar, nutmeg and melted butter in a bowl.
  2. Stir the ingredients thoroughly to combine.
  3. Add in the eggs and stir thoroughly again.
  4. Pour in the chopped cattail tops and once again stir completely to combine.
  5. Next, pour in the scalded milk and stir once more.
  6. Pour the scalloped cattails into a 9 X 13 baking dish.
  7. Bake at 275 degrees for half an hour or until golden brown on top.

Cattail Casserole

Ingredients:

  • 1 and ½ cups of cattail roots
  • 1 whole onion – diced
  • ½ of a cup of milk
  • 1 cup of shredded cheese
  • 1 cup of breadcrumbs
  • 1 egg, beaten
  • Salt and pepper to taste

Directions:

  1. Preheat oven to 350 degrees.
  2. Mix the cattail roots, breadcrumbs, and milk together thoroughly.
  3. Add in the onion and egg and stir completely.
  4. Toss in the salt, pepper, and shredded cheese – stirring thoroughly to combine.
  5. Bake in a 9 X 13 dish for 25 to 30 minutes.

Cattail Biscuits

Ingredients:

  • ¼ of a cup of cattail pollen
  • 1 teaspoon of salt
  • 3 cups of baking powder
  • ¾ of a cup of milk
  • 4 tablespoons of lard or shortening

Directions:

  1. Preheat the oven to 425 degrees.
  2. Combine all of the ingredients together in a large bowl and stir thoroughly to combine.
  3. Knead the mixture into a dough.
  4. Roll out the dough and cut into traditional biscuit shapes using the mouth of a glass or cookie cutters.
  5. Bake on an ungreased cookie sheet for 20 minutes.

Cattail Pancakes

Ingredients:

  • ½ cup cattail pollen
  • ½ cup all-purpose flour
  • 1 tablespoon sugar
  • 1 teaspoon baking powder
  • ¼ teaspoon salt
  • ¾ cup milk
  • 1 egg
  • 2 tablespoons melted butter

Directions:

  1. In a bowl, mix the cattail pollen, flour, sugar, baking powder, and salt.
  2. In a separate bowl, whisk together the milk, egg, and melted butter.
  3. Combine the wet ingredients with the dry ingredients and stir until smooth.
  4. Heat a lightly oiled skillet over medium heat. Pour ¼ cup of the batter onto the skillet and cook until bubbles form on the surface, about 2 minutes. Flip and cook for another minute.
  5. Serve warm with honey or syrup.

Other Uses for Cattails

Cattails can serve as more than a survival food ingredient during an SHTF event. For example…

  • The dried leaves can be used as tinder to start a campfire.
  • The dried stalks can be used as arrow shafts or in hand drills.
  • Dried tops can be light and carried by the sturdy stems and use as a torch.
  • You can cut, dry, and then lightly soak the leaves to use for weaving baskets or mats.
  • The puffy interior of a cattail top can be dried and used as stuffing in mattresses, pillows, blankets, and for homemade toys.
  • Break open a cattail leaf, as you would the leaf of an aloe plant, and use the cool gel inside as a natural antiseptic cream.
  • Use the leaves and gell to make a poultice and apply it to bruises, burns, stings, and other mild wounds.
  • Take the dried leaves and braid at least three of them together to create cordage.
  • The fluffy seed heads of cattails are excellent natural insulation. They can be stuffed into clothing or shoes to trap heat during cold weather or used as a lightweight insulating material in shelters.

After reading this article, you'll probably start noticing cattails all over the place. During the spring and fall, they are often very easy to find. Go ahead and pick some and try one of the recipes or methods mentioned above. You'll be glad you did.

You May Also Like:

The post Cattails – The Little Known Survival Superfood appeared first on Urban Survival Site.


from Urban Survival Site

10 Things to Keep in Your Fire Safe Box

10 Things to Keep in Your Fire Safe Box

Ray reminded me a few years ago about having a fire-safe box. As all my faithful readers know, my heartfelt wish is for each of them to feel the need to be as best prepared for unexpected emergencies as they possibly can. I’m updating this article so new readers will think about storing their essential items in a secure location.

Of course, it takes more than just feeling the need; they need to take those critical action steps to move forward with those preparations. That includes evaluating 10 things to keep in your fire-safe box.

The ”things” I’m referring to aren’t necessarily expensive jewelry or other possessions. I’m thinking more about documents you have that can make all the difference if your home burns down, is flooded, or may even be wiped out by a violent storm. You are now left to deal with the aftermath and how to reconstruct your life, so to speak.

Emergency Binder Contents

Many of you have taken advantage of my Emergency Binder, which you can download from my website. It outlines and has printouts of pages/sections of documents that will prove critical as you try to pull your life back together. Check it out and download it if you haven’t done so already. Emergency Binder Download. I prefer printing it on cardstock, and it’s actually in color if you want to print with a color printer.

Most of us have a safe deposit box at a bank, or at least we should have one. That is generally one of the safest places for critical documents and valuables. That is where we would keep most of the “originals” regarding documentation. The challenge is that the bank could have also been affected by the disaster, may have been closed for a period, or may be inaccessible from where you live. Or your bank, where you have a safe deposit box, is flattened by a tornado or hurricane.

As we’ll discuss later, the fire safe box is something portable that you’ll grab if you have to evacuate, but it will be kept in a location within your home that you feel will be the safest.

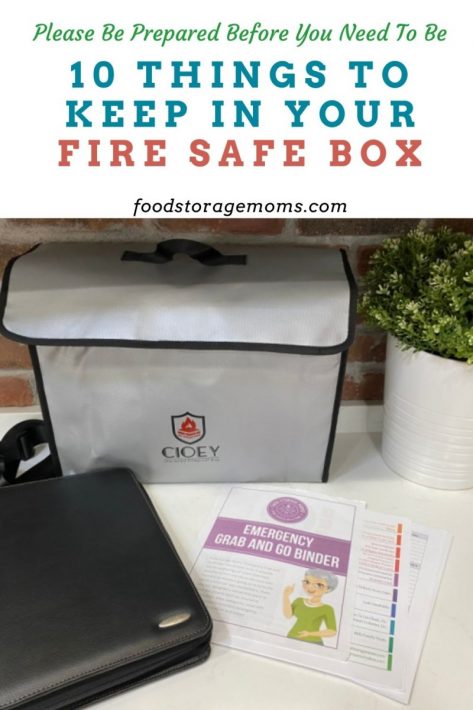
This is the one I purchased: CIOEY Fireproof Document Bags – Fireproof Box.

Since each of us has different circumstances we live and deal with daily, your critical documents may vary somewhat from mine. Still, there are certainly some documents we’ll all need if we’ve been through a devastating emergency. Let’s look at 10 things to keep in your fire-safe box as starters, and we may even outline a whole bunch more if you’re interested.

10 Things to Keep in Your Fire Safe Box

10 Things to Keep in Your Fire Safe Box

Proof of Insurance

No matter what type of disaster has fully or partially destroyed your property, you will need copies of insurance policies. If you are flooded out, hopefully, you’ve got flood insurance. Fire is the most common emergency we can face, no matter where we live. Of course, there are sections of the country where people face tornados, hurricanes, earthquakes, etc. Be sure to have the contact information of your agent, who can assist you in this desperate time of need.

You should also have copies of your health insurance policies. Hopefully, you come out of the emergency safely and sound, but you may have been injured and must show you have medical coverage for the treatments you may be going through.

Heaven forbid that one of your loved ones may pass due to the disaster. In that case, you’ll need copies of life insurance policies that list the coverage amount, who the beneficiaries are, and how to file claims. If you tend to deal with one agent for all your insurance needs, call that agent as soon as possible.

Documents to Prove Who You and Your Family Members Are

As you pull your life together, you may need to prove who you are, the makeup of your family, and other vital information. The best source of this information is a birth certificate. You should have at least a copy of one for every family member, especially if they are still living with you. 

This may also need to be backed up with the adoption papers of a family member brought into the fold through legal adoption. If there happen to be foster children living with you at the time of the emergency, for your protection and the safety of those children, foster parent documentation should be kept, too.

In today’s society, many of us are immigrants who need proof of naturalization or formal citizenship. Having passports, green cards, or military ID cards wouldn’t hurt to help prove who you are.

Pictures

I have mentioned before that you should add at least two pictures of every family member and pet in case you are separated after an unforeseen disaster. One for you to keep and one for the “board” (missing persons/animals) or law enforcement.

Rhonda mentioned this vital information: Besides proving who *you* are–consider adding pictures of pets who could get lost or separated from you in an emergency. If possible, have the photo taken *with you* to prove the connection/ownership. Show both sides and any identifying marks, scars, whorls, tattoos, etc. In the case of animals like horses with a shaggier winter coat, take winter pictures as well.

Leanne mentioned we should take photos of our home interior/exterior and a list of our personal property. Remembering all the items throughout your house once they’re gone will prove difficult, so make a list NOW.

Social Security Cards

After an emergency, you might find yourself looking for new employment. It could be that your place of employment was also destroyed or possibly damaged to the point it may not open for an extended period. You must sign a new W-4 and present your SS cards as part of the employment and benefits process.

It’s sad to say how much revolves around these government-issued documents. It’s more than just the filing of taxes. Personal identification on so many levels uses your social security number.

Proof of Marital or Partnership Status

It’s surprising how many new circumstances exist where proof of marital status is serious business. It can affect tax filings, medical insurance coverage, 401K participation, medical leave benefits, etc. Including marriage-related agreements, such as prenuptial ones, would also be a good idea.

If you’re no longer married, you should also have proof of that status through a divorce decree, alimony requirements you must pay on your behalf, and child support stipulations.

Estate Documents

The last thing you want to get involved in is a contested estate status situation. You, for sure, not only need a will but one that is somewhat foolproof by way of legal certification, notarization, etc. You may also have a trust set up to help protect your financial assets from tax issues that may come up later.

Many of us have established what is called a living will. It may not be related to the current emergency. Still, a living will directs your surviving family members what your wishes are in case you become incapacitated and can’t make life-altering decisions on your own. That may include if and under what circumstances you want to be put on life support or taken off life support under certain circumstances.

There also may be times when using a power of attorney may be appropriate. There may be a situation where you are put in the position to sign papers on behalf of someone else. It may include the authorization to sign off/sell assets, place someone in a care center, provide for burial arrangements, etc.

Unique Government, Military, Retirement, or Disability Benefit Documents

One of the worst things to happen after an emergency is to be cut off from any unique benefits for some reason. Maybe the home or apartment you lived in was government-subsidized housing, or a VA loan was in place. You want to be able to document your status as one who should continue to qualify for these benefits without interruption.

Proof of Home Ownership Is Vital

Yes, you can go to the county clerk’s office to get copies of trust deed filings, but they may be closed when you need the information, or it may cost you fees to get copies. If you have copies of your mortgage documentation, real estate deeds of trust, and any other property ownership documentation specific to your location, be prepared and have them in your fire-safe box.

Proof of Vehicle Ownership, Current Registration, and License Info

One of life’s joys is interacting with your city, county, or state’s Department of Motor Vehicles (DMV). Sorry to say, but they tend to be the subject of many not-so-friendly jokes due to their operating hours, less-than-helpful service, and stiff penalties for non-compliance with regulations. Put copies of your car’s current registration, vehicle titles, and insurance papers in the fire-safe box.

This includes copies of your state IDs and/or driver’s license. As mentioned earlier, your immigration status and required documentation are also critical.

Stock, bond, commercial paper, certificates of deposit, and cryptocurrency ownership info

Again, you don’t want to keep original documents at home that, if destroyed, could wipe you out financially. The emergency has already put you in an uncomfortable position. Loss of financial assets compounds your challenges. Keep copies of recent bank statements, stock transfer documentation, bond purchase affidavits, etc. You can show the status if needed with a copy.

Most recent local, state, and federal tax filings

If your luck is like mine, you’ll find yourself in the middle of a state or federal tax audit while trying to pull all the rest of your life-altering issues together. You are much better off having copies of the last two or three years of tax filing available. If you have room, include the backup documentation for income and deductions.

Consider storing essential papers listed below:

Reward accounts like your frequent flyer program agreements or recent statements.

Mortgage statements showing current payment status.

Lease agreements on your living quarters, car, or other property.

Student loan documents and recent payment receipts.

Record of immunizations and vaccines.

Dental records, DNA reports, and ancestry data.

Military ID and/or discharge DD 214 form to prove full-time service to receive veteran benefits. (Certificate of Release or Discharge from Active Duty)

USB Drive

Be sure to back up what you have on a USB drive if you lose everything in your home. Please store it where you have access if you must evacuate your home in minutes.

Do You Want a Fireproof Safe at Home or a Fire Safe Box?

One of my readers recently introduced me to a product I wasn’t familiar with, the fire-safe box/bag by CIOEY. Mark and I have had a sturdy, fireproof safe in our home for over 40 years. It has proved convenient, doesn’t take up too much room, and comforts us that our critical documents are safe.

I’ve often wondered if we would have time to open the safe and pull out all those documents I’ve suggested my readers have available if they needed to evacuate in a hurry, as outlined in my Emergency Binder. I’ve made copies of the most critical items and put them in the CIOEY fire-safe bag I ordered. That way, I’ll have a backup copy of things I’ll need if/when we need to leave the house during an emergency. I can put the binder right in the fire-safe bag, and away we go.
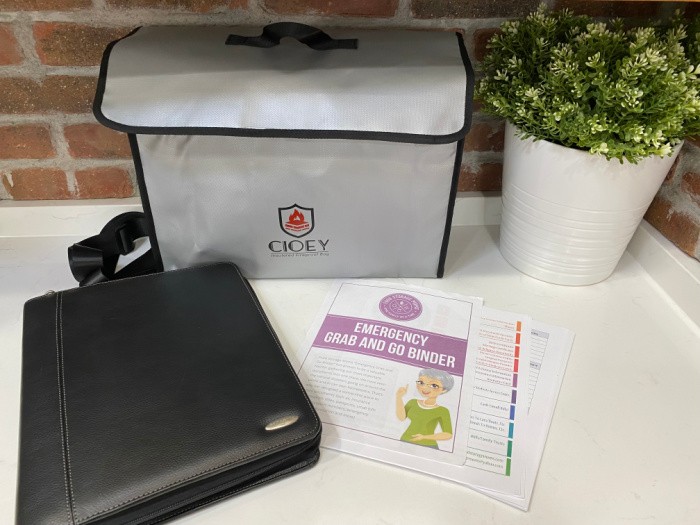
CIOEY Fire-safe Bag

CIOEY Fireproof Document Bags – Fireproof Box.

I’ve outlined some of the key features that make this bag so attractive and valuable, as found on their website:

This bag is thermal insulated, has the highest fireproof rating for like bags, and is water-resistant. It can withstand heat up to 2000 F. using the UL94 V-0 certified fiberglass fabric. The mid-layer is also thermally insulated and has an aluminum foil coating.

It is an easy-access bag with wide openings. The materials are easy to clean using a damp cloth. Carrying the bag is comfortable since there are no itchy surfaces. It also should prove durable, and the travel strap is handy. The strap has been tested to hold up to 45 pounds, and the carrying handles up to 35 pounds.

The bag has rugged, lockable zippers, a Velcro covering flap, and fire-retardant stitching. It is designed well with reinforced seams, a wide hook, and loop fasteners, all showing high-quality craftsmanship. The bag is 16 inches long, 12 inches high, and 5 inches wide, dimensions that will prove versatile as you fill it with so many critical documents as outlined.

In case you missed this post on my FREE Binder content, Critical Documents You Need for Emergencies

Some things to consider when storing your essential documents:

What Fire Rating Should I Look For?

Most fire protection safes or boxes have a rating based on temperature and length of time before ignition ranges, sometimes referred to as the fire endurance level. The higher the rating, the more often it relates to the purchase cost. Research what best fits your needs and budget, then move forward.

There are different kinds of locking mechanisms to consider.

The locks protecting your valuable documents come in different levels of sophistication. You can have a regular key lock, an electronic lock that typically uses a combination dial or both. Each protects unauthorized entry, and they come in various price points. I like ours, which has a combination, but you can also use a key. Remember to have an extra key or two in a safe place if the one you usually use gets lost.

Water resistance is an issue to consider if you live near a flood zone or experience frequent heavy storms or hurricanes.

Very few safes or fireboxes are rated as “waterproof.” Most do have a level of water resistance, much like your wristwatch. The higher the rating, the safer your content will be. Sometimes, they’re rated according to the depth of water level or possibly a pounds per square inch factor. You’ll need to decide how important this may be and how much you will pay for better protection.

An additional safety step would be to put the papers or other valuables in the safe in waterproof bags before locking them in the safe. That could prove to be a more cost-effective approach.

Think about possibly putting some other valuables in your fire safe or box.

I’ve emphasized putting things like paper documents in your safe or fire safe box at home and putting things like jewelry, coin collections, bonds, and other financial instruments in a safe deposit box at your local bank. You may want to consider putting some things with sentimental value in the safe or fire-safe box, like trinkets, stamp collections, or other memorabilia.

It all comes down to their value and the price you’re willing to pay to keep them safe. Space is also an issue since safety deposit boxes generally aren’t huge, and the bigger ones can be costly to rent from your financial institution.

Other features to consider:

Some features you may want to consider would be if you’d like a light inside the safe or fire-safe box. You probably won’t have power in a disaster, so using a flashlight or battery-powered internal light would prove handy.

Is it essential to have very thick gauged steel, or will a tough fabric do? The value of the contents and the cost for the highest level of protection all come into play. These containers are often UL-rated, so again, do your research.

Having some shelving inside was essential to me. I have some shelves at the top of my home-based safe where I can place things, and they slide out. On the bottom are hangers so I can put dividers that hold my document files.

I talked about the portability of the container. If that isn’t high on your priority list, maybe you should consider a way to bolt yours down so it stays in place and becomes difficult to remove if vandals find it.

Final Word

It feels so good to be prepared for the unexpected. I hope my post today puts a bug in your ear, if it hasn’t already, about gathering your essential documents and storing them safely. We can do this, yes we can. Please stay safe and stay well. May God Bless this world, Linda

The post 10 Things to Keep in Your Fire Safe Box appeared first on Food Storage Moms.


from Food Storage Moms

Common Pioneer Foods Made With Everyday American Ingredients

The food the pioneers ate are a testament to resourcefulness, with many dishes relying on simple, everyday ingredients that are staples in American households. These recipes, born from necessity and […]

The post Common Pioneer Foods Made With Everyday American Ingredients appeared first on Survivopedia.


from Survivopedia