Making a fire is one of the most basic survival skills to know. Honestly, it’s pretty easy to get a fire going when the conditions are right. But what about after it has rained (or while it is still raining!) and all you have is wet firewood?
Here’s what you need to know to start a fire with wet wood like a pro.
Quick Answer:
- Use a knife or hatchet to cut off the wet exterior of some dead branches and get to the dry wood inside.
- Ignite this wood underneath layers of wet firewood set up in the “lean-to” or “A-frame” lay.
- The flame will dry off the damp firewood so you can keep a good fire going, even when it is raining.
How to Make a Fire with Wet Wood (Detailed Answer)
1. Gather LOTS of Firewood
When making a fire in wet conditions (especially if it is raining), you need to have all your firewood gathered ahead of time.
You’ll mostly want to gather kindling – smaller sticks no wider than your thumb. The kindling does NOT need to be dry.
You can also gather some smaller fuel logs. In my experience, it’s easier to keep a fire going in wet conditions when the wood is thinner.
2. Make a Fire Platform
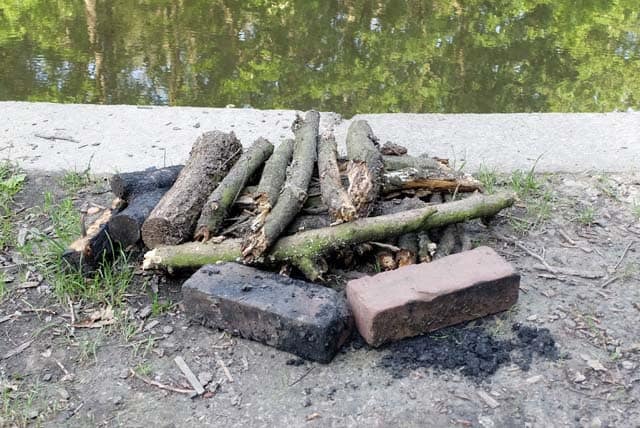
If all you have is wet firewood, then chances are the ground is also very wet. If you try to make a fire on damp ground, the wetness will extinguish your fire and prevent you from getting a good base of coals going.
The solution? To make a platform for your fire. To do this:
- Lay a row of small fuel wood or large kindling on the ground.
- Make another row of wood on top of this, but going in the opposite direction
- Repeat until you have 3 or 4 layers of wood.
The platform wood does NOT need to be dry!
3. Create Dry Tinder and Kindling
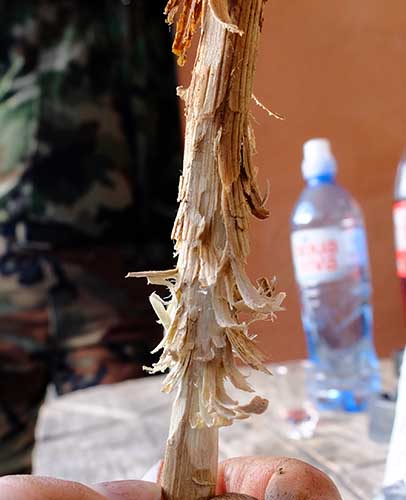
Even if it has been raining for days, you can usually still find some dry wood in the forest. All you need to do is look underneath piles of leaf and wood debris. But if you can’t find any dry sticks to use, you’ll need to create your own.
Unless the wood has been sitting in a stream or rotting (rotten wood absorbs water like a sponge!), only the exterior parts are wet. The inside of the wood is probably perfectly dry.
Remove the wet outer parts, and you’ve got dry kindling!
Sometimes all you need to do is shave away the wet bark to get to the dry wood inside.
If the wood still feels wet after removing the bark, you’ll need to split it into long, thin pieces to expose the dry interior. To do this, you’ll need a small survival knife or hatchet.
*Hopefully, you have some dry tinder (I like dryer lint covered in Vaseline). If not, you can use your knife to make a “featherstick” or shave off tiny pieces of wood from the interior of a stick to use as a tinder.
Also read: Best Tinder for Firestarting
4. Build Your Fire Lay
To make a fire with wet wood, you will need to use either the “lean-to” or “A-frame” fire lay. These lays use layers of wood to create a “roof” over your dry tinder and kindling. As the fire burns, the flame beneath dries out the layers of wet wood on top.
These fire lays also make it possible to make a fire in the rain because the top layers protect the flame below from rain.
You can use a basic teepee fire lay if it isn’t raining. However, you’ll have to add new wood onto the teepee constantly so the flame beneath has time to dry out the top layers. Because of this, the lean-to and A-frame lays are preferred.
To build the A-frame fire lay:
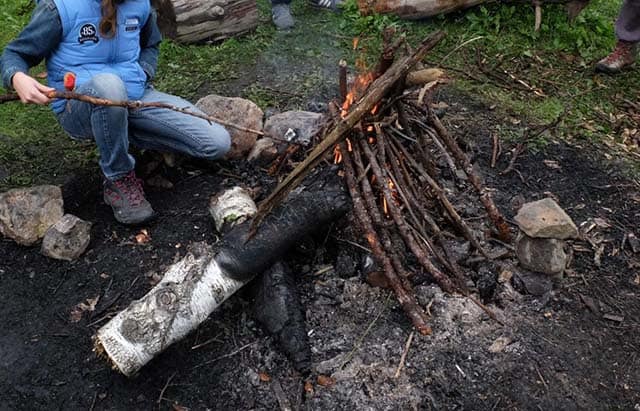
- Prop a longish log over your platform. You’ll prop wood on this to build your a-frame.
- Place your dry tinder on the platform you made
- Make a teepee over the tinder with your dry kindling.
- Starting with the thinnest pieces of wet kindling, create a layer going over the little teepee you just made.
- Keep adding layers to your A-frame.
- Don’t block the front or back of the A-frame, so you still have airflow.
To build the lean-to fire lay:
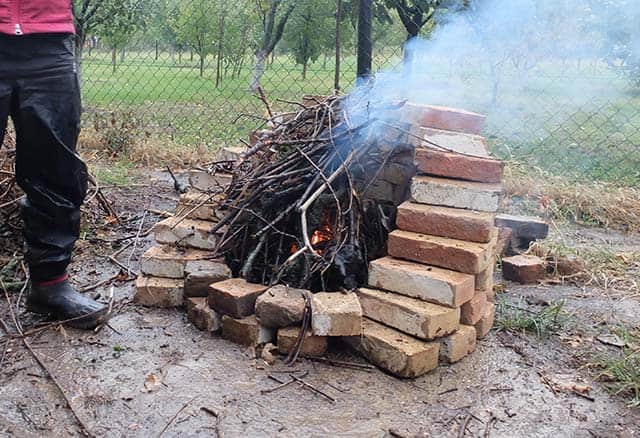
- Put a big log or rock next to your platform. You’ll prop wood on this to build your lean-to.
- Place your dry tinder on the platform.
- Make a teepee over the tinder with your dry kindling.
- Starting with the thinnest pieces of wet kindling, create a layer going over the little teepee you just made.
- Keep adding layers to your lean-to.
- Don’t block the front or back of the lean-to, so you still have airflow.
5. Light the Tinder
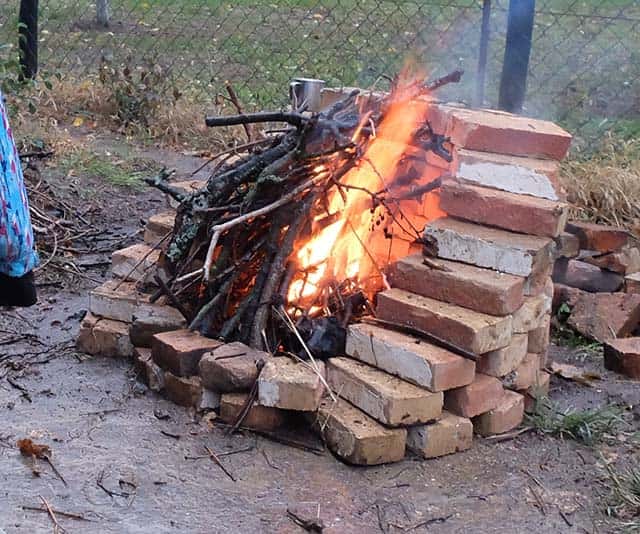
Now it’s time to light the tinder. The tinder will light the dry kindling, which will then start to dry out the layers of wet kindling above it. Once those dry out, they will ignite and dry out the layers above them. And so on.
Note that there will be a LOT of smoke as the kindling dries out. It can also take a while for the fire to get going. But, once it does, you can have a massive, warm fire. I’ve made fires while the rain was pouring right on top of them!
Just add more wood to your lean-to or A-frame, and your fire won’t go out.

No comments:
Post a Comment