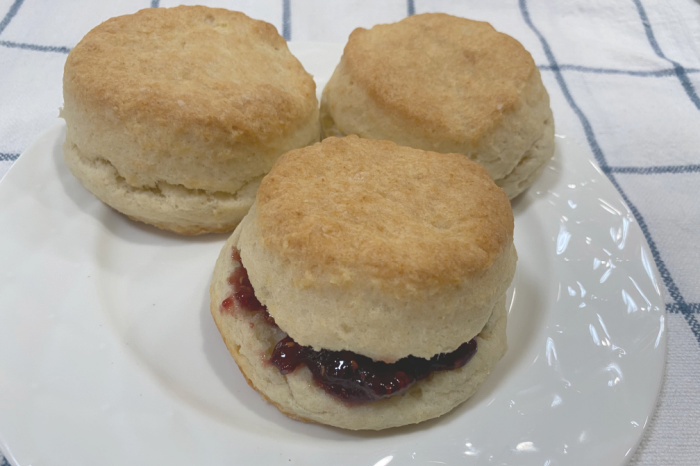
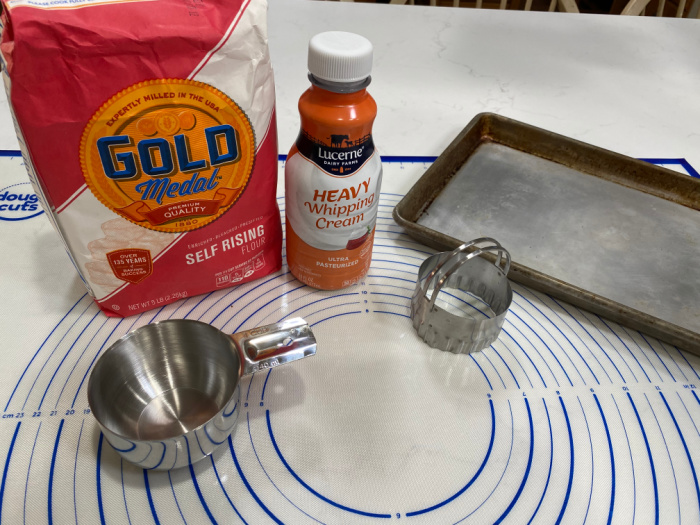
I’ve been dying to share this easy two-ingredient biscuit recipe that a reader sent me. Thank you, Pam! Here’s the deal: It has only two ingredients. Who doesn’t love whipping cream, right? This recipe calls for 2 cups of heavy whipping cream and 2 cups of self-rising white flour.
I only store white bread flour, so I went and picked up a small bag of self-rising white flour. Yes, you can substitute bread flour, but I wanted to make it just like the recipe sent to me. Pam was right—these babies melt in your mouth like Krispy Kreme doughnuts!
When I was young, my mother often made homemade biscuits, which I loved! This recipe is the easiest, and oh my, so good! You can serve them hot out of the oven with butter, jam, or honey, or use them in one of my favorite dishes, Cream-Chipped Beef!
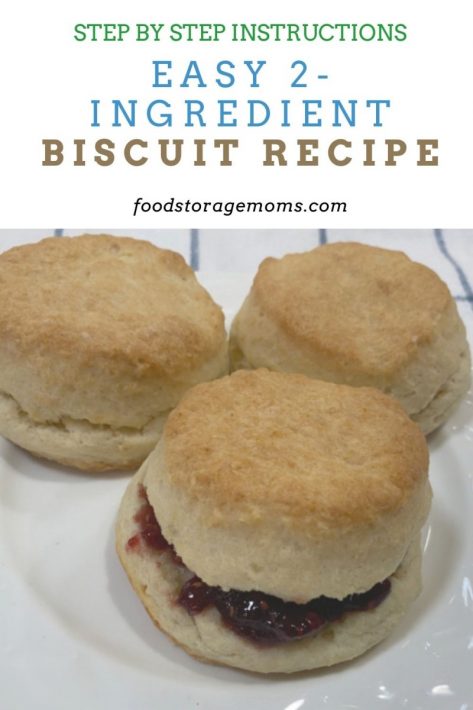
Easy 2-Ingredient Biscuit Recipe
It’s hard to believe that something that tastes so good involves only two simple ingredients, but that’s what you’ll get with this cream biscuit recipe. I can promise you that it’s one of the easiest recipes you’ll ever follow that doesn’t require butter, buttermilk, or shortening.
For those in a pickle with your finances, this recipe with so few ingredients sounds too good to be true. But it’s not! These cream biscuits turn out like every biscuit-lover would expect them to be: fluffy, flaky, and tender.
Oh, and did I mention they’re delicious, too? You’ll never waste another minute on other biscuit recipes that require more time and energy, which is entirely unnecessary.
Another reason to try this recipe is that it’s so easy to make that a child could do it with assistance. This presents you with another wonderful opportunity to bake and create memories in the kitchen alongside your kids and grandkids.
Not to mention making something that warms both their hearts and their tummies. So here’s how you can whip up your cream biscuits by following this speedy and easy recipe.
My other Easy Homemade Biscuit Recipe
Kitchen Tools Needed:
Step One: Gather Ingredients
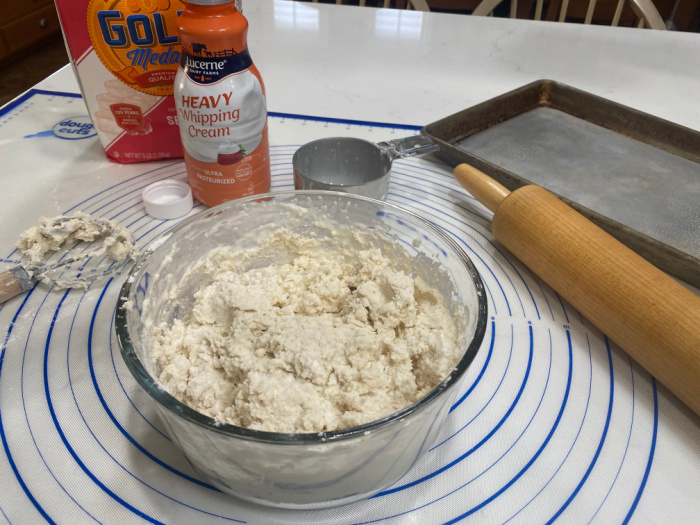
Step Two: Mix Ingredients
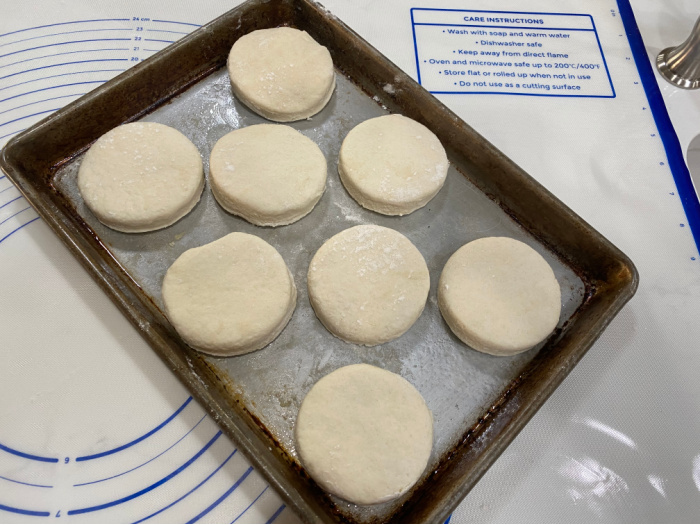
I ended up not using the biscuit cutter above. It didn’t cut the biscuit dough the way I needed it to. It has to be cut straight down, then lift the cutter with the biscuit and place it on the cookie sheet.

Step Three: Preheat Oven – Combine Flour & Cream
Preheat your oven to (400°F) = (204°C) degrees. Combine 2 cups of flour and 2 cups of heavy whipping cream. Stir until thoroughly mixed.
Step Four: Scoop Mixture onto Countertop
Scoop out onto the floured countertop and knead 10-12 times.
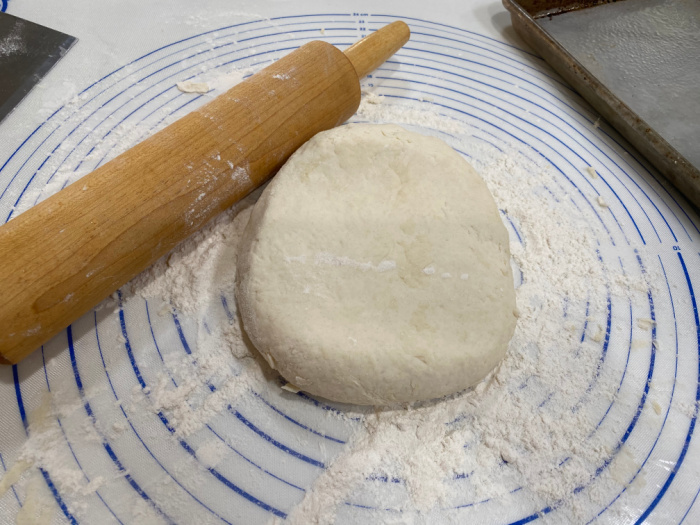
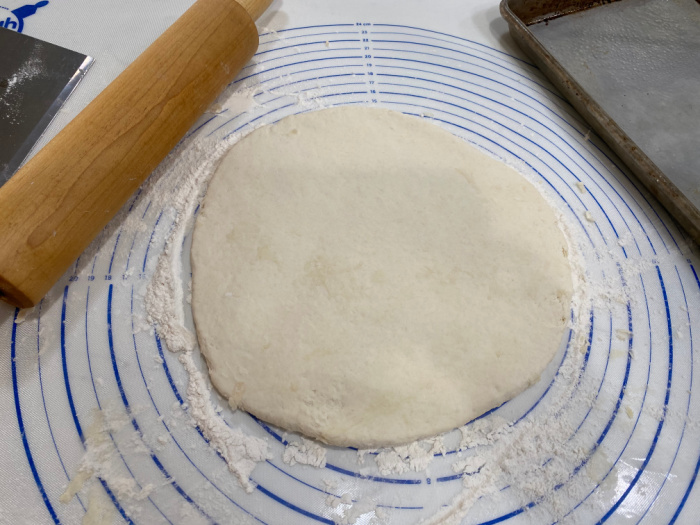
Step Five: Roll Out Dough
Sprinkle with flour, as needed, to prevent the dough from sticking. Then, roll out the biscuit dough 1/2 inch thick with a floured rolling pin. Cut out the biscuits and place them on a greased cookie sheet.
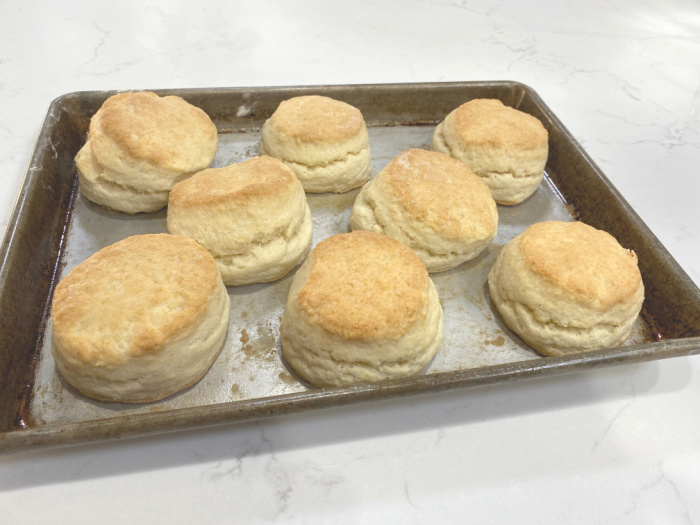
Step Six: Bake
Bake for 15-20 minutes or until light golden brown. Serve with butter, jam, or honey. Enjoy. They will melt in your mouth, I promise.
Step Seven: Note About Flour & Baking Powder
Please note: If you only have Bread FLOUR, You can use bread flour, but add 1-1/2 teaspoons of baking powder and 1/4 teaspoon of salt to EACH CUP of flour.
This recipe calls for 2 cups of flour, so you would add three teaspoons of baking powder and half a teaspoon of salt.

Easy 2-Ingredient Biscuit Recipe

2-Ingredient Biscuit Recipe
Ingredients
- 2 cups of heavy whipping cream
- 2 cups Self-rising white flour
Instructions
-
Preheat your oven to (400°F) = (204°C) degrees.
-
Combine 2 cups of flour and 2 cups of heavy whipping cream. Stir until mixed.
-
Scoop out onto the floured countertop and knead 10-12 times.
-
Sprinkle with flour, as needed, to prevent the dough from sticking.
-
Then, roll out the biscuit dough 1/2-inch thick with a floured rolling pin.
-
Cut out the biscuits and place them on a greased cookie sheet.
-
Bake for 15-20 minutes or until light golden brown.
-
Serve with butter, jam, or honey. Enjoy. They will melt in your melt, I promise.
-
If you only have Bread FLOUR: You can use bread flour but you will have to add 1-1/2 teaspoons of baking powder and 1/4 teaspoon of salt to EACH CUP of flour. This recipe calls for 2 cups of flour so you would add 3 teaspoons of baking powder and 1/2 teaspoon of salt to the recipe.
Do I need to Preheat the oven?
Yes, you do. The oven must be hot when you put biscuits in it. The hot oven helps them fluff up and rise like the best biscuits in the world.
How do I make my biscuits rise?
This is a trick my mother taught me years ago. After you roll out the biscuit dough, use your biscuit cutter, glass, or cookie cutter to cut the biscuits, but do not twist the cutter. If you twist the cutter, the biscuits will not rise and split apart as shown above. In other words, push the cutter down, lift the biscuit up, and place it on the greased cookie sheet.
Can I switch out the flour with other flour?
As you know, I only buy bread flour, but a reader named Pam gave me this recipe, and I wanted to follow it exactly as she gave it to me. You can use bread flour, but you must add 1-1/2 teaspoons of baking powder and 1/4 teaspoon of salt to each cup of flour.
This recipe calls for 2 cups of flour, so you would add three teaspoons of baking powder and 1/2 teaspoon of salt.
I would not recommend any other flour to make this a gluten-free recipe. Please remember that flour is kept safely in a tightly closed container for 9-12 months.
What about my baking powder?
If you will use bread flour and need to add baking powder and salt, consider how long that container has been sitting on your pantry shelf. Fresh or nearly fresh baking powder is key to making so many baked items. I know it’s tough to toss a can out, so I don’t buy large cans. I buy the size of a soup can, give or take.
BAKING SODA has a longer shelf-life, but BAKING POWDER is not as long. Once you open a can of baking powder, please use it up within 6-12 months for the best results in baking. Please don’t store the baking powder in the freezer or your refrigerator; it may cause condensation in your can.
How do I store these?
Baked biscuits can be stored in plastic wrap on your counter for 1-2 days. If wrapped tightly in plastic, they will also keep 4-5 days in your refrigerator.
Can I freeze these biscuits?
Yes, you can. Let them cool on a rack. Tightly wrap each biscuit in plastic wrap and place them in an airtight container. They will stay in your freezer for about three months.
Freezing Your 2 Ingredient Cream Biscuits
Wouldn’t it be nice if you could save your biscuits and heat them for a quick bite to eat in the morning before work? Well, it turns out you can. All you need to do is whip up a large batch of this 2-ingredient cream biscuit recipe and freeze any that you won’t use immediately.
After they’ve been cooked, allow them to cool to room temperature. Then, put them in a freezer-safe container or Ziploc bag, label it, and place it in the freezer. They’ll last for up to three months this way. When you’re thinking about eating them the next day, move the biscuits to your refrigerator, where they can thaw overnight. You can reheat them in your oven or a toaster.
Related: Instant Pot Hummus and Mediterranean Bowl
Final Word
I hope you enjoyed this 2-ingredient biscuit recipe that one of my readers shared! Thank you, Pam, for the recipe!!! Please teach others to cook from scratch. I realize whipping cream is expensive, but it’s all about cooking from scratch, my friends. May God Bless this world, Linda
The post Easy 2-Ingredient Biscuit Recipe appeared first on Food Storage Moms.
from Food Storage Moms
No comments:
Post a Comment