Estimated reading time: 18 minutes
There are a lot of ideas out there about how to get something to burn for 100 hours or more. We’re going to cover some of them, but we'll start with the true definition of a candle, which is a wick contained in wax.
The truth is, most conventional candles won’t burn for 100 hours. Their burn-life varies depending on a number of factors, particularly their size. But while size matters, there are other factors that allow a candle to burn long-term.
Who Needs a 100-Hour Candle?
The benefit of a long burning candle is that it simplifies things. Rather than stocking multiple candles or constantly finding replacements, a long-burning candle can be extinguished and relit without a lot of fussing around.
That can be a benefit in an emergency when the power is out and a few candles are the only way to find your way around in the dark. A long-burning candle is also more cost-effective.
They might cost a little more to make upfront, but if you look at the price for multiple, conventional candles with the same burn time, it’s cheaper to have a candle that keeps going and going.
Candle Making 101
There are books about candle making, but the actual process is fairly basic and watching a video or reading an article or two should give you all you need to know. Here are links to some candle making sources to consider:
- How to Make Homemade Candles for Beginners
- Learn how to make candles
- How to Make Candles: A Step-by-Step Guide
- How to Make Candles (VIDEO)
Before we get into the basic steps for making a few variations on a 100-hour candle, it’s worth covering some of the factors that allow a candle to burn longer. Some of it has to do with the materials and the amount of wax you use to make your candle, but there are some other small and surprising factors that can extend the burn-life of any candle.
Consider the following:
Candle Wicks
We’re accustomed to candle wicks made from braided cotton or fabric. They’re a proven material for candles, and the burn-life of the material is determined by the “ply.” A candle wick is a braided combination of small strings, and the larger the ply, the larger the wick.
A 24-ply candle wick has 24 threads in the braid. A 45-ply wick is often identified as the best wick size for a long burn, but all of this assumes you have the time to buy or order wicks online for candle making.
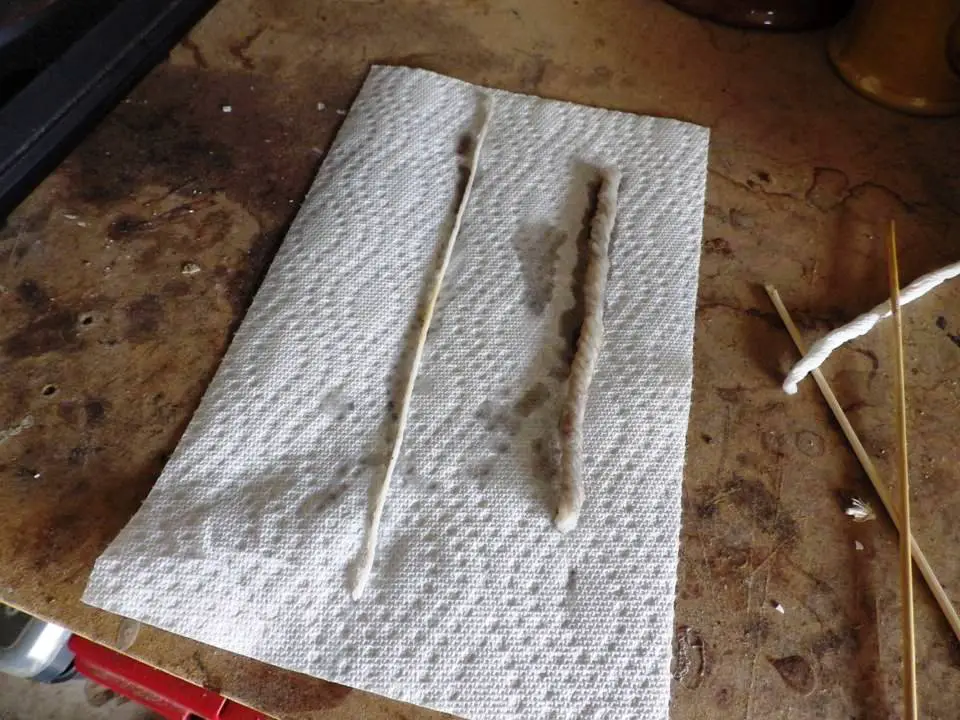
In an emergency, there are a variety of other materials that can be used in place of a braided wick. Here are a few possibilities in case you’re without some resources for candle making:
- Cotton shoelaces
- Small strips of braided fabric
- A strand from a mop
- A wooden skewer
- Twisted paper towel, napkin or toilet paper
- Small diameter, hemp rope, or string
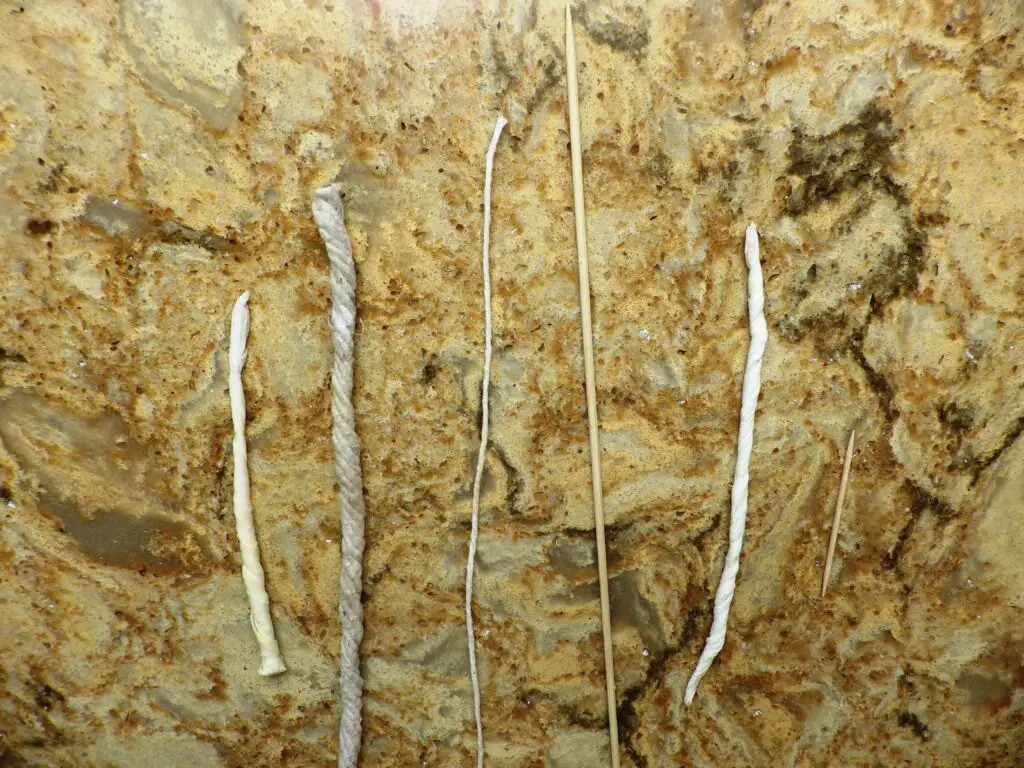
All of these materials will burn with the characteristics of a candle wick not only in wax, but fats, oils, and some of the other fuels we’ll cover. A specifically braided candle wick may be best, but many of these alternatives work surprisingly well.
A Bit More About Wicks
Here are some other things to remember on the subject of candle wicks that go a bit beyond the materials used to extend the burn-time of any candle:
Trim Your Wicks
As a candle burns, the wicks can increase in length, curl, or worse – drop bits of charred materials into the pool of wax at the top of the candle. After your candle has been extinguished for a few minutes, or before you relight, make sure you trim the wick to a ¼ from the top of the wax.
Wick trimming also prevents the candle from burning too hot and too tall. This burns off wax faster and that’s not the idea when you’re going for a long-term burn.
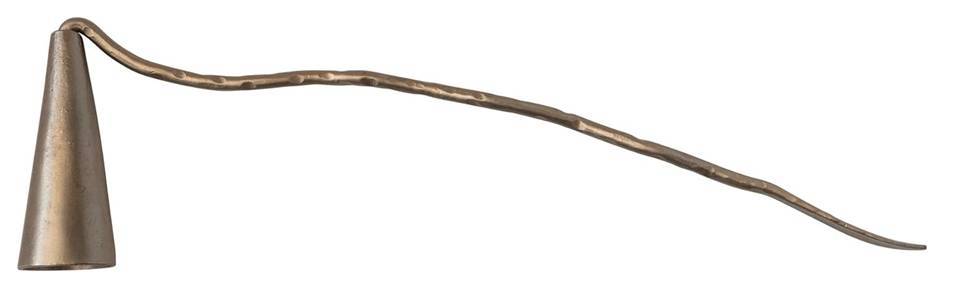
Of course there are wick trimmers you could buy, but most of us use a small pair of scissors or nail clippers. It doesn’t matter as long as you remember to trim your wicks before relighting.
If you ever have a wick that is broken off at the base, or trimmed too far – push a length of toothpick into the wax next to the wick and it will burn until the wax burns down to the original candle wick again.
Dip The Wicks
Regardless of the material you use for a wick, it’s wise to dip any wick in melted wax and let it dry on parchment paper or suspended from a stick or string. This will give the wick some structural integrity when you’re filling your candle container or mold with melted wax. The melted wax will melt some of the wax on the wick, but it gives you a fighting chance to keep the wick straight.
There are also candle wick weights that are circular and flattened that can keep your wick in place while the melted wax sets. Attach these weights to your candle wick before dipping the wick in wax so it’s firmly attached to the wick material.
You could also suspend the week from a stick or pencil over the candle mold to keep it in position. A lot of that depends on the type of candle you’re making, but if it helps to keep the week straight and in position, do it.
3 wicks versus 1 wick
It may come as a surprise, but a 3-wick candle can actually burn longer than a single wick. That’s because 3 wicks melt the wax on the surface into an even pool of wax that prevents tunneling. More wick maintenance is inevitable with 3 wicks, but if you watch your wicks and use the right wax in the right size, a 3-wick candle can be a 100-hour winner.
Some Things About Candles You Maybe Didn’t Know
The first time you light a candle you should let it burn for 4 to 6 hours.
Hopefully you’re doing this at night when you need the candle, but try to at least get a 4-hour burn on a new candle.
That’s because there’s actually something called “candle memory.” A candle seems to remember how deep it burned and will remember that and repeat the burning behavior. The result is consistently poor burning once the candle memory has been set.
The reason for a long first burn is to avoid something called “tunneling.” Tunneling occurs when a pool of wax has not been allowed to form across the top of the candle. If only a small pocket of wax has been melted and burned off, the wick will begin to burrow the flame down into the candle, literally creating a tunnel.
It results in a very inefficient burn and can actually bury the wick in melted wax when extinguished. That first burn sets the stage for how efficiently the candle will burn throughout its burn-life, so try to get it off to a good start with at least a 4-hour burn.
Don’t Blow It Out
This is a head-scratcher for a lot of us. After a lifetime of birthday parties since childhood, where we’re always told to “blow out the candles,” there’s some advice out there to use a snuffer.
Snuffers have been around for centuries, and there’s a reason. A snuffer protects the integrity of the wick and once again helps to prevent bits of wick and debris from breaking off onto the surface of the candle. The result is a clean candle and a clean burn.
Snuffing also prevents a wick from smoking after the flame is out, and while the wick cools, it will actually draw some melted wax up and into the wick. Once this hardens, it’s a lot easier to trim that wick.
You don’t have to buy a snuffer. A thimble taped to a stick works in a pinch, or you can watch a video or read an article all about how to improvise one.
Salt the Candle
Sodium chloride or salt slows the melting and dripping of a candle. There’s two ways to use it. One is to sprinkle some salt on the top of a burning candle after the wax pool has formed. The other way is to dissolve 2 tablespoons of salt in two cups of water and soak the candle for 24 hours. Dry it off and it should burn better with less dripping.
Freezing the Candle?
There’s some advice out there that recommends freezing a candle for a couple of hours to extend its burn life. Unfortunately, it could also cause the candle to crack and significantly reduce its burn time.
It might be worth trying with a paraffin candle, but some of the more expensive wax options probably aren’t worth the risk, and they already have good, long-burning characteristics.
How to Prolong the Burn Time of my Candle
Wax Facts
Most candles are made from paraffin. It’s a petroleum derivative and is the cheapest form of wax. As usual, you get what you pay for, and paraffin has the shortest burn-life of the all the waxes we’ll cover.
They also tend to be the most odorous, and any chemicals they give off while burned are of course derived from petroleum. All of that notwithstanding, they’re relatively safe and the most popular candle wax in use.
1. Soy Wax
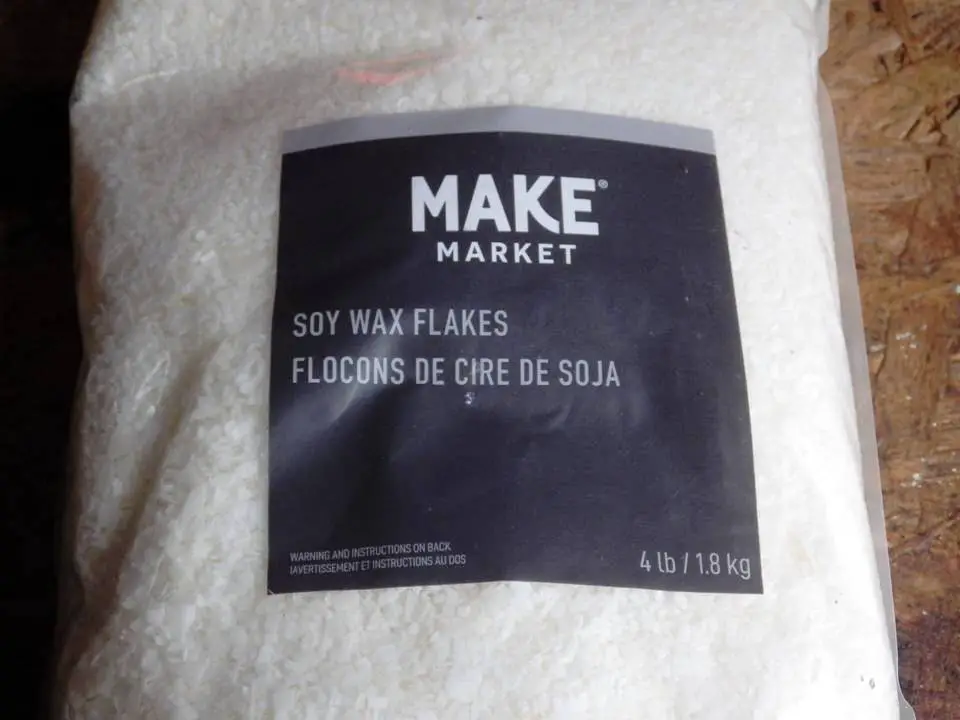
Soy wax is derived from the oil in soybeans. The oil is hydrogenated to a wax and is often used in candle making. It does not give off smoky odors, harmful by-products or black soot because it’s vegetable based.
It has a mild scent and burns slower than any other wax due to its slow-burning characteristics. Soy wax also pools easier and better than paraffin so a candle is less likely to tunnel. It’s also somewhat inexpensive but not as cheap as paraffin.
2. Coconut Wax
You don’t hear a lot about coconut wax, but it’s emerging as a type of wax used more and more in candles. It is made from the meat of the coconut which is then hydrogenated to thicken it into a wax.
Contrary to what you might expect, it does not give off a coconut scent due to the hydrogenation process. It’s a clean burning wax type and also burns longer than paraffin because it burns at a lower temperature and costs a little more than paraffin.
3. Beeswax
Beeswax is the historical choice when it comes to candle making. Many houses of worship will only use beeswax candles. It burns clean and long. It’s obviously organic and gives off no noxious fumes or chemicals. It’s also the most expensive and gives off a faint scent of honey when burned.
Wax Blends
It didn’t take people to long to engage in some candle wax alchemy. Many of these combinations combine waxes to defray the cost or enhance performance.
Some unscrupulous merchants will combine paraffin with another wax and tout it as beeswax or coconut wax and neglect to mention there’s a percentage of paraffin in the mix. That’s another benefit of making your own. You’ll always know what’s in it.
Whether or not you blend your waxes is up to you. Soy wax and paraffin wax makes the most economical blend with the longer lasting properties of the soy wax as a benefit.
Wax Additives
There are two additives that can extend the burn-time for a candle. If you want to make this complicated, you can try it. It could be the cheapest way to get paraffin to burn longer.
Vegetable Stearin
This is essentially stearic acid. It’s a palm oil-based candle additive. It has a high melting point making the wax harder to melt and extending candle life.
Homogenizer BE60
This stuff is starting to sound scary, but it’s not that bad. It’s an additive that optimizes the combustion rate and fixes the oils in candles.
The recommended ratio is 0.2% to 0.5% of the total weight of the candle. It can be added to all waxes but is unnecessary if all you’re trying to accomplish is 100-hours for a candle. If you’re out to set some candle records, give it a try.
Guide to the 7 Types of Candle Wax
Candle Shape and Size
Candles come in a variety of shapes, although most tend to be elongated with various widths. The best shape for a long-burning candle is cylindrical. In actual fact, the size and shape of a candle also affects the burn time. A small votive candle will burn slower than a larger, cylindrical candle, but the small amount of wax in a votive won’t get it to 100-hours.
Generally, the best height and diameter for a 100-hour candle varies depending on the wax type, and we’ll cover those parameters in a chart a little later.
Candle Molds and Containers
You basically have two options with a candle: Mold it into a solid shape or contain the wax in a jar or container.
A container is a little more difficult to maintain as the wax or fuel burns down. This is particularly true with any wick maintenance or debris that ends up in the wax or fuel (oil/shortening/etc.) Candles in jars or containers always look pristine when first put together, but after half of the wax or fuel is gone, we rarely see a picture.
Candles made of solid wax are more accessible in terms of wax and wick maintenance although they should still have a plate, dish, or other barrier between the candle bottom and any surface. In spite of your best efforts, candles drip and open flames are always a fire hazard.
You can buy candle molds online or at stores like Hobby Lobby. You can also improvise your own candle molds with packages that are cylindrical and made of cardboard. Some coffee cans and others products have this type of packaging. The cardboard is important so you can tear and peel it off once the wax has hardened.
Mason jars are another possibility but a wide mouth jar is better so you can access the wick for trimming or to remove debris from melted wax.
Even something as basic as a glass bowl can be used to contain the wax, especially for a 3-wick candle.
Wax, Fat and Oil Burn Times
Regardless of what you use as fuel for your candle, the amount you need for a 100-hour burn is going to vary. This is good to know if all you have are certain types of wax or fuels and want to create a 100-hour candle.
As a general rule, 1 ounce of wax will burn in a candle for 7+ hours on average. This depends on other factors like wick type and size, candle size, and general candle maintenance.
Here are some average burn times for various waxes, fats, and oils. The averages assume ideal burning conditions and wick maintenance. If in doubt or unable to maintain ideal conditions, just use more of the wax or fuel if you can spare it.
| Wax or Fuel | Amount | Burn Hours | Size |
|---|---|---|---|
| Paraffin | 1-ounce | 4 to 5 hours | 22 ozs./6”H x 3”W CANDLE |
| Soy Wax | 1-ounce | 5+ hours | 20 ozs./5”H x 3”W CANDLE |
| Coconut Wax | 1-ounce | 6 to 7 hours | 16 ozs./4”H x 3”W CANDLE |
| Beeswax | 1-ounce | 7+ hours | 14 OZS./3.5”Hx3”W CANDLE |
| Vegetable Oil | 1-ounce | 2 hours | 50 ozs. In a wide mouth jar |
| Shortening (Crisco) | 1-ounce | 6+ hours | 17 ozs. In a wide mouth mason jar |
| Butter (butter candles are a tradition in Tibet) | 1-ounce | 2 hours | 50 ozs in a wide mouth jar |
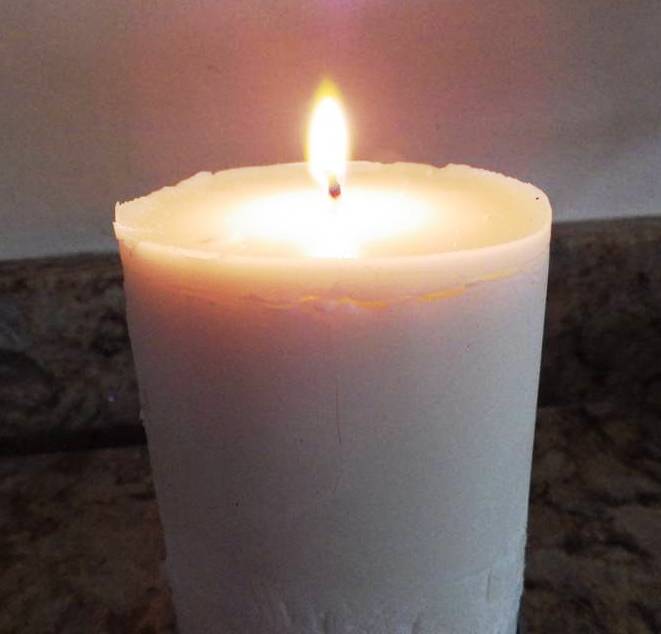
The Best 100-Hour Candle
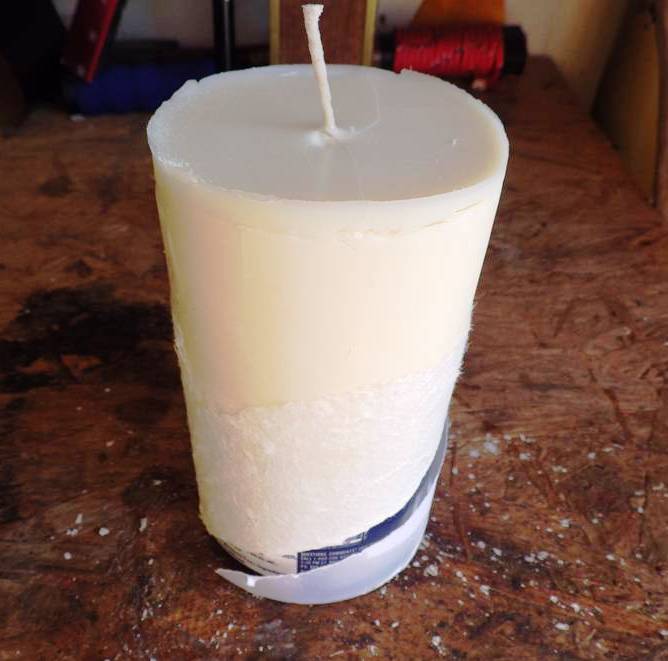
5×3 Soy Candle
Considering what we’ve covered so far, we’re going to select the best and most affordable elements to make a wax-based, 100-hour candle. Here’s the winning combination:
Ingredients:
- 20 Ounces of soy wax
- 6-inch long, 45-ply wick
Equipment:
- Hot plate
- Metal pot with spout
- Candle thermometer (or candy thermometer)
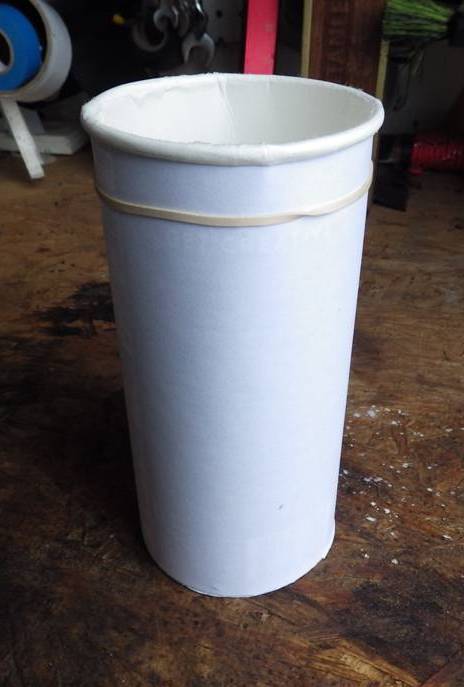
- Cardboard tube at least 5-inches high and 3-inches wide (We used an empty cardboard package used to hold Progresso bread crumbs.)
- Wooden skewer or pencil to support wick and keep it centered
- Metal or ceramic plate to support the candle when done (We ended up using an empty tuna can.)
Directions:
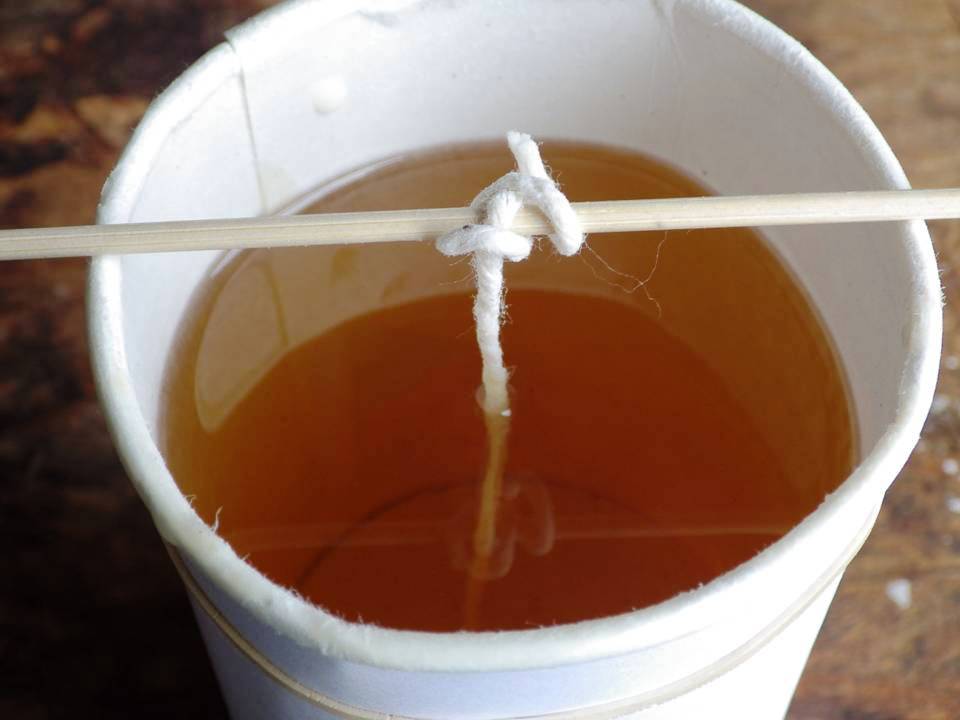
1. Weight the bottom of the wick either with a wick shoe or tie the wick to a washer or metal nut.
2. Push the skewer through the side of the cardboard mold about 6-inches high. We’re making a 5-inch tall candle so you want at least an inch of the wick sticking up. We’ll trim it later before lighting for the first time.
3. Lower the wick into the cardboard mold and try to center it in the bottom.
4. Tape the top of the wick to the skewer or pencil to keep the top centered.
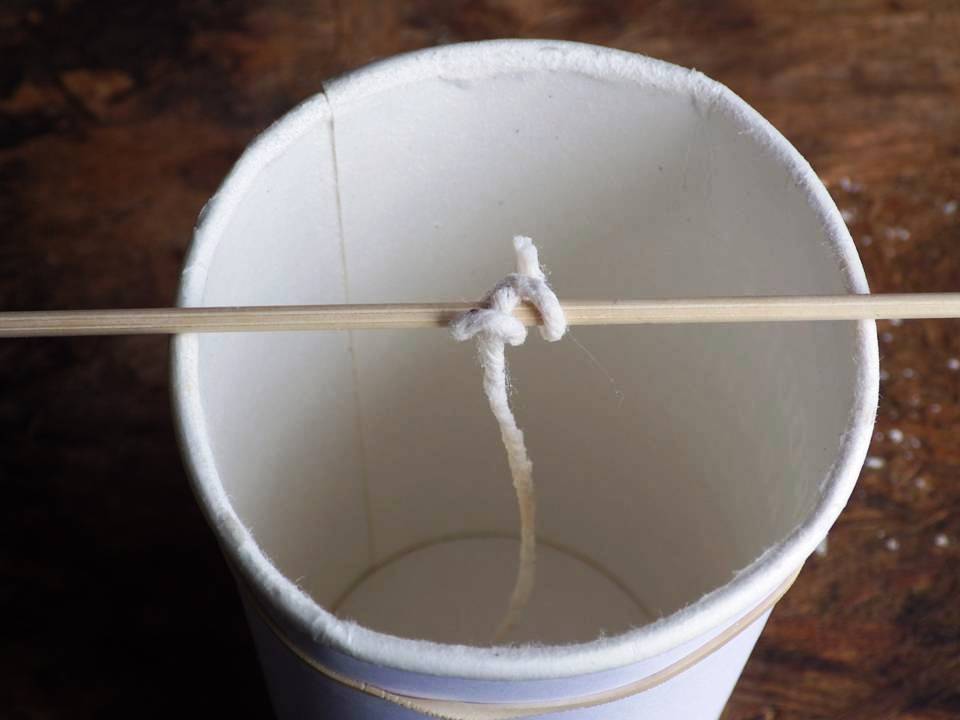
Note: You may need to use another skewer or pencil to move the bottom weight of the wick back to center after pouring in the melted wax.
5. Tape the bottom of the cardboard mold to a piece of wood or some other surface so it doesn’t tip while you pour the wax.
6. Put 20 ounces of soy wax into your metal pot and begin to melt it over the hot plate on medium heat.
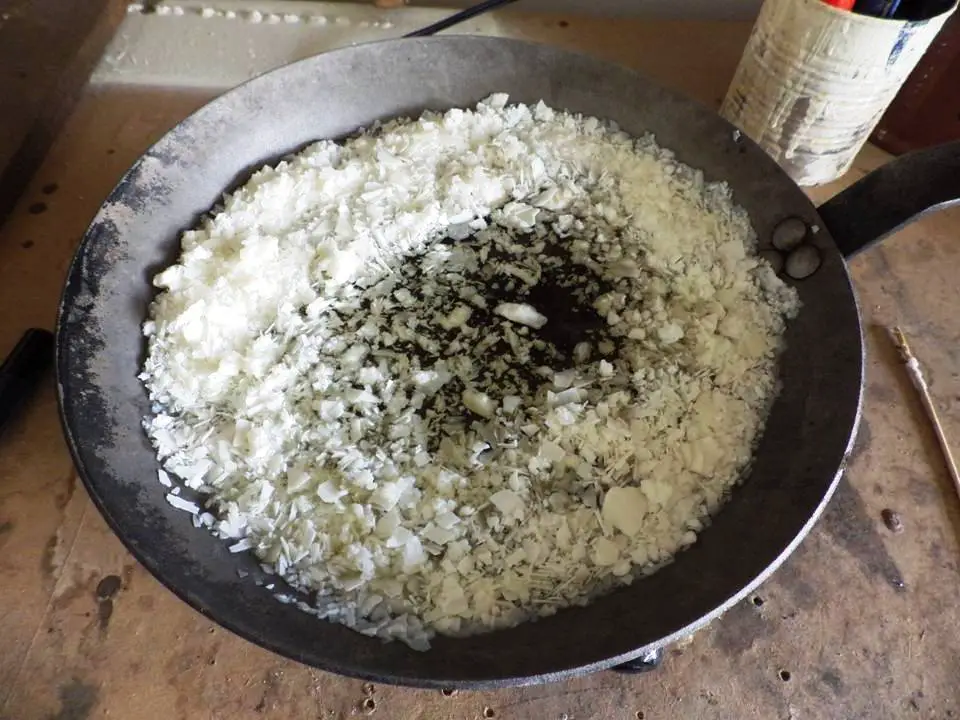
7. Stir gently as the wax melts. You could use the thermometer to gently stir and while you monitor the temperature.
8. You do not want the temperature to exceed 200 degrees Fahrenheit. That could burn the wax and lead to a higher risk of flammability.
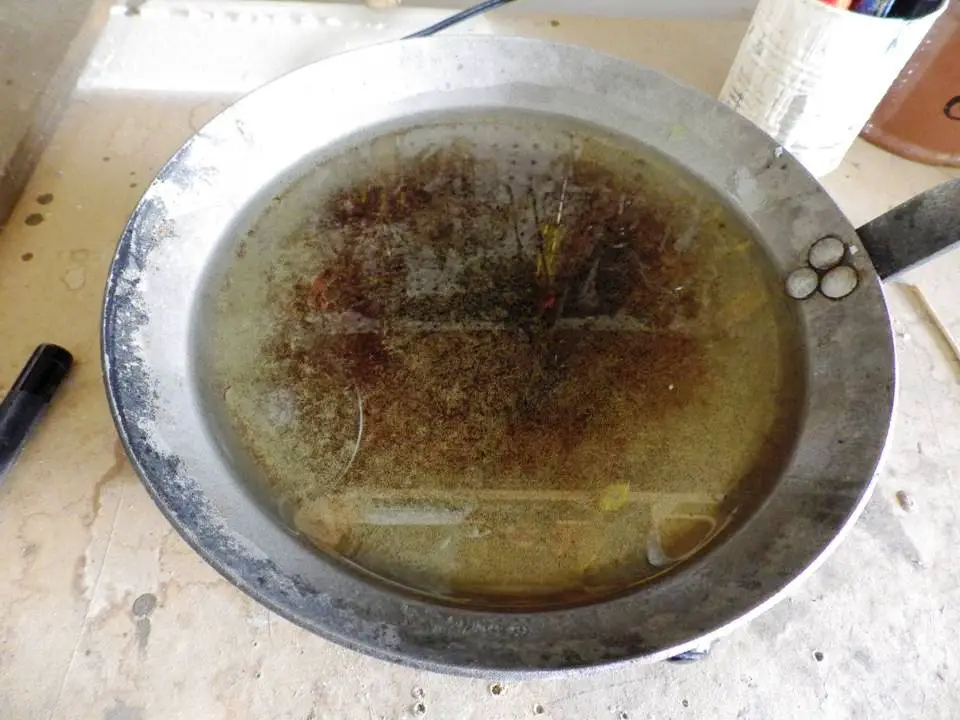
9. Once the wax is melted and clear, slowly and carefully pour it into the mold until it is 1-inch below the top of the wick.
10. Add hot water to the pot and bring to a boil to clean the pot. While the water is boiling, stir your thermometer around to melt any wax that has adhered to the thermometer.
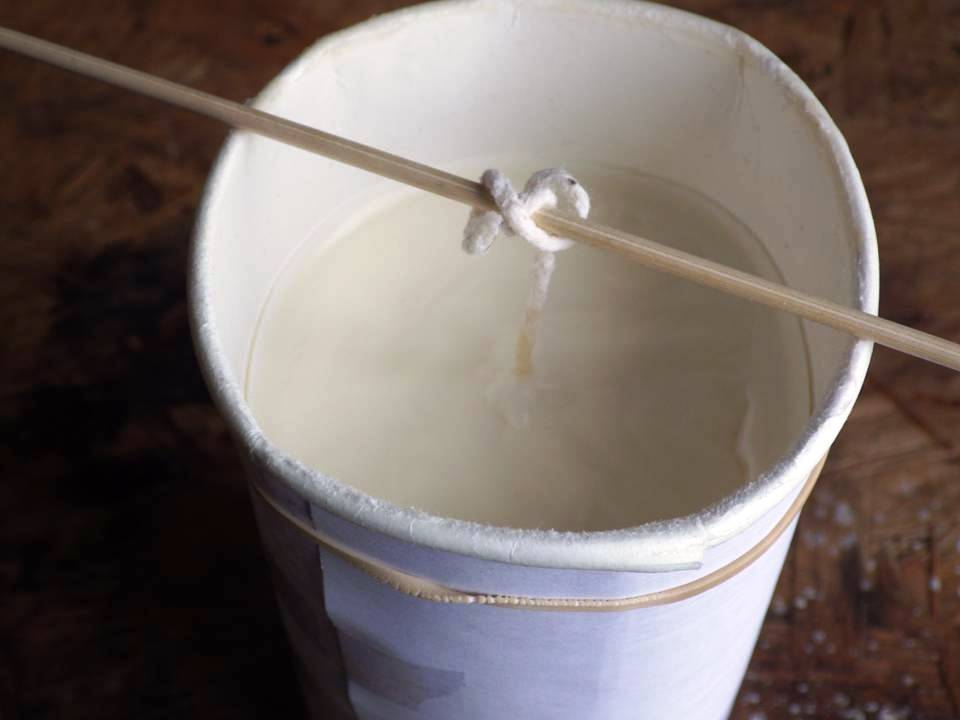
11. Let the wax harden in the mold for 24 hours.
12. Once the wax has hardened, carefully cut a slit in the top of the cardboard and begin to peel off the cardboard.
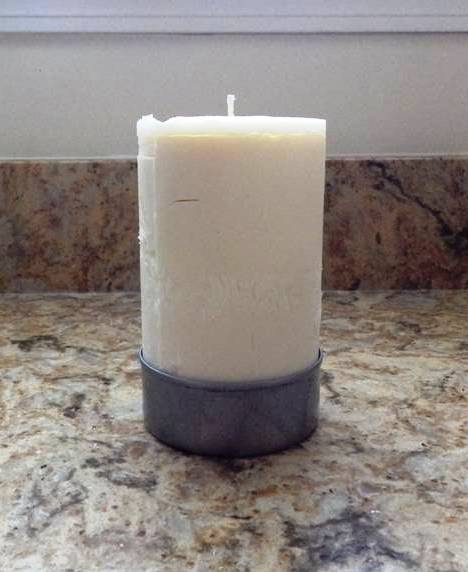
13. Drip some wax onto your metal or ceramic plate and set the candle into the melted wax so it adheres to the base.
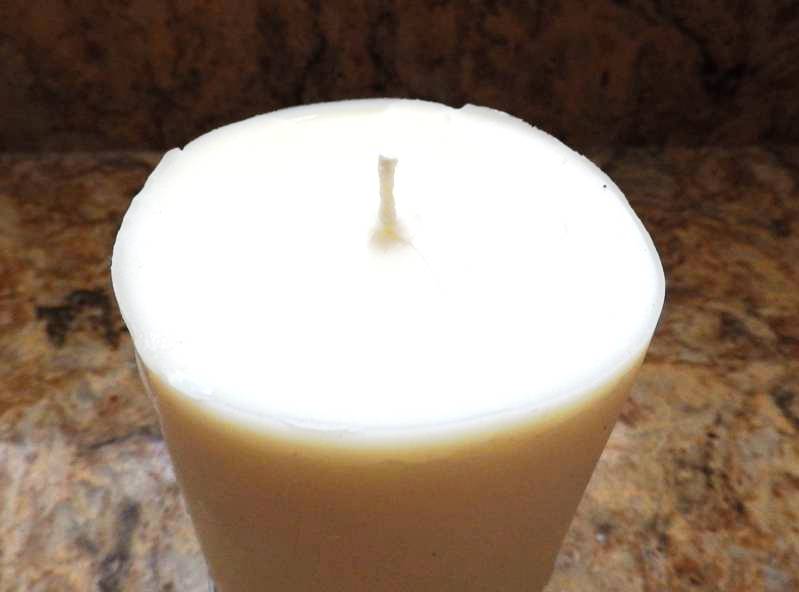
14. Trim the wick to ¼-inch from the surface of the candle.
15. If it’s an emergency, you’re new 100-hour candle is good to go. If you have the time, let the candle continue to harden and cure for about a week.
Some Quick Variations
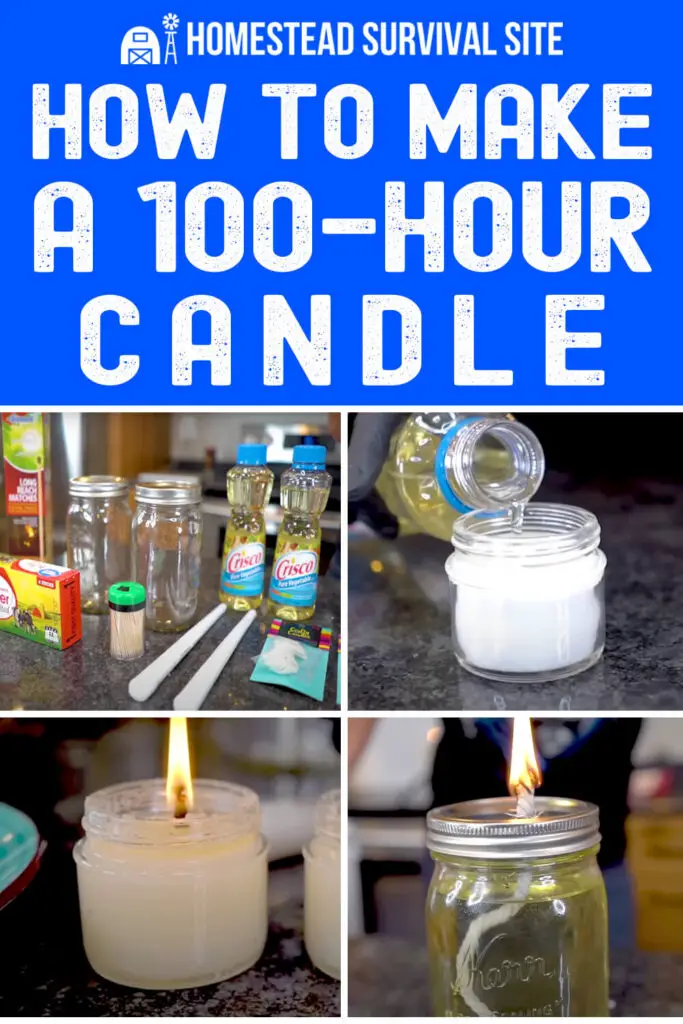
The process for a wax candle is the same with any wax you use whether it’s paraffin, soy wax, coconut wax or beeswax. However, there is a lot out there about Crisco candles and other types of fuels using a wick to create light. All of them promise significantly long burn times.
Rather than dive into all the details, here are some links to some very good ideas for improvising a candle when you don’t have the luxury of exotic waxes, or in the event of a rapidly unfolding emergency.
- Emergency DIY Crisco Candle
- How To Make a 100 Hours Waste Cooking Oil Candle | DIY
- How to Make a Butter Candle in 3 Easy Steps
Candles are Actually Easy to Make
Like so many things, once you’ve tried something it’s easier to try it again. Over time you can experiment with wax blends and even fragrances and scents. The important thing to is to know how to improvise light with candle in and emergency, and know how to make it last and last.
You May Also Like:
The post How to Make a 100-Hour Candle appeared first on Homestead Survival Site.
from Homestead Survival Site https://ift.tt/7PBNX5V
No comments:
Post a Comment