Water bath canning is one of the simplest ways to preserve food at home. It’s a great option for beginners, and everything you need to get started is easily available. In this post, we’ll take a closer look at water bath canning and explore some of the best foods to can using this method.
What is Water Bath Canning?
As any home canner knows, there are two primary methods of canning – water bath and pressure. Water bath canning is the simpler of the two, and is ideal for canning high-acid foods like fruits and pickles.
Water bath canning is when you process jars submerged in boiling water instead of under pressure. The jars are boiled for a certain amount of time, depending on the food you are canning and your altitude or elevation. This is important because water boils at different temperatures depending on your altitude or elevation.
Boiling the jars brings heat into them to a temperature that will stop food from spoiling. As the jars cool, the atmospheric pressure outside the jar is greater than the pressure inside, and the difference in pressure pulls the lid down, forming a vacuum seal. The seal on the lids keeps the food intact and the shelf stable.
I always follow the National Center for Home Food Preservation. They have extensively tested to determine the proper processing time that acidic foods need to be safe for storage.
Tomorrow, I will repost the pressure canning post. Home Canning- Important Do’s and Don’ts
What is Water Bath Canning?
Only certain foods are safe to can using the water bath method. Water bath canning is a great way to can high-acidic foods such as peaches, berries, jams, and pickles. However, to preserve meat or vegetables, you must use the pressure canning method.
Before you start with water bath canning, you’ll want to ensure you have everything you need. Here’s what you’ll need to be successful:
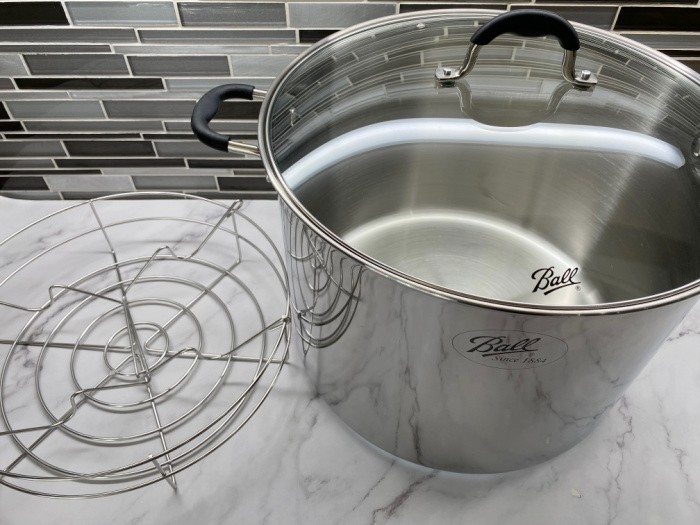
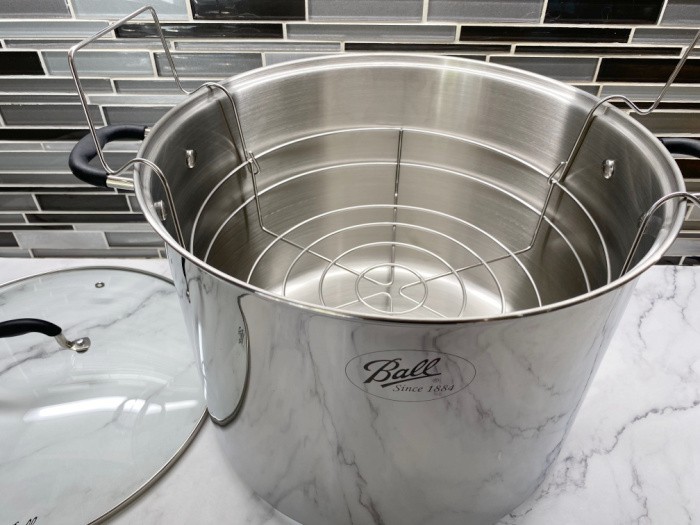
- Water Bath Canner or a Ball Stainless Steel Water Bath Canner (this is the one I have, 21-quart (19.8L) capacity fits up to 8 pints and 7-quart jars).
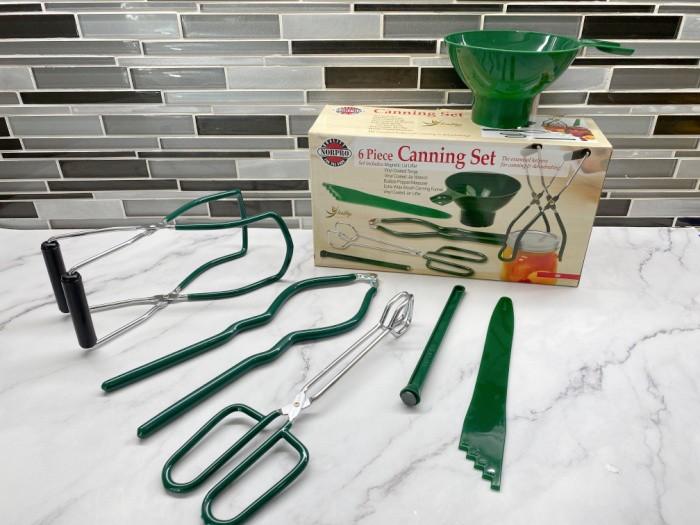
- Jar Lifter, Funnel, and Canning Essentials
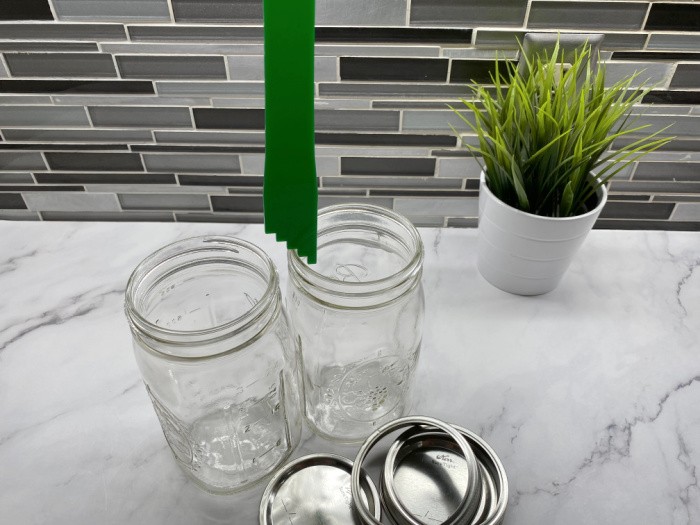
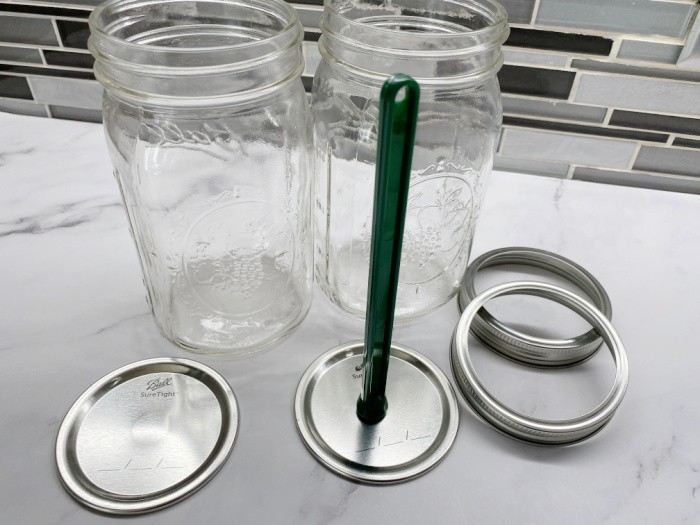
- Canning Jars (with lids and bands)
- Ladle
- Towels and pot holders
- Pots and bowls
- Spoons & Knives
- Food to can
- Other ingredients, depending on the recipe
- The ONLY Canning Books I recommend: Ball Complete Book of Home Preserving and USDA Canning Guide
Always use high-quality food for the best results. Follow the step-by-step directions below to preserve your food like a pro!
Canning Tools
Besides hot pads and towels, you will need an extra-wide-mouth funnel, vinyl-coated jar lifter, vinyl-coated jar wrench (I have never used this one), vinyl-coated tongs, magnetic lid lifter, and bubble popper/measurer. The vinyl-covered tools are designed to protect your hands from getting burned.
Water Bath Canning Step By Step Directions
Heat Your Canner
First, you will want to prepare and heat your canner so it is ready to go. Fill the canner 1/3 full with water. Heat the water over medium heat until hot, but not boiling.
Wash the Jars & Keep Them Warm
Next, you will want to wash your jars to ensure they are clean. If the processing time for your recipe is less than 10 minutes, you will also need to sterilize the jars.
Once you have washed your jars, you will want to keep them warm until you are ready to use them. There are three options for doing this:
- Please place them in the canner. You can place the jars upside down in the canner you are already heating up.
- Please leave them in the dishwasher. If you wash your jars in the dishwasher, you can leave them until you are ready to fill them. Keep the door closed to keep the heat in. In my Master Canning and Preserving class, we used jars from the dishwasher.
- Use another pot. You can also place the jars upside down in another pot of water. Boil 2-3 inches of water, then turn the pot off.
Fill the Jars With Food
Depending on your recipe and what you are preserving, there are two methods for preserving food using the water bath canning method.
- Hot packing means that your food is hot before you put it into the jar. Typically, you will simmer the food for a few minutes first.
- Raw packing means the food is not cooked before you put it in the jar.
Whichever method you use, be sure to prepare and pack the food according to the recipe. Then, fill the jar, leaving the recommended headspace.
Headspace in Jars Recommended by The USDA Canning Guide (1-13)
You need this: Canning Bubble Popper/Measurer
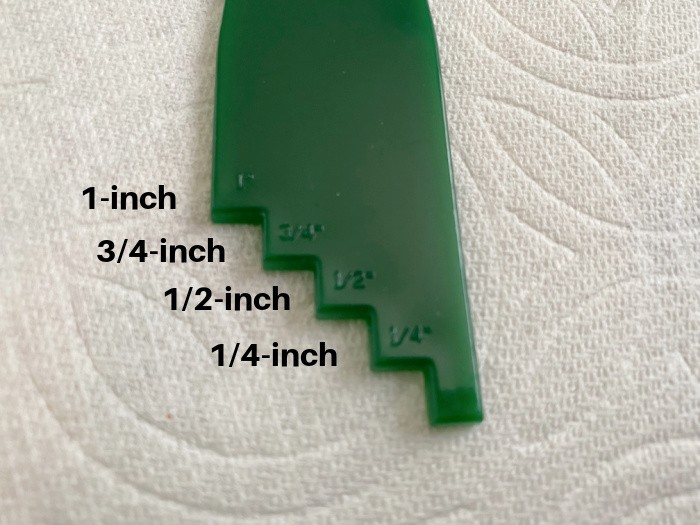
- 1/4-inch for jams and jellies
- 1/2-inch for fruits and tomatoes processed in boiling water
- 1 to 1-1/4-inches in low-acid foods to be processed in a pressure canner
Remove the Air Bubbles
After the food is in the jar, remove any air bubbles. You can do this by running a non-metallic spatula around the inside of the jar. A small rubber spatula works well. I use this, the Canning Bubble Popper/Measurer.
Clean the Rim of the Jar
The lid needs to seal, so the rim of the jar needs to be cleaned. Wipe the rim of the jar with a clean, damp cloth, tea towel, or paper towel.
Add the Seals and Rings
Next, place the seals and the rings on the jars. You don’t have to tighten the lids like a machine. Finger-tight is just fine. This magnetic lid lifter is excellent for lifting the lids out of hot water. Magnetic Lid Lifter
Place the Jars in the Canner
Place the jars upright into the rack in the canner. The rack keeps the jars off the bottom of the pot and prevents them from hitting each other while boiling.
A canner rack is built to rest on the sides of the canner while being loaded, keeping the jars above the water until you have it loaded. Then, you can lower all the jars at once into the canner.
Once you lower the jars into the canner, make sure the water flows freely around each jar and that they are covered by 2 inches of water. If not, add more hot water until the jars are covered by the required 2 inches of water.
Process the Food
Once your jars are submerged in the water, turn the heat up and bring them to a boil with the lid on. Do NOT start your time until the water comes back to a full boil.
Once the water reaches a boil, start the timer. You’ll want the water to boil for the entire time. Check the canner occasionally to ensure it is still at a full boil. Be sure to adjust the time according to altitude.
When the time is up, turn off the heat.
Let Cool
Using a towel or potholder, carefully raise the rack of jars. Let them sit for a minute before removing them from the canner.
Then, use the jar lifter to remove the jars. Set them upright on a wooden board or a thick towel to cool. Leave 1-2 inches of space between them so that air can circulate in the jars.
As the jars cool, the lids will pull down and seal. As they seal, they make a pinging sound, so you’ll know the process worked. Another test for proper sealing is to look at the lid’s center to ensure it is recessed and not popped out. Please remove the outer jar rings after 24 hours and wipe down the jars before placing them in your pantry.
You want to remove the rings because the lids may not have been fully sealed, and leaving the ring on could prove fatal if bacteria get into the contents. If you leave the rings on, the seal may pop up and then pop down again, and if the rings are on, you may not be aware of this.
I always wondered why Mom removed the rings from her jars after 24 hours. My Master Canner Preserver instructor explained to all of us why we must remove them. I always removed them, but I didn’t know the reason why. So there you have it.
Please store the rings in containers until the next canning season.
Why Can Foods For Your Family?
Canning can be a safe and economical way to preserve quality foods at home. Not counting the time you have to spend, canning homegrown food may save you nearly half the cost of buying commercially canned food. When you can your favorite food products that your family enjoys eating, it provides a fun and fulfilling experience, and you can take pride in your accomplishments.
Many veggies lose some of their vitamins during the harvesting process. Nearly half the vitamins could be lost within a few days unless the fresh produce is kept cold or properly preserved. Within one to two weeks, even refrigerated produce will lose half or more of some critical vitamins we need.
Applying heat during the canning process also destroys from 1/3 to 1/2 of vitamins A and C, thiamin, and riboflavin. Once the product is canned, these essential vitamins are lost by 5 to 20 percent each year they’re stored.
Other vitamins are only slightly lower in canned foods than in fresh foods. If your vegetables are correctly handled and canned right after harvest, they can be more nutritious than fresh produce at your local grocery store. Hopefully, your local Farmer’s Market will provide good-quality products if you can’t grow the ones you want or in the quantities you have in mind.
Food You Can Water Bath Can
- Tomatoes (add two tablespoons bottled lemon juice or 1/2 teaspoon citric acid for quarts, add one tablespoon bottled lemon juice or 1/4 teaspoon citric acid for pints)
- Apples
- Apricots
- Berries (whole)
- Cherries (whole cherries, and I remove the seeds)
- Grape Juice
- Grapes (whole)
- Mandarin Oranges
- Pears (halves for quarters)
- Peaches (halves or quarters)
- You get the picture, there are many wonderful fruits you can water bath can.
How Does the Canning Process Preserve Food?
Most fresh foods have a relatively high percentage of water, making them more perishable. The loss of quality in the food, often referred to as spoilage, is caused by several factors:
- The growth of undesirable microorganisms like bacteria, mold varieties, and yeasts
- Food enzymes become active
- Oxygen causes some reactions
- There is a loss of moisture
Microorganisms live and multiply quickly on the surfaces of fresh foods and the inside of bruised, insect-damaged, and diseased food products. The tissues of fresh food also contain oxygen and enzymes that can affect the food’s quality.
To minimize the adverse effects of these factors, there are proper canning practices that need to be followed:
- You need to select and thoroughly wash the fresh food carefully
- Some products should be peeled before canning
- Many of the foods should be hot-packed
- Some foods will need acids, like lemon juice and vinegar, added
- Using good-quality mason jars, lids, and rings is important
- Processing the jars in a boiling water canner bath or pressure canner for the prescribed time is critical for success
All these practices help remove oxygen, destroy enzymes, prevent the growth of bacteria, yeasts, and molds, and form the high vacuum needed to seal the jars properly. The seal connects tightly with the jar and lid, keeping the liquid, air, and microorganisms out.
What Ensures the Canned Food is Safe to Eat?
The primary concern when canning food is to prevent the growth of the bacterium Clostridium botulinum, which causes deadly poisoning called botulism. These bacteria take the form of either spores or vegetative cells. Like plant seeds, the spores survive well in soil and water for many years and do so harmlessly. There are conditions in which the spores begin to grow and produce vegetative cells that multiply rapidly. These cells can make a very deadly toxin in a short 3 to 4-day period if the environment consists of:
- A moist, low-acid food source
- A temperature that’s between 40 and 120 degrees Fahrenheit (F)
- There is less than 2% oxygen present
The botulinum spores exist on the surfaces of most fresh food. Since they only grow without air, they are harmless to the fresh foods. Most bacteria, yeasts, and molds are difficult to remove from food surfaces. When you wash those fresh foods, you’ve only slightly reduced the amount. Peeling crops from the plant’s root, underground stems, and tomatoes reduces their numbers significantly.
Blanching is also another option to help reduce the chance of infection. But truth be told, the critical controls outlined here are your best bet for safe canning. That includes the well-researched and confidently recommended processing times. The processing times ensure that the most heat-resistant microorganisms in home-canned foods are destroyed.
Note that if properly sterilized, canned food will be free of spoilage if the lids seal (test to make sure), and the jars are then stored where the temperature stays below 95°F (35°C).
Is Food Acidity an Issue When Canning?
When deciding whether to pressure-can or boil-water-can the food to control the botulinum bacteria, you have to consider the specific acidity of the food itself. The acidity level may be natural to the food, as you find in most fruits. Acidity can be added, like you do when you pickle foods.
Low-acid foods aren’t acidic enough to prevent the growth of bacteria. Acidic foods contain enough acid to block the bacteria’s growth or destroy them more quickly when heated.
We often hear the term “pH” when we discuss the makeup of our swimming pool water and the measure of the acidity of foods. The lower the pH value in the food, the more acidic it is. Add lemon juice, citric acid, or vinegar to increase the acidity.
Processing Time and Altitude Issues
As mentioned above, altitude does affect the temperature at which water reaches its boiling point, so for a boiling-water canner, if you are at a higher altitude, you need to heat/process the canner for a longer period. The higher the altitude, the longer the process. Let’s look at an example below for the time to process peaches:
Style of Jar Pack Jar Size Altitude Processing Time
Hot Pack Pints 0 – 1,000 ft. 20 minutes
1,001 – 3,000 ft. 25 minutes
3,001 – 6,000 ft. 30 minutes
Above 6,000 ft. 35 minutes
Hot Pack Quarts. Add 5 minutes of processing time for each increment of altitude listed above. So, 0 – 1,000 ft. would be 25 minutes for quart jars.
Home Canning- Important Do’s and Don’ts
Final Word
Water bath canning is a great way to preserve fresh fruits from your garden, but don’t use it for your veggies. Follow the directions in your recipe exactly and listen for that pinging sound as the lids properly seal to the jars.
What foods have you used the water bath canning method for? Let me know in the comments below! May God bless this world, Linda
The post What is Water Bath Canning? appeared first on Food Storage Moms.
from Food Storage Moms
No comments:
Post a Comment