Today, I have 15 steps to follow in preparation for a disaster. I’ve been reflecting on how I started my journey to preparedness. I was living with my aunt and uncle in Chicago, Illinois, who needed some help with a newborn baby. When I was 16 years old, I flew out to attend school there and help her take care of her family, especially the new little one.
My mother taught me to clean our home, plan and prepare meals, and essentially run a household when she had to return to work. I was very close to my aunt and was thrilled to be able to help her with her newborn baby with fetal alcohol syndrome.
It was an adjustment to leave my friends and family, but I would do anything to help my aunt and my four cousins. The reason I want to share my story is that I have always been prepared. I wrote about some of it in my book, “Prepare Your Family For Survival”.
When I moved from Las Vegas, Nevada (the desert), I had never owned a coat, let alone snow boots and warm gloves. Well, Chicago is known for its cold, blustery snowstorms, or at least it was when I lived back there. I learned fairly quickly that my aunt and uncle didn’t have an emergency plan or understand the concept of emergency management. They had few resources set aside for hazards or really hadn’t ever considered the need to consider prevention of risk to the family from a disaster.
15 Steps To Prepare For A Disaster
Icy Covered Roads
One day, school was canceled, then another day, and another. We had ice-covered streets that no one could drive on. Roads and highways were literally shut down for almost 2 weeks, or so. My oldest cousin and I had to walk to the grocery store to get some groceries. This was the first time I had heard about food shortages.
Each family was allotted one quart of milk and one pound of hamburger each week. However, with my uncle living there, we now had a family of seven. My uncle had given us cash, which really didn’t matter because we were limited to the items I just mentioned. In other words, money was essentially worthless.
Now, I grew up with a single mom who eventually remarried, and we always had a fairly full pantry. We made bread every single week. We had dinner on the table every night at 5:00 sharp. Back then, we were too poor to have lessons of any kind or join sports teams. When my dad got home, we always had the table set and dinner ready to eat. It was a great routine, and we loved it.
Empty Cupboards
My aunt didn’t have any food stocked in her cupboards. This was a shock to me. But she did what she had learned from her childhood. Her mother didn’t stock food either. My aunt was the most loving and kind person I had ever met in my life, but many life lessons I’d learned at a young age hadn’t been taught to her.
We’ve all seen or read about the numerous severe natural disasters that’ve occurred in the last few years. Today, I want to discuss a few key items that I believe we should review so we’re as well-prepared as possible. Some of you may be well-prepared, but others may need a reminder to take a few steps to prepare for various types of emergencies.
We aren’t talking about buying every preparedness item or having to change our lifestyle; we just need to take some steps that make sense. We all know we need water and food – that’s a given. But there are other items we must stock in order to be self-reliant and follow quality disaster plans. It could mean becoming better organized, but also acquiring additional resources for an effective emergency response.
Please remember the government won’t be able to deliver water or food to your door for days or weeks after a disaster. In fact, you may have to drive or walk to get what you need. In other words, FEMA, no church or government entity has food or water stored to help everyone; they just don’t have that many resources at their disposal.
Possibly, the emergency responders will be nearby and can assist some of the residents. But let’s be real, my friends, we’re on our own. As it should be. Yes, we can do this; we just need to have a plan to cover our functional needs.
Prepare For A Disaster
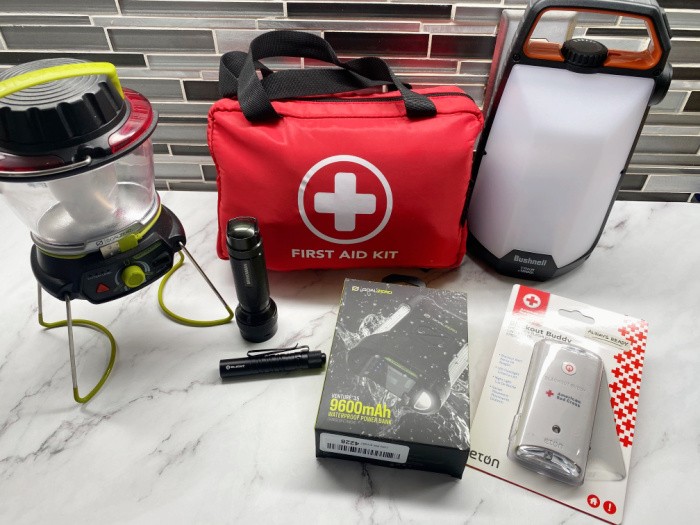
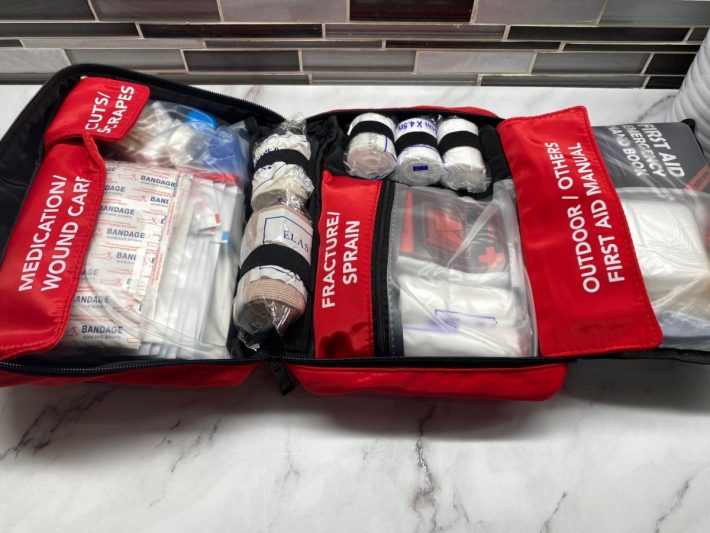
1. First Aid Kit
I’ve written many articles about first aid kits. Here is one option that may help those who want to put one together. First Aid Kit. I found this one on Amazon that I think is perfect for someone who wants the stuff in a bag, ready to go. It contains a variety of essential supplies. If you have a large family, you may need more than one or a few extra items to feel you have enough supplies. Premium Waterproof Compact First Aid Kit. You can see the inside of this one below. I really like it.
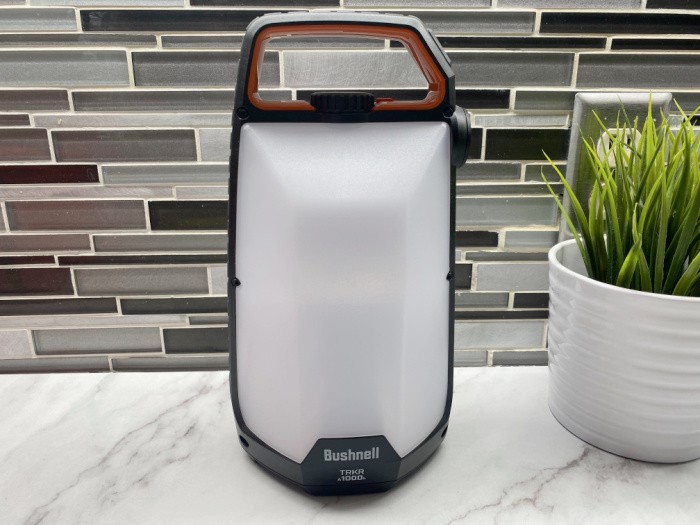
2. Bushnell TRKR Lantern
This Bushnell Lantern was gifted to me by a friend. I love it. It sits right next to my bed. I can grab it with the handle on top and run out the door if need be. It has a flashlight on the side and a RED light setting for emergencies outside. There are also adjustable settings for the light to illuminate the room you are sitting in. Plus, it’s affordable. Bushnell Lantern (500L). It is a great choice if you need to shelter in place or evacuate, as advised by local officials.
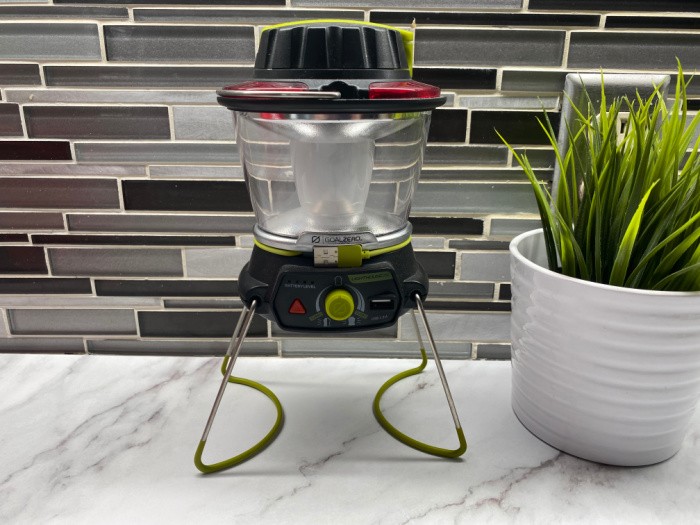
3. Goal Zero Lantern
I’ve had this lantern for a long time. It’s similar to the Goal Zero Lantern LightHouse. I highly recommend it, as it’s affordable, features a USB outlet, and recharges in 4 hours from a USB power source. The picture shown below is the old style, in case you’re wondering. It has different features from the new one they are now offering.
4. Flashlights-Please Purchase Extra Batteries
Everyone needs at least one, or even more, if we have a large family. The ones below need batteries. I also recommend getting some solar ones as well. I got the green units in a set that was very affordable, and they are LED lights. The Olight flashlights (I learned about these from Matt) are the very best. Four LED Flashlights. Having enough flashlights and batteries is all part of the planning process.

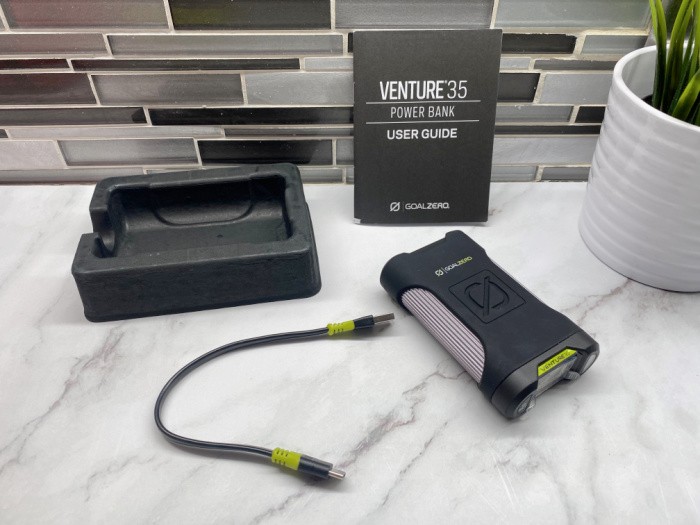
5. Power Bank
I chose this one because I love the Goal Zero brand. Goal Zero Venture 35 Portable Charger Power Bank. This is the more affordable option because it can only power a cell phone, headlights, and a tablet. Of course, this all depends on the wattage of the ones you have. It will work with the smaller devices I have. I would need to purchase something else for my laptop, so please keep that in mind.
You can pair this one with the Goal Zero Nomad 10 Solar Panel, making it very versatile. You can charge it from a wall outlet when you have power, so it’s ready to charge your phone when the power goes out. It’s dustproof and waterproof, making it perfect for camping or hiking. Additionally, it features a USB-C (18W) delivery port.
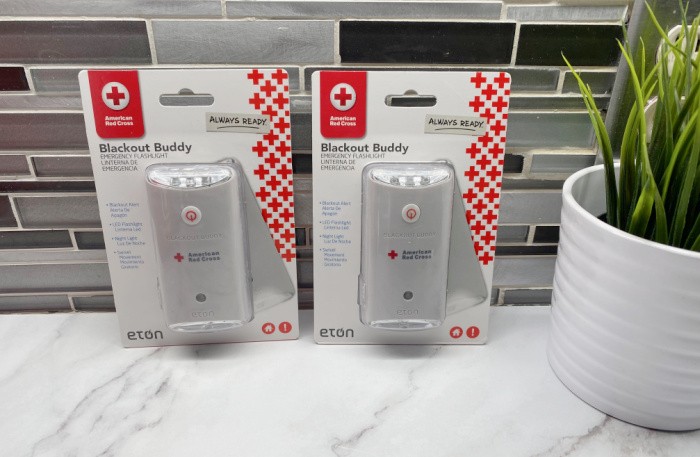
6. Power Outage Plugin
These are fairly inexpensive and yet work great when the power goes out. The lights turn on automatically when power is lost. If you can afford one for the hallway, kitchen, or a few bedrooms, that would be awesome. And for sure, it’s a safety measure. American Red Cross Blackout Buddy. (Doubles as a night light and emergency flashlight).
If you have older adults in your home, having sufficient lighting for them to see clearly is vital. These are also a great idea in case you experience a workplace emergency, whether a severe winter storm, flood, wildfire, or other circumstances where power is lost.
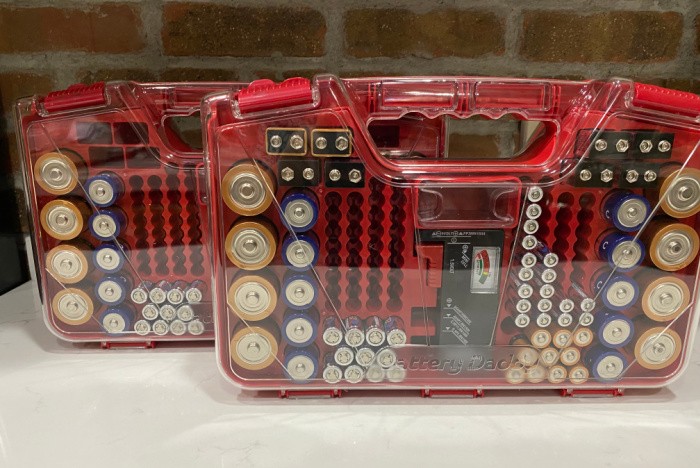
7. Batteries
Be sure to stock up on the batteries you use. Sam’s Club, Costco, and possibly the dollar stores are great places to get them; just have some stocked. I bought these cases, but a box would work just as well. Battery Holder Case. Don’t wait to hear weather warnings before you stock up; do it now.
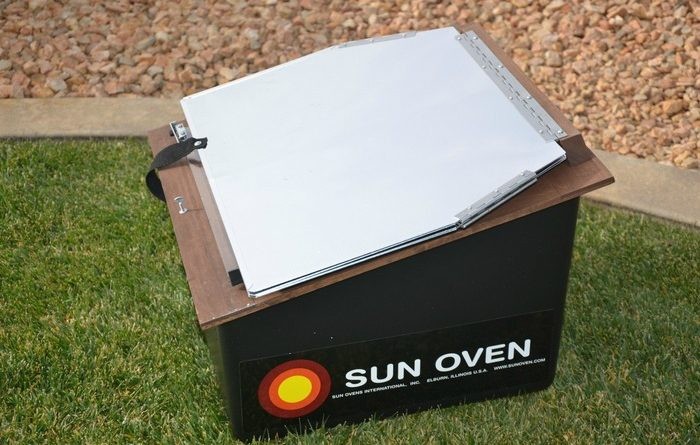
8. Sun Oven
I only recommend a Sun Oven for baking and cooking if you have a lot of sunshine in your area. They work great, as you can bake whatever you want in your conventional kitchen oven. With enough sunlight, they generate the same temperature and perform at the same rate over the same amount of time. The bonus, the food doesn’t burn. I highly recommend using the Sun Oven from 10:00 a.m. to 3:00 p.m. You can’t start a roast at 3:00 in the afternoon; it won’t have enough sunshine for it to bake long enough. I hope this statement makes sense.
I want you to think of using it when you wouldn’t want to be outside in the hot sun. That’s the time period when people typically get sunburned, but a great time for this oven to do its thing. So there you have it. Once you try it, you’ll use it often, I promise. It works much better than using a man-made fire pit, but again, you do need consistent sunshine.
UPDATE: It’s becoming increasingly difficult to find Sun Ovens now. You may have to resort to eBay or Facebook Marketplace. It seems every day I’m finding a shortage of the products I have recommended for years. Those who were able to get them are blessed beyond words.
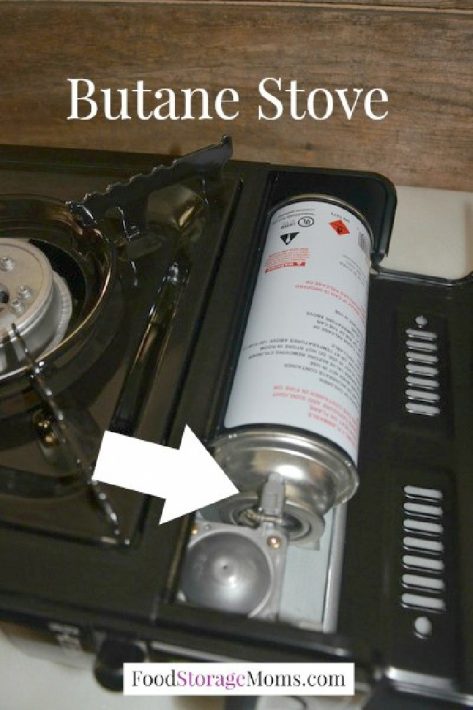
9. Butane Stove with Fuel
Butane Stove with Fuel. Try one of these when you’re looking for best practices when considering alternative cooking devices.
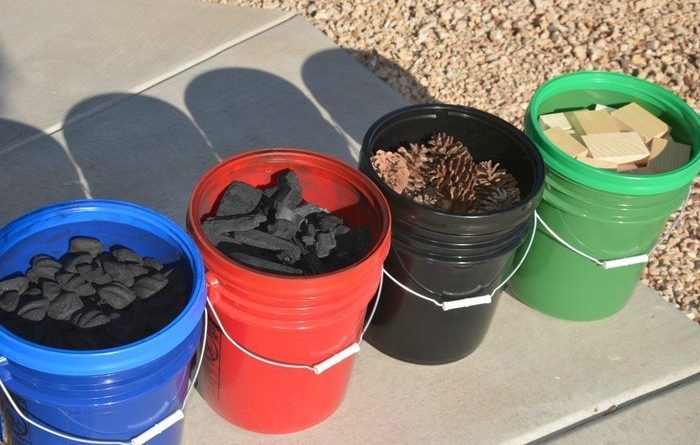
10. Fuel
In case you missed reading the post about fuel, here it is: Emergency Fuel to Store for Survival. Color-coded 5-gallon buckets with matching Gamma Lids is the way I’ve organized mine as part of an overall emergency supply kit for fuel needs.
The blue buckets contain regular charcoal without lighter fluid, the red buckets are filled with oak hardwood charcoal, and the black buckets are filled with pinecones. The green ones are filled with clean raw wood scraps, with no paint or stain on the pieces.
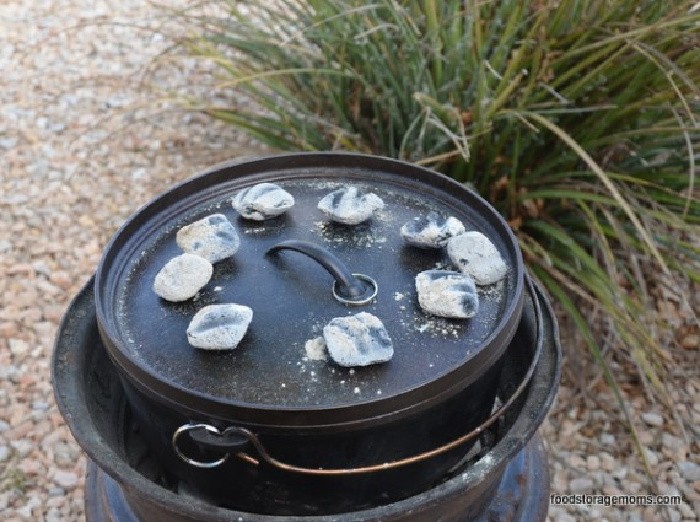
11. Get A Dutch Oven
If you have a Dutch oven and some charcoal (dig a hole in a safe location), then you can boil water and cook just about any meal you may need. I prefer a 6-quart Size because of the weight, as I can no longer lift heavy items. Lodge 6-Quart Dutch Oven (be sure and check thrift stores for good used ones).
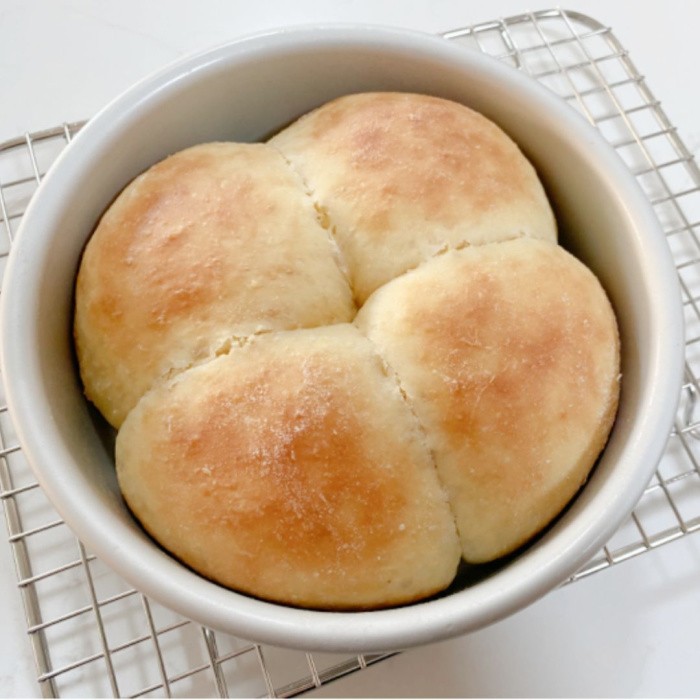
12. Learn to Make Bread/Dinner Rolls
My bread recipes are truly no-fail recipes if you have fresh ingredients. Please store your yeast in the freezer to keep it fresh and active. Your monthly supply can be stored in the refrigerator, but not in your pantry, as it will spoil very quickly. Please start with dinner rolls, yes, you can do it, I promise. You just need fresh ingredients. Make a pot of soup and fill the belly with soup and the best darn dinner rolls ever. My Dinner Rolls
Bread is a great food choice for your family, but also for sharing with neighbors in your support network.
13. Learn to Make Biscuits
I grew up on biscuits; anyone can make them. They can be served with almost any homemade dinner. Easy Homemade Biscuit Recipe

14. Teach Your Family To Cook From Scratch
In case you missed this post, Cooking From Scratch 101. Please print out any recipe that would be easy to make and teach your kids and grandkids how to make it. Cookbooks are awesome. You can find simple recipes to teach those who need help. Creamed Chipped Beef

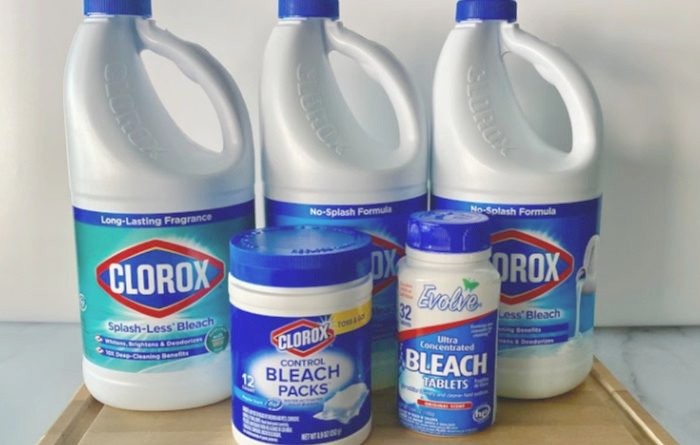
15. Cleaning Supplies
Please stock up on cleaning supplies. Bleach will be a critical component if we have a sewage issue or contaminated water problem. It’s better to have too many clean rags, towels, or paper towels than not enough. Please stock 33-gallon black garbage bags; we’ll all need them, I assure you. In case you missed this post on Bleach, Bleach: Everything You Need to Know
Final Word
I hope you enjoyed my 15 Steps To Prepare For A Disaster today. It’s all about the little things that make our lives easier and safer. Please be prepared before you need to be. We don’t know when a disaster may strike, so it’s best to start preparing now. May God bless this World, Linda
The post 15 Steps To Prepare For A Disaster appeared first on Food Storage Moms.
from Food Storage Moms
No comments:
Post a Comment