I’m excited to share my post again on how to make homemade snow cone syrup in the middle of summer. When it comes to sharing ideas with my readers, I’m open to almost any recipe if I think it could help them make great meals and desserts, particularly if the recipe is simple and can save them some money.
When we lived in St. George, Utah, it got really hot in the summer months. We looked for all sorts of options when it came to a cool drink, a cold salad, and a refreshing dessert. Growing up, my girls loved their snow cones and ice cream treats; they probably still do!
I researched to discover the origins of snow cones. It’s thought that people in the higher elevations, where snow was the norm, would bring ice and snow into the valleys and share their bounty with valley dwellers for a fee.
The first mass-produced ice treats were a function of the Industrial Revolution of the 1850s, when machines were invented to make ice. New York City had several “ice houses” where large blocks of ice were produced and delivered to homes and businesses by wagon.
Sometimes when the wagons came into a neighborhood, the kids would ask for the ice to be scraped. Those thin slices of ice would be covered with popular flavors like vanilla, egg custard, and sugar.
It wasn’t until 1919 that a fellow named Samuel Bert invented a machine to mass-produce shavings from ice blocks, and snow cones became popular after he sold them at the Texas State Fair. Since then, they’ve been called by various names, like snow cones, snowballs, and shaved ice. Over the years, they have been served with a variety of flavors and add-ons, including ice cream, condensed milk, and candy.
In case you missed this post, The Best Homemade Playdough Recipe
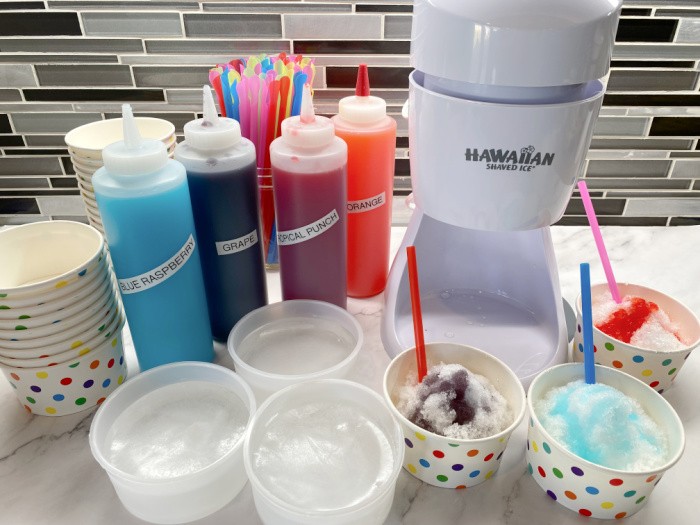
Snow Cone Syrup
Items You May Need In The Kitchen:
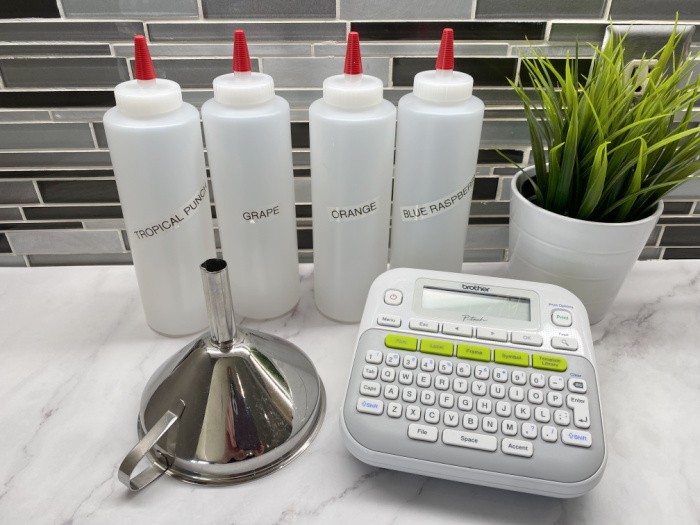
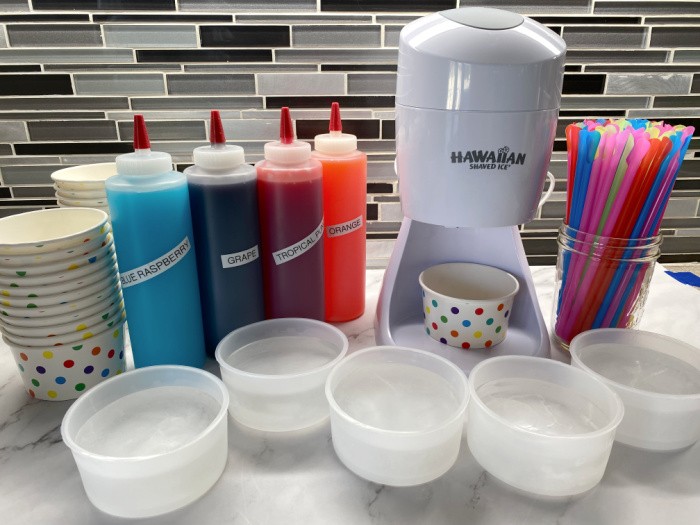
- 16-ounce Squeeze Bottles
- Ice Cream/Snow Cone Holder
- Snow Cone Paper Cups or Reusable Silicone Cups with Lids
- Electric Snow Cone Machine with Ice Molds
- Funnel
Snow Cone Syrup Recipe
Step One: Gather Ingredients
You only need water, sugar, and dry unsweetened flavor drink packets. I used Kool-Aid packets of various flavors.
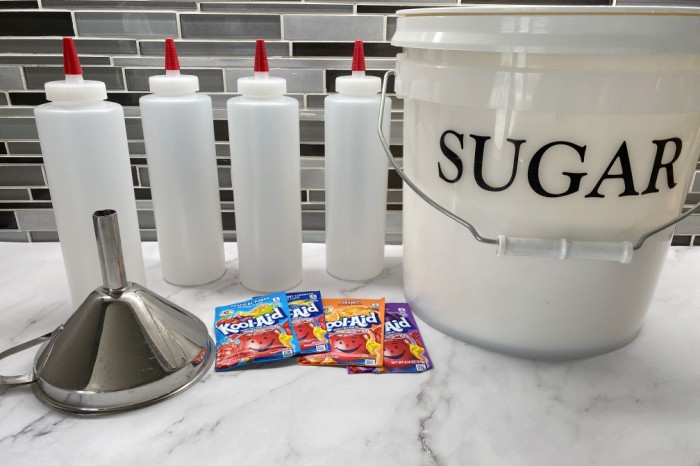
Step Two: Label the Bottles
I labeled my bottles. I use this labeler for everything. Brother Label Machine
Step Three: Combine Water and Sugar
Grab a medium-sized saucepan, and combine the water and the sugar.
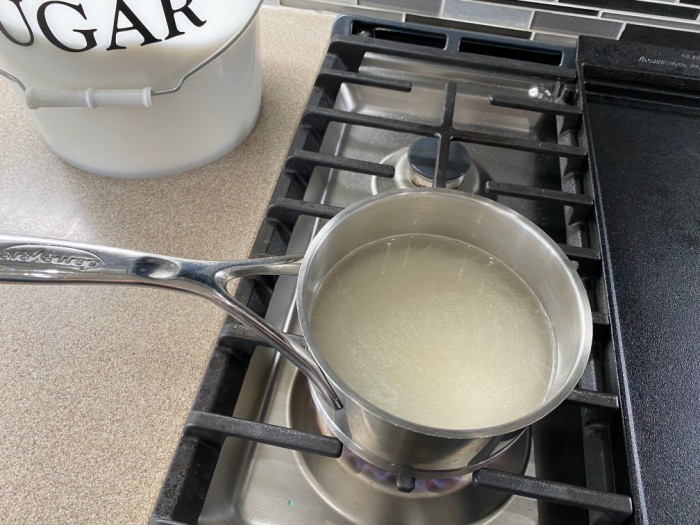
Step Four: Boil for 3-4 Minutes
Bring the mixture to a boil, and then simmer for about 3-4 minutes, or until the sugar is dissolved.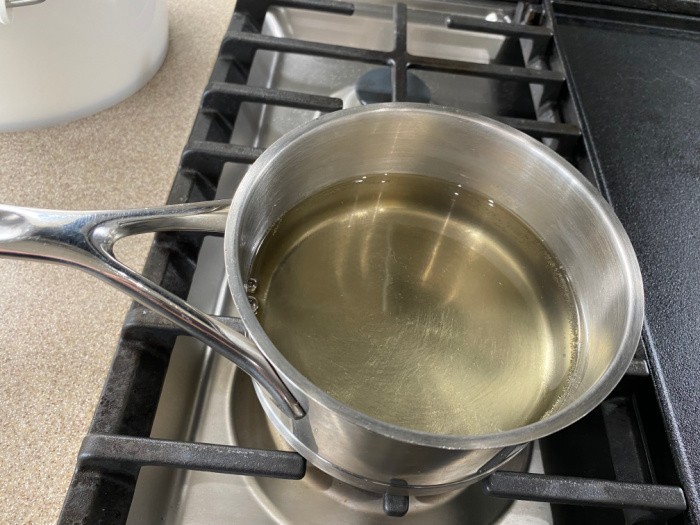
Step Five: Add Flavor Packets
Add the dry, unsweetened flavor drink packet (I used Kool-Aid) and stir until the mixture is thoroughly mixed throughout. Let the syrup cool down. I did this four times, once for each flavor: orange, blue raspberry, grape, and tropical punch.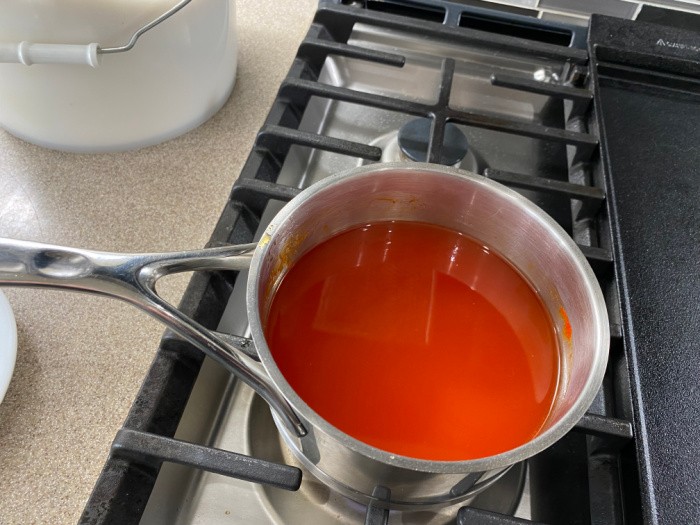
Step Six: Use A Funnel
Pour into a container using the funnel. I prefer the squeezable bottle containers shown in the picture.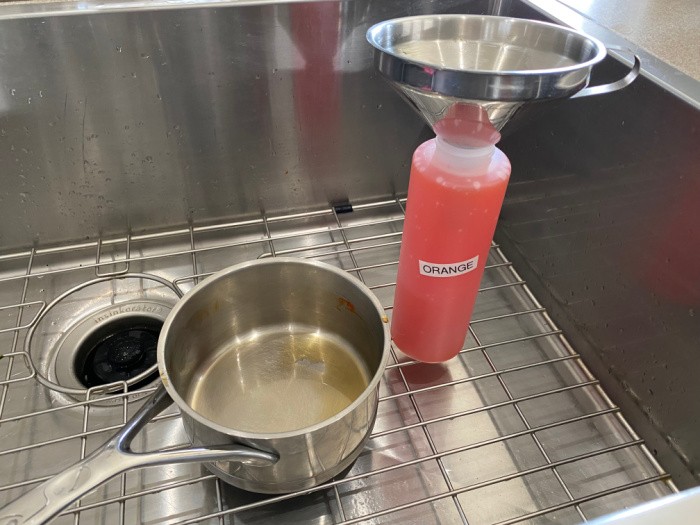
Step Seven: Make the Crushed Ice
We used to have a fridge that not only made ice cubes but also crushed the ice if desired. I haven’t had that fridge for years. The Hawaiian Shaved Ice Machine I bought comes with two “ice molds” that you fill with water and then freeze. You need to freeze the ice molds in advance.
I bought a few extra molds because we always have 5 or 6 kids around here ready for a snow cone! After you freeze the ice molds, bring them out and let them “thaw” for about 5-7 minutes, and they will be ready to place inside the top of the shaved ice machine. Bright Colored Spoons
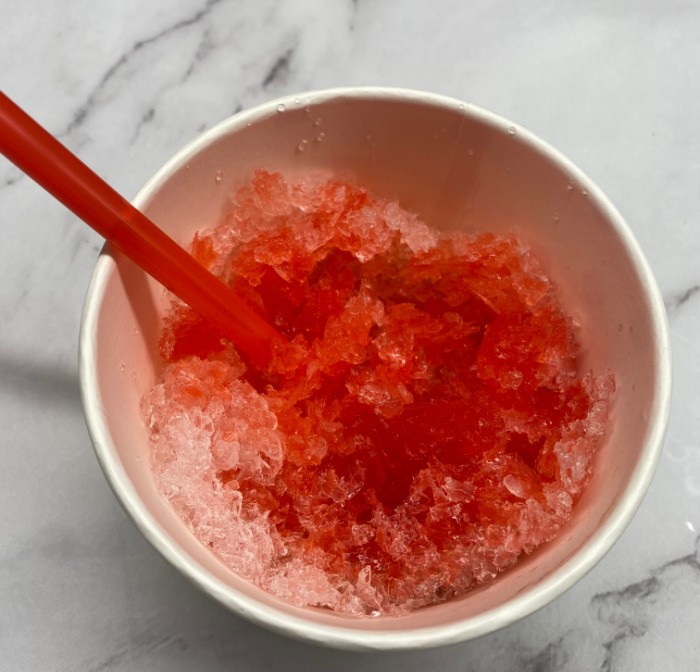
Step Eight: Drizzle over Ice
Push down on the top of the ice machine so it can “shave” the ice into a cup, cone, or another container you want to eat from. Gently squeeze the desired amount of snow cone syrup over your shaved ice snow cone or cup.Notice the cute multicolored cups I bought just for this treat. I also purchased some pretty multicolored “spoon straws” so you can eat the shaved ice more easily. Enjoy! These are so much fun to make, especially with all the doom and gloom in the world; snow cones hit the spot! Let’s bring some fun back into our lives!
Finished Product
These are so light and fluffy, the kids will smile from ear to ear when they see them! I can’t wait for summer!
Snow Cone Syrup Recipe
Ingredients
- 1-1/2 cups white granulated sugar
- 1-1/2 cups water
- 1 package dry unsweetened drink mix (I used a Kool-Aid package)
Instructions
-
Grab a medium-sized saucepan, combine the water and sugar.
-
Bring the mixture to a boil, and then simmer for about 3-4 minutes, or until the sugar is dissolved.
-
Add the dry unsweetened drink mix and stir until completely mixed throughout.
-
Let the syrup cool down. Pour into a container, I prefer squeezable containers.
-
Gently squeeze the desired amount over your shaved ice snow cone. Enjoy.
-
Store the bottles of snow cone syrup in the refrigerator for 7-10 days.
What’s the difference between snow cones and shaved ice?
Snow cones typically use pointed-end cone cups to serve the ice. Shaved ice is usually served in flat cups.
Can I use a sugar substitute with this syrup recipe?
Splenda is often used as a substitute for sugar. I’ve never used it when making this recipe, but keep in mind that one packet of Splenda is equal to 2 teaspoons of sugar, so 1/2 cup of sugar would take approximately 12 packets. Of course, be sure to look at the package you use. I only buy Stevia as a sugar substitute, but I stick with granulated white sugar when I make these.
Does snow cone syrup go bad?
The word on the street is that ready-to-use syrups can last between one and two years. Since this is homemade, it doesn’t contain any preservatives, which is how I prefer it. I would expect this syrup to last about 7 to 10 days, but check yours for any changes in color or odor if you are approaching that timeline.
What other syrup flavors should I consider trying?
Since Kool-Aid comes in so many flavors and is so convenient, I haven’t considered trying other flavor options. There are certainly many approaches to making and using different flavors, and they may involve using fresh or frozen fruits.
I would suggest trying cherries, apples, raspberries, grapes, and other fruits your family considers favorites. Using these fruits will also involve adding some extracts like vanilla and lemon.
Another approach, and one you should consider, is using Jello. Google it and see all the flavors that jump out at you!
Final Word
I’ve learned over the years, as I’ve worked with dozens of people, that some of us love working in the kitchen. It just seems to come naturally and doesn’t feel like a chore; it’s fun. So when I find a recipe like this one, where you can make your own homemade snow cone syrup so easily,
I just had to share it. Never be afraid to try new recipes; make them part of your personality and skill set. Let me know if you made a syrup, what ingredients you used, and how it turned out. I want to share your experience with my other readers. May God bless this world. Linda
The post Homemade Snow Cone Syrup appeared first on Food Storage Moms.
from Food Storage Moms
No comments:
Post a Comment