About 30 years ago, I bought a bread-making machine for each of my daughters when they married or went away to college. They were cheaper than a Bosch Bread Mixer, at the time.
The bread maker I’m showing you today is about the same price as a Bosch Bread Mixer. I wanted the girls to be able to make bread and survive on homemade bread and soup with their limited budgets. We all remember those days. Actually, those days are back! LOL!
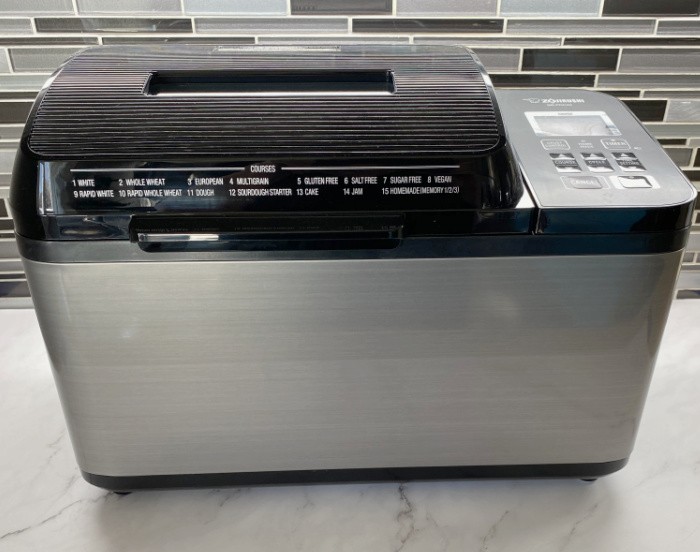
I wrote a post about making bread and how a bread-making machine can make the process much easier. I can’t remember which post it was, but in response to reading that post, a reader commented to me that she loved her Zojirushi Bread Maker.
Well, one of my daughters still has her bread machine but has determined it’s on its last leg. I ordered one of the Zojirushi units for us to use, and haven’t looked back.
After reading my reader’s comment, I wish I had written down her name. If you’re reading this and it was you who commented about the Zojirushi Bread Maker, please remind me who you are so I can get in touch with you. I knew I wanted a bread mixer, but I didn’t know which one to choose.
In case you missed this post, French Bread in One Hour.
Bread Mixer vs. Bread Maker
Let me clarify the difference between a bread mixer and a bread maker.
Bread Mixer
Most of us are familiar with the Bosch bread mixer, which combines and kneads dough for bread. I love mine, I still use it to make the bread dough. We can mold the bread dough when the mixing is complete and the bread has had a chance to rise, and then I bake the loaves in the oven.
I can mix and knead eight 8-pound loaves in my Bosch. Yes, I freeze a lot of bread for another day.
I wanted to mention that my Bosch has a powerful electric motor. It can mix some fairly large batches of dough. I have to keep an eye on the machine, as it’s been known to shake and shift on the counter while the dough is being mixed.
Yes, it does have some suction pads on the unit’s feet, but again, the motor is strong enough that it can cause the machine to move along the counter. I’m careful to ensure it doesn’t get too close to the edge; I’d hate to see it fall to the floor.
How do I know this? I was teaching a class about making cinnamon rolls, and I asked my “helper” to stand watch over the Bosch. She didn’t realize it could bounce off the counter; it can, not often, but it can. Yes, it cracked the lid. However, the class continued, with no lid attached.
Bread Maker
I wanted something to make less bread without having to use my arthritic hands to knead it physically. This machine produces just two loaves, which is precisely what I needed: small loaves, fewer dinner rolls, and a way to make less pizza dough in the batch.
A bread maker is a machine, like the one I’m showing you today, that mixes the bread ingredients, kneads the bread dough, lets it rise, and then bakes it. Well, I don’t enjoy the bread baked in a bread mixer as much; I like baking my own. More often than not, I’ll let the machine prepare the dough, and then I’ll bake it in the oven.
My daughters and I have always taken the bread dough out after it has mixed, kneaded, and risen. Then we mold the dough into our greased bread pans and bake it.
Zojirushi Bread Mixer Tips
I’ll be honest, I don’t enjoy going through Instruction booklets to figure out how things should work. I don’t like reading them as a means to learn all that goes into a successful result.
BUT, I had to today. I opened the box, washed the measuring cups and spoons, and washed the bread pan. Here is what I learned:
- The liquid measuring cup is for the liquid ingredients.
- The nested measuring cups are for the dry ingredients.
Items You May Need In The Kitchen:
- Bread Mixer (this is the one I purchased) is currently out of stock
- Bread Mixer
- 2 Bread Pans (I use smaller ones-7.75 x 3.75 x 2.5 Inches)
Bread Machine Bread
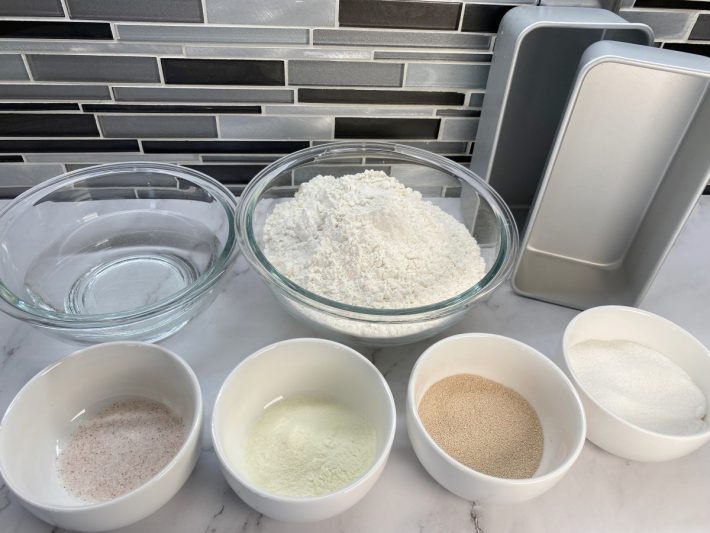
Ingredients
- Water
- Bread Flour or White Flour (I only store bread flour)
- Sugar
- Dry Milk (I use Instant)
- Salt
- Butter
- SAF Instant Yeast
Step-By-Step Instructions:
Step One
Measure both the dry and wet ingredients before beginning the process.
Step Two
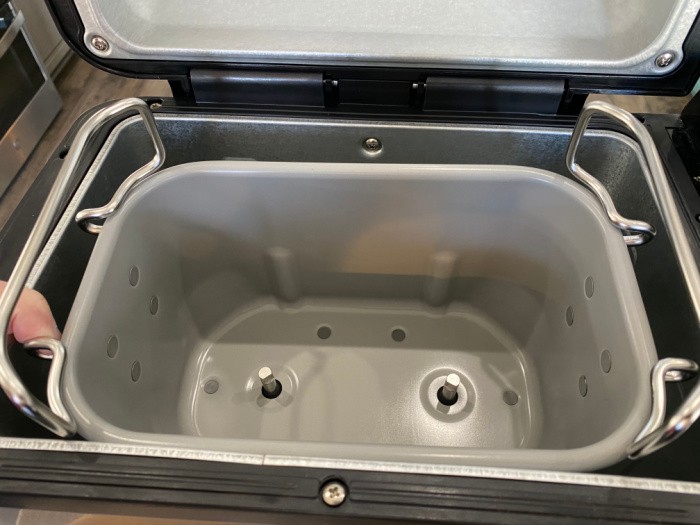
To remove the baking/mixing pan from the machine, hold the Baking Pan Handles and tilt the Pan towards you to unlatch and lift it out. Do NOT pull the bread pan straight up. You can see Mark’s thumb on the right, tilting the pan forward.
Step Three
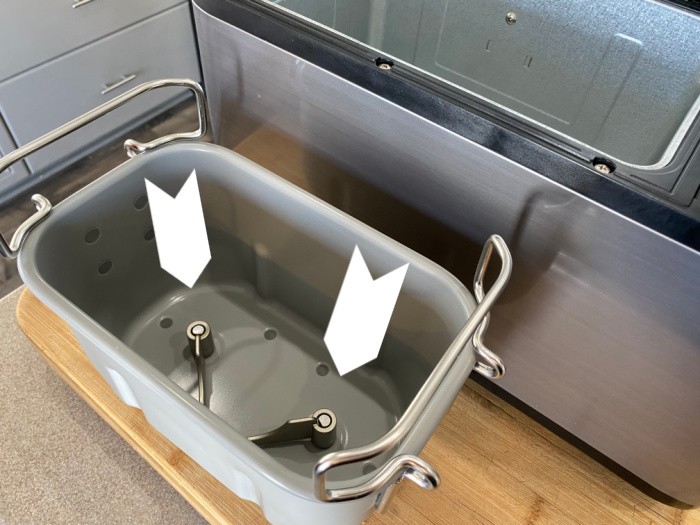
Attach the Kneading Blades to the Rotating Shafts in the Baking Pan (look at page 14) to confirm the blades are positioned correctly.
Step Four
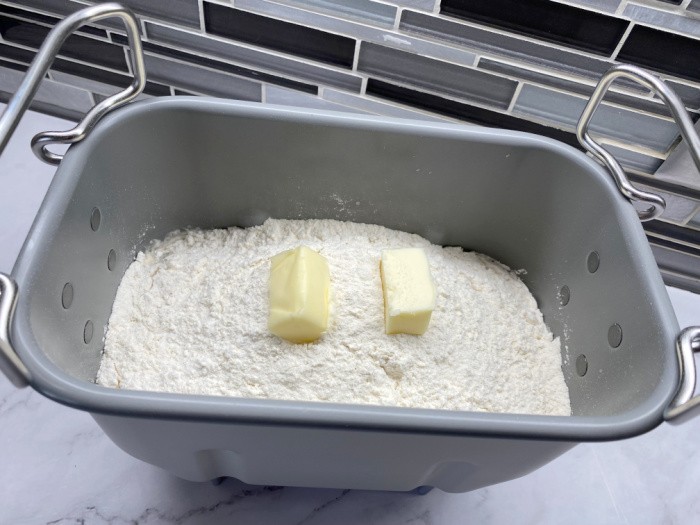
Carefully add the water and then the dry ingredients to the Baking Pan (the instructions say make a depression in the flour and add the yeast to the middle of the depression so the yeast doesn’t make contact with the liquid at the bottom of the pan). I dumped everything in, that’s how I roll.
Step Five
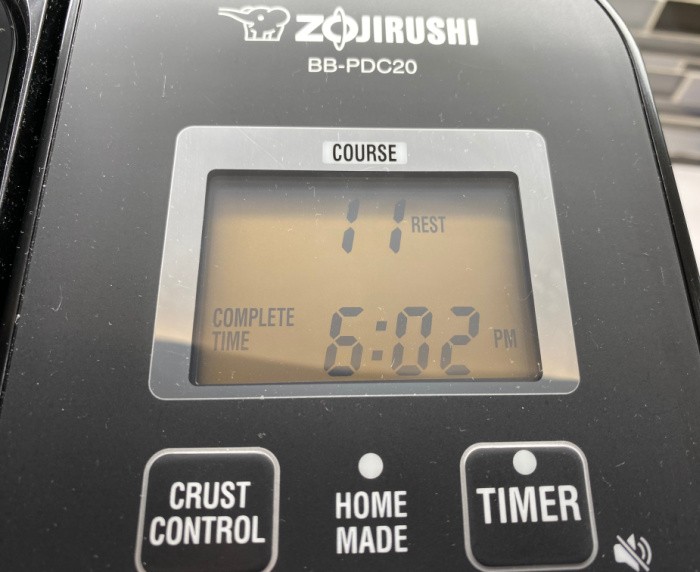
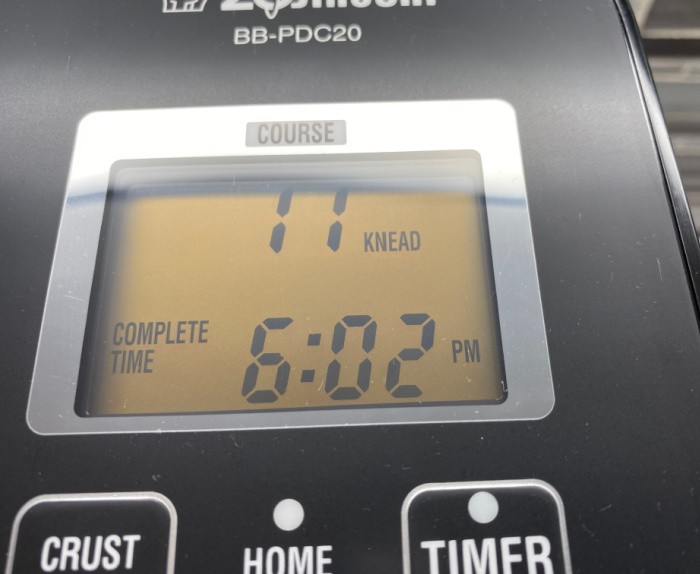
Set the Baking Pan into the Main Body and close the lid. Insert the Power Plug into an electrical outlet. Press the “COURSE” UP button until it reaches Course #11 (for DOUGH ONLY); this is what I did today. Push the Start button.
You’ll also see the word “Rest” next to #11, telling you that it is in the “rest” phase as the unit warms up the ingredients. This “rest” phase should last about 20-25 minutes. Note the estimated completion time at the bottom of the screen. We started the machine at approximately 4:00 PM, and the unit estimated that the process would end at 6:02 PM.
Step Six
You’ll hear the unit move into the “knead” phase as the kneading blades start spinning to knead the dough. The screen will change from “rest” to “knead” during this period.
Step Seven
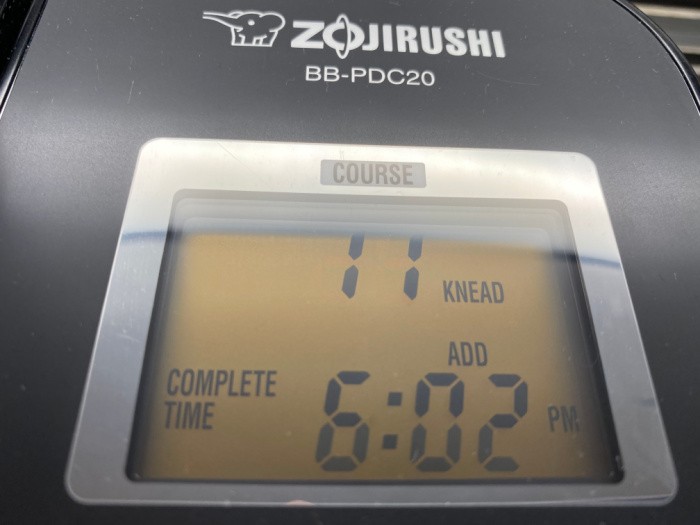
After a few minutes, the unit will make a buzzing sound, and you’ll notice the word “add” flashing on the screen. This is the ideal time to add ingredients you want in your dough, such as nuts or raisins.
You can open the lid, add the desired additional ingredients, and then close the lid without changing any of the settings.
Step Eight
Once the knead phase is complete, you’ll see the word “rise” on the screen next to #11. This is the phase where the yeast kicks in and does its thing. I forgot to take a picture of the screen showing the “rise” phase. I will add it later.
When approximately 30 minutes remain in the dough-making process, the time setting will change from the estimated completion time to 30 minutes, indicating the remaining time. This clock setting will change in 1-minute increments until the dough-making phase is finished.
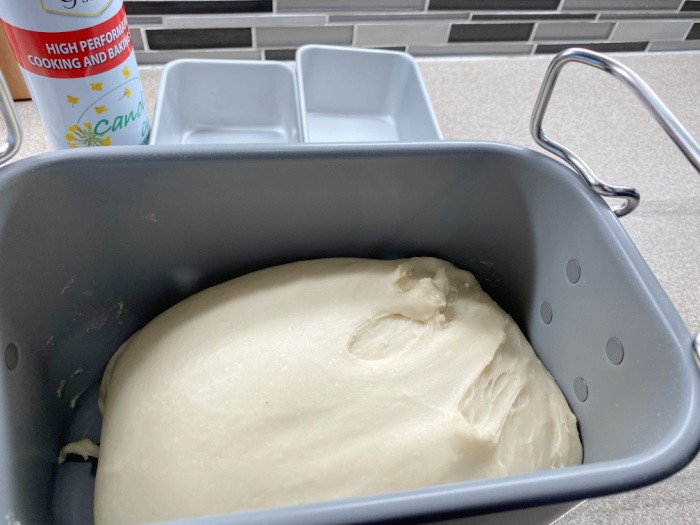
I turned the machine off (and unplugged it) and pulled the dough out before it reached that phase. I could see that the dough was perfect and ready to mold through the glass window.
After it stopped, I removed the dough from the Dough-Making Bread Pan to the kitchen counter so I could mold it.
Step Nine
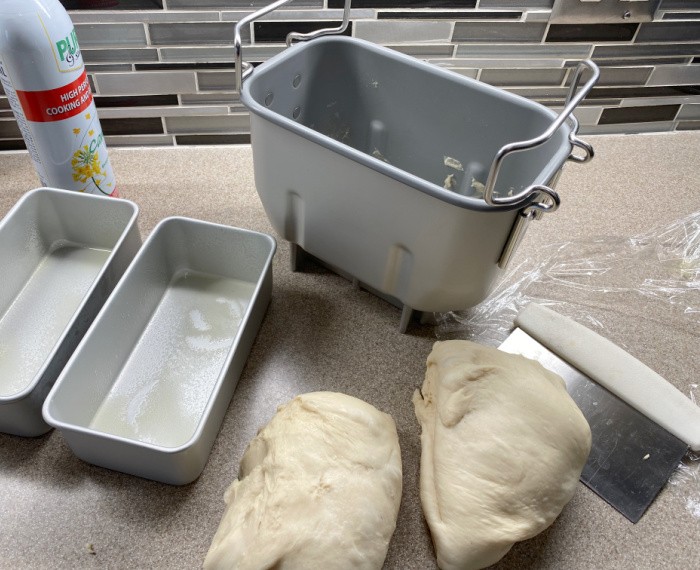
Use a dough scraper to cut the dough into two equal-sized pieces and then mold them into two loaves of bread. (I use bread pans this size: 7.75 x 3.75 x 2.5 Inches.)
Step Ten
Here are the two molded loaves.
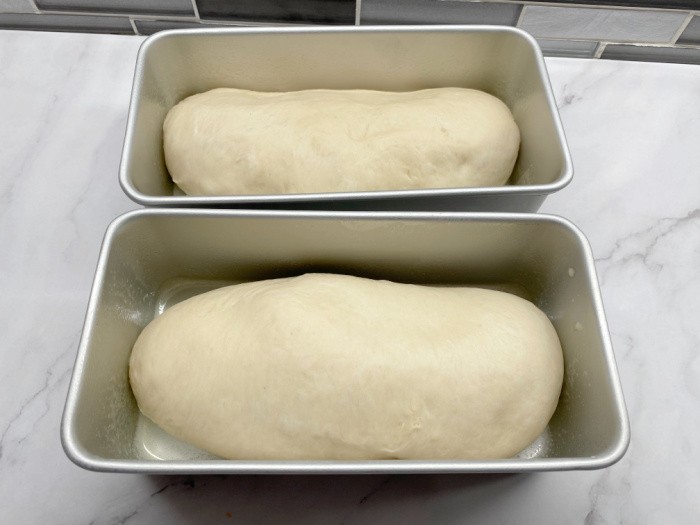
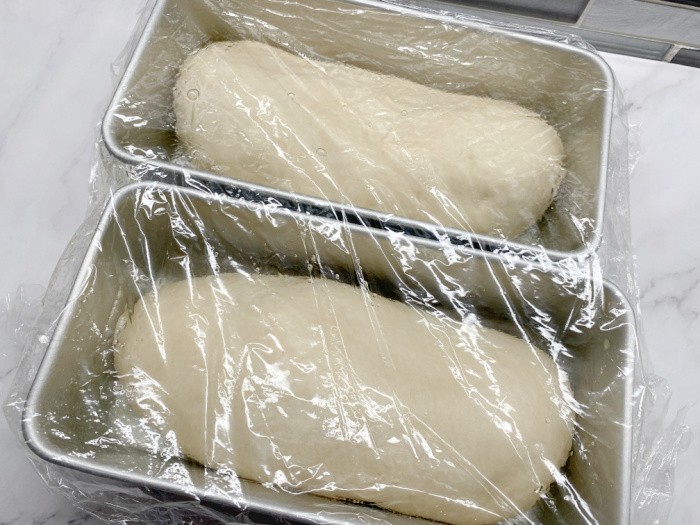
Step Eleven
Place the loaves into your greased bread pans, cover with plastic wrap, and let the dough double in size.
Step Twelve
Remove the plastic wrap. Preheat your conventional oven to 350°F (176°C). Bake for 28 minutes, or until the bread is baked through.
Step Thirteen
Remove the baked loaves from the oven.
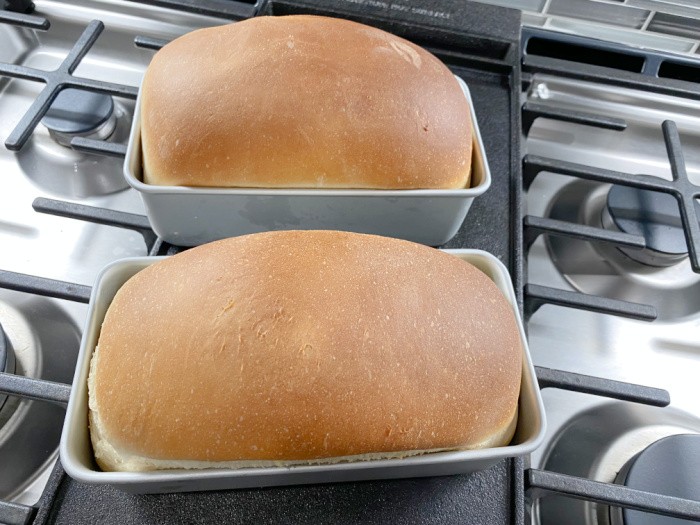
Step Fourteen
Remove the loaves from the pans and place them on a cooling rack.
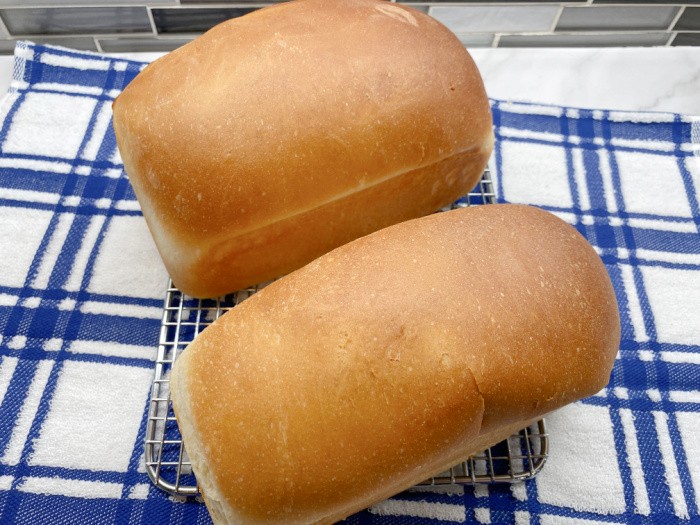
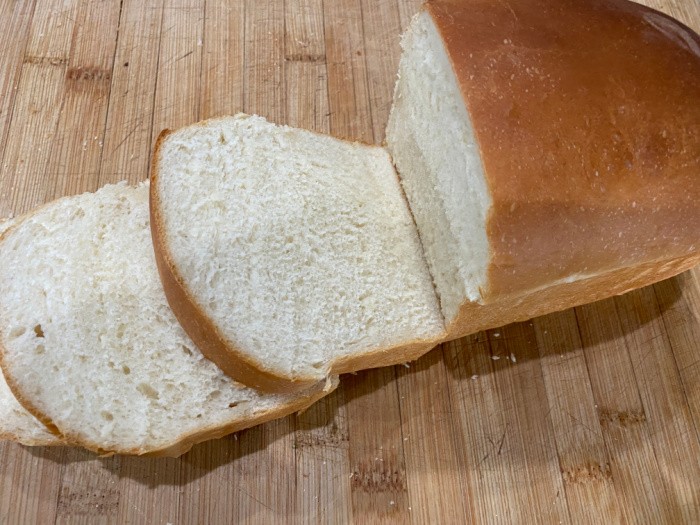
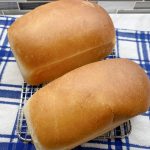
Finished Product
I love this recipe because it’s easy. Once you realize how easy the bread mixer steps are to make bread, you’ll be a pro at making it. Here again, I prefer my dough to be baked in a conventional oven, not in this bread mixer. Here is the bread sliced and ready for butter and jam, of course.
I wanted you to see how perfect the loaves looked coming out of the oven. Often, I’ll take a stick of butter and rub it over the top of the loaves to make the bread crust a little softer. These looked so great, I decided not to do that.
Bread Machine Bread Recipe
Heidi’s Bread Machine Recipe/TWO one-pound loaves
Ingredients
- 1-1/2 cups water
- 4 cups bread flour
- 1/4 cup sugar
- 2 tablespoons dry instant milk
- 2 teaspoons salt
- 2 tablespoons butter
- 1 tablespoon Saf Instant yeast
Instructions
Zojirushi Bread Mixer Instructions
-
Add the ingredients listed to the Baking Pan in the order listed. Press the COURSE button and select Course No. 11 (for DOUGH ONLY) and press the start button. After it stops, remove the dough from the Dough Bread Pan. Use a dough scraper to cut the dough into two equal-sized pieces for the two loaves of bread. I use bread pans this size: 7.75 x 3.75 x 2.5 Inches. Grease your bread pans and place the dough in them and cover with plastic wrap. Let rise until double the size. Remove the plastic wrap. Preheat your oven to (350°F) = 176°C). Bake for 28-30 minutes or until baked through. PLEASE CHECK YOUR BREAD MIXER BRAND'S INSTRUCTIONS.
Step-By-Step Instructions (Additional Help)
-
1. Set the Baking Pan into the Main Body and close the lid. 2. Insert the Power Plug into an electrical outlet. 3. Press the "COURSE" UP button until it reaches Course #11 (for DOUGH ONLY), this is what I did today. 4. Push the Start button. 5. You'll also see the word "Rest" next to #11 telling you that it is in the "rest" phase as the unit warms up the ingredients. 6. This "rest" phase should last about 20-25 minutes. 7. You'll hear the unit move into the "knead" phase as the kneading blades start spinning to knead the dough. 8. The screen will change from "rest" to "knead" during this period. 9. After a few minutes, the unit will make a buzzing sound and you'll notice the word "add" flashing on the screen. This is the appropriate time to add things you want in your dough, like nuts, raisins, etc. You can open the lid, add the desired additional ingredients, and then close the lid without changing any of the settings. 10. Once the knead phase is complete you'll see the word "rise" on the screen next to #11. This is the phase where the yeast kicks in and does its thing. 11. When there are approximately 30 minutes remaining in the dough-making process, you'll see the time setting change from the estimated completion time to 30 minutes, which means there is that much time remaining. This clock setting will change in 1-minute increments until the dough-making phase is finished. When I could see the dough was ready through the glass opening in the lid, I skipped this step. I turned off the machine and unplugged it. 12. After it stops, you remove the dough from the Dough Bread Pan. 13. Use a dough scraper to cut the dough into two equal sizes and then mold them into two loaves of bread. (I use bread pans this size: 7.75 x 3.75 x 2.5 Inches.) 14. Place the loaves into your greased bread pans, cover with plastic wrap and let double in size. 15. Remove the plastic wrap. 16. Preheat your conventional oven to (350°F) = 176°C) bake for 28-30 minutes or until baked through. PLEASE CHECK YOUR BREAD MIXER BRAND'S INSTRUCTIONS.
Final Word
Here’s my take on this excellent bread maker. I love it; I really love it. I’m so glad that a reader mentioned she bought one. I have big plans to teach the world how to make pizza, dinner rolls, French bread, and breadsticks using this incredible machine. I’m sure there will be other things I’ll want to make, so stay tuned.
I can use this machine to make bread from start to finish in about 2 hours. I won’t worry about it needing electricity. Mark and I live for today and stock up for tomorrow. This bread can be made with pennies compared to buying store-bought bread and will pay for itself within a year, depending on the amount of bread, dinner rolls, or pizza you make at home. Bread is so expensive; this is one more way to be self-sufficient.
I’ve been telling my readers for years that mastering the art of bread making is a must-have skill if you genuinely want to be prepared for the unexpected. You and your family can thrive if you have the ingredients on hand to make bread and know how to do it. If you’ve been reluctant to learn bread making, now is the time to jump in with both feet. Learn and live through most anything!
I can always make bread in a bowl. But until then, I will enjoy making bread without hurting my fingers and hands. May God bless this world, Linda
The post Bread Machine Bread-How To Make It appeared first on Food Storage Moms.
from Food Storage Moms
No comments:
Post a Comment