
I decided to show the world how to dehydrate cherries today! I remember when my daughters were young we would all pit the cherries with this two-finger tool. You could only do one cherry at a time. We bottled dozens of quart bottles of cherries years ago. To be honest with you, I never liked them, I really didn’t.
We picked the cherries for free, so I was on it to bottle them. Yes, we bottled them for years until we no longer got them for free. In the bumper years, we bottled more jars than we could count. The only thing I needed to buy were new canning lids/seals and sugar. I loved using a wide-mouth mason jar to provide a means for storage on shelves in our basement. Fun time with family working on projects together.
Back then, we did more canning than dehydrating. The kids loved canned fruit with breakfast in the morning or as an after-school healthy snack.
Updated Post from 2015
I’m updating this post from 2015 with better images and more information. You’ll love to dehydrate cherries!
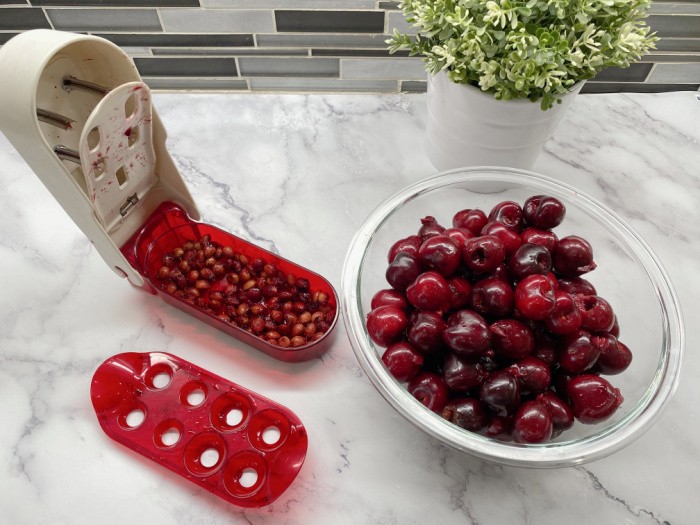
Well, I have been on the lookout for a better cherry pitter. I didn’t want one that only did one cherry at a time. I’m so past that one cherry-at-a-time pitter game. I Googled and searched reviews and other blogs for the perfect cherry pitter. Let me say this, this cherry pitter is so much better than the one cherry at a time gizmo. Check out this link to see what I used to prepare the whole cherries for the batch of dried cherries shown in this post.
I use an Excalibur dehydrator, so I’m going to give you the instructions that are in my dehydrator book. Always check your own manual, and of course, the drying time will always vary according to the humidity in the room and the temperature setting on the unit. Here’s the one that is similar to the one I use: Excalibur Food Dehydrator. I prefer a dehydrator with a timer, which allows me to set it to the approximate time needed. I can always add a few hours after returning home from errands, as needed, to remove any residual moisture.
You can also dehydrate your cherries in the oven or on screens outside covered with cheesecloth. My first dehydrator was a HUGE 24-inch square gold harvest gem. It was a beauty, trust me.
How To Dehydrate Cherries
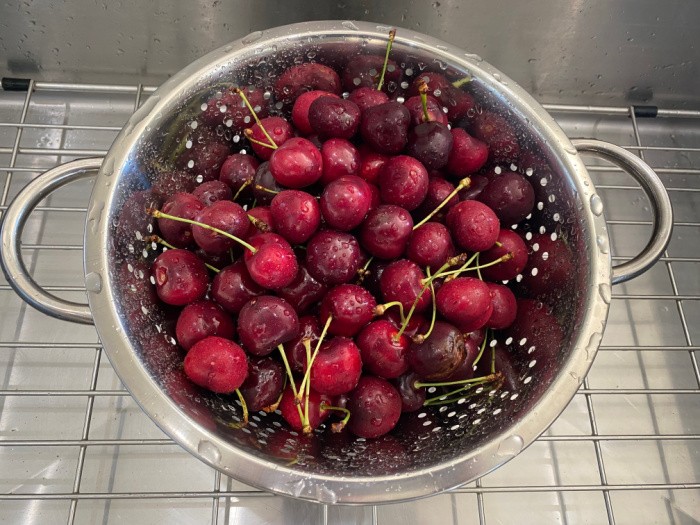
Wash the Cherries
Wash and rinse your fresh cherries in a colander and drain. Colander: Remove the stems and discard any badly blemished cherries. For the best dehydrated fruit, you need to make sure the fruit isn’t too ripe or damaged.
Get Your Cherry Pitter Ready
This is my favorite cherry pitter for everyday use when eating fresh cherries, as well as for dehydrating cherries. OXO Cherry Pitter
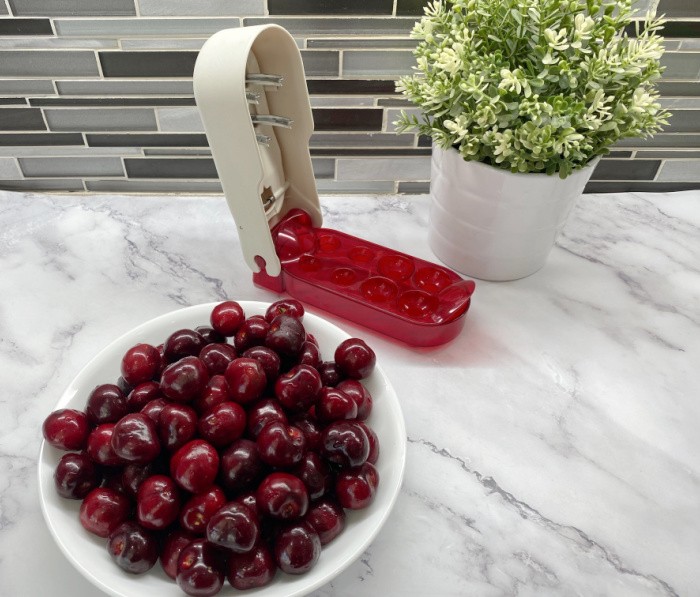
Remove the Cherry Pits
You can remove the pits from 4 cherries at a time. The pits stay in the container below.
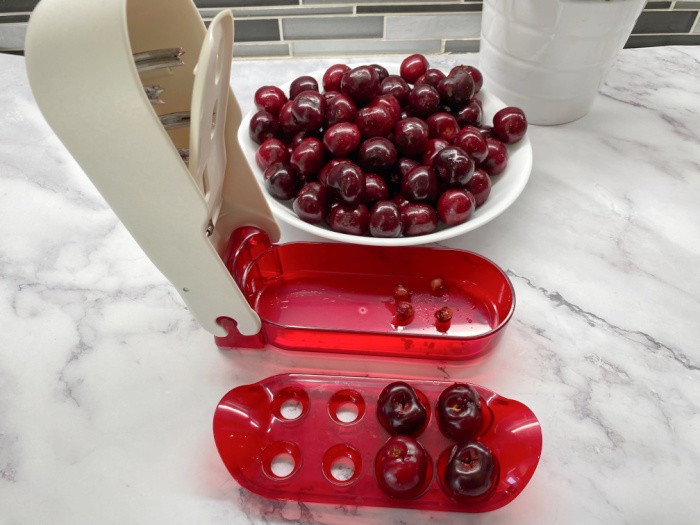
Remove all The Seeds
This cherry pitter makes it so much easier to prep them.
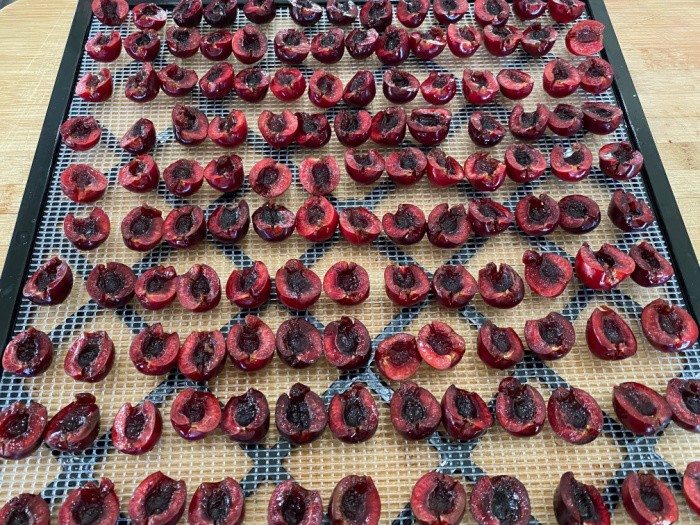
Cut The Cherries in Half
Cut the cherries in half and place them in a single layer with the skin side down and cut side up on the dehydrator trays. As you cut them, ensure that all the cherry seeds are removed, as the pitter may miss a few.
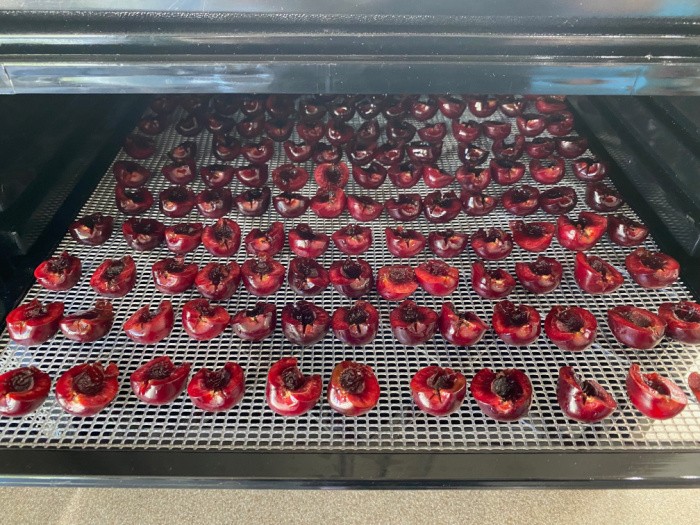
Cherries in the Dehydrator
According to my Excalibur dehydrator, the instructions say to do the following: Turn your dehydrator on (145°F) = (62°C) degrees for two hours. Then lower the temperature to (135°F) = (57°C) degrees and dehydrate until the cherries are leathery. Watch the cherries towards the end to prevent them from over-drying. When using dried cherries in your recipes, such as jams, pies, homemade trail mix, or simply as a topping on ice cream, you want them to be slightly pliable and not crispy.
What’s incredible about dehydrating our own healthy fruit snacks is that we know what’s in the jar because we dried them ourselves. We love to eat dry cherries as a healthy snack while watching TV at night, they’re delicious!
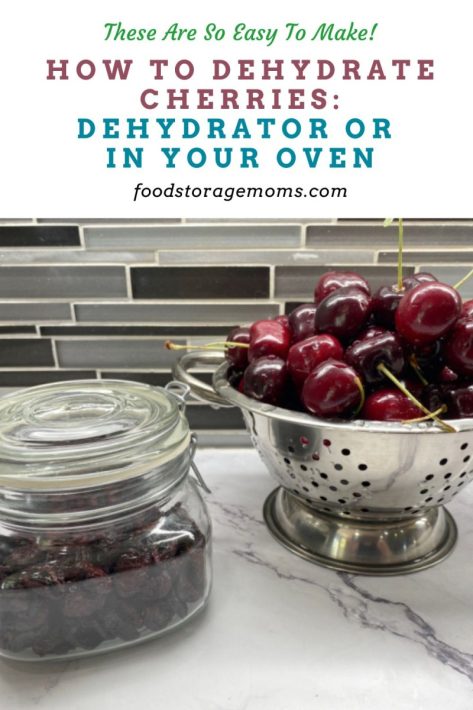
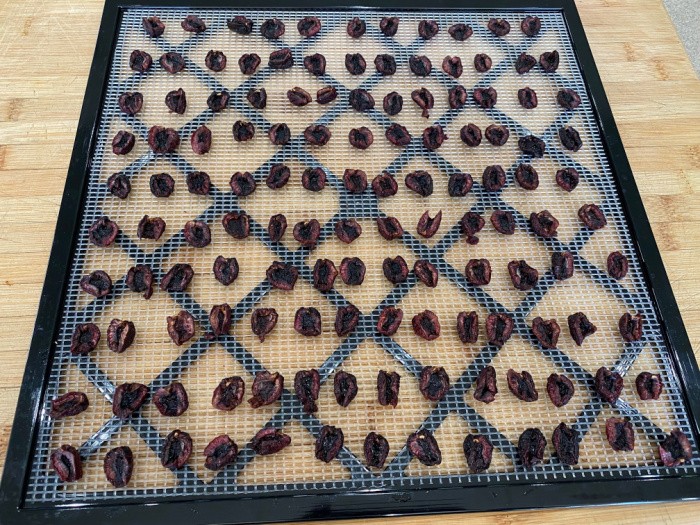
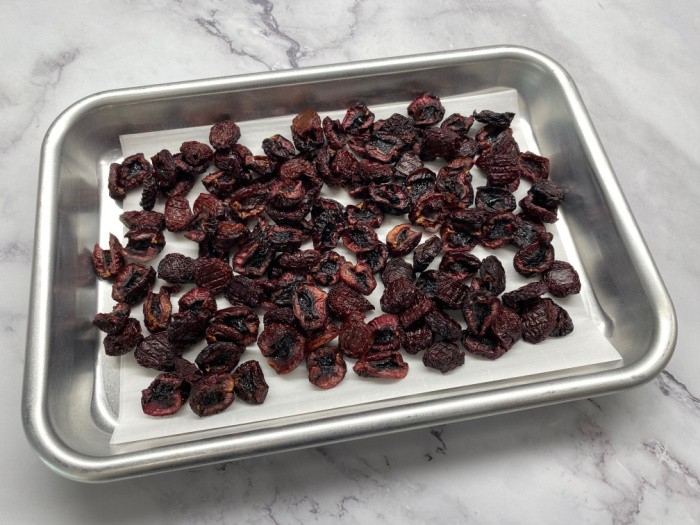
Dehydrated Cherries
These took almost 36 hours to dry. They were huge Bing cherries. Remember, the times will vary depending on the humidity in the room where you’re drying your fruit or vegetables. Dried cherries become similar to raisins after drying. They are great for snacks, spinach salads, or added to muffins, cakes, a pie, or cookies. Of course, you generally use more tart cherries when making cherry pies, and your recipe will more than likely not call for using dried cherries.
I store mine in pint jars because we go through them quickly. You can get more “shelf life” from the dried cherries if you put them in a jar in the refrigerator rather than leaving them on your countertop at room temperature.
Once you start dehydrating food, you’ll be hooked, I promise. I’m not sure about you, but I can only freeze so many things in my freezer. I want some food that sits safely on my pantry shelves or in the fridge. Life is good when you know what you are eating.
How To Condition Your Fruit or Vegetables
If you live where it’s HUMID: “After drying, the “conditioning” process helps equalize moisture among the various-sized pieces of fruit. It lessens the chances of mold growth and other spoilage. To condition, place cooled dried fruit loosely in glass or plastic containers. Lightly cover the containers and store them in a dry, well-ventilated place, stirring or shaking the container(s) daily for four to seven days. If moisture condenses in the jar, return the fruit to the dehydrator or oven for further drying, then repeat the conditioning process”. I Quote from North Dakota State University.
I used to live in the DRY DESERT: I set my fruit and vegetables on my countertop for 5-7 days. Ten days is even better to make sure everything is dry before using your FoodSaver unit to preserve them. They are good for about one year because we don’t put any preservatives in our jars. They never make the year mark because we eat them or use them in recipes.
Can I Dehydrate the Cherries in My Oven?
Yes, you can. Many people like to use ovens for dehydrating fruits and veggies. You need to set the oven to its lowest temperature, put a wad of foil to keep the oven door ajar, and place the sliced cherries on a cookie or baking sheet covered with parchment paper. Be sure to check the cherries often since your oven will dry them much faster than a regular dehydrator. The lowest temperature my oven can be set at is (170°F) = (76°C) degrees, If you can set yours lower to (150°F) = (65°C) degrees that would be much better.
Dehydrating Cherries in Your Dehydrator or Your Oven
Ingredients
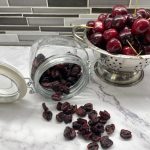
- Fresh Cherries any amount (I used Bing Cherries)
Instructions
-
Remove the stems from the cherries and discard any bad ones
-
Rinse the cherries in a colander and drain them
-
Use a cherry pitter of choice to remove the cherry pits
-
Cut the cherries in half
-
Place the cut cherries skin side down with the cut side up on your dehydrator racks in a single layer
-
Turn your dehydrator on to (145°F) = (62°C) degrees for two hours. Then lower the temperature to (135°F) = (57°C) degrees and dehydrate until the cherries are leathery. Please refer to your Dehydrator Book, I have an Excalibur Dehydrator. All dehydrators have a different wattage so some will take longer than others to dehydrate.
-
The time to fully dehydrate your cherries will of course depend on the humidity in the location you are dehydrating them.
How to Condition Your Fruits and Vegetables
-
If you live where it’s HUMID: "After drying, the “conditioning” process helps equalize moisture among the various-sized pieces of fruit. It lessens the chances of mold growth and other spoilage. To condition, place cooled dried fruit loosely in glass or plastic containers. Lightly cover the containers and store them in a dry, well-ventilated place, stirring or shaking the container(s) daily for four to seven days. If moisture condenses in the jar, return the fruit to the dehydrator or oven for further drying, then repeat the conditioning process". I Quote from North Dakota State University. I used to live in the DRY DESERT: I set my fruit and vegetables on my countertop for 5-7 days. Ten days is even better to make sure everything is dry before using your FoodSaver unit.
Dehydrating in Your Oven
-
You need to set the oven to its lowest temperature, put a wad of foil to keep the oven door ajar and place the sliced cherries on cookie sheets covered with parchment paper. Skin side down and cut side up.
-
Be sure to check the cherries often since your oven will dry them much faster than a regular dehydrator. The lowest temperature my oven can be set at is (170°F) = (76°C) degrees, If you can set yours lower for instance (150°F) = (65°C) degrees that would be much better. Then Condition your cherries before storing them.
Where else can I use these dehydrated cherries?
We like to add dehydrated cherries to granola, yogurt, and oatmeal. Any recipe that calls for cherries is a time to consider putting them to use.
Cherry Health Benefits:
Not only do these sweet cherries taste delicious, but they are also very good for us too! Here are just a few of the health benefits:
1. They are high in Vitamin C
2. High in antioxidants
3. They help reduce the risk of gout-check with your doctor to see how much is safe for you to eat
4. Natural melatonin helps you sleep better
5. Helps reduce arthritis inflammation
6. They may lower our risk of strokes
My Other Dehydrated Articles
- Dehydrating Apples
- Dehydrating Bananas
- Dehydrating Blackberries and Powder
- Dehydrating Blueberries and Powder
- Dehydrating Cilantro
- Dehydrating Cucumbers and Powder
- Dehydrating Ginger and Powder
- Dehydrating Grapes
- Dehydrating Green Onions and Powder
- Dehydrating Kale and Kale Powder
- Dehydrating Kiwi
- Dehydrating Lemons and Powder
- Dehydrating Marshmallows
- Dehydrating Peppermint Marshmallows and Powder
- Dehydrating Mushrooms and Mushroom Powder
- Dehydrating Onions and Powder
- Dehydrating Pears
- Dehydrating Pineapple
- Dehydrating Raspberries and Powder
- Dehydrating Spinach and Powder
- Dehydrating Strawberries
- Dehydrating Tomatoes and Powder
- Dehydrating Watermelon
Final Word
I guess this is why we keep hearing that we should eat more fruits and vegetables to stay healthy. Let’s stay healthy by preserving our own food. Please be prepared for the unexpected. May God Bless this world, Linda
The post How To Dehydrate Cherries-Dehydrator or Oven appeared first on Food Storage Moms.
from Food Storage Moms
No comments:
Post a Comment