I can walk into a grocery store today and still find a cooler full of beef, with steaks and roasts stacked where they have always been. Nothing about that display looks like a shortage, which is exactly why cattle numbers are so easy to ignore. The shelves show what is available today. They do not […]
from Survivopedia
Tuesday, November 3, 2026
Monday, November 2, 2026
72-Hour Kit Checklist: What to Pack for Your Family
A practical, mom-to-mom guide to building a 72-hour kit for every member of your family, with real-world tips from people who've used theirs and cold-weather upgrades for winter storm season.
The post 72-Hour Kit Checklist: What to Pack for Your Family appeared first on The Survival Mom.
from The Survival Mom https://ift.tt/8TfFAD0
I Taste-Tested Survival Food From the 1990s. Here’s How It Held Up
Last spring, I bought a few acres one town over, along with the old house on them. The man who owned it had passed away, and his family sold the place with the root cellar dug into the hillside out back. I knew him a little from the feed store, a quiet fellow who never threw anything away. And once we pried the cellar door open, we found shelves of food he’d stored over three decades, from a case of ’90s MREs to home-canned jars with his handwriting on the lids. My wife took one look and asked if I was hauling it all to the dump.
I told her I’d taste some of it first. That man put real work into those shelves, and I didn’t want it wasted without a fair try. I wanted to know what food stored for decades actually tastes like, and whether any of it would keep a family going in a pinch.
So I spent a couple of Saturdays going through what he’d left behind, nose first and then mouth. Some of it held up better than I expected. Some of it went straight in the trash, and I’ll tell you why.
Eating 30-Year-Old Military MREs
The case had a date code of 6045 stamped on the side. MRE cases use a Julian date, so the first digit is the year and the next three are the day. That put these meals at February 14, 1996, the same era of rations our troops carried in Bosnia.
I picked a beef stew menu and checked the entree pouch before anything else. It lay flat, with no puffing and no oily residue on the outside. The stew looked darker than I remembered, and the potatoes had gone soft as baby food. Still, it smelled like beef stew, and the flavor came through mostly intact.
But the crackers didn’t fare nearly as well, since they tasted like the cardboard box they came in and broke into dust. The cheese spread had turned tan and grainy, though it still tasted like cheese.
Then came the pound cake, which surprised me most. It crumbled the second I tore the pouch, dry and stale like an old sponge. So I broke it into a bowl and poured cold milk over it. After about five minutes, it softened up and tasted close to vanilla cake, and I finished the bowl.
Mind you, that case lasted on luck as much as packaging, and half the menu tasted like the box it came in. Plus, fresh military MREs with years of shelf life left cost a small fortune today, and you get no say over what goes inside.
The better move is to keep these 7 MREs in your stockpile, packed after the military “one meal or one day” rule. That means you can build a single-meal pack around the numbers of a real Army MRE, which provides about 1,285 calories, including 40 grams of protein, 176 grams of carbohydrates, and 47 grams of fat.
And a full-day pack can match the Army’s First Strike Ration, where each FSR (food for 24 hours) provides around 2,900 calories, including 91 grams of protein, 421 grams of carbohydrates, and 98 grams of fat. Better yet, you pick every item yourself, so your family will actually eat what’s in the bag.
Here’s how to do it:

Tasting 17-Year-Old Homemade Pemmican
He’d made two batches of pemmican and marked both tubs 2009 in black marker. They sat sealed on the lowest shelf, in the coolest corner of the cellar. The first was plain, just lean beef dried hard, pounded to powder, and mixed with rendered beef tallow. The second had dried blueberries and cranberries worked in for flavor.
Thankfully, the plain batch still looked the way he must have packed it, a dense, pale brown brick. I shaved off a piece with my pocketknife and let it warm up in my mouth. It tasted like strong beef jerky with a waxy coating, and the tallow left a faint stale note at the back of my throat. I wouldn’t serve it at a family dinner, but I’d eat it without complaint if needed.
The fruit batch, though, failed the smell test the moment I popped the lid. A sour, almost winey smell came off it, and the fat had a sharp rancid edge, so I set it aside without tasting it.
That plain brick held up for 17 years with nothing but dried beef and fat holding it together. No wonder fur traders and Arctic explorers trusted pemmican to carry them through months with no other food in their packs.
To make pemmican that lasts that long in your own pantry, start with the original 1743 pemmican recipe and follow it the way the trappers did, ratios and all. Find the full recipe here. Then give the berries their own sealed bag, and mix them in the day you eat.
Franco-American Canned Pasta From the Late ’90s
Anyone who grew up on canned pasta remembers Franco-American. Campbell’s dropped the name from its pasta in 2004, so the cans on his shelf had to be older than that, and you won’t find that label in a store today. He had a can of their macaroni and cheese and a can of Superiore beef ravioli tucked behind the newer stuff.
The macaroni can looked clean, with no rust on the seams and no swelling on either end. It opened the way a good can should, with no spurt of liquid and no sour smell. Inside, the sauce had darkened from bright orange to a muddy brownish color. And the noodles had soaked up so much liquid they mashed against the roof of my mouth like paste.
Still, I heated it in a pot and gave it a fair shot. The cheese flavor was weak, but it tasted like food, with a mild metallic aftertaste. My kids would’ve turned their nose up at it, though a hungry man in a bad winter would clean the bowl.
Store-bought canned pasta loses a lot over the years, and that macaroni came out mushy with a metallic aftertaste. You’ll get a much better meal by keeping your pasta dry and canning the hearty part yourself.
That’s where this famous Poor Man’s Steak recipe comes in, since you can put up a few jars of it before the cold sets in. Then just pour a jar over some freshly boiled pasta, and you’ve got a real meal when SHTF, or simply on a cold winter evening after work.
Home-Canned Food After 12 and 13 Years
The old man kept a big garden, and the cellar held a few dozen jars he’d canned over the years. Some were labeled 2013 and 2014 in his shaky handwriting, and those were the only ones I tasted. For each one, I checked that the lid stayed concave and didn’t flex when I pressed the center.
The pressure-canned green beans from 2013 had faded to an olive drab color and turned soft. Low-acid home-canned food can carry botulism without any smell or swelling, so I boiled them hard for ten minutes before tasting. After that, they tasted like ordinary canned green beans, just mushier, and a pat of butter fixed most of it.
As for the 2014 peaches, they held up better than anything else I tried. The fruit at the top of the jar had browned, and the syrup had turned amber. Even so, they were sweet and soft, and my wife ate a few slices with me straight from the jar.
Those green beans came out soft and olive drab because pressure canning cooks them once in the jar, and the years on a shelf keep softening them after that. The peaches hid it under sweet syrup, but plain vegetables have nothing to hide behind.
Freeze-drying solves that problem, and you don’t need a store-bought machine that costs thousands to do it. With the homemade freeze-drier that keeps food for 25+ years, your garden beans hold on to their color and flavor, and they take up a fraction of the shelf space a row of jars would.
A Nice Surprise…

Behind the jars, he’d lined up a few wicker-wrapped demijohns and some green corked bottles, each dated on masking tape. Turns out the old man made his own wine, from a 2016 bottle to a 2024 jug.
The 2016 cork crumbled halfway out, since the bottle had stood upright for years and let air creep in. The wine had turned brick-brown and tasted flat and nutty, like cheap sherry, so now my wife cooks with it.
The 2024 jug had its cork sealed under wax, and it poured bright red and tasted fruity, if a little rough. We each finished a glass that evening, and these days any wine we store goes on its side with a dip of wax over the cork.
The Old Food I Wouldn’t Touch, and Why
That Franco-American ravioli can had both ends domed outward. If I pressed one end down, the other popped up, and that’s a sign gas built up inside from bacterial growth. So it went into a doubled trash bag without being opened, since even a spray of that liquid on your hands can make you sick.
Two of the MRE entree pouches had also puffed up like little pillows. The rest of the case looked fine, but I wasn’t about to gamble on a swollen pouch from 1996. And I already told you about the fruit pemmican, which smelled bad enough to settle the question.
Then there were about a dozen jars with no label at all. Some looked like green beans and some looked like stew meat, but I couldn’t tell when he canned them. More important, I couldn’t tell whether he’d pressure-canned them or used a water bath, and low-acid food done in a water bath is a botulism risk. I dumped every one of those jars, even the ones with good seals.
What This Taste Test Taught Me About Long-Term Food Storage
My wife still thinks I’m a little crazy for eating a 30-year-old beef stew. But that old man’s cellar showed me how our own stored food will hold up over the years. And I’d like to think he’d be glad it all got a fair try.
So after two Saturdays in that cellar, I changed a few things about how we store food at home:
- Boil low-acid home-canned food before you eat it. Botulism gives you no smell and no bulge to warn you, but ten minutes at a rolling boil destroys the toxin. That’s why it’s mandatory to learn the 5 early signs of botulism poisoning now, while you still have a doctor to call.
- Mark every jar with the canning method. Our lids now get the contents, the year, and PC or WB for pressure canner or water bath. A jar of green beans marked WB goes straight in the trash, since a water bath can’t kill botulism spores in low-acid food.
- Keep fruit and fat apart. The plain pemmican outlasted the berry batch by years, because the fruit brought in moisture and sugar that turned the tallow rancid.
- Store food where you’d want to sleep in July. The military rates MREs for about 130 months at 60°F, yet at 100°F that drops below two years. That case survived because a hillside cellar holds a steady temperature. If your land is flat, the backyard cellar that stays cool all summer can do the same job without a hill.
- Put the oldest food up front. Those Franco-American cans sat behind newer stuff for over 20 years. Now new cans go in from the back, and we always eat from the front. Better yet, build the gravity shelf that rotates cans for you and you’ll never lose a can behind the others again.
- Keep pasta dry and add the sauce later. Dry pasta in a sealed bucket holds its texture for decades, and a can of sauce beside it gives you the same meal. Also, stock these 4 shelf-stable sauces that last for years, and a bucket of noodles turns into a real supper.
- Stock something to soak old food in. That stale pound cake came back to life after five minutes in milk; same with crackers in broth. That’s why we keep powdered milk next to the long-term food. Even the Civil War hardtack that never spoils turns soft and filling once you drop it in a hot bowl of broth.
- Check your shelves on a schedule. Twice a year, I press every can end and jar lid, and I make sure each pouch still lies flat.
- Eat your oldest can once a year. Each fall, we open the oldest thing in the house and have it for supper. It shows us how food ages in our own basement, and it keeps the rotation from slipping.
Build a Stockpile That Holds Up
That old man spent 30 years filling those shelves, and still a good share of his work went straight to the dump.
So to make sure every jar you seal this fall is still safe to open in 2050, you can learn the old preserving methods in The Lost Frontier Handbook and avoid the mistakes that quietly spoil a stockpile.

This way you will learn:
- How to make the 100-year survival ration fur trappers and Arctic explorers carried for months with no other food
- 3 ways to keep food cold through a summer blackout, from a root cellar to a long-lost evaporation trick
- How to smoke and cure meat, so a deer you take in November still feeds you in May
- The Civil War biscuit that won’t go bad in any climate, and softens into a filling meal once you soak it in broth
- The food-spoiling dangers that can wipe out a pantry, so you catch them while the rest of the shelf is still good
As for that cellar, it’s filling back up with our own jars, each one marked with the year and PC or WB on the lid. So if somebody pries that door open in 2056, they won’t have to guess what’s safe to eat.
You may also like:
 How to Preserve Bacon for a 5+ Year Shelf Life (VIDEO + PHOTO)
Ultimate Home Medical Supplies Checklist
9 Ways You Can Repurpose Expired Food Cans
If You Live in THIS State, You Have Gold in Your Backyard
What Happens If You Put Silver In Milk?
The post I Taste-Tested Survival Food From the 1990s. Here’s How It Held Up appeared first on Ask a Prepper.
from Ask a Prepper https://ift.tt/xEuoKjQ
How to Water Bath Meat
Estimated reading time: 10 minutes

If you’ve ever canned food before, you’ve probably heard the rule that meat should always go in the pressure canner. Period. And there’s a good reason for that. Meat is a low-acid food, and low-acid foods are where botulism likes to hide. A pressure canner gets the inside of your jars hotter than boiling water ever can, which is why the USDA says it’s the only safe way to can meat at home.
But here’s the thing: people were canning meat long before pressure canners were invented. In fact, the Amish still water bath their meat to this day. And in a lot of countries, pressure canners are either impossible to find or way too expensive, so water bathing is the only option. It’s sometimes called “heritage canning” or “rebel canning,” and while it’s not the officially recommended method, it can be done if you’re careful.
If the grid ever goes down and you’ve got a freezer full of meat that’s about to thaw, knowing how to do this could save you a lot of food. If you want to try it, there's a great video from the YouTuber Survival HT that explains exactly how to water bath meat as safely as possible. You can watch the video and read the steps blow.
Want to save this post for later? Click Here to Pin It On Pinterest!
A Quick Word Before You Start
Survival HT is upfront about this: if you own a pressure canner and can use it, use it. Water bathing meat is something she shares for educational purposes, for folks in other countries who don’t have another option, and as a backup skill for emergencies. That’s the right way to think about it.
It’s also worth knowing that boiling water doesn’t kill botulism spores the way pressure canning does. That’s why the long processing time and the “reheat before eating” step (more on that below) are so important. Don’t skip either one.
Step 1: Thaw Your Meat First
Don’t put frozen meat straight into jars. Heating up frozen jars is asking for trouble, since sudden temperature swings can stress the glass and crack it. Let your meat defrost completely before you start.
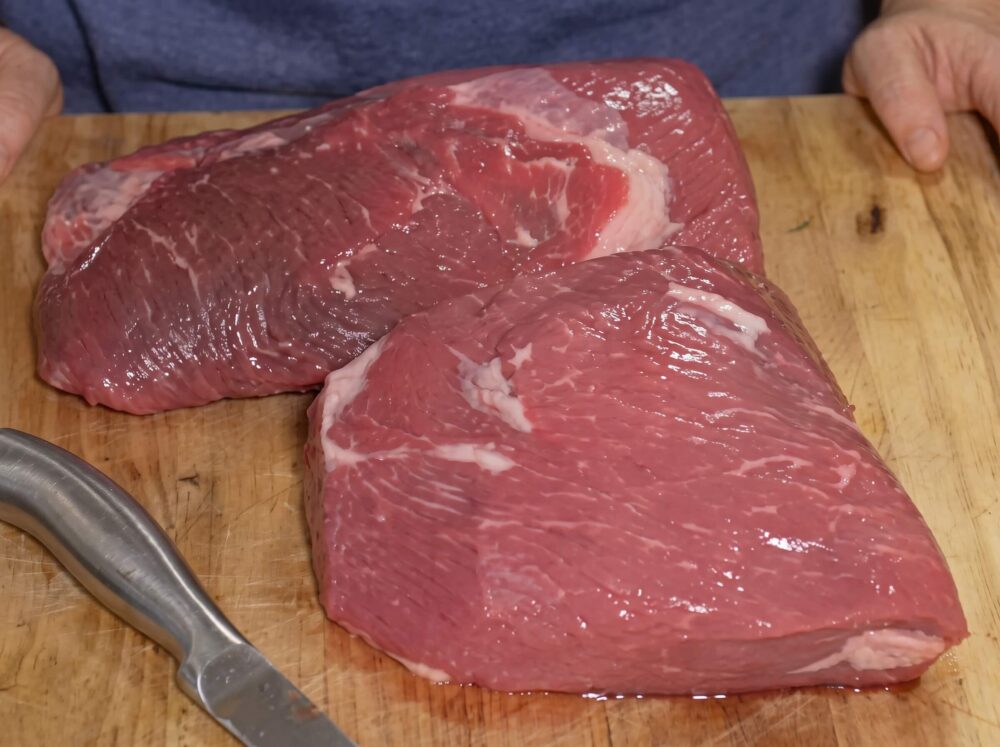
Step 2: Cut It Into 1- to 2-Inch Chunks
Cube your meat into pieces roughly 1 to 2 inches across. In the video, she used two beef roasts and cut them into about 1-inch cubes, since roast is a tougher cut. If you’re working with a more tender cut, you can go up to 2 inches.
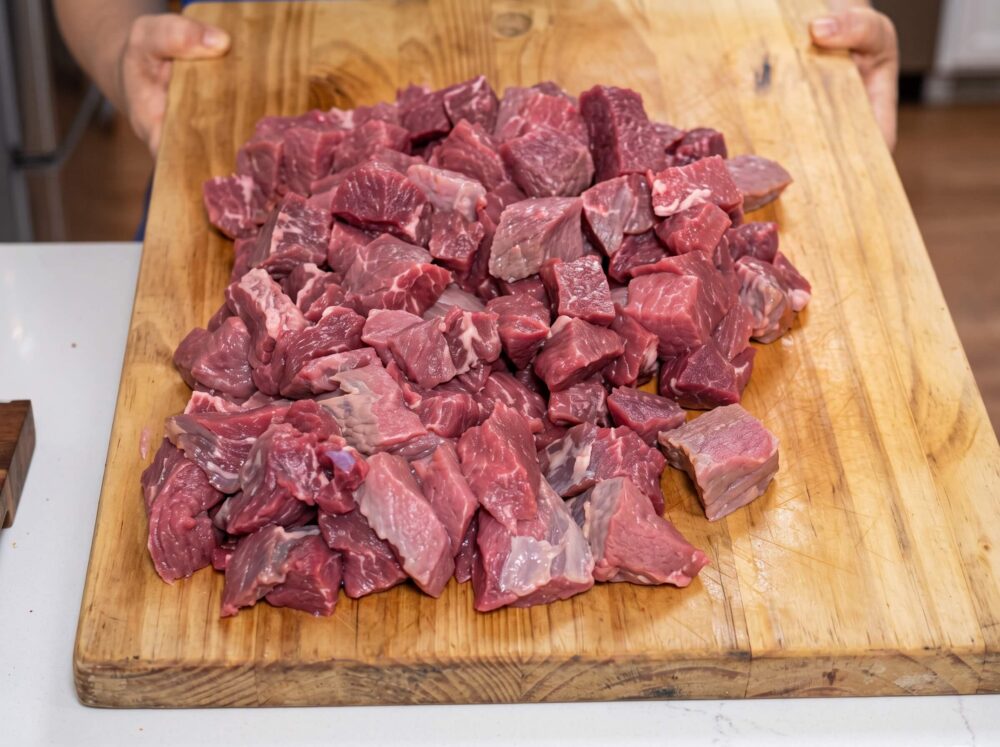
Step 3: Decide Whether to Add Liquid
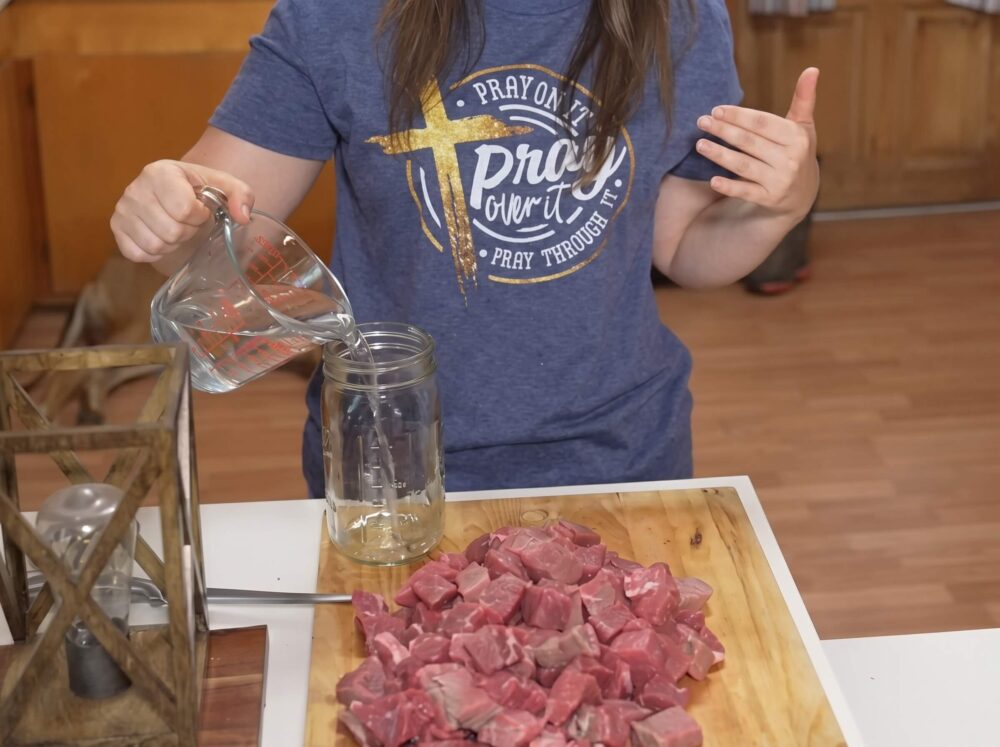
If you’re raw packing (putting the meat in the jar uncooked), you technically don’t need to add any liquid. The meat releases plenty of juice as it cooks.
That said, she usually adds about an inch of water or broth anyway. Sometimes the meat doesn’t give off enough juice to stay covered, and any pieces sticking up out of the liquid can come out a little tough. It won’t make them unsafe, just less pleasant to eat.
If you cook your meat before packing it, you’ll definitely want to add broth or water.
Step 4: Season It (Salt Is Optional but Helpful)
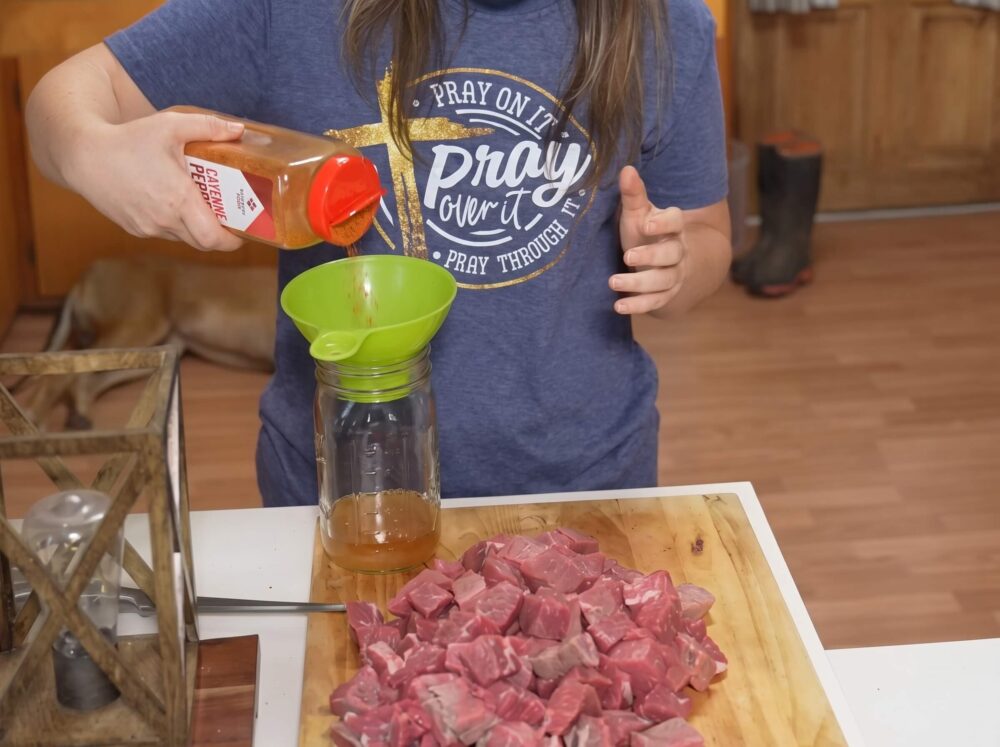
Salt isn’t required, but it’s a preservative, so it can help with shelf life. Most people add anywhere from half a teaspoon to half a tablespoon per jar.
She seasons everything, and her reasoning makes a lot of sense for preppers: if you’re storing food for an emergency, you don’t know what you’ll have on hand when you open it, so you might as well season it now. She keeps the salt to about half a teaspoon because her other seasonings already contain some.
Step 5: Pack the Jars
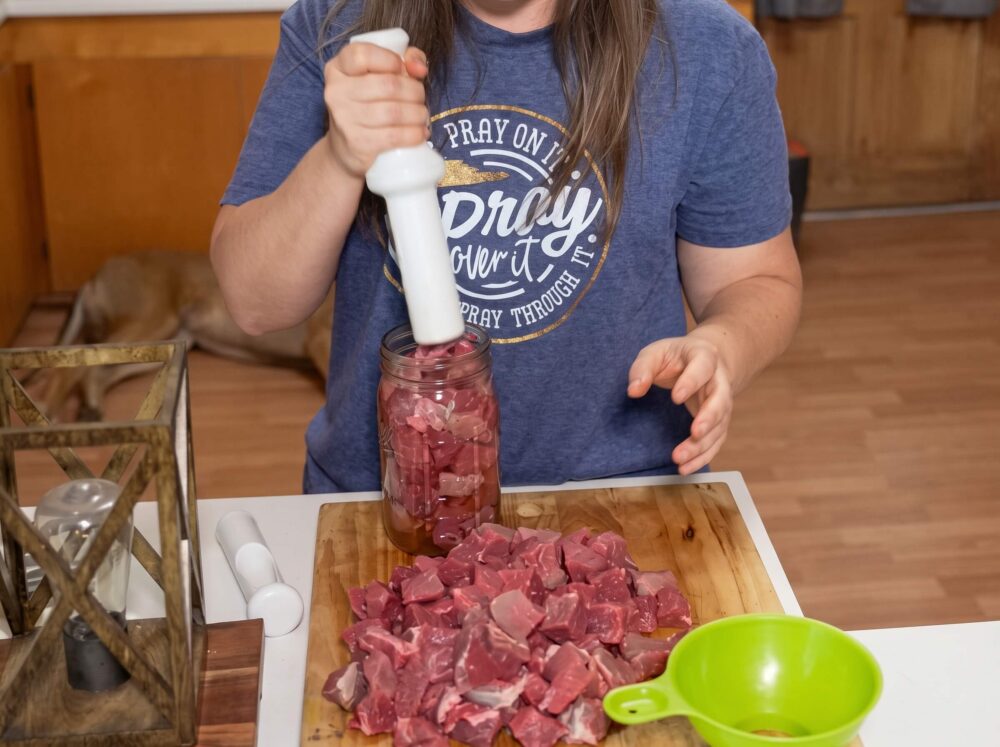
Wide-mouth jars are your friend here, since they make it a lot easier to get the meat back out later. Stuff as much meat into each jar as you can, leaving about an inch of headspace. It doesn’t have to be perfect.
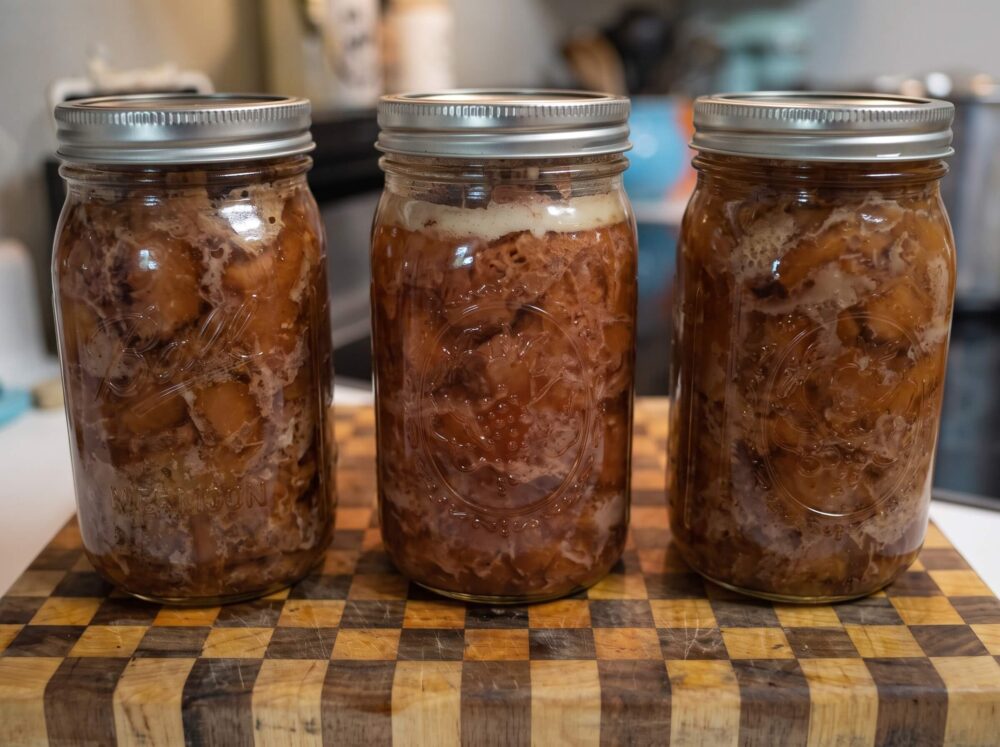
You’ll be surprised how much meat fits. Those two beef roasts filled three quart jars.
Step 6: Wipe the Rims
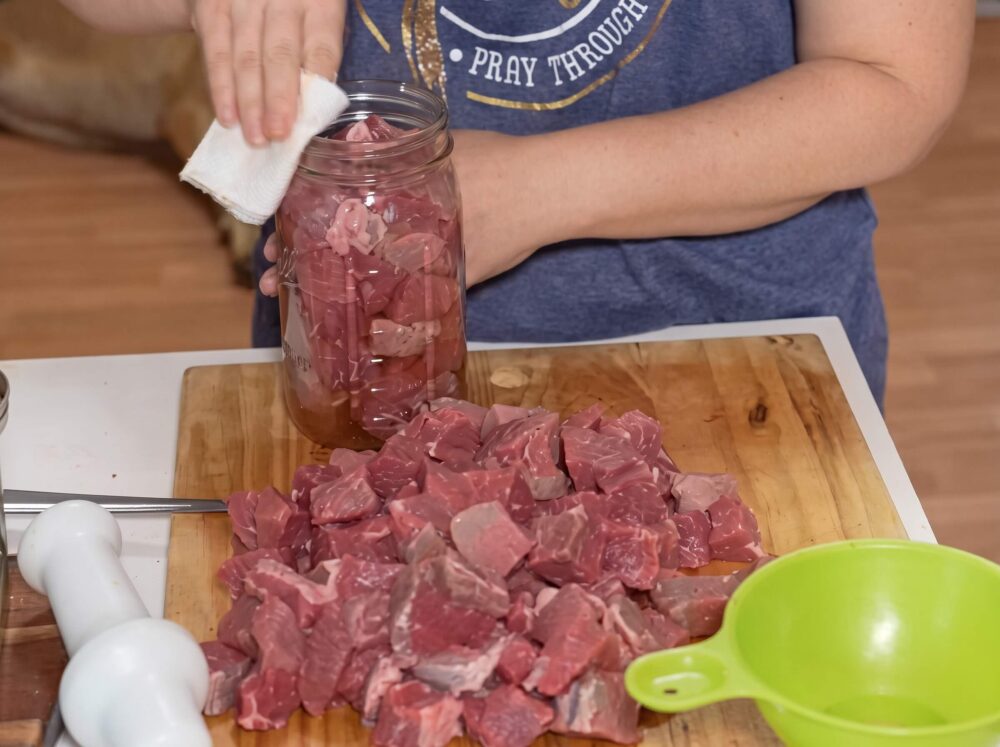
Before the lids go on, wipe each rim with a clean rag dipped in hot water or vinegar. Vinegar works especially well with meat because it cuts through the grease. You don’t want anything sitting between the rim and the lid, or you won’t get a good seal.
Step 7: Put the Lids On Fingertip Tight
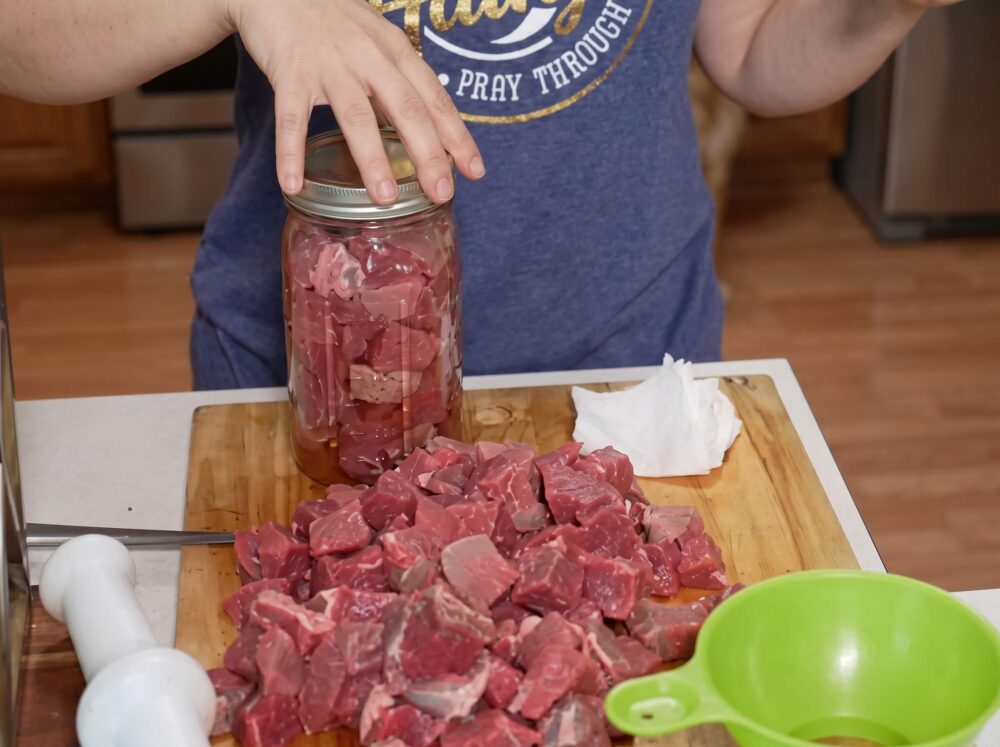
Screw the rings on just fingertip tight. Don’t crank them down.
Here’s why: as the jars heat up, the contents expand and push air out through the lid. Then as everything cools, a vacuum forms and seals the lid down. If the ring is too tight, the air can’t escape. You want it just snug enough to keep water out.
Step 8: Set Up Your Pot
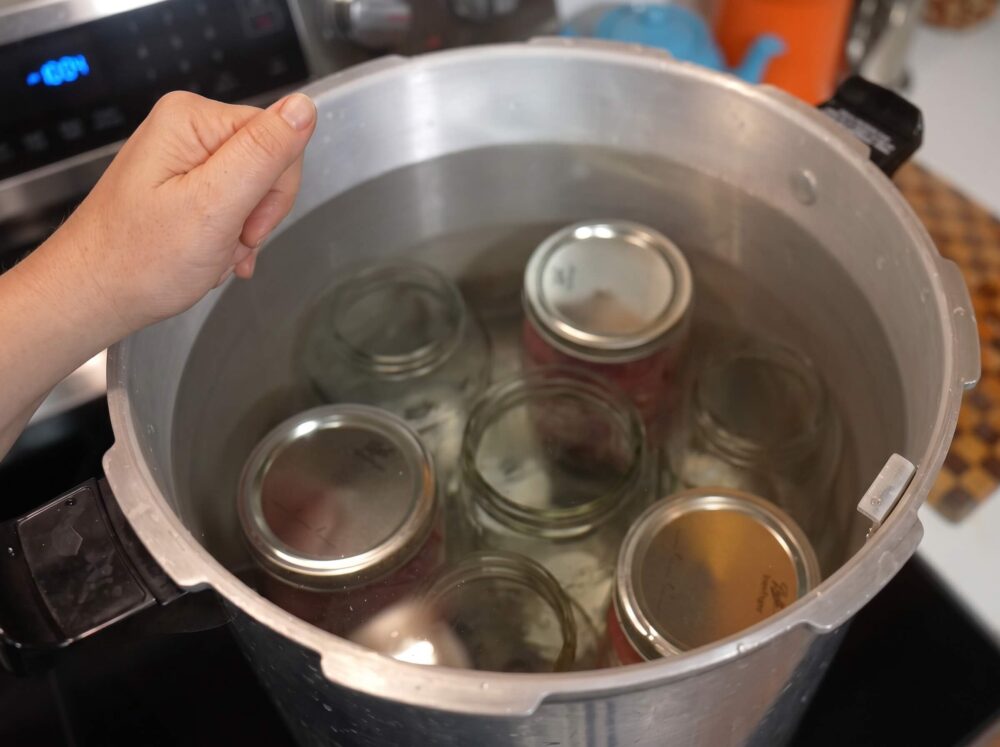
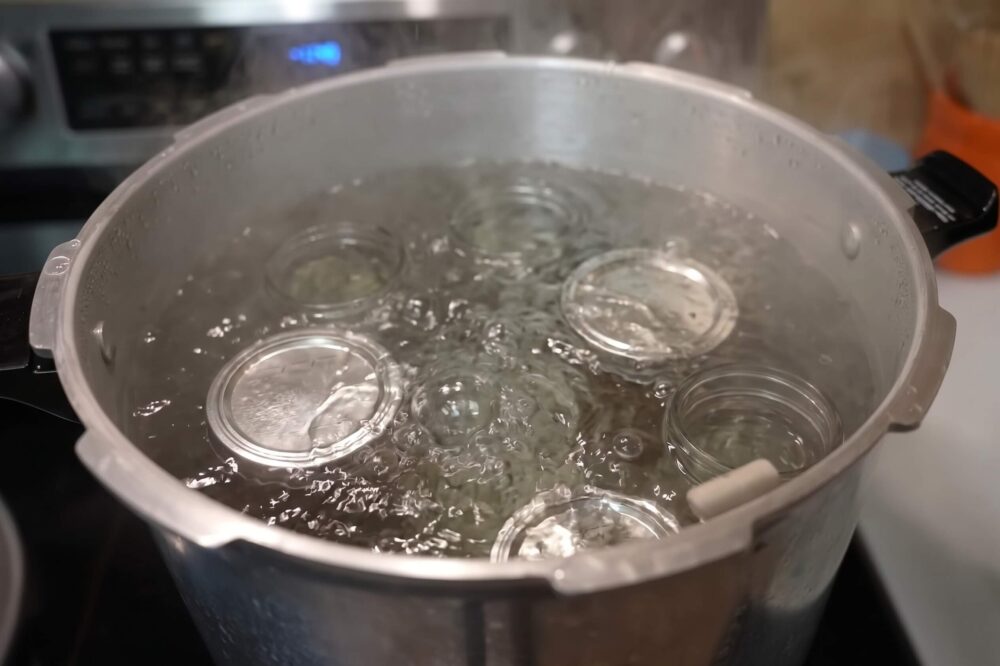
You don’t need a fancy water bath canner. Any pot that’s deep enough to fully submerge your jars will work. A few tips:
- Use a heavy-bottomed pot if you can. Thin pots put a lot of direct heat on the jars.
- Put something under the jars. A canning rack is ideal, but a folded dish towel works too. It buffers the heat and keeps jars from bouncing around during the boil.
- Fill empty space. If you don’t have a full load, add empty jars to fill the gaps so your full jars can’t knock into each other once the water’s at a hard boil.
- Cover the jars completely. The exact amount of water doesn’t matter as long as it’s over the tops of the lids. More water means less chance you’ll have to top it off later.
The process is the same whether you’re doing three jars in a stockpot on the stove or 70 jars in an 80-quart crawfish pot over a propane burner outside.
Step 9: Boil for 3 Hours Straight
This is the big one. Once the water reaches a hard, rolling boil, start your timer for 3 hours. Not before. You can put a lid on the pot to help it come to a boil faster.
The boil has to be continuous for the full 3 hours. If it stops boiling at any point, you have to bring it back up to a hard boil and start the timer over.
Important: Keep Hot Water on Standby
Three hours is a long time, and your water is going to evaporate. If the level drops below the tops of your jars, you’ll need to top it off, but only with hot water. Adding cold water will knock the pot off its boil and reset your clock.
Keep a kettle or a second pot of water heating nearby so you’re ready the moment you need it. Even if you’re using a big pot and don’t expect to need it, have it ready anyway. You don’t want to get two and a half hours in and have to start over.
Step 10: Let the Jars Cool Overnight
When the 3 hours are up, turn off the heat and let the pot settle down a bit. When you pull the jars out, you should see the contents still boiling inside the jars. That’s a good sign that everything got heated through.
Then leave them alone. Let them sit undisturbed overnight so they can cool completely and seal.
Step 12: Check the Seals and Remove the Rings
The next day, check your seals. A good one will let you lift the jar by the lid alone.
Once everything’s fully cooled and sealed, take the rings off before storing. There are two reasons for this:
- If a jar loses its seal and the contents start to spoil, the gas will just pop the lid off instead of building up pressure and possibly cracking the jar.
- With the ring on, a jar can lose its seal and then appear to reseal as temperatures change, so you might never know something went wrong.
Step 13: Label Your Jars “WB”
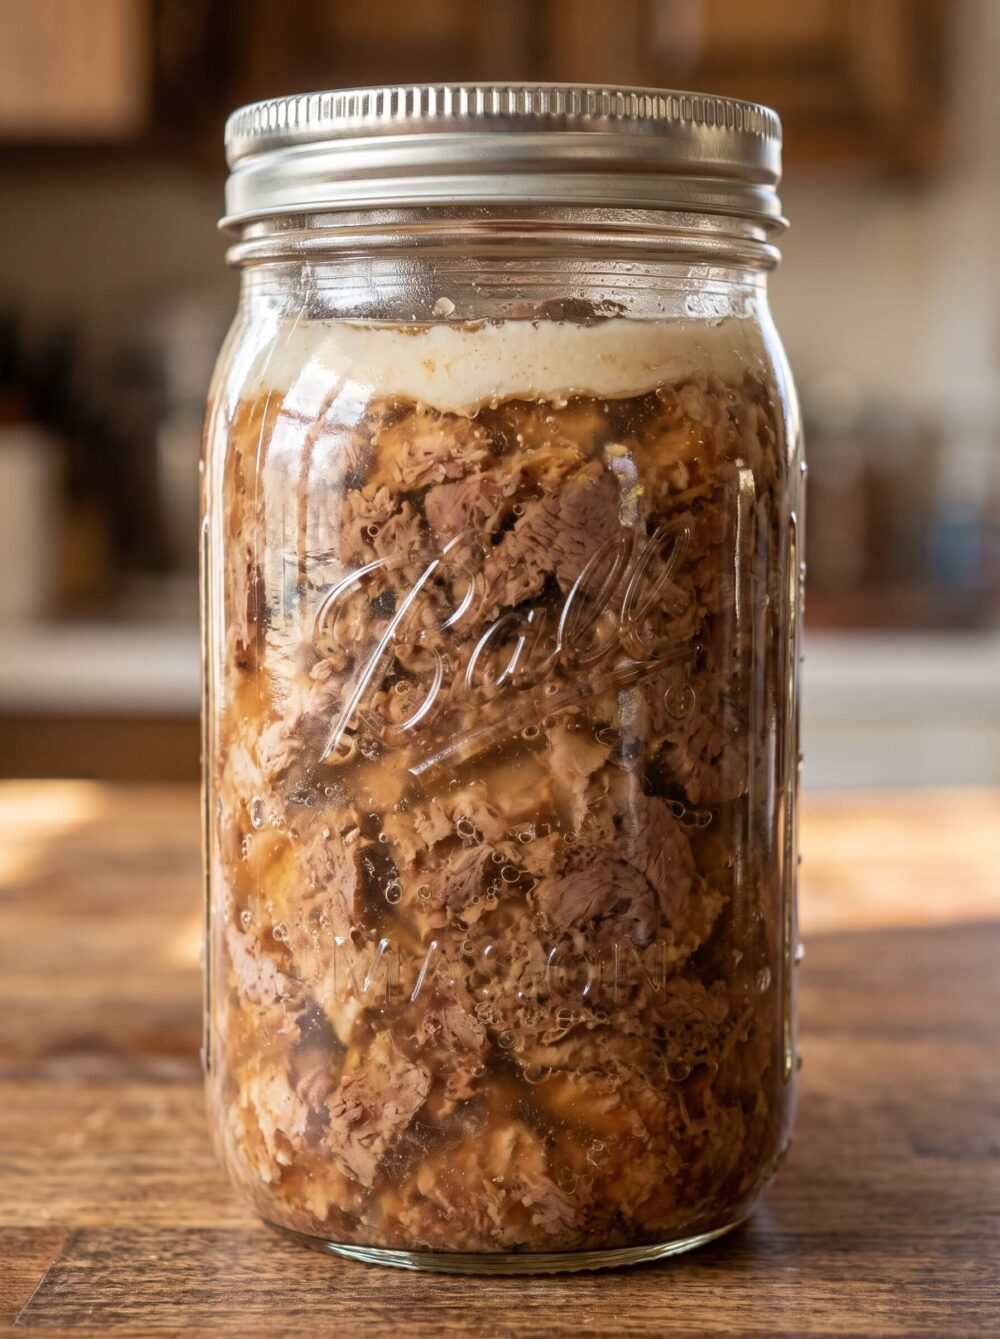
When you mark your lids, write “WB” on them so you know at a glance which jars were water bathed and which were pressure canned. Down the road, that’s going to matter.
Step 14: Always Reheat Before Eating
This one’s non-negotiable. Before you eat water-bathed meat, heat it thoroughly to a boil. (Many canning sources recommend boiling home-canned low-acid foods for at least 10 minutes before eating.) She actually recommends doing this even with pressure-canned meat.
That’s why water-bathed meat is best saved for dishes you’re going to cook again anyway, like soups, stews, gravies, pot pie filling, etc. That way you’ve got an extra layer of protection every single time.
Final Thoughts
Water bathing meat isn’t the officially recommended method, and if you’ve got a pressure canner, that’s still your best bet. But it’s a valuable skill to have in your back pocket, especially if the power goes out with a full freezer or you ever need to put up a lot of meat at once. Just follow the steps in the video carefully, never cut the 3-hour boil short, label your jars, and always reheat before eating.
Like this post? Don't Forget to Pin It On Pinterest!
You May Also Like:
The post How to Water Bath Meat appeared first on Homestead Survival Site.
from Homestead Survival Site https://ift.tt/eDyLi9S
How to Avoid Scams After a Disaster, Before They Knock on Your Door
[…]
The post How to Avoid Scams After a Disaster, Before They Knock on Your Door appeared first on The Survival Mom.
from The Survival Mom https://ift.tt/nIEjx1P
Subscribe to:
Posts (Atom)