Submissions     Contact     Advertise     Donate     BlogRoll     Subscribe                         

Monday, August 31, 2026

Why You Should Bury Fish Heads Under Your Crops This Fall

The first time I buried a fish head in my garden, I did it lazily and shallowly, and the dog had it dug up before dinner. The second attempt went deep. By August that tomato plant stood a foot taller than the ones on either side, carrying fruit heavy enough that I had to stake it twice. Everything else about that bed was identical. Same seedlings, same watering, same compost worked in that spring. The only difference was a bluefish head sitting a foot and a half under the roots, quietly turning itself into plant food.

Farmers figured this out long before fertilizer bags existed, which is why the story about Squanto teaching the Pilgrims to bury fish with their corn still gets told every Thanksgiving. The technique goes back further than that on both sides of the Atlantic, and it runs completely independent of any supply chain. 

What’s Actually Inside a Fish Head

Break a fish head down into its parts and you can see why it outperforms most of what comes in a bag. Every piece of it feeds the plant differently, and they release on different schedules, so one head covers a lot of ground.

  • Nitrogen from the flesh, gills, and brain. Protein means nitrogen, and commercial fish meal runs somewhere around 9 to 10 percent by weight. That puts it in the same league as blood meal and well ahead of finished compost.
  • Phosphorus and calcium from the skull and jawbones. Bone is calcium phosphate, so you’re burying a slow-release phosphorus source right where the roots will find it. Phosphorus drives flowering and fruiting, and it’s usually what’s missing when a plant grows lush and green but never sets much fruit.
  • Months of feeding instead of weeks. Bone breaks down far slower than soft tissue, so a single head keeps working long after the flesh is gone.
  • Oils that feed the soil itself. Fish oils feed bacteria and fungi, which in turn unlock other nutrients already sitting in your ground.
  • Trace minerals inland soils often lack, including iodine, magnesium, zinc, and selenium. Ocean fish are the better source here, since that’s where those minerals came from.
  • Amino acids as a mild growth stimulant. As the protein breaks down it releases them straight into the root zone, so you get a small boost on top of the nitrogen.

Potassium is the one gap, since fish is low in it. That’s why it pays to pair your buried heads with wood ash, banana peels, or a bit of kelp if your soil test comes back short.

You know what else you can do with fish heads? You can protect your crops of insect pests with this DIY trap:

pest trap lost skills of independence banner fish head

Test Your Soil Before You Dig Anything 

Before you put a single fish head under your tomatoes, make sure you do the mason jar soil test on that bed first, since it takes twenty minutes and a jar of water and it tells you whether your ground is sand, silt, or clay.

The soil test answer decides how deep the fish goes, since clay traps the salt while sand flushes it straight past your roots.

So once you know what you’re working with, these are the rules that decide whether the fish feeds your plants or ruins the bed: 

  • Twelve to eighteen inches is the target. Anything shallower and something will smell it and dig. Anything deeper and the roots may never reach it.
  • Keep three to four inches of plain soil between the fish and the roots. Fresh fish decomposing right against a root ball releases ammonia and heat, and young roots will burn. Bury the head, backfill several inches, then set your transplant on top of that buffer.
  • One head per plant is plenty for anything tomato-sized or larger. Two or three smaller heads work if that’s what you’ve got.
  • Chop bigger heads in half if you’re dealing with something like a tuna or a big salmon. A whole large head can take most of a season to break down and may go anaerobic and sour instead of decomposing cleanly.
  • Skip it in soggy ground. Waterlogged soil has no oxygen, so instead of breaking down, the fish just rots and stinks. Raised beds and well-drained ground are where this shines.

If you’re doing a whole row rather than individual plants, dig a trench a foot and a half deep, lay the scraps along the bottom every eighteen inches or so, and backfill. Corn rows take beautifully to this.

Four Crops You Should Never Put Fish Under 

Heavy nitrogen feeders are the obvious winners. Tomatoes, corn, squash, pumpkins, cucumbers, peppers, and the whole brassica family all respond hard to a buried head. So do fruit trees and berry canes, though those want the scraps out near the drip line rather than against the trunk.

A few crops you should leave out of it:

  • Root vegetables like carrots and parsnips will fork and split when they hit a rich pocket of decomposing matter.
  • Beans and peas fix their own nitrogen and don’t need the help. Extra nitrogen just gives you vines with hardly any pods.
  • Herbs like rosemary, thyme, and oregano actually taste better in poor soil. Feed them heavily and you get big, bland plants.
  • Garlic and onions can handle moderate feeding but tend to grow soft, poor-storing bulbs if you push nitrogen too hard.

Why Fall Is the Best Time for This

Warm soil breaks a fish head down in roughly four to eight weeks. Cold soil can take months, and in frozen ground nothing happens at all until thaw.

That timing works in your favor if you plan ahead. Bury your scraps in fall, and by the time you’re setting out seedlings the following spring, the soft tissue is gone and the nutrients are already spread through the soil where roots can grab them immediately. Spring burial still works, it just means your plants wait a few weeks before they see the benefit.


➡ 8 Things to Do This Fall to Winter Proof Your Garden


Don’t have fish in the fall? Freeze your scraps as you get them. A gallon bag of frozen heads in the back of the chest freezer costs you nothing and gives you a stockpile ready for planting day. 

Watch Out for Raccoons and Bears

Anything with a nose is interested in what you just buried, and a raccoon that finds one fish head will come back and work through the rest of your garden methodically. Depth is your first line of defense, but in areas with heavy critter pressure you’ll want backup, and the Three Sisters System handles that problem for you.

A flat rock laid over the spot also works, and so does a square of chicken wire pinned down with landscape staples, since that lets water and roots through while stopping paws. Some homesteaders pack a couple inches of coffee grounds or wood ash over the fish before backfilling, which muddies the scent trail.

Bears are a different conversation. If you’re in bear country, keep fish out of the garden entirely and use a sealed compost tumbler instead, because a bear that learns your garden smells like food becomes a permanent problem.

Turning Scraps Into Liquid Feed

Once your plants are in the ground, you can’t bury things under their roots. That’s when fish scraps become a liquid feed instead.

Fill a bucket about a third of the way with fish heads, guts, and frames, then top it with water and stir in a few tablespoons of molasses to feed the bacteria and cut the smell. Cover it loosely, since it needs to breathe, and park it somewhere far from the house and downwind. Stir it every few days. In two to four weeks, you’ll have a dark, foul liquid that’s finished fermenting.

Dilute it well before using, roughly one part liquid to ten parts water, and pour it at the base of your plants. Some people strain and spray it on leaves, though the smell hangs around for a day or two afterward. What’s left in the bottom of the bucket goes straight into the compost pile or gets buried in an empty bed.

But, as I said before, fish heads are short on potassium, so pair them with this homemade booster fertilizer. You need only six ingredients, costs nothing and takes about ten minutes to make:

DIY fertilizer click here to see the method

Mistakes That Could Kill Your Plants

  • Piling on too much. Half a dozen heads under one tomato gives you a seven-foot plant with beautiful foliage and almost no fruit. Nitrogen overload pushes leaves at the expense of everything else.
  • Using heavily salted fish. Salt cod, brined scraps, and anything cured will load sodium into your soil and stunt growth. Fresh or frozen only.
  • Ignoring saltwater residue in clay soil. Ocean fish carry some salt naturally. Sandy soil flushes it out with rain; heavy clay holds onto it, so go lighter on the quantity if your ground drains poorly.
  • Burying scraps in a bag. Plastic mesh from the fish counter doesn’t break down and creates a barrier. Everything goes in loose.
  • Setting the transplant directly on the fish. Worth repeating, because it’s the most common way people lose a seedling doing this.

No Fish Heads? Use This Instead

Wood ash and urine together do most of what a fish head does, and the Rich Earth Institute has field trials showing urine fertilizer matches synthetic fertilizer of the same nitrogen content.

Work a cup or two of wood ash into an empty bed for the potassium and calcium, then hold the urine until your plants are past seedling stage. Their rate for a 10 by 10 bed is 3.5 to 5.5 gallons across the whole season, diluted one part urine to three or five parts water, poured into a furrow four inches from the base and covered with soil.

Never spray it, since urea turns to ammonia gas the moment it hits air. And don’t mix the two in a bucket. Rich Earth says ash makes the ammonia more volatile, so both go in separately.

Ready to put your whole garden to work this fall? Alex Deacon is a well known homesteader and gardening expert, and he’s put his best kept secrets out in the open on his website rather than keeping them to himself. You can go through his fall garden strategies there, and there’s also a video telling his story and explaining why he decided to give all that knowledge away. Take a look at what he’s sharing over on backyardliberty.org.


You may also like:

How To Use Ash To Make Food Last Longer

Make Biodiesel at Home from Food Scraps (VIDEO)

25 Survival Uses for Chewing Gum

How To Make Comfrey Fertilizer For An Extended Harvest

Why You Should Put Plastic Forks In Your Vegetable Garden

The post Why You Should Bury Fish Heads Under Your Crops This Fall appeared first on Ask a Prepper.


from Ask a Prepper https://ift.tt/o5ZyHlN
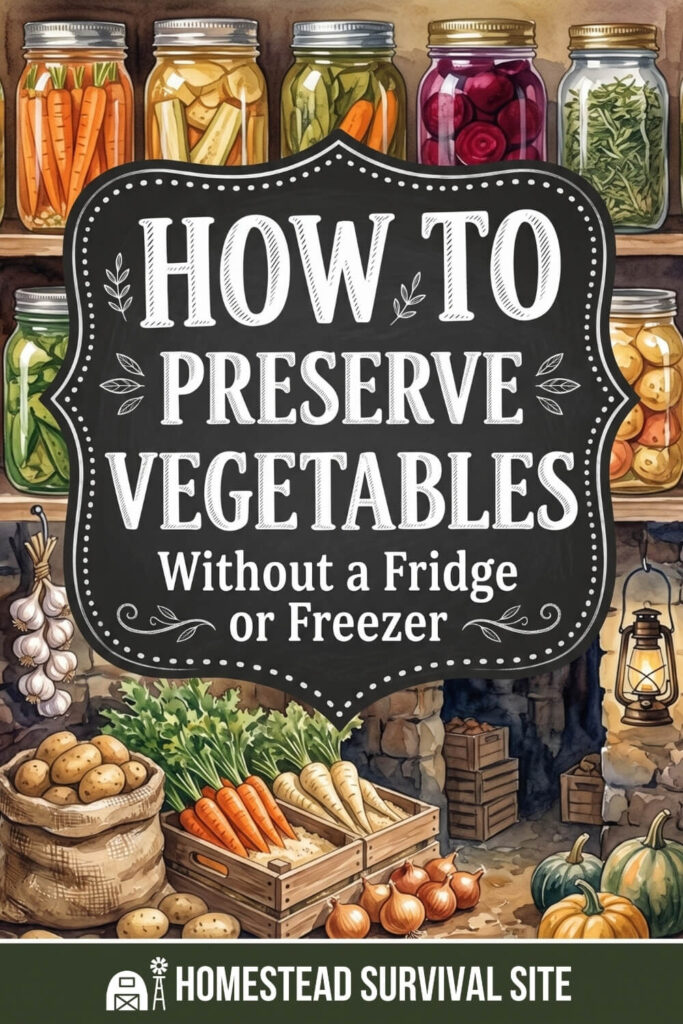
How to Preserve Vegetables Without a Fridge or Freezer

Estimated reading time: 5 minutes

How to Preserve Vegetables Without a Fridge or Freezer

During a long-term disaster, one of the first things to go is the power, and with it goes your refrigerator and freezer. If the grid stays down for days or weeks, everything you have chilled or frozen will slowly spoil, and there's nothing more discouraging than watching expensive food rot. That is exactly why knowing how to store fresh vegetables without electricity is so important.

The good news is that this isn't a new problem. People used to keep root vegetables fresh for months at a time before refrigerators existed, and they did it with nothing more than a cool, dark space and a little know-how. Root crops like potatoes, carrots, and parsnips are especially easy to store. Give them the right conditions and they'll keep for months with no power at all. The trick is understanding what those conditions are and setting them up correctly.

This is also the kind of skill you want to practice now rather than trying to figure it out during a long-term power outage. The YouTube channel, Frugal Lizzy Bee, does a great job of explaining these methods in her video. You can watch it and read about her methods below.

Want to save this post for later? Click Here to Pin It On Pinterest!

Step 1: Choose a Cool, Dark Storage Spot

The location matters more than anything else, and it comes down to three things: cool, dark, and dry.

Cool is important because heat encourages vegetables to spoil and sprout faster. An unheated room, a spot away from any radiator, or a cupboard along an exterior wall all work well. Frugal Lizzy Bee stores hers in a cool kitchen with no heating, along with a large cupboard that once held a water tank, which turns out to be excellent storage space.

Dark is just as important, especially for potatoes. As soon as light hits them, they start to turn green and sprout, which is exactly what you want to avoid. A closed cupboard, a pantry, or any enclosed space that stays dark is ideal.

Dry rounds out the list. Skip any spot that leaks or stays damp, since moisture leads to rot. A leaky garage will not work, and neither will a glass porch that stays bright all day, no matter how cool it gets. The goal is a space that is chilly, pitch dark, and free of dampness.

Step 2: Gather Your Materials

You don't need anything fancy for this. Sturdy cardboard boxes are the main container, and it helps to have a few different sizes so you can match the box to the amount of each vegetable. Keep in mind that a full box of potatoes gets heavy fast, so smaller boxes are easier to move and stack.

You'll also want some thick brown paper. Frugal Lizzy Bee uses heavy brown paper and even rips up plain paper shopping bags to do the job. The paper helps block light and separates the layers of vegetables. That is really all it takes to get started.

Step 3: Store Your Potatoes

Potatoes are the priority since they store the longest and feed you the most. Open your bags and place the potatoes into a box, both the small ones and the large ones together. A single box can hold quite a few. In the video, one box takes ten kilograms (about 22 pounds) of potatoes without a problem.

The most important part is keeping the light out. Lay some brown paper over the top of the potatoes, or tuck the box into a dark cupboard so no light can reach them. This is what stops them from turning green and sprouting. Another simple trick she uses is to set the bagged potatoes in a dark junk cupboard and cover them over with paper or old bags, which keeps them going for a long time.

Step 4: Pack Your Carrots and Parsnips

Carrots and parsnips can share a box. Lay the carrots in first, then tear up a piece of brown paper and lay it over the top. Add your parsnips on top of that paper layer. The paper keeps the layers separated and helps block light, just as it does with the potatoes. Once packed, this box goes into the same cool, dark cupboard.

If you want your carrots to last even longer, there is a traditional method worth knowing. You can pack them in a box of damp sand or wood shavings, layering the carrots so they do not touch each other and covering them completely. The sand holds a little moisture and keeps the carrots from drying out and going limp, which can extend their storage life considerably.

Step 5: Check On Them Regularly

Storing your vegetables is not a set-it-and-forget-it task. Check on them every so often and pull out anything that is starting to soften, sprout, or go bad. Removing a spoiling vegetable early keeps it from affecting the ones around it.

When you spot vegetables that are on their way out, you do not have to waste them. If you have any freezer space or power at the time, you can chop them up and freeze them, or cook them into a meal to use them before they turn. Sorting through your stored produce this way helps you get the most out of every harvest and cuts down on waste.

Final Thoughts

Storing vegetables without a fridge or freezer really comes down to giving your root crops a cool, dark, dry home and keeping the light off them. Boxes, brown paper, and a quiet cupboard are all you need to keep potatoes, carrots, and parsnips fresh for weeks.

Set it up once, check on it now and then, and you'll have a working food storage system that keeps going even when the power doesn't.

Like this post? Don't Forget to Pin It On Pinterest!

You May Also Like:

The post How to Preserve Vegetables Without a Fridge or Freezer appeared first on Homestead Survival Site.


from Homestead Survival Site https://ift.tt/Pya6Ndz

Power Outages and Home Medical Equipment: A Plan for More Than 72 Hours

[…]

The post Power Outages and Home Medical Equipment: A Plan for More Than 72 Hours appeared first on The Survival Mom.


from The Survival Mom https://ift.tt/TCI5jBD

Hand Sewing and Mending for Hard Use Clothing

Basic sewing skills are a life skill. Up until the 1950’s, most families purchased cloth and sewed much of the clothing they needed at home. Those who could afford it had clothing tailored. Americans spent 12-14% of their annual income on clothing compared to the 3% the average American spends today. (Quartz Media, 2026) We owned […]

from Survivopedia

Sunday, August 30, 2026

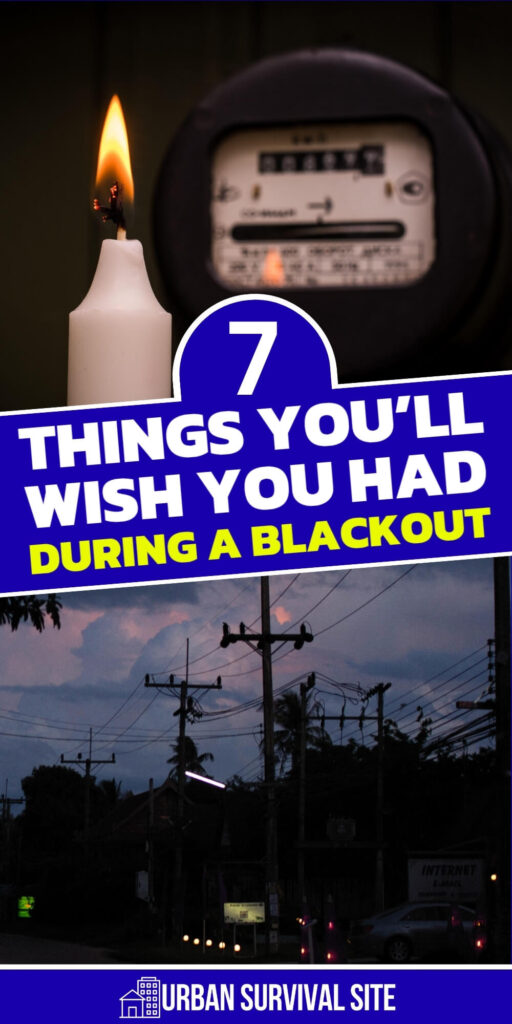
7 Things You’ll Wish You Had During a Blackout

Estimated reading time: 7 minutes

7 Things You’ll Wish You Had During a Blackout

When most people start prepping, they picture worst-case, end-of-the-world scenarios. And while those events are worth thinking about, the event that actually shows up year after year is the power outage. Sometimes it lasts a few hours. Sometimes it stretches into days. Either way, it's far more likely to disrupt your life than any doomsday event, which makes it a great place to start prepping.

Outages are also becoming more common during extreme weather, and summer heat waves are a big reason why. When temperatures climb, millions of air conditioners kick on at once, and that surge in demand pushes the power grid to its limits. Utilities sometimes respond with rolling blackouts to keep the whole system from failing. Add in aging infrastructure and severe storms, and it is easy to see why losing power is a “when,” not an “if.”

That is where the idea of a blackout bag comes in. It is simply a bag, box, or container stocked with everything you need to ride out a power outage, all in one place. The list below comes from the YouTube channel Survival Know How. You can also watch their video below.

1. Light Sources

The moment the power goes out, the first thing you will want is light, and you have a few directions to choose from.

Candles are the classic option. Emergency candles and simple dollar-store tea lights both work, as long as you also pack candle stands to hold them safely and waterproof matches or long lighters to light them. That said, many people move away from open flames once they have kids in the house. A home full of bored children and ten lit candles is a recipe for trouble.

Flashlights solve that problem. They break down into two groups. Directional lights, like standard flashlights, compact LED lights you can buy in bulk, or a hands-free headlamp, throw a focused beam and are great for moving around or finding things. Keep at least one directional light in your bag, along with plenty of extra batteries.

Omnidirectional lights are the other group, and they shine in every direction to fill a whole room. These are ideal for blackouts because they light a space evenly and free up your hands. Emergency glow sticks are a favorite here. They can last up to twelve hours, they are safe around children, and they are cheap enough to buy in bulk.

Battery-powered lanterns are worth adding too. One large lantern can light an entire room so the family can read or play together, and smaller lanterns give each person their own light for the kitchen or bathroom.

2. Emergency Radio

If you lose power for any length of time, staying informed becomes critical. A good emergency radio gives you access to weather alerts and news updates, which is especially important during tornadoes, hurricanes, flash floods, and blizzards.

The best models do far more than pick up a signal. Many include a built-in flashlight, and quality units offer several ways to stay powered. Look for one that takes standard AA batteries and also has a rechargeable battery you can top off with a built-in solar panel, a hand crank, or a USB port. Some can even charge your cell phone off that internal battery, which could be the difference in making an emergency call.

On top of all that practicality, the ability to listen to a little music can be a real morale boost when you are stuck in the dark for days.

3. Hand Warmers

This one depends on your climate, but it belongs on the list for anyone who deals with cold winters. When the power goes out in the middle of winter, a house cools down fast, and nighttime is when it really bites.

Disposable hand warmers and pocket warmers give each person a source of individual heat, often for up to twenty-four hours per warmer. Plan on at least one per person in your home, and consider stashing an entire box for a longer, worst-case outage. They take up almost no room and cost very little, which makes them an easy addition.

4. Cards, Books, and Board Games

It is easy to overlook entertainment, but a deck of cards, a few books, or a couple of board games can make a real difference during an outage. With no screens to fall back on, these keep the whole family occupied and help the hours pass.

There is a practical safety angle too. A bored, restless family is more likely to wander off and make careless mistakes in a dark house. Giving everyone something to focus on keeps people calm and together.

Planning Beyond the First Day

The items above will carry you comfortably through the first twenty-four hours or so. If an outage stretches to three or four days, you need to shift toward longer-term, sustainable supplies. The next three items are built for exactly that.

5. Solar-Charged Flashlights and Lanterns

Once you are looking at multiple days without power, battery supply becomes a concern, and solar-charged lights start to shine. A hybrid solar flashlight is a smart pick. Many include both replaceable batteries and a rechargeable battery fed by built-in solar panels, so you set it in the sun during the day and bring it inside to use at night.

Inflatable solar lanterns are another excellent option. They hold a set of LED lights inside a translucent, inflatable body that spreads the light and can brighten an entire room. Best of all, they deflate and pack down flat, so they store easily. Leave one in a sunny window to charge during the day, then inflate it for the evening. These are affordable enough to buy one for each member of the family.

6. Propane Camping Stove

You probably have enough snacks around the house to get through the first day. But once a few days pass, you cannot use your electric stove or microwave, and the food in your refrigerator starts to spoil. That is when a backup way to cook becomes essential.

A small propane camping stove fills that gap nicely. Pick one up along with a couple of extra propane canisters, and you will be able to boil water to sterilize it or cook simple meals like soup, pasta, or freeze-dried food. Remember to pack waterproof matches or a reliable lighter to go with it. It also helps to keep some easy, cook-anywhere food on hand, such as freeze-dried meals, canned soup, or ramen noodles, so you always have something quick to heat up.

7. Water Storage

Water is the item people forget until they need it. If your home runs on a well and a well pump, you likely lose running water the moment the power goes out, since the pump needs electricity to move water into your house.

Store gallon jugs of water to cover that gap. The CDC recommends keeping one gallon per person per day for at least three days. That water is not only for drinking. You will also need it for cooking and for basic sanitation. You do not have to fit this into your blackout bag, but keep enough somewhere in your home to cover your whole family for three days.

Final Thoughts

A blackout bag turns a stressful, disorganized scramble into a calm, manageable evening. Start with the basics that get you through the first day, then layer in the sustainable supplies that keep you going if the power stays off. Build it once, keep it stocked, and you will be ready long before the lights ever flicker.

You May Also Like:

The post 7 Things You’ll Wish You Had During a Blackout appeared first on Urban Survival Site.


from Urban Survival Site

Do More Than ‘Fall Back’! Get Prepped for Winter!

[…]

The post Do More Than ‘Fall Back’! Get Prepped for Winter! appeared first on The Survival Mom.


from The Survival Mom https://ift.tt/JEGDBzV

Homemade Vegetarian Chili

Vegetarian Chili

Homemade Vegetarian Chili is an alternative to a meat option but with the bulk and flavor of the classic. Nothing says comfort food like a nice steaming bowl of homemade chili. Ensuring you get your full serving of veggies, this chili has a flavor that will satisfy everyone and have even the most carnivorous of carnivores coming back for more. In July 2019, I posted this recipe for the first time. I remember meeting Harry years ago, and he said, “In Texas, our chili does not have beans.” I have loved him ever since! LOL! I didn’t know Texas doesn’t put beans in its chili. His recipe is below for all my meat-loving chili eaters. Thank you, Harry, for sharing your awesome recipe!

Toppings For Vegetarian Chili

I personally like mine topped with shredded cheddar cheese, a dollop of Greek yogurt, and a side of Fritos (which, let’s be honest, are quintessential to the chili experience). I always substitute Greek yogurt in place of sour cream, and frankly, there isn’t much of a noticeable difference in flavor.

Homemade Vegetarian Chili

Chili is one of those dishes that you can add and subtract ingredients to your liking (or depending on what you have on hand) quite easily. I’ve found that a lot of Veggie Chili recipes turn out more like veggie bean stew, which is always great too, but when I’m craving chili, I’m craving something with a little more traditional, meaty consistency. What I like about this recipe is that the processed veggies and the quinoa create a filler that really rounds out the consistency.

The History of Chili and Why Going Meatless Is a Smart Move

Chili is one of those meals that feels like it’s always been around, and in many ways, it has. The origins of chili con carne trace back to the 1800s in Texas, where cooks combined dried meat, chili peppers, and spices into a portable, hearty meal that could feed hardworking families and travelers alike. Some historians point to Spanish missions and Mexican vaqueros as early influences, while others credit the “chili queens” of San Antonio, women who sold bowls of spiced stew from outdoor stands in the late 1800s, helping turn chili into a beloved Texas tradition.

By the early 1900s, chili had spread across the country, appearing at fairs, on chuck wagons, and at family tables everywhere. It became known as a people’s dish. It was cheap, filling, and endlessly adaptable, made from whatever ingredients a family had on hand. That spirit of resourcefulness is really the heart of chili, and it’s exactly why a vegetarian version fits so naturally into that same tradition.

Why Vegetarian Chili Just Makes Sense

When most of us think of chili, we think of ground beef simmered with beans and tomatoes. But if you look at the roots of this dish, it was never really about the meat. It was about warmth, spice, and stretching simple ingredients into something satisfying for a hungry family. Beans, in particular, have always played a starring role in chili, and they happen to be one of the most budget-friendly, shelf-stable proteins you can keep in your food storage pantry.

Making chili without meat allows you to lean into that heritage of resourcefulness while also saving real money at the grocery store. Meat prices continue to rise, and a pot of vegetarian chili made with dried or canned beans, tomatoes, and vegetables costs a fraction of what a meat-based version does. For a family trying to eat well while sticking to a budget, that difference adds up fast over the course of a month.

Building a Pantry That Works for You

One of the reasons I love this recipe so much is that it draws from ingredients that store beautifully. Dried beans, canned tomatoes, onions, and spices all have long shelf lives, which makes vegetarian chili a wonderful option for anyone building up their food storage. You aren’t relying on fresh meat that needs to be used quickly or kept frozen. Instead, you have a meal you can pull together from your pantry shelves at a moment’s notice, even during a tight week or an unexpected emergency.

This is also a fantastic way to stretch your food budget without your family feeling like they’re missing out. A well-seasoned vegetarian chili, loaded with a variety of beans, peppers, and warm spices like cumin and chili powder, is every bit as hearty and satisfying as the meat version. Many families find they don’t miss the meat at all once the dish is properly seasoned.

A Tradition Worth Continuing

Chili has always been a dish shaped by necessity and creativity, made by people who turned simple ingredients into something comforting and delicious. Choosing to make it without meat isn’t a departure from that tradition. It’s a continuation of it. You’re still creating a warm, filling meal for the people you love, and you’re doing it in a way that honors both your budget and the resourceful spirit on which chili was built.

I hope this gives you a little extra appreciation for the pot of chili simmering on your stove tonight. It carries a long history of families making the most of what they have, and your vegetarian version fits right into that story.

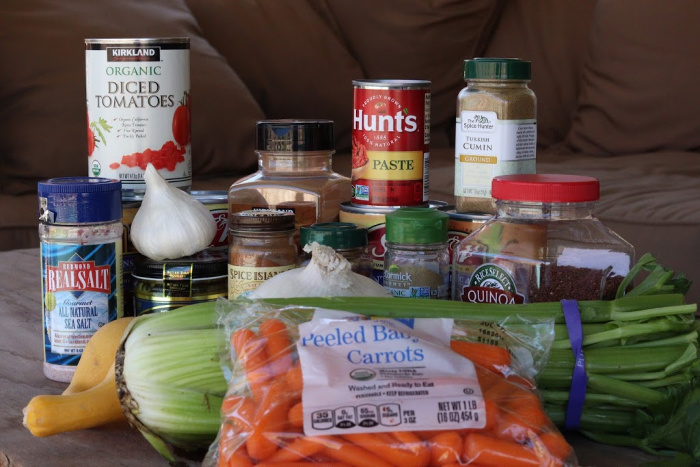
Vegetarian Chili Ingredients

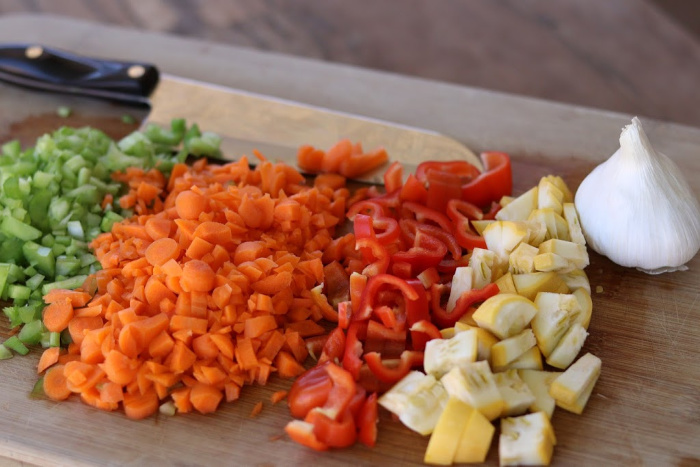
Chopped The Vegetables

Simmer Veggies & Dump The Rest In

We started with about 2 tablespoons of olive oil in the 6-quart Dutch oven, then added the crisp, freshly chopped garlic, diced onion, and red pepper. Oh my gosh, I wish you could smell this vegetarian chili. For some reason, I feel so much healthier when I add several vegetables to a meal. Do you feel that way?

Then add the roughly-processed (or minced) summer squash, carrot, and celery; sautƩ for a few more minutes. Add tomato paste and broth; stir until the tomato paste is thoroughly mixed in. Throw in the cooked quinoa and let it cook for about 5 minutes, stirring occasionally.

Dump in chili, pinto, and kidney beans with their water. Drain and rinse black beans before adding. Add the crushed tomatoes and the pumpkin puree. Add the salt, pepper, oregano, cayenne, chili powder, cumin, and cinnamon.

Bring almost to a boil, then stir, cover, and let simmer on low. Simmer until thoroughly heated and some of the liquid has cooked out. Add the veggie broth and simmer, simmer, simmer until you just can’t stand it anymore.

Simmering Is The Trick

I would at least let it simmer for an hour or two, but the real trick with chili is the longer it simmers, the better it is. It’s even better the next day after the flavors have a chance to meld. If you prefer something a little spicier, throw in a handful of diced jalapeƱos or add extra cayenne!

You can use this exact same recipe with a crockpot (sautƩ onion, peppers, and garlic in a pan, then transfer to the crockpot). Just dump everything in and either cook on high for 4 hours or low for 8. Slow Cooker: I used a Lodge Dutch Oven

This Homemade Vegetarian Chili is also perfect for freezing; reheat, defrost overnight in the fridge, and heat thoroughly on the stovetop. This recipe easily serves 8-10 people! Not quite trying to feed an army? No problem, just cut all the ingredients in half and add only 2 cans of your choice of beans. Additional options for leftovers: throw a couple of scoops into a tortilla for “chili tacos,” or serve them over rice for a satisfying variation.

Vegetarian Chili Recipe

Vegetarian Chili
Print

Homemade Vegetarian Chili

Course Main Course
Cuisine American
Keyword Chili, Vegetarian
Prep Time 15 minutes
Cook Time 2 hours
Total Time 2 hours 15 minutes
Servings 6 people
Author Linda Loosli

Ingredients

  • 1 can chili beans
  • 1 can pinto beans
  • 1 can kidney beans
  • 1 can black beans (rinse and drain)
  • 1 can diced tomatoes
  • 2 tablespoons tomato paste
  • 2 tablespoons olive oil
  • 1 quart vegetable broth
  • 2 celery sticks, finely chopped
  • 1 carrot or a handful baby carrots (finely chopped)
  • 1 red pepper, finely chopped
  • 1/2 cup chopped onion
  • 4 cloves garlic, finely chopped (optional)
  • 1/2 of a summer squash, finely chopped
  • 1/2 cup pumpkin puree
  • 2 cups red quinoa (cooked)
  • 1/2 teaspoon oregano
  • 1/2 teaspoon Cayenne pepper
  • 1 tablespoon chili powder
  • 1 teaspoon cumin
  • 1 teaspoon cinnamon
  • 1 teaspoon pepper
  • 2 teaspoons salt

Instructions

  • Heat the oil in a large pot; sautĆ© the onions, celery, and red peppers.
  • Add the remaining ingredients and simmer on the stove for at least one hour; two hours is even better.
  • Or if you want to use a slow cooker, cook on high for 4 hours; or on low for 8 hours. Times may vary depending on your slow cooker brand.

What To Serve With Vegetarian Chili

  • Grated cheese
  • Sour cream
  • Cilantro
  • Dinner rolls
  • French bread
  • Crackers
  • Tortilla chips

Harry Texas Chili (No Beans)

Slow Cooker Recipes
Print

Harry’s Texas Chili (no beans)

Course Main Course
Cuisine American
Prep Time 20 minutes
Cook Time 6 hours
Total Time 6 hours 20 minutes
Servings 12 people
Author Linda Loosli

Ingredients

  • 3 lbs. coarse ground beef
  • 1 large onion chopped
  • 28- ounce can of diced tomatoes
  • 2-8 ounce cans tomato paste
  • 4 ounce can of chopped green chilies
  • 1 cup of water
  • 2 tablespoons minced garlic
  • 2 tablespoons chili powder
  • 2 teaspoons cumin
  • 2 teaspoons salt
  • 1 teaspoon pepper
  • 1-8 oz can tomato sauce

Instructions

  • Brown the ground beef with the onions, then drain the grease.
  • Get the slow cooker out and start adding the browned ground beef, onions, and the remaining ingredients. Cook on low for 6-8 hours.

20 Award-Winning Instant® Pot Chili Recipes

French Bread by Linda

Final Word

I really hope you try this vegetarian chili I made today. It’s a keeper, and the best part is that we can make it all from our pantry, food storage stash, and garden. Please stock up on spices; we’ll need them as grocery prices continue to skyrocket. Please stock beans, rice, and spices this week. Thanks for being prepared for the unexpected. May God bless this world. Linda

Copyright Images: Red Slow Cooker Depositphotos_82051064_S

The post Homemade Vegetarian Chili appeared first on Food Storage Moms.


from Food Storage Moms

The Great Depression: Some Tidbits

Soup Three Sets

The Great Depression: Some Tidbits! If you woke up on October 29, 1929, you would’ve had no idea that your world was about to change forever. That morning felt like any other morning for most people. Farmers across the Midwest were finishing the fall harvest, loading wagons and trucks with the last of the season’s corn and wheat. Mothers were making breakfast and getting children ready for school, packing lunch pails the same way they had for years.

Men in cities put on their hats and coats and headed to work, many of them stopping to grab a newspaper on the way. Streetcars rattled along their usual routes. Shopkeepers swept their sidewalks and opened for business. Life felt steady. Life felt normal. And that’s exactly what makes this story so important for us today. My mother was born on September 29, 1929. She was one month old when the events kicking off the Great Depression took place. I can’t imagine how her mother (my grandmother) felt that day.

Please print every soup recipe you have; I feel strongly we’ll be eating a lot of soup if we have a similar event in our lifetimes. I’m not saying tomorrow, but having several soup recipes that use your pantry items will help you feed your family. Please learn to make bread; you can survive just about anything if you can cook from scratch. Soup Pot and Soup Ladle. Dinner Rolls.

Broth With Vegetables

The Great Depression: Some Tidbits

The Roaring Twenties Backdrop

To understand why October 29 hit so hard, it helps to understand what came before it. The 1920s had been a decade of dazzling growth and optimism in America. New inventions like radios, automobiles, and household appliances were becoming common in ordinary homes. The stock market had climbed higher and higher, and it seemed like everyone, from bankers to butchers to schoolteachers, wanted a piece of it. Buying stocks felt like an easy way to get rich. Many people borrowed money just to invest, a practice called buying on margin, putting down only a small percentage of a stock’s price and borrowing the rest. As long as prices kept rising, this worked out fine. Few people stopped to ask what would happen if prices ever fell instead.

How the Day Began

By late October 1929, the market had already been shaky for about a week. On October 24, a day now remembered as Black Thursday, nervous investors began selling off shares in a hurry, and the market dropped sharply within the first few hours of trading. A group of powerful bankers, led by men from firms like J.P. Morgan and Company, stepped in that afternoon and pooled their own money to buy up stocks in an effort to calm the panic. It worked, at least for a few days. Newspapers reported that the crisis had passed. People went back to their normal routines, trusting that the worst was behind them.

So on the morning of October 29, most Americans were simply living their lives. Farmers were tending livestock. Children were walking to school. Housewives were doing the wash. They had no reason to believe that this particular Tuesday would be any different from the one before it.

What Happened That Day

They were wrong. As soon as the opening bell rang on the New York Stock Exchange, sell orders came flooding in from all directions, from large investment trusts down to ordinary individuals who had put their life savings into the market. Investors who had borrowed money to buy on margin were now desperate to get out before they lost everything, and many were forced to sell simply to cover what they owed. The selling fed on itself in a vicious cycle. The more people sold, the more prices fell, and the more prices fell, the more people panicked and sold.

By the end of the day, about 16 million shares had changed hands, a record that would stand for nearly forty years. The volume was so overwhelming that the ticker tape machines, which printed out stock prices as trades happened, couldn’t keep up with the pace. Some tickers didn’t finish printing the day’s trades until hours after the closing bell, leaving investors in stunned uncertainty, unsure exactly how much they had lost. The Dow Jones Industrial Average fell roughly 12 percent in a single day, on top of steep losses earlier in the week. Estimates suggest that around 30 billion dollars in wealth vanished in the crash, an almost unimaginable sum for that era, worth far more in today’s money. Fortunes that had taken lifetimes to build were wiped out in a matter of hours.

How the Day Ended

By evening, the mood in America had shifted completely. Crowds gathered outside the New York Stock Exchange on Wall Street, and many accounts from the time describe an eerie, stunned quiet rather than shouting or chaos. People simply stood there, almost unable to process what had happened. Police officers were stationed nearby in case tempers flared, but mostly what witnesses remembered was silence and shock.

Businessmen who had been wealthy that morning were suddenly facing ruin by nightfall. Some had lost not only their own savings but money borrowed from banks or relatives. Families who had invested their savings, hoping to build a better future for their children, watched those hopes disappear in the span of an afternoon. The next morning, newspapers struggled to find words large enough for their headlines.

What made it so frightening was how quickly it happened. There was no warning siren, no announcement at breakfast, no chance to prepare. People went to bed that night in a country that looked completely different from the one they had woken up in.

The Ripple Effect

The crash itself didn’t cause the Great Depression, but it set off a chain reaction that spread through nearly every part of American life. Banks that had invested depositors’ money in the stock market began to fail, unable to cover withdrawals. Word of these failures spread quickly, and people rushed to withdraw their savings from banks that were still open, a phenomenon known as a bank run. This panic caused even more banks to collapse, since banks didn’t keep all deposits on hand in cash. By the early 1930s, thousands of banks across the country had closed their doors, and many families had lost every dollar they’d saved because deposit insurance didn’t exist to protect them.

Breadlines and Soup Kitchens

Businesses that depended on consumer spending and credit began cutting back or closing altogether. Factories reduced their workforce or shut down entirely. Millions of people lost their jobs, and by 1933, roughly one in four American workers had no job at all. Farmers, who were already struggling with low crop prices throughout the 1920s, were hit especially hard, and many lost their land entirely. Breadlines and soup kitchens became common sights in cities. Families who had once shopped freely now stretched every dollar as far as it could go.

Home canning, gardening, mending clothes instead of buying new ones, and making do with what you had went from being old-fashioned habits to survival skills almost overnight. Grandparents who lived through this era often talked about learning to waste nothing, saving string, reusing flour sacks for clothing, and stretching a single chicken into several meals, because they had seen firsthand how quickly comfort could disappear.

Lessons for Today

I’m not an economist, and I’m not here to tell you exactly what will happen in our economy. Smart people disagree about that, and it’s worth listening to a range of views rather than just one voice, including mine. But I do think history teaches us something worth remembering. Even in the most modern, most confident, most prosperous-seeming moments, things can shift fast. The people living on October 29, 1929 didn’t get a warning. They just got a Tuesday that turned into something else entirely, and it took years for the country to recover.

That’s really the heart of why I write about food storage and self-reliance. It’s not about fear. It’s about being the kind of family that can weather a hard season, whether that season is a job loss, a natural disaster, a supply shortage, a family illness or accident, or something none of us have thought of yet.

Here are a few practical steps worth considering, no matter what the future holds.

Build a pantry with a few months’ worth of food your family actually eats, rotating it so nothing goes to waste. Set aside even a small amount of money regularly for emergencies, since having something is always better than having nothing. Learn skills like gardening, baking bread, and preserving food through canning, freezing, or dehydrating. Get to know your neighbors, since strong communities helped many families survive the Great Depression by sharing what they had. Reduce unnecessary debt where you can, since families with less debt had more room to adjust when times got hard. Keep a small supply of cash on hand at home, since bank runs and system outages can happen even now.

These things don’t just help in a depression. They help on any ordinary Tuesday that suddenly turns extraordinary. Take a little time this week to look at your pantry, savings, and preparedness plan. Not because disaster is guaranteed, but because being ready costs you far less than being caught off guard.

Seven Days Worth Of Meals

Living Without the Grocery Store

Final Word

History doesn’t repeat itself exactly, but it does rhyme, as the saying goes. October 29, 1929 reminds us that ordinary days can turn into extraordinary ones without warning. The families who came through that season best weren’t the ones who correctly guessed what the stock market would do. They were the ones who’d already built a little cushion into their lives, a full pantry, a garden, some savings, and neighbors they could count on.

We can’t control the economy, the headlines, or what tomorrow brings. What we can control is how ready we are to meet it. So whether you take just one small step this week, like adding a few extra cans to your shelf or setting aside a little cash, or whether you dive in and build a full year of food storage, know that every bit of preparation matters. It’s not about fear of what might happen. It’s about peace of mind no matter what happens.

Thank you for reading, and for taking your family’s preparedness seriously. That’s exactly the spirit that carried so many households through the hardest years of the last century, and it’s the same spirit that’ll carry us through whatever comes next. May God bless this world, Linda

Copyright Images: Soup Three Sets Depositphotos_354063230_S, Broth With Vegetables Depositphotos_322913468_S

The post The Great Depression: Some Tidbits appeared first on Food Storage Moms.


from Food Storage Moms