
Today, we’re going to be taking a look at dehydrated meals and how to make them in the comfort of your own home.
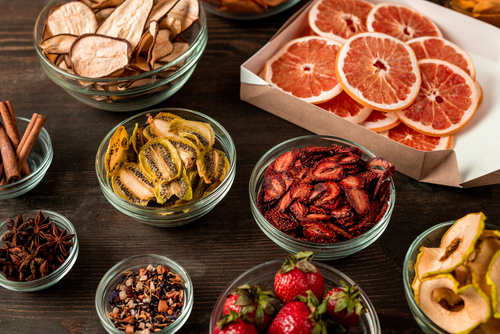
We have all seen dried vegetable packets and all sorts of “fitness” food like shriveled up banana slices, apple chips, and other dehydrated meals gaining popularity lately.
As a prepper, you don’t want to eat just fruits and vegetables, because even if they all healthy, they will get very dull, very quickly.
How about we look at some actual meals?
Some that will keep properly nourished when grocery stores go empty.
What are dehydrated meals?
Dehydrated meals contain different dehydrated foods that you would usually have in a meal. These are stored in a container of some sort, and you can cook them when you want them.
Dehydrating food dates back to as far as 12,000 BC. So, it is an ancient process that has kept people well-nourished for a long time.
Dehydrated food is any food that has had the water taken out of it. In the old days, that process was completed by only putting food in the hot sun and allowing the food to dry out.
However, as humankind advanced, that process has changed quite a bit since then. Although, if you live in a dry and hot enough place, you could still use that technique since it will cost you nothing.
The Egyptians were the first people to use the sun to dry food out for preservation actively, but that was almost impossible in wetter climates such as Europe. That is where the beginning of the evolution of food dehydration starts.
First, fish and meat were quickly dried, placing them in direct sunlight until all of the water had evaporated or near an open fire. After that was found to be very useful in preserving food, people started to hang foods such as herbs, fruits, and vegetables up on a line across a room by an open fire.
People still use both of those methods today, and they work just as well as they did thousands of years ago.
What meals can you make?
On today’s market, you can find all sorts of dehydrated meals, and there is almost nothing that can’t be dehydrated. In your cupboards at home, you can find various foods that were dehydrated, and the main three reasons for dehydrating foods nowadays are storage, transportation, and lengthening the shelf life.
Foods have a greater water content than you think, and when you take that water out, the weight of the food decreases considerably. Take the simple garden pea, for example. Pea seeds dehydrate to a point at which they have as little as 5% water without deterioration. So, if we consider 100lbs of peas, there is up to 14% of that which is water, that is 14lbs. If peas are dehydrated to 5% water content, that means that we reduce that water weight by 9lbs. If you think about that by the truckload, that is an awful lot of weight that you can save by dehydration.
Besides saving a huge amount of weight, you can also save a lot of storage space by dehydrating foods and certain foods “shrink” up to 50% of their initial size.
As for the extended shelf life, that’s a pretty straightforward concept if you think about it. Oxygen is what makes food go bad (that’s why you store your foods in airtight containers with oxygen absorbers), and water has plenty of it. By removing the water from foods, you will also remove the oxygen content, and you will extend the shelf life of your foods.
How long will they last?
Here it all depends on what ingredients you are using for your dehydrated meals and how much you dry them, but also how long you plan on storing them. Since we were talking about peas, let’s look at how long dehydrated peas can last compared to fresh produce.
- Fresh peas in the pod – 2-3 days if you do not shell the peas until you need them.
- Dried peas in an airtight container – 4-5 years.
- Dried peas in a container with O2 absorber – Indefinite time.
- Canned peas – about one year.
As you see, using the proper storage method, you can keep your peas for an indefinite amount of time.
Methods of dehydration
Preppers are using a few methods to dehydrate foods for storage, and here are the most popular ones:
Sunlight
The sunlight is the oldest way of drying food for storage, and of course, it still works today. All you need to do is lay your food out in a hot, sunny spot and wait. It does have its downfalls, though. You have to be in a climate that supports it, and you have to keep an eye on it to make sure that nothing gets onto the food. Usually, you have to provide some sort of protection for the dehydrating food, either a cheesecloth, an insect net, or pretty much anything that will prevent unwanted guests.
Oven
Oven drying is probably the most common way in which the average person dries food. However, this method takes quite a long time to do it properly, and you won’t be able to use your oven for anything else during that time.
Microwave
Microwaves can dry small amounts of food pretty thoroughly. However, it is only small amounts of food, such as herbs.
Household dehydrator
Household dehydrators are the most preferred method for dehydrating meals nowadays. They are relatively cheap to buy, they are easy to use, and you won’t have to worry about keeping your other cooking appliances busy.
Freeze-Drying
Freeze-drying food is the “new age” method to preserve food for the long term. However, you need a special freeze dryer, and these appliances are pretty expensive. I know people that have bought one, and to get some ROI, they are freeze-drying foods for their neighbors and friends.
As you see, these are the main options for dehydrating food, and if you have the money, you could invest in a good food dehydrator, or even better, a freeze dryer.
Do it Yourself!
Here are some tips for doing things right and making sure you have some tasty meals that you can store for a long time.
Temperature and timing
As with any type of cooking process, there are different temperature settings and time lengths that you need to use to dehydrate food. There are many recipe books for various dehydrated meals you can easily make at home, and the internet is full of examples of both successful and unsuccessful results.
Ensure the correct level of dehydration
Again, the same with cooking, you need to make sure that the food is “done” before you take it out of the dehydrator. A good rule of thumb is to make sure that there is no squidgy-ness or that the food is not sticky. Correctly dehydrated food becomes hard and brittle at about 95% water removed. That is when the process is complete.
Do not rush the process
It can take more than ten hours to dehydrate food properly. And that time is expected to go up depending on the type of foods you are drying. Turning up the heat in a bid to speed up the process will only cook the outside, leaving the moisture in the middle of the food. This is a mistake most beginners make, and they will end up with a lower shelf-life than expected.
Prepare the food.
Yes, unfortunately, you still have to prepare it. Wash foods that need it, and wear gloves to stop oil from the skin from getting onto the food. You do have to steam some vegetables before you dehydrate them but always work to the manufacturer’s instructions. Spraying some fruit with lemon juice will stop them from going brown while drying them.
Preheat the dehydrator
Again, as with an oven, preheating the dehydrator will allow you to be more efficient in the process.
Plan your meals
If you are cooking to store meals, and that is what most of us do, then you will need to plan things carefully. Many foods take different amounts of time to dehydrate and at different temperatures. So be sure only to dehydrate the foods that require the same time and heat together.
Some of my favorite recipes
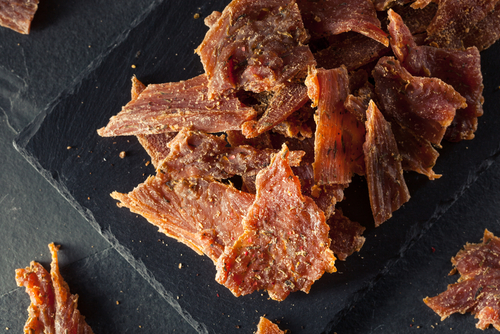
1. Turkey Jerky
Preparation Time: 30 minutes | Cooking Time: 2 hours | Ready in 19 hours | Servings: 1 pound
INGREDIENTS:
- 2 pounds boneless skinless turkey breast
- 2 tablespoons chili-garlic paste
- 3/4 cup soy sauce
- 2 teaspoons dried red chili flakes
- 3 tablespoons honey
HOW TO:
Cover the turkey breast with plastic wrap and freeze it for 2 hours. Remove it from the fridge and slice it into ¼ inch slices.
Mix the chili garlic paste, red chili flakes, soy sauce, and honey in a large bowl. Let the turkey slice marinate in the mixture at cold for 12 hours.
Remove the bowl from the fridge, dry the slices, and let them come to room temperature for 30-40 minutes.
Preheat the oven to 165°F and spray cooking spray on the oven racks (remove them from the oven when spraying).
Place the turkey strips horizontally across the oven racks such that they don’t touch each other. If the strips are moist, you need to soak the marinade using paper before placing them on the racks. It will be less cleaning for you.
Dehydrate the jerky for 2 hours.
Remove the jerky from the oven and let it cool before serving or storing.
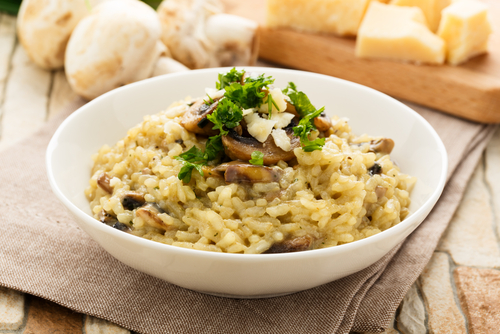
2. Risotto
Preparation Time: 30 minutes | Cooking Time: 9 hours | Ready in 9 hours and 30 minutes | Servings: 3
INGREDIENTS:
- 1 cup short-grain rice
- 2 cups chicken broth
- ½ cup white wine
- 1 cup diced mushrooms
- ½ medium onion, chopped
- 1 clove garlic, minced
- 3 tablespoons parmesan cheese
- 1 tablespoon olive oil
HOW TO:
Place a deep pot over medium heat and add olive oil to it. Add the onions and garlic once the oil is heated and cook until they become translucent.
Boil the broth in a separate pot over medium heat.
Add the rice to the pot with onions and garlic and stir for 2 minutes.
Pour the wine over the onion and garlic and stir until it’s absorbed.
Add the mushrooms and the boiled broth, ½ cup at a time, to the pot. Let the liquid be absorbed before adding more and stir
Remove the pot from the heat and allow the risotto to cool down.
Once cooled, spread it out on dehydrator sheets.
Dry for 3 hours and then separate any rice grains sticking to each other. Afterward, dry for another 4 hours and rub the risotto grains with your palms to separate them even more.
Dry for another hour before removing it and transferring it to packing containers. Pack the parmesan cheese in small plastic bags alongside the containers with risotto.
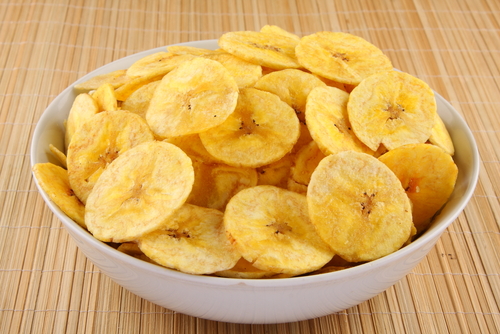
3. Banana chips
Preparation Time: 10 minutes | Cooking Time: 20 hours | Ready in 20 hours and 5 minutes | Servings: 1 cup
INGREDIENTS:
- 3-4 ripe bananas
HOW TO:
Cut the bananas into 1/8-inch-thick slices.
Prepare the dehydrator as per the owner’s instruction and line it with parchment paper.
Spread the banana slices on the parchment paper and dry them for 19-20 hours.
Let the chips cool before serving or storing.
Storing your dehydrated meals
Once you’ve dehydrated your preferred meals, it’s time to think about storage. One of the best ways to do it is to store the food in airtight containers with oxygen absorbers. I often use on a packet of absorbers pe nine ounces of food.
Another option is to use a vacuum sealer and seal the food in portions. You could seal a 4-potion meal and use it when needed. Storing precise quantities prevents you from opening containers that contain more than you can use. If you keep opening containers, you will contaminate the food and alter its shelf-life.
For a bug out bag, if you want to make ready meals, you can use Ziploc bags. Once you have the food in separate storage with oxygen absorbers, you will need to leave them in a dark, cool, and dry area. Make sure that you check your stock every few days or every few weeks to ensure that the O2 absorber doesn’t indicate that you have air leaks.
Eating dehydrated meals
One you want to eat the foods you’ve stored for a long period of time, you will want to add water to your dehydrated meals to make them “edible.” Use a 1:1 ratio and wait for about 4 hours before eating. This becomes necessary since adding water will rehydrate the foods and return them to their initial state.
Concluding
No matter how you look at the emergency preparedness process, one of your main concerns will continue to be the need for food. This may not be your main priority, but you will need it sooner or later, depending on the disaster you have to face. Dehydrating food is a great way to store food and keep it for such times.
No comments:
Post a Comment