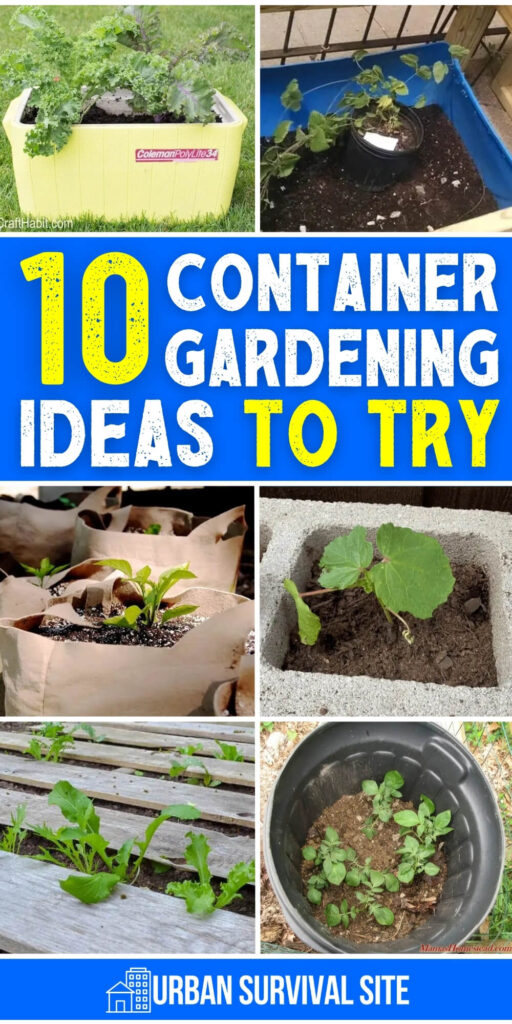
For gardeners with poor soil, hungry wildlife, poor sunlight, or all of the above, container gardening provides several answers. You can manipulate the soil in your container to be just what you need for the type of plants you are growing.
Container gardens can be moved anywhere you like. They can be transferred to follow seasonal sunlight changes, and they can be placed in an enclosure, on a porch, or a protected location to deal with hungry pests like rabbit, deer, and squirrels.
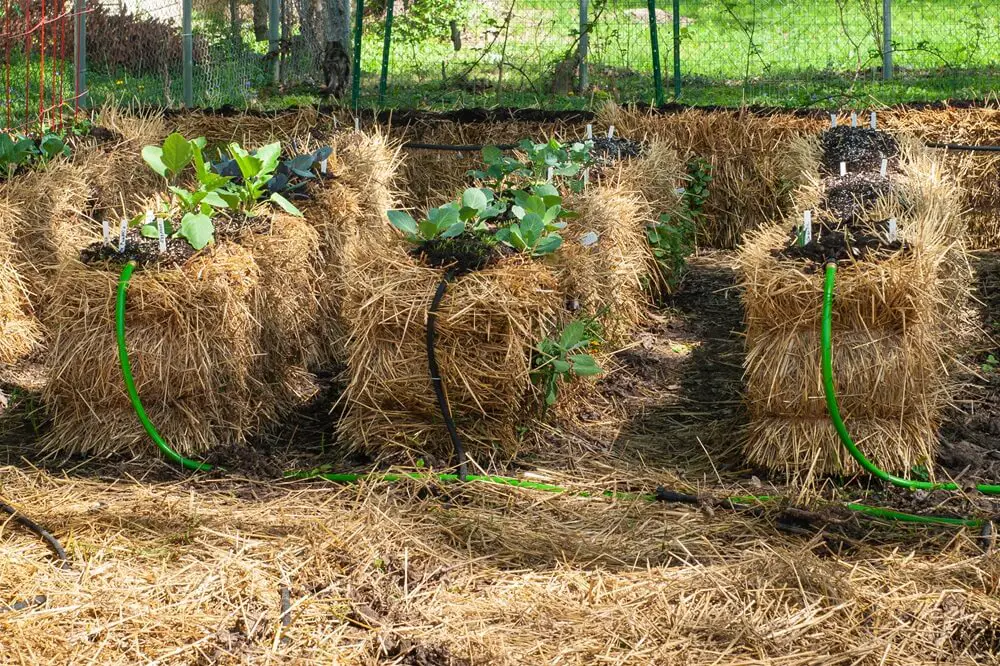
Hay bales are one of the more interesting “containers” because they break down as the growing season goes on. They are the only container on the list that will feed your garden as it contains your garden. That’s pretty cool!
To create a haybale container you need 4 haybales, and you simply arrange them so there is a rectangular space between them all. Sort of like you are building a raised bed except instead of lumber, you are using haybales.
Fill that section with fertile soil and grow whatever you like in there.
You can also cut a section out of the center of a single haybale and grow inside the individual hay bale itself. If you combine methods, then you can grow things like tomatoes in the large growing space in the center while growing lettuces and herbs in the cutout sections of each individual haybale.
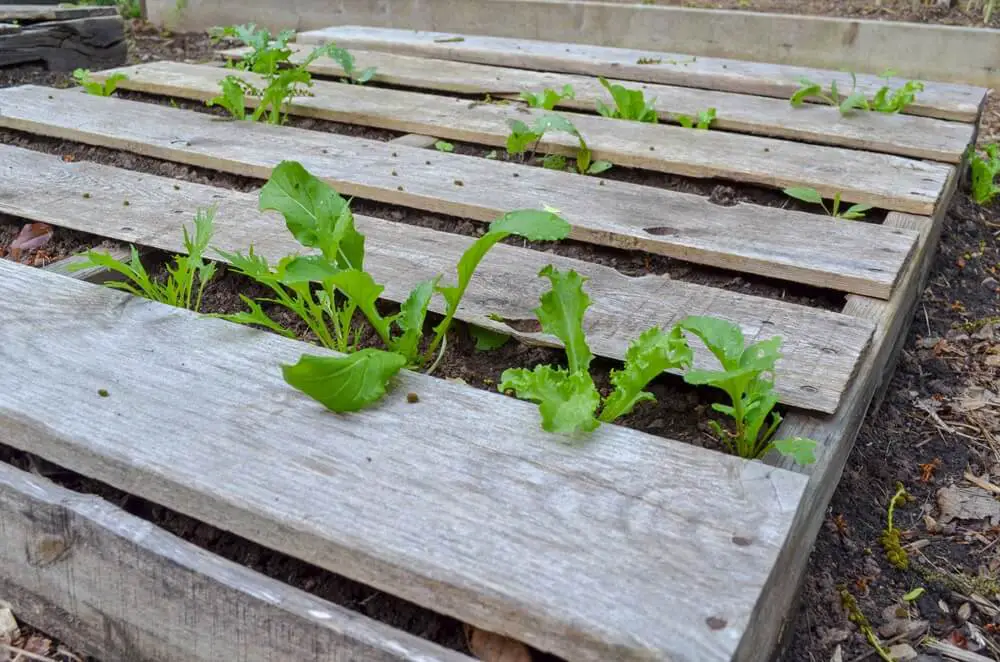
In one of its early iterations, I had a garden that was made up of pallets. The pallets were not disassembled or built into anything. I just laid them on level ground and filled them with nutrient-rich growing soil.
I smoothed it out over the top removing the excess from the pallet wood on top.
What I had were mini raised beds that had rows built into them. I really like this design. They did very well with things like lettuce, squashes, and herbs.
Since I did not protect them, our dogs stepped and laid on them while some of the plants were young and it affected the yields. Other than that, these were a great out of the ordinary “container” for growing.
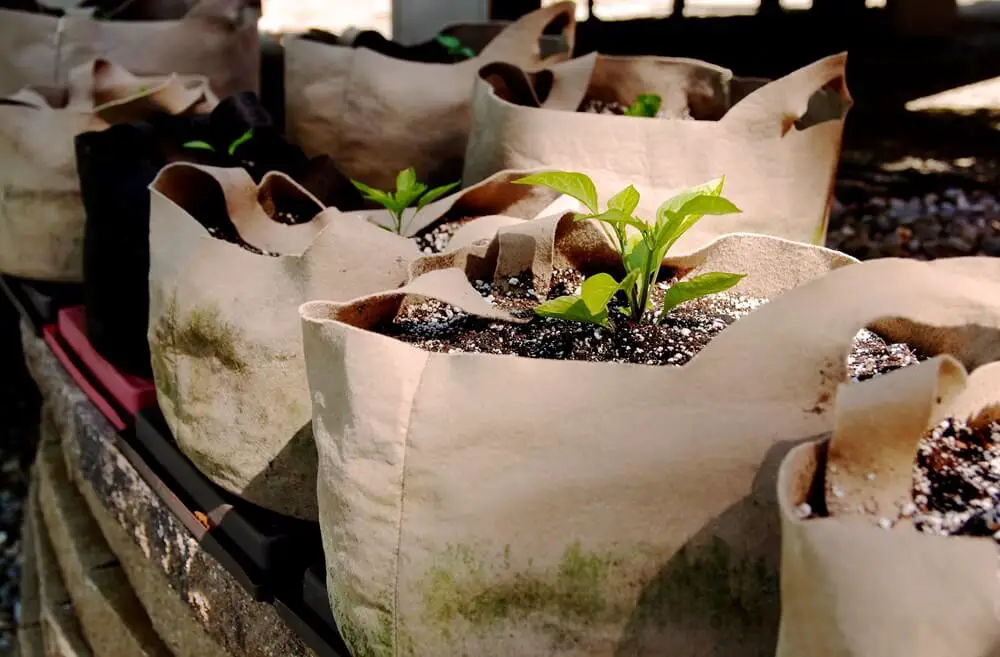
About 7 years ago, my father-in-law gave me a dozen or so grow bags, and I think they are one of the best containers to grow in. They are incredibly versatile, they drain well, and they have handles ,which makes them super easy to use.
I have seen people have tremendous success with things like sweet potatoes, though I have only grown things like pole beans and squash in them.
If you haven’t tried grow bags as part of your container garden, you should consider them for your next garden. I know people that grow almost everything in these bags. Keep em moist and you will have success.
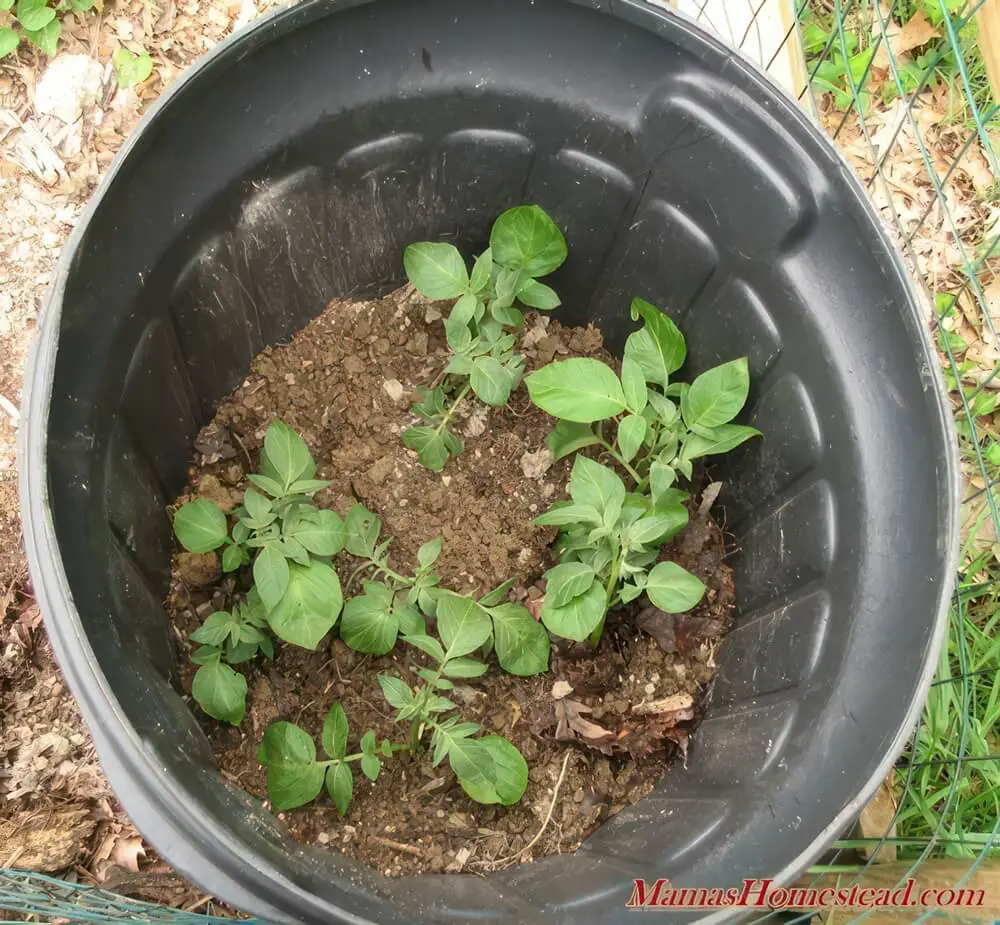
When my son was very little, we drilled holes into a trash can and filled it about halfway with soil and planted potatoes. Then we let them sprout and covered them with more soil just to the tops of the plant. We did this over and over till the trash can was filled with growing soil.
After the potatoes grew to maturity and the mature plants died off, we tipped the can over and dug through all the dirt for our harvest. It was a cool exercise. We had a decent yield. There are some things we could have done differently, but the container itself worked out really well.
A simple trash can with drainage provides you great room for larger roots to grow. It also holds a lot of soil.
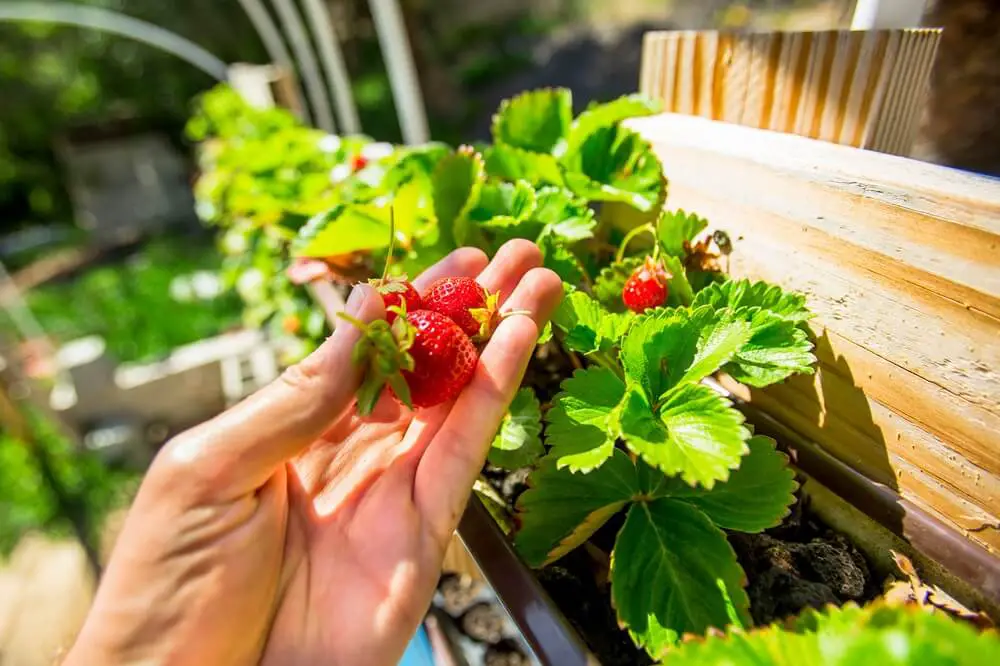
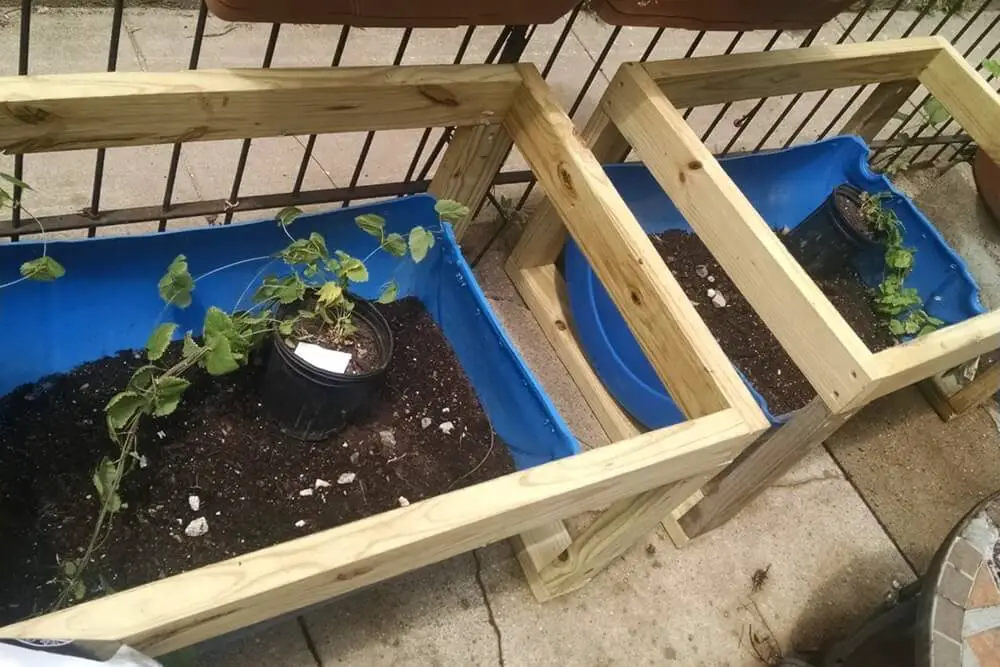
Do you have a tall fence? What about a greenhouse or an attached grow room? I have seen rain gutters employed for a number of uses. One of the very best was for growing strawberries inside of a greenhouse.
Rain gutters are a great option for plants that have shallow root systems like lettuces and leafy herbs. They are not great for root vegetables.
A raised bed made of cinderblocks is one way that you can use cinderblocks. However, the coolest part about each cinderblock is that there are two small growing compartments in each. These two holes can be filled with soil, and you can grow things like leafy greens, herbs, lettuces, and bush beans.
Some people have mentioned to me that these blocks can leech chemicals. I never worried much about this. If you aren’t growing food, then you are already eating food that is covered in a variety of chemicals.
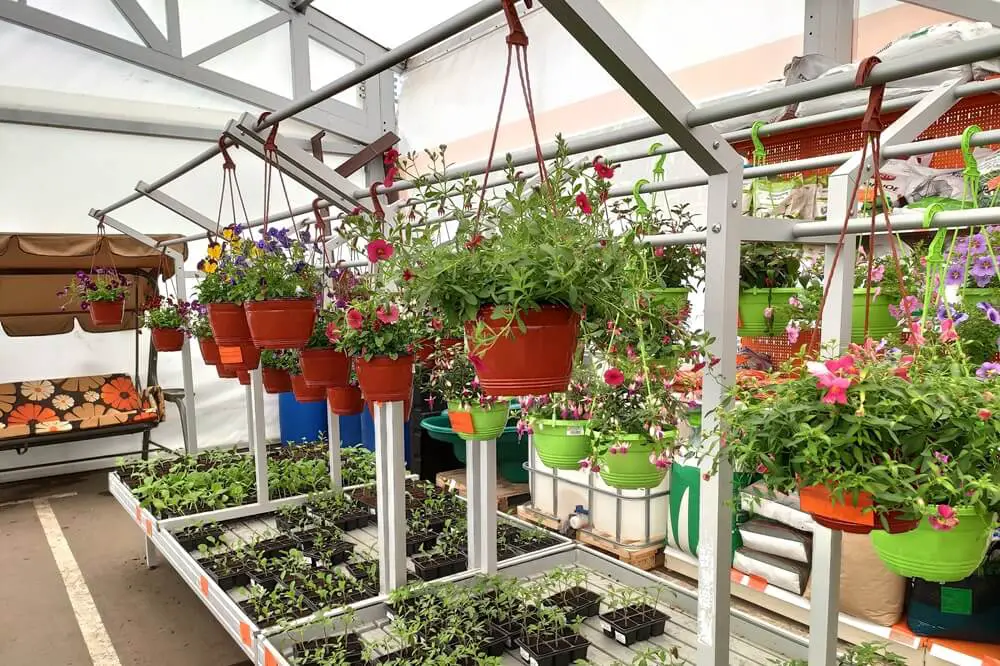
We all see hanging planters. They are great little containers for growing. The biggest struggle with the hanging planter is that you must keep them watered. In cool conditions, they are just hanging there and drying out quickly.
Even a couple days without watering can be detrimental to whatever you are growing in your hanging planter. So, keep these things saturated if you plan to use them.
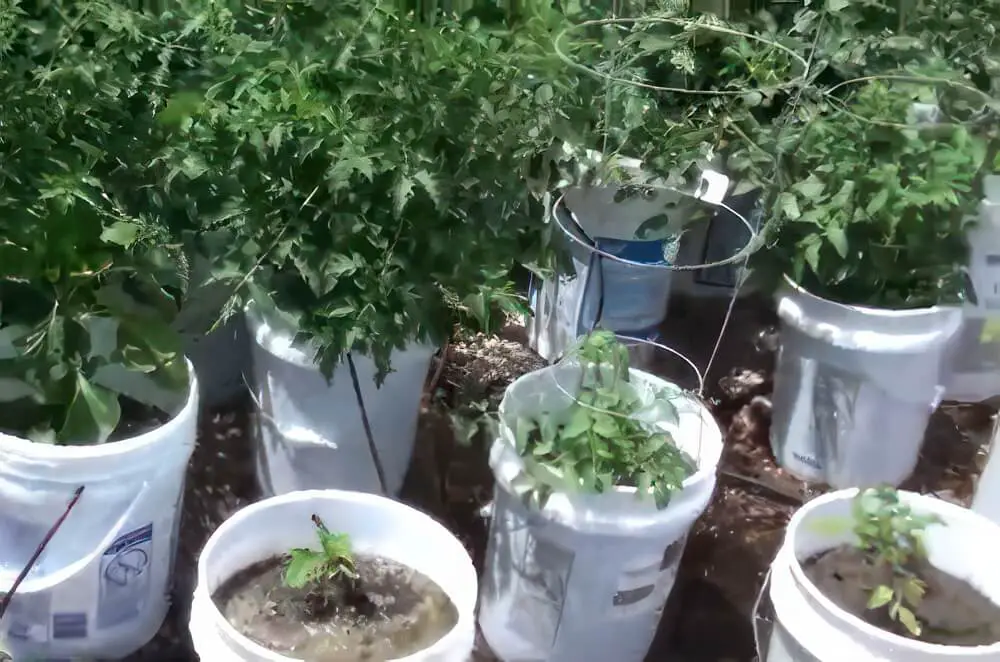
Any prepper knows that the 5-gallon bucket is one of the most versatile tools in the tool kit. You can do almost anything with a 5-gallon bucket. When it comes to using them as a growing container they excel in a number of different ways.
You can convert a 5-gallon bucket into a small hydroponics system. You can transform a 5-gallon bucket into an aero garden that sprays nutrient-laced water on the roots of your plants inside the bucket while the tops of the plants grow above the bucket.
Of course, you can just punch some holes in the bottom and fill it with soil to grow traditionally.
Those 55-gallon rain barrels can do more for you than just gather and hold water. They are capable of growing food, too. By cycling the water with a water pump and adding nutrients, you can create a hydroponics system.
If you are hanging on to too many rain barrels, then you can cut the tops off them and create a deep growing pod for things like root vegetables or vegetables like tomatoes with deep taproots. You can also halve the rain barrels or split them right down the middle to create two growing containers from one barrel.
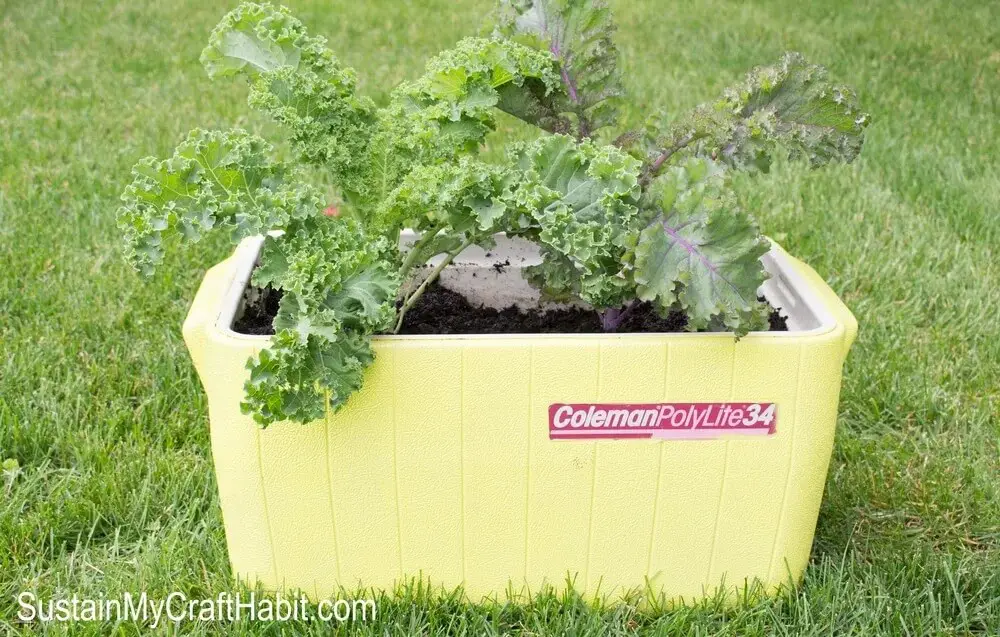
One of the worst parts of a container garden is soil drying out. When you plant in the ground, the moisture is more spread out and the ground is also insulated. Your above-ground containers heat up fast and dry out.
The benefits of using an old cooler as a container is the added insulation. It will keep your dirt moist because it helps regulate the temperature. Don’t forget about drainage on this container.
For people in urban settings, rooftop gardens, limited spaces, or even indoor growing, container gardens can be an answer when growing your own food seems impossible. Container growing is also a great growing method to explore for adding options to your traditional garden.
You can have just as much success, sometimes even more, in container gardening as you do when growing directly in the ground.
Don’t just stop with the ideas I have presented. You can grow in almost anything. I have seen people grow flowers in old boots! Not a very efficient growing setup but valid, nonetheless. Get creative. Just don’t forget about drainage.
Going off-grid with solar is one of the most significant investments a self-reliant homesteader can make. Done right, it eliminates your utility bill permanently, keeps your property powered when the grid fails, and gives you the kind of energy independence that no amount of prepping supplies can replace. Done wrong, it drains your budget on […]
There is a particular kind of person who reveals themselves during a crisis. They are not usually the loudest voice in the room, not the one with the most impressive title or the most polished way of speaking. They tend to be the neighbor who was already outside assessing the situation before anyone else had […]
Most preppers spend their money on freeze-dried food, water filtration systems, and tactical gear, which makes perfect sense when you consider that physical supplies matter the most in a genuine emergency. However, one of the most valuable and completely free resources available to anyone serious about preparedness is quietly sitting at the end of your […]
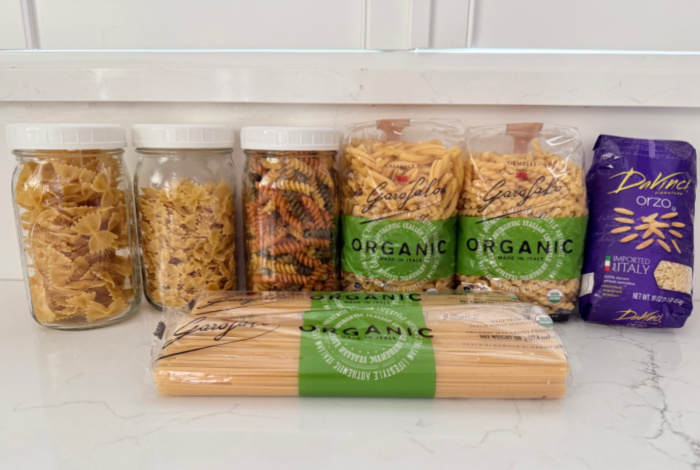
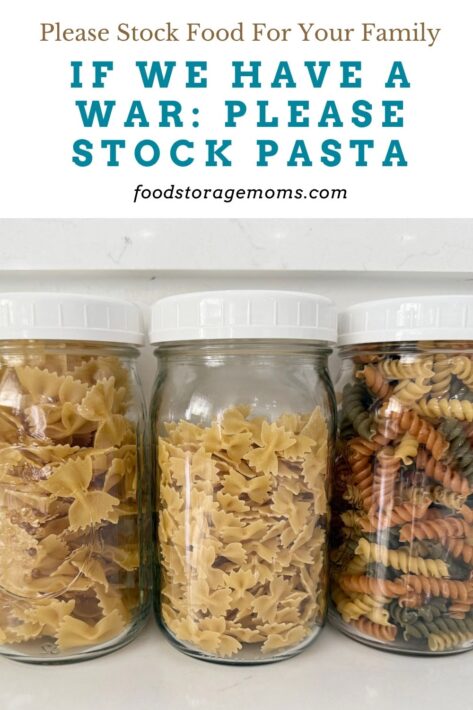
If we have a war, please stock pasta. When the world feels uncertain, the pantry becomes a place of quiet power. Stocking pasta isn’t a statement of fear; it’s an act of love for the people who depend on you. Dried pasta is one of the most practical, nourishing, and versatile foods a family can store, and in times of disruption, it may prove to be one of the most important decisions you ever make in a grocery aisle.
Governments, emergency management agencies, and generations of resilient families all agree: a well-stocked pantry is the first line of food security in any crisis. Whether the threat is war, natural disaster, supply chain collapse, or prolonged economic hardship, families who have stored food face a fundamentally different reality than those who haven’t.
Pasta keeps for years, feeds a crowd, requires no refrigeration, cooks with little fuel, and costs almost nothing to store. No other food checks every box quite like it.
Why Pasta Deserves a Place in Every Emergency Pantry
Dried pasta has an extraordinary shelf life. Stored in a cool, dry location, ideally in sealed containers away from light and moisture, most dried pasta varieties remain safe and nutritious for two to five years, and many last even longer. Unlike canned goods that can corrode or freeze-dried meals that require special packaging, plain dried pasta in its original sealed bag asks almost nothing of you.
From a nutritional standpoint, pasta provides complex carbohydrates that give sustained energy to adults and children during physically and emotionally demanding times. It pairs with virtually anything available in an emergency pantry: canned tomatoes, olive oil, dried beans, canned fish, powdered cheese, preserved vegetables, or simply salt and water. One pound of pasta feeds a family of four, making it an exceptional calorie-to-cost investment for any household budget.
Pasta also requires minimal cooking time and fuel. In scenarios where propane, electricity, or firewood may be rationed, a pot of pasta reaching the table in eight to twelve minutes offers a significant practical advantage over grains like rice or legumes, which may simmer for an hour or more.
Finally, pasta is familiar. Children eat it. Older family members recognize it. In moments of stress and displacement, a meal that tastes like home has a value that goes beyond nutrition.
Ten Pastas Worth Stocking
Not all pasta shapes serve the same purpose. Stocking a variety ensures your family can prepare different meals, accommodate different ages and textures, and adapt to whatever ingredients are on hand. Here are the ten essential shapes every emergency pantry should contain.
Angel Hair-Capellini: Very Fine Long Strand
Angel hair is the finest of all long pasta varieties, and its delicacy makes it uniquely practical in emergencies. It cooks in two to three minutes, faster than any other pasta shape, which means less fuel is consumed per meal. It goes gently with light broths, olive oil, canned clams, or simple tomato sauces, and its thin structure makes it easy for young children and older family members to eat. Store several bags: when fuel conservation matters, angel hair will earn its place.
Spaghetti: Classic Long Strand-The Universal Standard
Spaghetti is arguably the most universally recognized pasta in the world, and it belongs at the center of any emergency reserve. Its familiarity alone provides comfort. Families who rarely cook will know what to do with spaghetti when nothing else is available. It works with every sauce in a pantry arsenal, from bolognese made with canned beef, to aglio e olio with oil and garlic, to a simple broth with pepper. Stock more spaghetti than any other shape. It’s the workhorse of the pasta world. You may need to cut up the spaghetti noodles when feeding children, since long noodle strands can be difficult to pick up with a fork.
Elbow Macaroni: Short Curved Tube-The Children’s Staple
Elbow macaroni may be the single most important pasta to stock for families with young children. Its small, curved shape is easy for small hands to manage and for little mouths to chew. Elbow macaroni forms the base of macaroni and cheese, one of the most universally accepted meals among children, and it works equally well in soups, casseroles, and pasta salads. With powdered cheese stocked alongside it, elbow macaroni becomes an almost guaranteed meal that a distressed child will actually eat, which matters more than any adult-centered consideration during a crisis.
Lasagna: Wide Flat Sheet-The Layered Feast
Lasagna sheets are an underappreciated emergency pantry item because they signal abundance. A baked lasagna, even one assembled from canned meat sauce, powdered milk béchamel, and dried herbs, is a meal that can feed a large group from a single dish, which matters greatly when cooking for extended family, neighbors, or displaced community members. Lasagna also stores exceptionally well, and its wide surface area means it can be broken into pieces and used as a substitute in other baked pasta applications. When morale matters as much as calories, lasagna delivers both.
Rigatoni: Large Ridged Tube-The Hearty Vessel
Rigatoni is a large, ridged tube pasta that earns its place in an emergency pantry for its extraordinary ability to hold onto thick, chunky sauces. When protein is scarce, and a sauce must be stretched, beans, lentils, canned tomatoes with herbs, and rigatoni make every bite satisfying in a way that thinner pasta can’t. Its ridged surface grips sauce, its hollow center traps flavor, and its substantial size means a smaller portion feels filling. In conditions where food must be rationed, the psychological and physical satisfaction of rigatoni is a genuine asset.
Penne: Angled Short Tube-The Reliable All-Purpose
Penne is one of the most versatile short pasta shapes in existence, equally at home in baked dishes, stove-top sauces, cold pasta salads, and soups. Its diagonal cut ends and ridged or smooth exterior make it compatible with light olive oil preparations and hearty meat-based sauces alike. Penne is also the shape most likely to be eaten without complaint by both children and adults. If you’re stocking only one short pasta, penne is the most defensible choice for nutritional flexibility, recipe diversity, and universal palatability.
Fettuccine: Flat Ribbon-The Comfort Noodle
It’s a wide, flat ribbon pasta most commonly associated with rich cream-and-butter sauces, but its utility in an emergency pantry extends well beyond that reputation. Fettuccine provides a satisfying texture and chew that thinner noodles can’t offer, and it goes surprisingly well with broth-based soups, olive oil, and even simple tomato preparations. For families accustomed to Asian noodle dishes, fettuccine works as a reasonable substitute in improvised ramen or noodle soups. Its width and substance make each forkful feel like a meal, not a side dish, important when portions must be kept modest.
Farfalle: Bow Tie-The Morale Booster
Don’t underestimate the psychological value of farfalle, the bow-tie shaped pasta, in an emergency pantry. Children light up when they see it. Adults smile. In a sustained crisis where meals become monotonous, a bowl of bow-tie pasta communicates that life retains some of its playfulness. Beyond morale, farfalle is a practical, all-purpose pasta that holds up well in cold preparations, making it ideal for pasta salads when hot meals can’t be prepared. It’s a shape that stores without difficulty, cooks predictably, and delivers genuine delight in settings where delight has become rare.
Orzo: Rice-Shaped-The Soup Extender
Orzo occupies a unique position in the pasta family: shaped like a large grain of rice, it behaves like pasta but blends invisibly into soups, stews, and casseroles. This makes orzo one of the best tools for extending a limited supply of ingredients into a nourishing meal. A modest handful of orzo added to a broth with canned vegetables transforms a thin soup into something filling. Orzo is also easily tolerated by people who are ill or by older family members recovering from stress; its soft texture after cooking makes it easy to eat. Stock orzo specifically for the weeks when survival cooking, not comfort cooking, becomes the reality.
Fusilli: Twisted Spiral-The Sauce Trap
Fusilli, the spiral-shaped pasta also known as twisted or rotini, is one of the most efficient shapes for carrying sauce, second only perhaps to rigatoni among short pastas. Every twist and groove in a fusilli spiral collects and holds whatever liquid surrounds it, meaning that a thin or watered-down sauce still coats every bite with flavor. In emergency cooking, where sauces are often improvised and ingredients are stretched, this functional advantage matters enormously. Fusilli also works beautifully in cold applications, making it the preferred shape for pasta salads prepared without heat. Stock it generously alongside penne for maximum short-pasta flexibility.
How to Store Pasta for Maximum Shelf Life
Unopened commercial pasta bags typically last two to three years. To extend that meaningfully, transfer pasta into airtight glass or food-grade plastic containers after purchase, or seal them in vacuum-sealed bags. Keep stored pasta in the coolest, darkest corner of your home; a basement shelf or interior closet will always outperform a cabinet near the stove. Avoid storing pasta near onions, garlic, or any pungent items; the dried dough can absorb odors over time. Label every container with its shape and storage date, and rotate your stock by using the oldest containers first when cooking regular family meals.
A reasonable starting goal for a family of four is 40 to 60 pounds of assorted dried pasta, which provides roughly 30 to 40 pasta-based dinners. At current grocery prices, that entire supply costs less than a single restaurant meal. The investment is minimal. The return, if it’s ever needed, is immeasurable. Store what you eat, and eat what you store. Pasta earns its shelf space every single week, emergency or not.
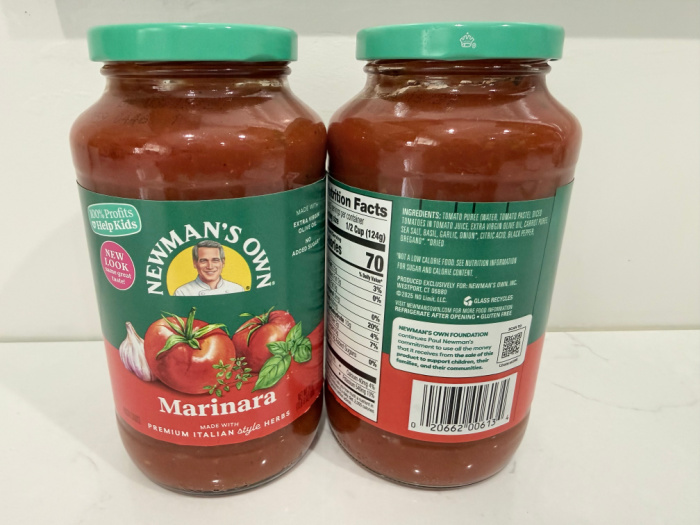
Yes, I used to bottle my homemade spaghetti sauce, but I don’t anymore. I don’t have the strength to can anymore. This is the healthiest spaghetti sauce I’ve found. My favorite nephew, Clint S., told me about it. He reads all the labels and packaging to be healthy. It’s now the only one I’ll buy. Bonus: the price is great!
Final Word
There is a particular kind of peace that comes from a ready pantry. Stockpiling pasta won’t prevent war, natural disasters, or economic crises. But it will mean that whatever comes your way, your family still sits down to dinner. The water boils. The steam rises. The smell of something warm fills the room. And for a moment, in the middle of whatever the world has become, everything is going to be all right. That’s not a small thing. That is everything.
As a side note, those plastic storage bags you have in your pantry ready to use with leftovers, prepared meals planned for later, or even to store nuts, bolts, and small tools, may become scarce and more expensive. We often forget that plastic is made from oil-based fossil fuels, and when the supply chain for those fuels is disrupted, the products made from them become more expensive. Stock up now, since we’re hearing that large oil tankers are backed up near the Middle East conflict zone. No one can tell us when the backlog will open up. Better safe than sorry. May God bless this world, Linda
You probably have a freezer full of food right now. Maybe a chest freezer in the garage, a freeze dryer you’re proud of, and a pantry that took years to build. That setup is impressive, but it has one weakness that most preppers don’t like to think about: every single bit of it depends on […]
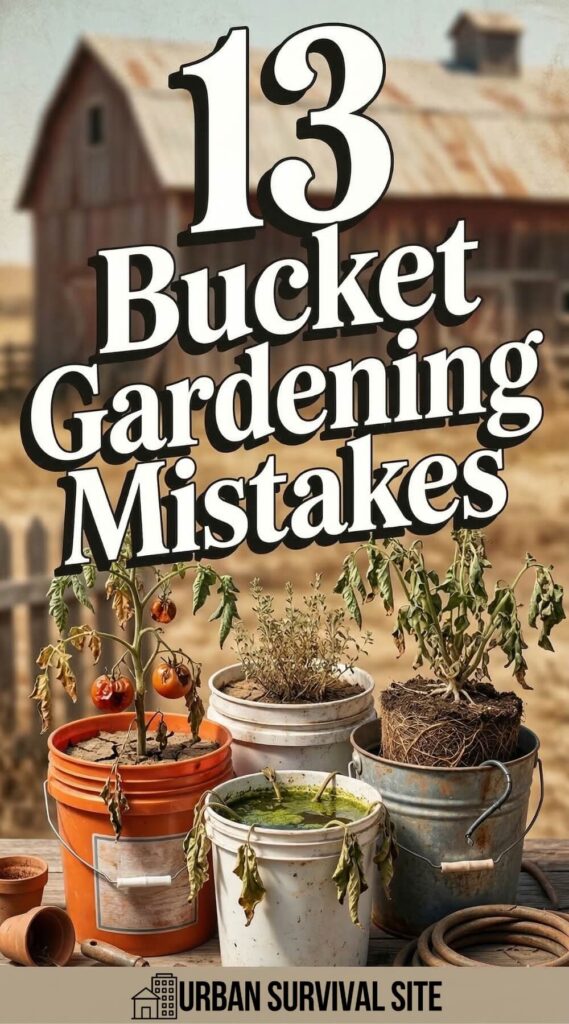
Bucket gardening is a fantastic way to grow food, especially for beginners or anyone who doesn’t have much space. With just a few five-gallon buckets, you can grow a surprising variety of vegetables, herbs, and even some fruits on a patio, balcony, porch, driveway, or small backyard. It’s affordable, easy to set up, and gives you more control over soil quality, drainage, and plant placement than a traditional garden bed.
Of course, bucket gardening also comes with its own set of challenges. Because buckets are smaller and more limited than raised beds or in-ground gardens, mistakes with watering, drainage, soil, and plant choice can cause problems fast. In this article, we’ll go over the most common bucket gardening mistakes and explain how to avoid them so your plants stay healthy and productive.
1. Using Buckets That Are Too Small
One of the biggest bucket gardening mistakes is choosing a bucket that doesn’t give the plant enough room to grow. When a bucket is too small, its roots get crowded, which can stunt growth and reduce your harvest. The soil also dries out more quickly, which means you have to water more often and your plants are more likely to struggle during hot weather.
In general, it’s better to use a full five-gallon bucket for most vegetables rather than trying to squeeze them into smaller containers. This is especially important with larger crops like tomatoes, peppers, cucumbers, and squash, which need room for both roots and moisture. A bucket that’s too small might seem fine when the plant is young, but once it takes off, you're going to have problems.
2. Forgetting to Add Drainage Holes
Proper drainage is absolutely essential in bucket gardening. If you use a bucket without enough drainage holes, water can collect at the bottom and leave the roots sitting in soggy soil. That can quickly lead to root rot, fungal problems, and weak, unhealthy plants. Unlike garden beds, buckets don’t have any natural way for excess water to escape, so this one mistake that can ruin your plants fast.
Before you plant anything, drill several holes in the bottom of each bucket so extra water can drain out freely. Some gardeners also add a few holes near the lower sides to improve drainage even more. Once that’s done, place the buckets somewhere the water can escape easily without making a mess or pooling underneath.
3. Putting Rocks in the Bottom of the Bucket
A lot of people think adding rocks or gravel to the bottom of a bucket will improve drainage, but it actually does the opposite. Instead of helping water move through the soil, a layer of rocks creates a barrier that causes water to collect above it. That means the soil stays wetter longer, which increases the risk of root rot and other moisture-related problems.
If you want your bucket to drain well, the best thing you can do is skip the rocks and just use a good potting mix in a bucket with proper drainage holes. That gives water a more even path to flow through the container and out the bottom. In bucket gardening, space is already limited, so filling the bottom with rocks also reduces the amount of soil available for the roots.
4. Using the Wrong Soil
One of the most common bucket gardening mistakes is filling your buckets with soil straight from the ground. Regular garden soil might work fine in a raised bed or backyard garden, but in a bucket, it usually becomes too dense and compacted. That makes it harder for roots to spread, harder for water to drain , and harder for air to reach the root zone.
For bucket gardening, you need a light, loose potting mix that is made for containers. Potting mix drains better, holds the right amount of moisture, and gives roots space to grow. This is especially important in buckets because the growing space is so limited. When the soil is too heavy, problems show up fast.
5. Using Cheap or Poor-Quality Potting Mix
Even if you use potting mix instead of garden soil, the quality still matters. Cheap potting mix is often full of filler and may not hold moisture well, drain properly, or provide the kind of structure plants need for healthy root growth. In bucket gardening, where plants have a very limited amount of soil to work with, low-quality mix can cause problems.
A good potting mix costs more, but it’s usually worth it. When you’re only filling a few buckets, spending a little extra on better soil can make a big difference in how healthy and productive your plants are. High-quality potting mix is lighter, more consistent, and better at balancing moisture and airflow. Since bucket gardening gives roots less room for error, you want every part of that growing space to work in your favor.
6. Choosing the Wrong Plants or Varieties
Not every plant is a good fit for bucket gardening. Some vegetables simply get too large, need too much root space, or spread more than a bucket can reasonably support. Even when a type of plant can grow in a container, certain varieties do much better than others. For example, compact or dwarf varieties are usually a better choice than large sprawling ones because they’re bred to stay smaller and more manageable.
It’s important to think beyond what you want to grow and consider what actually grows well in a five-gallon bucket. Crops like peppers, bush beans, lettuce, spinach, herbs, and compact tomato varieties tend to do much better than large melons, corn, or oversized squash plants. The goal is to match the plant to the container instead of forcing the container to support something it wasn’t designed for.
It’s tempting to squeeze several plants into a single bucket, especially when you’re trying to grow as much food as possible in a small space. But overcrowding is one of the fastest ways to run into trouble. When too many plants share one bucket, they end up competing for the same limited water, nutrients, and root space. Airflow also gets worse, which can increase the risk of disease.
Bucket gardening works best when you give each plant enough room to develop properly. In many cases, that means one large plant per 5-gallon bucket, especially for crops like tomatoes, peppers, cucumbers, or squash. Smaller crops like lettuce or green onions may be able to share space, but even then, it’s important not to overdo it. A bucket may look spacious when the plants are small, but once they mature, that extra crowding catches up with them.
8. Not Watering Enough
One of the biggest challenges with bucket gardening is how quickly the soil can dry out. Because buckets hold a limited amount of potting mix, they don’t retain moisture as long as garden beds. On hot, sunny, or windy days, the soil can dry out very fast, and that can put a lot of strain on your plants. If they don’t get enough water, growth slows down, leaves may wilt, and your harvest shrinks.
This is why bucket gardens need to be checked regularly, especially during warm weather. In many cases, you may need to water every day, and sometimes even twice a day in extreme heat. The key is to keep the soil consistently moist without letting it dry out completely. A neglected bucket can go from healthy to struggling in a very short time.
9. Watering Too Much
While underwatering is a common problem in bucket gardening, overwatering can be just as damaging. When the soil stays too wet for too long, the roots can’t get the oxygen they need. This can lead to root rot, yellowing leaves, fungal problems, and plants that look weak no matter how much care you give them. Many beginners see a drooping plant and assume it needs more water, but sometimes the real issue is that the roots are already waterlogged.
The goal is to keep the soil consistently moist, not constantly soaked. That’s why good drainage and the right potting mix matter so much. Before watering, check the soil rather than doing it on a fixed schedule without thinking. If the top inch still feels damp, the plant may not need more water yet. In bucket gardening, balance is everything. T
10. Not Fertilizing
Plants in buckets use up nutrients much faster than plants growing in the ground. In a traditional garden, roots can spread out and search for more nutrients in the surrounding soil. In a bucket, they only have access to whatever is in that limited amount of potting mix. Over time, those nutrients get depleted, especially once the plant starts growing quickly and producing flowers or fruit.
That’s why regular feeding is so important in bucket gardening. Even a high-quality potting mix might not supply everything a plant needs for the entire season. To keep plants healthy, you usually need to add fertilizer from time to time, especially for heavy feeders like tomatoes, peppers, and cucumbers. The exact schedule depends on what you’re growing and what kind of fertilizer you use, but the main point is simple: bucket plants need ongoing nutrients.
11. Using Too Much Fertilizer
While bucket plants do need regular feeding, don't overdo it either. Using too much can do more harm than not fertilizing at all. Excess fertilizer can build up in the limited soil inside a bucket and damage the roots. It may also cause fertilizer burn, which can lead to brown leaf edges, wilting, weak growth, or plants that suddenly start struggling for no obvious reason.
The best approach is to follow the directions on the fertilizer and avoid the temptation to add extra in hopes of getting faster growth. Too much fertilizer can also lead to plants with lots of leafy growth but fewer flowers and fruits, especially with vegetables. In bucket gardening, balance matters just as much with feeding as it does with watering. A steady supply of nutrients will help your plants thrive, but overdoing it can create as many problems as neglecting them altogether.
12. Not Giving Plants Enough Sunlight
Even if you're doing an incredible job with soil, watering, and fertilizing, your plants won't thrive without enough sunlight. This is one of the most overlooked mistakes in bucket gardening. Because buckets are so easy to move around, people often place them wherever there’s room without thinking about how much sun that spot actually gets, but most vegetables need plenty of direct sunlight every day.
This is especially true for crops like tomatoes, peppers, cucumbers, and squash, which need full sun to really thrive. If your buckets are tucked under a porch roof, beside a fence, or in a spot that only gets a few hours of light, those plants probably aren't going to do well. One of the advantages of bucket gardening is that you can move the buckets to a sunnier location if needed, so take advantage of that flexibility.
13. Neglecting Support for Larger Plants
Some plants can grow just fine in a bucket without any extra help, but larger crops often need support to stay healthy and productive. Tomatoes, cucumbers, pole beans, and even some pepper plants can become top-heavy as they grow, especially once they start producing fruit. Without a cage, stake, or trellis, these plants may bend over, break, or sprawl across the ground. In a bucket, this can be even more of a problem.
Adding support early makes a big difference. It’s much easier to place a cage or stake in the bucket when the plant is still young than to try and force one in later after the roots have spread. Proper support helps keep plants upright, improves airflow, makes harvesting easier, and reduces the risk of disease by keeping leaves and fruit off the ground.
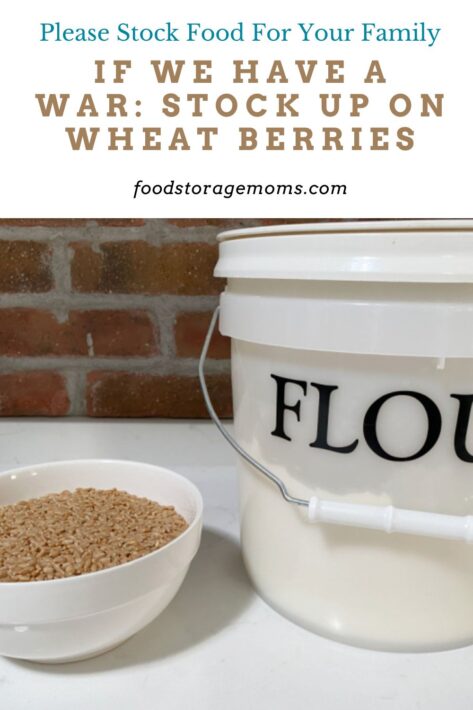
Please stock up on wheat berries. When most people think about emergency food storage, they think canned goods and freeze-dried meals. But seasoned preppers know the real secret weapon: wheat berries. Shelf-stable, nutrient-dense, and incredibly versatile, wheat berries may be the single most important food you can stockpile before a crisis hits. I understand those with gluten issues may not stock wheat, I get it.
If We Have A War: Stock Up On Wheat Berries
What Are Wheat Berries and Why Are They Called That?
Wheat berries get their name simply from what they are, the whole, unprocessed kernel of the wheat plant, looking very much like a small, hard berry or seed. In this context, the term “berry” refers to the grain kernel itself, a botanical term for a simple fruit with seeds. When you look at a wheat berry, you’re looking at the complete wheat kernel with all three parts intact: the bran (outer layer), the germ (the living embryo), and the endosperm (the starchy interior). Nothing has been removed, bleached, or refined. It’s wheat in its most pure, whole form, and that’s exactly why it stores so well and nourishes so completely.
Hard White Wheat Berries
Hard white wheat is one of the most popular choices for long-term food storage, and for good reason. It has a milder, slightly sweeter flavor compared to red wheat, making it ideal for baking bread, rolls, tortillas, and even pancakes. The lighter color also means baked goods come out with a softer, more traditional appearance that families tend to prefer.
Hard white wheat has a high protein content, typically around 10 to 13 percent, which produces a strong gluten structure, essential for bread that rises properly. When stored correctly in airtight containers with oxygen absorbers, hard white wheat berries can last 25 to 30 years without significant loss of nutrition or baking quality. Please note this is the only wheat I buy. I grew up on hard red wheat, and the loaves of bread were like bricks. Life has changed, my friends. Two products I add to my bread and dinner rolls:
Wheat Gluten (This softens the whole wheat bread as well). I use this in my whole wheat bread, not my white flour bread or dinner rolls)
Dough Enhancer (this makes your bread and rolls extra fluffy and soft). I always use this in my white bread, dinner rolls, and cinnamon rolls. I also use it in my whole wheat bread recipes.
Hard Red Wheat Berries
Hard red wheat is the workhorse of the wheat world and has been the backbone of American bread baking for generations. It carries a slightly earthier, more robust flavor with a nuttier finish. Hard red wheat is higher in protein than soft varieties, often reaching 12 to 14 percent, which makes it excellent for hearty sandwich breads, pizza dough, and dense, chewy loaves. The bran gives it a richer color and a deeper nutritional profile, including higher levels of iron and B vitamins. For preppers who want a single variety to rely on in a survival scenario, hard red wheat is often the top recommendation due to its versatility, yield, and long storage life.
Soft White Wheat Berries
Soft white wheat berries are a different animal altogether. Lower in protein (typically around 8 to 10 percent) and starch-rich, soft white wheat is not meant for bread baking. Instead, it shines in pastries, cakes, cookies, crackers, and flatbreads. The lower gluten content produces tender, crumbly textures that hard wheat simply can’t achieve. In a long-term survival situation, mental and emotional well-being matters just as much as physical nutrition, and being able to bake a batch of cookies or a birthday cake for your children can make an enormous difference in morale. Soft white wheat berries give you that option. They store just as well as hard varieties and add a critical dimension of variety to your emergency food supply.
Einkorn Wheat Berries
Einkorn is the ancient ancestor of all modern wheat, and it’s experiencing a powerful resurgence among health-conscious preppers and homesteaders. Dating back over 10,000 years, Einkorn has never been hybridized or selectively bred the way modern wheat has, meaning it retains its original genetic structure. This matters for several reasons. Einkorn contains a different type of gluten, smaller and weaker proteins, that many people with gluten sensitivities report tolerating far better than modern wheat. It’s also significantly higher in carotenoids, lutein, riboflavin, and certain essential minerals. Einkorn has a rich, buttery, almost nutty flavor that is genuinely delicious. It does require some adjustments when baking, since the dough behaves differently, but the nutritional and digestibility advantages make it a worthy addition to any serious food-storage pantry.
Why Storing Wheat Is One of the Smartest Decisions You Can Make
The importance of storing wheat can’t be overstated. Wheat berries, when kept in cool, dry, airtight conditions, are among the most calorie-dense, nutritionally complete, and cost-effective foods you can store for the long term. A single pound of wheat berries contains roughly 1,500 calories, significant protein, dietary fiber, B vitamins, iron, zinc, and magnesium. Unlike flour, which goes rancid within months, whole wheat berries retain their nutrition and freshness for decades when stored properly.
In a grid-down situation, a war, a supply chain collapse, or any other prolonged crisis, access to flour and commercially baked goods will disappear quickly. Stores will empty within days. But if you have a supply of whole wheat berries, a manual grain mill, and basic knowledge of how to bake from scratch, you can feed your family real, nourishing food indefinitely. Wheat isn’t just calories; it’s the foundation of civilization itself. Every great culture throughout history has understood that controlling the grain supply is controlling survival.
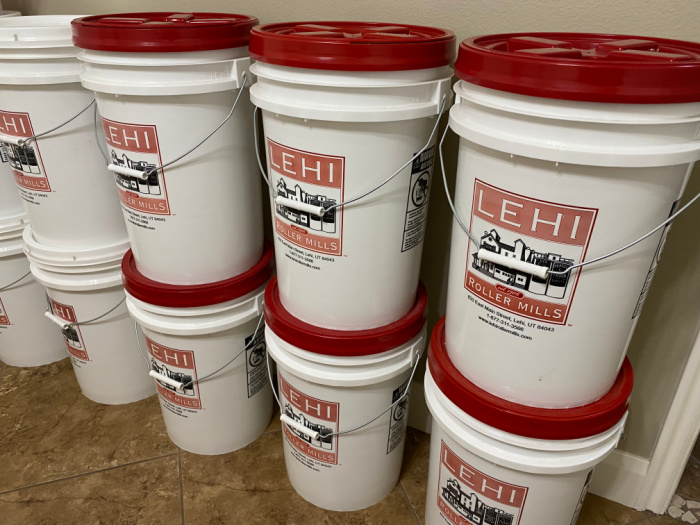
Begin building your wheat berry supply now, before you need it. Store a variety of types to cover your nutritional bases and give your family options. Rotate your stock, keep it sealed and cool, and learn how to use it. A year’s supply of wheat berries stored in five-gallon buckets with gamma seal lids and oxygen absorbers takes up very little space and costs far less than most people imagine. The peace of mind it provides is priceless. When the shelves go empty, the people who planned ahead will be the ones who eat.
Oxygen Absorbers
Please note, I don’t use oxygen absorbers. Some people use them because of where they live (humidity), I get it. I’ve never needed them. The cans of hard white wheat from Thrive Life include oxygen absorbers (they are now out of business), but I only use my wheat from Lehi Mills in Lehi, Utah. It’s cleaned six times, which is critical when you grind wheat in an expensive wheat grinder. I used to work at a Bosch store, and we learned what cheaper wheat can do to an electric grinder. Or a hand grinder for that matter.
How to Use Wheat Berries in Meals
Wheat berries aren’t just a survival food you crack open in a crisis and force yourself to eat. They are a genuinely delicious, incredibly versatile ingredient that can be used in dozens of everyday meals, long before any emergency ever arrives. In fact, the best time to learn how to cook with wheat berries is right now, while you have the luxury of a full kitchen, access to other ingredients, and the freedom to experiment. If you wait until a grid-down situation to crack open your first bucket, you’re going to be learning on the hardest possible day. Start cooking with them today.
Cooking Whole Wheat Berries
Before you can use wheat berries in most recipes, you need to cook them. The process is simple but requires time. Rinse your wheat berries thoroughly under cold water, then soak them overnight in a large bowl of water. Soaking softens the kernel, reduces cooking time, and improves digestibility by beginning to break down the naturally occurring phytic acid in whole grains. After soaking, drain and rinse them again, then add them to a pot with fresh water at a ratio of roughly one cup of wheat berries to three cups of water. Bring to a boil, reduce to a simmer, and cook for 45 to 60 minutes, until tender but still with a pleasant chew. Drain any excess water, and they are ready to use. Cooked wheat berries can be refrigerated for up to five days or frozen in portions for quick use throughout the week.
Wheat Berry Breakfast Porridge
One of the most comforting and nutritious ways to start the day is a warm bowl of wheat berry porridge. Cook your wheat berries as directed above, then simmer them in milk or water with a pinch of salt, a drizzle of honey or maple syrup, and a dash of cinnamon. Top with dried fruit, nuts, or a spoonful of nut butter. The result is a hearty, high-fiber breakfast that keeps you full for hours. In a survival scenario, this is an incredibly important quality; you need foods that stretch your energy and reduce meal frequency when supplies are limited. Wheat berry porridge does exactly that.
1cupuncooked whole wheat berries,rinse with water in a fine strainer
3cupswater
1/4teaspoonsalt
Instructions
Three Ways To Cook It
SLOW COOKER: cook all the ingredients listed above for 8-9 hours on low in a slow cooker.
STOVE TOP: add the rinsed wheat and salt to three cups of boiling water and cook uncovered on the stove for one hour or until tender.
PRESSURE COOKER: add all of the ingredients above into your electric pressure cooker and cook on high for 30 minutes. You will use “natural release," let the pressure come down naturally.
Wheat Berry Salads
Cooked and cooled wheat berries make an outstanding base for grain salads. Their chewy texture holds up beautifully against bold dressings and doesn’t turn soggy the way pasta or rice can. Toss them with olive oil, lemon juice, chopped vegetables, fresh herbs, and a crumble of cheese for a simple, satisfying lunch. A classic combination is wheat berries with roasted root vegetables, dried cranberries, toasted pecans, and an apple cider vinaigrette. These salads travel well, hold up in the refrigerator for days, and pack an impressive nutritional punch. In a preparedness context, grain salads are also an efficient way to stretch whatever fresh or preserved vegetables you have on hand.
Soups and Stews
Adding whole wheat berries to soups and stews is one of the easiest and most rewarding ways to use them. They act similarly to barley, absorbing the flavors of the surrounding broth while adding body, chew, and nutrition to the dish. A simple vegetable soup becomes a full meal when you add a cup of cooked wheat berries. Bean and wheat berry stew is a particularly powerful combination from a survival standpoint; beans provide the amino acids that grains lack, and together they form a complete protein. This is critical knowledge for anyone relying heavily on stored food. Toss wheat berries into chicken soup, beef stew, minestrone, or a simple tomato-based broth with whatever you have available.
Grinding Into Fresh Flour
This is where wheat berry storage truly becomes transformative. With a manual grain mill, an essential piece of preparedness equipment, you can grind your wheat berries into fresh flour on demand. Fresh-milled flour is nutritionally superior to anything you can buy at a store. Commercial flour has the germ and bran removed to extend shelf life, which also removes a significant portion of the vitamins, minerals, and fiber. Fresh-milled whole wheat flour retains everything. Use it to bake sandwich bread, sourdough loaves, flatbreads, tortillas, biscuits, muffins, pancakes, and more. Hard red and hard white wheat berries are ideal for bread baking. Soft white wheat berries produce a finer flour better suited for pastries and delicate baked goods. Einkorn flour creates a rich, golden product with exceptional flavor.
Sprouting Wheat Berries
In a long-term survival situation, access to fresh vegetables and vitamin C becomes a serious concern. Sprouting wheat berries solves this problem elegantly and requires nothing more than the berries themselves, water, and a jar with a mesh lid or cheesecloth. Rinse your wheat berries, soak them for 8 to 12 hours, then drain and rinse twice daily. Within two to three days, you’ll have fresh, living wheat sprouts packed with enzymes, vitamins, and nutrients, including vitamin C, which isn’t present in dry wheat at all. Wheat sprouts can be eaten raw on sandwiches and salads, tossed into stir-fries, or blended into smoothies. This ability to generate fresh, living nutrition from a shelf-stable seed is one of the most underappreciated advantages of storing whole wheat berries.
Wheat Berry Pilaf
Think of wheat berries the way you would think of rice or farro, and you’ll never run out of ideas. A simple wheat berry pilaf can be made by toasting dry wheat berries in a dry skillet until fragrant, then cooking them in broth instead of water. Finish with sautéed onions, garlic, herbs, and a squeeze of lemon. This makes a deeply satisfying side dish that pairs with almost any protein. In a camp or off-grid cooking scenario, this same dish can be made over an open fire or a rocket stove with minimal equipment.
The Bottom Line on Cooking With Wheat Berries
The families who’ll fare best in a prolonged crisis aren’t just the ones who stored the most food; they’re the ones who stored food they actually know how to cook. Wheat berries reward that preparation. They are filling, nutritious, shelf-stable, and capable of producing an enormous variety of meals from breakfast to dinner. Learn to cook with them now. Invest in a quality manual grain mill. Practice baking bread from freshly milled flour. Teach your children how to sprout them. By the time you actually need these skills, they should feel as natural and familiar as any other part of your kitchen routine.
The wheat berry is one of the oldest foods in human history. It fed armies, built empires, and sustained families through centuries of hardship. It will do the same for yours
Start adding the ingredients in the order shown above with one exception into your mixing bowl…start with 2 cups of flour and slowly add more flour until the dough pulls away from the sides of the bowl. I use a Bosch Mixer.
I grew up making bread without a mixer. It can be done by hand. I grew up letting my bread rise twice so I still do that. Old habits are hard to break!
I mix it for 10 minutes in my Bosch. Cover with greased plastic wrap until it doubles in size.
Punch down and form dough into two one-pound loaves. I let the dough rise one more time with greased plastic wrap.
Remove the plastic wrap Bake the bread at (350°F) = (76°C) degrees for 27-30 minutes. If your pans are larger you will bake your bread longer. You will love making whole-wheat bread, I promise!!
We live in a time when the illusion of abundance is everywhere. Grocery store shelves are stocked, delivery apps bring food to your door in thirty minutes, and most people haven’t missed a meal their entire lives. That comfort is real, but it’s also fragile. Supply chains are longer and more complicated than they’ve ever been. Geopolitical tensions are rising. Natural disasters are growing more frequent and more severe. And history has shown, repeatedly and without exception, that the difference between a family that survives a crisis and a family that doesn’t often comes down to one simple thing: preparation.
Wheat berries aren’t a trendy superfood. They aren’t a new idea. They are among the oldest, most proven, and most dependable foods in the entire history of human civilization. Cultures across the world have stored grain as their first line of defense against famine, war, and disaster for thousands of years. That wisdom didn’t disappear; it just got buried under the convenience of modern life.
Stocking up on wheat berries costs very little. A twenty-five-pound bag of hard white or hard red wheat berries stored in a sealed five-gallon bucket with oxygen absorbers takes up less space than a piece of luggage and can last thirty years. A manual grain mill is a one-time investment that will outlast you and serve your children after you are gone. The knowledge of how to bake bread, cook a grain for salad, sprout seeds for fresh nutrition, and stretch a simple stew into a week of meals is knowledge that no one can ever take from you.
Final Word
You don’t need to believe the worst is coming to prepare for it. You simply need to love your family enough to act before you’re forced to. Fill your pantry. Learn your skills. Store your wheat. The time to prepare is always before the crisis arrives — never during it. The wheat berry has fed humanity through its darkest hours before. Let it be ready to do the same for you. May God bless this world, Linda
Copyright Images: Wheat Porridge AdobeStock_507346595 by By murziknata