Estimated reading time: 6 minutes
If you're a gardener with an overflowing harvest, or a prepper working to build a ready-to-eat food stash, you already know the value of canning. But here's the thing: most of the time, you’re not going to eat canned green beans, carrots, or tomatoes straight from the jar. You’ll use them in meals.
So why not skip a step and can full meals instead?
That's why I'm a big fan of canning hearty soups. Not only are they shelf-stable and long-lasting, they’re also ready to eat straight out of the jar. Great to have for emergencies, power outages, or just busy evenings. No cooking required. Just open, heat, and eat.
One homesteader who really knows her stuff is Jamie from Guildbrook Farm. She’s canned dozens of batches of soup including Senate bean soup, ham and pea soup, ham and potato, German-style ham and green bean soup, and more.
Want to save this post for later? Click Here to Pin It On Pinterest!
In this this video, she talks about why she likes to pressure can soup and some key rules for canning soup safely. She also shares her recipe for ham, potato, and corn soup. For those who prefer to read, I typed it up below.
Why Pressure Can Soup?
Let’s clear this up before we dive into the recipe. All soups must be pressure canned. There are no exceptions.
Water bath canning is only safe for high-acid foods like jams, jellies, and some pickles. Soup is a low-acid food, especially when it includes meat, potatoes, or vegetables. That means it can harbor botulism if not processed at a high enough temperature.
Key Rules for Canning Soup Safely
Before you start canning, there are a few important guidelines you need to follow:
- Use a pressure canner, not a water bath.
- Do not add pasta, rice, or other grains – they become mushy and interfere with safe processing.
- No dairy or creamers – they can’t be safely canned.
- No thickeners (like flour, cornstarch, or roux) – they prevent proper heat penetration.
- Soup must be thin – not thick or creamy.
- Fully cook all ingredients before canning – especially dried beans or peas.
Want a thicker, creamier soup later? Add dairy, pasta, or thickeners after you open the jar to reheat it. Not during the canning process.
Step-by-Step: How to Make and Pressure Can Ham, Potato, and Corn Soup
This soup is rustic, hearty, and customizable. No strict measurements. Adjust the ingredients based on your taste and what you have on hand.
1. Cook Down a Ham Bone
Start by placing a meaty ham bone into a crockpot. Cover it with hot water and let it simmer on medium overnight (about 8–12 hours). This creates a rich ham stock and loosens all the meat.
Pro Tip: Save your ham bones whenever you buy bone-in ham. Just freeze them until you're ready to make soup.
2. Strain and Separate the Meat
The next morning, remove the ham bone and pick it clean. Separate the meat into three piles:
- Good, lean meat for the soup
- Gristle and fat to discard
- Scraps for chickens (optional)
Then strain the broth to remove any floating bits of fat or bone. What you’re left with is homemade ham stock. You can skim the fat after chilling, but Jamie prefers to leave it for extra flavor.
3. Create a Creamy Base (Optional)
To give the soup a creamy texture without adding dairy, blend one jar of canned potatoes with some ham stock in a blender. This thickens the soup naturally and adds richness.
4. Combine the Soup Ingredients
In your crockpot or stockpot, add:
- The blended potato mixture
- Diced carrots (fresh or frozen)
- Frozen or canned corn
- Chopped ham (from your cooked bone)
- Enough ham stock to cover everything
Stir it all together and bring it up to temperature.
5. Add Aromatics and Seasoning
Saute one diced onion in a bit of oil until soft. Add it to the soup along with:
- Garlic powder
- Salt and pepper to taste
- A generous amount of dried parsley
- A splash of apple cider vinegar (for flavor and brightness)
Let the soup simmer for about an hour to let all the flavors meld.
Time to Can the Soup
6. Prepare Your Pressure Canner
- Add about 2 inches of water to the canner.
- Apply a light layer of oil around the canner lid to help seal.
- Gather clean quart jars (they don’t need to be sterilized if pressure canning over 10 minutes).
- Warm cold jars by running them under hot water to avoid thermal shock.
- Set out your lids, rings, funnel, bubble remover, and a damp cloth.
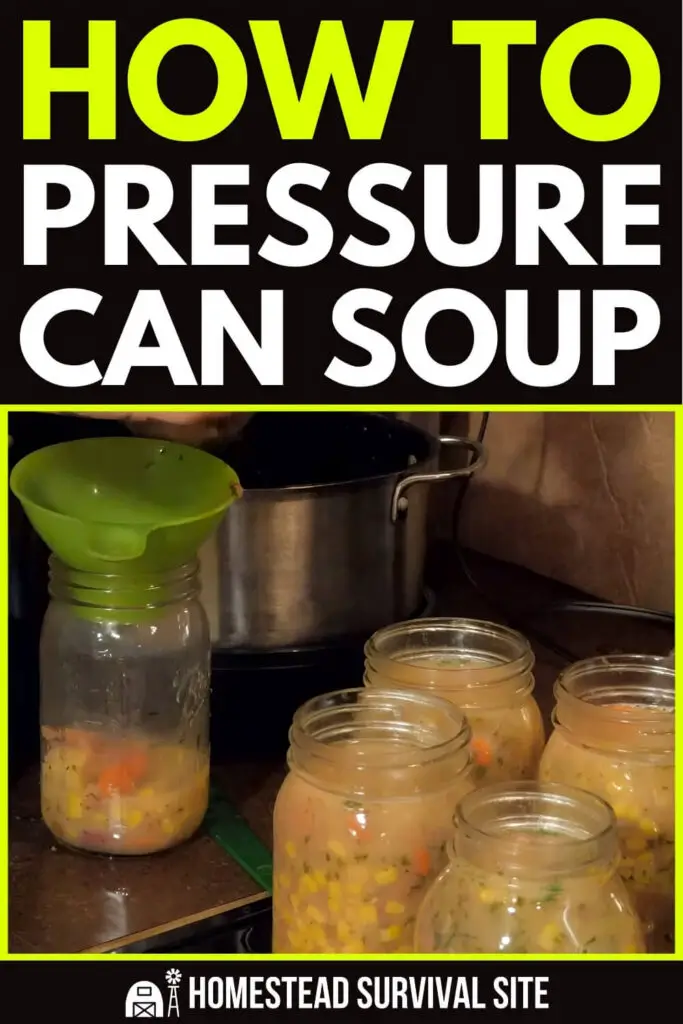
7. Fill the Jars
- Use a ladle and funnel to fill each jar with soup, leaving 1 inch of headspace.
- Run a bubble remover tool around the inside of each jar to release air pockets.
- Wipe the rims clean with a damp cloth.
- Add the lids and screw on the rings finger-tight.
8. Process the Jars
- Lock the lid on your pressure canner and heat on medium-high.
- Allow it to vent steam for 10 full minutes before adding the weight.
- Once vented, add your 10 lb weight (if under 1,000 ft elevation).
- When it reaches 10 pounds of pressure, set a timer for 75 minutes (quarts) or 60 minutes (pints).
- Monitor the pressure throughout and reduce heat if needed to maintain 10 lbs.
9. Cool and Store
- When time is up, turn off the heat and let the canner come down to zero pressure naturally.
- Remove the weight and let the canner sit for 10 minutes before opening the lid.
- Tilt the lid away from you to avoid steam burns.
- Use a jar lifter to place the jars on a towel-lined counter.
Let them sit undisturbed until fully cooled and sealed (you'll hear the ping sound as they seal).
Once cooled:
- Remove the rings
- Wash the jars
- Label with contents and date
- Store in a cool, dark place
Each quart typically serves two people, making this an incredibly efficient way to stockpile meals.
Final Thoughts
Pressure canning soup is one of the best ways to build a food storage pantry that’s not just shelf-stable, it’s actually appetizing. In an emergency, you won’t want to fiddle with complicated recipes. You’ll want meals you can eat right out of the jar.
As long as you follow the safety rules (no dairy, thickeners, rice, or pasta) and pressure can for the proper time, you’ll be well on your way to a pantry full of ready-made meals.
Like this post? Don't Forget to Pin It On Pinterest!
You May Also Like:
The post How to Pressure Can Soup appeared first on Homestead Survival Site.
from Homestead Survival Site https://ift.tt/pvYR0Uc
No comments:
Post a Comment