Submissions     Contact     Advertise     Donate     BlogRoll     Subscribe                         

Friday, July 31, 2026

Water Filtration Systems for Home – A Prepper’s Complete Guide

Municipal water treatment fails more often than most people realize. Boil water notices, main line breaks, treatment plant outages during storms, and slow-moving contamination from aging lead pipes all happen on a normal week somewhere in this country. If your household still depends entirely on the tap and a wish, you have exactly one point of failure standing between your family and clean water.

This guide breaks down every major category of home water filtration system, decodes the certification labels that actually matter versus the ones that are pure marketing, and lays out how to build a layered setup that keeps working when the grid, the well pump, or the municipal supply lets you down.

Start by Knowing What’s In Your Water

Buying a filtration system before you know what you are filtering out is throwing money at a guess. If you are on municipal water, request a copy of your utility’s Consumer Confidence Report, which by law must be published annually and lists detected contaminants and their levels. If you are on a private well, none of that oversight applies to you, and testing falls entirely on you.

  • Municipal water: pull your utility’s annual water quality report, usually available on their website
  • Private well: test annually at minimum, and immediately after any flooding, new construction nearby, or a noticeable change in taste, smell, or color
  • Use a certified independent lab rather than a free kit from a filter manufacturer, since manufacturer-provided tests can be built to sell you their product
  • Test specifically for bacteria, nitrates, lead, arsenic, and any contaminants known to be common in your region, such as agricultural runoff near farmland or PFAS near industrial and military sites

Once you know what is actually in your water, the rest of this decision gets a lot easier, because different filtration technologies are built to solve different problems.

The Contaminant Categories You’re Actually Fighting

  • Biological: bacteria, viruses, and parasitic cysts like Giardia and Cryptosporidium, the primary threat in floodwater, untreated surface water, and compromised wells
  • Sediment: dirt, rust, and sand, which clog fixtures and shorten the life of downstream filters if not caught early
  • Chlorine and chloramine: added by municipal treatment plants and generally an aesthetic taste and odor issue rather than a health threat at normal levels
  • Heavy metals: lead, arsenic, and others that can leach from old pipes, solder, or natural mineral deposits
  • Emerging chemical contaminants: PFAS forever chemicals, pharmaceuticals, pesticides, and industrial runoff, increasingly showing up in testing nationwide
  • Dissolved solids and hardness minerals: calcium and magnesium that affect taste and scale buildup, addressed by water softeners rather than filters

No single filter media handles all of these equally well. That mismatch, buying a system built for one problem and expecting it to solve a different one, is the single most common mistake homeowners make.

Decode the Certification Labels Before You Buy

NSF/ANSI certification numbers get thrown around as a blanket marketing stamp, but each one certifies a specific performance claim, often for specific contaminants only, not a general seal of approval. Per Tap Score’s certification breakdown, a product can be certified to a standard for one listed contaminant while saying nothing about the others that same standard covers, so the certificate itself needs to be checked against the specific contaminant, not just the number on the box.

  • NSF/ANSI 42: aesthetic effects only, chlorine taste and odor and basic sediment. Does not certify removal of anything that would make you sick
  • NSF/ANSI 53: health-related contaminant reduction, including lead, cysts like Giardia, and certain VOCs, verified against EPA maximum contaminant levels
  • NSF/ANSI 58: certifies complete reverse osmosis systems, covering total dissolved solids and, depending on the specific listing, arsenic, fluoride, nitrate, and chromium-6
  • NSF/ANSI 401: an added layer on top of NSF 53 covering emerging contaminants such as pharmaceutical traces, pesticides, and BPA
  • NSF/ANSI P231: the standard for full water purifiers intended for microbiologically unsafe water, the relevant benchmark for backcountry and emergency-grade filtration
  • NSF/ANSI 55: ultraviolet disinfection systems, Class A for treating unsafe water and Class B only as a supplemental step on already-treated water
  • NSF/ANSI 372: confirms the filter’s own wetted parts are lead-free, a materials safety standard rather than a performance one

If a product markets itself heavily around contaminant removal but cannot point you to a specific NSF/ANSI number and contaminant list, treat that as a red flag rather than an oversight.

The Main Types of Home Water Filtration Systems

Whole House (Point of Entry) Filters

Installed at the main water line, these treat every tap, shower, and appliance in the house. Per Culligan’s comparison guide, a whole house filter typically targets sediment, chlorine, chloramine, and general chemical contaminants across the entire home, protecting your water heater and plumbing from scale and buildup in the process.

  • Best for: households wanting broad protection at every fixture, especially on well water with sediment or iron issues
  • Limitations: generally does not remove dissolved solids, and full contaminant coverage depends heavily on the specific filter media installed
  • Installation: requires cutting into the main line, usually a professional job unless you are confident with plumbing

Under Sink and Point of Use Filters

These treat water at a single tap, most often the kitchen sink, and range from simple carbon block filters to multi-stage reverse osmosis units. They are the most common choice for households that only care about drinking and cooking water rather than every fixture in the house.

  • Best for: renters, apartment dwellers, or anyone who wants targeted drinking water quality without whole-house cost
  • Limitations: only treats water at that one location; showers, laundry, and other taps remain untreated

Reverse Osmosis Systems

Reverse osmosis forces water through a semipermeable membrane fine enough to reject dissolved solids, heavy metals, fluoride, PFAS, and a wide range of trace contaminants, going well beyond what carbon alone can do. According to This Old House’s reverse osmosis buying guide, systems are commonly rated in gallons per day, and tankless designs have become popular for taking up less under-sink space while refilling faster.

  • Best for: households wanting the deepest level of contaminant removal available at the point of use
  • Limitations: produces wastewater as part of the filtration process, is slower than a straight carbon filter, and strips out beneficial minerals along with contaminants unless the system remineralizes afterward
  • Whole house RO systems exist but require higher installation cost, more space, and closer attention to household water pressure

Countertop and Pitcher Filters

The lowest-commitment option. Pitcher filters and countertop units use activated carbon, and increasingly some countertop RO units are compact enough to skip installation entirely.

  • Best for: renters, dorms, or anyone testing the waters before committing to a permanent system
  • Limitations: lower flow rate, smaller filter capacity, and frequent cartridge changes compared to installed systems

UV Purification Systems

Ultraviolet systems disinfect biologically by damaging the DNA of bacteria, viruses, and cysts as water passes under UV light. They do nothing for chemical contaminants, heavy metals, or sediment, and work best paired with a sediment pre-filter so cloudy water doesn’t block the UV light from reaching organisms.

  • Best for: well owners dealing with confirmed bacterial contamination, often paired with another filter for chemical concerns
  • Limitations: requires electricity, meaning it goes offline during a power outage unless backed by a generator or battery system

Gravity-Fed Systems: The Prepper’s Standby

This is the category that matters most for grid-down scenarios. Gravity-fed countertop systems, the Berkey being the best-known name, use no electricity, no plumbing, and no pump, relying entirely on gravity to pull water through purification elements. Per a 2026 Berkey review, the brand claims removal of over 200 contaminants including bacteria and viruses, with a cost per gallon among the lowest of any home filtration option.

  • No electricity, plumbing, or installation required, works anywhere including off-grid or during a power outage
  • Long filter life, often rated for thousands of gallons per element before replacement
  • Widely used for camping, RV use, off-grid living, and as an emergency backup even by households with a full installed system

Buyer beware: as of this writing, Black Berkey elements are not NSF/ANSI certified for any contaminant removal claim, and the EPA issued a stop-sale order after reclassifying them under federal pesticide-device regulations. Certified alternatives in the same gravity-fed category, including ProOne and Culligan MaxClear elements, carry independent NSF or IAPMO certification if third-party verification matters to you. Whichever brand you choose, look for a specific certification number rather than relying on a manufacturer’s own contaminant list.

Matching the System to Your Situation

  • On municipal water and mainly concerned with taste and chlorine smell: an NSF 42 carbon filter, pitcher or under-sink, solves this cheaply
  • On municipal water with lead or older plumbing: an NSF 53 certified under-sink filter or a reverse osmosis system
  • On a private well: start with a sediment pre-filter, add UV or a biological-rated filter if bacteria testing comes back positive, and consider a whole house unit for iron or sulfur odor
  • Renting or living somewhere you can’t modify plumbing: pitcher, countertop, or gravity-fed systems, none of which require installation
  • Building a grid-down emergency plan: a gravity-fed system belongs in your setup regardless of what else you already have installed
  • Concerned about PFAS or emerging contaminants specifically: reverse osmosis or an NSF 401 certified carbon filter

Building a Layered System That Survives Grid-Down

The mistake I see preppers make constantly is treating their nice installed filtration system as the whole plan. An RO system or whole house filter is worthless the moment the power grid or municipal supply actually fails, because most of them depend on line pressure, and some depend on electricity outright. A real plan has backup layers that do not depend on infrastructure staying up.

  • Layer 1, everyday use: your installed whole house or under-sink system for daily convenience and normal contaminant reduction
  • Layer 2, grid-down backup: a gravity-fed countertop purifier that needs no power or plumbing, stored ready to go or already in daily rotation
  • Layer 3, portable and bug-out: a compact personal filter or straw-style filter rated for biological contaminants, for anyone who might need to filter water on the move
  • Layer 4, chemical backup: water purification tablets or unscented household bleach at the proper dilution, for situations where boiling or filtering alone isn’t enough against certain pathogens
  • Layer 5, last resort: a rolling boil for at least one minute, longer at higher elevation, which kills biological contaminants but does nothing for chemical or heavy metal contamination

Store backup filter elements, not just the unit itself. A gravity-fed system with a dead cartridge and no replacement on the shelf is just an expensive water pitcher.

Mistakes That Undermine an Otherwise Good System

Watch Out For:

Ignoring the filter replacement schedule. A carbon filter left in service past its rated capacity can become a breeding ground for bacteria rather than a barrier against it.

Assuming boiling handles everything. Boiling kills biological contaminants but does not remove heavy metals, PFAS, or most chemical contamination, and can actually concentrate some of them as water evaporates.

Relying on a UV system alone during an outage. Without power or a backup energy source, a UV unit is offline exactly when you may need it most.

Buying based on a contaminant list with no certification number attached. A manufacturer’s own testing claim is not the same as independent NSF, IAPMO, or WQA certification.

Skipping a sediment pre-filter on well water. Cloudy, sediment-heavy water shortens the life of every downstream filter and can block UV light from reaching pathogens effectively.

What This Actually Costs

  • Pitcher and countertop carbon filters: roughly $20 to $60 upfront, with filter replacements every 2 to 3 months
  • Under-sink carbon or basic RO systems: $150 to $500 installed, plus annual filter costs
  • Full multi-stage reverse osmosis: $300 to $600, with some higher-capacity tankless units running higher
  • Whole house filtration: $500 to $2,000 depending on filtration stages and whether installation is professional or DIY
  • Gravity-fed purifiers: $150 to $400 for the unit, with a long-life element replacement every several years under normal use

Factor replacement filters into the real cost of ownership. A cheap unit with expensive, frequently needed cartridges can cost more over five years than a pricier system with a long-life element.

Build a Water Plan That Works – Even When the Tap Doesn’t

Reading about water filtration is the first step. Building a complete water preparedness plan is what keeps your family supplied when storms, boil-water notices, aging infrastructure, or power outages interrupt your normal water source. As this guide explains, no single filtration system covers every situation—the smartest approach is layering your defenses and having reliable backups ready before you need them.

That’s exactly why we created Water Smart Box.

Inside, you’ll discover practical strategies for storing, filtering, purifying, and securing safe drinking water for both everyday emergencies and long-term disruptions. Whether you’re on city water, a private well, or preparing for an off-grid lifestyle, Water Smart Box gives you the knowledge to make informed decisions and avoid costly mistakes.

Inside Water Smart Box, You’ll Learn:

  • 💧 How to build a layered water preparedness system that doesn’t rely on the grid
  • 🚰 The best ways to store drinking water safely for short- and long-term emergencies
  • 🦠 Practical methods to filter and purify water when your normal supply isn’t available
  • 🏕 Water solutions for home, travel, camping, bug-out bags, and off-grid living
  • ⚠ Common mistakes that leave families without safe water when they need it most

Clean water isn’t something you should have to worry about when disaster strikes. Prepare now, so your family is ready for whatever tomorrow brings.

👉 Get Your Copy of Water Smart Box Today and Take Control of Your Water Security Before the Next Emergency!

Bottom Line

There is no single water filtration system that covers every scenario, and anyone trying to sell you one that does is skipping over the fine print. Test your water first, match the filtration technology to the actual contaminants you’re dealing with, verify certifications rather than trusting marketing claims, and build in at least one layer that works without electricity or plumbing. A house with clean tap water every normal day and zero backup plan for the day the power or the municipal system goes down is only halfway prepared.

Water quality regulations, contaminant testing requirements, and product certifications can change. Check current EPA and NSF International resources, or your local health department, for the latest guidance specific to your area.


You may also like:

This will be better than gold when SHTFJoin Our WhatsApp Community For Daily Prepping/Survival Tips!

The $5 DIY Water Filter (VIDEO)


The post Water Filtration Systems for Home – A Prepper’s Complete Guide appeared first on Ask a Prepper.


from Ask a Prepper https://ift.tt/a3dov65
Corn: Should We Be Worried About A Shortage?

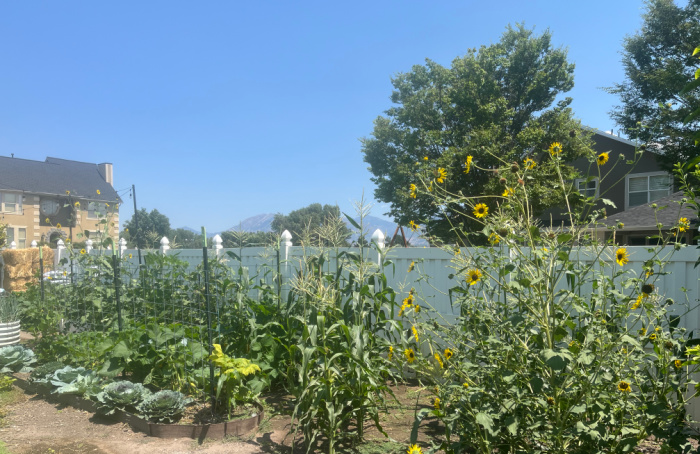
Corn Growing At Rebekahs

Corn: Should We Be Worried About A Shortage? If you’ve scrolled through farm news or grocery store chatter lately, you may have caught whispers about corn supplies tightening. It’s a fair question to ask, especially for those of us who like to stay a step ahead when it comes to feeding our families. So let’s dig into what’s actually happening with corn in 2026, why the picture is more complicated than a simple yes or no, and why corn matters so much more than just what shows up on your dinner plate.

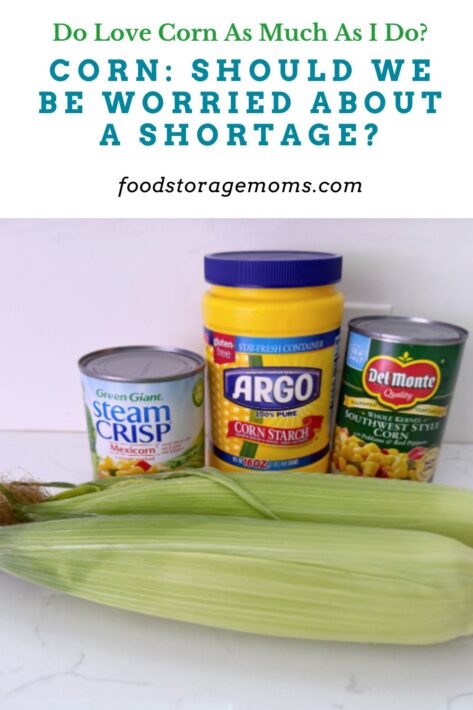
Corn with Corn Starch and Cans of Corn

Corn: Should We Be Worried About A Shortage?

The Short Answer

Right now, there’s no corn shortage in the United States. In fact, 2025 gave us one of the largest corn crops ever recorded, with farmers harvesting more than 17 billion bushels. That’s such a large amount that the country ended up with roughly 2 billion bushels sitting in surplus, the biggest leftover stockpile in a decade. So if anything, the corn story of the past year has been about too much corn, not too little.

But here’s where it gets interesting for 2026 and beyond. That surplus cushion is shrinking, and several forces are converging that have agriculture economists watching closely.

Corn Holders, Butter Roller

Why People Are Starting To Worry

A few real pressures are behind the growing concern. Fertilizer costs and availability took a hit this year. Conflict in the Middle East disrupted shipping through the Strait of Hormuz, a critical route for fertilizer exports, particularly nitrogen and phosphate. Corn is one of the most fertilizer-hungry crops grown in America, so when nitrogen and phosphate become harder to get or are more expensive, farmers have fewer options and thinner margins.

Farmers responded by planting less corn. For the 2026 growing season, planted acreage dropped to about 95.3 million acres, down from 98.8 million the year before. Fewer acres in the ground means less room for error if weather turns unfavorable during the growing season.

Demand has stayed strong even as supply growth slows. Corn used for animal feed, ethanol production, and exports all remain near record levels. USDA data shows corn used for feed and byproducts is expected to climb further, and ethanol use is projected to hold steady at around 5.6 billion bushels. When demand holds firm while acreage shrinks, the surplus cushion that once felt comfortable starts to shrink too.

Farm Economics

Farm economics have also been rough. Corn growers have now faced four straight years of negative returns on their crop, according to the National Corn Growers Association. When farmers lose money year after year, some scale back operations or shift acres to other crops, which can tighten supply over time even if this particular season looks fine.

Even with all of that said, the National Corn Growers Association has been direct about it. Their representatives have stated they don’t expect a near-term shortage of corn. The concern is less about running out tomorrow and more about resilience. The system has less flexibility to absorb another shock, whether that’s a drought, a trade disruption, or another fertilizer supply issue.

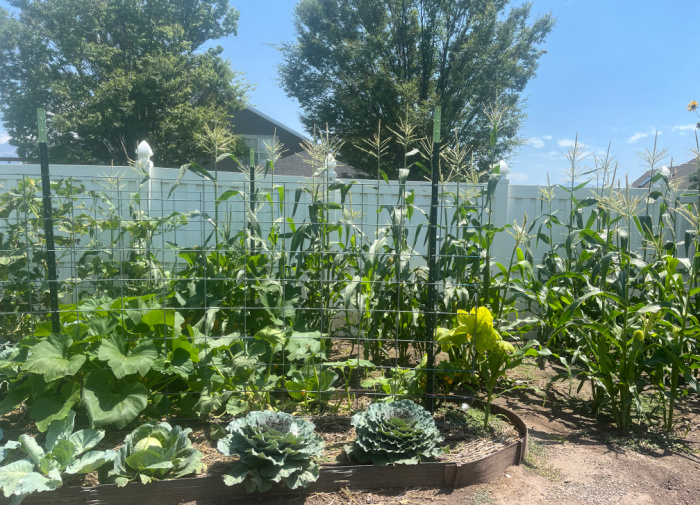
This garden below is a picture of my very close friend’s garden, who is a Master Gardener without the certificate. She’s taught herself to grow everything edible. When I sit in her backyard, it’s like a little piece of heaven; you would love it, I know. I get to enjoy her mini-farm I always wanted; it’s so peaceful and calm, it’s surreal. When I sit there, I smile and laugh the whole time; if you know me, I love to giggle. So there you go. Life is good when you grow your own food. Bonus: She donates to the Food Bank nearby. She’s a blessing to so many people.

Corn and Sun Flowers at Rebekahs

Corn Isn’t Just Corn On The Cob

Here’s something that might surprise you. Only a small fraction of the corn grown in America each year is the sweet corn we eat straight off the cob or from a can. The vast majority of corn grown in the United States is field corn, sometimes called dent corn, and it goes into far more products than most people realize.

Livestock feed is the single largest use of corn in the country. Beef cattle, hogs, chickens, and dairy cows all rely heavily on corn as a primary feed source. This means a change in corn supply or price ripples straight through to the cost of beef, pork, chicken, milk, and eggs at your grocery store.

Ethanol Production

Ethanol production is another massive use. Corn-based ethanol is blended into most of the gasoline sold in America, and roughly a third of the entire domestic corn crop goes toward biofuel production each year. That’s one of the reasons corn prices are so closely tied to energy markets.

Exports matter enormously too. The United States is one of the largest corn exporters in the world, shipping over 3 billion bushels overseas most years. Countries around the globe depend on American corn for their own food and feed systems, which means international demand and global politics can influence what happens right here at home.

Corn also shows up in your pantry in forms you might not expect. Cornstarch thickens gravies, sauces, and puddings. High fructose corn syrup sweetens a huge portion of processed foods and beverages. Corn oil is used in cooking and packaged foods. Even the citric acid, xanthan gum, and dextrose listed on food labels often trace back to corn.

Beyond food, corn shows up in surprising everyday items. It’s used in the production of certain plastics, adhesives, cardboard and packaging materials, textiles, and even some pharmaceuticals and cosmetics. Some biodegradable packaging and disposable tableware are made from corn-based plastics called PLA. Corn starch is also used in the paper industry and in some building materials.

When you add it all up, corn touches an enormous share of the American economy and food system, which is exactly why any sign of tightening supply gets attention, even when the actual numbers aren’t alarming yet.

What This Means For Your Family

I always tell folks that preparedness isn’t about panic; it is about awareness. The corn situation right now is a good reminder that our food system runs on a delicate balance of weather, farm economics, energy policy, and global trade. None of those things are guaranteed to stay stable forever.

This doesn’t mean you need to run out and stockpile corn today. What it does mean is that this is a good time to take stock of your pantry staples that rely on corn, whether that’s cornmeal, corn starch, canned corn, popcorn, or the many packaged foods that contain corn-derived ingredients. Rotating a reasonable supply of these items into your food storage plan is simply good stewardship, the same way we plan ahead for any staple crop that our family depends on.

It’s also worth remembering that corn prices affect more than just corn itself. Because so much of our meat, dairy, and processed food supply depends on corn as an input, price swings in the corn market often show up later as price changes at the meat counter or on the shelf. Watching corn-related news is really watching an early indicator for a much wider slice of your grocery bill.

Corn: Everything You Need To Know

How To Grow Sweet Corn From Start To Finish

Final Word

Corn is one of those crops we tend to take for granted, tucked into everything from our dinner plates to our gas tanks without a second thought. Right now America has plenty of it, but the forces shaping next year’s crop-fertilizer costs, planting decisions, and steady demand, are worth watching. Staying informed about the crops that quietly support so much of our food system is just one more way we take care of our families before we ever need to. May God bless this world, Linda

The post Corn: Should We Be Worried About A Shortage? appeared first on Food Storage Moms.


from Food Storage Moms

Rural Prepper OPSEC: How Your Neighbors Already Know You’re Prepared

Living out past the pavement gives you room to stockpile, garden, raise livestock, and store fuel without a homeowners association breathing down your neck. It also gives you neighbors who notice everything, from the extra chest freezer humming away in your garage to the pallet of canned goods that showed up on your porch last ... Read more...

from Prepper's Will

Thursday, July 30, 2026

What Happens to Your Stockpile After 5 Years? (A Real-World Test)

Five years ago I sealed up a full stockpile and told myself I’d leave it alone until it either saved my family or proved me wrong. Last month I finally cracked it open, category by category, and went through everything with a flashlight, a notepad, and honestly, a little bit of dread.

Some of what I found backed up everything I’d read about long-term storage. Others genuinely surprised me.

The Bucket that Almost Made Me Sick

I’ll start with the one that scared me. A five-gallon bucket of white rice, sealed with a mylar bag and two oxygen absorbers back when I first set this up, looked perfect from the outside. 

But one bag near the bottom of a different bucket, this one holding brown rice, had gone rancid enough to make my stomach turn the second I opened it. Brown rice still has its bran layer intact, and that bran holds natural oils that go bad over time no matter how well you seal the bag. White rice, stripped of that layer, showed zero signs of spoilage and tasted completely normal once cooked. 

Lesson learned the expensive way: if you’re storing rice long-term, white beats brown every time, and it’s not even close. But white rice can go rancid too, and what saved me was some advice I read on a blog I used to follow back then.

The main idea, according to the blog, was that rice needs to go in bone dry, sealed properly, and kept somewhere cool and stable if you want it to actually last. Skip any of those steps and even white rice can turn on you years earlier than expected. The whole thing is better explained on stockpilechallenge.com.

The Canned Food Gamble Paid Off, Mostly

I had two dozen commercially canned goods in this stockpile, a mix of vegetables, soups, and meats, all stored in a cool, dark corner of the basement. Every single can was still sealed tight with no bulging or rust through the seams, and every one of them tasted fine once opened, if a little softer in texture and less vibrant in color than fresh. 

The USDA has said for years that properly stored canned goods often stay safe well past their printed date, sometimes for many years beyond five, as long as the can itself holds its seal. 

The one exception I found was a can of tomato sauce that had a small dent I hadn’t noticed at the time of storage. That one had started to bulge slightly, and it went straight in the trash without a second thought.

High-acid foods like tomatoes are always the first to show trouble, so if you’re rotating stock, start there. There are 37 other items in your stockpile that need regular checking too. If you haven’t looked at that list yet, check it out here and make sure you don’t end up with spoiled food when SHTF actually hits. 

Freeze-Dried Food Barely Noticed the Five Years

This was the least surprising result of the entire test, and also the most reassuring one. The freeze-dried meals I’d packed away, rated by the manufacturer for twenty-five to thirty years of storage, tasted almost identical to a batch I’d opened fresh a few months earlier for comparison.

Freeze-drying pulls almost all the moisture out of food, and moisture is what bacteria and mold need to get a foothold, so these meals barely aged at all sitting in a cool, dry space. If your budget allows for any single upgrade to a stockpile, freeze-dried meals are the closest thing to a guarantee you’ll get.

The Fuel Was the Biggest Letdown

I’d left a container of gasoline in the shed without stabilizer, mostly out of laziness, telling myself I’d get to it eventually. Five years later it had turned a darker color, smelled distinctly off, and left a gummy residue when I poured a small test amount out. 

Gasoline starts breaking down within months without a stabilizer added, and five years untreated is well past any point of usefulness. A second container, treated with fuel stabilizer and rotated once partway through, still ran clean in a small engine test. 

The difference between those two containers, sitting three feet apart in the same shed, was the difference between a five-minute maintenance step and a total loss.

The Medications Were More Complicated Than I Expected

I won’t pretend to have solid answers here, because this is genuinely one of the trickier parts of long-term storage. Research from military shelf-life testing has found that many medications retain a meaningful amount of potency well past their printed expiration date when stored in cool, dry, stable conditions. 


Got questions about medications and how well they store when SHTF? Go on survivalmd.org and find out before it’s too late!


But that data doesn’t apply evenly across every medication, and potency isn’t the only thing that can change over time. My own basement stash showed no visible changes in the pills themselves, but I’m treating this one as a rotate-and-replace category rather than a set-it-and-forget-it one.

Also, I’d talk to a pharmacist before relying on anything past its date.

My Batteries Told Two Completely Different Stories

Batteries were the part of my stockpile I trusted the least going into this five year check, and it turns out I was right to worry. Not every battery in that box aged the same way, and the differences surprised me:

  • Alkaline AA/AAA: mixed bag. Some still tested full. Some were dead. Two had leaked, leaving that white crusty residue that eats through contacts.
  • Lithium AA: held up best. Nearly all tested near full charge, no leaks. Worth the extra cost for long-term storage.
  • Rechargeable NiMH: the biggest letdown. Drained down close to empty even though I stored them charged. Still took a charge fine, just wasn’t ready when I needed it.
  • Car battery: sulfated hard from sitting unused. Wouldn’t hold voltage at all.

That car battery was the one that actually got to me. I went to my husband asking what we were even supposed to do with it. Recycle it? Isn’t there lithium in there somewhere that’s toxic to just toss? Should we be digging around for scrap value before it goes in the bin?

He just said, wait, I saw something about this online, and pulled up a course on reconditioning old batteries. Turns out that dead battery wasn’t actually dead. Now that same method covers every battery type sitting in our stockpile, and the guide’s still on the shelf for the next one that gives out. If you’ve got batteries you’ve already written off, make sure you check out EZ Battery Reconditioning here before you toss them.

The Water Wasn’t the Problem, But…

Here's Why The Amish Never Store Water In Blue Barrels AWB

I’d stored water in food-grade plastic containers, treated properly before sealing. The water itself tested clean and tasted normal.

But two of the containers, both a cheaper brand I’d bought in a hurry one year, had gone slightly cloudy and started to feel brittle at the seams. That kind of wear comes from the plastic itself, especially the blue kind, and there’s a valid point about these barrels.

Also, they slowly break down under temperature swings in an unheated basement. Luckily, nothing leaked, but after reading about it, I wouldn’t trust those two containers for another year without replacing them.

So, you should keep in mind next time storing water that the container itself has its own shelf life, and that’s the part most of us forget to check.

The Basics Everyone Forgets to Worry About

Buried near the back of the shelf were bags of salt, white sugar, and powdered milk, none of which I’d given much thought to when I packed this stockpile away. 

  • Salt and sugar came out exactly the way they went in, both essentially unchanged, since neither one supports the kind of bacterial or mold growth that ruins most food over time. 
  • The powdered milk held up nearly as well, with only a slightly duller flavor once mixed, likely from a small amount of moisture that had crept in over the years despite the sealed container. 

These items ended up being some of the least exciting parts of the whole test, and also some of the most reliable, which says something about how often the simplest stockpile items get overlooked in favor of flashier gear.

The Seeds Were the Real Wake-Up Call

Four years ago I bought Dr. Nicole Apelian’s Medicinal Herb Seed Kit and set it aside with the rest of my seeds in a cool, dark spot, expecting them to be ready whenever I needed them. A germination test on a sample batch returned roughly half the success rate I’d gotten when testing the same seeds a year after storing them.

That’s actually a good sign. Half the germination rate after four years means the seeds are still very much alive, just slower to answer the call. Stored the way this kit is, most of these herbs hold viability for 3 to 5 years, and calendula in particular tends to go well beyond that. Mine had already cleared four years and were still sprouting, so there’s a solid chance they’ll keep going past the five-year mark.

If your stockpile includes seeds for a worst-case garden, testing germination every couple of years and replacing the weak batches isn’t optional. It’s the whole point of having them in the first place.

What Five Years Actually Taught Me

The biggest lesson from cracking open this stockpile wasn’t about any single item. It was realizing how differently each category ages, and how a plan built five years ago needs a fresh look now instead of blind trust.

But a stockpile isn’t something you build once. It’s something you keep checking on, the same way you’d check the oil in a car you’re planning to rely on.

Checking my own stash is actually what sent me looking for something else – learning from someone who’s spent his whole life doing this the right way. 

If you’ve spent any time in this space, you know Claude Davis isn’t just another voice in it. Turns out he just put out a new book, and it’s sharper than anything he’s done before. Reading it is what pushed me to go pull everything out of storage in the first place.

What’s in it isn’t the stuff you’ll find rehashed on every prepper blog. It reads less like a manual and more like an interactive experience into prepping. Trust me, once you get your hands on this book, you won’t put it down until you’ve gone through the last page.

➡CHECK OUT CLAUDE DAVIS’ NEW SURVIVAL BOOK HERE⬅

So next time you’re wondering if your years-old stockpile is fine, get this book and check it fast. You don’t want SHTF to catch you off-guard.


You may also like:

banner book11 Things You Should Never (Ever!) Add to Your Stockpile

How to Use Plants to Generate Power (VIDEO)

Best Canned Foods To Stockpile

Almost 50% of Americans Cannot Afford Food. Will You Be Next?

The Only Fuel I Stockpile For Survival (And Why You Should Stockpile It Too)

The post What Happens to Your Stockpile After 5 Years? (A Real-World Test) appeared first on Ask a Prepper.


from Ask a Prepper https://ift.tt/9abXfCh

Hurdling: A Food Storage Technique That Extends Shelf Life By Years

Estimated reading time: 17 minutes

Hurdling: A Food Storage Technique That Extends Shelf Life By Years

Hurdling is defined as a combination of more than one food preservation technique. The idea is to create a series of barriers for microorganisms like bacteria and fungus.

These barriers act as hurdles for the microorganisms so it's harder for them to make it into the food we eat. If the proper amount of hurdles are used, any microorganisms are overwhelmed and ultimately die so the food lasts longer.

What is a Microorganism?

In a food context, microorganisms are bacteria or various forms of fungus that can thrive and grow on food. The result leads to any number of diseases and conditions from commonly known food-borne bacteria like e-coli, listeria, salmonella, and botulism. There are more, and the same is true for the variety and range of fungi that can show up, especially on fruits, vegetables, meats, seafood, and most commonly, bread.

The fundamental challenge is the fact that food presents an ideal environment for microbial growth. Microorganisms thrive in a moist environment, and most foods deliver plenty of moisture. They also thrive on the natural sugars, proteins, fats, and other elements that constitute food.

Food tends to be soft if not penetrable, and if you add additional moisture and warmth to the environment surrounding the food, you’ll have an ideal breeding ground for microorganisms.

Hurdling combines techniques that remove or minimize moisture, alters or enhances the chemistry of foods, manages or limits temperatures, and creates an environment that minimizes contamination from food-borne microorganisms.

What primitive cultures learned the hard way was that many steps had to be taken to preserve food. The good news is that they succeeded without even understanding the basic concepts of infection and disease.

Origins of Hurdling

Our ancient ancestors didn’t call it “hurdling.” The term was actually coined by large, professional food processors, and many of them use it to process commercial foods we buy at the grocery store today.

Pioneers used hurdling all the time, even though they didn’t understand the dynamics of bacteria and harmful food microorganisms. They just figured it out through trial and error. Pickling is an excellent example.

Pickling as a Hurdling Process

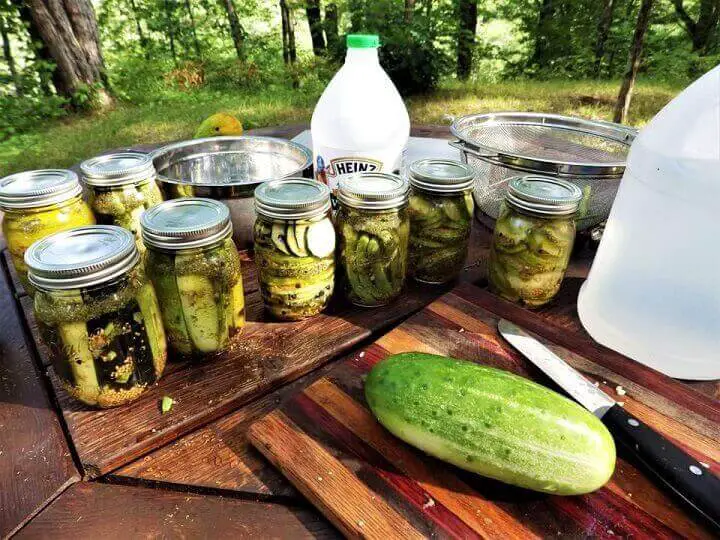
Cucumbers Being Pickled

If you’ve ever pickled cucumbers, you’ve engaged in many levels of hurdling. Just think back to the process steps.

1. Cucumbers are often brined in water and salt in a covered crock sometimes for weeks. The sodium chloride or salt effectively kills and inhibits further bacterial growth. The brined pickles and then de-brined in changes of water in preparation for the next step.

2. A pickling solution is prepared, usually using additional salt (sodium chloride), vinegar (diluted acetic acid), and sometime the addition of spices like mustard seeds. And by the way, mustard seeds aren't a part of pickling recipes just for their flavor. According to a study on Food Preservation techniques, mustard seed has unique preservative properties:

“Mustard seed has as a primary pungency component the compound allyl isothiocyanate (AIT). Isothiocyanates are inhibitory to fungi, yeasts and bacteria in the range of 16–110 ng/ml in the vapor phase (Isshiki et al., 1992) and 10–600 μg/ml in liquid media (Mari et al., 1993).”

3. Sterilization of glass jars is the next step in the pickling process for packaging and further processing.

4. A pickling solution is brought to a boil and added to the cucumbers in the jars.

5. The jars are sealed and then processed in a boiling water bath usually for 15 minutes to further destroy any resistant bacteria or other microbes.

6. The jars are carefully stored in a cool, dark place to further prevent the growth of microbes.

A brief glance at that process reveals 6 steps or “hurdles” used to preserve something as simple as cucumbers. We just rarely think of it that way. That’s the recipe we find in canning books or on the Internet, and we follow it without a thought. But a good understanding of the dynamics of hurdling can empower us to make good decisions in the future when it comes to preserving any type of food.

3 Broad Types of Hurdling

We’re going to get into a little food science here, so fasten your seat belts. It might seem a bit technical, but once you understand the basic processes, it gets easier to improvise and interpret food preservative solutions and approaches.

We’ll skip some of the more extreme hurdles. An example of an extreme hurdle is the use of radiation to preserve foods, similar to the way the military preserves MRE’s. That’s quite a hurdle but irrelevant to home food preservation.

Here are the 3 basic types:

1. Physical Hurdles

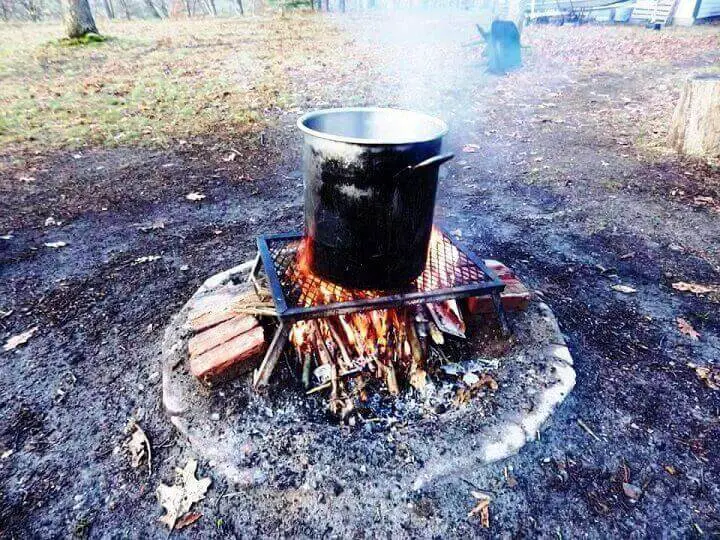
Stockpot Over Fire
  • High temperature (cooking, hot water processing, heating or pasteurization)
  • Low temperature (refrigeration and freezing)
  • High pressure (pressure cooker)
  • Aseptic packaging (sterile and sealed)
  • Low moisture (dehydration, drying, curing)

2. Physiochemical Hurdles

Vinegar 5% Acidity
  • Carbon dioxide (removal of oxygen)
  • Use of low pH acids (addition of vinegar, citrus juices, lactic acid)
  • Natural preservatives like sodium chloride (salt), mustard seeds, red pepper flakes or other peppers high in capsaicin, sugar, honey and other forms of sucrose or fructose.
  • Artificial preservatives (usually used by commercial food processors)

3. Microbial Hurdles

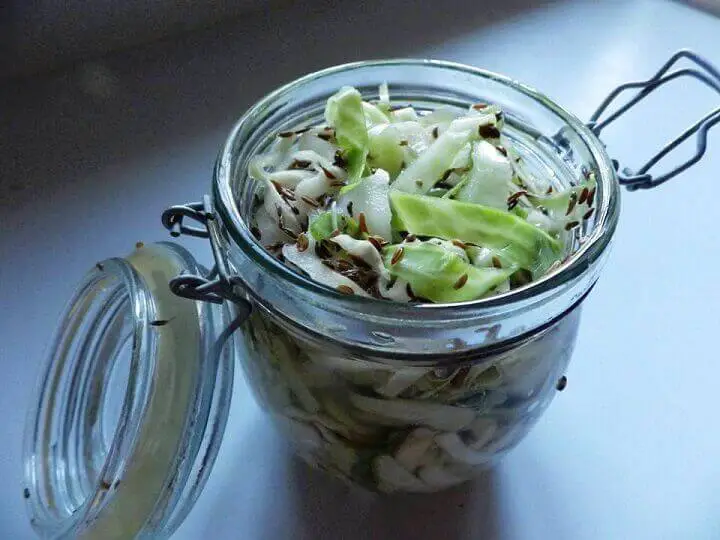
Fermented Food Jar
  • Competitive flora (good bacteria from fermentation that compete and overwhelm bad bacteria)
  • Antibiotics (sometimes used in commercial processing)

Here again, if you step back and look at much of what is described, it’s common stuff, and steps we often use for preserving food. But the best approaches combine many of those steps, resulting in a lot of the food preservative recipes we continue to find and use today. What’s important is to use more than one hurdle whenever possible.

Single hurdles used alone can have a dramatic effect on the texture, color, flavor, and overall acceptability of the food. You can use salt to preserve many types of food, but salt alone has a significant effect on the food. Lutefisk is a good example.

Lute-what?

Lutefisk is a Scandinavian food preservation technique for Cod. It involves immersing the Cod in lye for weeks. It’s a highly effective way to prevent microbial growth. Lye falls at the far end of the pH scale up around a 13 or 14 and creates a hostile environment for bacterial or fungal growth.

Acids like vinegar land at the other end of the pH scale, usually around a 3, and also inhibit microbial growth. Something to remember is that chemicals or elements at either end of the pH scale inhibit bacterial and fungal growth. The trick is balancing or diminishing the pH level so the food is both safe to eat and actually tastes good.

In order to eat the lutefisk, you have to go through multiple preparation steps to make it palatable. This includes repeatedly soaking in changes of water to remove the lye and the smell. Lutefisk is notorious for its smell because of the lye preservative and is one of the main reasons people avoid it. The soaked and rehydrated lutefisk is then subjected to a number of other preparation steps, and the use of many ingredients to make it taste like something you would actually want to eat.

In spite of those efforts, many people who have tried lutefisk only try it once. It’s an acquired taste, and most of us never acquire it. Then again, in primitive times it may have been the only source of preserved protein, so the taste was tolerated. Curiously, Scandinavians today laugh at the thought of eating lutefisk and see it as quaint reminder of a past time when single techniques defined food preservation. Hurdling has made things better today.

Why is Hurdling so Important?

Take a deep breath because it’s time for a little more food science. That’s because hurdling is all about preventing homeostasis.

Homeostasis is an organism’s ability to stabilize itself in an environment. When a hurdle or preservative property is put up, they undergo metabolic exhaustion. That’s when a microorganism uses up all of their energy to maintain homeostasis and die as a result. And while it’s true that a single food preservation technique could halt a microorganism, there’s a problem.

A single preservative approach can induce metabolic exhaustion. They don’t die, but they are struggling. In some bacteria, this leads to a stress shock reaction, causing the release of stress-shock hormones into the food. Those aren’t good, and it’s all starting to feel like a “damned if you do, damned if you don’t” scenario.

But hurdling prevents this stress shock reaction because of the application of multiple hurdles working synergistically to simply cause the death of the bacterium without the release of stress-shock hormones.

And with that said, the science class is over and we can get back to the kitchen. But hurdling really doesn’t start on a stove. Hurdling starts in the garden.

In fact there are 5 fundamental steps that define a total food preservation process. All of them represent hurdles beyond the use of salt, vinegar, heat, and other traditional steps to process and preserve foods.

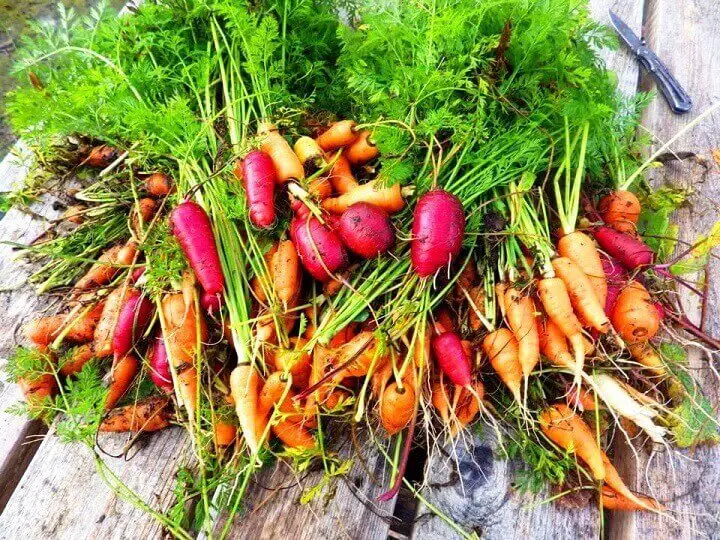
Fresh Vegetables On Table

1. Grow and raise food clean and wash after harvest or slaughter.

Take a tip from agri-business. They wash the harvest as soon as possible after picking, and you should too. The same goes for how you treat your garden. Manure is great compost, but make sure it’s fully composted. Try to keep a clean garden and wash any fruits or vegetables as soon as you can after the harvest. It also helps to grow foods that lend themselves to preservation process.

2. Store raw foods properly (refrigerator/freezer) or preserve quickly.

It contradicts food preservation to let it start to spoil even before you’ve preserved it. After washing them, get your fruits, vegetables, meats, and seafood into the refrigerator or freezer, or begin the preservation process as soon as you can. Microbes act fast and once they get started, you’ll have a different kind of hurdle that you’ll now need to overcome.

3. Use a multi-hurdle food preservation process (no lye).

Think about the various processes you can use to preserve any food. We’ll cover them in detail later, but whenever you can combine preservation processes, the better the overall result will be with regards to texture, flavor, final food prep, and most importantly, food preservation.

4. Package or contain properly.

No matter how many hurdles you may combine to stop or prevent microbial growth, it’s all for naught if the food is not packaged properly. The biggest key is to use packaging that prevents oxygen or any outside air from coming into contact with the food.

Bacteria and fungus are often airborne, and once they find their way into food, they’ll make themselves right at home. Vacuum sealing, canning jars, or any other container that can keep the air out before the package is opened makes for a great hurdle.

5. Store preserved food properly.

Keep it out of the sun, avoid heat and if storing in metal cans or jars with metal lids, avoid environments that are wet or humid. How you store your preserved foods depends on the type of food and preservation process.

Some preserved foods will do fine for years in a pantry. Others are well suited to a root cellar and others do better with refrigeration or freezing. One thing to always remember is that once a package of any kind is opened, it will probably last longer in the refrigerator or freezer.

Food Preservation Hurdles to Consider

The question to ask yourself is which food preservation process works best for the type of food you're preserving, and which processes you might combine to add hurdles and extend shelf-life. Don’t overdo it, but the more hurdles you can reasonably add, the more you will extend the shelf-life of your stored foods.

Drying

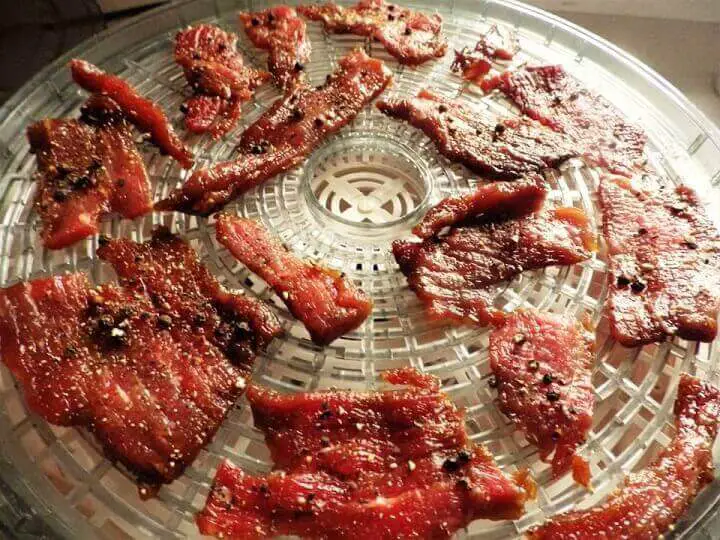
Meat On Dehydrator Tray

Drying foods may be the oldest form of food preservation. Typically, foods were dried in the sun, but today dehydrators are often used, and even low temperatures around 140 degrees or more in a conventional oven.

Rehydration is sometimes the only step necessary to make dried foods palatable, but drying alone will often sacrifice much of the flavor. That’s why foods like jerky are preserved with other processes in addition to a drying step that does not totally desiccate the fibers in the food.

Dry-Salt Curing

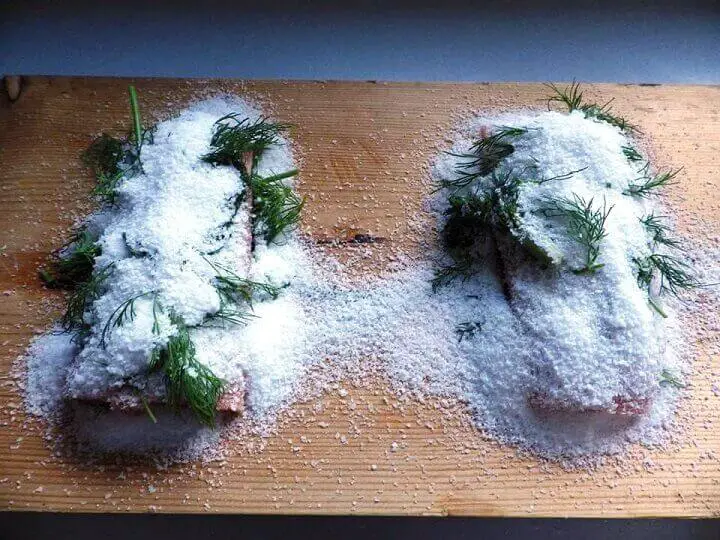
Salt Preserving Food

Salt curing is a food drying process that uses salt to leach out the water and moisture in foods. Various recipes have specific time frames for curing, and the results range from Gravlax (salt-cured salmon) to country hams.

In some cases, the foods need to be soaked in various changes of water to reduce the saltiness. This is another example of a process that can be done in moderation as a hurdle, but when it’s the only process used, the results can be extreme in terms of taste and texture.

The best example is when salt is used to trigger fermentation in foods like sauerkraut or Kim Chi. In those instances, the bacteria driving the fermentation are a micro-flora that inhibit the growth of other microbes.

In its simplest application, salt-curing is used as a rub before smoking or barbecuing.

Brine (Wet-Salt) Curing

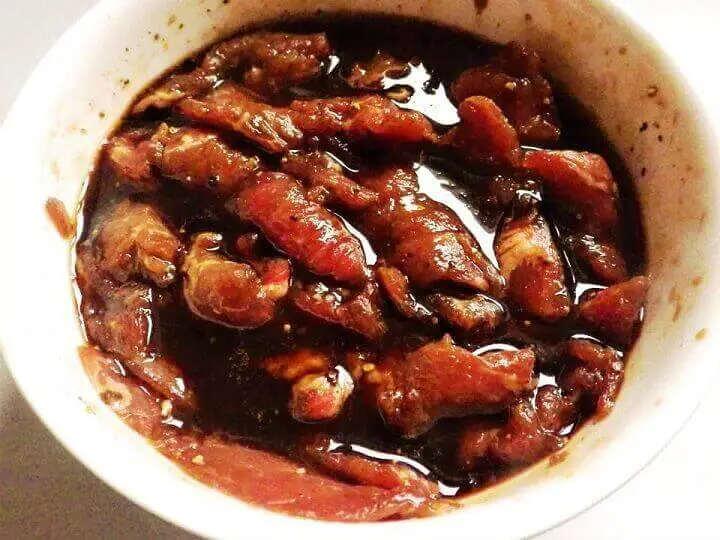
Brining – Wet Salt Curing

This is another ancient technique often used by people who lived on ocean shores where salt was plentiful. The salt was dissolved in a liquid like wine or water and the food was soaked in the brine, allowing the salt to travel into the food through a process known as “osmosis.”

The salt concentration was usually 10-15% or enough to float an egg. The benefit of wet-slat curing is that it keeps the foods moist while killing and inhibiting microbes, although foods often had to be soaked in fresh water to remove excess salt from the brine. A lot has to do with the duration of curing. Shorter cures don’t require fresh water soaking, but longer cures may require it.

Sugar-Curing

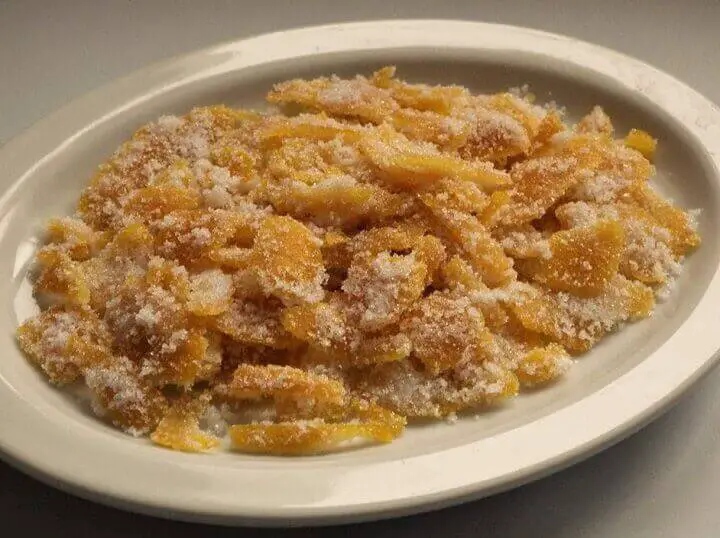
Sugar Preserving Food

To the surprise of some, sugar is a preservative. Sugar also draws moisture from food. This type of curing is often used with fruits like candied orange peels. Honey may be the best natural sugar-cure, and the tale of the honey found in a pot in a 3,000 year old Egyptian tomb is both true and remarkable. The honey was edible, and no trace of bacteria was present.

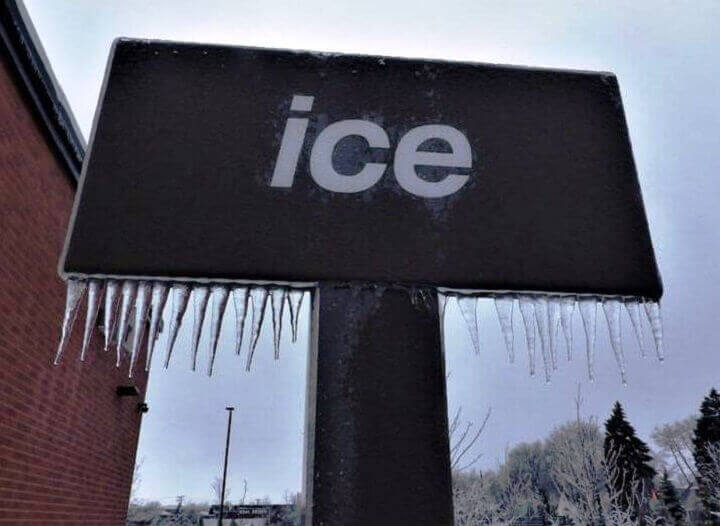
Cool Temperatures

Frozen Ice Sign

Whether it’s a refrigerator, root cellar, or even a cold water spring, cool temperatures inhibit bacterial and fungal growth. The important thing to remember is that it only “inhibits”, meaning it slows or impedes the rapid growth and spread of bacteria.

Unfortunately, it’s a relatively temporary preservation technique measured in days, weeks, and in some rare instances –years. The good news is that it’s the best way to store any preserved food before it’s opened and especially after it has been opened. In the grand scheme of things, a root cellar may be the best option for long-term, cool storage if you have a significant quantity of preserved foods.

Freezing

Thank Clarence Birdseye for pioneering the freezing of food as a preservation technique. Freezing may be one of the few processes that don’t require hurdling, although even frozen foods have a shelf-life often measured in a year or two.

Here again, any food that has been hurdled with other preservation techniques will exceed the one to two year limit of straight frozen foods. The biggest question is how much you’re trying to freeze and the need for reliable electricity to keep a large freezer running.

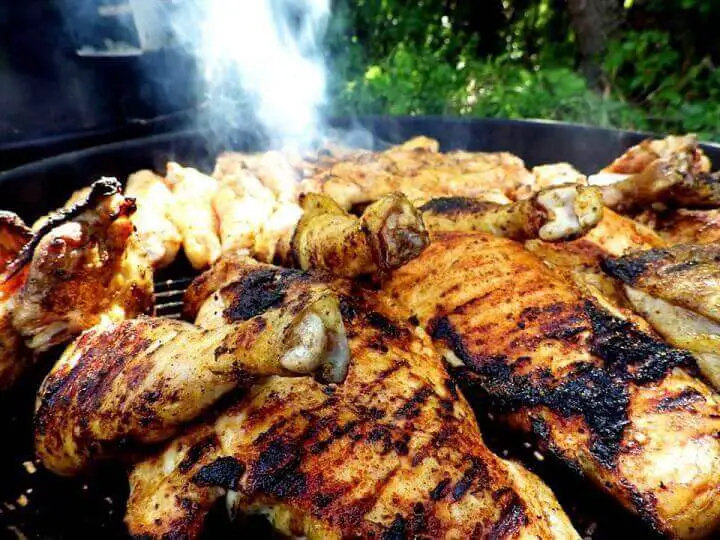
Heating

Meat On Grill

It would be great to know when the first food was cooked, but it’s quite likely it was long before written or even verbal communication. However, heating related to food preservation has less to do with cooking and eating more to do with killing bacteria and creating an environment that is not conducive to bacterial growth.

It all gets back to preventing bacteria from reaching that state of homeostasis where it gets just a little too comfortable in food and decides to stay for a long time.

Heating as a hurdling process is used a variety of ways including:

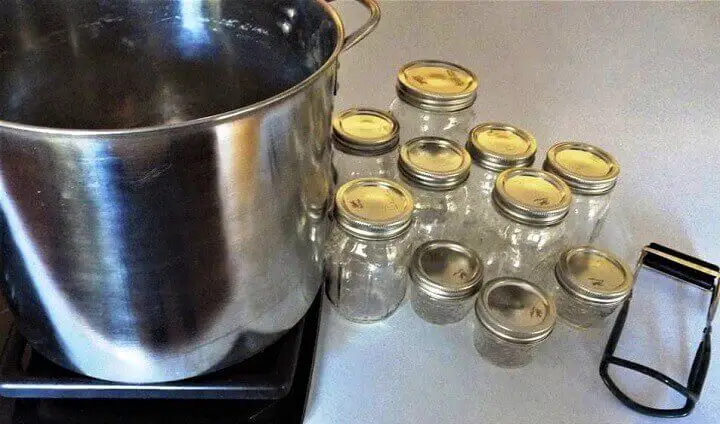
  • Hot water processing of canned foods to kill bacteria and fungus after it has been packaged, jarred or canned. Louis Pasteur discovered the process and it is often referred to as “Pasteurization.”
Pot and Canning Jars
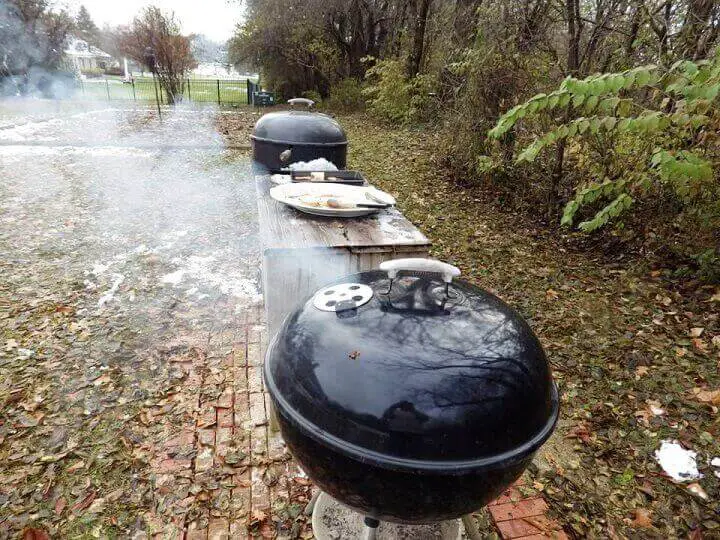
  • Smoking foods involves low-heat smoke to remove moisture and both kill and inhibit the growth of bacteria. Brining or salt curing is often a preliminary step, and the smoked food is ideally refrigerated or frozen to extend the shelf-life.
Smoking Food on Grill
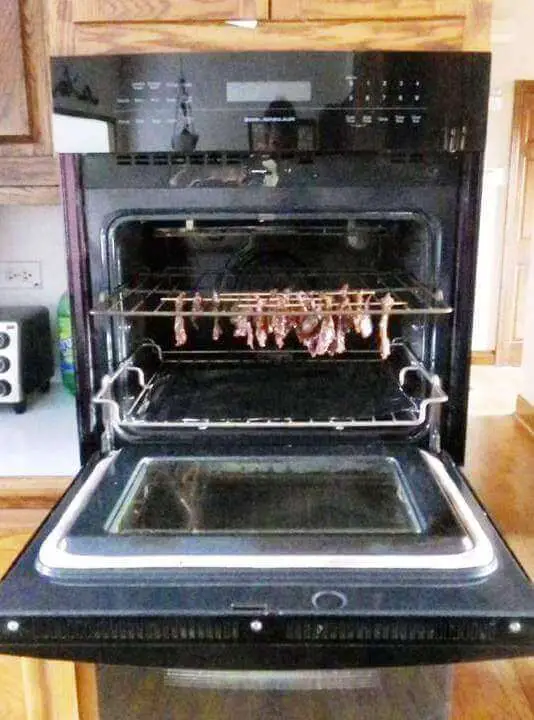
  • Low heat was and is still used as a drying method. Primitive people dried foods hung high over a small fire, while today we use ovens and food dehydrators. It’s another example of a preservation process that works on its own but works better to extend shelf life when combined with other processes.
Smoking Food in Oven

Hurdling is No Mystery

Anyone who has ever preserved foods in any way has probably engaged in various levels of hurdling. The key thing is to stop and think if you’re doing all of the possible steps to extend shelf-life and guarantee that any home-preserved foods are safe. If you’re tempted to use a single process for food preservation, it may be worth thinking about other things you can do to preserve the food and get those hurdles in place.

Shelf-life is important for any home preserved foods, but just as important is food safety. Hurdling is perhaps the best way to not only keep your home preserves longer but ensure that all of the foods you preserve and store are as safe to eat as you can make them.

Originally published on Homestead Survival Site.

You May Also Like:

The post Hurdling: A Food Storage Technique That Extends Shelf Life By Years appeared first on Urban Survival Site.


from Urban Survival Site