Submissions     Contact     Advertise     Donate     BlogRoll     Subscribe                         

Wednesday, September 30, 2026

Why I Regret Stockpiling These 21 Popular Items

My storage room had a graveyard section in the back corner, and it sat there for eleven years before I admitted what it was. Clearing it out took most of a Saturday, and I made two trips to the dump before the shelves were empty.

The strange part was that nothing back there had spoiled. The rice was fine, and the buckets were still sealed the way they arrived. So what I’d really been paying for all those years was the feeling of being ready, and that feeling never got tested once.

I’d take back twenty-one of those purchases today. A few of them still live in my pantry in smaller amounts, bought and stored a different way. But the rest went into the truck bed that Saturday, and I haven’t replaced a single one.

Then again, hauling everything to the dump wasn’t the smartest move either. Plenty of old stuff sitting in a garage becomes useful again in a crisis, and I covered the best examples in 7 Pieces of Junk That Could Save Your Life When SHTF. So before a clear-out pile goes into the truck, that list is worth a read.

21. Emergency Food Buckets

The sealed buckets sold as a month of food count their days in servings, and a serving is a lot smaller than a meal. So if you divide the calories on the side panel by the days promised, many of them land near 1,200 a day. That’s close to what a dieting office worker eats, and it won’t hold up anyone splitting wood in February.

On top of that, a good share of the pouches inside are drink mix and dessert, and the label still counts them as food. The sodium also runs high, so your water needs climb right when water gets hardest to find.

That’s why it pays to run the numbers before you order one. You can divide the total calories by the days claimed, then count how many pouches are real meals. After that, pricing the same calories in rice, beans, oats and canned meat usually shows the bucket losing badly.

Some decent buckets do exist, but they rarely come in the loudest packaging. Instead, you can buy each item yourself, but it pays to have a good plan first so you don’t waste money and time. For a more organized approach, I recommend The Lost Superfoods, a book that many of my prepping friends rely on. And if you don’t have it yet, it’s worth at least taking a look at the blog. You’ll find plenty of good advice there that you won’t come across anywhere else, whether in libraries or online.

LSI Claude Davis video ss

20. Freeze-Dried Meals I Never Taste-Tested

I bought a case of freeze-dried entrees because the reviews looked good, and I opened the first pouch four years later. Turns out my family couldn’t get past the first few bites. Worse, the salt coated your whole mouth, and my wife said the texture reminded her of wet paper.

Freeze-drying is good technology, but brands vary a lot in whether the result tastes like dinner. So make sure you cook one pouch and test it before you buy a whole case. 

19. Duplicate Survival Tools

In the early enthusiasm, I bought a survival axe, a folding saw, a machete and a multi-tool with its own saw blade. Meanwhile, a good felling axe and a bow saw were already hanging in my shop.

Turns out a lot of gear marketed to preppers is a weaker copy of tools made for farmers and tradesmen. And the prepper version usually costs more because of the branding. So checking the tools I already owned before ordering would have saved me a few hundred dollars.

Meanwhile, I tried to make sure I had exactly what I needed, but at some point it became overwhelming. It felt like I needed everything, and in the end it was like packing for a vacation. You bring 70% more clothes than you’ll ever wear. So you can skip that mistake by going through this list of 27 tools you need to have in your stockpile.

18. A Gas Mask Without Spare Filters or Fit Testing

Mine hung on a hook for six years with the original filter still sealed in its sleeve. That filter is the part doing the work, and it’s also the part that expires. So a mask with no spare filters on the shelf stops being useful the day that first one goes out of date.

Fit is the second problem, because the mask only protects you when the rubber seals tight against your face. A beard breaks that seal completely, and so does a strap adjusted wrong.

You can check it with a negative pressure test, which means covering the filter with your palm and inhaling gently. If the seal holds, the mask pulls in slightly and stays there. 

17. A Thousand Feet of Paracord

Paracord is cheap and useful, so it’s easy to buy far more than you’ll ever cut. I’ve gone through maybe sixty feet in a decade, and most of that went into tarp lines and a clothesline.

What I actually reached for were ratchet straps and a roll of baling wire. On top of that, bank line saw plenty of use, and it’s a thin tarred twine that holds knots well and costs pennies a foot. So two hundred feet of paracord covers a whole household, and anything past that just gets moved from shelf to shelf.

16. MREs Kept in Hot Storage

Military rations look like the serious choice, and that look is a big part of why people buy them. But per calorie, they cost more than almost anything else you could stock.

The shelf life printed on the box also assumes cool storage, and a shed in summer runs much hotter than that. Kept at 70 degrees, an MRE holds up for years, which is the number the box is built on. But at 100 degrees, an ordinary afternoon in a Texas shed, quality starts falling off within months. So the price of one case could put away far more food that stores better and tastes like something your family would pick on purpose.

15. Tactical Gear Bought for the Look

I owned a plate carrier, which is a vest built to hold armor plates, and I never wore it for anything harder than a photograph. The chest rig that went with it, a harness of magazine pouches worn on the front, saw even less use.

Some of this gear makes sense for people who train with it every month. But for everyone else it’s an expensive outfit, and it can send the wrong message to neighbors about what you’re planning. That’s why I’d rather have spent that money on water barrels or a hand pump for the well.

14. Potassium Iodide Tablets in Bulk

Potassium iodide, often sold as KI, fills your thyroid with safe iodine so it can’t absorb the radioactive kind after a nuclear release. But it does nothing against any other type of radiation exposure. On top of that, it only helps when taken within a short window around the exposure. And the tablets themselves last about five to seven years on the shelf.

A single bottle in the medicine cabinet costs little and isn’t a bad idea. Still, plenty of people I know bought whole cases in 2022, and that much KI reaches its expiration date long before they needed it.

13. One-Pound Propane Canisters

The little green propane cylinders are convenient, but they’re an expensive way to store fuel. A twenty-pound grill tank holds about as much as twenty of them for a fraction of the price. And it won’t rust through at the seam the way small canisters do when they sit on concrete.

An adapter hose costs about twenty dollars and lets a camp stove run straight off the big tank. I still keep a few small canisters in my truck, but everything at the house runs on twenty-pounders.

12. Whole Wheat Flour Instead of Wheat Berries

Whole wheat flour carries the same kind of oil in the germ, which is the part of the kernel that sprouts. So it goes bitter somewhere between six and twelve months, and a fifty-pound bag rarely gets used in time.

Wheat berries are the whole, unground kernels, and sealed in a bucket they keep twenty-five years or more.

On top of that, a hand mill costs less than a decent rifle scope. And grinding a cup at a time gives you fresh flour you can bake with this week.

11. Toilet Paper by the Closetful

I filled a whole closet with toilet paper in the spring of 2020, like half the country did. It all stayed usable, but that closet could have held three months of food instead. And toilet paper is mostly air by volume, so you give up a lot of shelf space for very little.

Two months’ worth makes sense for a household. After that, a stack of washable cloths and a lidded bucket handle the long stretch in a fraction of the space.

chemical free toilet paper

10. Fifty Pounds of One Single Food

Buying deep on one item feels efficient at the register, but it gets hard to eat by the third week. Disaster relief workers call this appetite fatigue, which is when people get so tired of the same food that they eat less or skip meals. And it hits children and older folks hardest.

My first year of storage was almost all rice and beans because they were the cheapest calories I could find. But what I should have added cost almost nothing, like bouillon, vinegar, hot sauce, canned tomatoes, dried onion, cumin and curry powder. With those on the shelf, the same two staples turn into a different dinner most nights of the month.

09. Canned Soup

Canned soup is mostly water, and water belongs in its own part of your plan. On top of that, a standard can runs 150 to 250 calories. So a family of four needs six or eight cans at supper to get anywhere near full.

Canned meat and dry beans, on the other hand, give you several times the calories per inch of shelf. That’s why I keep about a dozen cans of soup for sick days and give the rest of that shelf to heavier food.

08. Ammunition for Calibers You Don’t Shoot

I bought cases of ammunition during a panic because I figured it would always be good for trading. Turns out some of it was for calibers nobody in my house even shoots.

Ammunition is heavy and expensive to store in bulk. And handing it to strangers in hard times is a lot riskier than it sounds from a comfortable chair, because you may be arming the person who comes back for your supplies. So buying deep makes sense for the guns you actually own and practice with, and the panic buys can go.

07. Cases of Retail Bottled Water

Thin retail cases and flimsy gallon jugs are made to be used up within a week or two. But stored for years, the plastic lets water seep out slowly. Worse, thin plastic lets odors pass through, so water stored near the gas can ends up tasting like gas.

The same money buys food-grade barrels or rigid seven-gallon containers that hold several times the water in better shape. I keep mine up on wood pallets, which keeps them off the bare concrete and away from whatever’s in the slab. Still, even the biggest barrel runs dry eventually, so I added a DIY AWG to my setup. On humid days it keeps adding water while the barrels only go down.

06. First Aid Kits With No Trauma Supplies

At one point I owned four store-bought first aid kits spread between the house and our vehicles. Put together, they held several hundred adhesive bandages and a few gauze pads. But there wasn’t a single thing in them for a wound that bleeds hard.

What I needed first was a tourniquet, which is a strap you tighten above a limb wound to stop arterial bleeding. Next to it belongs hemostatic gauze, which is treated with an agent that speeds up clotting. Chest seals round it out, and they’re adhesive patches that cover a puncture wound in the chest so air can’t get in. Still, every one of those items needs a class behind it, because a tourniquet put on wrong can slip when it matters most.

On a homestead, the likely emergencies are chainsaw cuts and falls from ladders or equipment. And a box of cartoon bandages can’t do much for either one. That’s why every first aid kit should come with a manual, and the best one I’ve ever put my hands on is a doctor’s survival guide written for regular folks. After all, even the best supplies only help if someone in the house knows what to do with them.

05. Brown Rice Instead of White

Brown rice keeps its bran layer, and that bran is what makes it the healthier choice. But the bran also carries oil, and that oil turns rancid in about six months at room temperature.

White rice has the bran polished off, so there’s no oil left to spoil. That’s why it keeps for decades in a sealed bucket with an oxygen absorber, a small iron packet that pulls the oxygen out of the air inside. And the small nutrition gap matters very little next to a bucket of brown rice that’s gone bad.

04. A Generator That Never Gets Started

I’ve watched this happen many times over the years in my friends circles. The generator arrives and gets unboxed, and then it sits in the corner of the garage through four quiet winters.

But when an ice storm finally knocks the power out, the problems show up all at once. The gas in the tank has turned to varnish, a sticky residue that clogs the carburetor. Worse, the oil was never changed, and nobody knows which extension cord reaches the freezer. So the generator ends up as the heaviest useless thing in the garage on the worst night of the year. That’s why a generator needs a monthly run and a yearly service.

So, to make sure I’d never be stuck with a generator that won’t start, I decided to switch to a backyard generator that never needs gas. That way, there’s no fuel sitting in the tank to go stale.

03. Hybrid Seed Packets

Many seed packets on the hardware store rack are hybrids, and hybrid seed doesn’t grow true to the parent plant. So if you save seed from a hybrid tomato, next spring’s plants come up as a mix of the grandparent varieties. And many of them won’t give you anything worth eating.

Open-pollinated and heirloom seed produces the same plant year after year, which is the whole point of saving seed. Still, germination drops as seed ages. That’s why I keep mine in a sealed jar in the freezer and buy a fresh batch every few years.

These days, that batch also includes a set of apothecary garden seeds chosen by an herbalist I trust. So right next to the tomatoes and beans, I’m growing the start of a home medicine cabinet.

02. Dollar-Store Solar Lights

Cheap solar path lights run on small nickel-cadmium batteries that usually die after a season or two. On top of that, the plastic lenses cloud up in the sun until barely any light reaches the panel. So they work as yard decoration, but they’re miserable to rely on when the power goes out.

One rechargeable lantern with a lithium battery and a decent solar panel will outlast a whole box of them. And it puts out enough light to read by. As for the dead cells from those path lights, learning how to bring “dead” batteries back to life changed what I do with them. So instead of the trash can, that drawer of old cells now feeds spare power to every flashlight in the house.

01. Silver Bought at a High Premium

I paid heavy premiums on fractional rounds and commemorative coins during a stretch when I thought the dollar had months left. The premium is the markup over spot price, meaning the market value of the silver itself. And when you sell, that markup stays with the dealer.

Common bullion coins and generic rounds carry the smallest markup, and they’re the easiest pieces to trade. So if bartering in bad times is the reason to own metal, a fancy design on the face adds cost without adding any trading value.

After years of investing, I’ve come to see silver as valuable, and it has held its worth through plenty of economic crises in history. Still, there are good reasons not to put too much money into it. In fact, economist D. Bates argues there are better options, and he makes a strong case against both silver and gold in his latest book about the US economy and beyond. From there, it’s up to you to decide whether his argument holds up.

What I Would Have Done Differently 

Most of the items on this list have a place in a stockpile, and I’d still keep a few of them today. But I bought them in bulk and stacked them in the back, and that turned good gear into wasted money. Worse, a lot of it would have failed me in a crisis, because the flour went bitter and the bleach went weak long before I needed either one.

So if I could redo those eleven years, I’d buy the same categories in a smarter way. These are the habits I run on now:

  • Match quantity to shelf life. I figure out how much of something we go through before it expires, and I stop buying there. For bleach that means one jug every six months, and for whole wheat flour it means only what I’ll bake in three months.
  • Put a date on everything. Every bucket and jug gets the purchase date in marker on the lid. I also keep a master sheet and check it twice a year when the clocks change.
  • Spend on storage before quantity. Mylar bags, small packs of oxygen absorbers and buckets with gamma lids (screw-on lids that seal tight) protect what you already own. That money goes further than another fifty pounds of anything.
  • Store below 70 degrees wherever you can. An interior closet or a basement keeps food and medicine good for years longer. Meanwhile, a summer garage cuts that shelf life down to months.
  • Run the equipment under load. On the first Saturday of every month, I start the generator and plug the chest freezer into it for twenty minutes. And the stored gas gets stabilizer, then goes into the truck every six months so fresh fuel replaces it.
  • Put training on the same budget as supplies. A Stop the Bleed class costs little or nothing, and it makes the tourniquet in your kit worth carrying. On top of that, a practice afternoon with the gas mask or the grain mill shows you what’s missing while there’s still time to fix it.

That approach costs less than the way I started, and everything on the shelf still works when the power goes out. Of course, experience taught me which mistakes to avoid, but so did research, and a lot of it. Out of all the books, videos and blogs I went through, this one resource stood out, and I wish I’d had it when I started stockpiling.

It comes from an experienced prepper, so the whole course treats the house itself as the main prep. And reading his one-year stockpile plan felt like someone had walked through my graveyard corner with a clipboard. The MREs and emergency food kits I regret are left out entirely, and the plan builds around healthy food you’d actually eat.

What sold me was the section on how to inspect every prep you own in about an hour, since that’s exactly the habit I was missing for eleven years. On top of that, the checklists that come with it made it easy to spot what was still missing from my shelves. So if I could hand my younger self one thing before that first bulk order, it would be this smart bug-in course, along with a note to read the stockpile chapter twice.


You may also like:

empp banner us states post-empBest Canned Foods To Stockpile

How to Filter Water Using a Pot (VIDEO)

What Happens to Your Stockpile After 5 Years? (A Real-World Test)

How To Choose The Best Food Grade Buckets

5 Delicious Recipes Made with Ingredients that Last 100 Years

The post Why I Regret Stockpiling These 21 Popular Items appeared first on Ask a Prepper.


from Ask a Prepper https://ift.tt/xmprIbq

What To Plant In October

What To Plant In October-Zones 1-10

Do you think that because the air temperatures are cooling down, you can’t plant anything this time of year? While it may be true that most vegetables won’t have enough time to produce before the first frost hits due to cooler temperatures, there are plenty of things you can plant this month. If you’re unsure what to plant in October, keep reading to learn more about what to grow this month.

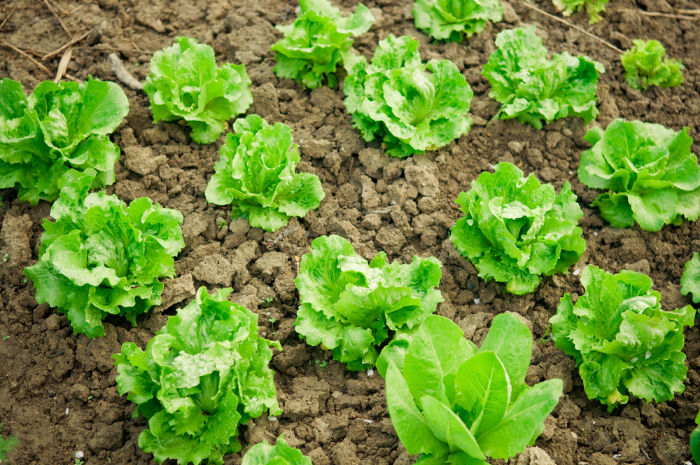
Grow Lettuce in October

Nowadays, the Zones are off due to the weather. We used to be able to base our planting on the Zones in our region. It’s a bit trickier now due to the excessive rainfall and fluctuating temperatures. We may have trouble growing things we used to grow, so keep an eye on the temperatures in your area. Don’t forget to check the soil temperature as well. Please continue teaching your family how to garden; it will be a valuable skill sooner rather than later, trust me.

I update this series every month of the year. This year, it seems even more important to grow our own food. We can do it in pots, buckets, raised gardens, and, of course, in the ground if you have a yard that will support a garden. If nothing else, get your soil amended now. It will be ready for a late-fall planting, giving you an early start so you’ll be well prepared for next year.

What is the Window for Planting in October?

The window for planting in October is approximately 6 weeks before your first frost. In my area, that date typically falls between September and October.

I highly recommend these for seedlings: CowPots and Organic Seedling Soil. This way, you plant your seeds and place the CowPots in your garden when the temperatures are correct.

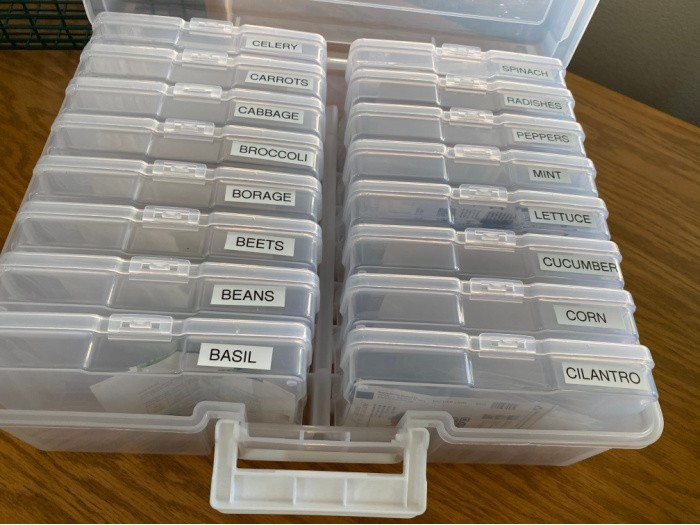
How I Store My Garden Seeds

Plastic Photo Container and Label Maker

What To Plant In October

Find Out Your Garden Zone and Frost Times

If you’re unsure of your zone or when your first frost is expected, you can check here for your zone information. All you need to do is enter your zip code.

What to Plant in October by Zone

I live in Zone 8a, so most of what I have written would apply to that Zone. So, I wanted to make sure my readers know what they can plant in their Zone. Below is a list of things you can grow in each zone in October!

Zones 1 and parts of 3

In Zones 1-3, October is the time to harvest. In fact, in some places, we’ve had blizzards in October in these zones. October is not the best time to begin planting outdoors. However, you can grow herbs, peppers, and tomatoes indoors.

Zone 3

In Zone 3, be cautious of frost. October can be your best friend or your worst enemy. Instead of planting things in October, you’ll want to harvest your crops. Crops you should be harvesting include:

  • Apples
  • Root Veggies

Zone 4

The weather is starting to deteriorate in Zone 4. This means it’s almost time to start wrapping up your outdoor garden. It is time to harvest your root veggies and apples. However, you can also plant:

Zone 5

October is the perfect time for Zone 5 growers to begin compost and mulching efforts. Again, there isn’t much you can plant in this zone in October, but you should harvest fruits. You can plant:

Zone 6

In Zone 6, it’s still a little late in the season to begin planting much. This is the perfect time to start tidying up your garden and adding to your compost pile. You can still plant:

  • Spinach
  • Lettuce
  • Kale
  • Broccoli
  • Carrots

Zone 7

Typically, you’ll want to plant more in September than in October if you live in Zone 7. However, you can still plant the following if you plant in early October:

  • Radishes
  • Garlic
  • Onions
  • Spinach
  • Carrots
  • Turnips
  • Broccoli
  • Kale
  • Lettuce

Zone 8

If you live in Zone 8, you are in luck because there are still various things you can plant in your garden this month. These include:

  • Lettuce
  • Cabbage
  • Spinach
  • Carrots
  • Beets
  • Peas
  • Strawberries
  • Garlic
  • Onion
  • Radishes
  • Turnips
  • Broccoli
  • Bok Choi
  • Bright Lights Swiss Chard

Zone 9

In this Zone, the weather is much the same as in Zone 8. This means you also have a few options for planting in this zone. Here are items that you can start planting this month:

  • Radishes
  • Spinach
  • Greens

Zone 10

If you live in Zone 10, it’s time to plant and transplant. Here are some things you can start doing in October

Transplant………..

  • Tomatoes
  • Eggplants
  • Peppers

Plant…………………

  • Beans
  • Root Veggies
  • Lettuce
  • Spinach

Why Plant in October?

In many states, you may still be feeling warmer weather in October. Fall is about to sneak up on you, but that doesn’t mean you don’t have time to plant more in your garden before winter hits. Here is why it’s essential to plant in October:

  • Autumn’s cooler weather is easier on plants and on you.
  • The soil is still warm, allowing the plants to take root, and healthy root growth ensures robust plant development.
  • Fall has more good days for planting than spring does.
  • You don’t have to wait for the soil to warm up.
  • It’s typically a great time to shop at the stores. This means you can get plants and seeds for a fraction of the cost.
  • Autumn showers are plentiful, so you won’t have to water your plants as often or as long.
  • Pests and disease problems are minimal in October.

What to Plant in October

If you haven’t planted year-round, you are in for a real treat! There are various plants you can grow even in October! Hopefully, you can find the seedlings for the plants you want at the garden centers near your home. Better yet, get some seeds and grow your seedlings.

Brussels Sprouts

Fortunately for you, Brussels sprouts grow best in cool weather. This means that October is an ideal time to plant them. They can sprout from the seed when soil temperatures range from 45°F to 85°F.

It is best to plan to plant them 6-8 weeks before your first expected frost. Gardeners in zones 9-10 can plant Brussels sprouts between October and December.

How to Grow Brussels Sprouts

Brussels sprouts are pretty easy plants to grow, especially in the fall. Here are some tips you need to know when planting Brussels sprouts:

  • Plant your sprouts 6-8 weeks before the first frost.
  • Select an area of your garden that gets full sun.
  • Make sure the soil is rich.
  • Sow seeds 3-4 inches apart. Or, if you have seedlings, plant them 18-24 inches apart.
  • Keep the plants watered so the soil remains consistently moist.
  • Fertilize your plants a month after planting with All-Purpose Food Granules.
  • You will want to keep an eye out for worms.
  • Brussels Sprouts can be a great choice if you want to have low-maintenance plants in your garden.

How to Harvest Brussels Sprouts

Your Brussels sprouts will ripen around 80-90 days after being planted. Snip off the sprouts when they are about 1 to 2 inches in diameter. The leaves will turn yellow as the plants mature. Store your unused Brussels sprouts in the refrigerator.

Bulbs

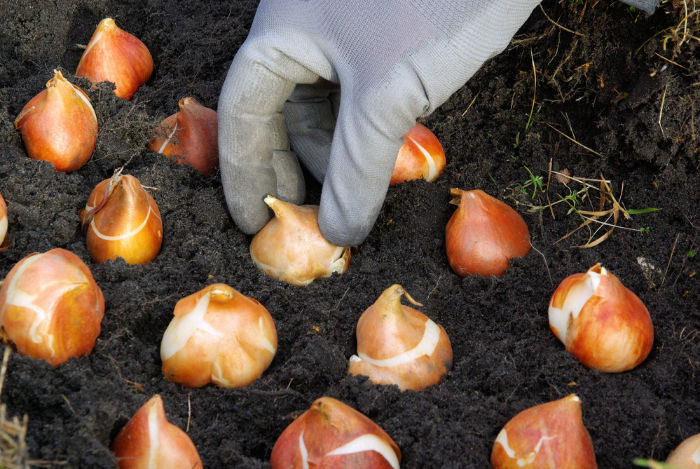
Did you know that most plants with bulbs can be planted in October? Bulbs actually need to be planted during the early fall so they have enough time to root and develop before spring. Let’s get busy and plant bulbs now so we can enjoy a plentiful harvest next year. Some people refer to these plants as spring bulb plants because they are planted in the fall to produce blooms in the spring.

The cold, dormant period from October to March provides these plants with the “chill hours” they need to thrive the following year. However, plant your bulbs at least six weeks before the first frost.

How to Grow Bulbs

Planting your bulbs is super easy, but remember that you won’t reap the benefits until the following spring. Here are some tips for planting and growing bulbs this fall:

  • Choose a spot with full sunlight. This means at least 6 hours per day.
  • Dig a hole 2-3 times deeper than the bulb is long. For a 3-inch bulb, the hole should be 6 to 9 inches deep.
  • Place your bulb on the ground, pointy side up (if there is a pointy side).
  • Plant in rich, well-draining soil.
  • Spread a layer of mulch to prevent small animals from digging up your bulbs.
  • Plant in groups instead of in straight rows.
  • Keep them watered well.

Carrots

The great thing about growing carrots is that they are fun and easy to grow during the fall months. Carrots grow best during fall and winter in zone 8. It takes 70-80 days to reach harvest.

How to Grow Carrots

Planting carrots is super easy. Here is how you can grow carrots during October with minimal effort:

  • Dig your carrot plot to a depth of 12 inches.
  • Make sure the soil is smooth.
  • Add a 1-inch layer of compost to the soil.
  • Plant your carrot seeds in the soil. Then, cover with a quarter-inch of soil.
  • Plant seeds in rows that are 3 inches apart.
  • Handle the water carefully, as you don’t want to wash away the seeds.
  • Keep your plot moist at all times.

How to Harvest Carrots

To determine if carrots are ready to harvest, dig around the base of the stems with your finger. This will tell you the size of the carrot.

Carrots should be ready for harvest about 8 weeks after planting. To avoid rotting, you’ll want to pick these fall carrots before the ground freezes.

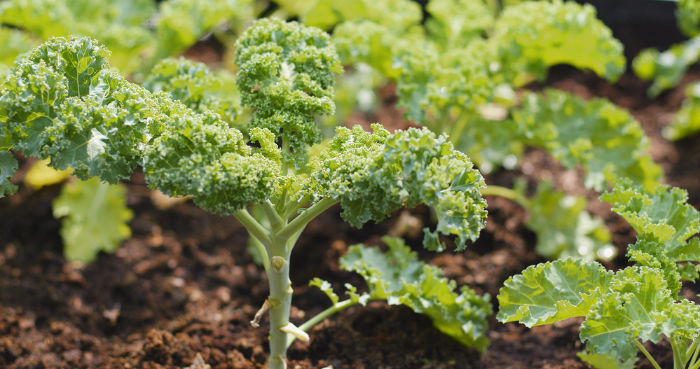
Planting Kale in October

Kale is best planted in the Autumn months so you can have delicious salads come harvest time. It is a hardy, cool-season plant that can even tolerate fall frosts.

How to Grow Kale

Growing kale is relatively easy. Here are some of my tips on how to grow kale in October:

  • Mix 1-½ cups of 5-10-10 fertilizer into the top 3 to 4 inches of soil.
  • Plant your seeds 1/4 to 1/2 inch deep.
  • Spread the seedlings 8-12 inches apart after approximately two weeks.
  • Water plants regularly, but don’t overwater them.
  • Place a heavy amount of mulch around the plants after the first frost.

How to Harvest Kale

Your kale plants can continue to produce leaves during the winter months. When Kale is ready to harvest, the leaves will be the size of your hand. To harvest, only pick about a fistful of leaves per harvest.

You want to avoid picking the terminal bud (located at the top center of the plant) to keep the plant producing more leaves. Kale can continue to grow until it’s 20 degrees outside.

Lettuce

Like Kale, Lettuce is a hardy plant that can grow well in the spring or the fall. The great thing about growing lettuce is that it is a super source of vitamin A.

How to Grow Lettuce

If you plan to grow lettuce in the fall, plant it eight weeks before the first expected frost. Lettuce can tolerate a light frost, which is beneficial. Here are some tips on growing lettuce in the fall:

  • Plant your seeds when the soil is above 40 degrees. They germinate best in temperatures between 55°F and 65°F.
  • Select a sunny spot to give your lettuce lots of sunlight each day.
  • Plant seeds in well-draining, tilled, and prepared soil. Feed the soil with composted organic matter.
  • Plant seeds 1/4 to 1/2 inch deep.
  • Cover seeds with 1/4 to 1/2 inch of soil.
  • Water the lettuce when you notice the leaves are wilting.
  • Mulch around the plants to preserve moisture.

How to Harvest Lettuce

For the best taste, harvest your lettuce when it has reached full size but is just before maturity. It’s best to harvest it in the morning before the sun has hit the leaves.

For Butterhead or Romaine lettuce, harvest by removing the outer leaves, digging up the whole plant, or cutting the plant an inch above the soil surface.

For Crisphead lettuce, you’ll want to harvest the outer leaves when the center is firm.

Radishes

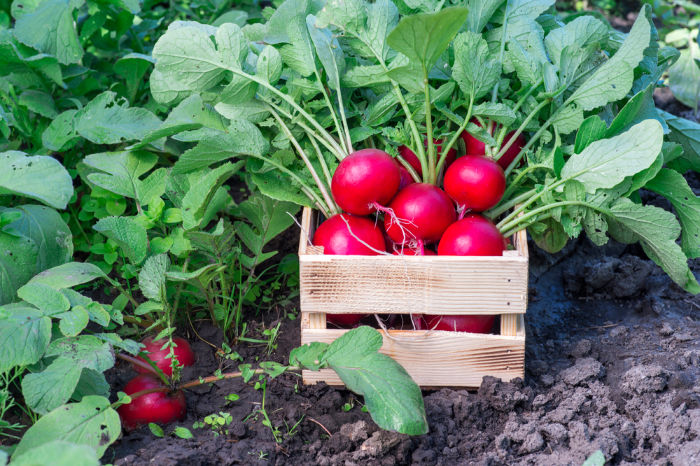
Radishes can be planted in the spring and the fall. They are hardy and easy-to-grow root vegetables that can be planted multiple times throughout the year.

How to Grow Radishes

Since radishes are among the easiest vegetables to grow, you won’t have trouble planting them in October. Here are some tips on increasing your radishes:

  • Plant your radishes in a sunny spot.
  • Radishes grow like carrots and should be planted in rich organic matter.
  • Plant seeds 4-6 weeks before the first frost.
  • Sow your seeds 1/2 to 1 inch deep. Plant them 1 inch apart.
  • Thin your radishes to about 2 inches apart when they are at least a week old.
  • Keep your soil evenly moist. However, don’t waterlog the plant.
  • Put a thin layer of mulch around the plants to keep them moist.

How to Harvest Radishes

Radishes proliferate. You can begin harvesting them three weeks after planting. You’ll want to harvest them when the roots are about 1 inch in diameter at the soil surface. Pull one out to test for size and maturity before harvesting them all.

Blueberries

Blueberries

Did you know blueberries are an ideal fall plant? Planting blueberries in the fall allows them plenty of time to develop their roots and ensures they get the right amount of chilling to set the fruit for next year.

However, you will want to ensure that you purchase the correct type of blueberry bushes for your specific climate zone.

Northern highbush varieties tend to perform better in northern states, whereas rabbiteye and southern highbush varieties are more suited to the southern regions.

How to Grow Blueberries

Blueberries are one of those fruits that need to be planted in late September or early October. Here are some tips for growing blueberries:

  • Select a sunny location for your blueberry bushes with well-drained soil.
  • You want to plant your bushes approximately 2 1/2 feet apart in diameter and 1 foot deep for each plant.
  • Remove 1/3 to 1/2 of the soil, add an equal amount of pre-moistened peat moss, and mix well to improve plant growth.
  • Place 2-4 inches of mulch around plants to help retain soil moisture and keep weeds at bay.

How to Harvest Blueberries

You’ll know it’s time to harvest your blueberries because they’ll turn blue! Don’t harvest blueberries until they have turned blue.

When blueberries are ready to harvest, they will fall from the branches into your hands without any tugging or pulling.

Flowers

In addition to food sources, several flowers can be planted in your October garden. Flowers that can be planted during the cooler Autumn weather include peonies and pansies.

You can also replant and divide Hostas during this time. Flowers can be planted in zones 5-10 this time of year.

If you need some sturdy garden gloves, I love these DIGZ Garden Gloves. They come in different sizes!!

Please Check Out What To Plant Each Month:

Final Word

Taking advantage of your garden year-round is the best way to achieve self-sufficiency. Not only is it a good idea to be self-reliant in case of emergencies, but using your garden to grow food also saves you more at the store! What do you plan to plant this October? Let me know in the comments below! May God bless this world, Linda

Copyright Images: Lettuce Depositphotos_150493086_S, Brussels Sprouts Depositphotos_29941119_S BY Pabkov, Bulb Planting Depositphotos_17989315_S By Kassandra2, Carrots Depositphotos_184398376_S By Chromorange, Kale Depositphotos_179513502_S BY Leungchopan, Fresh Lettuce Depositphotos_24718323_S By Viki2win, Radishes In A Wooden Box Depositphotos_273179738_S By Ostariyanov, Blueberries On a Bush Depositphotos_49942891_S By Zigzagmtart, Pansies Closeup Depositphotos_66197041_S By MatildaV

The post What To Plant In October appeared first on Food Storage Moms.


from Food Storage Moms

Super El Niño vs. El Niño: How to Prepare Your Home and Pantry

Rain Storms Happening At Sea

Super El Niño vs. El Niño: How to Prepare Your Home and Pantry! If you’ve been hearing the words “Super El Niño” on the news lately, you’re not alone. Weather forecasters have been talking about it for months, and for good reason. Government forecasters now say El Niño is already here and growing stronger, and they give it a better-than-90-percent chance of becoming a very strong event this fall and winter. That’s a big deal, and it’s exactly the kind of news that reminds me why we prepare in advance rather than scrambling at the last minute.

Today I want to walk you through the difference between a regular El Niño and a Super El Niño, what each one can mean for your family, and the practical steps you can take right now to get your home and pantry ready. No panic, no fear, just calm and steady preparation.

Rain Over Sea

What Is El Niño?

El Niño is a natural climate pattern that starts in the Pacific Ocean. It happens when the water near the equator in the Pacific becomes warmer than usual. That warm water changes how air moves around the globe, which in turn shifts where storms go, where rain falls, and where droughts settle in.

The name comes from Spanish and means “little boy.” Scientists officially call it an El Niño when that stretch of ocean remains about half a degree Celsius warmer than normal for several consecutive months. El Niño events usually occur every few years and can last anywhere from 9 months to 2 years.

A typical El Niño might bring your area a slightly wetter winter or even a milder winter. Many families barely notice it. That’s where a Super El Niño is very different.

What Makes an El Niño “Super”?

A Super El Niño is simply a very strong El Niño. Scientists measure El Niño strength by how much warmer-than-normal the ocean water is. When the water climbs about 2 degrees Celsius or more above average, the event moves into the top category, which forecasters officially call “very strong.”

You might be surprised to learn that “Super El Niño” isn’t an official scientific label. International weather agencies don’t use it in their formal classifications. It’s more of a nickname that meteorologists and reporters use to describe these rare, powerful events.

And they truly are rare. The most famous Super El Niño events in modern history happened in 1982 and 1983, 1997 and 1998, and 2015 and 2016. Some of you may remember the flooding, mudslides, and wild winter storms from the late 1990s. Those memories are a good reminder that a strong El Niño isn’t just a weather headline. It can affect homes, roads, crops, and grocery prices.

Why This Year Matters

The El Niño building right now is not ordinary. By the middle of September, ocean temperatures in the key monitoring area had reached about 3 degrees Celsius above normal, and they’re still climbing. Some forecasters believe there’s a real chance this could become the strongest El Niño ever recorded.

Forecasters also expect it to hang around for a while. Current outlooks show it staying firmly in place through the end of this year and lasting into spring of next year. That means we’re looking at a full winter season, and possibly more, of unusual weather.

Super El Niño vs. El Niño: The Key Differences

Here’s the simplest way to think about it. A regular El Niño nudges the weather. A Super El Niño pushes it hard.

With a regular El Niño, weather shifts are often mild and patchy. Some areas get a little extra rain, others stay a bit warmer, and plenty of places see no real change at all.

With a Super El Niño, those same patterns become stronger and more reliable. The more powerful the El Niño, the more likely the typical weather patterns are to actually show up. Instead of a slightly wetter winter, some regions may see repeated heavy storms, flooding, and mudslides. Instead of a slightly milder winter, other regions may see very little snow and a dry spring that stresses water supplies and gardens.

What a Super El Niño Could Mean for Your Region

Every El Niño is a little different, but most follow a familiar pattern across the United States during the winter months.

The southern states often get wetter. Forecasters are most confident about additional rain along the Gulf Coast and across parts of the Southeast, with the potential to extend into the Mid-Atlantic. California and the Southwest have also historically seen heavy rain and flooding during strong El Niño winters.

The northern states often get warmer and drier. The Pacific Northwest, northern Rockies, Great Lakes, and Ohio Valley may see less snow than usual. The Northeast also tends to get less snow during strong El Niño winters. Less snow sounds nice until you realize that snowpack feeds rivers, reservoirs, and wells come spring and summer.

There can also be a silver lining. El Niño tends to make it harder for hurricanes to form in the Atlantic during the summer months. Still, a quieter hurricane season never means zero risk, so keep your hurricane plans in place if you live along the coast.

How a Super El Niño Can Affect Your Grocery Bill

This is the part that matters most to those of us who care about food storage. A Super El Niño doesn’t just affect your backyard. It affects farms all over the world.

Strong El Niño years have historically brought drought to places like Australia, India, Indonesia, and southern Africa, while other regions deal with flooding. Those areas produce much of the world’s rice, wheat, sugar, cocoa, coffee, and cooking oils. When crops struggle, prices tend to rise on store shelves a few months later.

Here at home, flooding can damage fields and disrupt trucking routes, and dry conditions in the northern states can affect next year’s harvest. None of this means empty shelves are guaranteed. It simply means this is a smart season to stock up while prices are steady.

How to Prepare Your Pantry for a Super El Niño

Here are the steps I recommend for every family, no matter where you live.

  1. Stock up on staples now. Rice, beans, oats, flour, sugar, pasta, and cooking oil store well and are the items most likely to go up in price. Buy a little extra each time you shop.
  2. Add comfort foods and treats. Coffee, cocoa, and chocolate have all been affected by weather problems in growing regions. If your family loves them, tuck a few extra away.
  3. Store water. Aim for at least 1 gallon per person per day for at least 2 weeks. Flooding can contaminate local water supplies, and drought can lead to restrictions. You know my thoughts: Consider storing 4 gallons per person per day to stay properly hydrated, provide for cooking, allow you water for personal hygiene, and leave some for limited laundry chores.
  4. Rotate what you have. Use the oldest items first and replace them as you go. Stored food only helps if it’s still good to eat.
  5. Plan for power outages. Heavy winter storms can knock out electricity for days. Keep foods on hand that require little or no cooking, such as canned meats, peanut butter, crackers, and canned fruit.
  6. Think about your garden. If your region may face a dry spring, start planning for drought-tolerant varieties, mulch, and water-saving methods now.

How to Prepare Your Home

Food is just one piece of the puzzle. A strong El Niño winter can test your home too.

  1. Clean your gutters and downspouts so heavy rain drains away from your foundation.
  2. Check your sump pump and consider a battery backup if you have a basement.
  3. Look into flood insurance. Most regular homeowner policies don’t cover flooding, and federal flood insurance policies usually have a 30-day waiting period before they take effect. Don’t wait until the storms arrive.
  4. Keep sandbags or flood barriers on hand if you live in a low area or near a creek.
  5. Gather important papers like birth certificates, insurance policies, and medical records in a waterproof container you can grab quickly.
  6. Refresh your emergency kit with flashlights, batteries, a weather radio, first aid supplies, medications, and phone chargers.
  7. Have an evacuation plan. Know two ways out of your neighborhood and where your family will meet if you get separated.

Keeping Kids Calm and Involved

Weather news can feel scary for little ones. I’ve found that giving children a job makes a world of difference. Let them help pack the emergency kit, count cans in the pantry, or pick out a favorite snack for the storage bin. Explain El Niño in simple terms, like “the ocean is extra warm this year, so our weather might act a little different.” When kids see that the grownups have a plan, they feel safe.

Dangerous Heat Dome With El Niño Brewing

Flooding: Everything You Need to Know

Prepping for When Flooding Strikes

Final Word

A regular El Niño is something most families can live through without much thought. A Super El Niño deserves a little more attention. The good news is that you don’t need to be afraid. You just need to be ready. Stock your pantry, store your water, protect your home, and talk with your family about your plans. Small steps taken today will bring great peace of mind when the storms come.

Remember, preparedness isn’t about fear. It’s about loving your family enough to take care of them before trouble arrives. Let’s use this season wisely. Please remember the government won’t be able to deliver water or food to everyone, including your family, but you probably know that by now. May God bless this world, Linda

Copyright Images: Rain Storms Happening At Sea Depositphotos_119289166_S, Rain Over Sea Depositphotos_1179188_S

The post Super El Niño vs. El Niño: How to Prepare Your Home and Pantry appeared first on Food Storage Moms.


from Food Storage Moms

Water Mitigation: What to Do in the First 48 Hours After Water Gets In

A burst pipe at 2 a.m., a sump pump that quits during a storm, or floodwater creeping under the door all start the same countdown. Every hour water sits in your home, it soaks deeper into drywall, subfloor, insulation, and framing. What starts as a wet floor can turn into rotted wood, buckled flooring, and a mold problem that costs far more than the original leak.

Water mitigation is the work you do to stop that chain reaction. It is not about rebuilding your home, it is about limiting the damage in the first critical hours and days. Get this phase right, and restoration becomes cheaper, faster, and far less painful.

This guide walks through water mitigation the way a prepared homeowner should handle it. That means safety first, then stopping the source, documenting the loss, removing water, and drying the structure before mold gets a foothold.

What Water Mitigation Actually Means

Water mitigation is the immediate response to water intrusion. The goal is to reduce the amount of damage by stopping the water, removing it, and drying everything out as quickly as possible. It covers everything from shutting off a valve to pulling up wet carpet and running dehumidifiers around the clock.

Mitigation Versus Restoration

People often use these terms interchangeably, but they are different jobs. Mitigation is damage control, done right away to prevent the problem from getting worse. Restoration is the repair and rebuild work that comes after, such as replacing drywall, installing new flooring, and repainting.

Think of it like first aid versus surgery. Mitigation stops the bleeding, and restoration heals the wound. Skip the first step, and the second one gets much bigger.

Why the Clock Matters So Much

Water damage is time sensitive in a way most household problems are not. Wood swells, drywall softens, and adhesives let go the longer materials stay wet. The biggest threat, though, is mold.

According to the EPA’s guide to mold and moisture in the home, water-damaged areas and items should be dried within 24 to 48 hours to prevent mold growth. After that window, you are no longer just drying a house, you are cleaning up a biological problem. That is why every step in this guide is built around speed.

Know What Kind of Water You Are Dealing With

Not all water is equal, and the source changes how you handle cleanup. The restoration industry’s IICRC S500 standard sorts water into three categories based on contamination level.

Category 1: Clean Water

This comes from a sanitary source, such as a broken supply line, an overflowing sink with clean water, or a leaking water heater. It poses the lowest health risk, but it does not stay clean for long. Clean water that sits on a dirty floor or soaks into building materials can degrade into a more contaminated category within a day or two.

Category 2: Gray Water

Gray water carries significant contamination and can make people sick if they contact or swallow it. Common sources include washing machine or dishwasher discharge and toilet overflows that contain urine but no feces. It calls for more caution, protective gear, and thorough cleaning.

Category 3: Black Water

Black water is grossly contaminated and may contain sewage, bacteria, chemicals, and other harmful agents. Sewage backups, rising river water, and storm surge all fall into this category, and the CDC’s floodwater safety guidelines warn that floodwater can carry human and livestock waste, hazardous chemicals, and germs that cause wound infections and stomach illness. Porous materials touched by black water generally need to be removed and thrown out, and this is the category where professional help makes the most sense.

Safety First: Before You Touch Anything

The most dangerous part of water mitigation is not mold or rot, it is the hazards you cannot see when you first walk in. Rushing into a flooded room can kill you. Run through this checklist before you start moving furniture or grabbing a shop vac.

Kill the Power Safely

Water and electricity are a lethal mix. The CDC’s safety guidelines for reentering a flooded home say to shut off the main power only if you can reach it from a dry location. If reaching the panel means stepping into standing water, call an electrician or your utility instead, and never switch power on or off while standing in water.

Check for Gas

If you smell gas or suspect a leak, shut off the main gas valve if you can do it safely, then get out immediately. Do not flip light switches, use a lighter, or do anything else that could cause a spark. Stay out until the gas company or fire department tells you it is safe.

Watch the Structure

Sagging ceilings, bulging walls, and cracked foundations are warning signs. A water-soaked ceiling can come down without warning, especially with standing water trapped above it. If anything looks unstable or you hear shifting or cracking sounds, leave and get the building inspected.

Prevent Carbon Monoxide Poisoning

Power outages often push people toward generators and gas-powered pumps, and that is when carbon monoxide deaths spike. Never run a generator, pressure washer, or gas-powered pump inside a home, basement, or garage. The CDC’s carbon monoxide guidance calls for running generators only outdoors, more than 20 feet from any window, door, or vent, with a battery-powered CO detector inside the home.

Gear Up

Treat any water you did not personally see come out of a clean pipe as contaminated. The CDC’s guidelines for cleaning safely after a disaster recommend goggles, N95 respirators, heavy work gloves, and waterproof boots with steel toe and insole. If sewage is involved, rubber boots, rubber gloves, and goggles are the minimum.

Keep children, pets, and anyone with asthma, lung conditions, or a weakened immune system away from the work area.

Cleanup is physical work that injures people who push too hard. OSHA’s flood response guidance recommends teams of two or more for heavy or bulky items, and warns that standing in water cooler than 75 degrees Fahrenheit pulls heat from the body faster than it can be replaced.

Take breaks, stay hydrated, and watch for snakes and rodents displaced by the water. Wash exposed skin with soap and clean water, and clean any cuts that contact floodwater right away.

Step 1: Stop the Water at the Source

If the water is coming from inside the house, find the source and shut it down. Every adult in your household should know where the main water shutoff valve is located and how to turn it. Many homes also have individual shutoff valves under sinks, behind toilets, and at the washing machine hookups.

For roof leaks or storm damage, get temporary protection in place as soon as it is safe. Tarps over damaged roof sections and plywood over broken windows keep more water from entering while you work. If the source is outdoor flooding, you may simply have to wait for the water to recede before you can begin.

Step 2: Document Everything Before You Clean

This is the step people skip in the panic, and it costs them at claim time. Before you move, clean, or throw away anything, take photos and video of the damage. Capture wide shots of each room, close-ups of damaged materials, and the water line on walls and furniture.

FEMA’s guidance on documenting flood damage recommends recording serial numbers from appliances and electronics and keeping small samples of damaged carpet, drywall, or insulation. Save every receipt for supplies, equipment rentals, and emergency repairs. Once everything is documented, remove items that pose a health risk, such as spoiled food and moldy soft goods.

Call your insurance company as early as possible. Many policies expect you to take reasonable steps to prevent further damage, so starting mitigation promptly and documenting what you did can support your claim rather than hurt it.

Step 3: Get the Standing Water Out

Small Leaks and Shallow Water

For a few inches of water or less, a wet-dry shop vacuum is your best tool. Mops and towels work for small areas, but they are slow and leave moisture behind. Once power has been confirmed safe, a submersible utility pump can handle larger volumes much faster than a shop vac.

Use a wet vacuum only while materials are still wet. Running one over dry, moldy material can spread spores through the air.

Flooded Basements: Pump Slowly

This is where good intentions cause real damage. When the soil around your foundation is saturated, water pressure pushes hard against the outside of basement walls. The water inside the basement is actually pushing back and helping hold those walls in place.

Guidance from North Dakota State University Extension on flooded basements says not to rush pumping if you have more than 6 inches of water. Wait until the water around the house recedes, then pump out roughly one-third of the water per day. Pumping too fast can cause floors to heave and walls to cave in, which turns a water problem into a structural one.

Discharge the water well away from the house so it does not flow straight back toward the foundation. If you use a gas-powered pump, keep the engine outside and well clear of doors and windows.

Step 4: Remove What Cannot Be Saved

Wet porous materials hold water deep inside, where no fan will reach it in time. Carpet padding, upholstered furniture, mattresses, pillows, cardboard, paper, and stuffed toys that have been soaked, especially by contaminated water, usually need to go. Drywall and insulation that absorbed floodwater or sewage should be cut out and discarded.

A common approach is to cut drywall a foot or more above the visible water line, since water wicks upward into the gypsum. Pull out wet insulation behind it, and open up the wall cavity so air can reach the studs.

Before tearing into older homes, take extra care. The EPA’s flooded home cleanup guidance warns that older homes may contain lead-based paint, and that vinyl floor tile may contain asbestos. Do not disturb suspect materials yourself, and bring in a qualified professional to test and remove them.

Step 5: Dry the Structure Completely

Move Air and Pull Moisture

Once the bulk water and wet debris are out, drying begins. Open windows and doors when the outdoor air is drier than the indoor air, and set up fans to keep air moving across wet surfaces. CDC guidance recommends positioning fans to blow air outward through windows or doors so you are not pushing spores deeper into the house.

Dehumidifiers are the backbone of effective drying, especially in basements and humid climates. Run them continuously, empty them often, or set them to drain directly into a floor drain or sump. Pulling up baseboards and drilling small holes near the bottom of walls can help air reach trapped moisture inside wall cavities.

Be Careful With Your HVAC System

If your heating and air conditioning system took on water, do not turn it on until a qualified technician has inspected and cleaned it. A contaminated system can spread mold through every room in the house. Once it has been cleared, it can become one of your best drying tools.

Measure, Do Not Guess

Surfaces often feel dry long before the material underneath actually is. A simple pin-type moisture meter lets you check studs, subfloor, and drywall and compare them with dry areas elsewhere in the house. An inexpensive humidity meter helps too, since the EPA recommends keeping indoor humidity below 60 percent and ideally between 30 and 50 percent.

Do not close up walls, lay new flooring, or paint until readings confirm everything is dry. Sealing in moisture is one of the most common reasons mold returns months after the job looked finished.

Step 6: Clean and Disinfect

Scrub hard surfaces such as concrete, tile, metal, and sealed wood with hot water and detergent. Wash every surface that the water touched, including cabinets, fixtures, and the lower sections of walls you are keeping.

For flood cleanup, the CDC suggests a solution of 1 cup of household bleach per 1 gallon of water for surfaces with mold. The EPA notes that bleach is not needed for routine mold cleanup and that physically removing mold matters more than killing it. Whichever you use, ventilate well, wear protective gear, and never mix bleach with ammonia or other cleaners, since the combination produces toxic fumes.

Wash all clothing worn during cleanup in hot water and detergent, separately from your household laundry. Clean tools and boots before bringing them back into living areas.

For a deeper walkthrough of hazards such as generators, mosquitoes, and debris disposal after a flood, the EPA’s Flooded Homes Cleanup Guidance pulls together advice from EPA, CDC, FEMA, and HUD in one place.

When to Call a Professional

Plenty of water mitigation is well within reach of a capable homeowner, but some situations call for experienced help. Bring in a professional water mitigation company or remediator when any of these apply.

  • The water is sewage or floodwater from outside, which falls into the black water category
  • Mold growth covers more than about 10 square feet, the threshold the EPA uses for when homeowners should consider outside help
  • Water has spread into ceilings, multiple rooms, or deep into wall cavities
  • The HVAC system or ductwork took on water
  • You see structural warning signs, such as cracked foundations or sagging ceilings
  • Anyone in the household has health conditions that make exposure risky

When hiring, check licensing and insurance, ask for references, and get written estimates. Be wary of anyone who demands full payment up front or pressures you to sign immediately after a disaster.

Insurance Realities You Need to Know

Water damage coverage is full of traps. Standard homeowners policies generally cover sudden and accidental water damage, such as a burst pipe, but they usually exclude damage from gradual leaks and slow neglect. Read your policy before you need it, not after.

Flooding is its own category. The Ready.gov flood preparedness page makes it plain that homeowners insurance policies do not cover flooding. Flood coverage requires a separate policy, and a new policy typically takes up to 30 days to take effect, so waiting until a storm is forecast is too late.

Also know that standard National Flood Insurance Program policies do not cover mold damage in most cases. That makes fast water mitigation more than good practice, since it directly protects your wallet.

Build a Water Mitigation Kit Before You Need It

The middle of an emergency is the worst time to discover the hardware store is sold out of pumps and dehumidifiers. Put together a basic kit and store it somewhere that will not flood.

  • Wet-dry shop vacuum with spare filters
  • Submersible utility pump with enough discharge hose to reach well away from the house
  • One or two dehumidifiers and several box fans or air movers
  • Pin-type moisture meter and a digital humidity meter
  • N95 respirators, goggles, heavy work gloves, and rubber boots
  • Utility knife, pry bar, and drywall saw for removing wet materials
  • Heavy tarps, plywood, and a staple gun for temporary weatherproofing
  • Contractor trash bags, buckets, detergent, and scrub brushes
  • Headlamps and battery lanterns for working without power
  • Waterproof container holding insurance documents and a home inventory

If you rely on a generator to run pumps and fans during an outage, store fuel safely and plan exactly where it will sit outdoors. Know in advance how you will run extension cords without creating a shock or trip hazard.

Prevention: Stop the Next One Before It Starts

The cheapest water mitigation is the kind you never have to do. A few routine habits and upgrades stop most household water disasters.

Your sump pump is your basement’s first line of defense, so test it before the wet season. NDSU Extension’s sump pump guidance explains how to test the float and pump, check that the discharge pipe is clear and directs water away from the house, and consider a battery-powered backup pump for when the power fails.

Keep gutters and downspouts clear, and make sure the ground slopes away from your foundation. Inspect washing machine hoses, water heater connections, and supply lines under sinks every year, and replace aging rubber hoses with braided steel. Installing backflow or check valves on sewer lines can keep municipal sewage from backing up into your basement during heavy storms.

In cold climates, insulate exposed pipes and know how to drain your plumbing if you lose heat for an extended period. Inexpensive water leak alarms placed near the water heater, washer, and sump can alert you before a slow drip becomes a flood.

Common Water Mitigation Mistakes

The first mistake is waiting. Many people assume a wet carpet will dry on its own, but the padding underneath can hold water for days and grow mold long before the surface feels dry.

The second is pumping a flooded basement too fast, which can crack or collapse foundation walls. The third is running indoor generators or gas-powered pumps, a mistake that kills people after storms every year.

Other common problems include tossing damaged items before documenting them, ignoring the water category, and closing up walls before the framing is truly dry. Each one can turn a manageable loss into a costly, drawn-out ordeal.

Common Questions About Water Mitigation

How Long Does Water Mitigation Take?

A small clean-water leak caught quickly may dry out in a few days with fans and a dehumidifier. A flooded basement or multiroom loss can take a week or more of continuous drying, and longer if materials need to be removed and walls opened up. Drying is finished when moisture readings say so, not when the calendar says so.

Can I Do Water Mitigation Myself?

Yes, for small clean-water events that you catch early. Once sewage, floodwater, large areas, or structural concerns are involved, professional help becomes the safer and often cheaper choice in the long run.

Is Water Mitigation Covered by Insurance?

It depends on the source of the water and your policy. Mitigation after a sudden, covered event such as a burst pipe is often included, while flood damage requires a separate flood policy. Always document your work and keep receipts so you can support a claim.

When the Unexpected Happens, Skills Matter More Than Supplies

A flooded basement is a perfect example of why self-reliance is about much more than stockpiling emergency supplies. When something goes wrong, the people who know how to assess the situation, improvise with what they have, protect their home, and solve problems themselves have an enormous advantage.

That kind of practical knowledge was once commonplace. Previous generations knew how to preserve food without modern conveniences, collect and store water, repair everyday items, grow what they needed, cook from basic ingredients, and keep a household functioning when outside help was unavailable.

The Lost Skills of Independence brings many of those practical, nearly forgotten skills back together in one resource.

Inside, you’ll discover old-fashioned knowledge designed to help you become more capable and less dependent on fragile modern systems. Whether you’re preparing for an extended power outage, supply shortages, severe weather, or simply want to become more self-sufficient around your own property, these are skills worth learning before you actually need them.

You can buy another emergency gadget and hope it’s useful someday, or you can invest in knowledge that stays with you wherever you go.

Discover The Lost Skills of Independence and start rebuilding the practical self-reliance our grandparents took for granted!

Final Thoughts

Water mitigation comes down to a simple rule: act fast, but act safely. Shut off the power and the water, document everything, get the water out at the right pace, remove what cannot be saved, and dry the structure until the meter confirms the job is done.

The families who come through water damage with the least loss are the ones who planned before the pipe burst or the river rose. Build your kit, learn where your shutoffs are, test your sump pump, and review your insurance now. When the water comes, you will already know exactly what to do.


You may also like:

this house is actually the safest place on earthDoes Renters Insurance Cover Flood Damage? What Every Renter Needs to Know

The Pocket Soup that Saved the Lewis and Clark Expedition (VIDEO)

How to Sanitize a Camper Water Tank – The Complete Prepper’s Guide

What Is a Root Cellar? Everything You Need to Know to Build and Use One


The post Water Mitigation: What to Do in the First 48 Hours After Water Gets In appeared first on Ask a Prepper.


from Ask a Prepper https://ift.tt/v2PDpcZ