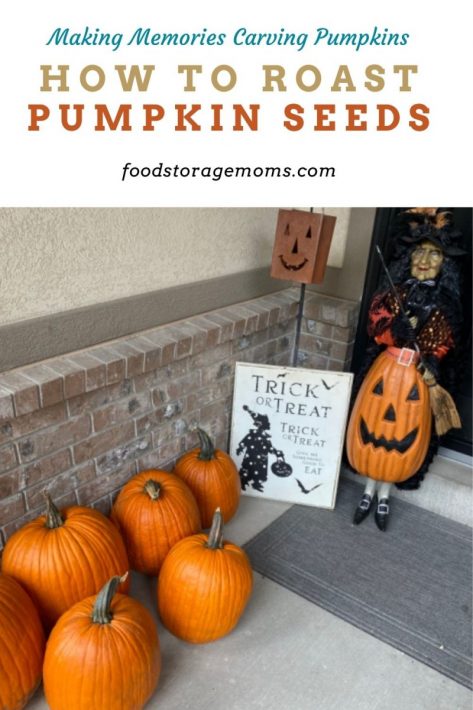
I love Halloween and this time of year! I have updated this post, and I am reposting how to roast pumpkin seeds! My family is carving pumpkins together this weekend, and I will show them how to roast pumpkin seeds again. It’s such a fun family tradition for everyone.
We love to carve pumpkins and display them on our porch, lit brightly as jack-o-lanterns, along with other fun lanterns, to create an inviting atmosphere! For many years, it has been extra special carving pumpkins because we bought our pumpkins from our grandson, Max’s Homestead Nursery, right here in Salt Lake City, Utah. He even delivers these beautiful pumpkins to us for our family gatherings.
Be sure to have a large plastic cover for your table to make cleanup easy after you carve the pumpkins.
How To Roast Pumpkin Seeds
Ingredients – How to Roast Pumpkin Seeds
- Pumpkins: Any variety of pumpkins will do! The larger the pumpkin, the more likely it is to contain a larger amount of pumpkin seeds! A pumpkin is a round winter squash with thick, smooth skin and a ribbed texture. It tends to be orange, yellow, or white. The pumpkin seeds and pulp are contained within its thick walls.
- Extra Virgin Olive Oil: Loaded with antioxidants and a heart-healthy fat; made from pure, cold-pressed olives; less processed than regular olive oil.
- All-Season Salt: This salt blend, along with black pepper, paprika, garlic, onion, and a bit of chili pepper, adds a savory kick to the pumpkin seeds!
- Garlic Salt: A combination of crushed garlic powder and table salt gives the pumpkin seeds a garlicky kick!
Kitchen Items You Will Need:
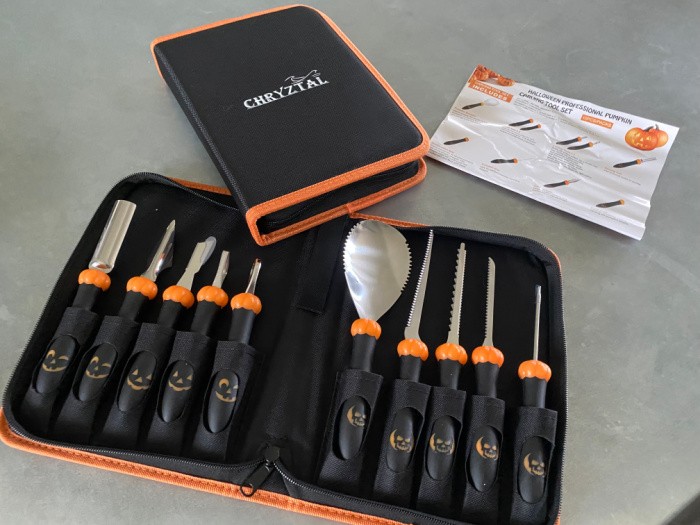
- Pumpkin Carving Knife
- Pumpkin Carving Set
- Large Cookie Sheet
- Large Plastic Disposable Tablecloth
- Colander
How To Roast Pumpkin Seeds
Pumpkin Carving Set
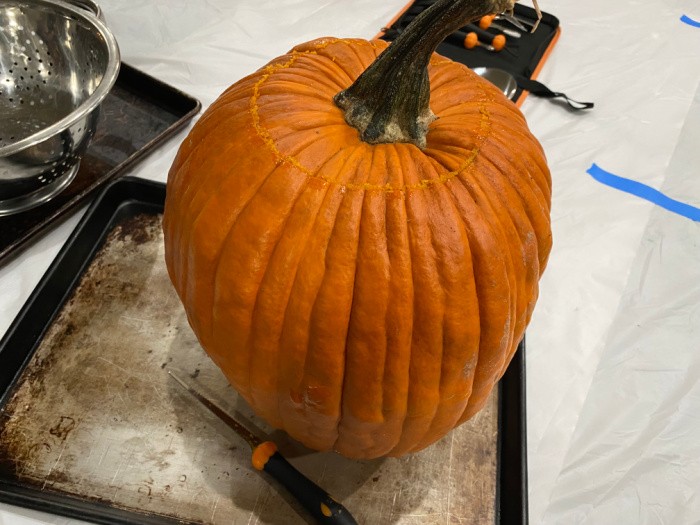
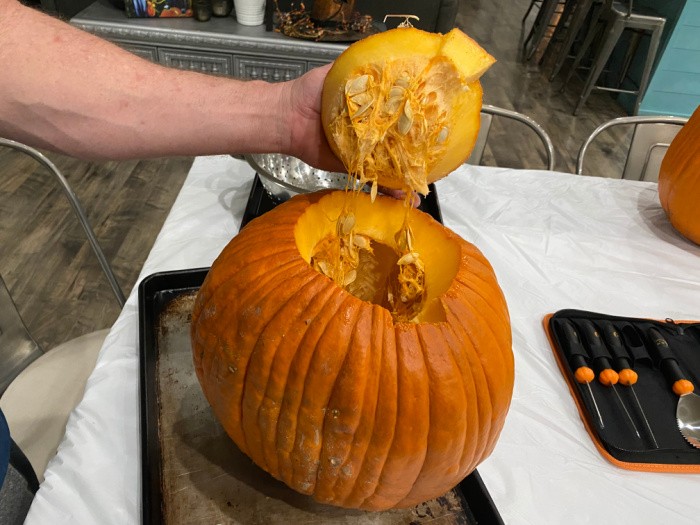
Step One – Gather Pumpkin(s) & Tools – Preheat Oven – Cut Around Stem
Gather your carving tools, pumpkin(s), and a disposable tablecloth. Spread the disposable tablecloth on the table to make clean-up a breeze. Place the pumpkin on a large cookie sheet. Cut around the pumpkin’s stem as shown below, and set the stem aside. Preheat oven to (350°F) = (176°C) degrees.
Step Two – Scrape Pumpkin and Gather Seeds.
Use a scraper to collect the seeds and place them in a bowl. Scrape and scoop out as many of the seeds as possible until the inside of the pumpkin is clean and smooth.
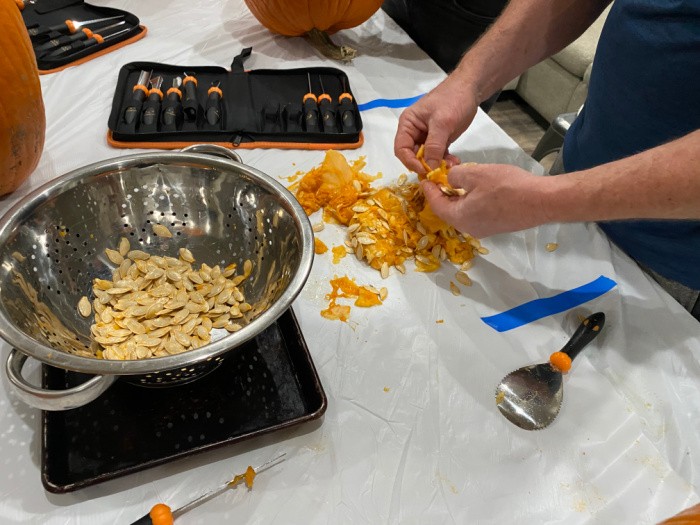
Step Three – Separate Pumpkin Seeds from Pumpkin Strings
Now we need to separate the pumpkin seeds from the pumpkin strings in the bowl with the seeds. Sometimes the pumpkin seeds are easier to separate from the pumpkin strings than at other times. This is why store-bought seeds are so expensive. But these are so delicious, you will never repurchase them!
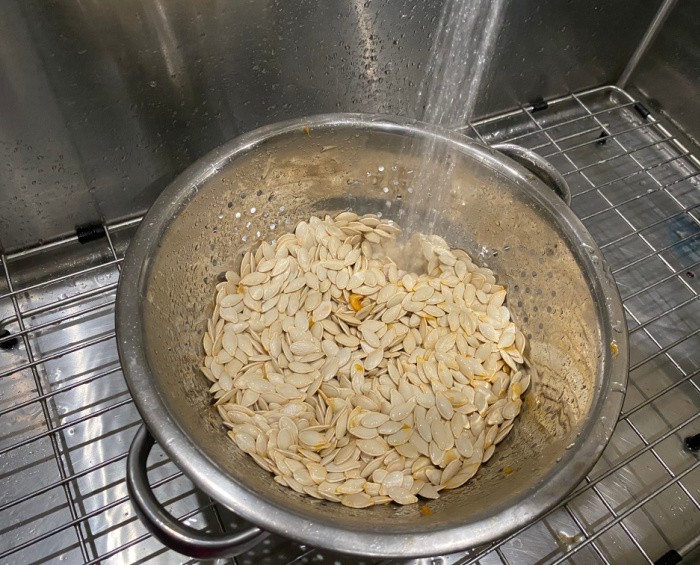
Step Four – Rinse Seeds Under Cool Water
Now we need to separate the pumpkin seeds from the pumpkin strings in the bowl with the seeds. Use a colander to rinse the seeds under cool water, then swish your hands around to remove the strings. The seeds will float to the top.
Be sure to look through all the seeds carefully, as you may find some that are damaged. Also, ensure they are clean enough to have no strings attached.
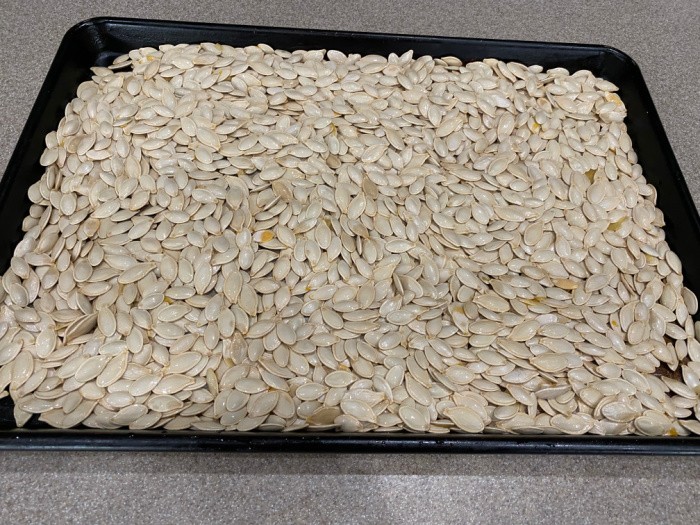
Step Five – Pat Seeds Dry – Let Seeds Dry Overnight
Now, pat the seeds dry as much as possible with a cotton towel or paper towels. Let them sit at room temperature overnight to dry completely before roasting.
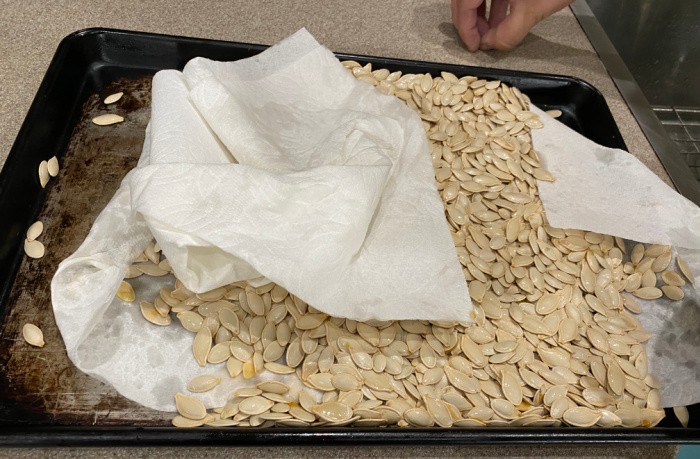
It helps to spread them evenly in a single layer on a cookie baking sheet so they will completely dry overnight.
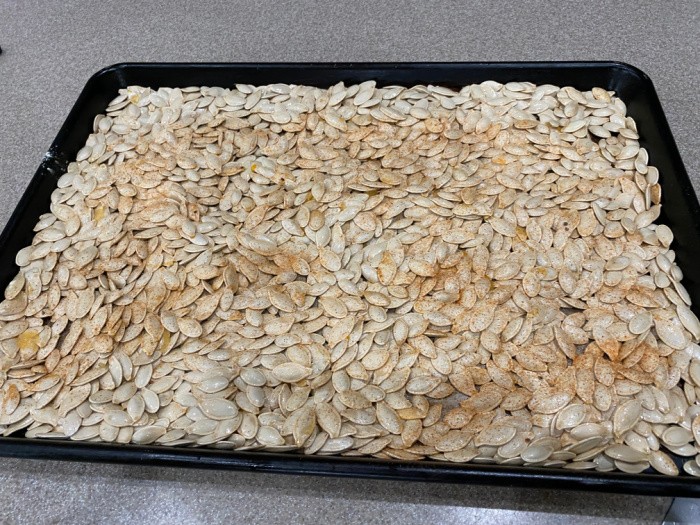
Step Six – Drizzle Olive Oil and Sprinkle Pumpkin Seeds with Seasonings
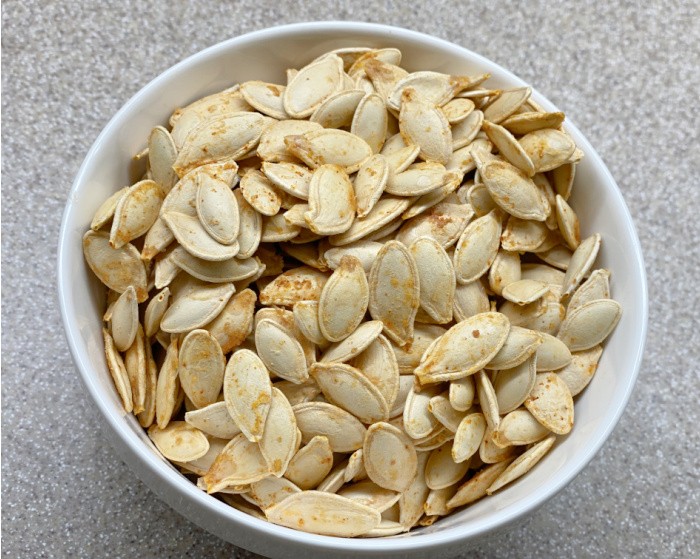
Drizzle a little olive oil (about 1-2 tablespoons), depending on how many pumpkin seeds you have. Today I sprinkled the pumpkin seeds with Johnny’s All-Season Salt and some Garlic Salt. Some people want a flavor similar to Chex Mix. If that is your desire, mix some Worchestershire sauce with garlic salt, then spread it on the roasted seeds. Others love the taste of cinnamon, brown sugar, nutmeg, or even curry powder. You can sprinkle yours according to your own taste preferences. Oh, you can smell the yumminess. I must say I love cooking and eating these seeds!
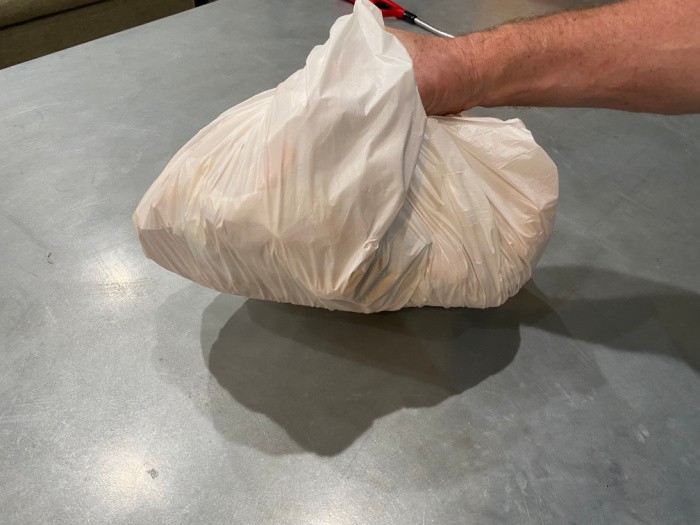
Step Seven – Gather the Tablecloth and Dispose of the Mess
I love using a disposable plastic tablecloth to gather up the mess and discard it. Disposable Tablecloth
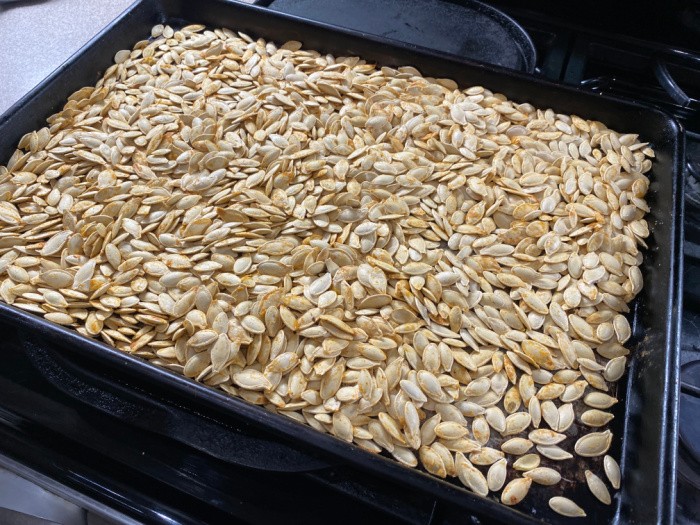
Step Eight – Bake for 15-40 Minutes at (350°F) = (176°C) degrees Degrees
In a preheated oven, bake for 15-40 minutes at (350°F) = (176°C) degrees. I like mine a bit crunchier, and so I had to keep checking the crispiness. Some recipes recommend cooking for a shorter period. Their seeds must have been drier than mine! They are so good!
Finished Product
How to Roast Pumpkin Seeds Recipe
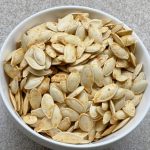
Roasted Pumpkin Seeds
Ingredients
- 1-3 Pumpkins
- 1-2 tablespoons olive oil
- All Season Salt (lightly sprinkle-before baking)
- Garlic Salt (lightly sprinkle-before baking)
Instructions
-
Gather your pumpkin(s), carving tools, and disposable tablecloth. Preheat oven to (350°F) = (176°C) degrees. Cover your table with a plastic disposable tablecloth for easy cleanup. Place the pumpkins on a cookie sheet and use a sharp knife to cut around the stem to remove it.
-
Use a scraper or spoon to scrape and gather the seeds to put into a bowl. Scrape out as many of the seeds as possible until the inside of the pumpkin is clean and smooth.
-
Now we need to separate the pumpkin seeds from the pumpkin strings in the bowl with the seeds. Sometimes the pumpkin seeds are easier to separate from the pumpkin strings than others. This is why store-bought seeds are so expensive. But these are so delicious, you will never buy them again!
-
Use a colander and rinse the seeds under cool water and swish your hands around to get rid of the strings. The seeds will float to the top. Be sure and look through all the seeds carefully because you may see some seeds that are bad and will not want have any strings left on them.
-
Pat dry the seeds as much as you can with a cotton towel or paper towels. Let them sit at room temperature overnight so they dry completely before you roast them. It helps to spread them evenly in a single layer on a cookie baking sheet so they will completely dry overnight.
-
Drizzle a little olive oil (about 1-2 tablespoons) depending on how many pumpkin seeds you have. Today I sprinkled the pumpkin seeds with two spices Johnny’s All Season Salt and some Garlic Salt. Some people want something like the Chex Mix flavor. If that is your desire, mix some Worchestershire sauce with garlic salt then spread it on the roasted seeds. Others love the taste of cinnamon, brown sugar, or even curry powder. There are so many options! Oh, you can smell the yumminess, I must say!
-
I love using a disposable plastic tablecloth to gather up the mess that’s left and discard.
-
In a preheated oven, bake for 15-40 minutes at (350°F) = (176°C) degrees. I like mine a bit crunchier, so I had to check the crispiness. Some recipes state that you should cook for a shorter period. Their seeds must have been drier than mine! They are so good!
How do I store the pumpkin seeds?
Storing pumpkin seeds is easy; you need to decide whether to store them before or after roasting. If you’re storing them before roasting, you should dry them out first before placing them in any container. The best way to dry them is to set them out on a dish towel or paper towels to remove excess moisture. Then, using a dehydrator or your oven, put them on a cookie sheet or tray and bake them at 250 degrees for about an hour. Once they are dry, you can put them in an airtight container.
If you plan to roast them and then place them in the airtight containers, follow the roasting instructions above before putting them in the containers. You may be surprised and have them eaten before you have a chance to place them in the containers, since they are so tasty!
Do I need to boil the pumpkin seeds before roasting them?
No, you don’t need to boil them. You need to ensure they are as clean as possible, so some people soak them to help remove the attached strings. I didn’t soak mine, but I did “scrub” them with my fingers before placing them on the cookie sheet to dry.
Can pumpkin seeds be eaten raw?
Yes, you can eat them raw. They do taste fine that way, but most people take the time to roast them with some seasonings to help bring out the unique flavor of the pumpkin seeds. I’m not sure how serious it may be, but studies have shown that SOME people have difficulty digesting the raw seeds, and they may cause stomach aches and diarrhea.
Why are pumpkin seeds sometimes bad for you?
The main issue with pumpkin seeds and your health relates to the seasonings. Although the seeds contain some sodium, adding seasonings tends to increase sodium intake, which is a leading cause of high blood pressure.
What is the best time to eat pumpkin seeds?
The roasted seeds are a good treat at any time. Most of us are tempted to eat between meals, often opting for foods that may not be healthy or align with our current diet goals. As with any food, eat this treat in moderation, and you may want to treat it as a dessert or small bedtime snack.
Do you have to soak the pumpkin seeds before roasting them?
In case you missed this post, How To Choose The Right Pumpkin. As mentioned above, I didn’t soak mine before roasting. It is a personal preference, but keep in mind that you’ll still need to dry them, which adds time to your preparation process for roasting.
What are some of the health benefits of eating roasted pumpkin seeds?
There are several health benefits associated with eating pumpkin seeds. First of all, they are rich in proteins and unsaturated fats. The body is best served when you get sufficient omega-6 fatty acids, and these seeds provide those.
Pumpkin seeds are also rich in zinc, calcium, iron, B12, and folate. They also contain beta-carotene, which the body converts to vitamin A, a nutrient known to benefit your eyes.
Some additional benefits include:
Due to the zinc and fiber content, the seeds have been shown to benefit pregnant women. They are also displayed to experience better digestive health. The nutrient magnesium can provide stronger bones, too.
Zinc can also improve fertility in men. Men, in particular, can benefit from the seeds, which can help lower their blood pressure. Men have also been shown to have improved bladder and prostate health.
All of us can benefit from lower cholesterol by seeing improved heart health, which is so important. We can all see reduced inflammation due to the antioxidants found in pumpkin seeds.
Finally, eating a moderate amount of seeds consistently has been shown to reduce the risk of certain cancers. What a blessing to have such a delightful treat that provides so many nutritional benefits and health advantages!
How can I serve roasted dry pumpkin seeds?
- Pumpkin seeds make a delicious salad topper on any salad of your choice.
- Added to homemade granola
- Sprinkled on as a garnish on pumpkin or squash soup
- As a scrumptious, crunchy snack
What type of pumpkins or squash are best to use when roasting pumpkin seeds?
I highly recommend using regular carving pumpkins, acorn squash, butternut squash, or delicata squash. Their seeds not only taste the best but are also plentiful, which is precisely what we’re looking for!
Looking for some additional pumpkin recipes or tips? Check these out!
- Pumpkin Cookies-A Family Favorite
- Homemade Pumpkin Roll Recipe
- How To Choose The Right Pumpkin
- Pumpkin Muffin Recipe-Only Two Ingredients
- Pumpkin Chocolate Chip Bars
- Pumpkin Pecan Chocolate Chip Cookie Recipe
Final Word
It’s all about creating memories and sharing the joy of teamwork with our kids and grandkids in the kitchen. Let me know how you roast your pumpkin seeds and which seasonings you like. If you have a different approach, I’d like to know about it. May God bless this world, Linda
The post How To Roast Pumpkin Seeds appeared first on Food Storage Moms.
from Food Storage Moms
No comments:
Post a Comment