Learn how to declutter every room in your home with simple, step-by-step tips. From the kitchen to the garage, here’s how to create a calm, organized space that saves time and reduces stress.
The less “stuff” you have, the less “stuff” you have to take care of and put away to keep your home tidy.
Why Decluttering Matters
Clutter doesn’t just fill your home—it fills your mind. When you walk into a space that’s tidy and functional, you instantly feel calmer and more in control. Decluttering also helps you find what you need faster, reduces cleaning time, and even saves money since you won’t buy duplicates.
Step 1: Start Small and Stay Consistent
Don’t try to declutter your entire home in one weekend. Start with one area, such as a drawer, shelf, or countertop, and work your way up. Set a timer for 15–30 minutes and focus on one small win at a time.
Step 2: Follow the Four-Box Method
Use four labeled boxes or bins:
- Keep: Items you use regularly and love.
- Donate: Items in good condition that someone else can use.
- Sell: Things with resale value.
- Trash: Anything broken, expired, or unusable.
This method prevents decision fatigue and keeps you on track.
Decluttering Room by Room
Living Room
- Remove old magazines, DVDs, and cluttered décor.
- Keep only meaningful items on display.
- Use baskets or bins for remotes and small accessories.
- Vacuum under furniture, dust loves to hide there!
Kitchen
- Toss expired pantry items and condiments.
- Donate duplicate utensils or small appliances.
- Organize cabinets by category (baking, snacks, canned goods).
- Keep only one set of dishes per person, plus a few extras for guests.
Bonus Tip: Create a “use first” bin in your fridge to reduce food waste.
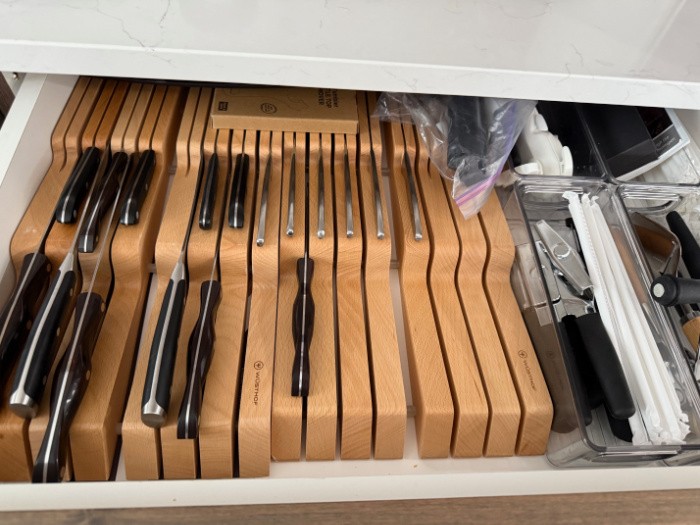
Organize The Kitchen Drawers
I love these Knife Holders for separating short and long, serrated, butcher, and other sharp knives.
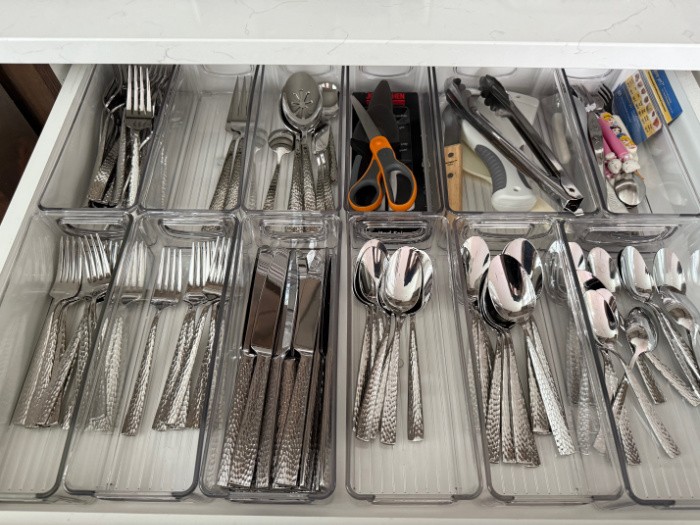
Organize The Everyday Silverware Drawer
I love these drawer organizers; they last for years: small IDesign Containers and the larger ones, Large IDesign Containers.
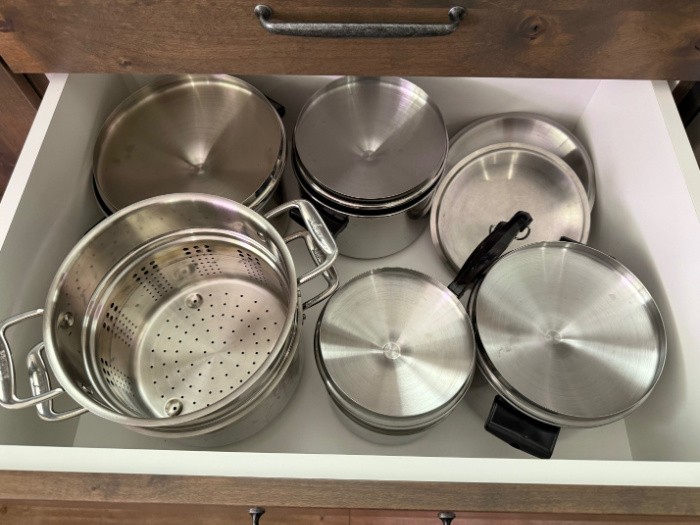
Organize Your Pots And Pans
Bedroom
- Go through your clothing, keeping only what fits and makes you feel confident.
- Store out-of-season clothes in bins or under-bed containers.
- Limit décor to a few calming, personal pieces.
- Clear nightstands and dressers for a peaceful sleep environment.
Bathroom
- Toss expired medications, makeup, and toiletries.
- Keep daily essentials in a small bin or drawer organizer.
- Use clear containers for cotton balls, Q-tips, and soaps.
- Wipe down shelves and drawers regularly.
Kids’ Rooms
- Sort toys by category and donate what you no longer use.
- Involve your children, teach them to let go of things they’ve outgrown.
- Use labeled bins or color-coded baskets for easy cleanup.
- Rotate toys seasonally to keep things fresh and manageable.
Closet
- Flip all your hangers backward; after six months, donate what you haven’t worn.
- Keep versatile pieces you love and that fit your lifestyle.
- Use vertical space by installing hooks, shelves, or stackable bins.
- Store accessories in clear containers or drawer dividers.
Garage or Storage Area
- Sort by type (tools, holiday décor, emergency supplies).
- Hang items on pegboards or use sturdy shelving.
- Label bins clearly for quick access.
- Dispose of old paint, chemicals, and batteries safely.
Step 3: Maintain Your Progress
- Do a quick 10-minute tidy-up daily.
- Follow the “one in, one out” rule: if something new comes in, something old goes out.
- Review each room seasonally to prevent buildup.
Step 4: Mindset Matters
Decluttering is more about your habits than your home. The goal isn’t perfection, it’s peace. By simplifying your surroundings, you’ll free up mental space and time for what truly matters: family, health, and preparedness.
Quick Recap Checklist
- Start small
- Use four decluttering boxes
- Tackle one room at a time
- Donate or sell what you don’t use
- Maintain your space weekly
30-Day Declutter List
One Small Task a Day to Simplify Your Home and Life
Tackle clutter in just a few minutes a day! Use this 30-day declutter checklist to organize every area of your home—one simple step at a time.
Week 1: Quick Wins (Start Small)
- Purse or Bag: Empty receipts, trash, and expired items.
- Junk Drawer: Toss what doesn’t belong and organize the rest.
- Kitchen Countertops: Clear unnecessary items. See if those small appliances can go in a deep drawer.
- Under the Sink: Check for leaks and toss old cleaners.
- Refrigerator: Remove expired foods and wipe shelves.
- Freezer: Label and organize what you’ll actually eat. Keep similar things together so they are easy to find when it comes to meal preparation.
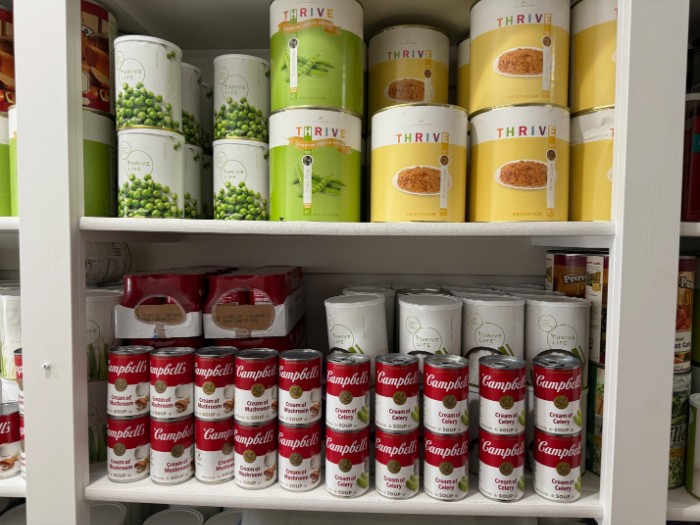
- Pantry: Toss expired goods and donate extras.
Week 2: Main Living Areas
- Coffee Table: Keep only décor or books you love.
- TV Stand or Media Center: Organize cords and remotes.
- Bookshelves: Keep favorites; donate the rest.
- End Tables: Clear old magazines, papers, or clutter.
- Entryway or Mudroom: Simplify shoes, coats, and keys.
- Mail Station or Desk Area: Sort and shred papers. Make sure you don’t have old bills hiding there.
- Decor Items: Keep only meaningful or timeless pieces.
Week 3: Bedrooms & Closets
- Nightstand: Remove unnecessary items and dust.
- Dresser Drawers: Fold neatly and remove duplicates.
- Closet -Tops: Keep what fits and makes you feel good.
- Closet – Bottoms: Donate those you never wear due to wear or size changes.
- Shoes: Keep only pairs that are in good condition.
- Jewelry & Accessories: Untangle and sort by use, like casual and dressy.
- Under-Bed Storage: Reassess what’s hiding down there.
Week 4: Bathrooms & Utility Spaces
- Bathroom Cabinets: Toss expired toiletries and meds.
- Linen Closet: Donate old towels or extra bedding.
- Laundry Room: Organize cleaners and supplies.
- Hall Closet: Streamline coats, bags, and gear.
- Home Office or Craft Area: File papers and organize supplies.
- Garage or Storage Area: Sort seasonal and unused items.
- Car: Clean out the glove box, trunk, and seats.
Week 5: Simplify & Maintain
- Digital Declutter: Delete old emails, apps, and photos.
- Sentimental Items: Keep only what brings joy or meaning.
Bonus Tips
- Set a timer for 15–20 minutes a day. I love this Minute Timer!
- Use four bins: Keep, Donate, Sell, Trash.
- Please take photos of sentimental items before letting them go.
- Reward yourself with a relaxing night once you finish!
How Do We Let Our Family Know Things of Value
Meta Description:
Learn how to help your family know what items, accounts, and possessions are truly valuable, both financially and emotionally. Use this guide to organize your legacy with clarity and peace of mind.
Why It’s Important to Share What Matters
Too often, loved ones are left guessing after someone passes, not just about finances, but also about sentimental treasures, passwords, and family heirlooms.
By clearly communicating what’s valuable and where things are located, you save your family stress, confusion, and even potential conflict.
This isn’t about focusing on loss; it’s about showing love through preparation.
Step 1: Identify What’s Truly Valuable
Start by walking through your home with a notebook or your phone and make a list of:
- Financial items: bank accounts, insurance policies, investments, deeds, wills.
- Physical valuables: jewelry, antiques, collectibles, tools, firearms, or silverware.
- Sentimental treasures: photo albums, letters, quilts, or family recipes.
- Digital assets: online accounts, passwords, social media, and cloud storage.
Tip: Sometimes, sentimental value outweighs monetary value; make note of both.
Step 2: Create a “Things of Value” Binder or Digital Folder
Keep all your essential information in one organized place. Label it clearly and tell trusted family members where it’s stored.
Include:
- Copies of legal documents (will, power of attorney, property deeds).
- Inventory lists of valuables with photos.
- Login info for digital accounts (store securely using a password manager).
- Notes explaining sentimental importance (why something matters).
- Contact information for financial advisors, attorneys, or executors.
Optional: Add a letter to your family about your wishes and values. This helps them understand the why behind your decisions.
Step 3: Label or Tag Important Items
If you have heirlooms, tools, or jewelry that you want certain people to have:
- Use tags, labels, or notes inside a keepsake box or drawer.
- Consider photo documentation: take pictures of items and write who they should go to and why.
- Apps like Sortly or Everplans can help digitally track possessions.
Step 4: Have the Conversation
This may feel uncomfortable, but it’s one of the greatest gifts you can give your family.
Gather everyone for an open, honest discussion about:
- What matters most to you?
- Where to find important documents.
- Your wishes for heirlooms, keepsakes, and property.
- Who to contact for financial or legal matters.
Keep it calm and factual; this is about making life easier for them later, not about possessions or power.
Step 5: Review and Update Regularly
Set a reminder to review your binder or digital file every year or after significant life events (such as a move, marriage, new accounts, or an inheritance).
Outdated info can confuse, so stay proactive.
Step 6: Add a Personal Touch
Attach handwritten notes or short letters to specific items.
For example:
“This quilt was made from your great-grandfather’s shirts. Please keep it in the family.” Small touches like these preserve your story, not just your stuff.
Letting your family know about things of value is an act of love, responsibility, and legacy. It spares them from uncertainty and ensures your intentions are honored.
Whether it’s through a binder, a conversation, or digital documentation, start today, your future self and your loved ones will thank you.
Quick “Things of Value” Checklist
- List all financial, physical, and sentimental valuables
- Create a binder or secure digital folder
- Label heirlooms and note who they go to
- Have a family discussion
- Review yearly for updates
Final Word
Letting your family know about things of value is an act of love, responsibility, and legacy. It spares them from uncertainty and ensures your intentions are honored.
Whether it’s through a binder, a conversation, or digital documentation, start today, your future self and your loved ones will thank you.
Decluttering your home doesn’t have to be overwhelming. When you tackle one room at a time, you’ll gain momentum and confidence. Remember, every small change adds up to a cleaner, calmer home that supports your lifestyle and future goals. May God bless this world, Linda
The post How To Declutter Every Room In Your Home appeared first on Food Storage Moms.
from Food Storage Moms
No comments:
Post a Comment