Estimated reading time: 6 minutes
Planter boxes are one of the best ways to grow food or flowers in small spaces, but buying them new can be expensive. Even the basic cedar boxes at hardware stores can run $40–$100 each, and they don’t always hold up well outdoors. That’s why more and more gardeners are turning to pallet wood. It’s strong, rustic, and often free.
If you’re willing to call around and ask, many stores will let you take old, beat-up pallets for free. That’s cheap lumber, perfect for quick garden projects. There are many tutorials on how to do this, but I particularly love this one from Our Kilkenny Homestead. You can watch it below, but I typed up detailed instructions based on the video.
Want to save this post for later? Click Here to Pin It On Pinterest!
What You’ll Need
- Flathead screwdriver
- Heavy-duty hammer (or pry bar/cat’s paw)
- Nail puller
- Drill/driver
- Exterior/deck screws (1¼” for slat-to-slat, 2″ for legs)
- Hand saw or circular saw
- Tape measure, pencil, square
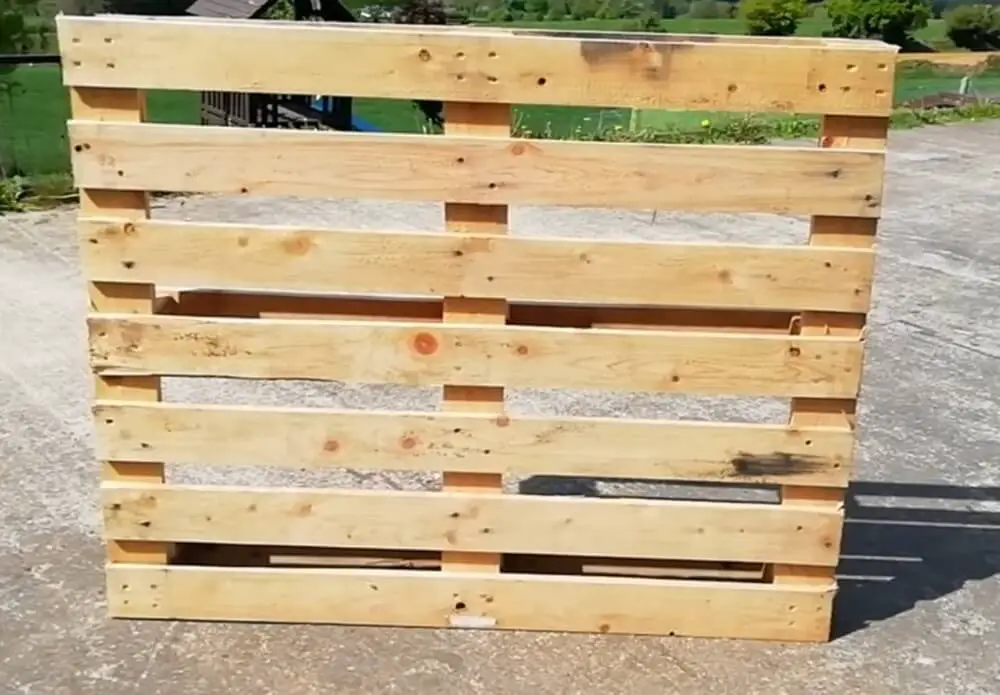
- 1 heat-treated pallet (look for the “HT” stamp; avoid “MB” and any oily/stained wood)
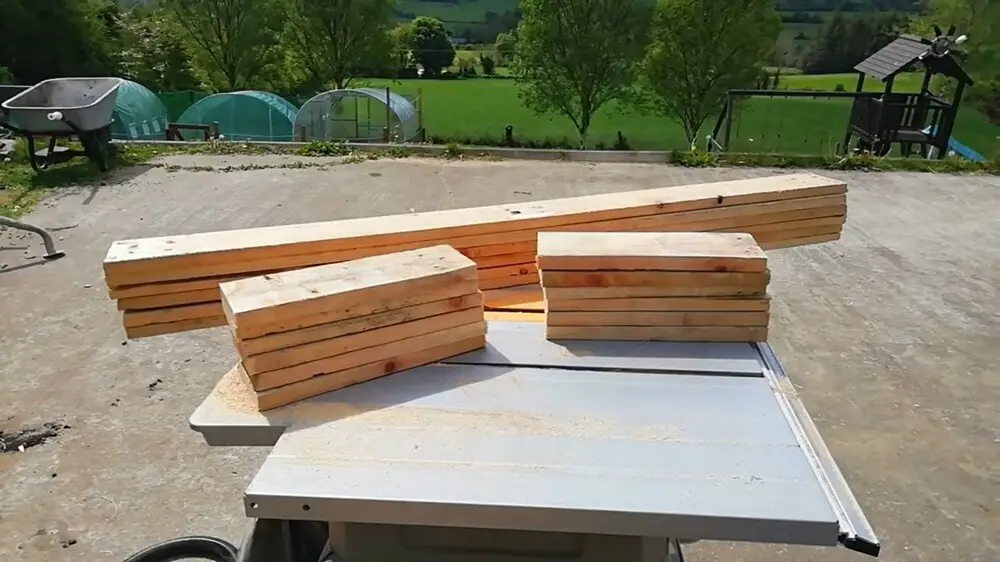
Cut List (adapt to your pallet)
Pallets vary, so measure yours first. You’re aiming for:
- Long planks: enough to make three identical rectangular “rings” (two long rails per ring)
- Quarter cuts: cut 3 planks into 4 equal pieces each (≈12 short pieces)
- You’ll use these for ring ends and for bottom cross-supports
- Set two aside to notch later
- Joiners (interior cleats): cut two pieces the height of three stacked planks (measure the combined width of 3 slats and mark/cut that length)
- Blocks (legs): use 4 of the pallet blocks for legs
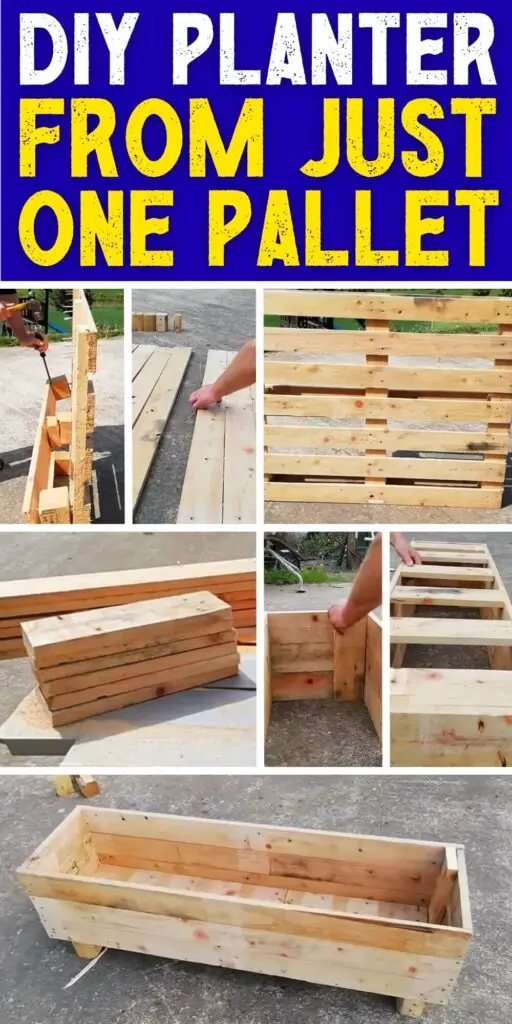
Instructions
1. Break Down the Pallet
- Carefully remove the bottom sections: the three underside boards and the six blocks they’re attached to. Use a flat screwdriver to start gaps; drive the hammer/pry bar to lift.
- Tap nails back out and remove: separate the top planks from the three cross-stringers.
- Slowly work the planks free with your screwdriver/hammer. Pull or cut any stubborn nails. For stubborn nails, use end-cutting pliers or some type of nail puller to grip the head and rock the tool against the wood to pry them out.
Tip: Work close to the nails to reduce splitting. If a plank starts to crack, flip and pry from the other side.

2. Lay Out and Mark
- Use 3 planks for each side of the planter height (you’ll stack three “rings”).
- Mark a short plank to make a joiner: lay three planks edge-to-edge, measure that combined height on a spare plank, and mark two pieces. Those will be your interior joiners that tie the stacked rings together.
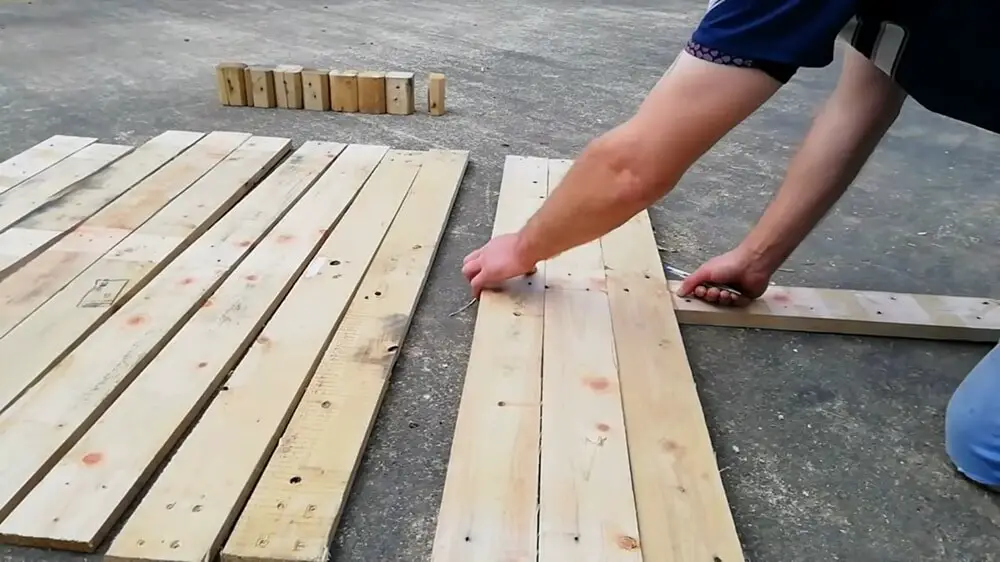
3. Make the Quarter Cuts
- Cut 3 planks into quarters. You’ll use these short pieces to:
- Cap the ends of each ring (two per ring) and
- Act as bottom cross-supports (you’ll have extras).
- Set two quarter pieces aside to notch later (they’ll intersect the joiners).
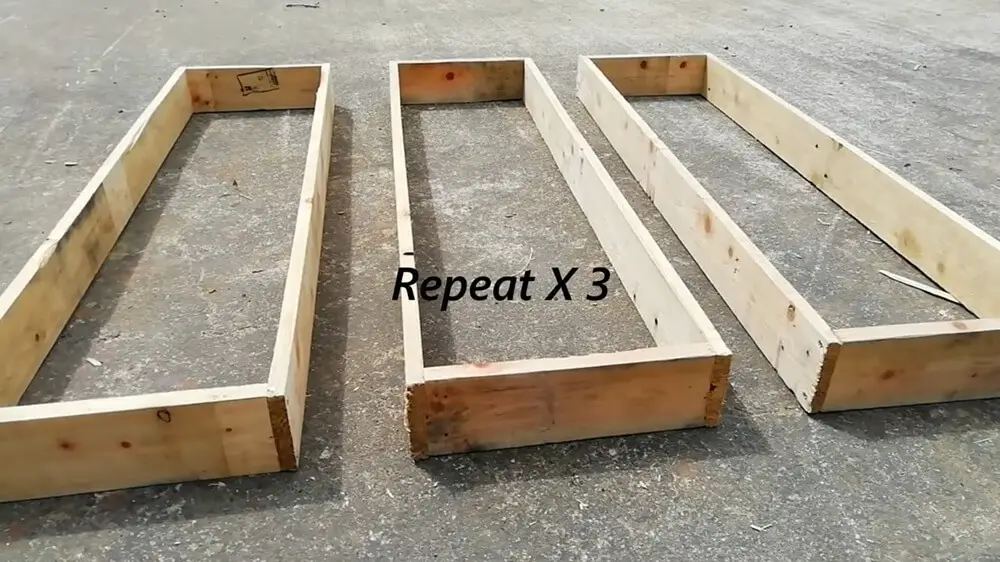
4. Build Three “Rings”
- For each ring: attach two quarter pieces to the ends of two long planks to form a rectangle. Pre-drill and use 1¼” screws.
- Repeat 3 times so you have three identical rings.
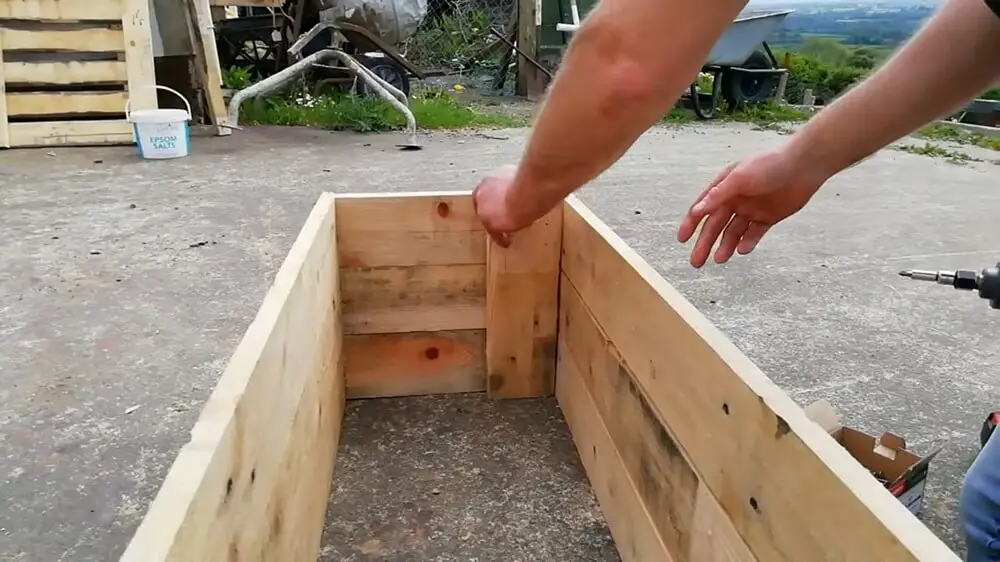
5. Stack and Connect With Joiners
- Stack the three rings into a tall box.
- Slide the two joiners inside, centered along the long sides (not at the corners), flush with the top.
- From the outside, screw through each ring into the joiner to lock the stack together. You’ve now tied all three rings into one rigid planter body.
- Why the joiners? They act like interior cleats, giving the thin pallet slats real strength and giving you something solid to screw the bottom into.
6. Add Bottom Cross-Supports (Quarter Cuts)
- Flip the box upside down.
- Attach 6 quarter-length pieces across the bottom as cross-supports (perpendicular to the long sides). Space them to leave 5 large gaps.
- Where a support crosses a joiner, notch those two supports so they sit flat around the joiner. Screw from the outside into the ends of each support.
- Tip: A quick notch is easy with a hand saw + chisel or a multi-tool.

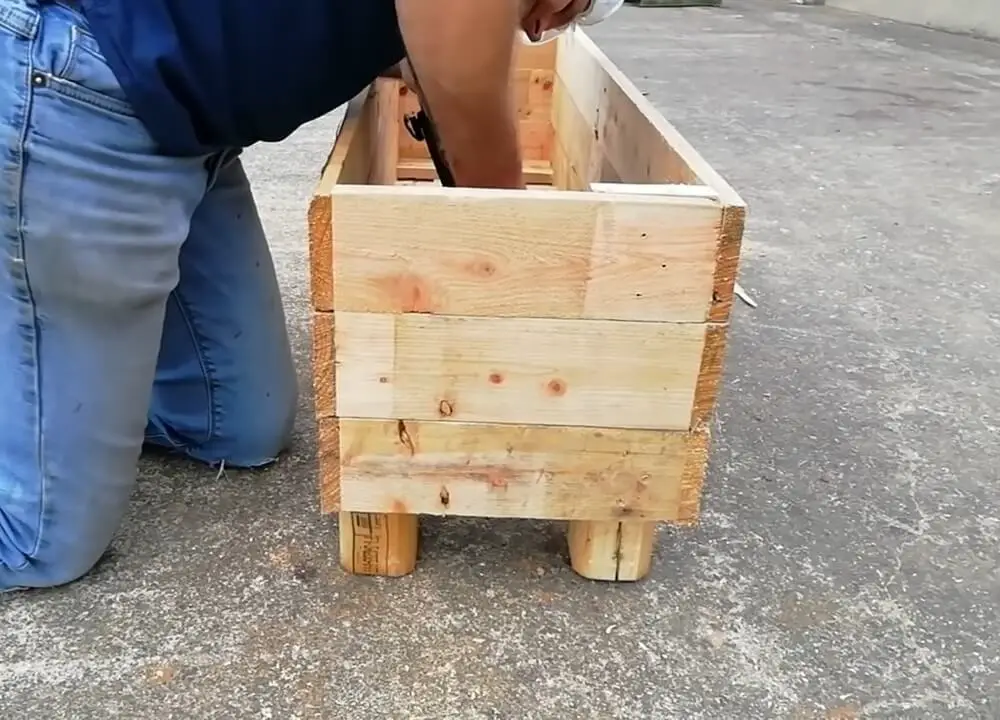
7. Add Legs (Blocks)
- Use 4 pallet blocks as legs. Screw them on from inside the planter into the cross-supports and lower ring.
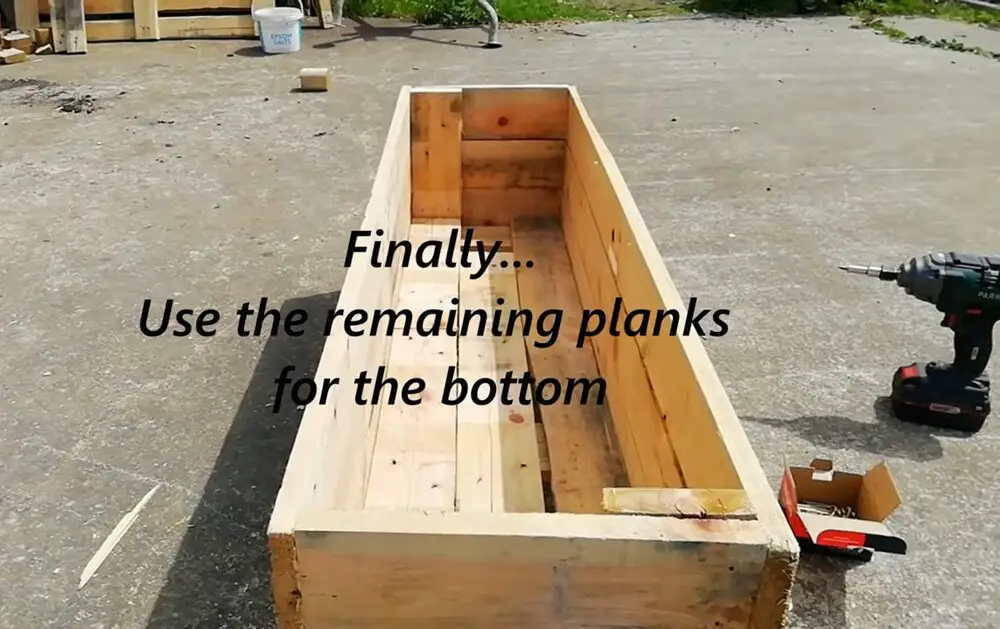
8. Deck the Bottom
- Lay two long planks lengthwise on top of the cross-supports; push them tight to the joiners.
- The third long plank, so fill the gap with an extra cutoff. Screw everything down.
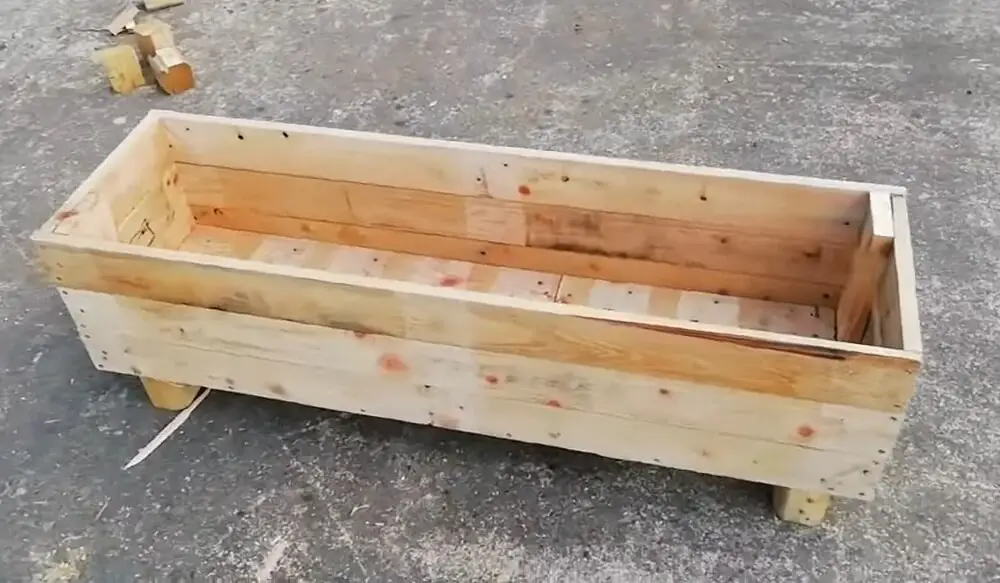
And that's it! If you want, you can sand the sharp edges and seal it with raw linseed or tung oil. I also recommend lining it with landscape fabric before filling it with soil.
Like this post? Don't Forget to Pin It On Pinterest!
You May Also Like:
The post DIY Planter from 1 Pallet appeared first on Homestead Survival Site.
from Homestead Survival Site https://ift.tt/LOfqeBA
No comments:
Post a Comment