By Timi Schmidt

Are you a beginner chicken owner? Or just looking for a safe way to allow your chicken to get that much-needed roaming time? Whichever category you belong to, this article will help you in creating a chicken run from scratch – no need to spend a fortune in getting the experts involved! This step-by-step guide by Wire Fence will help you achieve an easy and practical chicken run using only a couple of tools. So let’s get started!
You might also enjoy: Raising Chickens: It Really CAN Be All It’s Cracked Up to Be
What you’ll need to build a chicken run:
Tools:
- Shovel
- Hammer
- Wire Cutters
- Saw
- Nails/Screws
Materials:
Step 1
In order to get started, you need to do some planning first. It’s important to take into account the number of chickens you have, as you need to have at least 1 square meter per bird. The run also needs to be attached to the chicken coop itself for chickens to have free and safe access to it. By keeping these in mind, you should be able to calculate what size your chicken run will need to be.
Step 2
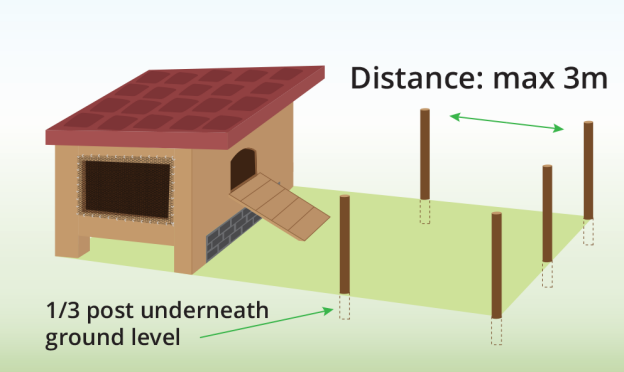
Now that you have a size and shape in mind, you can start positioning your posts. You will need to dig holes at even distances (approximately 2 meters) at the perimeter of the area. After you decide where you would prefer the gate to be, make sure to place two posts closer together to mark its place.
Start hammering the posts in the holes – make sure you hammer them at least 30 centimeters deep into the ground.
Optional: using gravel or concrete to set the posts into the soil will make them sturdier and less likely to move over time.
You might also enjoy: Everything You Need to Know About Raising Baby Chicks on a Budget
Step 3
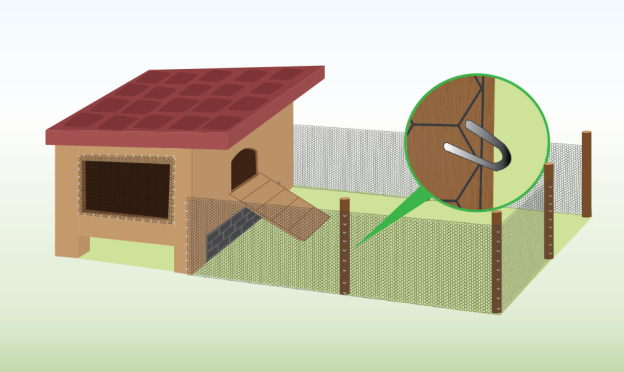
Once you have all the posts in place, it’s time to attach the chicken wire to them using staples. Make sure that you staple the mesh every 15 centimeters, securing it tightly to the posts. Ensure that the wire is also attached to the chicken coop itself. Don’t forget to leave the area for the gate uncovered.
Step 4
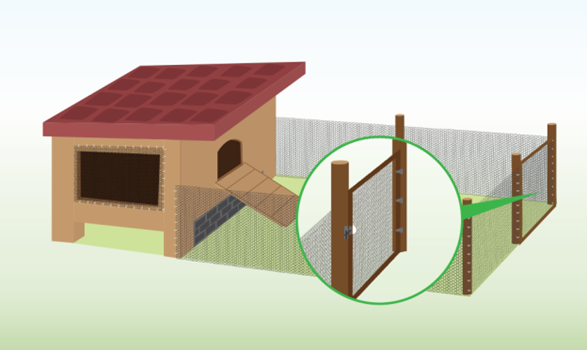
The next step is placing the gate. You can create a DIY gate by creating a wooden frame of the desired size and attaching the chicken wire to it with staples. Use three gate hinges to hang the gate, then attach a latch on the outside. Don’t forget to create a hole beside the latch in order to be reachable from inside the chicken run as well.
If you opt for a pre-made gate, make sure that the measurements match your project and simply attach it to the posts.
(Speaking of food, do you know how to build a 3-layer food storage plan? Our free QUICKSTART Guide will show you how.)
You might also enjoy: What Did People Feed Their Chickens Before Commercial Chicken Feed?
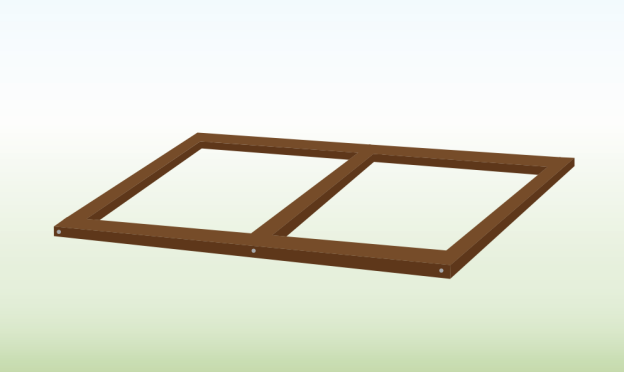
Step 5
Now your chicken run is functional – however, you also need to make sure that it’s keeping your chickens safe from predators, such as foxes. In order to do this, the next step is to build a frame to cover the chicken run.
Cut the wooden planks to the appropriate size using a saw. You should be using a minimum of four pieces of planks, but you can make it sturdier by using more. Join the planks together using nails/screws.
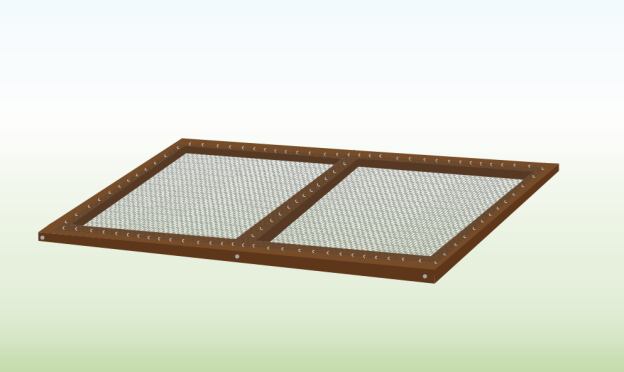
Step 6
Once the planks are joined together, and your frame is ready and sturdy, it’s time to attach the chicken wire to it. Staple your chicken wire at distances of approximately 15 centimeters. If you have more planks, make sure to staple the mesh to each.
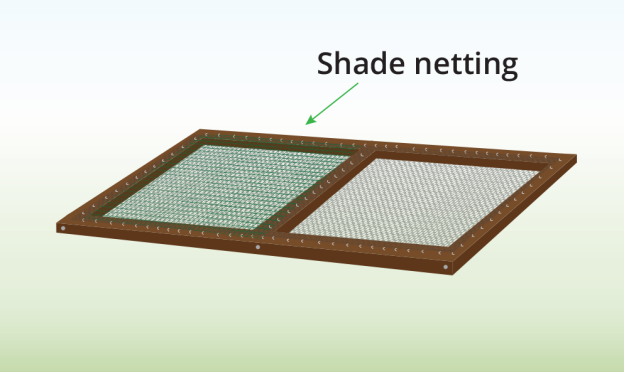
Step 7
This next step is optional, depending on the layout of your property. Chickens need some sort of protection from direct sunlight – if your chicken run doesn’t offer any shade, you should add a layer of shade to a section of the roof in order to protect your chickens from the sun.
You can use staples to attach the shade netting to the frame.
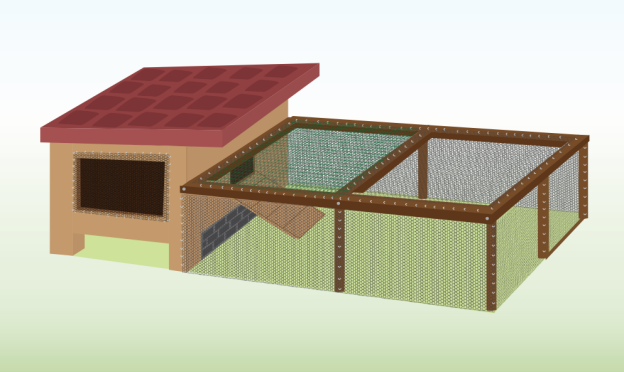
Step 8
Now you’re almost done – you just need to attach the top frame to the rest of your chicken run. You can use nails and screws in order to do this – the finish should be similar to the one seen in the picture.
Congratulations! If you followed the instructions carefully, you should now have a fully functional DIY chicken run. Your birds will surely love roaming around in the open space!
You might also enjoy: The 5 Best Chicken Breeds for Your Homestead
Extra tips:
- Don’t be afraid to use your sketching pad! When you start making plans for the chicken run, making a couple of drawings can help you see it through more easily. Prepare multiple sketches and take your time to plan everything out.
- Measure, measure, measure! When taking measurements, make sure to double (and triple!) check everything so you don’t end up with issues like a gate too big or a top frame that doesn’t fit well.
- Quality makes the difference! Creating this project from scratch allows you to choose the suitable materials you would like to use. Choosing quality materials will make your chicken run last longer!
- Add something extra! Do some research on enrichment options for your chicken and consider adding perches, stumps, or even a chicken swing to keep their time in the run happy and entertained.
(Want uninterrupted access to The Organic Prepper? Check out our paid-subscription newsletter.)
Let your chickens run in a chicken run!
You now have yourself a nice, protected area for your chickens to roam. Have you ever built a chicken run for your flock? How did you build yours? Tell us about it in the comments.
No comments:
Post a Comment