Estimated reading time: 5 minutes
If you're into DIY projects that save money and actually work, this one’s a gem. Whether you're prepping for a disaster, want a backup cooking method, or just like building cool stuff, this homemade smoker is worth your time. It's cheap, easy to make, and works great for smoking chicken, sausage, or anything else that fits inside.
This particular build comes from the YouTuber, The Crawlspace Craftsman, who put together a functioning mini smoker using just two flowerpots and a few basic supplies, spending less than $10 total. You can watch him do it and read the instructions below.
What You’ll Need
- Two 12-inch terra cotta flowerpots
- Small rocks or ceramic spacers
- Metal baking or pie pan
- Old cookie rack or grill grate
- Grinder or metal snips (to cut the rack)
- Marker
- Small piece of wood for a handle
- Screw, washer, and nut for handle
- Charcoal or wood chips
- Lighter or firestarter
Step-by-Step Instructions
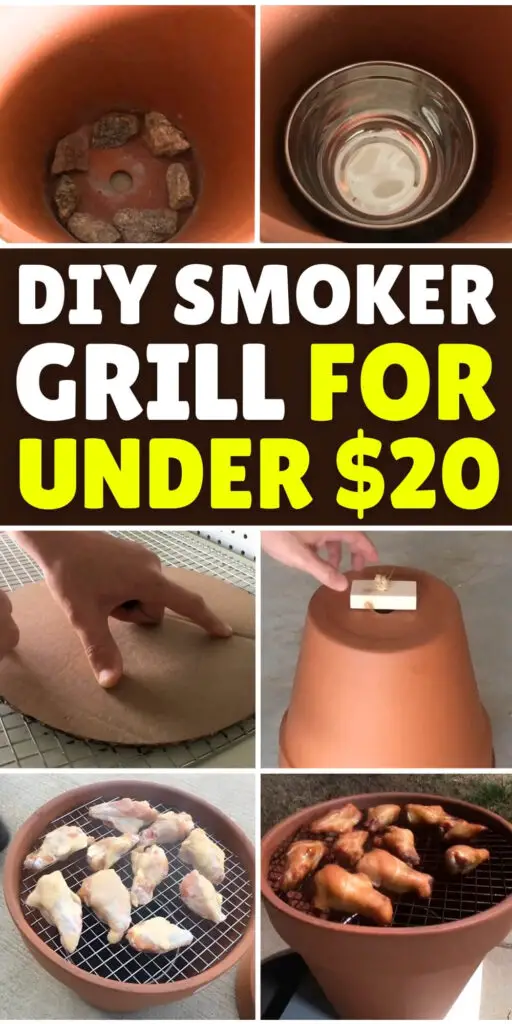
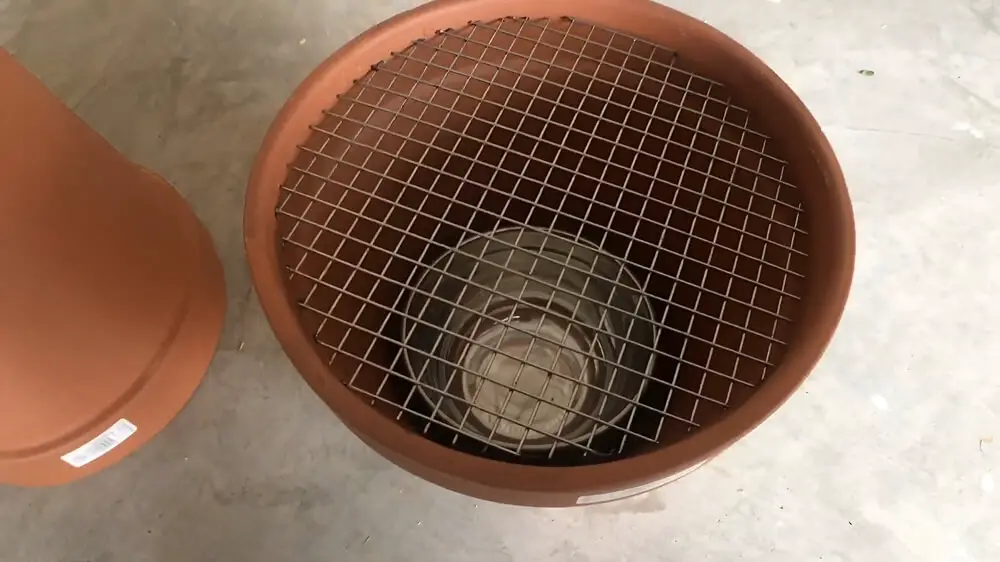
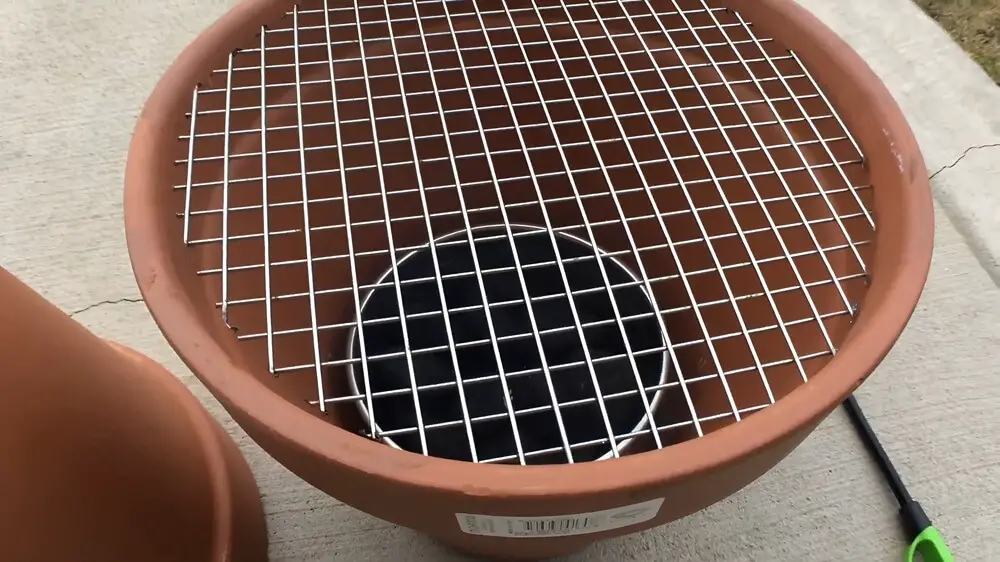
1. Add Rocks to the Bottom Pot
Drop in a layer of rocks to elevate the pan and allow airflow from the drain hole in the pot. This helps keep oxygen moving so your fire doesn’t suffocate.
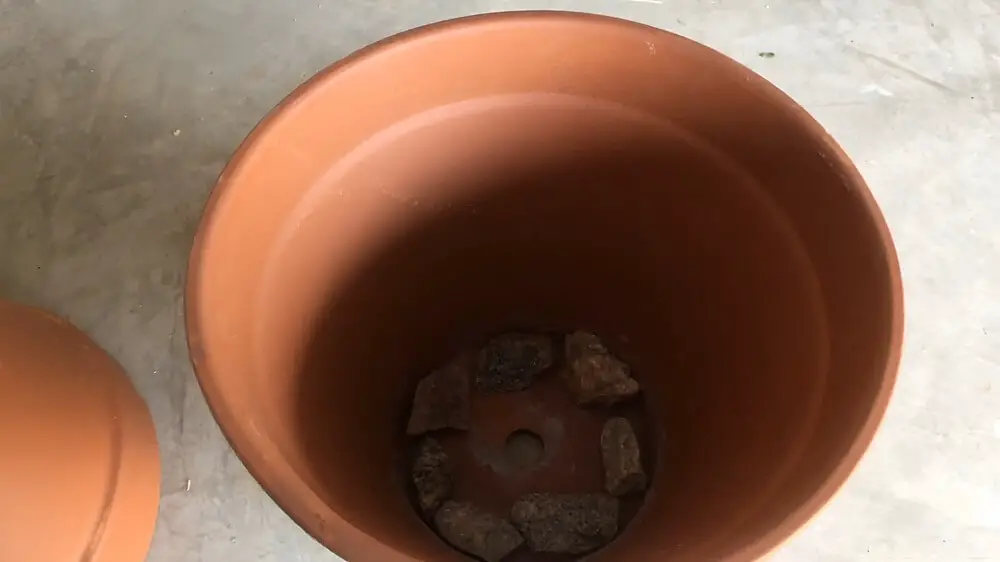
2. Place a Pan Over the Rocks
Use a metal pie pan or small baking pan. This is where you’ll place your charcoal and/or wood chips.
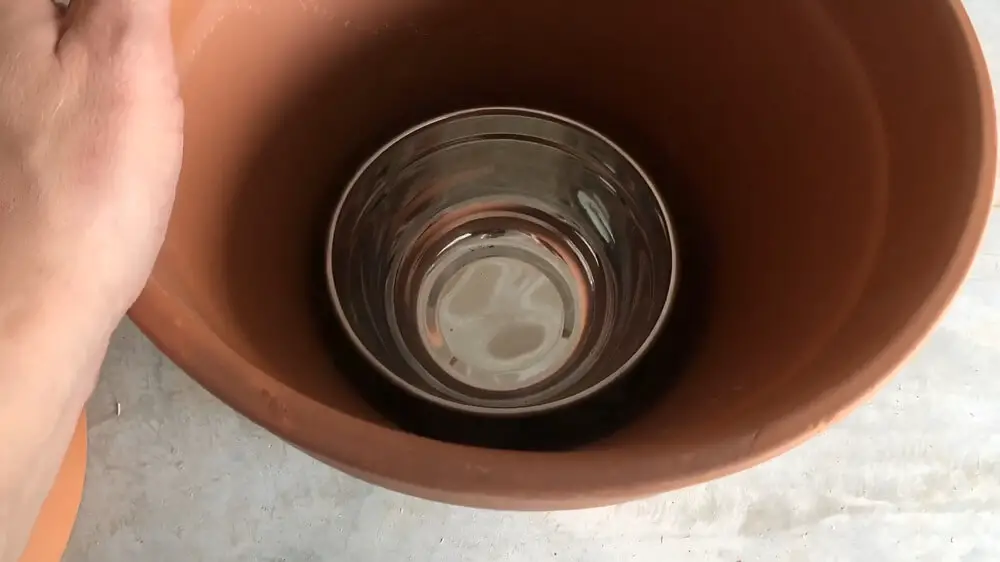
3. Make the Cooking Grate
Use a cookie rack or any metal grate that can support food.
Trace a circle on a piece of cardboard using the top of the pot as a guide.
Using the circular cardboard piece as a guide, make a circle on the grate.
Cut the rack with a grinder or snips to fit snugly just below the rim of the bottom pot.
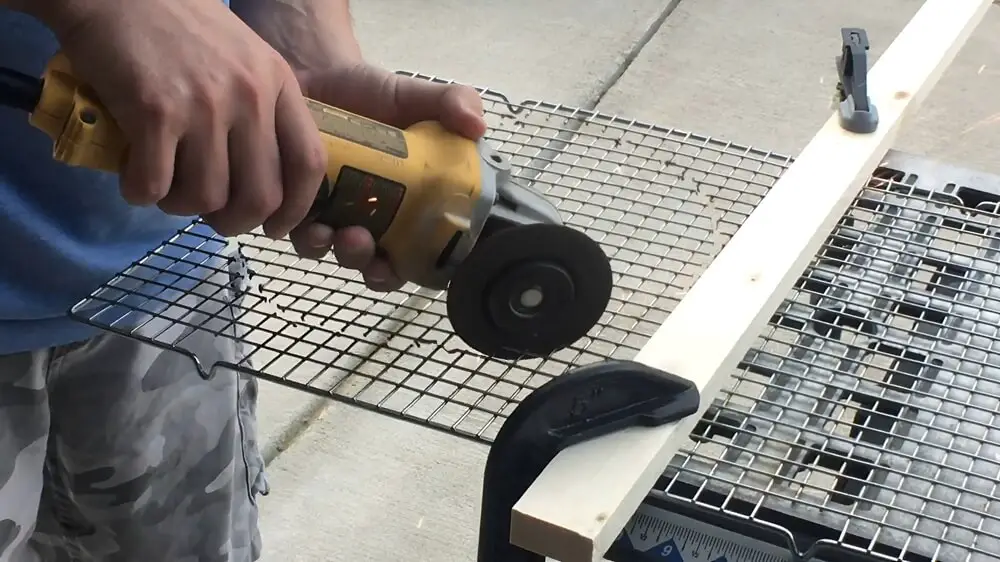
Place the grate in the pot.
4. Create a Handle for the Lid
Drill a hole in two small blocks of wood.
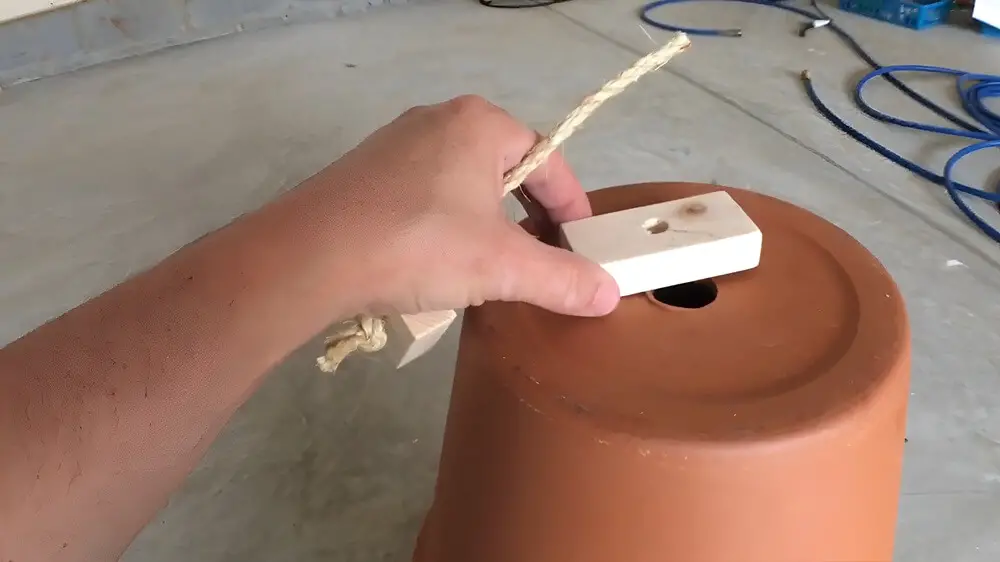
Tie a knot in a piece of rope, then loop it through one of the blocks of wood.
Place the block inside the upper pot and pull the rope through the hole in the pot.
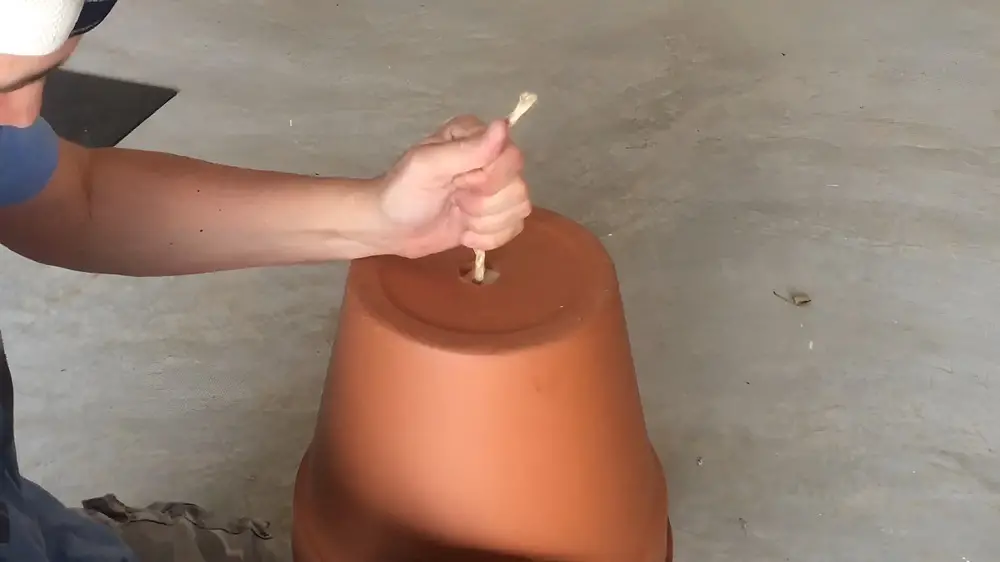
Now slide the rope through the second block, and secure it in place with another knot.
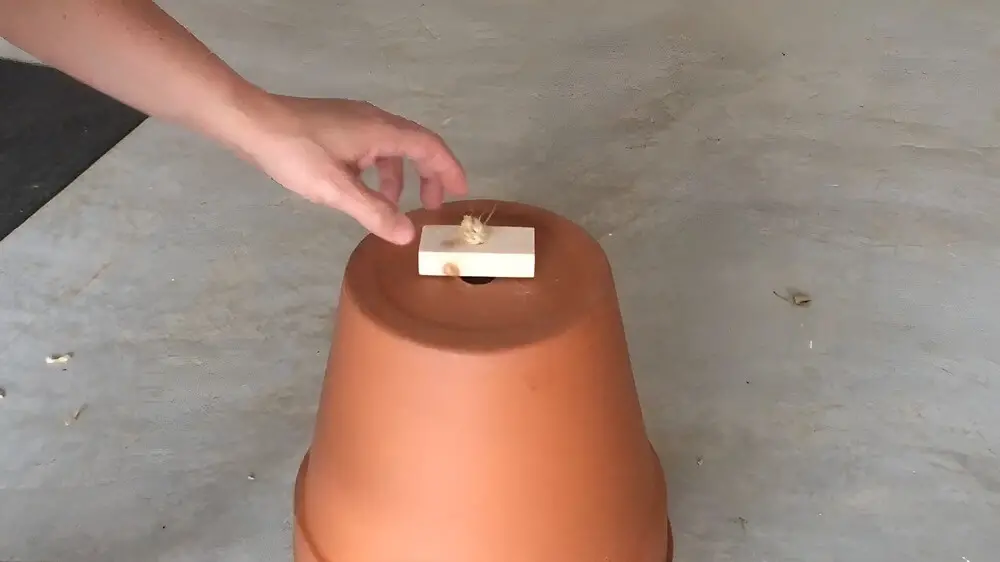
Bonus: The handle doubles as a damper—you can lift the lid slightly to vent smoke if needed.
6. Load the Smoker
Add charcoal to the pan and light it.
Once the coals are hot, toss in a handful of wood chips for smoke.
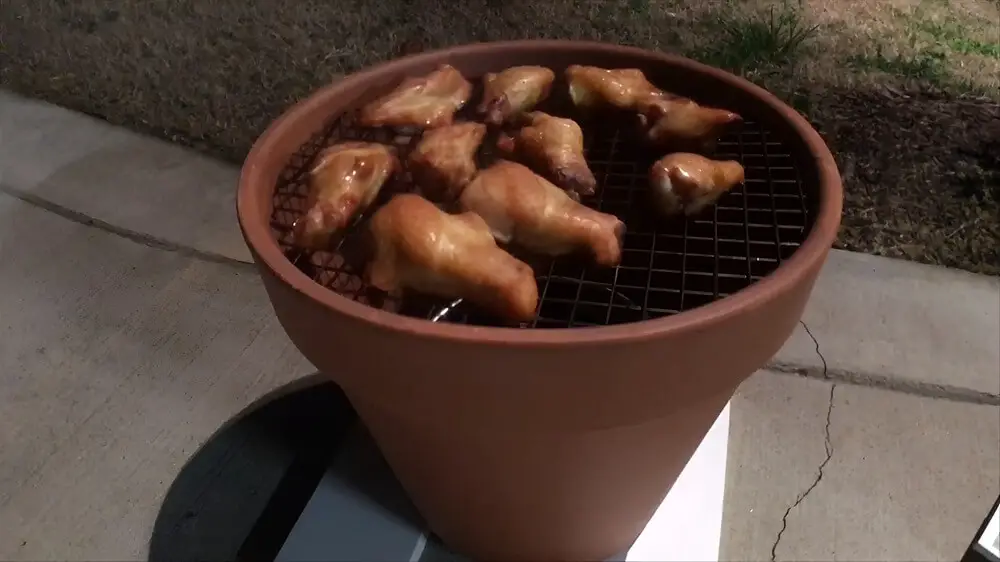
7. Start Smoking Food
Add your meat or veggies, chicken thighs, wings, burgers, etc.
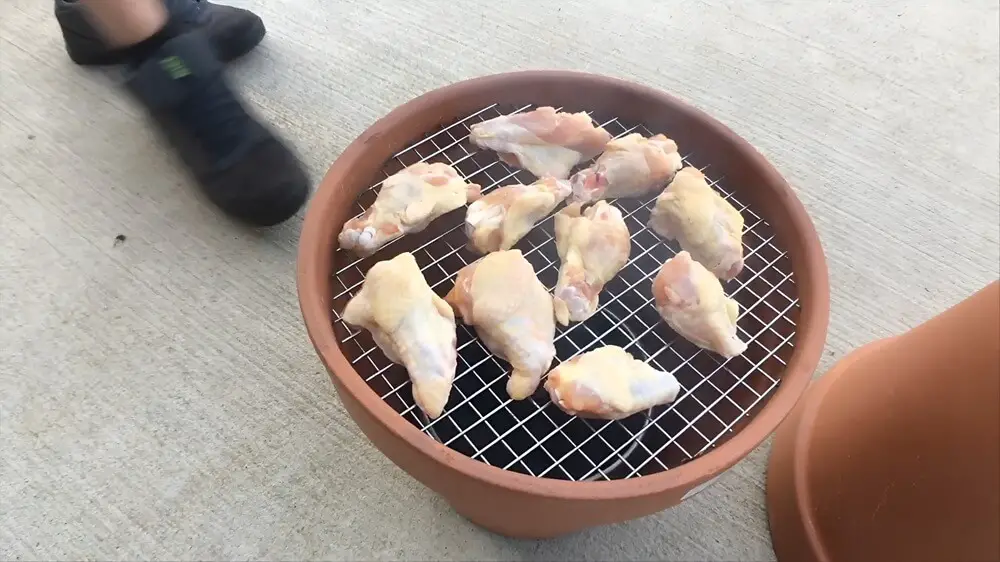
Place the top pot (lid) over it to start smoking.
Cooking Tips
- Start with just a few coals. The small space heats up quickly.
- Monitor the heat by touching the outside of the pot or using a meat thermometer inside.
- You can finish the food in an oven if you want crispier skin or higher temps.
You May Also Like:
The post DIY Smoker Grill for Under $20 appeared first on Urban Survival Site.
from Urban Survival Site
No comments:
Post a Comment