Fruit leather is one of those dehydrating projects that may look a bit intimidating, but actually isn't too hard to do. You'll see. Even you can make fabulous fruit leather. Your kids will love it and it makes a great trail, camp, or lunchbox snack. So let's get started, shall we?
First you'll need some fruit. Really, about any fruit will do. Okay, probably not citrus or melons, but about anything else. It can be fresh fruit or frozen, just make sure to thaw and drain some (maybe all) of the liquid off the frozen fruits.
Prepare your fruit as you would for any other canning or freezing experience--wash, peel if necessary, and pit if necessary. Then get your fruit in your blender or food processor. This fruit doesn't have to be nice and perfect. A lot of times I save the reject fruit when I'm canning and use it for fruit leather. I did two batches this time--one straight peach and the other peach/cherry with some frozen cherries I had from last year.


When you've got your fruit in, pulverize it. You want a nice smooth consistency with no lumps, so blend/chop the heck out of it.
The peaches weren't too sweet, so I added brown sugar to the peach batch. If you're going to add sweetener, use brown sugar, corn syrup, maple syrup, etc. but not granulated sugar as it tends to crystallize and make your fruit leather crunchy.

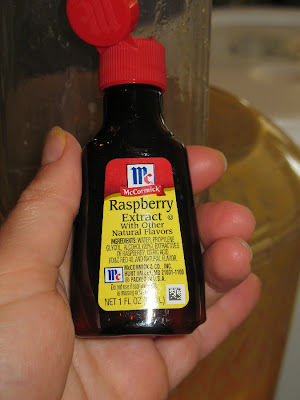
I also added some raspberry extract to the peach batch just for fun. Feel free to experiment. I once did peach with cinnamon in it and that was really tasty also. I just kind of guess at the amounts. You can always taste the fruit mush and see if you want to add more, but remember the flavors concentrate as it dries so don't get too carried away either!
The cherry batch was plenty sweet with those bing cherries, so it didn't get any additives. Just peaches and cherries. Thoroughly mix in anything you added.
When the fruit is all mushy, prepare your dehydrator trays. Some dehydrators come with fruit leather sheets. You can get fancy sheets for the Excalibur that work really well, but I'm too cheap, so I use plastic wrap. I laid it over the mesh and then tucked it under the sides loosely. I really should have wrapped it clear around the solid part of the tray even though that makes it a little sticky sliding in the dehydrator. I know I've done it that way in the past and it dried nice and flat. When the plastic wrap starts heating up it shrinks and if it's pulling on the edges of the mesh it can pull it up on the sides and you'll have to get in and un-tuck a bit so it can lay flat again like I had to do. Not a huge problem, but kind of a hassle.

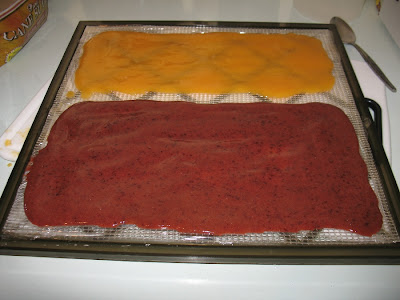
When you pour your fruit on the tray, you can do it in any shape you want. I generally like to fill the whole tray just because I want it done quick, but you can do strips or dots or whatever makes you happy. Spread it around so it's a little thicker at the edges. This is because the edges will dry faster and making them thicker is supposed to slow that down a bit and make it so it all dries about the same. I'm not sure how well this works since my edges always seem to get too dry even though I try to make the sides thicker when I pour it on the tray.


The extra of each variety got to share a tray.
Now that it's on your trays, put it in your dehydrator and start drying it. I dried mine at 135 degrees for about 8 hours or so. Keep checking it. You may want to turn your trays around part way through so they will dry more evenly.
When it's done, you roll it up. Except if the edges dried too much and they're crispy, then it won't roll well. If you crispied your fruit leather (like I usually do), you have a couple of choices. You can break it in chunks and have fruit shards, you can re-heat it by running the dehydrator again and see if you can get it soft enough to roll up warm, or you can leave it on the tray for a while. If you live in a humid environment it will probably soften up enough to roll up on its own if it's left alone. I left mine on the tray until I was doing some canning and the kitchen was all nice and moist, and voila! It was soft and rolled up just fine.
To roll it, tuck the excess plastic wrap over the bottom edge.

Then start rolling, taking the plastic wrap with you as you go. If you poured in strips or dots or whatever, just cut the plastic wrap in between your leathers before you roll them up.

Roll until it's all rolled up and you have a little fruit log.

You can either store it like a log or I like to cut mine into chunks about 1-1 1/2 inches wide to make it easier to eat. Make sure to use clean scissors and you'll need to wash them afterward--they'll get sticky.

I keep them sealed in a mason jar with just the lid screwed on tight. One of my commenters reminded me we're in a very dry area. If you live where it's humid, the un-sealed mason jar may not work for you. You can use a foodsaver bag or mylar bag with oxygen absorber or seal your jar with the foodsaver jar sealer attachment if you're wanting to store them longer than that or live in a humid environment. If you leave them out, they don't last long because they're so tasty your kids won't be able to keep from eating them, but hidden in the food room they'll last probably 3-4 years before starting to taste old and stale if you didn't long term pack them.

Now that wasn't so hard, was it? Super easy fabulous fruit leather.
First you'll need some fruit. Really, about any fruit will do. Okay, probably not citrus or melons, but about anything else. It can be fresh fruit or frozen, just make sure to thaw and drain some (maybe all) of the liquid off the frozen fruits.
Prepare your fruit as you would for any other canning or freezing experience--wash, peel if necessary, and pit if necessary. Then get your fruit in your blender or food processor. This fruit doesn't have to be nice and perfect. A lot of times I save the reject fruit when I'm canning and use it for fruit leather. I did two batches this time--one straight peach and the other peach/cherry with some frozen cherries I had from last year.


When you've got your fruit in, pulverize it. You want a nice smooth consistency with no lumps, so blend/chop the heck out of it.
The peaches weren't too sweet, so I added brown sugar to the peach batch. If you're going to add sweetener, use brown sugar, corn syrup, maple syrup, etc. but not granulated sugar as it tends to crystallize and make your fruit leather crunchy.

I also added some raspberry extract to the peach batch just for fun. Feel free to experiment. I once did peach with cinnamon in it and that was really tasty also. I just kind of guess at the amounts. You can always taste the fruit mush and see if you want to add more, but remember the flavors concentrate as it dries so don't get too carried away either!

The cherry batch was plenty sweet with those bing cherries, so it didn't get any additives. Just peaches and cherries. Thoroughly mix in anything you added.
When the fruit is all mushy, prepare your dehydrator trays. Some dehydrators come with fruit leather sheets. You can get fancy sheets for the Excalibur that work really well, but I'm too cheap, so I use plastic wrap. I laid it over the mesh and then tucked it under the sides loosely. I really should have wrapped it clear around the solid part of the tray even though that makes it a little sticky sliding in the dehydrator. I know I've done it that way in the past and it dried nice and flat. When the plastic wrap starts heating up it shrinks and if it's pulling on the edges of the mesh it can pull it up on the sides and you'll have to get in and un-tuck a bit so it can lay flat again like I had to do. Not a huge problem, but kind of a hassle.

When you pour your fruit on the tray, you can do it in any shape you want. I generally like to fill the whole tray just because I want it done quick, but you can do strips or dots or whatever makes you happy. Spread it around so it's a little thicker at the edges. This is because the edges will dry faster and making them thicker is supposed to slow that down a bit and make it so it all dries about the same. I'm not sure how well this works since my edges always seem to get too dry even though I try to make the sides thicker when I pour it on the tray.


The extra of each variety got to share a tray.

Now that it's on your trays, put it in your dehydrator and start drying it. I dried mine at 135 degrees for about 8 hours or so. Keep checking it. You may want to turn your trays around part way through so they will dry more evenly.
When it's done, you roll it up. Except if the edges dried too much and they're crispy, then it won't roll well. If you crispied your fruit leather (like I usually do), you have a couple of choices. You can break it in chunks and have fruit shards, you can re-heat it by running the dehydrator again and see if you can get it soft enough to roll up warm, or you can leave it on the tray for a while. If you live in a humid environment it will probably soften up enough to roll up on its own if it's left alone. I left mine on the tray until I was doing some canning and the kitchen was all nice and moist, and voila! It was soft and rolled up just fine.
To roll it, tuck the excess plastic wrap over the bottom edge.

Then start rolling, taking the plastic wrap with you as you go. If you poured in strips or dots or whatever, just cut the plastic wrap in between your leathers before you roll them up.

Roll until it's all rolled up and you have a little fruit log.

You can either store it like a log or I like to cut mine into chunks about 1-1 1/2 inches wide to make it easier to eat. Make sure to use clean scissors and you'll need to wash them afterward--they'll get sticky.

I keep them sealed in a mason jar with just the lid screwed on tight. One of my commenters reminded me we're in a very dry area. If you live where it's humid, the un-sealed mason jar may not work for you. You can use a foodsaver bag or mylar bag with oxygen absorber or seal your jar with the foodsaver jar sealer attachment if you're wanting to store them longer than that or live in a humid environment. If you leave them out, they don't last long because they're so tasty your kids won't be able to keep from eating them, but hidden in the food room they'll last probably 3-4 years before starting to taste old and stale if you didn't long term pack them.

Now that wasn't so hard, was it? Super easy fabulous fruit leather.
No comments:
Post a Comment