Estimated reading time: 28 minutes
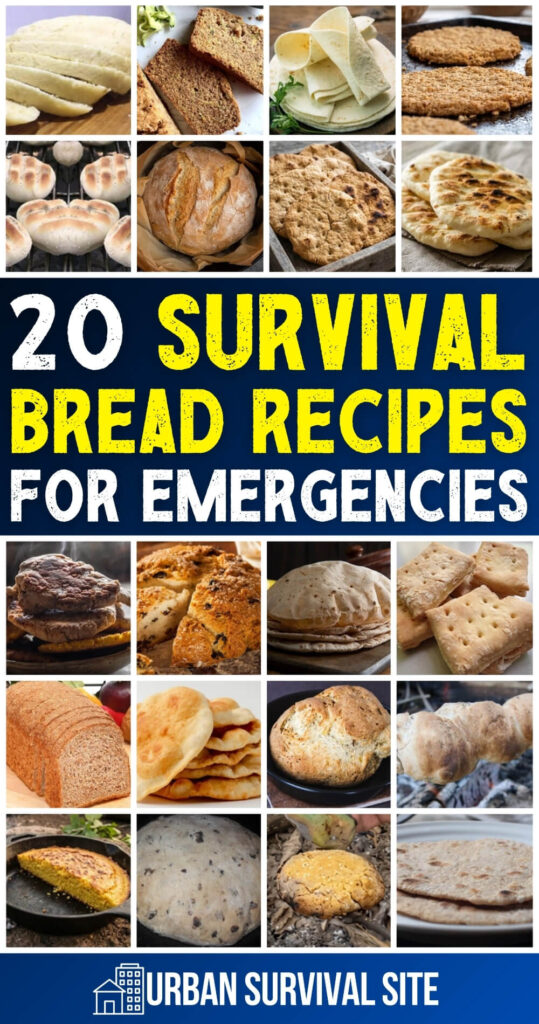
Baking a loaf of bread from scratch can be intimidating, but it's definitely worth the effort! There are so many delicious survival recipes out there that are perfect for emergencies. In this blog post, we'll share some of our favorite survival breads that are easy to make and store.
So don't worry – you'll always have a warm and satisfying meal, even when times get tough!
We all know that bread is a staple in any diet, but what about in a survival situation? Bread can be made from so many different types of flour, and with some added ingredients, it can be a filling and satisfying meal.
Here are 20 recipes for survival bread that will keep you fueled up in an emergency.
Ancient Flatbread
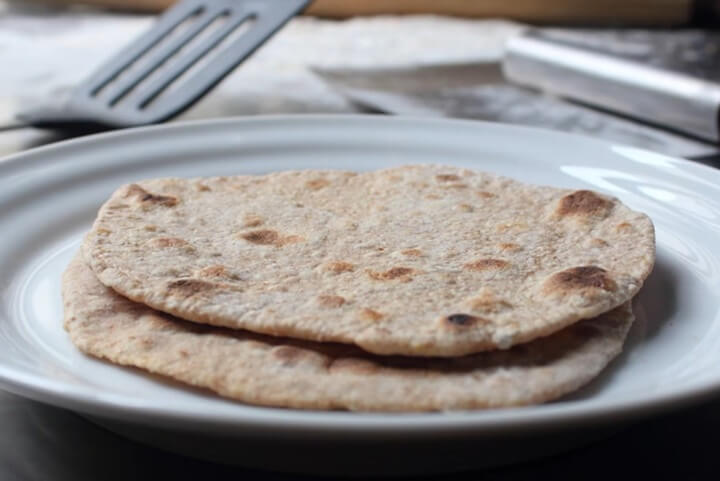
Ancient Flatbread is a type of unleavened bread that originated in the Middle East. It is made from a simple dough of flour, water, and salt, and can be cooked on a griddle or in a frying pan.
Unlike leavened breads, which use yeast or baking soda to help them rise, Ancient Flatbread is made without any rising agents. This gives it a denser, chewy texture, and a slightly crisp crust.
Ancient Flatbread can be made with any type of flour, but traditionally it is made with whole wheat flour. It can be eaten on its own or used as a wrapper for other foods. It is also a popular accompaniment to soup and stew.
Ancient Flatbread is easy to make at home. The dough can be mixed by hand or in a food processor, and requires no kneading or rising time. Once it is rolled out into thin rounds, the flatbread can be cooked on a griddle or in a frying pan until golden brown.
Ancient Flatbread can be stored in an airtight container for up to four days. It can also be frozen for up to three months.
Ancient Flatbread is a delicious and versatile food that can be enjoyed in many different ways. It is perfect for busy weeknights when there is no time to make dinner from scratch. It is also an excellent way to use up leftover flour or whole wheat flour that has been sitting in the pantry for a while.
Whether you are looking for an easy and healthy weeknight meal or a tasty way to use up some leftover flour, Ancient Flatbread is the perfect recipe for you!
Ingredients:
- 2 ½ cups whole wheat flour
- ½ tbsp active dry yeast
- ½ tbsp salt
- 2 tsp sugar
- ½ tbsp sugar
- ¼ cup cracked wheat bran
- 1 ¼ cup warm water
Instructions:
- Combine a cup of warm water, the sugar, and the yeast in a mixing bowl, then mix well.
- Cover the bowl and let sit for 10 minutes or until frothy and bubbly.
- Add half the flour and mix with a spoon. Cover again and let it proof for 30 minutes in a warm place.
- Add the rest of the flour, oil, and salt to the bowl, then knead for 10 minutes.
- Cover the bowl and allow it to rise until the dough has doubled in size (about an hour).
- Shape and divide into eight equal balls.
- Sprinkle the cracked wheat bran onto a piece of parchment, then place a ball of dough on top of each.
- Roll the dough out to an even circle.
- Place on a baking sheet, then cover again and allow to rest for 30 minutes.
- Preheat the oven to 500 degrees and place a pizza stone inside.
- Put the dough on the pizza stone, then bake for about six minutes or until fluffy.
Ash Cakes
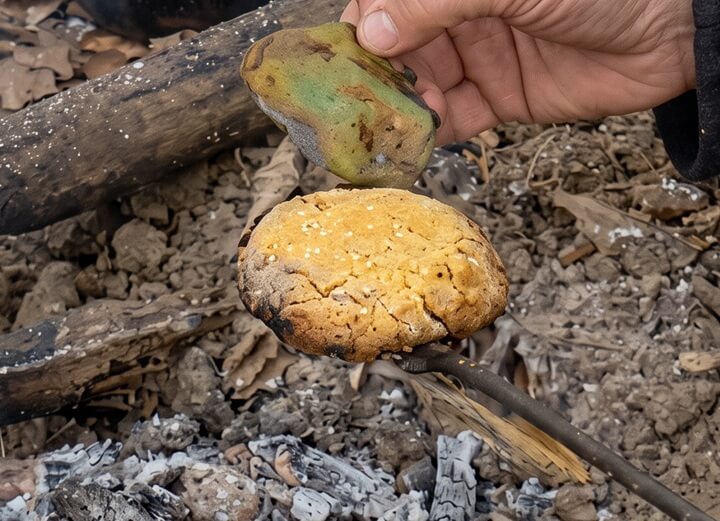
Ash cakes are a type of traditional cornbread that was popular in the American Colonies. The bread is made by cooking cornmeal mush on a hot stone or griddle, and it is typically served with molasses or honey.
Ash cakes get their name from the fact that they were often cooked in the ashes of a fire. This method helped to give the bread a crispy texture and intense flavor. While ash cakes are not as popular as they once were, they continue to be enjoyed by many people who appreciate their rustic charm.
Making ash cakes is not difficult, and the results are well worth the effort. Whether you choose to cook them in the ashes of a fire or on a hot griddle, ash cakes are sure to add a touch of flavor to your meal.
Ingredients:
- 1 cup flour
- ¼ cup water
- ½ tsp. salt
- 2 tsp. baking powder
- 1 tbsp butter
Instructions:
- Combine all ingredients, then knead into a ball of dough.
- Separate the large ball into four smaller parts.
- Flatten each one into a disc, then place on the coals in a fire. Once the edges are dark, flip and cook the other side.
- Remove from the fire and serve with butter.
Bannock
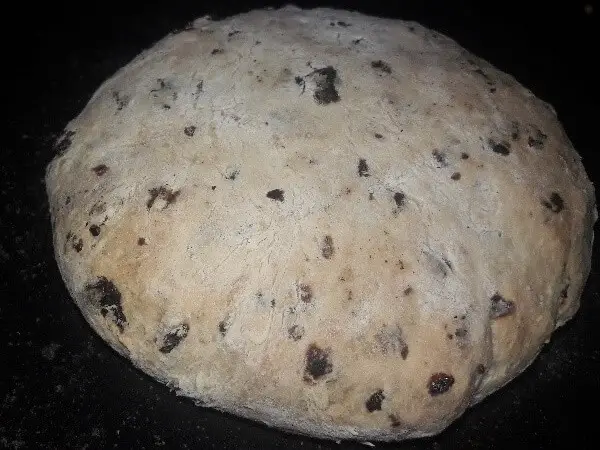
For many people, the word “bannocks” conjures up images of stone-cold Scotsmen eating fried oats out of their kilts. But the truth is, bannocks are a delicious and versatile food that can be enjoyed by anyone.
So what exactly are bannocks? They're basically quick breads made with flour, milk, baking powder, and eggs. They can be sweet or savory, and they can be cooked in a variety of ways – on a griddle, in a pan, or even baked in the oven.
There are many reasons to love bannocks. First of all, they're easy to make. And because they don't require yeast, they're also quick to prepare.
Plus, bannocks are extremely versatile – you can add any number of ingredients to them, such as fruit, nuts, herbs, or cheese. And finally, bannocks make a great portable snack – perfect for taking on a hike or picnic.
There are many different bannock recipes out there. We like the one below, but this one is good too.
Ingredients:
- 1 ½ cups buttermilk
- 1 ½ tsp salt
- 2 tsp baking soda
- 2 ⅛ cups flour
- 2 ⅝ cups oats
Instructions:
- Mix the oats, salt, and flour together.
- Add the baking soda to the buttermilk. Then, combine with the oats mixture.
- Turn the dough out and split into two pieces.
- Work into pieces to fit into a griddle or frying pan. Heat the griddle with some oil.
- Add the dough to the griddle once hot.
- Cook until golden brown on one side, then flip. Repeat.
- Serve warm!
Chapati
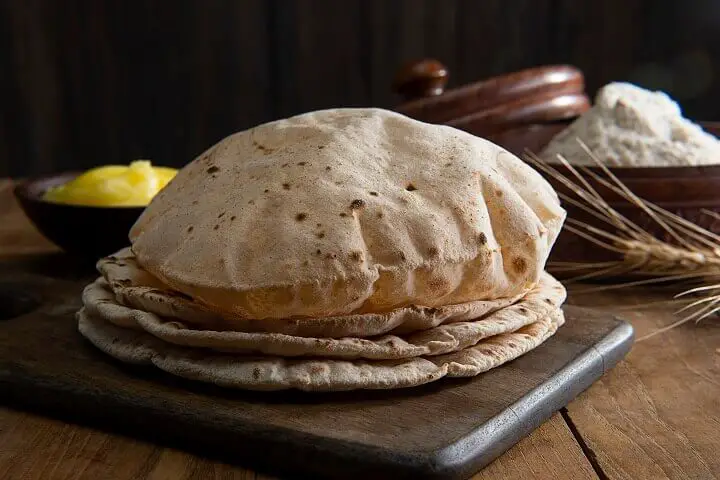
A chapati is a type of flatbread that originated in India. It is made by taking a ball of dough and flattening it out into a thin disc. The dough is then cooked on a hot griddle until it is golden brown. Chapatis are typically served with curry or other savory dishes, and they can also be used to make sandwiches or wraps.
There are a few reasons why chapatis are so popular in India. First, they are very quick and easy to make. Second, they are very versatile and can be eaten with almost any type of food. Third, they are very nutritious, as they are made from whole wheat flour and contain no added fat or sugar.
Finally, chapatis are extremely affordable, as they only require a few simple ingredients that are readily available in most Indian households.
If you want to try making chapatis at home, the process is actually quite simple.
Ingredients:
- 2 cups whole wheat flour
- 1 tsp salt
- ¾ hot water
Instructions:
- Mix together whole wheat flour, water, and a pinch of salt to form a dough.
- Then, divide the dough into small balls and use a rolling pin to flatten each one into a thin disc.
- Next, heat up a griddle or frying pan over medium heat and cook the chapatis for one to two minutes per side until they are golden brown.
- Serve immediately with your favorite curry or other dish.
Cornbread
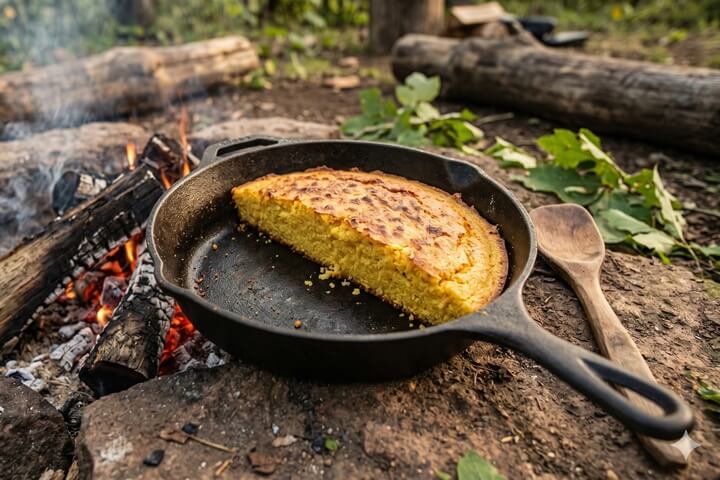
Cornbread is a type of quick bread that has been a staple in American kitchens for centuries, particularly in the South. It is made from cornmeal, flour, and a few simple pantry ingredients, and requires no yeast or rising time. That makes it one of the most practical breads you can make in a survival situation.
Unlike wheat-based breads, cornbread has a slightly crumbly texture and a mildly sweet flavor that pairs well with soups, stews, and beans. It can be cooked in a cast iron skillet over an open fire or camp stove just as easily as in a conventional oven, which makes it an incredibly versatile option when the power is out.
Cornbread is also a great way to stretch your food supply. A small amount of cornmeal goes a long way, and the recipe below calls for ingredients that are easy to store long-term.
Ingredients:
- 1 cup cornmeal
- 1 cup all-purpose flour
- 1 tbsp baking powder
- ½ tsp salt
- 2 tbsp sugar
- 1 cup milk (or reconstituted powdered milk)
- 1 egg
- ¼ cup vegetable oil
Instructions:
- Preheat the oven to 400 degrees, or heat a greased cast iron skillet over a camp stove or open fire.
- Combine the cornmeal, flour, baking powder, salt, and sugar in a large bowl.
- In a separate bowl, whisk together the milk, egg, and vegetable oil.
- Pour the wet ingredients into the dry ingredients and stir until just combined. Don't overmix.
- Pour the batter into a greased 8×8 baking pan or cast iron skillet.
- Bake for 20-25 minutes, or cook on the stovetop over low heat with a lid on until a toothpick inserted in the center comes out clean.
- Let cool slightly, then serve.
Cornbread is one of those recipes that is hard to get tired of. It's filling, easy to make, and uses ingredients that store well for the long haul. If you only learn one survival bread recipe, this one is a solid choice.
Damper
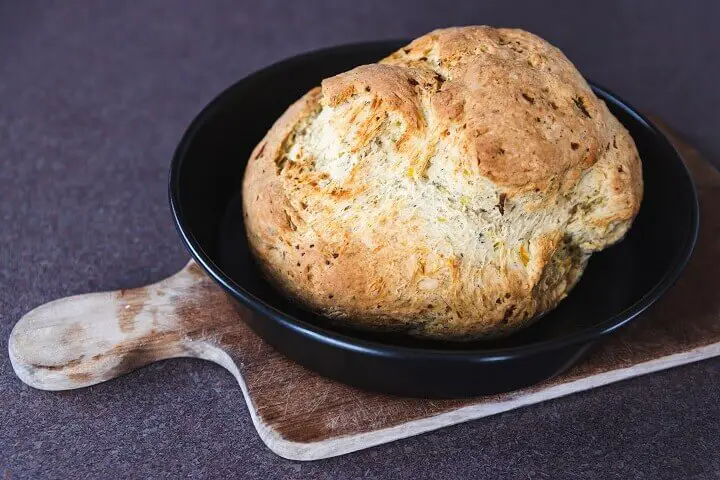
Damper bread is a type of unleavened bread that is popular in Australia. It is made by combining flour, water and salt to form a dough, which is then cooked over an open fire. Damper bread has a few key benefits over other types of bread.
First, it is quick and easy to make, which makes it ideal for camping trips or situations where time is limited. Second, it does not require any special ingredients or equipment. Finally, damper bread has a unique flavor that is often compared to that of a freshly baked biscuit.
While there are many different recipes for damper bread, the basic principles remain the same: simple ingredients, fast cooking and a delicious flavor.
Ingredients:
- 4 cups self-rising flour
- 1 cup milk
- 1 tbsp butter
- 1 tsp salt
- ½ cup water
Instructions:
- Preheat the oven to 425 degrees.
- Combine the salt and flour, then work in butter until the mixture is crumbly.
- Make a well in the center, then add water and milk. Stir until everything comes together.
- Turn the dough out onto a lightly floured surface and work into a round loaf. Put the loaf into a bread pan.
- Bake for 25 minutes, then lower the temperature to 350 degrees. Bake for another 10 minutes.
Danish Bonfire Bread
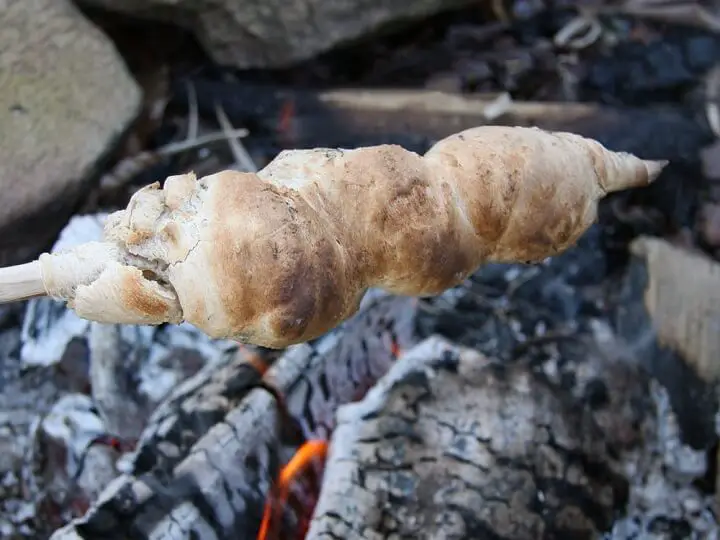
Danish Bonfire Bread, or baking a loaf on an open fire, is a centuries-old tradition that is still practiced today. The bread is made with simple ingredients – flour, water, salt – and baked in a special oven called a “steenoven.”
The steenoven is built with a stone bottom and walls, which allows the heat to circulate evenly, resulting in a crispy and chewy loaf. The bread is traditionally baked on the eve of St. John's Day (June 23), but can be enjoyed year-round.
Danish Bonfire Bread is the perfect accompaniment to any meal, or can be enjoyed on its own with a little butter and jam. So if you're looking for a unique and delicious bread recipe, give Danish Bonfire Bread a try!
Again, this recipe is Danish, so you’ll need to do the appropriate conversions for the measurements in the recipe.
Ingredients:
- 3 dl water
- 2 tsp salt
- 25 g fresh yeast (or similar dry yeast)
- 500 g all-purpose flour
- 2 tsp sugar
Instructions:
- Add the water and dissolve fresh yeast.
- Add the salt, sugar, and flour, then knead into a smooth dough.
- Let rise for 45 minutes.
- Roll large and thin “sausages” and twist them around wood sticks.
- Bake over a bonfire!
Ezekiel Bread
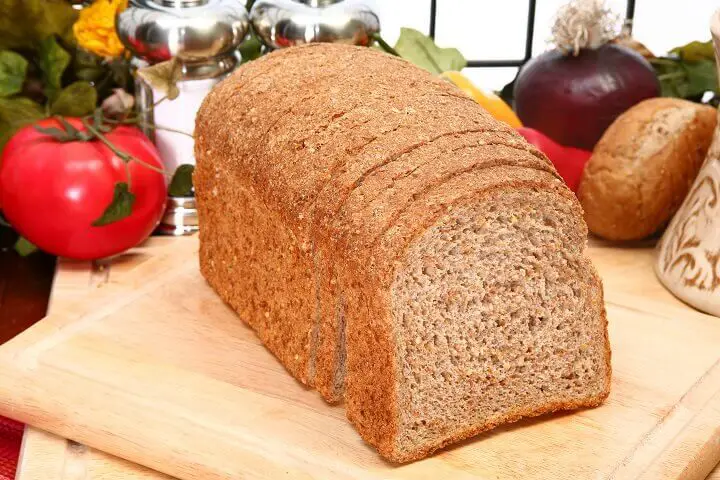
Ezekiel bread is a nutrient-rich bread that is made with sprouted grains. The bread gets its name from the Biblical prophet Ezekiel, who is said to have made a similar bread while he was in exile.
Unlike most store-bought breads, Ezekiel bread is not made with yeast or flour. Instead, the dough is made with soaked and sprouted grains, which are then ground into a flour. This makes the bread more easily digestible and gives it a higher nutrient content than traditional breads.
Sprouted grain breads are also said to have a lower glycemic index, meaning that they cause a slower rise in blood sugar levels.
For this reason, Ezekiel bread is often eaten by people who are trying to manage their blood sugar levels. While Ezekiel bread can be bought at some health food stores, it is also relatively easy to make at home.
Ingredients:
- ½ cup millet
- ½ cup barley
- ½ cup spelt flour
- 2 ½ cups wheat berries
- 2 tbsp Northern beans
- 2 tbsp pinto beans
- 2 tbsp kidney beans
- ¼ cup green lentils
- 4 cups water
- 1 cup honey
- 2 packages active dry yeast
- ½ cup olive oil
- 2 tbsp salt
Instructions:
- Combine yeast, honey, and olive oil, then let sit for five minutes.
- Combine the grains and beans and grind in a flour mill. Add the flour and salt to the yeast mixture, then stir until mixed.
- Pour the dough into two greased pans. Let it rise for an hour or until the dough reaches the top of the pan.
- Bake at 350 degrees for 45 minutes.
Frybread
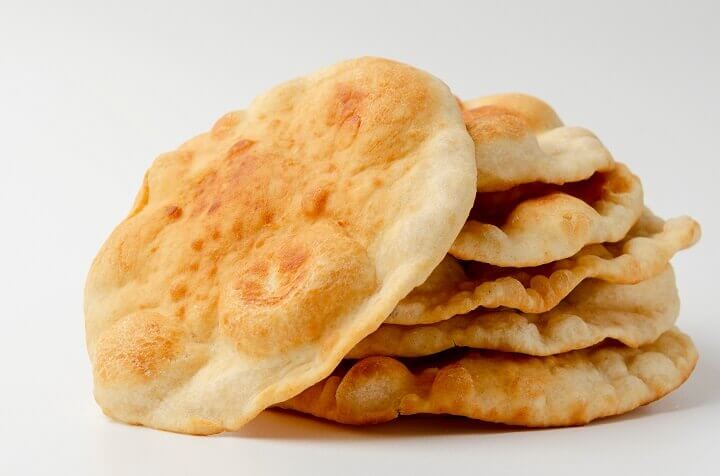
Frybread is a type of flattened, deep-fried dough that is popular among Native American tribes.
There are many different ways to fry bread, but the most common method is to use flour, salt, water, and yeast to create a dough. This dough is then rolled out into a flat circle and fried in hot oil until it is golden brown.
Frybread can be served plain or topped with various toppings such as honey, jam, or powdered sugar. It is also a popular ingredient in Indian tacos, which are tacos made with fry bread instead of tortillas.
Frybread is a delicious and easy-to-make treat that can be enjoyed by everyone. If you are looking for a new recipe to try, consider making fry bread the next time you want something different for dinner.
Ingredients:
- 1 tsp salt
- 2 tbsp vegetable oil
- 1 ½ tbsp baking powder
- 1 ½ cups hot water
- 4 cups flour
Instructions:
- Combine the salt, baking powder, and flour. Then add the water, mixing until the combination is sticky.
- Put the oil on the bread to keep it from drying out. Cover and let rest for two hours. The dough will not rise but it does need to rest.
- Pull off small balls from the dough, then roll out until thin.
- Heat a frying pan and put enough vegetable oil in it to cover it at a depth of about two inches.
- Fry the dough balls until golden brown, flipping halfway through.
Hardtack

Hardtack is a type of simple unleavened bread that was traditionally made from flour, water, and salt. Its simple ingredients and long shelf life made it a staple food for sailors, soldiers, and pioneers.
Today, hardtack is still eaten as a trail food or emergency ration, but it can also be enjoyed as a crispy cracker or dipped in soup or stew. You can find the recipe below, or you can go here for more detailed instructions.
Ingredients:
- 3 cups of white flour
- 2 teaspoons of salt
- 1 cup of water
Instructions:
- Preheat the oven to 375 degrees F.
- Mix the flour and salt in a bowl.
- Gradually mix in the water until the dough stops sticking to your hands. It will be very sticky at first, but keep shaping it until it stops being so sticky.
- Use a rolling pin the flatten the dough into a square.
- Use a knife to cut the dough into nine equal-sized squares.
- Use a nail to make a grid of holes (3×3 or 4×4) in each square.
- Put then nine squares on an ungreased cookie sheet and bake them for 30 minutes.
- Turn them over and bake them another 30 minutes.
- Remove them from the oven and let them cool off.
Hardtack is an easy bread to make at home and is a great option for those looking for an alternative to traditional wheat breads. Give hardtack a try the next time you are looking for something new to bake!
Irish Soda Bread
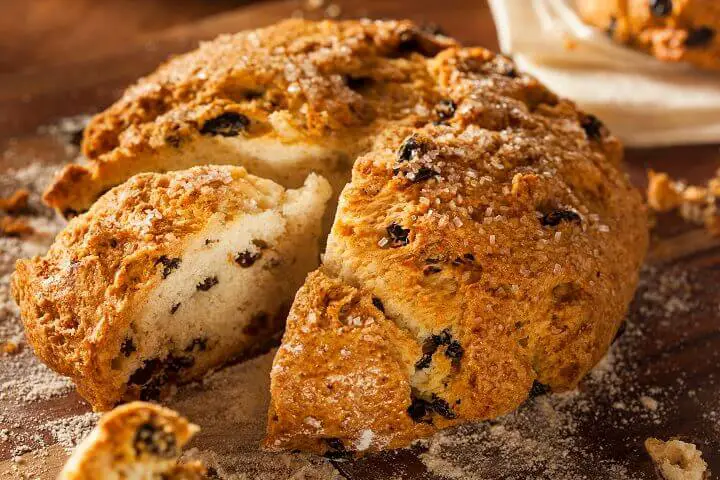
Irish soda bread is a type of quick bread that is made with baking soda instead of yeast. It originated in Ireland, and was traditionally made with just a few simple ingredients: flour, baking soda, salt, and buttermilk.
Today, there are many different variations of Irish soda bread, but it still typically includes raisins or currants. The bread is quick and easy to make, and does ot require any rising time.
This makes it a great option for busy weeknights or last-minute gatherings. Irish soda bread is also very versatile – it can be served plain or with butter, jam, or honey. It can be enjoyed for breakfast, lunch, or dinner.
Whether you're looking for a traditional recipe or something new to try, Irish soda bread is a delicious and easy option.
Ingredients:
- 1 ¾ cups buttermilk
- 1 egg
- 4 ¼ cups flour
- 3 tbsp sugar
- 1 tsp baking soda
- 1 tsp salt
- 5 tbsp unsalted butter
Instructions:
- Preheat the oven to 400 degrees.
- Whisk the buttermilk and egg together, then set aside.
- Combine the flour, sugar, baking soda, and salt. Cut the butter with a pastry cutter, then fold in.
- Add the buttermilk and egg mixture to the dough.
- Fold together until it’s too stiff to stir. Pour the dough (it will be crumbly) onto a floured surface.
- Work the dough into a ball, then knead until the flour has moistened.
- Transfer the dough to a skillet.
- Bake until the bread is golden brown or for about 50 minutes.
- Allow to cool, then serve.
Journeycake
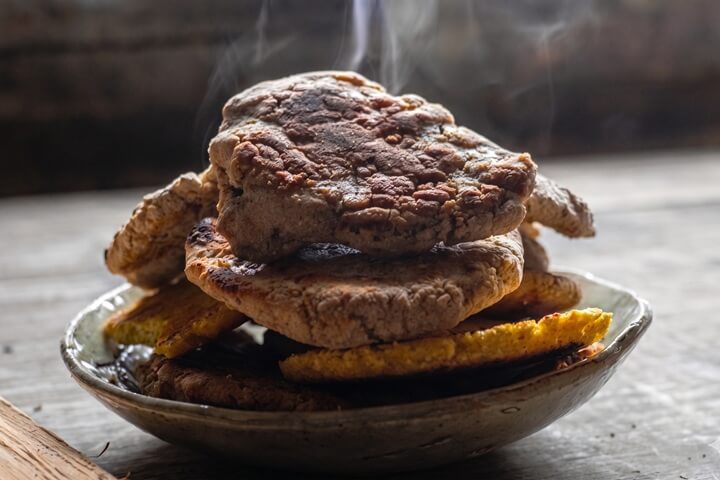
Journeycake is a type of cake that was traditionally made by travelers as they journeyed across the country. The cake is designed to be hearty and filling, making it an ideal food for long trips.
Today, journeycake is often made with whole wheat flour, oats, dried fruit, and nuts. It can be flavored with spices such as cinnamon or ginger. Journeycake is typically baked in a large loaf pan and then sliced into individual pieces. The cake can be served plain or with butter or cream cheese.
Journeycake is an excellent source of energy and nutrients, making it a perfect choice for an on-the-go snack or a quick breakfast. And because it is so easy to make, there’s no excuse not to try your hand at making your own journeycake the next time you hit the road.
Ingredients:
- 2 ¼ cups apple cider
- 1 tsp cinnamon
- 1 tsp cloves or ginger
- ½ cup dried fruit (apricots)
- 4 ½ cups flour
- 1 ½ cups sugar
- ¾ cups butter
Instructions:
- Cream the butter and sugar, then mix in apple cider. Add cloves, ginger, cinnamon, baking soda, and fruit.
- Blend in 4 ½ cups of flour.
- Beat until the mixture is blended, then pour into the oven and bake. Serve with butter and molasses.
Pilot Bread
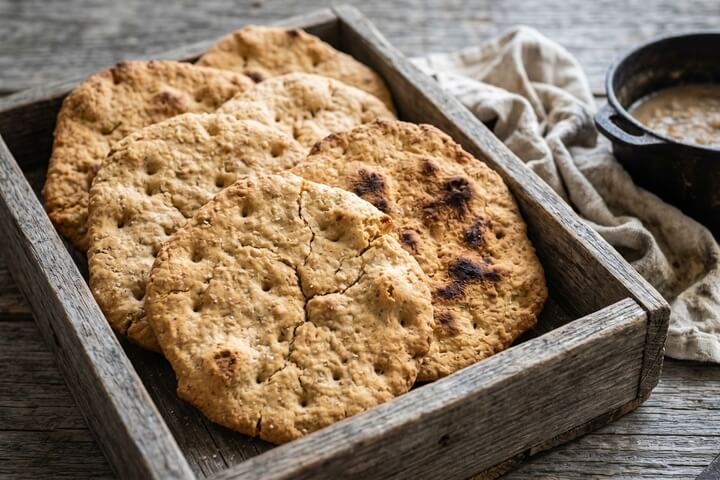
Pilot bread is a thick, sturdy cracker-style bread that has been used as a survival food for generations. Similar to hardtack but a bit thicker and slightly less dense, it has long been a staple in remote communities across Alaska and was historically carried on ships and military campaigns as a reliable, long-lasting ration.
What makes pilot bread so appealing as a survival food is its simplicity and shelf life. When stored properly in a cool, dry place, it can last for months or even years. It's also incredibly filling and can be eaten on its own, topped with peanut butter or canned meat, or used in place of crackers in a soup or stew.
Unlike hardtack, pilot bread has a small amount of shortening in it, which gives it a slightly more palatable texture. It's still firm and dry, but it doesn't require the jaw-breaking effort that traditional hardtack sometimes demands.
Ingredients:
- 2 cups all-purpose flour
- 1 tsp salt
- 1 tsp baking powder
- 2 tbsp shortening or lard
- ½ cup water
Instructions:
- Preheat the oven to 350 degrees.
- Combine the flour, salt, and baking powder in a bowl.
- Cut the shortening into the dry ingredients using a fork or pastry cutter until the mixture resembles coarse crumbs.
- Gradually add the water and mix until a stiff dough forms.
- Roll the dough out on a floured surface to about ¼ inch thick.
- Cut into squares or rounds, then use a fork or nail to poke a grid of holes in each piece.
- Place on an ungreased baking sheet and bake for 25-30 minutes, flipping halfway through.
- Remove from the oven and let cool completely before storing.
Pilot bread is a great addition to any emergency food supply. Make a batch ahead of time, store it in an airtight container, and you'll have a reliable, no-fuss bread ready to go whenever you need it.
Pita Bread
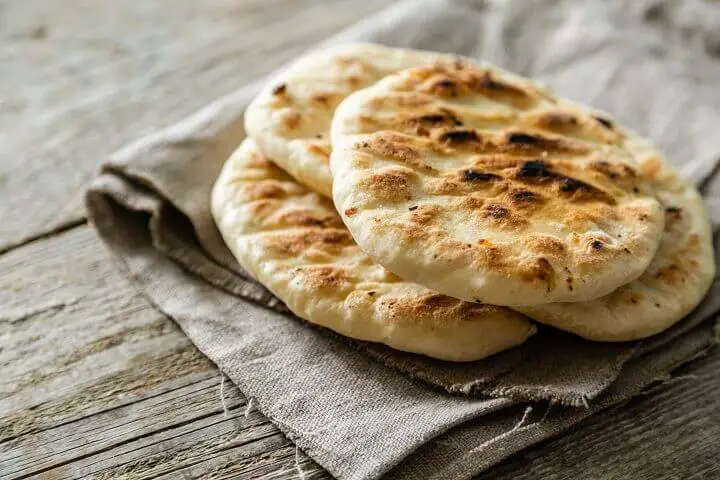
Pita is a type of flatbread that is commonly found in Mediterranean and Middle Eastern cuisine. It is made by baking dough in a special oven, and the resulting bread is soft and round with a pocket in the center.
This pocket can be used to hold fillings, such as vegetables, meats, or cheeses. Pita bread is a healthy and versatile option for any meal.
Ingredients:
- Water
- 2 tsp active dry yeast
- ½ tsp sugar
- 3 cups all-purpose flour
- 2 tsp salt
Instructions:
- Combine water, yeast, and sugar and mix until dissolved.
- Add flour and whisk.
- Put the bowl in a warm place, uncovered.
- Let the mix sit for 15 minutes or until it’s frothy and bubbling.
- Knead the dough.
- Let the dough rise for an hour or until it’s doubled in size.
- Form the pitas – typically, pita is flattened into rounds.
- Bake in the oven at 475 degrees F for 2 minutes on one side.
- Flip.
- Remove from the oven when golden-brown.
Whether you are looking for a healthy alternative to sandwich bread or just want to try something new, pita bread is a great option.
Pot Bread
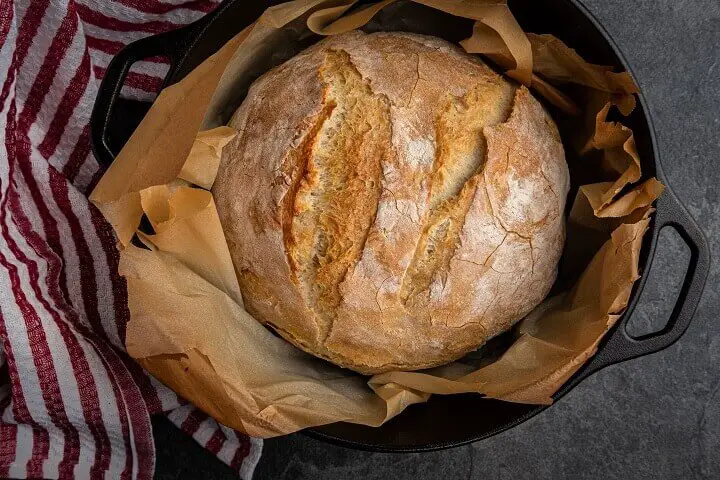
Pot bread is a type of quick bread that is traditionally made in a pot over an open fire. The ingredients are simple, and the bread can be made without any special equipment.
However, pot bread does require a bit of time and patience to bake properly. The key to success is to get the pot nice and hot before adding the batter. This will help to ensure that the bread cooks evenly and doesn't stick to the pot.
Once the pot bread is cooked, it can be served with butter or honey. It's also delicious on its own or used as a base for other dishes such as stews or casseroles. Pot bread is a great way to use up leftover flour and make a nutritious and filling meal.
Ingredients:
- 3 cups flour
- 1 ½ cups water
- 1 ½ tsp sea salt
- 1 tsp instant yeast
Instructions:
- Combine the yeast, flour, and salt, then add water and mix until the flour is a little wet.
- Cover the bowl with a towel and let it double in volume. It should take about eight hours.
- Preheat the oven to 450 degrees. Put a Dutch oven in the oven and heat for 30 minutes.
- Shape the dough into a round shape, folding the sides in to form a ball.
- Open the oven and put the bread into the Dutch oven.
- Bake for 30-45 minutes or until the crust is golden brown.
Quickbread
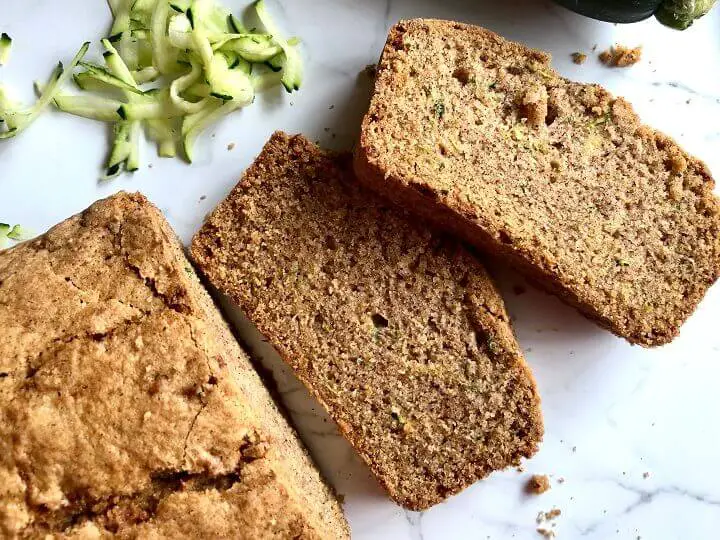
If you're in a hurry and need to whip up a quickbread, you may be wondering what exactly it is. Quickbreads are simply breads that are made without yeast.
This means they don't require the time-consuming process of rising and can be baked much more quickly. There are many different types of quickbreads, including muffins, biscuits, and scones.
While some quickbreads may be savory, most are on the sweeter side and make a great breakfast or snack.
One of the great things about quickbread is that it's very easy to make. You don't need any special skills or ingredients – just a basic understanding of baking.
The key to making a successful quickbread is to have all of your ingredients measured out and ready to go before you start mixing. This will help the bread to come together more quickly and prevent any disasters in the kitchen.
Quickbreads can be made with a wide variety of different ingredients, so feel free to get creative. Start with a basic recipe and then add in your favorite flavors, fruits, or nuts.
We won’t provide you with a recipe for this one, since there are so many variations of this (zucchini bread, carrot bread, etc). But get creative!
Roosterkoek
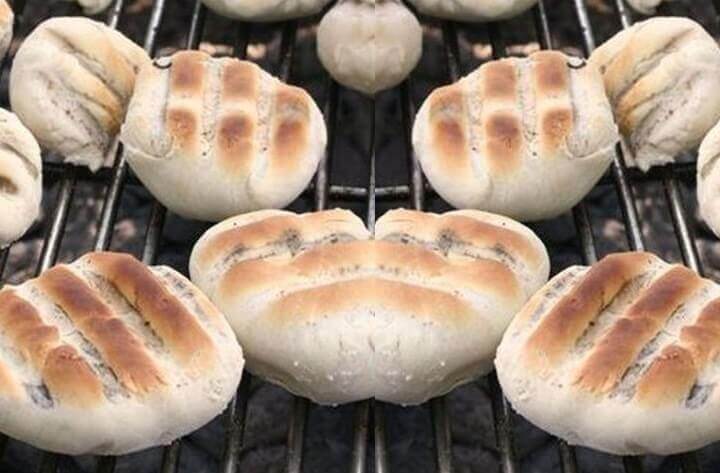
Roosterkoek is a type of South African bread typically made from white flour, yeast, water, and salt. It is generally round in shape and slightly flattened, with a soft and fluffy texture.
The dough is first kneaded, then left to rise for 30 minutes before being shaped into balls and placed on a hot griddle or pan. Once cooked, the Roosterkoek is often served with butter, cheese, or jam.
So why make Roosterkoek?
Well, first of all, it's delicious! But beyond that, it's also a great way to use up leftover bread dough. And because it's made from white flour, it's a bit lighter and fluffier than some of the denser rye or whole wheat breads out there.
Note that the ingredients listed are in grams and milliliters here, since it’s a South African recipe.
Ingredients:
- 300 g flour
- 200 ml water
- 5 ml salt
- 10 ml instant yeast
- 30 ml sunflower oil (or another oil of choice)
- 15 ml sugar
Instructions:
- Combine the yeast and sugar with a small amount of the warm water. The mixture should foam.
- Combine the salt and flour, then add the water and oil, mixing continuously.
- Combine everything together, and mix.
- Turn the dough out onto a floured surface, then roll into balls and palace on a baking sheet. Let rise for an hour.
- Put a braai grid over the coals and heat for five minutes. Grease, then place the rolls on it for 20 minutes. If you don’t have a braai grid, you can use a baking sheet in the oven.
- When half the cooking time has elapsed, flip the bread. They’re done when lightly brown.
Scottish Oat Cakes
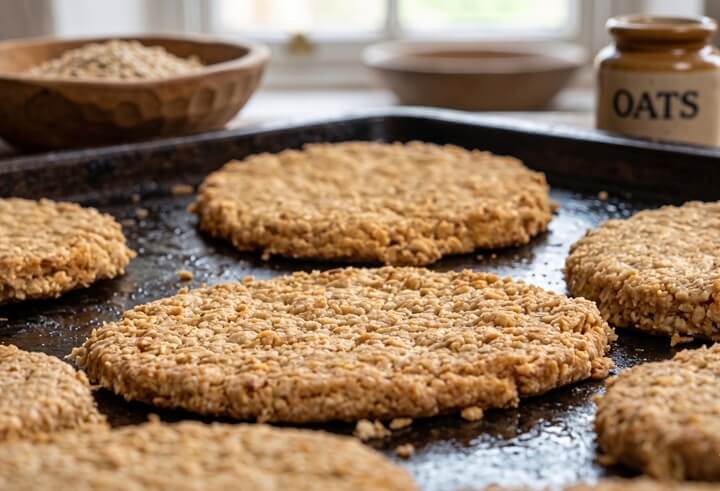
Scottish oat cakes are a type of flatbread made from oats, flour, and water. They have a chewy texture and a nutty flavor, and they can be served either sweet or savory. Sweet oatcakes are typically served with jam or honey, while savory oat cakes are usually topped with cheese or herbs.
Oat cakes are believed to have originated in Scotland, and they were traditionally made over an open fire. Today, they can be cooked in a variety of ways, including on a griddle, in a fryer, or in the oven.
Oat cakes are a healthy and hearty alternative to other types of bread, and they're perfect for breakfast, lunch, or dinner. If you're looking for a new and delicious way to enjoy oats, Scottish oatcakes are definitely worth a try!
Ingredients:
- 4 oz oatmeal
- ⅛ tsp baking soda
- 1 pinch salt
- 2 tbsp butter
- 2 tbsp hot water
Instructions:
- Preheat the oven to 375 degrees.
- Grind the oatmeal in a food processor until powdery.
- Combine oats, baking soda, and salt.
- Melt the butter.
- Drizzle in the butter and stir vigorously. Add hot water until you have a thick dough.
- Cut the dough into small balls.
- Knead each ball for a few minutes until it’s no longer sticky. Add more oatmeal as necessary.
- Roll each ball into a ¼” disc, then cut into quarters.
- Bake the wedges for 20-30 minutes on a baking sheet.
- Serve cool or warm.
Steam Bread
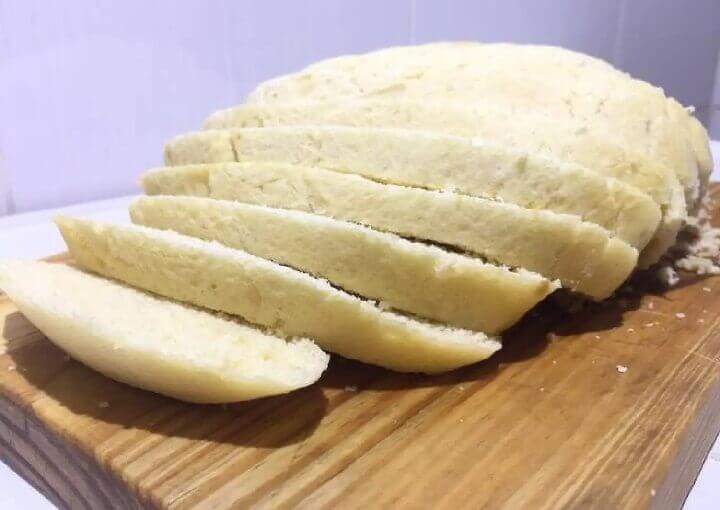
Steam bread is a type of bread that is made using steam instead of yeast. The bread is termed “steam” because it refers to the method of cooking the bread – steaming it instead of baking it.
The end result is a moist, fluffy bread that is slightly chewy. Steam bread is popular in Asian cuisine, and is often used in Dim Sum dishes. It can be made with either white or whole wheat flour, and is often flavored with ginger or other spices.
Making steam bread is a simple process, and only requires a few ingredients. The dough is first boiled in water, then steamed in a bamboo basket or steamer pot. The steam from the boiling water cooks the bread, resulting in a soft, fluffy texture.
Steam bread is a healthy alternative to traditional baked breads, and can be enjoyed as part of any meal.
Ingredients:
- 3 cups flour
- 2 tsp baking powder
- 1 tsp salt
- 1 tbsp cinnamon
- 1 tbsp ginger
- 1 cup buttermilk
- 3 eggs
- 1 ½ cups brown sugar
- 1 ½ cups applesauce
Instructions:
- Mix together the baking soda, baking powder, flour, and spices.
- Beat the eggs, buttermilk, sugar, and applesauce. Combine with the dry ingredients.
- Put the entire mixture into a pudding mold. Fill until about two-thirds full, then put the lid on.
- Put the mold in a saucepan on top of some crinkled tin foil. This will keep it off the bottom of the pan.
- Fill the pan with boiling water, about two-thirds of the way up the mold.
- Cover, bring the water to a boil, then lower the heat to a simmer.
- Steam for two hours, remove, and serve.
Tortillas
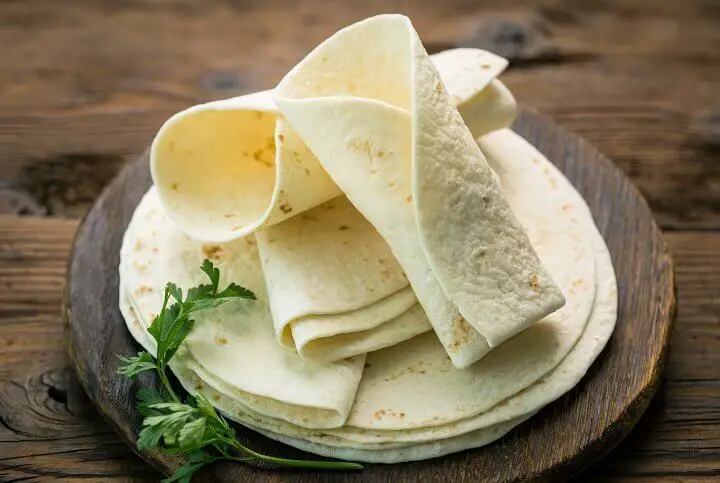
Crispy, thin and delicious – there's nothing like a freshly made tortilla. Whether you're eating them on their own or using them to wrap up your favorite burrito ingredients, tortillas are a staple of Mexican cuisine.
And although you can easily buy them pre-made at the store, there's nothing quite like the taste of a homemade tortilla. If you've ever wondered how to make your own tortillas, the process is actually quite simple.
All you need is a few cups of flour, some water and a little bit of oil. The key to a perfect tortilla is to get the dough nice and thin before cooking it on a hot griddle. This will help to create that delicious crispy texture that makes tortillas so irresistible.
Ingredients:
- 2 cups flour
- 3 tbsp olive oil
- ¾ cup water
- ½ tsp salt
Instructions:
- Combine salt and flour in a large bowl. Stir in oil and water.
- Turn onto a floured surface, then knead, adding flour or water if necessary for a smooth, consistent dough.
- Let rest for 10-15 minutes.
- Divide into eight pieces, rolling each into a seven-inch circle.
- Cook the tortillas over medium heat until golden brown. Serve warm.
The next time you have an emergency, don't forget these survival bread recipes. With a little preparation, you'll be able to make delicious, nutritious breads that will help keep you and your family fed. Which recipe are you going to try first?
You May Also Like:
The post 20 Survival Bread Recipes for Emergencies appeared first on Urban Survival Site.
from Urban Survival Site




 The mindset shift that took me too long to make was understanding that comms during a crisis isn’t about being able to talk.