Submissions     Contact     Advertise     Donate     BlogRoll     Subscribe                         

Monday, March 29, 2010

Tip of the Week…Preparing for Emergencies…Food Storage in the City…EMPs and Solar Flares

grocery store case nicole
Wednesday someone in the yahoo group asked about EMPs and solar flares wondering if they are really a serious threat to our safety. I spent the night and yesterday doing some brush-up research so I could discuss this armed with the latest information. While there has been some great info shared in our yahoo group, I have decided it is time to deal with this issue in a bigger way. Beginning Tuesday and continuing every week, until we have most of the answers, since you never have all of the answers, I will attempt to help you understand and prepare.
For those in the city food storage can become more of a challenge. Last week we looked at our homes and discussed how to make room for our preparedness supplies before we bring them home. If you missed that please go back and review it. Room seem to be the biggest obstacle for those living in a city.
Don’t fall into the trap of storing cans and cans of dehydrated or freeze dried foods believing these will provide you a way to store more in less space. There are three big problem with this approach.
First, they are very expensive.
Second, dehydrated foods require four times the amount of water to ingredients to reconstitute so, one cup of carrots takes four cups of water to prepare. During a crisis, especially a natural disaster you may be without clean water and would need to conserve the water you have available. As you know from the  my ebook  Mother Hubbard: What She’s Doing Now, I believe in storing the foods we normally eat. The calculator in the book will help you formulate  your storage plan.AS you store canned foods you will be increasing not only your food supply but also your water storage. You can cook your oatmeal in the juice you have saved from canned peaches. You can drain green beans and use the water to cook pasta.
Finally, these foods take a long time to cook. Again if you are without power these could not be cooked adequately in a few minutes on a barbecue grill or alcohol/TP stove.
We have seen from past disasters that food supplies can be cut off, and store shelves remain bare, for weeks after a disaster. Should we be hit with an EMP or solar flare or should the power grid be down for any reason supplies will be scare for many, many weeks. Food cannot be delivered to city stores if there is no gas. Gasoline takes electricity to pump. I always advocate a three month supply of the foods you eat but I realize for an apartment dweller this may not be possible.
It’s time to make friends. Now is the time to become acquainted with your neighbors. I would recommend talking the those who live in the same building as you, or in the building next door or across the street, about emergency preparedness. Any further away and sharing becomes a problem. Try holding a neighborhood meeting, maybe under the banner of a neighborhood watch. Feel out the guests about their concerns about disaster preparedness. Contact those you feel would be good partners after the gathering and see if they would be interested in planning together. You would now have allies. During an emergency you may want to gather together into one home making food preparations and keeping warm more efficient and also safer. There is safety in numbers. During a crisis if everyone brings the foods and equipment they have stored to one apartment who cares if the place has cans and boxes of oatmeal everywhere?
If you have a car, hard to believe but some city residents don’t, remember your trunk. The trunk of your car should always have a good car kit but if you lack space you may consider storing your 72 hour kit and some non food supplies in the car. Many supplies would not be appropriate for trunk storage, such as liquid medications. If you are planning to evacuate to a friend’s home outside the city consider storing items in the trunk that would be a welcome addition to their storage. For me, TP!  Toilet paper takes up a great deal of space but it is an absolute necessity in a good storage plan. It will be a great item to trade in addition to the obvious need. So, think trunk!
Back to food storage. Begin this week to store canned foods and grains which are easy to cook such as oatmeal and pasta. You may want to follow the plan we followed last year to fill the shelves in our General Store. You may just want to look and the spread sheet and calculator in Mother Hubbard and jump in. I would begin by getting a complete supply to last three weeks and then increase to a month…and so on. Remember to have the strength necessary to meet the demands of an emergency you will need a well balanced diet. No matter how you begin, just begin.
Join Our Yahoo Group: http://groups.yahoo.com/group/TotallyReady/
Subscribe to our Newsletter: http://blog.totallyready.com/announcing-the-totally-ready-newsletter/
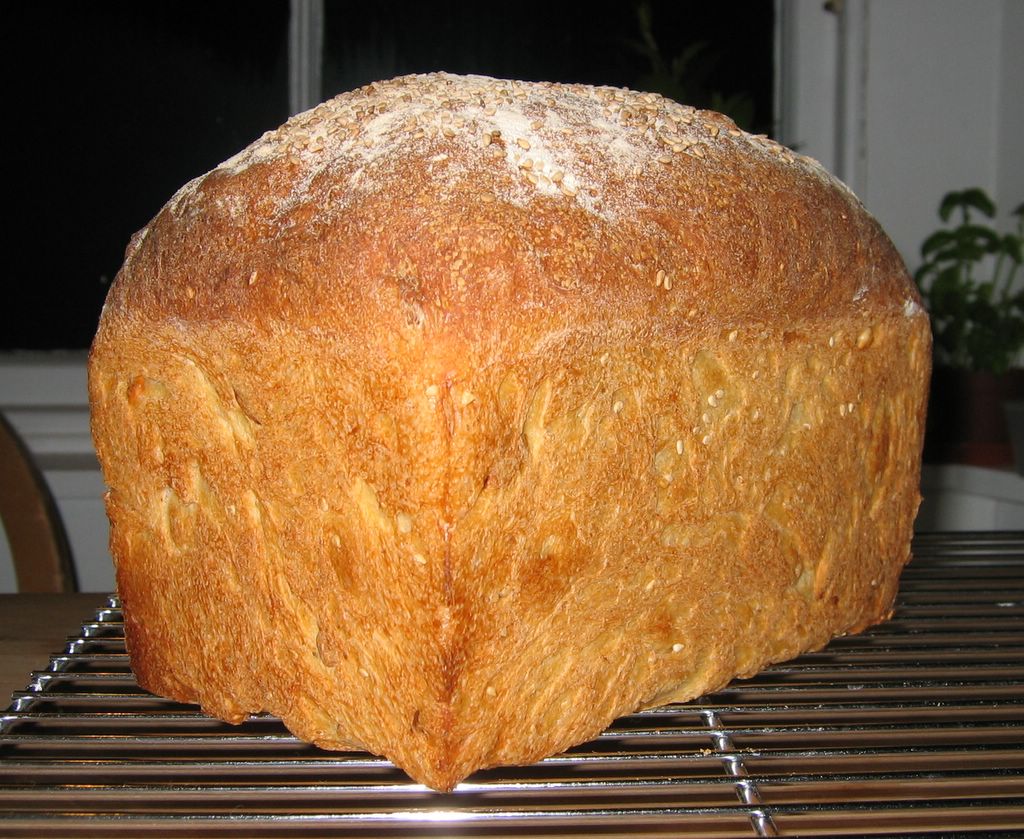
How to Make Basic Bread

Spring is here, and I thought I might look into a short series of articles on how to do practical things.  With the world of politics and the economy being so uncertain, a bit of down to earth stuff you can do at home is nice tackle.  Some of these will be aimed at bridging the gap between the wonderful world of prepping in North America and how to use them or do them over here in Ireland or the UK.

So today with start with Basic Bread Making, which is easier with a machine if you have never done it before, but it is good to learn the old fashioned way as well.  This was first used as a Kitchen Post at the UK site World of Survivalists http://www.worldofsurvivalists.com/content.php  A wonderful site for folks on both sides of the water, but really useful if you live over here.

Hi, today I thought I would see if I could get more postings here and add another recipe.  This one is more of a set of directions and I owe a lot of thanks to the various people and books in my life who helped me figure them out.  My directions are based partly on having a bread baker, but you don't need one and you won't have one in a long-term situation.  Oh, you might be able to rig up a solar or car battery to do this, if your major food preparer has physical issues, but otherwise kneading bread is really pretty easy.  There are now lots of You Tube videos that can take the place in old books where they say "to learn to knead bread invite over a friend who already knows"  Watch them now and don't wait, here is a good basic one to start with.  Don't let the eight to ten minutes scare you, once you learn to knead some breads will come together in much less, you will learn to "feel" the difference, just takes practice.

http://www.youtube.com/watch?v=dWj8oHMPFm0

For now, I suggest to all my friends they get a bread baker to get started. The more so if they are busy mothers of small children or single guys with no back up in the kitchen.  I don't care for how bread baked in them taste, so I use mine as a kneading machine (I have a bad shoulder) and then bake in a regular oven.  But you can (and I do sometimes) bake in the machine and you will still get much cheaper, better tasting and better for you than the store bought stuff.

Flour, the following Master Recipe is designed for white BREAD flour but you can use up to 1/2 Whole Wheat, Oats or Rye before you need to change much.  After that, the liquids become different, again  you can find lots of great recipes on the web for the heavier flours.  This is just a system to get you started.  I've also used American measurements, since that is what I am used to.  Most UK bread bakers come with a 1 cup measuring cup (or they used to) if not either use a measurement translator or buy a set of US measuring stuff.  A huge amount of good recipes for food storage are from North America, so it may be worth a few pounds to do this and have a set of everything.  I try to have both US and Metric stuff around, but the weight thing is what confusing when using bread bakers.

OK the basic recipe itself

Largest Bread Baker (common in the UK because it is a 1 kilo or 2 1/2 pounds)

First: read the directions on your bread baker and see if it is a liquid first or flour first.  Put the stuff in the order they suggest.  If doing this without a bread baker, you need to take your yeast and put it in a small bowl of WARM but NOT HOT water with a tsp or so of sugar and honey.  Wait for it to bubble, about five minutes, in the UK or Ireland you will also need to do this with regular yeast as only "Fast-Acting" Yeast works well directly in the bread baker.

Now Large Loaf (makes 2 loaves for the oven)
2 Tbsp Yeast
2 Tbsp to 1/2 cup of Sugar (savory to very sweet bread)
2 Tbsp to 1/4 cup butter or oil (corn oil, olive oil, melted lard etc)
1 to 1 1/2 tsp salt
6 cups of flour (be sure to use BREAD flour or HARD flour in the UK)
2 Cups liquid (Water, milk, eggs, cream, juice, mashed potatoes, etc)

If using something with some solids in it like mashed potatoes or yogurt as part of the liquid, mix it with the water or milk in the measuring cup.  Sometimes you will need to add a bit more water, I suggest not doing this the first time you make bread but wait until you've a couple of loaves under your belt.  Eggs are about 1/4 cup of liquid each, but you can test this by just mixing them with your flour or milk until it all reaches two cups.

Put your ingredients in order your bread baker suggests.  If doing this by hand, add all liquids to the yeast in a large bowl and then the flour gradually.  When it gets too thick to stir, begin to knead in the flour by had (see You Tube).  If you put oil or butter on your hands it is less messy.

Use the dough cycle on your machine, when it is done, take out dough and form into loaves.  If you don't have loaf pans, just use a couple of pizza trays, cookie sheets or even heavy foil to make round or long shaped loaves.

Cook for about 35 to 45 minutes depending on size of loaf. or about 25 minutes for rolls.

For hard breads (often made with water) cook higher like 180 to 210 (375 to 425)
For really hard breads add a pan of water onto the bottom shelf of a pre-heated hot oven.
For soft breads cook lower 150 to 170 (350 to 375)

For a really soft crust rub bread all over with butter when done.

To test for done, hit the bottom of the loaf, it should have a hollow sound.  You'll learn to "get it" over time.  If bread is very under done by accident, put it back in the oven on a cookie sheet and or use it for toast.

For bread you need for sandwiches, try to resist the urge to cut it hot and start eating it, hot bread is one of the most wonderful things in the world but it will squish down and make poor loaves if cut hot.  Make a pan of rolls and a loaf of bread instead.  Eat the rolls hot.

UK Flour:  Many folks have trouble using bread bakers because so many of the recipes are from North America where the Default flour is "Strong" enough to bake yeast bread.  UK and Irish "Plain" flour is not, it is designed for softer soda breads and cakes.  It will just spin around in your bread maker and make a mess.  You can make a very soft yeast bread or rolls by hand with it, but it will not work in the machines.  Look for BREAD flour or STRONG flour in the UK and Ireland.  Many these days will say "good for bread bakers" but you can't count on that.

Smaller Bread Bakers
This is mostly a liquid to solid method ratio thing

You can do this bread in:
5 Cups flour to 1 3/4 cups liquid
4 Cups flour to 1 1/2 cups liquid
2 Cups flour to 3/4 cup liquid (smallest machines that make one loaf)

For all but the smallest machine, the salt, sugar and yeast stay about the same.  For the tiny machines/1 loaf cut them in half

happy bread baking and please post pictures of our results! 

Sunday, March 28, 2010

Are Preppers Crazy or is it Crazy Not to Prep?

by TheSurvivalMom

What do your friends and family say when you tell them you've been storing food, growing your own produce or that you subscribe to Mother Earth News? When they find out that you're considering raising chickens in your suburban backyard, do they think you're crazy? My own friends get this uneasy look in their eyes, and then slowly back away as if they hear the opening notes of "Dueling Banjos"!

The fact is, human beings have been survivalists, or preppers, for nearly our entire existence. Foraging, hunting, and gathering wasn't just an alternate lifestyle for our ancestors but the only means of survival. Each day, each season, brought the possibility of having no water, no food, no medicinal herbs, and no shelter. Storing as much food as possible, yes, stockpiling!, wasn't radical, it was sensible. The only alternative to preparedness was death.

Fast forward thousands of years, and self-sufficiency, by and large, is a thing of the past. We have forgotten essential, practical survival skills. Why take the trouble to grow your own food when there's a grocery store on every corner? The produce department displays not just one variety of apples but a dozen, all shiny clean and not a worm in sight. Discount stores offer shoes and clothing at a price much lower than anything handmade. Most of us revel in the quality and variety of goods that are so easily accessible, but will this era of plenty last indefinitely?

Additionally, many of the skills of our forefathers have been lost. Who among us knows how to make shoes by hand or spin wool into thread? Knowledge, as well, has been lost, often within just one generation. A farmer or an ardent gardener discovers that his or her children just aren't interested in the details and nuances of growing food. Knowledge accumulated over generations is lost forever when that older generation passes on.

It really is no wonder that preppers seem out of step with most everyone around us. There are obvious, ominous storm clouds on the horizon, and to us, it just makes sense to stock up on groceries, learn long-forgotten skills, and make plans for any number of emergencies.

Friends and family may question our sanity, but our ancestors would be proud of our efforts to prepare for an uncertain future.

The Infamous 63 Uses for Vinegar List (Plus One From Me)

Vinegar
This list has been floating around the Internet since the Y2K panic. Someone sent this to me recently and it was probably the tenth time I’ve come across it so I decided to archive the list here for posterity. I do not endorse all these uses and recommend caution when you experiment with some of these.
If you are a Comparative Religion or Folklore wonk like me you’ll be interested to know that some of these vinegar uses were first made popular  in the late 1800s/early1900s by “occult” chapbooks like Egyptian Secrets and John George Hohman’s Long Lost Friend which were collections of Christian prayers, eyebrow raising home remedies (like distilling black snails to cure warts!) and recipes for making such farm hold staples as molasses. Ten or fifteen years ago you’d have to visit a botanica or other specialty shop to get your hands on one of these. Now they are becoming increasingly popular, (as is folk medicine in general) as it becomes clearer to more and more people that we are pretty much going to be on our own as our economy is ridden off a cliff.
Anyway, here’s the list:
1. Arthritis tonic and treatment; 2 spoonfuls of apple cider vinegar and honey in a glass of water several times daily.
2. Thirst-quenching drink: apple cider vinegar mixed with cold water.
3. Sagging cane chairs: sponge them with a hot solution of half vinegar and half water. Place the chairs out in the hot sun to dry.
4. Skin burns: apply ice cold vinegar right away for fast relief. Will prevent burn blisters.
5. Add a spoonful of vinegar to cooking water to make cauliflower white and clean.
6. Storing cheese: keep it fresh longer by wrapping it in a vinegar-soaked cloth and keeping it in a sealed container.
7. Remove stains from stainless steel and chrome with a vinegar-dampened cloth.
8. Rinse glasses and dishes in water and vinegar to remove spots and film.
9. Prevent grease build-up in your oven by frequently wiping it with vinegar.
10. Wipe jars of preserves and canned food with vinegar to prevent mold-producing bacteria.
11. To eliminate mildew, dust and odors, wipe down walls with vinegar-soaked cloth.
12. Clean windows with vinegar and water.
13. Hardened paint brushes: simmer in boiling vinegar and wash in hot soapy water.
14. Clean breadbox and food containers with vinegar-dampened cloth to keep fresh-smelling and clean.
15. Pour boiling vinegar down drains to unclog and clean them.
16. Clean fireplace bricks with undiluted vinegar.
17. An excellent all-purpose cleaner: vinegar mixed with salt. Cleans copper, bronze, brass, dishes, pots, pans, skillets, glasses, windows. Rinse well.
18. Make your catsup and other condiments last long by adding vinegar.
19. To clear up respiratory congestion, inhale a vapor mist from steaming pot containing water and several spoonfuls of vinegar.
20. Apple cider vinegar and honey as a cure-all: use to prevent apathy, obesity, hay fever, asthma, rashes, food poisoning, heartburn, sore throat, bad eyesight, dandruff, brittle nails and bad breath.
21. When boiling eggs, add some vinegar to the water to prevent white from leaking out of a cracked egg.
22. When poaching eggs, add a teaspoon of vinegar to the water to prevent separation.
23. Weight loss: vinegar helps prevent fat from accumulating in the body.
24. Canned fish and shrimp: to give it a freshly caught taste, soak in a mixture of sherry and 2 tablespoons of vinegar.
25. Add a spoonful of vinegar when cooking fruit to improve the flavor.
26. Soak fish in vinegar and water before cooking for a tender, sweeter taste.
27. Add vinegar to boiling ham to improve flavor and cut salty taste.
28. Improve the flavor of desserts by adding a touch of vinegar.
29. Add vinegar to your deep fryer to eliminate a greasy taste.
30. Add a tablespoon of vinegar to fruit gelatin to hold it firm.
31. Steep your favorite herb in vinegar until you have a pleasing taste and aroma.
32. Use vinegar instead of lemon on fried and broiled foods.
33. To remove lime coating on your tea kettle; add vinegar to the water and let stand overnight.
34. To make a good liniment: beat 1 whole egg, add 1 cup vinegar and 1 cup turpentine. Blend.
35. Apply vinegar to chapped, cracked skin for quick healing.
36. Vinegar promotes skin health: rub on tired, sore or swollen areas.
37. Reduce mineral deposits in pipes, radiators, kettles and tanks by adding vinegar into the system.
38. Rub vinegar on the cut end of uncooked ham to prevent mold.
39. Clean jars with vinegar and water to remove odor.
40. Avoid cabbage odor by adding vinegar to the cooking water.
41. Skunk odor: remove from pets by rubbing fur with vinegar.
42. Paint adheres better to galvanized metal that has been wiped with vinegar.
43. Pets’ drinking water: add vinegar to eliminate odor and encourage shiny fur.
44. For fluffy meringue: beat 3 egg whites with a teaspoon of vinegar.
45. Pie crust: add 1 tablespoon vinegar to your pastry recipe for an exceptional crust.
46. Half a teaspoon per quart of patching plaster allows you more time to work the plaster before it hardens.
47. Prevent discoloration of peeled potatoes by adding a few drops of vinegar to water. They will keep fresh for days in fridge.
48. Poultry water: add vinegar to increase egg production and to produce tender meat.
49. Preserve peppers: put freshly picked peppers in a sterilized jar and finish filling with boiling vinegar.
50. Olives and pimentos will keep indefinitely if covered with vinegar and refrigerated.
51. Add 1 tsp. vinegar to cooking water for fluffier rice.
52. Add vinegar to laundry rinse water: removes all soap and prevents yellowing.
53. After shampoo hair rinse: 1 ounce apple cider vinegar in 1 quart of distilled water.
54. For a shiny crust on homemade bread and rolls: just before they have finished baking, take them out, brush crusts with vinegar, return to oven to finish baking.
55. Homemade sour cream: blend together 1 cup cottage cheese, 1/4 cup skim milk and 1 tsp. vinegar.
56. Boil vinegar and water in pots to remove stains.
57. Remove berry stains from hands with vinegar.
58. Prevent sugaring by mixing a drop of vinegar in the cake icing.
59. Cold vinegar relieves sunburn.
60. When boiling meat, add a spoonful of vinegar to the water to make it more tender.
61. Marinate tough meat in vinegar overnight to tenderize.
62. A strength tonic: combine raw eggs, vinegar and black pepper. Blend well.
63. Douche: 2 to 4 ounces of vinegar in 2 quarts of warm water.
The guy usually given credit for this list is Henry Godwin, and old timer from the survival forums in the 90s.
I’ll add my own little use here that ties into #6 above. If you have cheese getting moldy cut the mold off and wipe down the rest with vinegar and you’ll get a few more days from the cheese. I’ve tried it and it works.

Natural Air Conditioning

As I am woring in one of the warmest places on earth, I was speaking to an associate on how to cool down one of the buried conexes used for storage.  I explained that there was a technique used or invented by the Romans a long time ago. A natural form of air conditioning or ventilation was used roughly as follows:


A trench 6 to 12 feet deep and 100 to 200 yards long was dug leading from the "house" in a straight line away from the house.

Into this trench a large diameter pipe (these days corrugated drainage pipe 2 or 3 feet diameter) was laid, with holes drilled into the bottom to drain water that condensed inside the pipe. The trench was then covered over.

At the far end a 90 degree elbow was attached and more pipe added so that it reached above ground and the end covered with some sort of wire mesh attached to keep out unwanted things such as rodents, etc., and then another elbow could be added at this end to shield against rain.

The house end of the pipe entered the house and was the source of incoming air.

The key to making this work is to add a convection chimney.

The Convection chimney is built such that it's inside opening is at a high point inside the building.

On the outside, two intersecting sides of the chimney; are painted flat black, and the resulting V formed by the two connecting sides face south. In other words, the V needs to face the mid point between where the sun rises and sets.

The two other sides must be transparent, Plexiglas or some equivalent. Also, the higher/larger the chimney, the better.

How it works: the sun heats up the chimney causing the air inside to rise, thus drawing air through the cool pipe. The pipe cools the air drawn from the outside to the temperature of the earth at the depth at which it is buried (which is virtually constant year around at this depth). By the way, an interesting note: Even in cold climates where the ground is frozen, the incoming air is only 32F when the air outside may be much colder, we need only heat the air by 38F to bring it to 70F; as opposed to heating outside air of say -15F to 70F we would have to heat the incoming air by 85F - quite a difference in the amount of heating energy we would have to supply by some other means.

Of course, without the sun to warm the chimney (or some other source) the system isn't worth fooling with.

For more interesting stuff, come visit me at Prepare to Survive in California.