There are a lot of essential items that you need to stockpile to be fully prepared for natural disasters and worst-case scenarios. It’s tempting to simply load up on a lot of food, water, ammo, and other supplies and call it good. Things get locked away in storage areas, tote bins, and barrels without being […]
Personal hygiene and survival without power are the topics of the day. If you missed some of my posts, I am often asked to speak to different church groups, businesses, and neighborhoods about emergency preparedness and food storage.
I hired a friend to take professional pictures of my emergency preps, cooking devices, washtubs, emergency toilets, emergency cooking stoves, and fuel, to name a few. I can no longer carry everything to all the classes or presentations.
Personal Hygiene-How To Survive Without Power
I’m not sure how much longer I’ll be able to continue to do these presentations. UPDATE: I am no longer able to do them. I’m honored to be able to teach when I can to get the word out about being prepared for the unexpected. Today, let’s talk about personal hygiene.
I’m so thankful to my reader, who I call a friend, Joanne, for asking me to put a “print” button on my website. I want people to be able to print my articles and teach others in whatever manner they feel comfortable. You can share my pictures and prepare your family, friends, and neighbors.
I realize some people “get it,” but many are not interested in any preparedness items or food storage, which I think is too bad. Somehow, we need to help others to be prepared for the unexpected. After a disaster, the government may not be able to bring supplies for 3 days, 3 weeks, or 3 months, depending on the type of disaster, where you live, and the government agencies assigned to work in your area.
A few years ago, I talked to my sister in Texas, who lived near where Hurricane Harvey was a Category 4. She said the gas pumps and store shelves were empty, and no one could buy water.
I remember calling my sister to check on their family before the authorities started evacuations. She called friends in other cities in Texas, and they were in the same predicament.
Here’s the deal: in some areas near Hurricane Harvey, they were asked to evacuate or try to get supplies, if possible, before the storm hit their location. I heard the City Manager in one city ask those who declined to evacuate to please write their social security numbers on their arms so they could be identified after the storm.
I took a double-take on that one. I had to rewind the DVR to make sure I heard that right.
Here’s the deal: we never know when our neighborhood, city, or county may have a disaster, just like Hurricane Harvey.
How to Survive Without Power
There are certain things we want after a disaster like we at least want clean underwear, right? I think we can all agree on that one. I have seen fancy wringer washers from different stores but have not purchased one yet. It’s on my wishlist, but here are a few ways to wash our clothes without power.
In most cases, we may lose power after a major or even a minor disaster. I hope you can use some of these ideas for those unexpected disasters. The water lines may become contaminated, but I’ll discuss that later.
So that you know, the American Red Cross recommends storing one gallon of water per person per day. I disagree. That amount is acceptable if you only want to hydrate yourself, but what about washing dishes, washing underwear, and cooking with dehydrated or freeze-dried foods? I highly encourage you to store 4 gallons of water per person per day.
Wash Tubs and Wash Boards:
Those shown below are Behrens wash tubs I purchased on Amazon and the washboard I found at a thrift store. The clothespins are made by Kevins Clothespins. I have bought many brands of clothespins that fell apart after using them once; this brand is the only one I can endorse.
You may have seen my post on making these Emergency Washing Machines. This set takes two 6-gallon buckets, one of which we drilled holes in so there would be more friction when washing or rinsing clothes.
You need one Gamma lid (we drilled a 2-inch hole in the top) with one mobile washing tool with a handle. I place paper towels between the buckets when stored. I can’t separate them without that buffer.
I did a YouTube video for a company called Earth Easy, which they use on their website. They sent me the clothesline to try, and I highly recommend one. I can close it and store it when not in use. It’s perfect for the HOA I live in. If you already own a clothesline, I tip my hat to you! Thank you for being prepared. You’re going to need it, I promise.
Emergency Toilet Ideas
The picture below shows the difference between a 5-gallon and a 6-gallon emergency toilet. The older you get, the harder it is to squat down on the lower toilet.
You will want to store things inside your emergency toilet: hand sanitizer, toilet paper, 10-gallon bags, kitty litter, or sawdust. The #10 can potty is a post I wrote for emergency toilets in cars. And don’t forget the toilet seat.
Sturdy Toilet Set
This emergency toilet was made by a nephew, Dayne. I’m having a friend make one for me, and I hope to share the instructions on creating one. This one uses an attached regular toilet seat and a 6-gallon bucket. If you are handy, you can probably build your own around the bucket.
Dayne even attached a toilet paper holder on the side. When I saw this, I almost did a cartwheel, or at least I wished I could do one. I was so excited to see this design.
The picture below shows an approach anyone can make in their own home. Please duct tape the handle so the little ones do not try to flush the large black 30-gallon garbage bag down the sewer lines. You lift the toilet lid and seat, place the bag in the toilet base, and fill it with kitty litter.
If you have a flushable toilet from a trailer, those work great and are inexpensive. Flushable camping toilet
Rose reminded me about storing baby wipes! I wrote a post about baby wipes. Remember, even if they dry out, you can fill the container with water, and they work fine!
Emergency Shower
I visited my doctor, a prepper, and he showed me his water bottles for personal showers! Oh my gosh, why hadn’t I thought of that? I quickly ordered some online Zep Water Spray Bottles (32-ounce size). Yes, baby wipes work, but I can now wash and rinse my hair and clean other critical areas of my body! Just fill the bottles when needed.
Final Word
I have wheat buckets, so I decided to save money and make my toilets. Thanks again for being prepared for the unexpected. May God bless this world at this time. We need it more now than ever before. Yes, you can survive without power because you are ready and realize you can’t depend on the government. They can’t begin to take care of everyone, as we have seen after several disasters. We must take care of ourselves and be self-reliant. Do you think we can survive without power? Yes, we can.
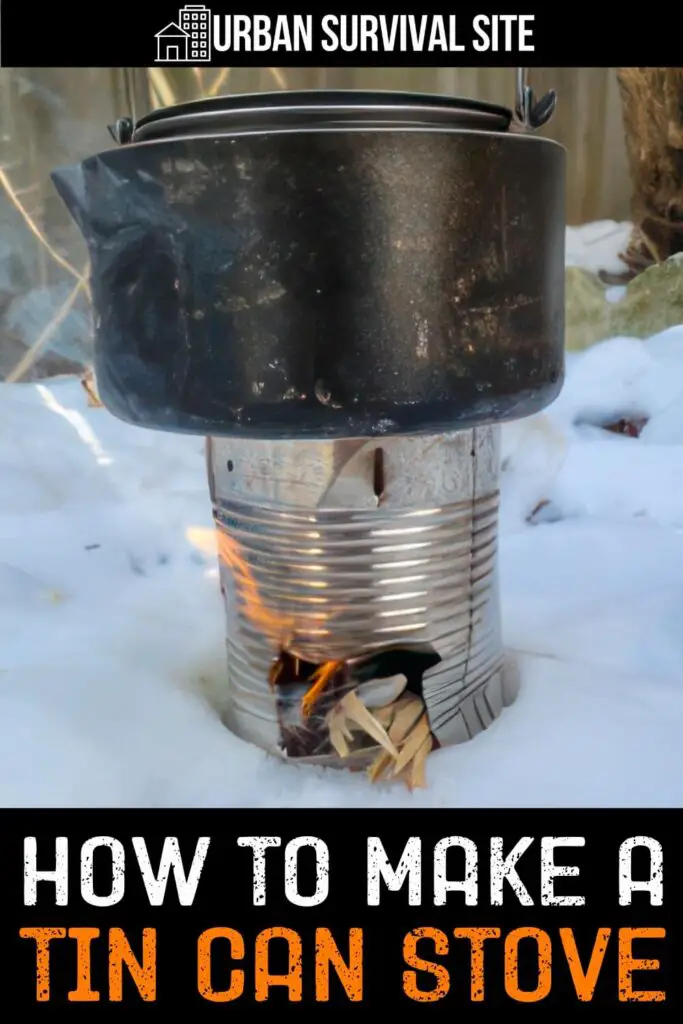
Even if you're not in a survival situation, knowing how to make a tin can stove is still an useful skill to have. Perfect for boiling water or whipping up a simple meal, this lightweight, efficient tool offers functionality without requiring expensive materials or tedious assembly.
Best of all, it's something you can create from items you likely already have at home or items that can be easily scavenged outside.
A tin can stove is a compact, DIY cooking tool built from an empty tin can. Because of its simplicity and versatility, it’s a popular solution for outdoor enthusiasts, survivalists, and anyone tackling basic preparedness projects.
Crafted with just a few holes and an opening for fuel, the stove channels airflow efficiently, allowing a small flame to burn hot enough to cook food or boil water.
Unlike larger camping stoves or equipment requiring fuel canisters, tin can stoves have the unique advantage of using natural materials like small sticks or cardboard as fuel. They provide a lightweight, low-cost alternative to commercial stoves, which some people will use on their camping trips for simple cooking.
Materials and Tools You'll Need
To get started, you’ll need a handful of basic materials and some tools. The can may be sharp to handle, so if you want to avoid injury, wear some cut-resistant gloves.
Materials:
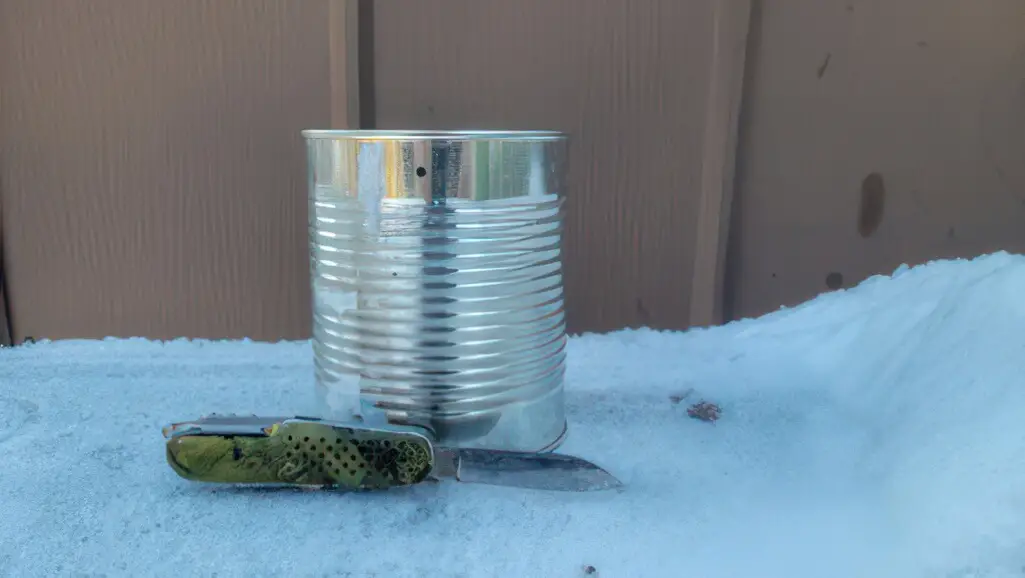
A large tin can (e.g., from canned vegetables or juice)
Thin sticks, twigs, cardboard, or other natural flammable material for fuel
Matches or a lighter to ignite the stove
Tools:
Tin snips, tough scissors, or a sharp utility knife
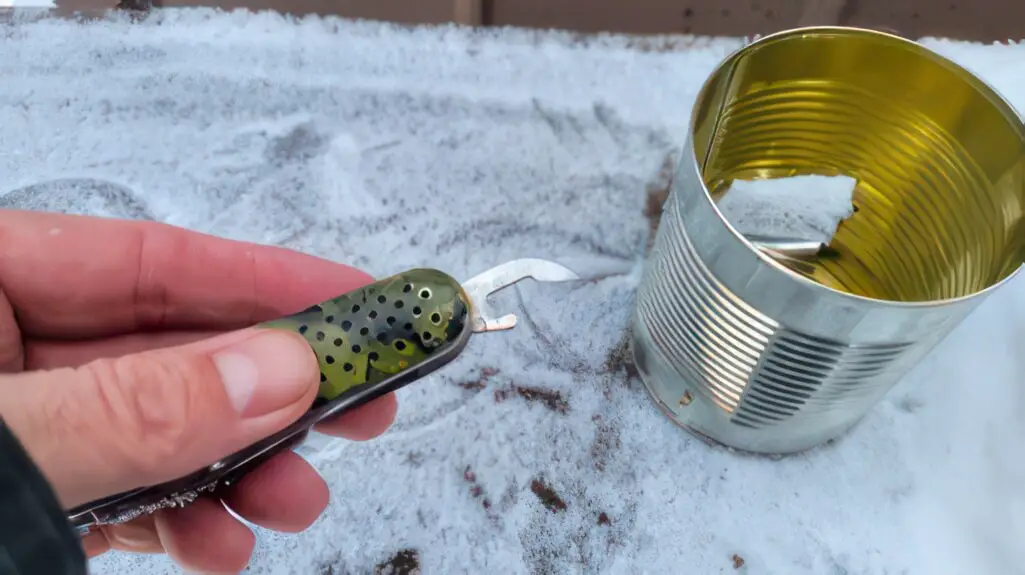
A pocket can opener (or any handheld can opener for punching holes)
Work gloves (highly recommended for handling sharp edges)
Choose the size of the tin can based on your cooking needs. Larger cans can hold more fuel, making them ideal for extended burns or larger meals. Smaller cans are more portable but may need refueling more often.
Step-by-Step Guide to Building Your Tin Can Stove
Now that you’ve gathered your materials, it’s time to build your stove. The steps are relatively simple, and you should have your stove up and running in 10 minutes or less.
Step 1: Preparing the Tin Can
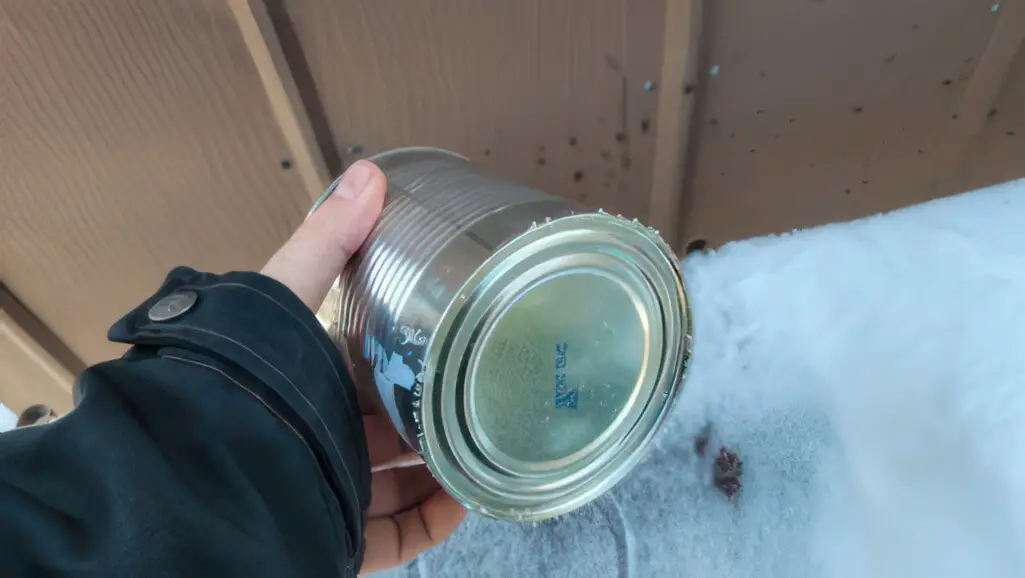
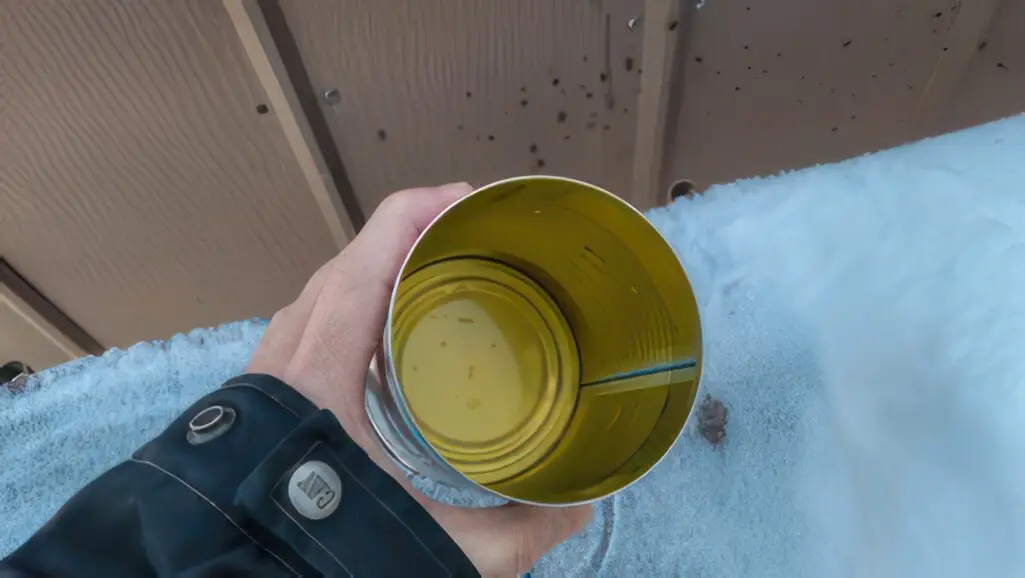
Start by removing any labels and adhesive from your can. Labels can catch fire and produce harmful fumes, so it’s essential to work with a clean exterior.
Inspect the can to ensure it’s intact and has a sturdy bottom to support fuel and your cooking vessel. If the can is missing its bottom, don’t worry—a tin can stove can still be built. At that point, you'll burn the fuel on the ground.
Step 2: Cutting the Fuel Opening
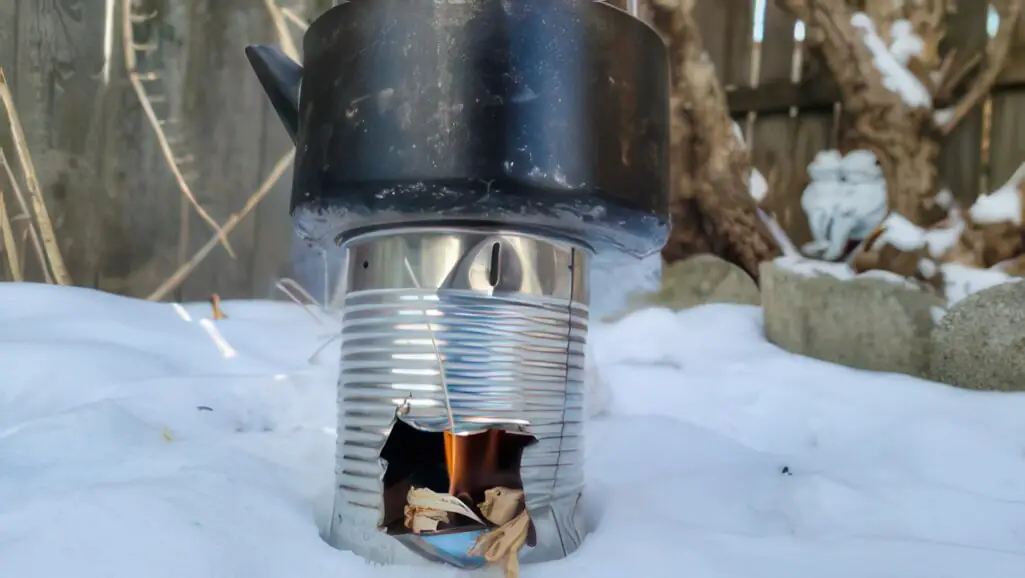
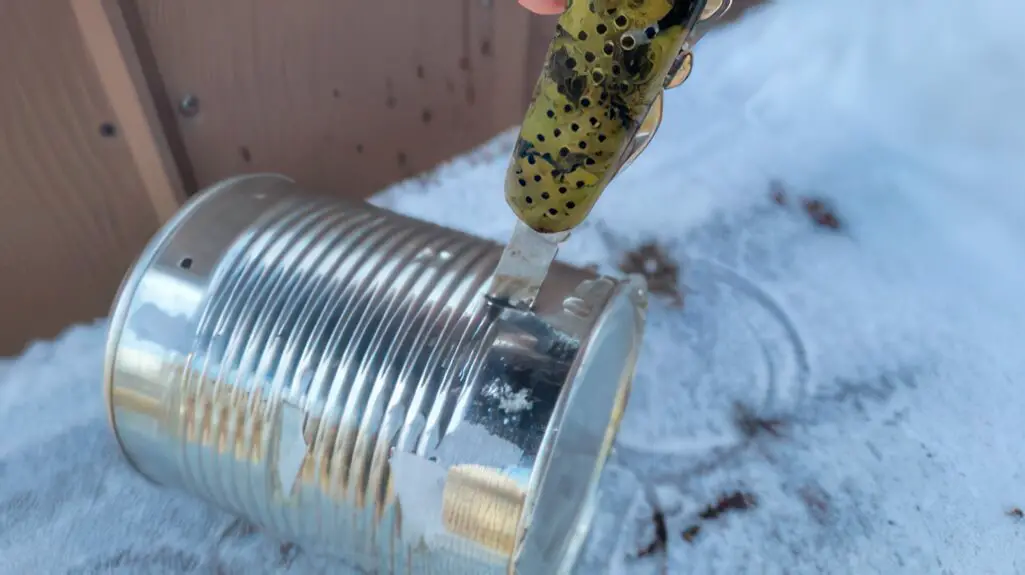
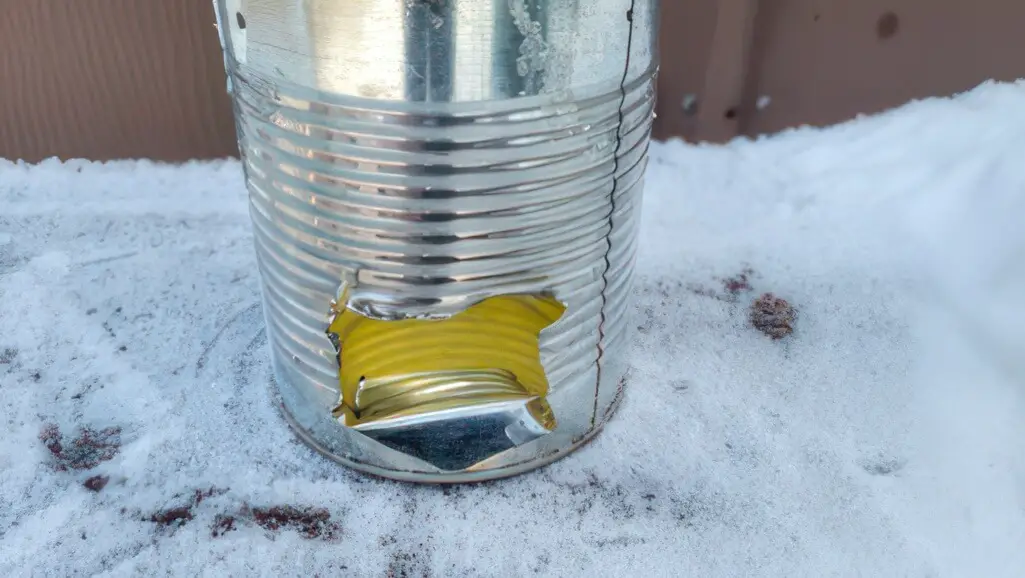
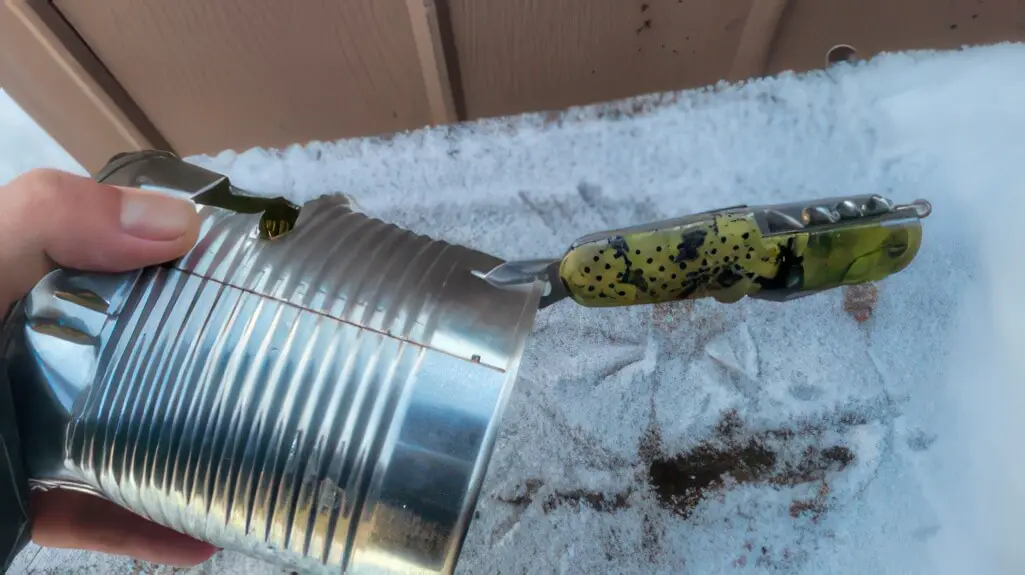
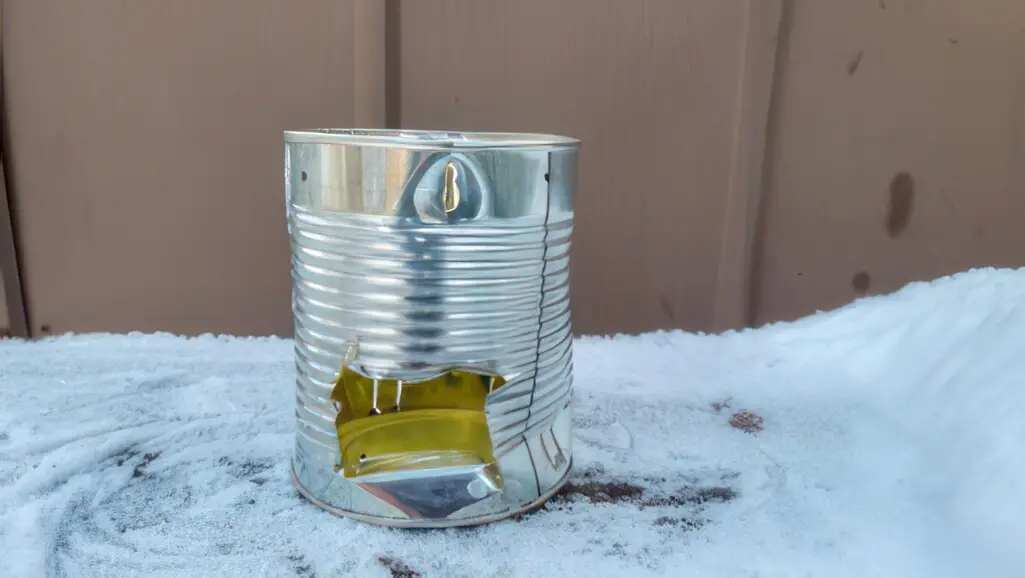
Using your knife, carefully cut a rectangular opening on the bottom side of the can. This opening will serve as the insertion point for your fuel. Aim for an opening that is just large enough to fit small sticks, twigs, or rolled cardboard.
After the opening is cut, fold the cut flap inwards, it should rest on the bottom lid of the can on the inside.
Step 3: Adding Ventilation Holes
Airflow is critical for keeping the fire burning efficiently. To achieve this, use your pocket can opener to punch small, evenly spaced holes in paired sets around the base of the can. This allows oxygen to flow in and feed the fire.
Next, add four single ventilation holes along the top rim of the can. These prevent your pot, pan, or kettle from smothering the flame while cooking. The holes also help release heat, aiding the combustion process.
How to Use Your Tin Can Stove
Lightweight, functional, and easy to assemble, your tin can stove is ready to tackle its first use! Here’s how to make the most of it.
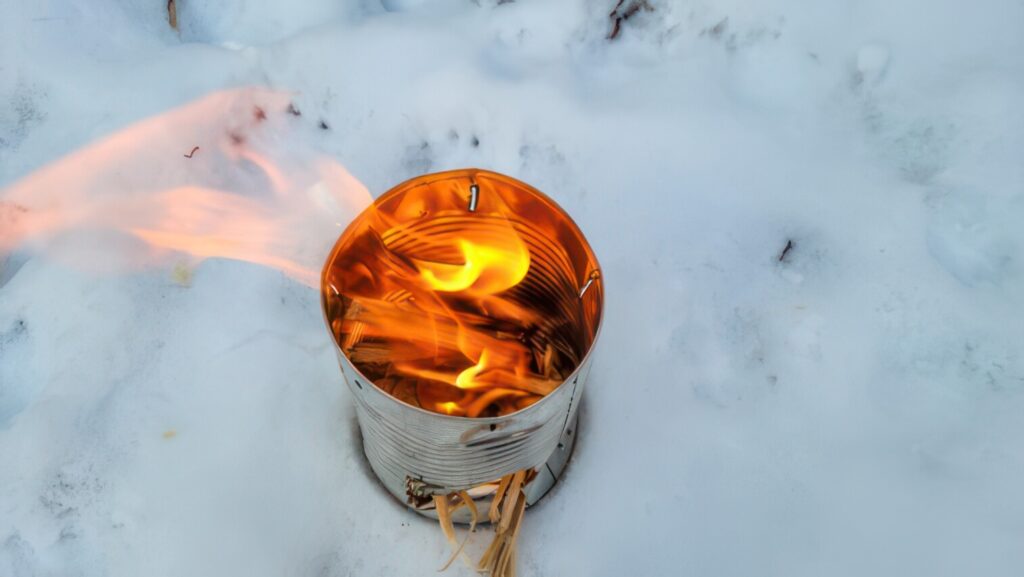
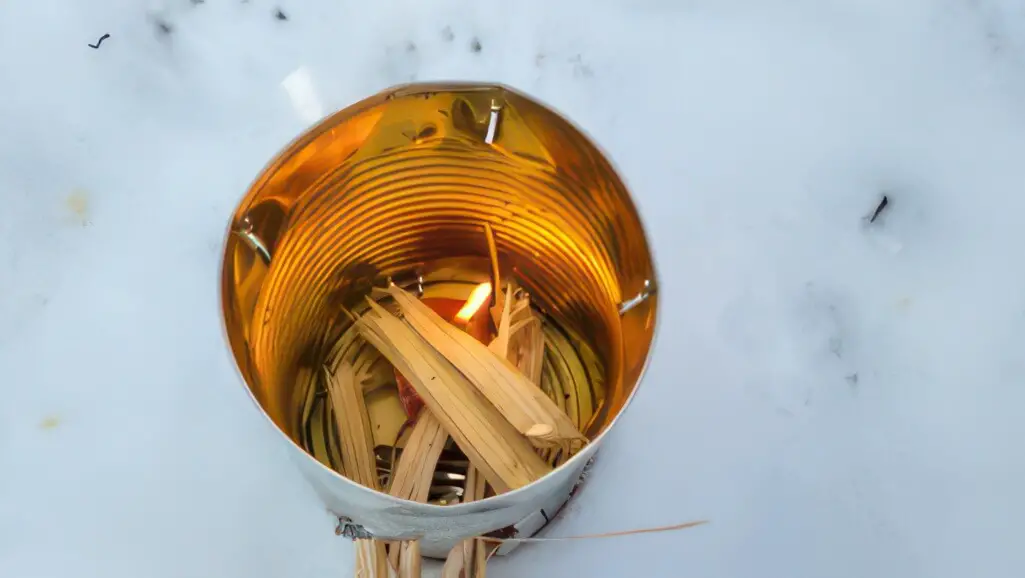
1. Load the Fuel: Begin by loosely stacking small sticks, twigs, or dry cardboard into the fuel opening at the bottom of the can.
For easy lighting, place a few pieces of crumpled paper or dry leaves close to the opening.
2. Ignite: Carefully light the paper or leaves using a lighter or matches. This base layer of tinder helps ignite the larger pieces of fuel above it.
3. Monitor the Flame: Add small sticks gradually as the initial fire catches, ensuring the flame stays consistent and hot. Many small, dry sticks will burn hotter and faster than a single large piece of wood.
4. Start Cooking: Once the flame is steady, position your pot or pan on top of the can. Keep an eye on the fire and add fuel every time you feel the heat is diminishing.
Final Thoughts
A tin can stove is one of those tools that showcases ingenuity, affordability, and practicality rolled into one DIY project.
While not a long-term solution, it is capable of lasting several burns before showing wear. Since you can find old cans nearly everywhere in the world it's one of the best options for anyone needing a stove in a pinch.
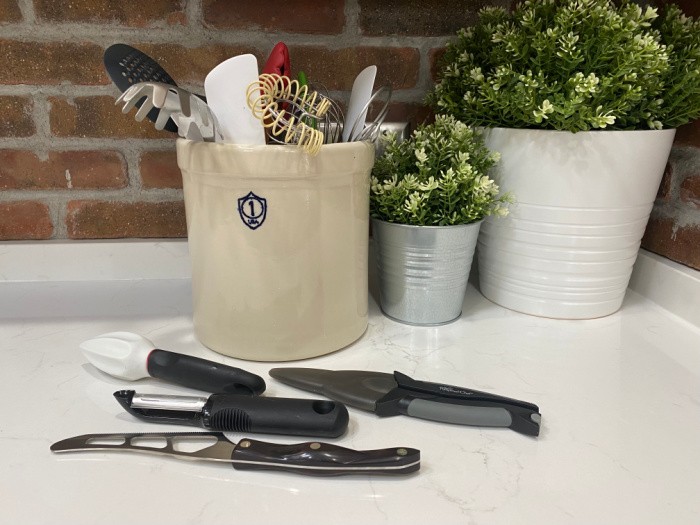
If you teach others to cook from scratch, I highly recommend these cooking utensils. If you have others you want to be added to my list, let me know. We all learn from one another.
Some may be new to you, and some may be your old standby. I remember teaching a food storage class, and I mentioned one item every family needs in the kitchen: a can opener. One lady asked why. She mentioned she only buys fresh fruit and vegetables. Okay, I get it. I would love to do that as well.
She said she’s never owned a can opener. You can picture my jaw-dropping, right? I know so many canned goods have flip tops with tabs that are supposed to be easier to open now. I understand they do not last as long on the shelves, so I try only to get “Can Opener” ones.
I have cans of olives and green chilies that need a can opener. I asked her, “How will you open your #10 cans?” This is if you need a good can opener for those large cans. Commercial Can Opener or a Regular Can Opener, or if you have arthritic hands like me, Hamiton Beach Electric Can Opener.
Yes, I will use 8-10 hand-crank ones when I have to. That’s how I roll. But for now, electric can openers are my best friend. So, this is why I am showing my number one item, a can opener, on the list today.
Every kitchen needs a few can openers. When I say a few, what I mean is if one breaks, you have a backup. You can never have too many can openers. I realize we are seeing more and more canned items with the pull tab, but there are still a lot that need a can opener.
2. Tongs
Having a few tongs in the kitchen is awesome. I have several different sizes. I prefer the ones with Silicone Handles. It’s nice to have different sizes because you need larger ones for barbecuing and smaller ones to use when serving “build your own sandwiches,” or for salads. They work perfectly for serving salads from a bowl. Smaller Tongs and 3 Sizes of Silicone Tongs
3. Skimmer
You can use a Skimmer Strainer for so many things. I use it when making doughnuts or blanching food to dehydrate. It’s larger than a slotted spoon and drains a whole lot better. Oh, and if you have lumps in gravy, use this, it works!
4. Pancake Turner
Pancake turners are for pancakes to flip them over. But Pancake Turners can be used for grilled cheese sandwiches, crepes, burgers, and more.
5. Spoon
Here’s the deal, I realize everyone has a spoon or several spoons in their kitchen. But this is where we will get a little more specific. You need a spoon that feels good in your hands to stir, you don’t want it too short and not too long either.
If you have a tall pot you need a longer spoon, if you are using a 4-quart pot, you can use a smaller one. Here is an 8-inch Stainless Steel Silicone Spoon, it’s perfect for smaller pans or bowls for mixing. These 10-inch Silicone Spoons are great for mixing up or stirring in medium-size bowls and pans.
6. Ladle
It’s nice to have a gravy ladle and a soup ladle. They are two different sizes. In the olden days, if you bought a set of stainless steel silverware you automatically received a matching gravy ladle. Not anymore, or at least the set I purchased at Costco didn’t. I’m still using my wedding gift gravy ladle, it’s 52 years old and still going strong. It doesn’t match my other stainless steel items, but hey, I have a gravy ladle. 12-inch Stainless Steel Ladle and here’s a smaller Gravy Ladle.
7. Gravy Bowl
Do you love gravy? I sure do. If you need help making it, this is how I make it. I love having a gravy boat or bowl. Gravy Boat/Bowl
I use the pan that the turkey, chicken, or beef was baked in with the "drippings" and bring the liquid to a boil. If you have very little juice or drippings, add some water. Now, I can't give you exact measurements because this depends on the size of a turkey, chicken, or roast you purchased and how many drippings are available. Over time, with experience, you'll learn.
I take about 1-2 cups of flour put it in a quart jar with cold water and shake it like crazy.
I slowly add this mixture to the hot boiling turkey, chicken, or beef drippings. Use a whisk and stir constantly.
I have a quart pitcher with cold water to add to this pan as the gravy thickens. I add water until it's the consistency I prefer. Not too runny, but not too thick.
I add salt, pepper, and sugar to taste. Yep, it's the sugar that brings out the best flavor. Of course, it's optional.
If you have some lumps, no worries, bring out the hand mixer. The flavor is fabulous and so easy to make.
8. Whisk
You can never have too many whisks, I use them for so many things. Scrambled eggs, gravy, making Jello, etc. It’s nice to have different sizes, right? Stainless Steel Whisks
9. Danish Whisk
By now you know, I love Danish Whisks, I use them all the time. You can buy a stainless steel one or one with a wood handle. If you are looking for a dishwasher-safe one, I recommend a Stainless Steel Danish Whisk. What I like about the Danish whisk is the fact that if we lose power, it works great for pancakes, eggs, cupcakes, muffins, cookies, and even cakes. Yes, I have a sweet tooth.
10. Hand-Crank Egg Beater
Here again, we must always be prepared for power outages, I grew up using one of these and you probably did as well. It can whip eggs fast, for instance. But, it’s good for just about mixing up anything, if it’s whippable. Hand-Crank Egg Beater
11. Lemon/Lime Reamer
I use those awesome TrueLemon and Lime Packets when I don’t have fresh fruit. But, I love to squeeze some fresh lime over my Mexican dishes. So I use one of these Lemon/Lime Reamer.
12. Pasta Server
Who loves pasta as much as I do? I know, it has a lot of carbs, but even so, I like to have spaghetti at least once a month. It helps to have a pasta server after you cook the spaghetti, right? Tongs are okay, but a true Spaghetti Server is best!
13. Rolling Pin
It’s funny, as I write about a rolling pin, I’m wondering if any of my daughters even have one! I actually started to laugh. I’m not sure they would have one. Oh, they must, right? I use mine when I make bread, some dinner rolls, pizza dough, and if I attempt to make a pie crust. So there you have it, everyone needs one. Rolling Pin
14. Slotted Spoon
Sometimes, a slotted spoon comes in handy to serve some foods where you want to drain the broth or serve something without scooping up all the gravy or sauce. It’s perfect for straining vegetables as you serve them. Slotted Spoon
15. Bread Board
Over the years I have given my daughters a good breadboard, my motto is to buy right the first time. If you keep it oiled it should last a lifetime. I have a few different sizes, but my favorite one is the larger one. Large Cutting Board In order to keep it nice, oil it often, this is what I use. Cutting Board Oil
16. Good Knives
Over the years I have tried many different knives. You may remember me telling you, I had the privilege of teaching classes at fancy kitchen stores. Therefore, I learned about the best knives. I quickly learned ceramic one are not for me. They can’t be sharpened and they can snap or break whatever you want to call it. They are expensive, but I prefer metal ones, a lot more.
One day I was at Costco, and they had a “Roadshow” where this guy was selling “Cutco” knives. I love the fact they sharpen them for free. You may have to pay to ship the knives to them for sharpening, I can’t remember.
I highly recommend you watch for one of their “Roadshows” and purchase one or two knives at a time. You will be thrilled how well they cut, and stay sharp. Plus, you can get them cheaper by buying a package deal.
They tend to be pretty expensive, but they are truly the best knives I have ever used. I gifted a few to my son-in-law and he loves them. He protects them like they are gold. He keeps them in sleeves and loves to cook with my daughter in the kitchen. These are my two favorite ones, the CUTCO Model 1766 Santoku and this one, the Model 1764 CUTCO Traditional Cheese Knives (perfect for so many things like tomatoes! This is the bread knife I use, Cutco 1724 10 Inch Bread Knife
17. Vegetable Shears
It’s nice to have a pair of kitchen shears that are dishwasher safe so they are not cross-contaminated with other foods. I use mine for cutting bacon, snipping herbs, cutting up pizza slices, cutting up lettuce, and so many other items. Vegetable Shears The advantage of kitchen shears is that they are sharper compared to craft scissors.
18. Lettuce Cutter
One thing I learned many years ago if you use a plastic lettuce knife it will keep the lettuce from getting rust-colored edges. ZYLISS Lettuce Knife
19. Cheese Slicer
Mark loves thinly sliced cheese so he always uses a cheese slicer. I use my Cutco cheese slicer. It’s all about how you prefer your cheese sliced. OXO Good Grips Non-Stick Cheese Slicer
20. Spatulas
My favorite spatulas are silicone because I can use them with a hot cast iron pan or scraping the frosting from a bowl. Spatulas
21. Measuring Cups
When I’m in the kitchen, I love seeing the distinct numbers on the handles of my measuring cups. These are the ones I give as wedding gifts. Measuring Cups. These nestle inside each other so that’s a bonus for me since it saves so much room in my kitchen drawers.
22. Measuring Spoons
Of course, having one or two sets of measuring spoons is critical for any cook or baker. Measuring Spoons
23. Dough Scraper
Whenever you need something to scrape stuff off your countertop, (carefully so as not to cut the counter) this is my go-to tool. I use it to cut my bread dough because I learned years ago never to stretch bread dough. I cut my bread dough into sections, and do the same with my dinner rolls as I cut the dough into portions. Dough Scraper
24. Pastry Cutter
My kitchen has one of these, but it is used rarely because I find I need to take most of the weekend to make the best pie crusts and really have trouble finding the time! But even so, every kitchen needs one of these to cut the butter into the flour for pie crusts. My dream would be to make a coconut cream pie, I’m good at making a crust for chicken pot pies, but I want the challenge for fruit pies. Pastry Cutter
25. Hand Blender
Oh my gosh, I remember getting one of these about 30 years ago, maybe. If I had lumps in gravy, I would use this, and bim-bam they were gone. Braun Hand Blender
26. Sifter
Now, I have the giggles, I never sift anything, even if the recipe calls for sifting. Don’t get me wrong, my mom sifted flour all the time. She used the sifter to sprinkle powdered sugar on cakes or fancy desserts. I have used mine to sift a little powdered sugar on fresh strawberries. My mom would be so proud I have one in the cupboard. Bellemain Stainless Steel Sifter
27. Vegetable Peeler
Do any of you have a few of these? I do because it’s how I roll. I used to peel so many things, then I learned how good the peelings are on certain vegetables, especially if they are Organic! So, sometimes I peel the cucumbers, and sometimes I don’t. But I still want a peeler, just in case the zucchini’s get overgrown, for one thing. Vegetable Peeler
28. Cheese Grater/Shredder
Were you aware that cheese that is purchased “grated or shredded” may have additives like potato starch and natamycin to keep it from clumping? Yes, I still buy it, but it tastes so much better freshly grated. Cheese Grater and this cheese grater for fresh Parmesan, Zyliss Classic Rotary Cheese Grater
29. Funnels
I use a funnel almost every day. If I purchase large bags of food, I break them down into quart or pint mason jars. This is the funnel I use for canning, Canning Funnel. This one is for any food that you don’t want spilling over the jars. Plain Funnel
30. Cookie Scoop
As you know I love to bake, and cookies are one of my favorite treats, besides ice cream. Yes, I have a sweet tooth! In case you missed this post, Soft Sugar Cookies. This is my favorite Cookie Scoop
31. Garlic Press
I’m so glad readers are reminding me of the ones I forgot to add! I love press garlic and a garlic press or squeezer is awesome! Garlic Press
32. Alaskan Ulu Knife
Angie reminded me of a knife she uses from Alaska. It’s an Ulu knife. My husband picked this up when on a trip to fish for halibut with family members in Alaska. I put the date of August 1- 4, 1995 on it when he returned so we could remember when he took the trip. Boy how the time flies.
It’s very sharp and is often used to cut the skin from game animals. My friend uses hers to cut up herbs on her wood cutting board in her kitchen. I’m sure it could come in handy cutting most anything as part of meal prep. Ulu Factory Alaskan Knife
33. Zester
I love adding a little “zest” to meals, salads, scrambled eggs, etc. It adds a little flavor and makes the dish pop with a zing. This is the zester I have, Microplane Zester and Angie mentioned this one, Foldable Zester/Grater
34. ServeSpoon
Thanks to Rhonda for telling me about this serving/cooking utensil. She said, “It’s not listed as a ServeSpoon, but I found it there under “ALL-IN-ONE KITCHEN TOOL SPATULA SKU: 1819” ( Lehman’s). Or Amazon, Spatula Server Made in The USA, 8-7/8
Cooking Utensils You Need In The Kitchen
Final Word
There is something about cooking with family in the kitchen. Please let me know your favorite cooking utensils and which ones I need to add. It’s all about making memories together and cooking from scratch in the kitchen. We can do this and have fun at the same time. May God Bless this world, Linda
A good chicken coop will be elevated off the ground slightly; this helps it stay dry, warmer, and also helps to deter predators. But even though your chickens are pretty adventurous and nimble, you don’t want them jumping up and down to get in and out of the coop. That can easily result in injury ... Read more