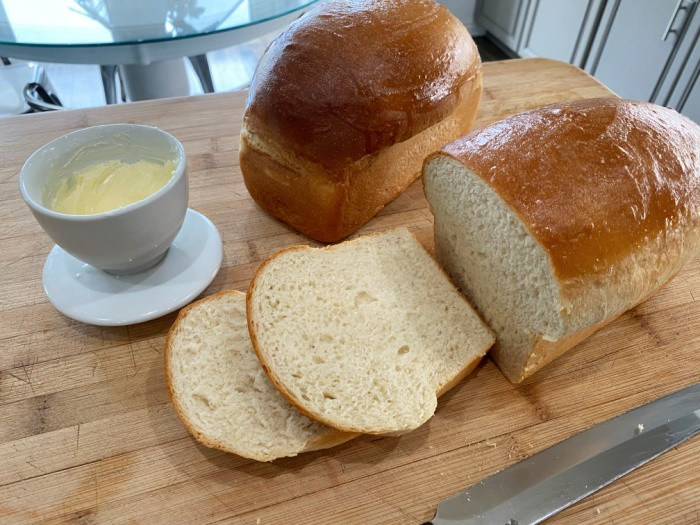
Today I’m sharing 50 sandwich ideas for your homemade bread. Most of them use ingredients you probably already have on hand, and many are perfect for using up leftovers so nothing goes to waste.
There’s something special about pulling a warm loaf of bread out of the oven. The whole house smells wonderful, the kids come running, and for a moment everything feels right with the world. But once that first slice with butter is gone, the next question is always the same. What should we make with the rest of it? I wish I could have everyone come over to my house and show them how easy it is to make bread. The trick is FRESH ingredients.
I love baking bread at home because it stretches the grocery budget, uses simple pantry staples like flour, yeast, salt, and water, and gives my family something far better than most store-bought loaves. Homemade bread is also a wonderful skill for anyone who cares about food storage and self-reliance. If you keep wheat, flour, and yeast in your pantry, you can feed your family well even when store shelves are bare. Please note: I store my Dough Enhancer and SAF Yeast in the refrigerator, never in the pantry. Surplus goes in the freezer. I only use a dough enhancer in my whole-wheat bread, dinner rolls, and cinnamon rolls. Bread Maker Machine, Dough Scraper, Bread Bags with ties.
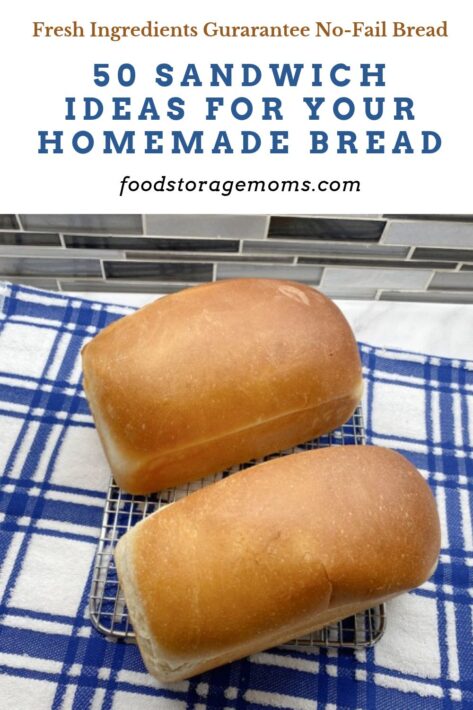
Why We Should Learn To Make Bread
Making homemade bread is one of the most valuable skills a family can learn. This saves money, since a few cups of flour, a little yeast, salt, and water cost far less than a bakery loaf. It gives you control over what goes into your food, with no preservatives or ingredients you can’t pronounce. It also builds self-reliance, because if you keep wheat, flour, and yeast in your food storage inventory, you can still feed your family fresh bread during a job loss, a winter storm, or an empty grocery store shelf. Just as important, bread making brings families together. Children love to knead the dough, watch it rise, and share that first warm slice. Our grandmothers knew these things well, and passing this simple skill on to the next generation is a gift that’ll bless your family for years to come.
Why Homemade Bread Makes Better Sandwiches
Homemade bread has more flavor, a better texture, and no long list of preservatives. A sturdy homemade loaf holds up to hearty fillings without falling apart, and it toasts beautifully. It’s also much cheaper. A basic loaf costs well under a dollar or two to make at home, depending on your ingredients, while a quality bakery loaf can cost five dollars or more.
Tips for Slicing and Storing Homemade Bread
Let your bread cool completely before slicing, or it’ll squish and turn gummy. A serrated bread knife works best. Store your loaf in a bread box or a paper bag for a day or two, or wrap it tightly and keep it in a plastic bag. If you won’t use it within three days, slice it and freeze it so you can pull out just what you need. Day-old bread is perfect for toasted sandwiches, grilled cheese, and French toast.
Classic Lunchbox Sandwiches
- Peanut Butter and Jelly. The old faithful. Use homemade jam if you have it, and your kids will think you’re a superhero.
- Peanut Butter and Banana. Slice a ripe banana over peanut butter and drizzle with honey for a filling, inexpensive lunch.
- Ham and Cheese. A few slices of ham, your favorite cheese, and a swipe of mustard. Simple and always a winner.
- Turkey and Swiss. Add lettuce and a little mayonnaise for a classic deli-style sandwich at home.
- Bologna and Cheese. A nostalgic, budget-friendly favorite. Fry the bologna for an extra treat.
- Egg Salad. Hard-boiled eggs, mayonnaise, mustard, salt, and pepper. Eggs are one of the most affordable proteins around.
- Tuna Salad. Canned tuna is a food storage staple. Mix it with mayonnaise, chopped celery, and a little pickle relish.
- Chicken Salad. Use leftover or canned chicken with mayonnaise, grapes or celery, and a sprinkle of pepper.
- Cream Cheese and Cucumber. Light, cool, and refreshing. Cut into small squares for a tea party lunch with the grandkids.
- Honey Butter. Soft butter whipped with honey on fresh bread. Sometimes the simplest things are the best.
Warm and Toasty Sandwiches
- Classic Grilled Cheese. Butter the outside of your bread and grill with cheddar or American cheese until golden. Pair it with tomato soup.
- Grilled Ham and Cheese. Add ham to your grilled cheese for a heartier meal.
- Tuna Melt. Spread tuna salad on bread, top with cheese, and grill or broil until bubbly.
- Patty Melt. A ground beef patty with grilled onions and Swiss cheese, toasted on buttered bread.
- Grilled Peanut Butter and Jelly. Grill it like a grilled cheese. The warm, melty center is a family favorite.
- Pizza Grilled Cheese. Add pepperoni, a spoonful of pizza sauce, and mozzarella. Serve with extra sauce for dipping.
- Apple and Cheddar Melt. Thin apple slices and sharp cheddar make a sweet-and-savory combination.
- Croque Monsieur. The French version of a ham and cheese, topped with a simple white sauce and broiled.
- Monte Cristo. Ham, turkey, and cheese dipped in egg and cooked like French toast. Dust with powdered sugar and serve with jam.
- Open-Faced Cheese Toast. Top a thick slice of bread with shredded cheese and broil. Quick, cheap, and comforting.
Hearty Dinner Sandwiches
- Sloppy Joes. Ground beef simmered in a tangy tomato sauce, spooned onto thick slices of toasted bread.
- Meatloaf Sandwich. Leftover meatloaf with ketchup is one of life’s greatest pleasures.
- Hot Roast Beef. Leftover roast on bread, smothered in hot gravy. Serve with a fork.
- Pulled Pork. Slow-cooked pork with barbecue sauce, topped with a scoop of coleslaw.
- Shredded Chicken Barbecue. Stretch one pot of chicken into several meals with this easy option.
- Philly Style Cheesesteak. Thin-sliced beef with sautéed onions and peppers, topped with melted provolone.
- Hot Turkey. Perfect for after the holidays. Leftover turkey, gravy, and a side of cranberry sauce.
- Meatball Sub. Use frozen or homemade meatballs with marinara and mozzarella on sliced bread.
- Chicken Parmesan. Breaded chicken with marinara and melted cheese. Leftover chicken nuggets work in a pinch.
- French Dip. Thin-sliced roast beef with a small bowl of beef broth for dipping.
Breakfast Sandwiches
- Egg and Cheese. A fried or scrambled egg with a slice of cheese. Ready in five minutes.
- Bacon, Egg, and Cheese. The classic diner breakfast made at home for a fraction of the price.
- Sausage and Egg. Use a breakfast sausage patty for a filling start to the day.
- French Toast Sandwich. Two slices of French toast with peanut butter or cream cheese, topped with berries in the middle.
- Fried Egg and Tomato. A summer garden favorite with salt, pepper, and a little mayonnaise.
- Cinnamon Toast. Butter, cinnamon, and sugar on toasted bread. Fold it over for little hands.
Vegetarian and Garden Sandwiches
- Tomato Sandwich. Thick garden tomato slices, mayonnaise, salt, and pepper. A true taste of summer.
- Veggie and Hummus. Spread hummus and pile on cucumbers, carrots, lettuce, and sprouts.
- Caprese. Tomato, fresh mozzarella, basil, and a drizzle of oil and vinegar.
- Avocado Toast Sandwich. Mashed avocado with a squeeze of lemon, salt, and a sliced egg.
- Black Bean Burger. Make patties from canned black beans, breadcrumbs, and spices. Another great food storage meal.
- Grilled Vegetable. Use zucchini, peppers, and onions from the garden with a little cheese.
Leftover and Pantry Sandwiches
- BLT. Bacon, lettuce, and tomato. Cook extra bacon at breakfast and save it for lunch.
- Club Sandwich. Three slices of bread layered with turkey, ham, bacon, lettuce, and tomato.
- Leftover Steak. Thin-sliced steak with horseradish sauce or steak sauce.
- Spam and Egg. A pantry classic. Fry the Spam until crispy and add a fried egg.
- Canned Chicken Melt. Mix canned chicken with mayonnaise and cheese, then grill.
- Deviled Ham. Canned deviled ham spread is a shelf-stable lunch your grandparents probably loved.
- Baked Bean Toast. Warm canned baked beans spooned over buttered toast, a British favorite.
- Sweet Treat Sandwich. Cream cheese, a little sugar, and sliced strawberries, or chocolate spread with banana for a special dessert.
Budget Tips for Sandwich Night
Plan a sandwich night once a week to use up leftovers before they go bad. Buy cheese in blocks and slice it yourself, since it’s usually cheaper than pre-sliced. Cook a large roast, ham, or whole chicken on the weekend and use it for sandwiches all week. Make your own spreads like honey butter, garlic mayonnaise, or flavored cream cheese. Keep canned tuna, chicken, Spam, and peanut butter in your food storage so you always have a sandwich option on hand.
And don’t forget the heels of the loaf. Those end pieces make wonderful toast, bread pudding, croutons, or breadcrumbs. Nothing has to go to waste.
No-Fail White Bread: 2 Loaves (Must Use Fresh Ingredients)
Ingredients
- 1 cup warm milk
- 2 tsp. SAF instant yeast
- 2 tsp. dough enhancer (optional)
- 1 egg
- 1/8 cup oil-I use olive oil
- 3/4 tsp. sea salt
- 1/4 cup sugar
- 1/4 cup warm water
- 3 to 3-1/2 cups white bread flour
Instructions
- I start with a Bosch bread mixer, although you could make this in a bowl. I put the yeast, warm water, salt, oil, and sugar in the bowl.
- I then add the eggs and lightly mix them in the Bosch so the egg does not “cook”.
- Then I slowly add the warm milk and flour. I continue to add flour until the bread dough pulls away from the sides of the Bosch bowl.
- Then knead the dough for about 7-8 minutes. I place the dough in a greased bowl and cover it with plastic wrap.
- Let the dough rise until it's doubled in size. Then punch down the dough, make it into loaves, and place these in greased pans (this recipe makes two 1-pound loaves).
- I let it rise once again (using the same plastic wrap) until doubled in size.
- Remove the plastic wrap and bake them at 350°F (176°C) for 27-30 minutes. I lightly butter the tops of each loaf after baking and remove them from the pans.
Notes
- I start with a very large skillet and heat the oil one to two inches deep until I can spritz a few drops of water into the oil ever so carefully; then I know it’s hot enough.

Heidi’s Bread Machine Recipe/TWO one-pound loaves
Ingredients
- 1-1/2 cups water
- 4 cups bread flour
- 1/4 cup sugar
- 2 tablespoons dry instant milk
- 2 teaspoons salt
- 2 tablespoons butter
- 1 tablespoon Saf Instant yeast
Instructions
Zojirushi Bread Maker Instructions
- Add the ingredients listed to the Baking Pan in the order listed. Press the COURSE button and select Course No. 11 (for DOUGH ONLY), and press the START button. After it stops, remove the dough from the Dough Bread Pan. Use a dough scraper to cut the dough into two equal-sized pieces for the two loaves. I use bread pans this size: 7.75 x 3.75 x 2.5 Inches. Grease your bread pans, place the dough in them, and cover with plastic wrap. Let rise until double the size. Remove the plastic wrap. Preheat your oven to 350°F (176°C). Bake for 28-30 minutes or until baked through. PLEASE CHECK YOUR BREAD MAKER BRAND'S INSTRUCTIONS.
Step-By-Step Instructions (Additional Help)
- 1. Set the Baking Pan into the Main Body and close the lid.2. Insert the Power Plug into an electrical outlet.3. Press the "COURSE" UP button until it reaches Course #11 (for DOUGH ONLY). This is what I did today. 4. Push the Start button. 5. You'll also see the word "Rest" next to #11, telling you that it is in the "rest" phase as the unit warms up the ingredients. 6. This "rest" phase should last about 20-25 minutes.7. You'll hear the unit move into the "knead" phase as the kneading blades start spinning to knead the dough. 8. The screen will change from "rest" to "knead" during this period.9. After a few minutes, the unit will make a buzzing sound, and you'll notice the word "add" flashing on the screen. This is the appropriate time to add any ingredients you want to your dough, such as nuts or raisins. You can open the lid, add the desired additional ingredients, and close it without changing any settings.10. Once the knead phase is complete, you'll see the word "rise" on the screen next to #11. This is the phase where the yeast kicks in and does its thing.11. When there are approximately 30 minutes remaining in the dough-making process, you'll see the time setting change from the estimated completion time to 30 minutes, which means there is that much time remaining. This clock setting will change in 1-minute increments until the dough-making phase is finished. When I could see the dough was ready through the glass opening in the lid, I skipped this step. I turned off the machine and unplugged it.12. After it stops, you remove the dough from the Dough Bread Pan.13. Use a dough scraper to cut the dough into two equal sizes and then mold them into two loaves of bread. (I use bread pans this size: 7.75 x 3.75 x 2.5 Inches.)14. Place the loaves into your greased bread pans, cover with plastic wrap. and let double in size. 15. Remove the plastic wrap.16. Preheat your conventional oven to 350°F 176°C and bake for 28-30 minutes or until baked through.PLEASE CHECK YOUR BREAD MAKER BRAND'S INSTRUCTIONS.
How To Make The Best Grilled Cheese Sandwich
Bread Machine Bread-How To Make It
Final Word
A fresh loaf of homemade bread is more than a meal. It’s a blessing we can share with the people we love. Whether you’re packing lunches, feeding a hungry crowd on a busy weeknight, or stretching your grocery budget, these 50 sandwich ideas will help you make the most of every slice. Gather your family around the table, say a little prayer of thanks, and enjoy the simple goodness of food made by your own hands. What’s your family’s favorite sandwich? I’d love to hear about it. May God bless this world, Linda
The post 50 Sandwich Ideas for Your Homemade Bread appeared first on Food Storage Moms.
from Food Storage Moms
No comments:
Post a Comment