Anyone who has spent years working in boots knows that a long day often announces itself first through the feet. Ten hours on concrete, miles of fence line, repeated trips up ladders, or a full shift pushing carts across a warehouse floor can leave the ankles, arches, and heels aching long after the work is […]
from Survivopedia
Thursday, September 3, 2026
Wednesday, September 2, 2026
What to Plant in September
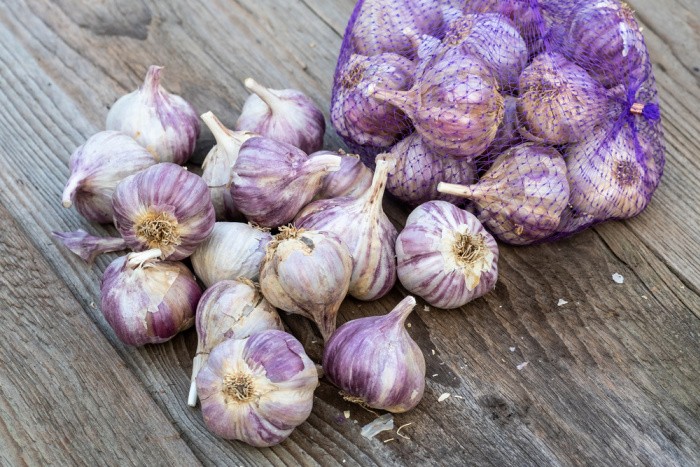
While gardens in the northern states start to wind down in September, it is the perfect time to start a garden in the southern states. However, depending on where you live, autumn is an ideal time to grow some vegetables that thrive in cooler weather. You may be surprised at all the vegetables, fruits, and herbs you can plant in September.
I try to update this list annually to keep it as current as possible. This year, food prices have increased, with much of the rise attributed to flooding in the Midwest and Southeast and the ongoing drought in the West. If you want to stay ahead of future price increases, you should consider growing more of your own food; it makes sense.
Here are a few reasons why growing even a little of your own food matters, pots included.
Fresh food right outside your door means you are never fully dependent on the store shelf being stocked. Even a few pots of lettuce, herbs, or tomatoes give you something to fall back on when supply chains hiccup or prices spike.
Homegrown food tastes better and often has more nutrition, since it goes from plant to plate without days or weeks of travel and storage in between.
Growing something, even in a small space, teaches skills that matter. Learning how to start seeds, keep a plant alive, and harvest at the right time builds confidence you can lean on if you ever need to grow more.
It saves money over time. A few dollars in seeds or a small starter plant can yield meals worth far more than the initial investment, especially with herbs, greens, and peppers that keep producing.
It is a wonderful way to involve family, especially children, in understanding where food comes from and the patience it takes to grow it.
Even a small harvest reduces your reliance on others for your basic needs, and that sense of self-reliance brings real peace of mind.
Gardening in pots also means almost anyone can do this. You do not need land or a big yard, just a sunny spot on a porch, balcony, or windowsill.
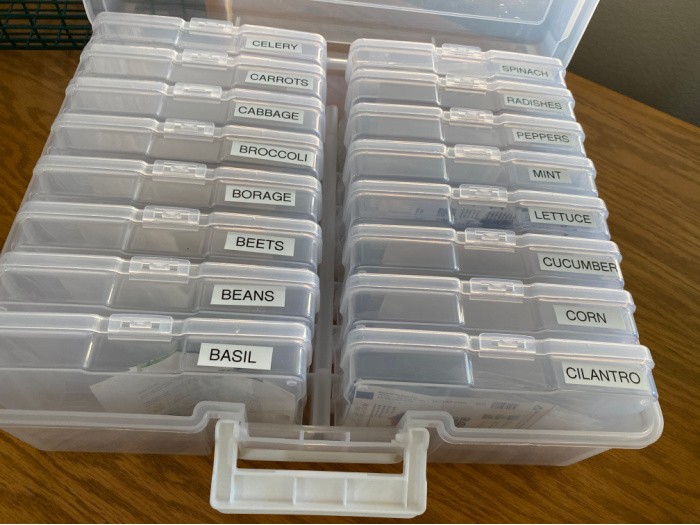
How I store my garden seeds:
Plastic Photo Container and Label Maker
I highly recommend these products for your seedlings: CowPots and Organic Seedling Soil. This way you plant your seeds indoors and then place the CowPots in your garden when the temperatures are right.
Why Have a Fall Garden?
Planting crops in September allows you to continue growing and eating fresh, healthy foods at home. Not only is this a great way to keep eating your own food, but there are also many interesting cool-weather plants to try.
While you might miss your sweet peppers and tomatoes of summer, fall veggies offer you healthy, flavorful foods you can enjoy just as much or even more.
You also get a lot of benefits from your fall garden. Here are just a few you may enjoy:
- Water your plants less. With cooler temps, you won’t have to water your garden as much. This means less sweat and cost for you.
- Fewer pests. Fall offers your garden a respite from many pests you encounter in spring and summer. That means fewer treatments to rid the garden of pests.
- Frost Sweetens some veggies. While the summer heat can make arugula and lettuce bitter, frost actually sweetens their flavors.
How to Have a Fall Garden
Almost everything that you plant in the spring can be grown in your fall garden, too. Spring-sown seeds are cool-season plants. This means they can tolerate a light frost, thrive in less light, and perform best in mild temps.
Before you can get started on your fall garden, you will want to know the frost dates for your region. Check here to find your zone.
What is a Frost Date?
Frost dates are defined by the day on which there is a 50/50 chance of frost. You will want your plants planted in September to reach maturity about 2 weeks before this date, to be on the safe side.
When to Plant Your Seeds
You’ll want your plants to be at maturity before the first frost. Here is what you will need to do:
- Check the seed packet for maturity information.
- Check your region’s frost dates. You can look up the dates by zone. See the link above to save some time.
- Count back from the frost date to a suggested plant date to see when the best time to plant your garden is. Of course, this depends on how long it takes particular plants to mature.
Give Basic Care
Just like your spring or summer garden, a fall garden has four basic needs. These needs include:
Sunlight
You still need to make sure what you plant in September receives the right amount of sunlight. Although fall veggies can tolerate shade, you’ll want to plant them in an area that gets plenty of sun as well.
Soil
No matter where you live, plants need great soil. Soil needs to be rich in nutrients and well-draining. You can improve your traditional garden with garden-specific soil. Please try adding some mulch to your soil. I buy Organic Raised Bed Mix
Water
Although you may not have to water your plants as often, you still need to water your plants consistently. A good rule of thumb is to give your plants an inch of water per week. You can use an inexpensive rain gauge to see if you need to add more water during the week.
Food
When you feel hungry, you don’t perform your best. The same is true with plants. In order for plants to flourish, whether in spring, summer, or fall, you’ll need to provide your plants with a good top-shelf fertilizer. You can also add natural ingredients such as earthworm castings, kelp, and bone meal to your garden to provide your plants with nutrition. Quality fertilizer should be available at your local garden store. They should also be able to advise you on which nutrients are best for this time of year.
Are you ready to find out what you can plant in September?
What to Plant in September
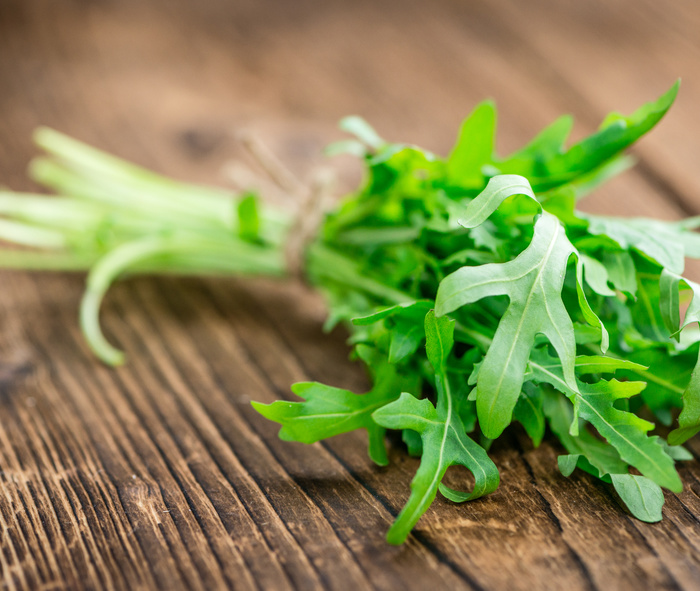
Arugula (shown in the image below) is one of my favorite items to plant this time of year! I could eat a fresh salad every night! My dream would be to grow my tomatoes year-round. Mark and I would love to have room for a small greenhouse, but it probably isn’t in the cards.
Once you have determined your frost dates, it is important to know what you can and can’t plant in your region. Below, you will find out what you can plant in your region/state in the month of September.
Related: What to Stock Up on In September
What to Plant in September by Zone
Please keep in mind that, with Climate Change or whatever, the weather has changed across different zones. We have droughts, flooding, hurricanes, wildfires, and tornadoes. Please follow your local weather channel for temperatures.
Zones New England Region
The New England Region of the United States is the easternmost part of the U.S. The states in this region include Maine, Rhode Island, Vermont, Connecticut, New Hampshire, and Massachusetts. This region is characterized by bitterly cold winters and semi-humid summers.
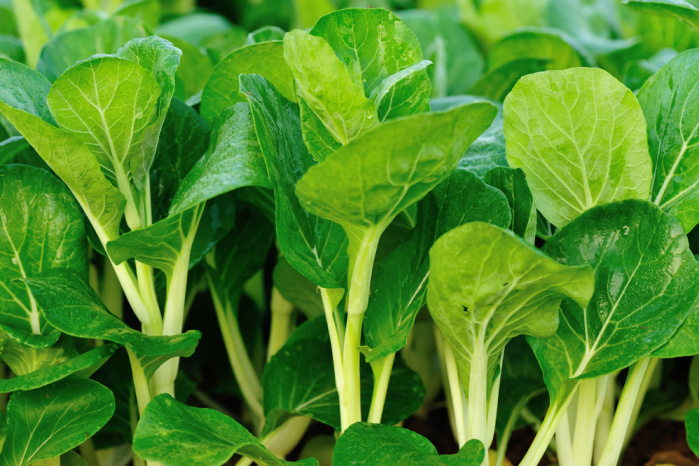
Due to the climate of this region, the vegetables that do well here in September include: (The image below is Bok Choy). In case you missed my post, Healthy Bok Choy Salad Recipe
- Arugula
- Bok Choy
- Lettuce
- Mache
- Radishes
- Spinach
Zones Mid-Atlantic Region
The Mid-Atlantic region is south and west of the New England States. The states in the Mid-Atlantic are New York, New Jersey, and Pennsylvania. Although the Mid-Atlantic region is quite different from the New England region, they share similar climates. Some plants to consider are:
- Arugula
- Bok Choy
- Lettuce
- Mache
- Radishes
- Spinach
Therefore, for the most part, the same vegetables that can be grown in the New England States can be grown in the Mid-Atlantic states in September.
Zones Southern Region
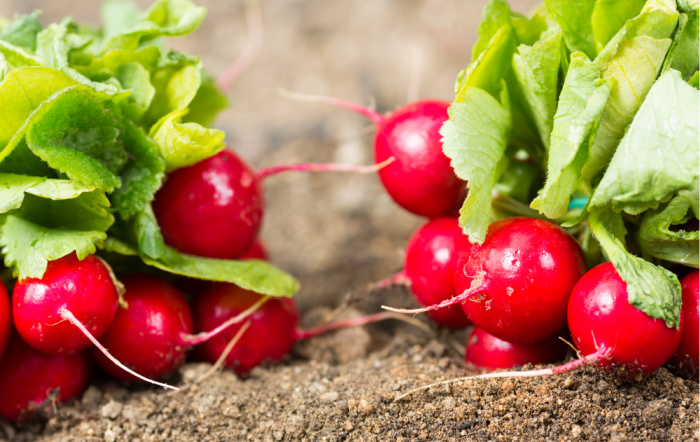
States in the southern region make up the third region of the United States. These states include Virginia, West Virginia, Kentucky, Delaware, Maryland, North and South Carolina, Tennessee, Arkansas, Louisiana, Florida, Georgia, Alabama, and Mississippi. The southern region states are characterized by humid subtropical climates that include mild winters and hot, humid summers.
In September, you will want to plant the following plants:
- Arugula
- Beets
- Bok choy
- Broccoli
- Brussels sprouts
- Carrots
- Cauliflower
- Collard greens
- Kale
- Lettuce
- Mustard greens
- Radishes
- Spinach
- Turnips
Zones Midwest Region
States in the Midwest are considered part of the Interior Plains and the Interior Highlands regions. The states that encompass the Midwest region include Michigan, North and South Dakota, Iowa, Minnesota, Kansas, Nebraska, Ohio, Indiana, Illinois, Wisconsin, and Missouri. In the Midwest, you will find that temperatures can be drastically different from summer to winter, and the temperatures can vary from state to state.
Because temperatures vary across this region, you’ll want to check your frost dates by zip code. Plants that do well in September in this region include:
- Arugula
- Collard greens
- Lettuce
- Mache
- Mustard greens
- Peas
- Radishes
- Spinach
- Turnips
Zones South-West Region
Part of the Atlantic Gulf Coastal Plain, the South-West region includes Texas, Arizona, New Mexico, and Oklahoma. Most of the South-West region has an arid desert climate, so it is very hot and dry.
Although the climate is very hot and dry, there are still a lot of vegetables you can plant in September. If you live in this region, you can plant the following:
- Arugula
- Beets
- Bok choy
- Broccoli (transplants)
- Brussels sprouts (transplants)
- Cabbage (transplants)
- Carrots
- Cauliflower (transplants)
- Collard greens
- Kale
- Leeks
- Lettuce
- Mustard greens
- Radishes
- Spinach
- Swiss chard
- Turnips
Zones: Rocky Mountains Region
This region is made up of states that run through the Rocky Mountains. States that run through the Rockies include Montana, Idaho, Colorado, Utah, Wyoming, and Nevada. The climate in the mountains becomes colder as altitude increases. In some locations, the climate tends to be wetter than the surrounding flatlands.
Because temperatures in the mountains can change by the hour, we can only plant a few plants in September. These include:
- Arugula
- Lettuce
- Mache
- Spinach
Zones Pacific Coastal Region
The Pacific Coastal Region comprises the states that border the Pacific Ocean. The states found in the Pacific Coastal Region are California, Oregon, and Washington. These states generally have a Mediterranean type of climate with rainy winters and dry summers.
You can plant the following in this region in September:
- Arugula
- Bok choy
- Collard greens
- Lettuce
- Mache
- Mustard greens
- Radishes
- Spinach
Perennials to Plant in September
Another option to consider when planting in September is perennial vegetables and fruits. Perennials come back year after year, which is a great option for those of us who don’t want to plant stuff every year. The cooler fall temperatures give the plants a chance to become established and take root. Perennials, such as asparagus and strawberries, can be planted in the fall and harvested in the spring.
Related: What You Need to Know About Growing Asparagus
Planting perennial herbs such as mint, thyme, oregano, sage, chives, lemon balm, lavender, and rosemary in September allows the plants to develop a good root system while avoiding heat stress. To find out if these plants are perennial in your region/zone, check here: USDA Hardiness Zone
What are you planning to plant in September? If you are worried about the cold, see if these Cloches (Plant Protectors) would work for you. A cold frame would work as well, depending on the temperatures you get in your area. Cold Frame
Greenhouse
How many of you have a greenhouse, big or small? I would love one. What do you like about it? Does it work as well as you had hoped? Do you have to heat it? I know we need to place them where they get full sun.
What flowers are good to plant in September?
In September, I always plant daffodils or tulips. Watch for the sales and get ready to sow those little bulbs! I dig holes about 4-6 inches deep, place the bulbs in them, and cover them with soil. Next spring you’ll see little green tips start to grow and pop up through your soil. My favorite daffodils are Lily Lent.
Can I plant onions in September?
Typically you harvest onions in the fall and let them dry so you have onions year-round.
Can I use leaves to mulch my garden soil?
Fall is a great time to use a tiller or a shovel to mulch your leaves into your soil. They should break down by next spring. I highly recommend turning the leaves under your soil surface.
Clean Out Your Weeds
In the fall, it’s a great time to clean up your yard and pull the weeds and debris leftover from your harvest.
Winter Squashes
If you planted some winter squash, you should be able to harvest it and let it cure over the winter to eat until you plant it next year. Winter squash has a thicker rind and therefore should last for several months. I’m talking about Acorn, Spaghetti, and Butternut squash. My mouth is watering right now; I love winter squash!
Please Check Out What To Plant Each Month:
- What To Plant In January
- What To Plant In February
- What To Plant In March
- What To Plant In April
- What To Plant In May
- What To Plant In June
- What To Plant In July
- What To Plant In August
- What To Plant In September
- What To Plant In October
Final Word
No matter where you live, you can grow at least some of your own food. Even if all you have is a sunny windowsill or a small porch, a few pots of lettuce, herbs, or tomatoes can make a real difference. Homegrown food tastes better, saves you money, and means you are not fully dependent on the store shelf being stocked. It teaches skills you will be glad you have, gives your family a chance to understand where food really comes from, and brings a sense of peace knowing you can provide for yourself even in a small way.
Start small if you need to, but start. Every pot you plant is one more step toward being prepared. You know, when you plant those seeds, water them in, and wait for them to sprout, the anticipation is just fun. Life is so awesome when you start eating your harvest of healthy vegetables. May God bless this world, Linda
Copyright Images: Lettuce Growing Your Own Deposit photos_7522318_s-2019, Bok Choy Deposit photos_308249330_s-2019, Arugula Lettuce Deposit photos_130604196_s-2019, Radishes in the Garden Deposit photos_71340343_s-2019, Garlic Ready To Plant Depositphotos_225888192_s-2019
The post What to Plant in September appeared first on Food Storage Moms.
from Food Storage Moms
7 Useful Things You Can Scavenge from Old Lawnmowers
Estimated reading time: 7 minutes
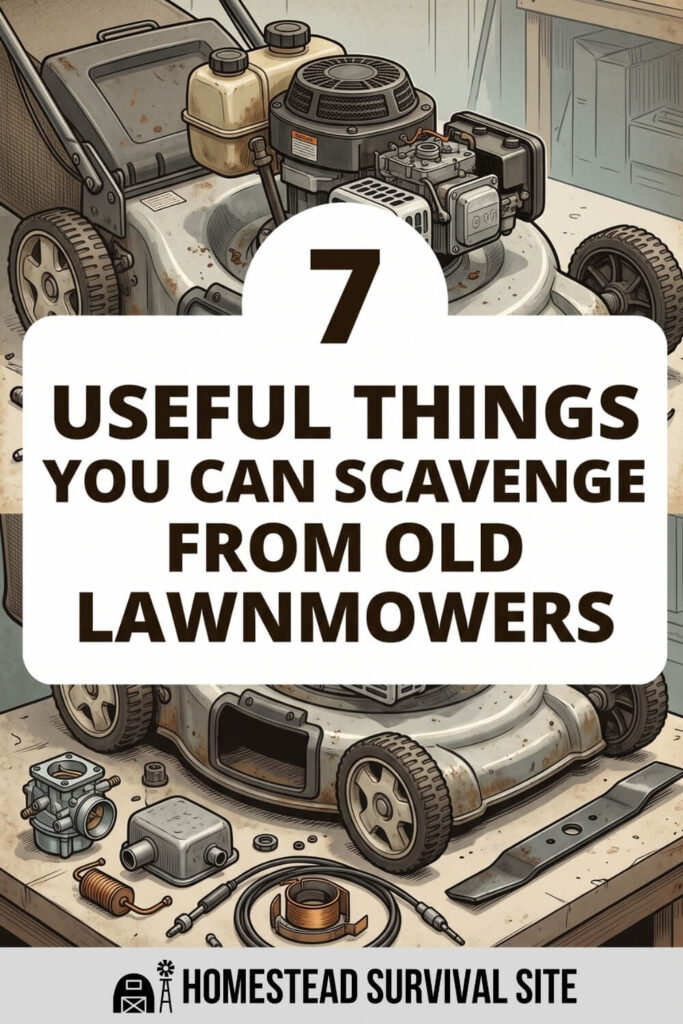
After a couple years of repairs and replacements, you’ve just got to accept that your lawnmower is not immortal. Even this grass-eating machine has an expiration date. But don’t haul that bad boy off to the dump just yet.
Instead of adding another hunk of metal to your local landfill, consider disassembling your lawnmower and repurposing its parts. In the spirit of homesteading, every piece of metal, plastic, and cordage can be reused somewhere around your house or property.
We’ve broken down your options so that you can break down your lawnmower. Piece by piece, here are 7 repurposing ideas to get your wheels spinning…
Want to save this post for later? Click Here to Pin It On Pinterest!
1. Cordage
A lawn mower’s starter cord is usually around 7 feet of tough rope that you can find a purpose for immediately…
- Clothing or Camping Line – Your lawnmower’s cord is most likely a double or triple-braided rope, which makes it quite the durable find. With that in mind, it is fit to hold a bit of weight. Try tying both ends to a pole or tree and now you’ve got a handy hanging line for the outdoors.
- Hauling Equipment – A lawn mower pull cord is pretty long and pretty strong, perfect to bundle items. Tie up a bundle of chopped wood, or thread your screwdrivers and now you’ve got an easy-carry system.
- Bag Straps – Do you have some old worn-out backpacks with torn straps? Don’t throw them out just yet! Replace the straps with some old lawnmower cords. They’re usually thick enough to hold the weight of your bag, but if not, you can make a fancy braid for extra support.
- A Basic Snare Trap – Imagine you’re in the middle of tough times and need to catch some food. Head over to your lawnmower, extract the cordage and set up a quick snare. You can catch big animals or small, depending on how long your cord may be.
2. The Blades
Depending on the brand, lawnmowers can have up to seven blades. These blades are tough and can be sharpened – so, why would you ever throw them away?
- Knife Blades – The most obvious way to reuse your lawn mower blades is to turn them into knives. A knife for protection, a machete for chopping through the brush, or a simple backyard knife – whatever. There will be some metalwork involved, so check out this video tutorial on how to shape and finish your knife.
- Small Parts – Some of those old mower blades are pretty small and thin, so here is where the metal work comes in again. You can carve these pieces of metal into small tools like hinges and shelf brackets. Have fun with the ways in which you can reshape and repurpose your metal with this wood stump workshop tutorial!
- Electrolysis Tank – If you haven’t already heard of one, an Electrolysis Tank is a contraption for removing rust, and it’s pretty popular since it’s so easy to assemble at home. You can DIY this electrolysis tank using the blades as metal rods. Check it out in this tutorial.
3. Engine
Sometimes, our lawnmower’s infrastructure fails but the engine still has some kick to it. If that’s the case, take that sucker and reuse it!
- Wheelbarrow – If that old engine still has some kick to it, then how about fixing it up to make an engine-powered wheelbarrow! It may sound odd, but if you’re doing a lot of gardening and landscaping, then it’ll make life a lot easier. You can even reuse those old wheels and handlebars, too.
- Generator – With a little welding and some power tools, you can turn that old engine into a generator! The best part of this project? It’s surprisingly easy once you’ve got the right parts! All you need is the engine, the alternator, a cast-iron pulley, electrical wires, an industrial V belt, some brackets, and you’re good to go.
4. Oil
Drain the old oil out of your lawnmower engine so that you get some use out of every last drop.
- Preventing Termites – I know, I know! When you think about it, coating your whole barn or furniture with motor oil is… not ideal. However, you can use oil on the tips and corners of wooden fences, boards, and posts to prevent termites from eating through the base.
- Make a torch – When the electricity is out for days, go syphon the oil out of your machines for a makeshift torch. Get a sock or some old rags and a stick. Just wrap the rag around the end to make it look like a cotton swab, and dip the end in motor oil.
5. Handle Bar
Here’s a video to show you how to remove the handle from your lawnmower. That was the hard part! Now, the fun part…
- Clothing Rack – With some nuts and bolts, you can attach your de-rusted handlebar to your wall. Just like with any other wall rack, hang towels or clothes on it.
- Rolling Bar Cart – Who said every repurpose had to be super practical? Here’s a chic addition to your home in the form of a rolling bar cart. In addition to your handlebars, you’ll need a few metal shelves to create a home bar that your friends will love.
6. Nuts, Bolts, and Springs
That mower is held together by more hardware than you might think, and it would be a shame to send all of it off to the scrapyard. Before the carcass goes out the door, pick it clean of every bolt, screw, washer, and spring you can get a wrench on. It is the least glamorous item on this list, but ask anyone who has ever needed one specific bolt on a Sunday when the hardware store is closed. A well-stocked hardware stash is pure gold on a homestead.
- A Repair Stockpile – A lawnmower is loaded with fasteners of every shape and size. Toss them into a labeled jar or an old coffee can, and now you've got a ready supply for fixing hinges, tightening up tools, patching fences, and keeping your machinery running when you can't make a supply run.
- Trap Triggers and Latches – Don't overlook those little springs, like the throttle return spring and the brake spring. They're perfect for rigging up trap triggers, snap mechanisms, and gate or screen door latches. Pair one with the starter cord snare from earlier, and you've got the makings of a simple survival trap.
- Building Projects – Those bolts and brackets are exactly what you need for putting together shelves, raised garden beds, chicken coops, and workbench jigs. Why pay for a fresh box of hardware when your old mower is sitting right there, ready to donate?
7. Dry Grass
Check your grass collection bag or bin before you start tossing things out! When times are tough, every bit of green material counts.
- Natural Fertilizer – Did you know that you don’t actually have to remove the grass clippings after you’ve cut your lawn? We do this because we want the yard to look nice, but you can literally leave the grass on your lawn, and it’ll decompose to provide nutrients for the soil.
- Animal Feed – If you’re raising animals, then store the dry grass for extra animal feed in the winter. As long as you haven’t been growing your grass with chemicals, then it’s perfectly safe for your livestock.
- Compost – Some people would rather just toss dry grass aside, but don’t forget that it’s a great addition to your compost pile. Green grass won’t compost on its own, however. Remember to balance out the brown materials with green materials.
With the right equipment and a little imagination, there are tons of ways you can repurpose an old lawnmower. While this may feel like extra effort, think of the benefits! By disassembling and reusing all of these parts, you are saving money, learning new skills, and most importantly, not contributing to soil pollution!
Part of homesteading is enjoying the process of learning how to be self-sufficient. Don’t know how to do metalwork? Here’s your chance. Want to teach your kids how to tie proper knots? Another opportunity has arisen! Find the lesson in the little things and enjoy this homesteading life.
Like this post? Don't Forget to Pin It On Pinterest!
You May Also Like:
The post 7 Useful Things You Can Scavenge from Old Lawnmowers appeared first on Homestead Survival Site.
from Homestead Survival Site https://ift.tt/HbPaudo
Herbs That Interact With Medications: Dangerous Combinations to Avoid
Walk into almost any pharmacy and you will find the supplement aisle sitting a few steps from the prescription counter, as though the two categories have nothing to do with one another. That physical separation mirrors a mental one most of us carry around without noticing. Pills from the pharmacist feel like medicine, capsules from ... Read more...
from Prepper's Will
from Prepper's Will
Mushroom Compost – The Prepper’s Guide to Building Soil From Waste
Soil fertility is a long-game survival problem most preppers underinvest in. You can stockpile seeds for a decade, but seeds planted in dead, depleted dirt won’t feed anyone. Mushroom compost is one of the fastest, cheapest ways to fix that, and it happens to fit perfectly into a closed-loop, grow-your-own system that doesn’t depend on a store shelf.
This guide covers exactly what mushroom compost is, why it’s worth understanding now instead of after a crisis hits, the one mistake that kills more gardens than anything else, and how to cure, use, or even make your own from scratch.
What Mushroom Compost Actually Is
Mushroom compost, more accurately called spent mushroom substrate, is the material left behind after a commercial mushroom crop has been harvested out. According to Penn State Extension, this substrate is typically a blend of wheat straw, horse manure, hay, corn cobs, poultry manure, and gypsum, composted together and pasteurized before mushrooms are ever grown in it. Once the mushroom crop is done feeding on it, the material still holds real organic matter and nutrients, just not enough to justify a second commercial crop.
That leftover material gets sold off cheap, or sometimes given away, to gardeners and landscapers, since it’s still packed with more organic matter and structure-building fiber than most bagged compost on a garden center shelf.
What’s Actually In Spent Mushroom Substrate
The exact nutrient breakdown varies by farm and by how long the material has weathered, but Penn State’s own lab analysis gives a solid baseline for fresh material straight out of the mushroom house.
- Total nitrogen: roughly 1.4 to 2.1 percent dry weight
- Phosphorus: roughly 0.45 to 0.7 percent dry weight
- Potassium: roughly 1.9 to 2.6 percent dry weight
- Calcium: roughly 3.6 to 5.2 percent dry weight, mostly from the gypsum used in production
- pH: typically 5.8 to 7.7, trending more neutral to alkaline as it ages
Weathered substrate, meaning material that’s sat outdoors for over a year, shows even higher calcium and nitrogen concentrations as it continues to break down, while sodium and potassium levels actually drop. This is one of the reasons curing time matters as much as the ingredients themselves.
Why This Matters for a Self-Sufficient Garden
A prepper garden lives or dies on soil fertility that doesn’t depend on a bag of synthetic fertilizer from a store that might not be open. Mushroom compost solves two problems at once: it rebuilds soil structure in worn-out ground, and it feeds the soil biology that makes everything else you grow more resilient.
It’s also frequently cheap or free in areas near mushroom farms, since spent substrate is treated as a byproduct rather than a product. Building a relationship with a local grower now, while things are normal, means having a known, reliable source of soil-building material before you’d ever actually need one.
The Salt Problem: Why Fresh Mushroom Compost Can Kill Your Garden
This is the mistake that ruins more gardens than anything else about mushroom compost. Oregon State University Extension warns that fresh mushroom compost is rich in soluble salts that can kill germinating seeds and harm salt-sensitive plants like blueberries, azaleas, and other members of the heath family. Dump a fresh load straight onto a seed bed and you can wipe out an entire planting before it ever sprouts.
The fix is simple but non-negotiable: let fresh mushroom compost weather and cure before it goes anywhere near seeds or salt-sensitive plants. Once cured, that same material becomes one of the safest, most beneficial soil amendments available.
How to Cure Mushroom Compost at Home
- Spread fresh spent substrate in an open pile or shallow windrow, not a sealed container
- Leave it exposed to rain and weather for at least six months, longer if you can manage it
- Turn the pile monthly if possible, which speeds up salt leaching and even decomposition
- Order or collect fresh material in fall so it’s fully cured and ready by spring planting season
- Test a small batch on a few seedlings before committing an entire bed if you’re unsure about curing time
Curing does more than just reduce salt content. It also mellows the pH and stabilizes the nutrients, so what you’re working into your beds is consistent rather than an unpredictable hot mix.
How to Use Mushroom Compost in the Garden
- Vegetable beds and flower beds: till about 2 to 3 inches of cured compost into the top 6 inches of soil
- Containers: cured mushroom compost should make up no more than a quarter of the total soil volume
- Mulch around trees and shrubs: a thin layer works well once cured, keeping it a few inches back from trunks and stems
- New lawns: fresh substrate can actually be spread directly over newly seeded grass, since it holds moisture for germination without the same seed-killing risk vegetable seeds face
As a rough coverage guide, one cubic yard of compost covers about 100 square feet of garden at a two-inch depth, which is a useful number when you’re trying to plan out how much material to source or haul.
Making Your Own Mushroom Compost From a Home Grow
If you’re already growing mushrooms at home on straw or manure-based substrate, whether button mushrooms in trays or oyster mushrooms in bags, you’re sitting on a closed-loop system without realizing it. Every spent block or spent tray of substrate is the start of your own mushroom compost supply.
- Once a substrate stops producing usable flushes, pull it from the growing area
- Break the spent block or straw mass apart to speed up decomposition
- Pile it outdoors, mixed with other yard waste if you have it, and let it cure the same way as commercial material
- Keep the pile moist but not soggy, turning occasionally to keep the process even
- After several months of curing, work it into garden beds the same way you would sourced material
This closes the loop completely: mushrooms feed your household, the leftover substrate feeds your soil, and the soil feeds everything else you grow. No purchased fertilizer required once the system is running, which is exactly the kind of self-sufficient cycle worth building before you actually depend on it.
Mushroom Compost vs Regular Garden Compost
Standard kitchen and yard waste compost tends to run higher in a broader mix of nutrients but lower in calcium and overall mineral density than mushroom compost. Mushroom compost’s real strength is structure: the straw fiber base does an exceptional job loosening clay soil, improving drainage, and holding moisture in sandy soil.
The two aren’t competitors so much as complements. Many experienced growers blend mushroom compost with regular finished compost to get both the mineral density of one and the broader nutrient range of the other.
Common Mistakes to Avoid
- Using fresh, uncured mushroom compost directly on seed beds or salt-sensitive plants
- Assuming all mushroom compost is identical, when recipes and salt content vary significantly by source
- Piling it directly against tree trunks or plant stems, which invites rot regardless of how well it’s cured
- Overusing it as a total soil replacement instead of an amendment worked into existing soil
- Skipping a source check when buying in bulk, since quality and curing time vary a lot between suppliers
Where to Get Mushroom Compost
Commercial mushroom farms are the cheapest source by far, often selling spent substrate for a fraction of bagged garden center compost, sometimes even giving it away just to clear space. Landscape supply yards and some garden centers carry bagged or bulk mushroom compost, usually already partially cured.
For a true self-reliance setup, growing your own mushrooms on straw or manure substrate and composting the spent material yourself removes any dependency on outside sourcing entirely. It takes more upfront effort, but it’s the version of this system that keeps working no matter what’s happening with local suppliers.
Frequently Asked Questions
Is mushroom compost safe for vegetable gardens?
Yes, once properly cured for at least six months; fresh, uncured material carries too much soluble salt for most vegetable seedlings.
Does mushroom compost contain pesticide residue?
Commercial substrate can carry trace pesticide residue from the mushroom growing cycle, but organic matter binds these compounds effectively and the high heat of pasteurization breaks most of them down, so residue levels are generally very low.
Can I use fresh mushroom compost on my lawn?
Yes, fresh spent substrate works well spread over newly seeded lawns, since it helps retain moisture for germination without the same salt risk that affects vegetable seeds planted directly into it.
How long does mushroom compost last once applied?
The organic matter continues breaking down and feeding soil biology for one to two growing seasons, though the structural soil improvements last considerably longer with regular reapplication.
Can mushroom compost replace fertilizer entirely?
It supplies a meaningful amount of nitrogen, phosphorus, and potassium, but very heavy feeders like corn or tomatoes may still benefit from supplemental feeding during peak growth; treat it as a strong foundation rather than a complete replacement for all soil inputs.
Reading a Mushroom Compost Load Before You Commit
If you’re buying in bulk from a farm or landscape supplier, ask two questions before you commit: how long has it weathered, and what’s the base recipe. A load that’s only a few weeks old needs the full curing process on your end, while material already weathered six months or more on the farm’s own property can often go straight into beds sooner.
Farms that market themselves as organic-certified are worth seeking out specifically if pesticide residue is a concern for you, since these operations skip synthetic pesticides in the growing cycle entirely rather than relying on heat and organic matter to break residues down after the fact.
Building Mushroom Compost Into a Long-Term Soil Plan
A single load of mushroom compost is a nice boost, but the real payoff comes from treating it as a recurring part of your soil-building routine rather than a one-time fix. Working in a couple of inches every year or two, rather than one heavy application, builds soil organic matter steadily without the risk of overdoing salts or calcium in any single season.
Pair it with cover cropping or a basic crop rotation, and mushroom compost becomes one leg of a soil system that keeps improving year over year instead of slowly depleting the way most gardens do without any organic matter going back in.
A Productive Garden Is Only the Beginning. Could You Keep It Running Without the System?
Growing your own food feels like independence, until you realize how many things your garden may still depend on.
Bagged fertilizer. Soil amendments. Seeds. Irrigation supplies. Replacement tools. Pest control. Electricity. Trips to the garden center.
What happens when those things become expensive, scarce, or simply unavailable?
Mushroom compost demonstrates a much bigger principle of self-reliance: the best systems turn what you already have into what you’ll need next.
Grow mushrooms. Feed your family. Compost the spent substrate. Rebuild your soil. Grow more food.
Nothing wasted. Less dependence on outside supplies.
And that’s exactly the kind of practical knowledge you’ll discover in The Lost Skills of Independence.
Rediscover the Skills That Made Self-Reliance Possible
The Lost Skills of Independence brings together practical, old-fashioned knowledge for people who want to become more capable at providing for themselves and their families.
It’s about learning how to grow, preserve, build, repair, improvise, reuse, and make better use of the resources already around you, instead of assuming there will always be a store, utility company, supply chain, or specialist available to solve the problem.
These aren’t skills that only matter after some enormous catastrophe.
They can help you cut expenses, waste less, become more resourceful, strengthen your homestead, and gradually reduce the number of outside systems your household depends upon.
And if those systems ever do fail?
You’ll already know how to do more for yourself.
Don’t Wait Until You Need These Skills to Start Learning Them
You can stockpile food.
You can stockpile seeds.
You can stockpile tools.
But eventually, every stockpile runs out. Knowledge doesn’t.
Building fertile soil from waste is one forgotten skill. There are many more that previous generations relied upon as part of ordinary life.
The Lost Skills of Independence can help you bring that practical knowledge back into your home and start building genuine self-reliance—one skill, one project, and one system at a time.
 DISCOVER THE LOST SKILLS OF INDEPENDENCE HERE!
Final Thoughts
Mushroom compost is one of the most underused tools for building real, lasting soil fertility without depending on store-bought fertilizer. Cure it properly, use it at the right rate, and pair it with your own mushroom growing setup if you can, and you’ve built a closed-loop system that keeps your garden productive with almost nothing coming from outside your own property.
Start small if this is new to you: source a modest load, cure it through a full season, and watch how your soil responds before committing to it as a core part of your long-term food security plan. Soil you’ve personally proven works is worth more than any theory about what should work when things actually get hard.
You may also like:
 Our WhatsApp Community Is Temporarily Accepting New Members
This Bug Will Kill Most Americans During The Next Crisis (VIDEO)
Why You Should Bury Fish Heads Under Your Crops This Fall
9 Ways You Can Repurpose Expired Food Cans
The post Mushroom Compost – The Prepper’s Guide to Building Soil From Waste appeared first on Ask a Prepper.
from Ask a Prepper https://ift.tt/Ig29LYv
Subscribe to:
Posts (Atom)