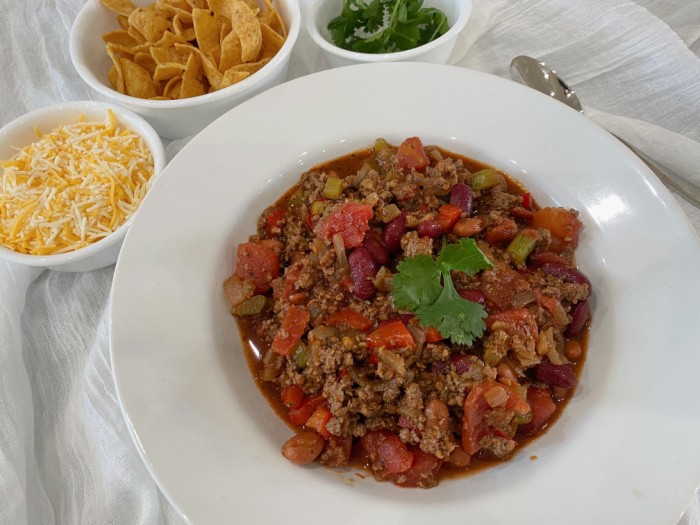
I want to introduce you to the world of comforting flavors and soul-warming aromas! Classic Homemade Chili is a tasty dish that has stood the test of time in our family. Whenever I’m craving something warm and comforting, I make this dish. Without a doubt, this recipe is bursting with savory spices, tender meat, and tasty beans. This timeless recipe is a true culinary masterpiece, especially in my family.
Why do people love chili?
Chili is a comfort food that fills you up and leaves you feeling satisfied. Its combination of meat, beans, and spices creates a hearty meal, making it perfect for chilly days or cozy evenings.
My friend Harry from Texas, whom most of us know from our comment forum, told me years ago that no one in Texas makes chili with beans. I still think of this every time I make chili. It makes me giggle every time because I grew up with chili being made with more beans than meat. Harry would be so proud of me today with the meat-to-bean ratio! LOL! Good friends are hard to find! Thanks, my friend, for teaching me the Texan way to make REAL chili. His recipe is down below. Love it!
Ground Beef: Ground beef is the base of this chili recipe and is an excellent source of protein.
Onions: Onions add flavor and texture to the recipe.
Garlic: A powerhouse of flavor that adds to any chili.
Diced Tomatoes: They are great when simmering a chili or soup because they stay firm.
Tomato Sauce: It brings a blend of tomatoes with spices when added to chili.
Red Bell Pepper: They add color, little to no odor, and a bit of sweetness to the recipe.
Celery: It adds essential flavor and a bit of crunch to this chili.
Kidney Beans (rinse and drain): They are a great source of iron, phosphorus, and potassium and a low-fat protein source.
Chili Beans: Canned chili beans are seasoned with a liquid mixture that adds more flavor to the chili.
Spices: Various spices listed below add flavor to the chili recipe.
Instructions
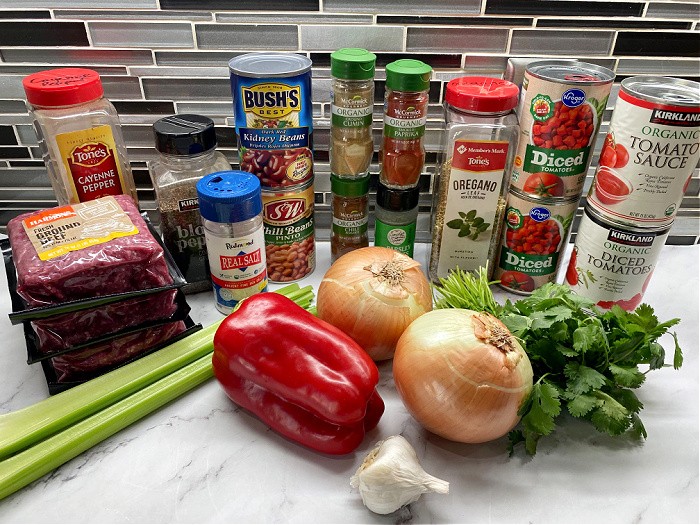
Step One: Gather The Ingredients
The first step is to gather all of the ingredients. I like to have everything ready to go so I don’t have to waste time searching for what I need.
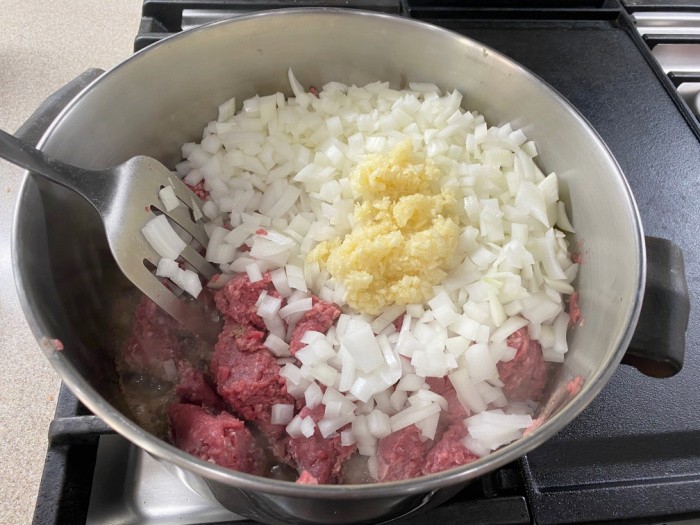
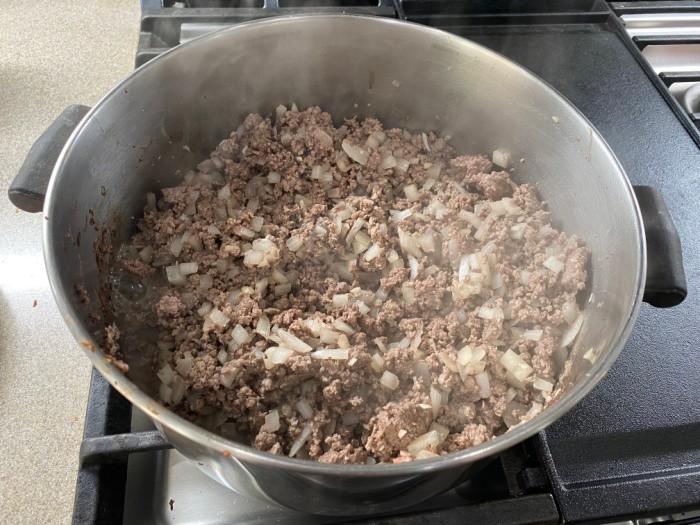
Step Two: Brown the Ground Beef, Onions, and Garlic
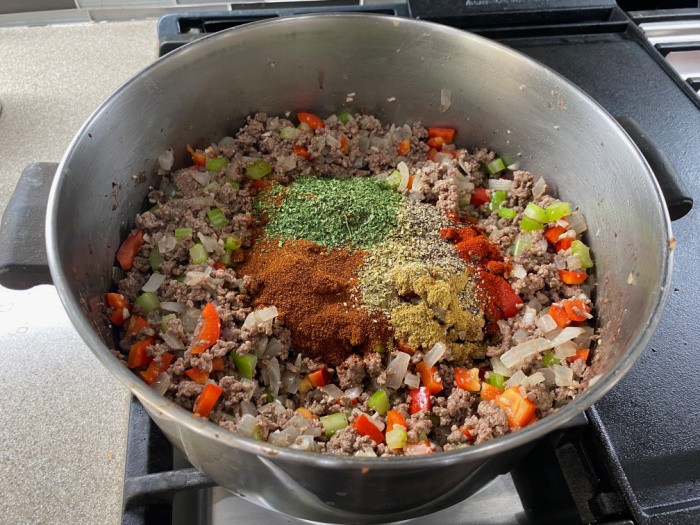
Brown the ground beef with chopped onions and minced garlic. This speeds up the overall cooking time, since you want the meat fully cooked before you’re done.
Step Three: Cook Until You Do Not See Any Pink Color
Cook until you don’t see any remaining pink in the meat, for safety and texture.
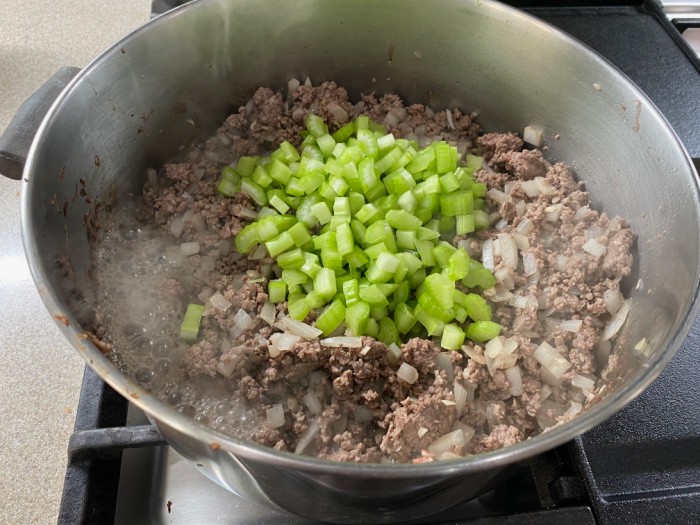
Step Four: Add The Celery
Add the chopped celery to the cooked meat mixture.
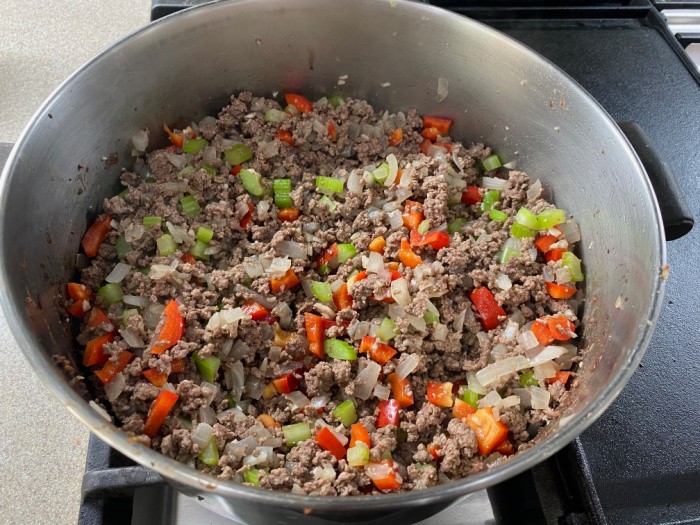
Step Five: Add The Red Bell Pepper
Add the chopped red bell pepper to the meat mixture.
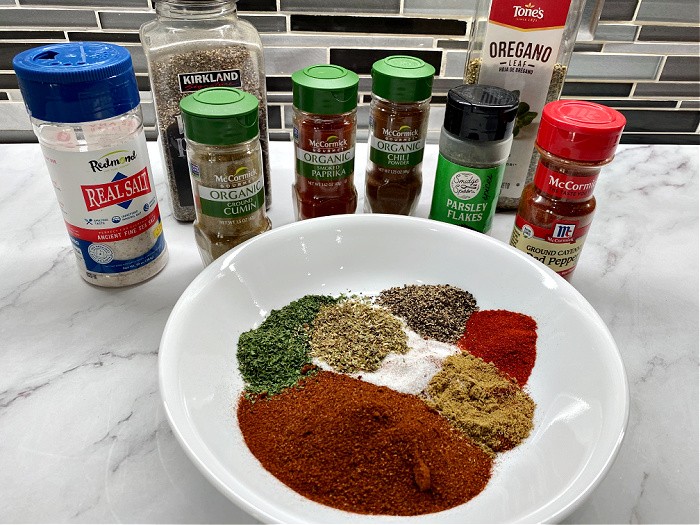
Step Six: Measure The Spices/Seasonings
Measure all the spices/seasonings into a bowl.
Step Seven: Sprinkle The Spices Over The Meat Mixture
Sprinkle the spice/seasoning mixture over the meat mixture and stir until thoroughly combined.
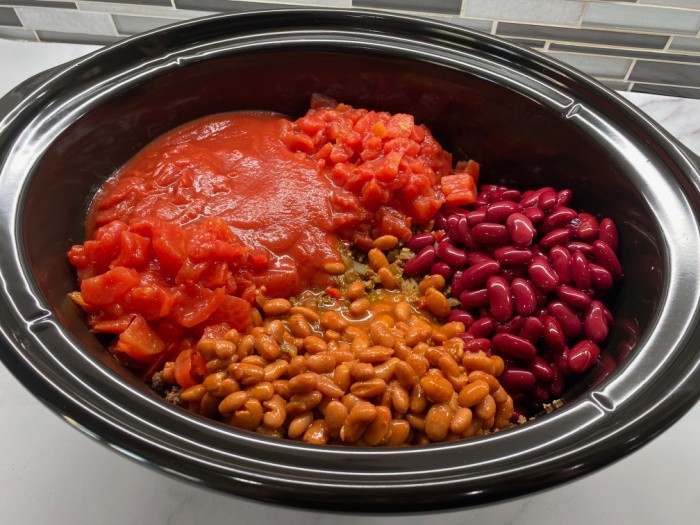
Step Eight: Add The Beans, Tomatoes, and Tomato Sauce
Place the cooked meat mixture in the slow cooker and add the beans, tomatoes, and tomato sauce.
Step Nine: Cook on Low for 7-8 Hours or 4 Hours on High
During this step, you will cook on low for 7-8 hours or on high for 4 hours.
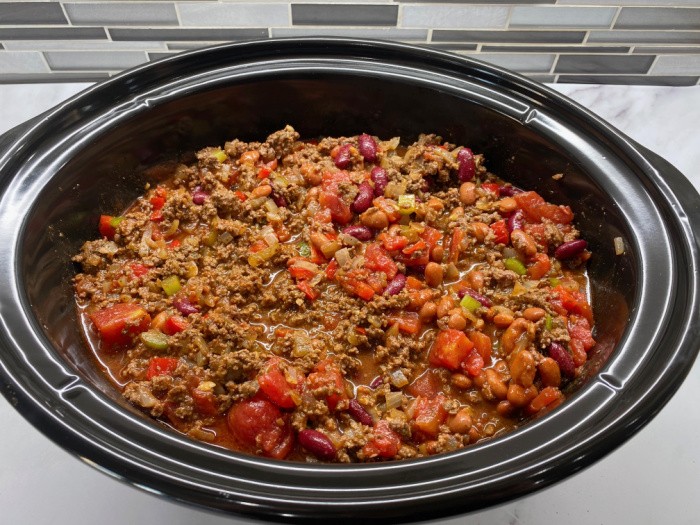
Finished Product
All you need to do is enjoy the chili when you’re done! You can add toppings to the chili, or you can enjoy it as is.
Brown the ground beef with the onions, then drain the grease.
Get the slow cooker out and start adding the browned ground beef, onions, and the remaining ingredients. Cook on low for 6-8 hours.
Can I make vegetarian chili?
Yes, you can definitely make a vegetarian version of classic homemade chili. Omit the ground meat and replace it with additional beans or other plant-based protein sources such as lentils or tofu. The rest of the ingredients and cooking process remain the same.
Can I freeze homemade chili?
Absolutely! Homemade chili freezes very well, making it a convenient option for meal prep or for storing leftovers. Allow the chili to cool completely, then transfer it to airtight containers or freezer bags and label them with the date. It can be stored in the freezer for up to 3 months. To reheat, thaw the chili in the refrigerator overnight, then warm it on the stove or in the microwave.
What are some standard toppings for classic homemade chili?
Popular toppings for classic homemade chili include shredded cheese (cheddar cheese is a popular choice), diced onions, sour cream, chopped fresh cilantro, sliced jalapeños, and crushed tortilla chips. These toppings add extra flavor and texture to the chili. Some people will actually add sliced avocado to their individual bowls of this chili.
An authentic favorite side dish is some fresh cornbread along with the chili. It also makes you feel fuller and more satisfied while adding more fiber to the meal. We also like to smother some baked potatoes with the chili for a unique flavor and texture rather than eating it plain.
If you like a more liquid approach, consider adding some beef broth. If you like it a little thicker, try adding some tomato paste during cooking. It won’t affect the taste, but it will slightly change the texture.
Can I adjust the spice level of homemade chili?
Yes, you can easily adjust the spice level of homemade chili to suit your taste. If you prefer a milder chili, reduce the chili powder or use a milder variety. If you like it spicier, add more chili powder or incorporate hotter chili pepper varieties such as cayenne or chipotle. You can also add your favorite hot sauce as a regular ingredient or keep it available on the side for individuals to add as they request.
What is traditional chili made of?
Traditional chili is made of a combination of key ingredients that come together to create a distinctive flavor and hearty texture. Ground beef is the foundation of conventional chili. Most people also add kidney beans, which add extra protein to the chili.
A fun adjustment to “traditional” chili is to use ground turkey instead of beef. A variety of beans can be substituted, such as pinto and black beans, along with mushrooms and veggies like carrots and green onions.
Diced tomatoes are often added to provide a flavorful base. You’ll also find that traditional chili uses chili powder, a blend of spices like cumin, garlic powder, onion powder, and paprika.
Can I cook this chili in something other than a slow cooker?
I’ve used my large Dutch oven to cook chili, and it works fine. You need to adjust the temperature and cooking time as suggested in the manufacturer’s cookbook. You may want to try using a pressure cooker like an Instant Pot, but I’m concerned the veggies added may end up too soft and mushy.
Where Was The First Chili Ever Made?
The origins of chili, often called chili con carne, trace back to the American Southwest, most likely San Antonio, Texas, in the early 1700s to 1800s.
Here’s a quick breakdown of its roots:
Early Inspiration: The dish likely evolved from Mexican and Spanish cooking traditions, combining indigenous ingredients (like chili peppers) with European meats and spices.
“Chili con carne” literally means chili with meat. Early versions were made by Tex-Mex settlers and cowboys, using dried beef, fat, chili peppers, and salt, a hearty meal that kept well on the trail.
San Antonio’s Claim to Fame: By the 1800s, Chili Queens in San Antonio were selling bowls of chili in the city’s plazas, making it the birthplace of what we now know as Texas chili.
Fun Fact: Traditional Texas chili doesn’t include beans or tomatoes, just meat and chiles.
When it comes to making Classic Homemade Chili, this is the best chili recipe to make! Whether you call it a classic chili recipe, a beef chili recipe, or a slow cooker chile recipe, it’s always a winner in our home, and my kids and grandkids love it. It’s also a recipe that can be topped if you’d like. Whether you want to add sour cream, cheese, or sprinkle extra seasonings, this is the perfect easy chili recipe for you to enjoy with your family this fall. May God Bless this World, Linda
If you own geese, especially if you’re just keeping a hobby flock, every single one of them needs a name. It’s important to help you keep track of them, and more importantly, it’s just plain fun and your birds deserve it. But make no mistake: picking a name for a goose is serious business. It ... Read more
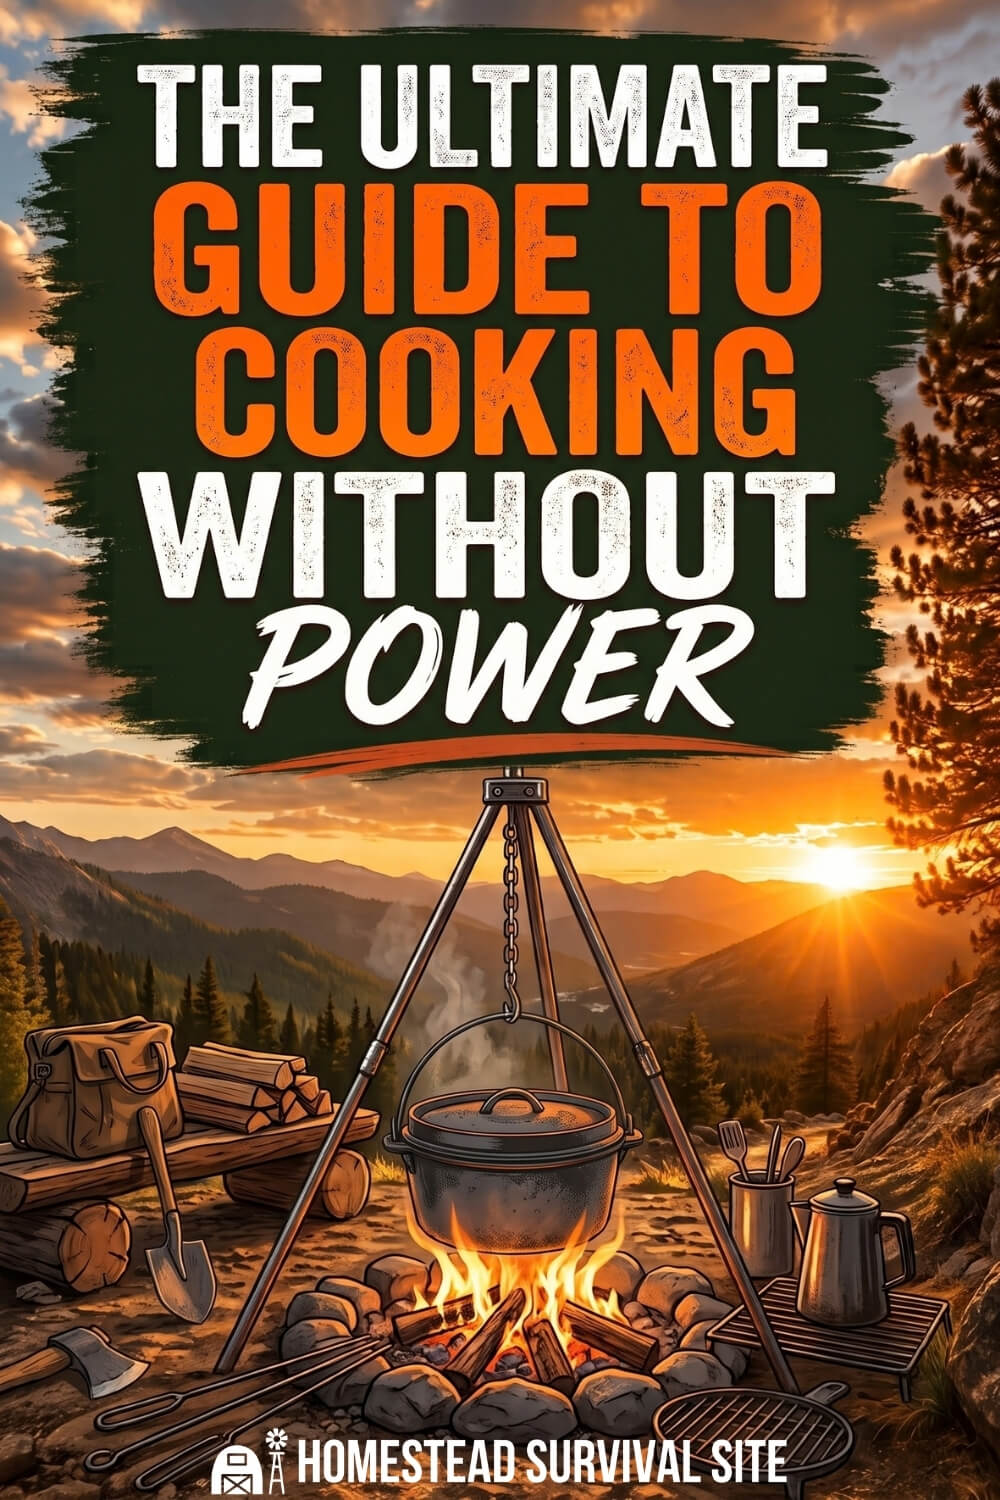
It's funny how cooking without power is regarded as a survival skill when for thousands of years, it was the only way to cook. Not long ago, there was no such thing as toasters, microwaves, and electric ovens, yet people still managed to cook big, delicious meals for their families.
If they could do it, so can you! There's no reason to be intimidated by the prospect of cooking without electric appliances. It's easier than you think.
For most people, the only way they've ever cooked without power is with a grill or a campfire. But in this dangerous and unpredictable world, it's important to have more options than that. What if you run out of propane? What if you can't find any firewood? What if you have to cook on the road? You should always have a backup, and a backup for your backup.
This article is looong, so I divided it into the following three sections. You can click on any of the links below to click to the section you want.
All 12 of these ways to cook without power are great, but you'll have to decide for yourself which methods are best for you. It will depend on where you live, what you can afford, the kind of resources you have, and so forth.
Be sure to familiarize yourself with all of these, and have at least three of them ready to go (two of which should be portable in case you have to bug out). We'll start with the most ancient method…
1. Campfire Method
This is easily the most obvious way to to cook food without power: a traditional, open, outside fire. Hopefully you already have some experience with this, but if not, all you have to do is:
Clear a round area of all plant material, leaving nothing but dirt behind.
Surround it with large rocks, bricks, or stone pieces.
Place your tinder (leaves, pine needles, etc.) in the center.
Build a teepee-like structure around it with sticks and twigs.
Leave an opening large enough for you to light the tinder.
Light it, blow on it, and add fuel if necessary.
Once the teepee falls, add some fuel logs to the fire.
Once you get a good fire going, lay large fresh logs right next to each other on one side of the fire and use them as a place to set your pots and pans. That's all there is to it.
The great thing about campfires is they give you so many ways to cook. Want to stab your food onto the end of a stick and roast it over the flames? Check. Want to set a grate over the fire and boil a pot of water or fry some eggs? Check. Want to set a tripod over the fire and hang a pot of soup over the flames? Check. Want to wrap some potatoes in aluminum foil and set them next to the base of the fire for a baking effect? Check.
If you've never cooked this way, be sure to practice. If any of the following methods fail or are simply unavailable to you, campfire cooking will be your final backup.
Note: When you're done, make sure you put out your campfire completely. Drown it with water, then mix the ashes and embers with the soil by stirring it up. Make sure everything is wet, then check if the ground is cool enough to touch. If it's still too hot to touch, repeat the process. Be sure you didn't miss an embers as it only takes one to start a fire.
2. Fireplace Method
You probably never thought about using your fireplace for cooking, but if the power goes out for a long time, you might have to. Even though you're cooking inside your house with a fireplace, it's really no different than cooking over a campfire. Place a cooking grate into the fireplace upon which you can set pots, plans, skillets, or food wrapped in aluminum foil.
Next, place some fire logs in your fireplace and light them. Once the flames are at the right height for your cooking grate, start cooking. Just remember that cooking with a fireplace requires extra precaution on your part because, if not maintained or done correctly, it could potentially cause a fire in your home. Try to keep the fire down in order to minimize the number of sparks or embers that escape the fire place (this is why most open fireplaces are not located in a room with carpet).
Oak, maple, and hickory woods are the best choices for an indoor fireplace. Not only will they provide a good seasoning on your food (which is why they're also good choices for outdoor fires), they will also burn longer and won't create as much smoke.
3. Grill Method
A majority of homes in America have a grill in their backyard or garage, so there’s a good chance you have a grill in your home as well (even if it’s just a small model that can only cook one thing at a time). Most grills are powered with propane, and many people mistakenly believe they can only use their grills until their propane runs out. This is simply not true.
You can also use any normal gas-powered grill as a charcoal or wood-burning grill. Setting charcoal or pieces of wood inside of your grill and lighting them on fire will easily create enough heat for you to cook your food quickly and evenly. Better yet, get a grill that is half charcoal half propane.
4. Camp Stove Method
A portable stove that runs on propane is a great thing to have. It's easy to use, you can take it almost anywhere, and it can cook practically anything you want. Just make sure you have plenty of propane cylinders (which, by the way, are a lot cheaper at the store than online).
The Coleman Road Trip Propane Portable Grill LXE is great for cooking big meals. It easily ignites with the push of a button, folds up into a nice compact size with wheels and handles for easy transportation, and is constructed out of cast iron and porcelain surfaces that not only make it highly durable but easy to clean. The only downside is it's a bit pricey.
A cheaper option is the Coleman Classic Propane Stove. I've been using this one for years and have never had any major issues except for the fact that the flame is always on high, even if you try to turn it down. But if you want to go even smaller, check out the Coleman Single Burner Propane Stove. The cooking power is easily adjustable, it ships with one sixteen ounce cylinder of propane that can last up to nine hours, and it will keep going regardless of the weather conditions.
5. Butane Stove Method
In many ways, butane stoves are even better than portable propane stoves. They're a little larger than a big textbook, they get hot enough to cook anything, and they're safe to use indoors as long as you use them by an open window.
However, butane stoves go through fuel a lot faster. GasOne canisters only last one to two hours, whereas propane cylinders can last several hours. Because of this, butane stoves are best for short-term cooking (such as a camping trip) and not something you want to use day in and day out for a long time.
6. Folding Stove Method
A folding stove is exactly what you think it is: a mini stove that folds up. The most popular are Sterno stoves, and they require a certain type of fuel which is often referred to as canned heat. These 7-ounce cans usually last about 2 hours and can be used over and over until the fuel gel is gone. If you've ever been to a catered event, you may have seen canned heat being used to keep platters of food warm.
Although I've used canned heat indoors before, the label says to use them in a well ventilated area. So if you want to be on the safe side, be sure to use it near a window that is open at least a few inches. But if you're in a scenario where it's very cold outside and you don't want to open a window, you could get some Biofuel by Greenscapes which is completely non-toxic and safe for indoor use.
Because they're so small and lightweight, folding stoves are also great for bug out bags. The only downside is they don't get nearly as hot as other stoves, and it's even worse if you're outside in the wind. They can be used to boil water (eventually), heat up canned food, or even fry eggs, but you should never ever try using a folding stove to cook raw meat.
7. Solo Stove Method
If you're worried about running out of propane, butane, or canned heat, consider getting a Solo Stove. It's a portable stove that runs on twigs, leaves, pine cones, and other small pieces of wood. This one is also great for bug out bags, especially since you don't need to bring any fuel with you.
Speaking of wood stoves, a good old fashioned wood stove is another great option. Not only do they cook food, they can also be used to provide heat in the winter (which is why people used to put them near the center of their houses).
Take note that while some wood burning stoves are intended for heating rooms and not necessarily for cooking, you can still use them for cooking if you need to. When heated enough, you can set pots or pans on the tops of these stoves and cook practically anything you want.
They're not particularly hard to find, either. Just check eBay, Craigslist, and large flea markets on a regular basis until you find one.
9. Rocket Stove Method
This is yet another type of wood-burning stove that most preppers and survivalists should be familiar with. Basically, it's a chimney-like structure of bricks with an opening at the bottom. A fire is started at the bottom and the heat travels up the chimney to a pot or pan sitting on top. Not only is the rocket stove a very efficient method for cooking food, it’s also dirt cheap. As long as you have bricks and a cooking grate, you can construct your own rocket stove in a matter of minutes. Watch the video below to see it done.
The real beauty of the rocket stove is how it’s able to create a large amount of heat with a minimal amount of fuel. The reason is because the chimney traps all the heat generated by the fire, making it very hot and very efficient. With a rocket stove, you can cook anything you want.
10. Solar Oven Method
Solar ovens, as the name suggests, use the power of the sun to cook food. As long as you have enough sunlight, you can cook just about anything. Also called solar cookers, solar ovens are inexpensive and easy to build if you aren’t able to buy one. And since they only use the sun for heating and cooking food, they require no additional fuel. This makes the solar oven one of the best methods for cooking food in areas where fuel is scarce, such as the desert.
If you're not interested in building your own, you can buy them online for a reasonable price. The Sunflair Portable Solar Oven comes with a thermometer, a baking tray, a dehydrating rack, 2 silicone pots, and a carrying bag. They also make a smaller one for about 2/3 the price.
11. Kerosene Heater Method
Kerosene heaters are very popular for heating up rooms. While they have not traditionally been used for cooking, they can still be used that way if they get heated up enough. The tops of them will sometimes become hot enough for you to boil water, make coffee, or heat up a can of soup. If you live in a cold area and need a heater anyway, this is a great option.
Kerosene heaters, such as this one by Dyna-Glo, are safe to use indoors as long as there is plenty of ventilation.
12. Car Motor Method
This is really a last resort option but it’s very doable. As the name suggests, you use the motor of your vehicle to cook food. This method is best done outdoors so carbon monoxide doesn’t build up in your garage.
To do this, turn on your car and allow the engine to run for a period of time. Wrap pieces of food in aluminum foil and place them strategically around your car motor. Wait until the food has cooked through, then remove them from your car and shut off the engine.
The biggest disadvantage to the car motor method is that it wastes a lot of gasoline. This is why it's a last resort option that should only be used when no other methods are available. In a true grid down scenario, all of the gas stations are going to be shut down, meaning you will only have the gasoline you stockpiled. You'll obviously want that fuel for driving or running your generator.
On the other hand, if you're bugging out and your motor is nice and hot anyway, consider using it for foods that don't need much heat.
Off-Grid Cooking Tips
In this article, we've covered 12 off-grid cooking methods, but there are several others. No matter which method you choose, there are certain tips that always apply if you want to be safe and cook a delicious meal. That's what we'll cover next.
1. Practice First
And by practice, I don’t mean do it once and never do it again. I mean you should practice extensively by preparing entire meals for your family using the above methods. This is the most important piece of advice. There are so many things that can go wrong when cooking without power, but if you practice ahead of time, you'll be ready for anything.
If you practice enough and with many different types of meals, it will start to feel like second nature. Then if the power goes out, it won't be a big deal. In fact, it might be an excuse to cook a delicious meal with the food in the freezer.
2. Wrap Meat and Fish in Leaves
Whenever you clean a fish or butcher small game, wrap the meat in non-toxic leaves. You don’t have to do this with ordinary meat if you don't want to, but you should definitely do it with fish. Loosely tie the leaves over the meat with some vine or cordage.
There are two reasons for doing this. First, the leaves will season the fish and make it taste better. Second, and more important, it will protect the skin of the fish from burning while it’s being cooked. Simply place the fish meat wrapped in leaves over the fire coals in order to cook it.
There are a wide variety of leaves that are a suitable choice for this tip, but the leaves from sycamore, walnut, oak, maple, cherry, and chestnut trees work the best. To learn more, check out this guide to cooking with leaves.
3. Keep Lids On Your Pots and Pans
Many people have a bad habit of not using lids when they cook, as if lids are just decorative. However, you should always use them–especially when cooking without power–because they make your food cook faster while retaining more liquid, even if you lower the heat of the fire.
4. Use All Grills Outside
Folding stoves are safe to use indoors, as are butane and propane stoves (although I would use them by an open window). But if you use any other methods, please be safe and make sure that smoke and gas do not accumulate where you are cooking. Make sure the flue in your fireplace is open, and also make sure your fire isn't near anything flammable. Consider getting a carbon monoxide alarm just in case.
5. Use Olive Oil If You Have It
It’s understandable if you don’t have olive oil with you in a grid down situation. But if you do, you should use it, especially if you’re frying meats or vegetables on a skillet. Not only is olive oil healthy, it makes cleaning the pots and pans a lot easier. Saving time on dish cleaning gives you more time to spend on other important tasks.
6. Avoid Relying On Electrical Appliances
It's okay to have some electrical appliances such as a microwave or toaster. However, I recommend getting some kitchen gadgets that work without power and using them on a regular basis. That way if the power goes out, it won't be a drastic change from how you've already been cooking.
7. Have a Diversity of Cooking Pots and Utensils
You should never have just one cooking pot or a single set of cooking utensils in your cooking arsenal. Have a variety of different sizes of pots and pans and different kinds of cooking utensils as well. This way you'll be prepared to cook almost anything grid down situation.
8. Choose Cast Iron Cookware
You want your cooking materials to last a long time, especially since you never know how long a disaster is going to last. That’s why you want your cookware to be of the absolute highest quality, and cast-iron is simply the best option for this. It will last you a long time through many cooking sessions. By the way, if you've never used cast iron before, here's how to season a cast-iron skillet.
9. Never Leave a Fire Unattended
Just don't. Accidents happen when you least expect them, so make sure there's always an adult around to keep an eye on the fire or grill. This tip should be obvious, but accidents happen all the time because people go inside or don't pay attention while their food is cooking.
In this section, we'll discuss some suggestions for cookware products and tools you should have in your off grid cooking arsenal. All of these products are available on Amazon, and while you don’t have to go with the exact models suggested here, you should at least go with something very similar. Now on to the list.
1. Grill Set
The Cuisinart Deluxe Grill Set comes with a spatula, tongs, skewers, basting brush, cleaning brush, a temperature fork, and an aluminum case. Everything is made of stainless steel, which is ideal for grilling.
2. Over Fire Camp Grill
This is essential for campfire and fireplace cooking. Basically, it's a grill that sits over your fire and holds your pots and pans. It needs to be durable enough to handle the intense heat of the fire and the weight of the cast iron cookware you set on it.
The Texsport Heavy Duty Camp Grill is a great option for this. It folds up nicely for easy storage and transportation, and it also comes in three different sizes: small, medium, and large. Texsport has designed their Heavy Duty Camp Grill with welded steel so that it can handle heavy cookware.
3. Camping Cookware Mess Kit
This 10-piece mess kit by MalloMe comes with a nonstick pot, a nonstick pan, two bowls, a folding spork, a soup spoon, a wooden spatula, a cleaning sponge, and a drawstring pouch. Since it all fits together inside the pouch, it takes up very little space. This is perfect for one or two people enjoying some soup or stew.
4. Enameled Cast Iron Skillet
This enamel coated cast iron skillet will resist rusting and provide you with a cooking surface that is non-stick. It's ten inches wide with a flat surface, so the heat will be evenly distributed across the pan for cooking everything from scrambled eggs to stew. It is recommended that you allow this skillet to cool off completely before you wash it in order to preserve its non-stick qualities.
5. Big Daddy Skillet
This is the ultimate skillet for large crowds. As you can see in the picture, it's big enough to fry a pile of hash browns, several strips of bacon, and a dozen eggs at the same time! Granted, it's not very portable, but if you have a large family or group, consider getting one.
6. Lodge Reversible Grill / Griddle
Lodge has been constructing cast iron cookware for over one hundred years, and from the very beginning of their history, they've been known for their rugged, long-lasting products.
The smooth side is for things like eggs, bacon, and pancakes, and the ribbed side is for things like steak, chicken, and hamburgers. This cast-iron grill/griddle combo has a nonstick surface that is seasoned with oil. It's 9.5 by 16.75 inches which means it can extend across two burners, allowing you to cook multiple things at once. All in all, a good camp griddle is one of the more overlooked off grid cooking items, but it’s also one of the most efficient.
7. Lodge Pre-Seasoned Cast Iron Dutch Oven
This five-quart Dutch oven can hold everything from chili to Asian chicken and. As a flat-bottomed model, it is designed to sit directly over a burner or inside an oven rather than hanging from a tripod. Lodge sells their Dutch ovens with a limited lifetime warranty that protects the product against any defects. If you take good care of it, you’ll be able to pass this Dutch Oven down to future generations.
8. Lodge Camp Dutch Oven Tripod
A Dutch oven tripod is designed to have its legs propped up around a campfire with a pot or Dutch oven suspended beneath it over the flames. It’s an old but tried-and-true design that can be very effective for cooking. This tripod features legs that measure forty-three and a half inches long, with a galvanized chain for holding onto the pot or oven.
9. Dutch Oven Lid Lifter
This does exactly what it sounds like it does. It allows you to remove a Dutch oven lid without burning yourself. This is important because it's not safe to remove a Dutch oven lid with just a pot holder or oven mitt, especially if you have hot coals on the lid. It's just too hot. This lid lifter by Lodge allows you to remove the lid to check on your food and shake ashes off of it if necessary.
10. Dutch Oven Lid Stand
Your Dutch oven should never touch the ground. It could get dirty (thus getting dirt in your food) or it could burn something. The solution? A Dutch Oven Lid Stand by Lodge. The great thing about this is you can also put it in some hot coals and set a Dutch oven or cast-iron skillet on top of it. Because of that, I recommend getting a couple of these.
11. Rotisserie Grill and Spit
Everyone knows a rotisserie is one of the best ways to prepare foods like chicken and turkey. With the Texsport Rotisserie Grill and Spit, you can slow-roast a chicken and grill food at the same time. The grill is 16 by 24 inches, and the height of the whole thing can be adjusted based on the size of your fire.
12. Rome Basket Broiler
This is a great way to quickly and easily cook chicken, hamburgers, hot dogs, and vegetables. Just put your food in the basket, snap it shut, and hold it over the fire. Better yet, put it on your grill. This makes it very easy to flip multiple pieces of food at the same time. With this one, you can adjust the depth depending on what kind of food you put in it.
13. Fire Iron
A fire iron is an awesome way to make a grilled cheese sandwich, or any other hot sandwich. Basically, it's a square cast-iron box that opens up. You just put your sandwich inside, close it, and hold it over the fire until your food is ready. Easy peasy.
14. Stainless Steel Skewers
These are essential for roasting marshmallows or hot dogs, or for making shish kabobs. This set comes with a dozen 12-inch skewers. If those are too short for you, here are some longer ones specifically for marshmallows.
15. Fishing Pole Campfire Roaster
This is a fun and unusual way to cook food. It's like a fishing pole, only you hang it over a fire. It's perfect for hot dogs and marshmallows, and it even has a mechanism where if you give it a light tug, your food flips over so you can cook the other side. The fishing pole campfire roaster is great if you have kids.
16. Cast Iron Cleaner
If you're using cast iron cookware, you'll want to keep it nice and clean. You don't want to use soap on cast iron because that will strip the pan's seasoning. You can use a brush and hot water, but that can be difficult and time-consuming. This stuff is a blend of all-natural oils that break down food particles and make cast iron much easier to clean.
17. Chainmail Scrubbers
Although you can use a sponge or scrubber to clean cast iron, that can be hard to do, especially with caked-on food. With this chainmail scrubber, you can scrub food away without stripping away the seasoning.
Well, that's about it, so thanks for reading! I hope you found this ultimate guide to cooking without power useful. If you have any cooking methods, off grid cooking tips, or products you want to recommend, be sure to leave a comment and let us know about it.
If a major EMP knocked out large parts of the electrical grid tomorrow morning, most Americans would notice within seconds. The lights would go out. Internet service could disappear, card readers could stop working, and cell networks could become unreliable. Gas stations could lose the pumps that move fuel. Refrigerators would start warming. And if […]
Nearly two years after the Los Angeles wildfires, and well over a year after a tornado tore through St. Louis and floods hit Texas Hill Country, survivors are still waiting for long-term federal recovery money. Officials estimate more than $10 billion is needed in Los Angeles County and St. Louis alone.
For preppers, the lesson is blunt. Your 72-hour kit gets you through the first few days, but rebuilding a life can take years, and the help many people count on may arrive late, arrive small, or not arrive at all.
What Is Holding Up the Money
According to a Guardian analysis published October 19, survivors of all three 2025 disasters are still waiting on long-term recovery funds from the Department of Housing and Urban Development’s Community Development Block Grant Disaster Recovery program, known as CDBG-DR. The last disaster to receive these funds was Hurricane Milton, which hit Florida in October 2024.
CDBG-DR is the big rebuilding fund. It helps homeowners rebuild and helps towns repair roads, water systems and public buildings. But the program has no standing pot of money, so Congress has to approve funding disaster by disaster, which has caused long waits before.
Los Angeles is now setting records. LAist reported in August that L.A. fire survivors had waited longer than any other disaster survivors for long-term federal help, passing the roughly 500 days Maui fire survivors waited. Officials there pointed to deep partisan divides and repeated government shutdowns, and lawmakers from both parties have pressed Congress to include disaster money in funding bills.
What FEMA Covers, and What It Does Not
Many people assume FEMA will make them whole after a disaster. It is not designed to.
Most survivors get far less than the cap. A Congressional Research Service analysis found the average FEMA individual award was $3,446 over roughly two decades of data, and tornado survivors averaged under $3,000. That might cover a few weeks of motel stays and groceries, not a new roof.
Insurance Has Gaps Too
Insurance is the first line of defense, but many survivors discover too late what their policy does not cover. One St. Louis tornado survivor told the Guardian that his insurance covered almost nothing.
In Los Angeles, LAist reported that fire survivors face average gaps of $200,000 to $500,000 to rebuild, even with insurance. Rising construction costs, new building codes and underinsured homes all widen the gap.
Flooding is the biggest blind spot. Standard homeowners insurance does not cover flood damage, and the Colorado Division of Insurance notes that a flood policy typically has a 30-day waiting period and that about a quarter of flood claims come from outside high-risk areas. You cannot buy it when the river is already rising.
Why a 72-Hour Kit Is Only the Beginning
Emergency kits are built for the first days: water, food, light, first aid. Recovery is a different problem, and it is mostly a money and paperwork problem.
After the storm passes, families face hotel bills, replacement clothing and tools, missed work, deductibles, debris removal, and months of rent or a mortgage on a home they cannot live in. That is where many households run out of road.
How to Build Financial Disaster Readiness
Build a Real Emergency Fund
Aim for at least three to six months of essential expenses in an account you can reach quickly. If that feels out of reach, start with enough to cover your insurance deductible and one month of temporary housing.
Keep a small stash of cash at home as well. When power and internet are down, card readers and ATMs often stop working.
Review Your Insurance Before You Need It
Read your policy now, not after the disaster. Check whether you have replacement-cost coverage, how much additional living expense coverage you have, and whether your dwelling limit would actually cover rebuilding at today’s prices.
Ask your agent about flood and earthquake coverage, which most standard policies exclude. Renters should carry renters insurance, which is usually inexpensive and covers belongings and temporary housing.
Protect Your Paperwork
Without documents, every claim and aid application slows down. Keep copies of IDs, deeds, insurance policies, bank information and medical records in a fireproof and waterproof document safe, with digital copies on an encrypted USB drive in your go-bag.
Walk through your home once a year and record a video of every room, closet and garage shelf. That inventory can be the difference between a fast claim and a fight.
Plan Where You Would Live
Recovery can mean months away from home. Talk with relatives or friends outside your area about where you could stay, and know your policy’s limits on living expenses before you need them.
Strengthen the House You Have
The cheapest disaster is the one that does less damage. Clearing brush around a house in fire country, adding hurricane straps in storm country, and moving valuables off the floor in flood country all reduce what you will need to rebuild.
The Bottom Line
The 2025 survivors are a hard reminder that disaster recovery is measured in years, and that federal help can be slow, limited and caught up in politics. Prepare for the storm, but also prepare for the long, expensive road after it.