Submissions     Contact     Advertise     Donate     BlogRoll     Subscribe                         

Thursday, July 30, 2026

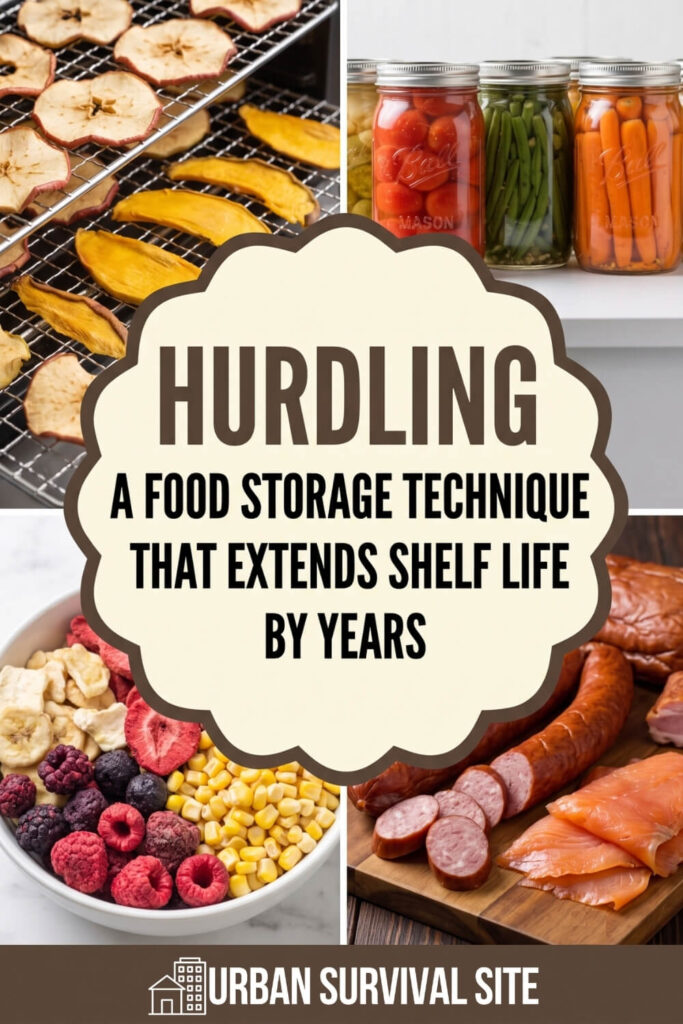
Hurdling: A Food Storage Technique That Extends Shelf Life By Years

Estimated reading time: 17 minutes
Hurdling: A Food Storage Technique That Extends Shelf Life By Years

Hurdling is defined as a combination of more than one food preservation technique. The idea is to create a series of barriers for microorganisms like bacteria and fungus.

These barriers act as hurdles for the microorganisms so it's harder for them to make it into the food we eat. If the proper amount of hurdles are used, any microorganisms are overwhelmed and ultimately die so the food lasts longer.

What is a Microorganism?

In a food context, microorganisms are bacteria or various forms of fungus that can thrive and grow on food. The result leads to any number of diseases and conditions from commonly known food-borne bacteria like e-coli, listeria, salmonella, and botulism. There are more, and the same is true for the variety and range of fungi that can show up, especially on fruits, vegetables, meats, seafood, and most commonly, bread.

The fundamental challenge is the fact that food presents an ideal environment for microbial growth. Microorganisms thrive in a moist environment, and most foods deliver plenty of moisture. They also thrive on the natural sugars, proteins, fats, and other elements that constitute food.

Food tends to be soft if not penetrable, and if you add additional moisture and warmth to the environment surrounding the food, you’ll have an ideal breeding ground for microorganisms.

Hurdling combines techniques that remove or minimize moisture, alters or enhances the chemistry of foods, manages or limits temperatures, and creates an environment that minimizes contamination from food-borne microorganisms.

What primitive cultures learned the hard way was that many steps had to be taken to preserve food. The good news is that they succeeded without even understanding the basic concepts of infection and disease.

Origins of Hurdling

Our ancient ancestors didn’t call it “hurdling.” The term was actually coined by large, professional food processors, and many of them use it to process commercial foods we buy at the grocery store today.

Pioneers used hurdling all the time, even though they didn’t understand the dynamics of bacteria and harmful food microorganisms. They just figured it out through trial and error. Pickling is an excellent example.

Pickling as a Hurdling Process
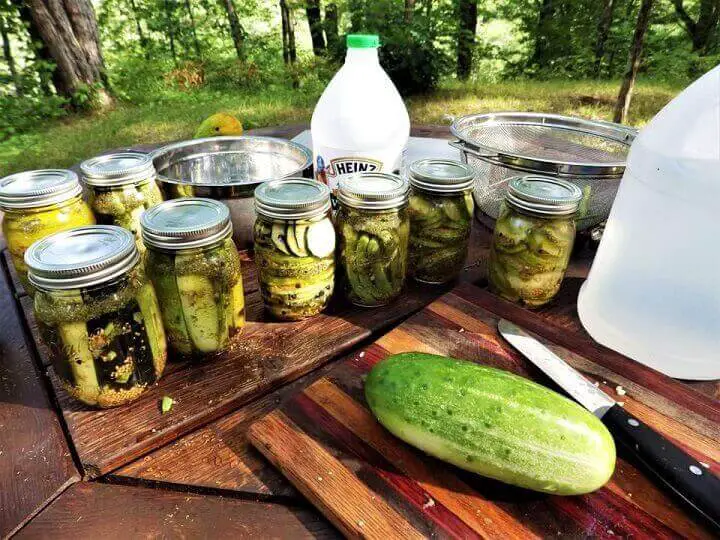
Cucumbers Being Pickled

If you’ve ever pickled cucumbers, you’ve engaged in many levels of hurdling. Just think back to the process steps.

1. Cucumbers are often brined in water and salt in a covered crock sometimes for weeks. The sodium chloride or salt effectively kills and inhibits further bacterial growth. The brined pickles and then de-brined in changes of water in preparation for the next step.

2. A pickling solution is prepared, usually using additional salt (sodium chloride), vinegar (diluted acetic acid), and sometime the addition of spices like mustard seeds. And by the way, mustard seeds aren't a part of pickling recipes just for their flavor. According to a study on Food Preservation techniques, mustard seed has unique preservative properties:

“Mustard seed has as a primary pungency component the compound allyl isothiocyanate (AIT). Isothiocyanates are inhibitory to fungi, yeasts and bacteria in the range of 16–110 ng/ml in the vapor phase (Isshiki et al., 1992) and 10–600 μg/ml in liquid media (Mari et al., 1993).”

3. Sterilization of glass jars is the next step in the pickling process for packaging and further processing.

4. A pickling solution is brought to a boil and added to the cucumbers in the jars.

5. The jars are sealed and then processed in a boiling water bath usually for 15 minutes to further destroy any resistant bacteria or other microbes.

6. The jars are carefully stored in a cool, dark place to further prevent the growth of microbes.

A brief glance at that process reveals 6 steps or “hurdles” used to preserve something as simple as cucumbers. We just rarely think of it that way. That’s the recipe we find in canning books or on the Internet, and we follow it without a thought. But a good understanding of the dynamics of hurdling can empower us to make good decisions in the future when it comes to preserving any type of food.

3 Broad Types of Hurdling

We’re going to get into a little food science here, so fasten your seat belts. It might seem a bit technical, but once you understand the basic processes, it gets easier to improvise and interpret food preservative solutions and approaches.

We’ll skip some of the more extreme hurdles. An example of an extreme hurdle is the use of radiation to preserve foods, similar to the way the military preserves MRE’s. That’s quite a hurdle but irrelevant to home food preservation.

Here are the 3 basic types:

1. Physical Hurdles
Stockpot Over Fire
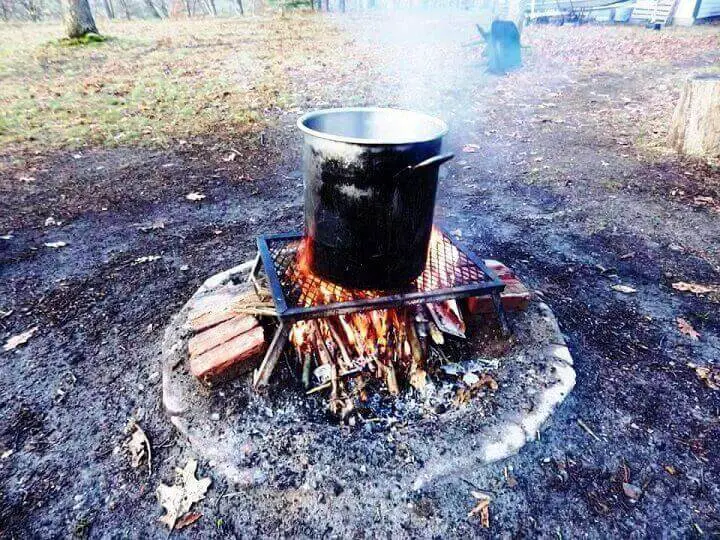
  • High temperature (cooking, hot water processing, heating or pasteurization)
  • Low temperature (refrigeration and freezing)
  • High pressure (pressure cooker)
  • Aseptic packaging (sterile and sealed)
  • Low moisture (dehydration, drying, curing)

2. Physiochemical Hurdles
Vinegar 5% Acidity
  • Carbon dioxide (removal of oxygen)
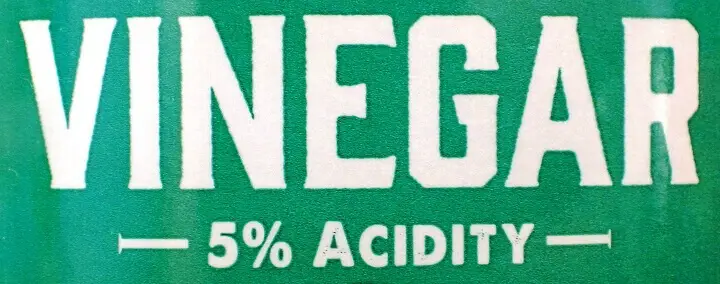
  • Use of low pH acids (addition of vinegar, citrus juices, lactic acid)
  • Natural preservatives like sodium chloride (salt), mustard seeds, red pepper flakes or other peppers high in capsaicin, sugar, honey and other forms of sucrose or fructose.
  • Artificial preservatives (usually used by commercial food processors)

3. Microbial Hurdles
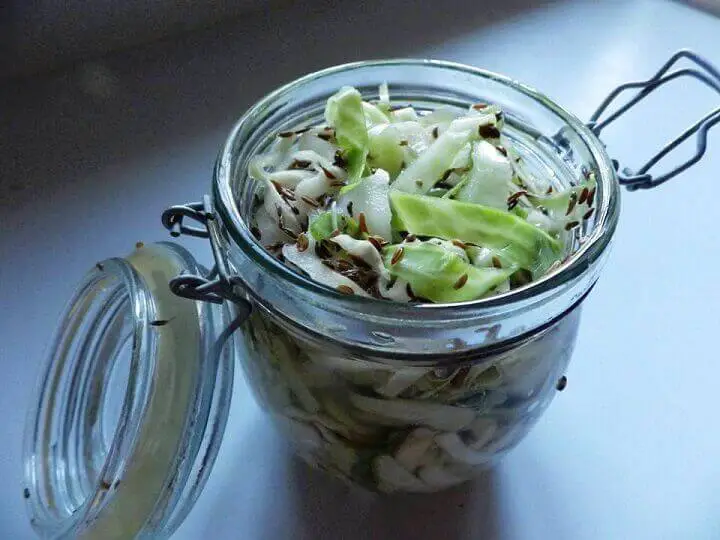
Fermented Food Jar
  • Competitive flora (good bacteria from fermentation that compete and overwhelm bad bacteria)
  • Antibiotics (sometimes used in commercial processing)

Here again, if you step back and look at much of what is described, it’s common stuff, and steps we often use for preserving food. But the best approaches combine many of those steps, resulting in a lot of the food preservative recipes we continue to find and use today. What’s important is to use more than one hurdle whenever possible.

Single hurdles used alone can have a dramatic effect on the texture, color, flavor, and overall acceptability of the food. You can use salt to preserve many types of food, but salt alone has a significant effect on the food. Lutefisk is a good example.

Lute-what?

Lutefisk is a Scandinavian food preservation technique for Cod. It involves immersing the Cod in lye for weeks. It’s a highly effective way to prevent microbial growth. Lye falls at the far end of the pH scale up around a 13 or 14 and creates a hostile environment for bacterial or fungal growth.

Acids like vinegar land at the other end of the pH scale, usually around a 3, and also inhibit microbial growth. Something to remember is that chemicals or elements at either end of the pH scale inhibit bacterial and fungal growth. The trick is balancing or diminishing the pH level so the food is both safe to eat and actually tastes good.

In order to eat the lutefisk, you have to go through multiple preparation steps to make it palatable. This includes repeatedly soaking in changes of water to remove the lye and the smell. Lutefisk is notorious for its smell because of the lye preservative and is one of the main reasons people avoid it. The soaked and rehydrated lutefisk is then subjected to a number of other preparation steps, and the use of many ingredients to make it taste like something you would actually want to eat.

In spite of those efforts, many people who have tried lutefisk only try it once. It’s an acquired taste, and most of us never acquire it. Then again, in primitive times it may have been the only source of preserved protein, so the taste was tolerated. Curiously, Scandinavians today laugh at the thought of eating lutefisk and see it as quaint reminder of a past time when single techniques defined food preservation. Hurdling has made things better today.

Why is Hurdling so Important?

Take a deep breath because it’s time for a little more food science. That’s because hurdling is all about preventing homeostasis.

Homeostasis is an organism’s ability to stabilize itself in an environment. When a hurdle or preservative property is put up, they undergo metabolic exhaustion. That’s when a microorganism uses up all of their energy to maintain homeostasis and die as a result. And while it’s true that a single food preservation technique could halt a microorganism, there’s a problem.

A single preservative approach can induce metabolic exhaustion. They don’t die, but they are struggling. In some bacteria, this leads to a stress shock reaction, causing the release of stress-shock hormones into the food. Those aren’t good, and it’s all starting to feel like a “damned if you do, damned if you don’t” scenario.

But hurdling prevents this stress shock reaction because of the application of multiple hurdles working synergistically to simply cause the death of the bacterium without the release of stress-shock hormones.

And with that said, the science class is over and we can get back to the kitchen. But hurdling really doesn’t start on a stove. Hurdling starts in the garden.

In fact there are 5 fundamental steps that define a total food preservation process. All of them represent hurdles beyond the use of salt, vinegar, heat, and other traditional steps to process and preserve foods.
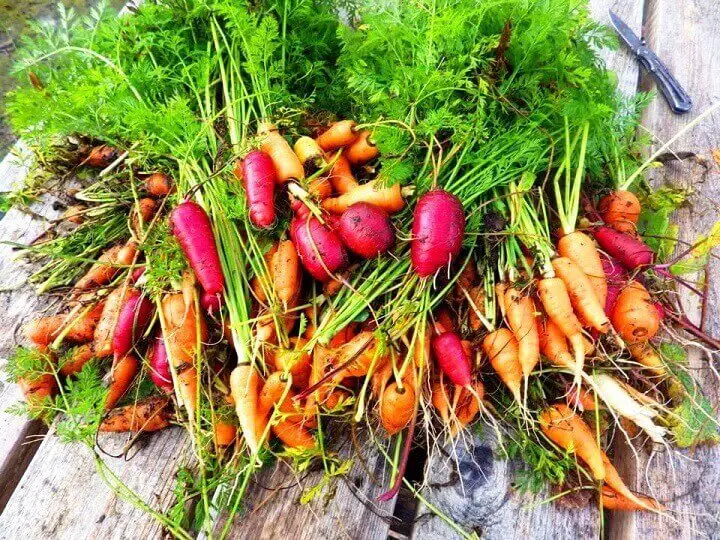
Fresh Vegetables On Table

1. Grow and raise food clean and wash after harvest or slaughter.

Take a tip from agri-business. They wash the harvest as soon as possible after picking, and you should too. The same goes for how you treat your garden. Manure is great compost, but make sure it’s fully composted. Try to keep a clean garden and wash any fruits or vegetables as soon as you can after the harvest. It also helps to grow foods that lend themselves to preservation process.

2. Store raw foods properly (refrigerator/freezer) or preserve quickly.

It contradicts food preservation to let it start to spoil even before you’ve preserved it. After washing them, get your fruits, vegetables, meats, and seafood into the refrigerator or freezer, or begin the preservation process as soon as you can. Microbes act fast and once they get started, you’ll have a different kind of hurdle that you’ll now need to overcome.

3. Use a multi-hurdle food preservation process (no lye).

Think about the various processes you can use to preserve any food. We’ll cover them in detail later, but whenever you can combine preservation processes, the better the overall result will be with regards to texture, flavor, final food prep, and most importantly, food preservation.

4. Package or contain properly.

No matter how many hurdles you may combine to stop or prevent microbial growth, it’s all for naught if the food is not packaged properly. The biggest key is to use packaging that prevents oxygen or any outside air from coming into contact with the food.

Bacteria and fungus are often airborne, and once they find their way into food, they’ll make themselves right at home. Vacuum sealing, canning jars, or any other container that can keep the air out before the package is opened makes for a great hurdle.

5. Store preserved food properly.

Keep it out of the sun, avoid heat and if storing in metal cans or jars with metal lids, avoid environments that are wet or humid. How you store your preserved foods depends on the type of food and preservation process.

Some preserved foods will do fine for years in a pantry. Others are well suited to a root cellar and others do better with refrigeration or freezing. One thing to always remember is that once a package of any kind is opened, it will probably last longer in the refrigerator or freezer.

Food Preservation Hurdles to Consider

The question to ask yourself is which food preservation process works best for the type of food you're preserving, and which processes you might combine to add hurdles and extend shelf-life. Don’t overdo it, but the more hurdles you can reasonably add, the more you will extend the shelf-life of your stored foods.

Drying
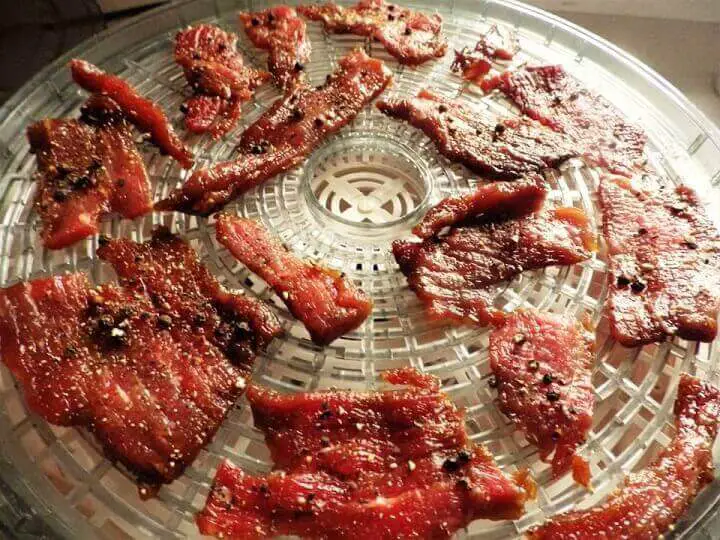
Meat On Dehydrator Tray

Drying foods may be the oldest form of food preservation. Typically, foods were dried in the sun, but today dehydrators are often used, and even low temperatures around 140 degrees or more in a conventional oven.

Rehydration is sometimes the only step necessary to make dried foods palatable, but drying alone will often sacrifice much of the flavor. That’s why foods like jerky are preserved with other processes in addition to a drying step that does not totally desiccate the fibers in the food.

Dry-Salt Curing
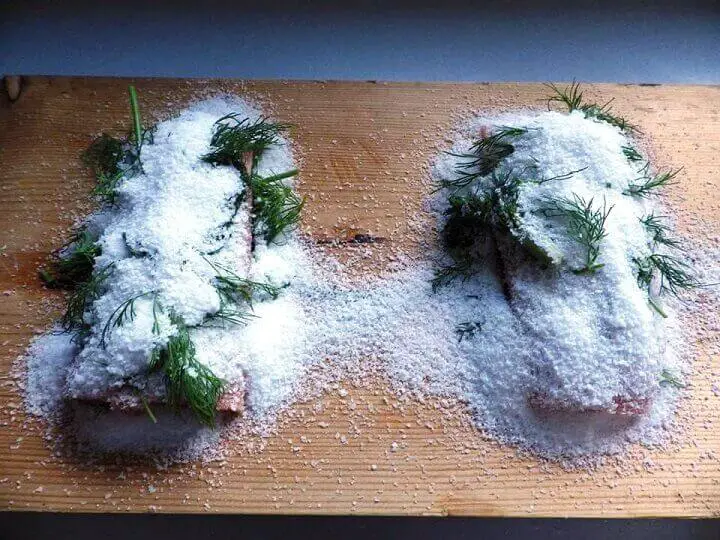
Salt Preserving Food

Salt curing is a food drying process that uses salt to leach out the water and moisture in foods. Various recipes have specific time frames for curing, and the results range from Gravlax (salt-cured salmon) to country hams.

In some cases, the foods need to be soaked in various changes of water to reduce the saltiness. This is another example of a process that can be done in moderation as a hurdle, but when it’s the only process used, the results can be extreme in terms of taste and texture.

The best example is when salt is used to trigger fermentation in foods like sauerkraut or Kim Chi. In those instances, the bacteria driving the fermentation are a micro-flora that inhibit the growth of other microbes.

In its simplest application, salt-curing is used as a rub before smoking or barbecuing.

Brine (Wet-Salt) Curing
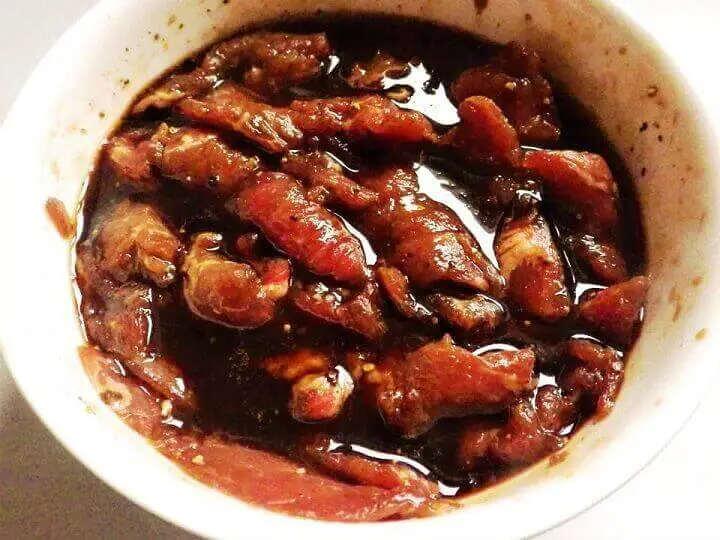
Brining – Wet Salt Curing

This is another ancient technique often used by people who lived on ocean shores where salt was plentiful. The salt was dissolved in a liquid like wine or water and the food was soaked in the brine, allowing the salt to travel into the food through a process known as “osmosis.”

The salt concentration was usually 10-15% or enough to float an egg. The benefit of wet-slat curing is that it keeps the foods moist while killing and inhibiting microbes, although foods often had to be soaked in fresh water to remove excess salt from the brine. A lot has to do with the duration of curing. Shorter cures don’t require fresh water soaking, but longer cures may require it.

Sugar-Curing
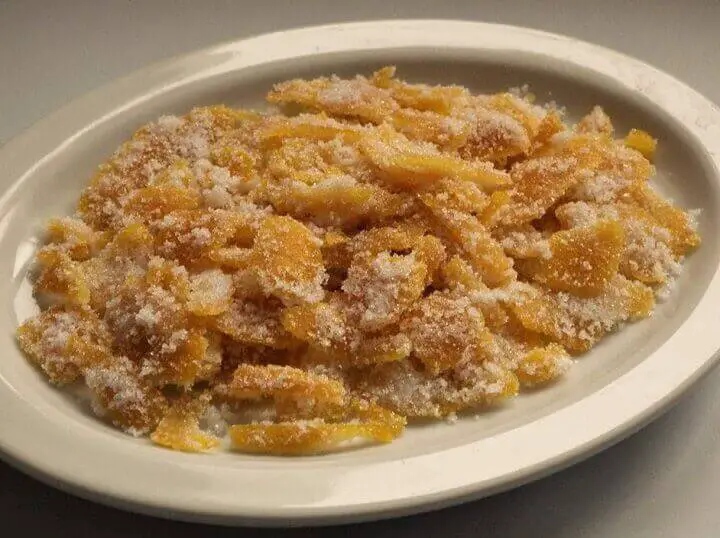
Sugar Preserving Food

To the surprise of some, sugar is a preservative. Sugar also draws moisture from food. This type of curing is often used with fruits like candied orange peels. Honey may be the best natural sugar-cure, and the tale of the honey found in a pot in a 3,000 year old Egyptian tomb is both true and remarkable. The honey was edible, and no trace of bacteria was present.

Cool Temperatures

Frozen Ice Sign

Whether it’s a refrigerator, root cellar, or even a cold water spring, cool temperatures inhibit bacterial and fungal growth. The important thing to remember is that it only “inhibits”, meaning it slows or impedes the rapid growth and spread of bacteria.

Unfortunately, it’s a relatively temporary preservation technique measured in days, weeks, and in some rare instances –years. The good news is that it’s the best way to store any preserved food before it’s opened and especially after it has been opened. In the grand scheme of things, a root cellar may be the best option for long-term, cool storage if you have a significant quantity of preserved foods.

Freezing

Thank Clarence Birdseye for pioneering the freezing of food as a preservation technique. Freezing may be one of the few processes that don’t require hurdling, although even frozen foods have a shelf-life often measured in a year or two.

Here again, any food that has been hurdled with other preservation techniques will exceed the one to two year limit of straight frozen foods. The biggest question is how much you’re trying to freeze and the need for reliable electricity to keep a large freezer running.

Heating

Meat On Grill

It would be great to know when the first food was cooked, but it’s quite likely it was long before written or even verbal communication. However, heating related to food preservation has less to do with cooking and eating more to do with killing bacteria and creating an environment that is not conducive to bacterial growth.

It all gets back to preventing bacteria from reaching that state of homeostasis where it gets just a little too comfortable in food and decides to stay for a long time.

Heating as a hurdling process is used a variety of ways including:

  • Hot water processing of canned foods to kill bacteria and fungus after it has been packaged, jarred or canned. Louis Pasteur discovered the process and it is often referred to as “Pasteurization.”
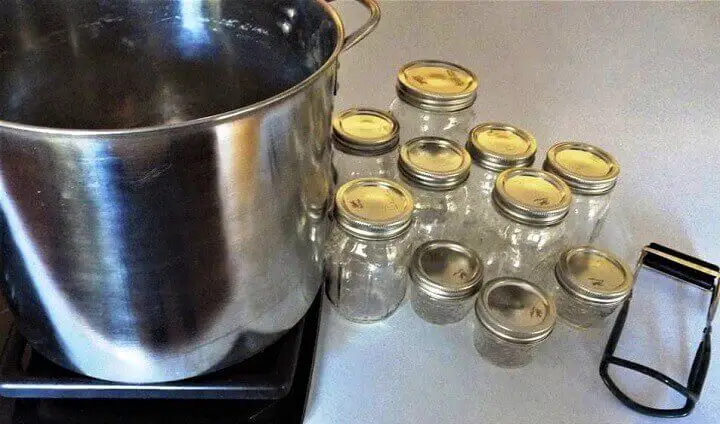
Pot and Canning Jars
  • Smoking foods involves low-heat smoke to remove moisture and both kill and inhibit the growth of bacteria. Brining or salt curing is often a preliminary step, and the smoked food is ideally refrigerated or frozen to extend the shelf-life.

Smoking Food on Grill
  • Low heat was and is still used as a drying method. Primitive people dried foods hung high over a small fire, while today we use ovens and food dehydrators. It’s another example of a preservation process that works on its own but works better to extend shelf life when combined with other processes.
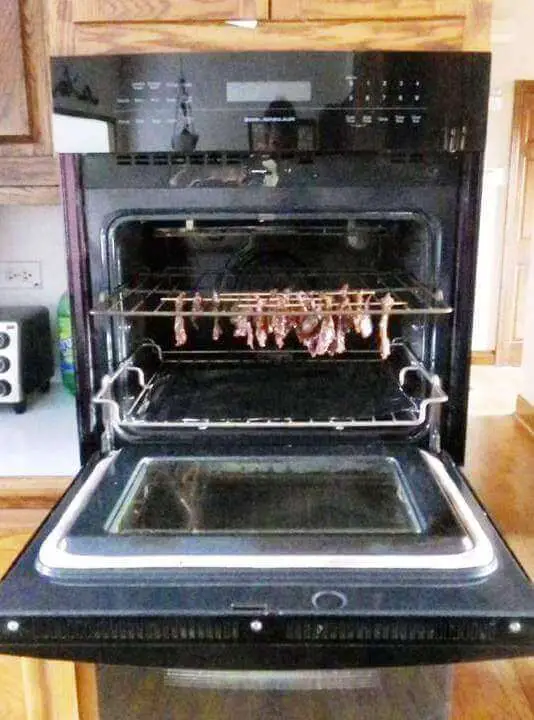
Smoking Food in Oven

Hurdling is No Mystery

Anyone who has ever preserved foods in any way has probably engaged in various levels of hurdling. The key thing is to stop and think if you’re doing all of the possible steps to extend shelf-life and guarantee that any home-preserved foods are safe. If you’re tempted to use a single process for food preservation, it may be worth thinking about other things you can do to preserve the food and get those hurdles in place.

Shelf-life is important for any home preserved foods, but just as important is food safety. Hurdling is perhaps the best way to not only keep your home preserves longer but ensure that all of the foods you preserve and store are as safe to eat as you can make them.

Originally published on Homestead Survival Site.

You May Also Like:

The post Hurdling: A Food Storage Technique That Extends Shelf Life By Years appeared first on Urban Survival Site.


from Urban Survival Site

How to Make Sugardine – A Prepper’s Homemade Antiseptic

When the pharmacy is closed, the roads are blocked, or you are three days from the nearest clinic, an infected cut stops being a minor inconvenience and starts being a real threat. That is exactly the kind of situation sugardine was built for. It is cheap, it stores well, and you can make it from two ingredients most preppers already have sitting in a cabinet.

Sugardine is a homemade antiseptic paste made by mixing granulated sugar with povidone-iodine (Betadine). Farriers and horse owners have relied on it for decades to treat hoof abscesses, thrush, and wounds without damaging healthy tissue. This guide breaks down exactly how to mix it, how to use it correctly, and where the real safety limits are, because getting this one wrong on a deep wound is not a risk worth taking.

What Sugardine Is and Why It Works

Sugar has been used to treat wounds since long before modern antibiotics existed, with documented military use dating back to World War I. Packed directly into a wound in high concentration, sugar pulls moisture out of bacterial cells through basic osmosis, which starves and kills the bacteria while also drawing fluid and debris out of the wound itself. Add povidone-iodine, a broad-spectrum antiseptic already trusted in hospitals, and you get a combination that disinfects and dehydrates bacteria at the same time.

A 2010s review out of Cairo University described sugardine plainly: it is applied as a paste, it is easy to use, it is painless, it is inexpensive, and by their account, it works. Unlike straight iodine or harsh drying agents, sugardine does not damage surrounding healthy tissue, which is part of why it became a farrier’s standby for treating thrush, hoof abscesses, laminitis, and proud flesh without slowing the healing process.

What You Need

Stick with povidone-iodine, not tincture of iodine or Lugol’s solution. Povidone-iodine is formulated to be gentle enough for skin contact, while tincture of iodine is harsher and more likely to irritate open tissue.

How to Make Sugardine, Step by Step

  • Pour your sugar into a clean mixing bowl. A good starting point is about 1 cup of sugar for a standard batch.
  • Slowly add povidone-iodine a little at a time, stirring as you go. Most recipes land somewhere between one part iodine to two parts sugar and one part iodine to nine parts sugar, so add gradually rather than dumping it all in at once.
  • Keep stirring and adding iodine until the mixture reaches a thick, peanut-butter-like consistency. It should hold together and spread easily without being runny.
  • If it turns out too thin, mix in more sugar. If it is too dry and crumbly, add a few more drops of iodine.
  • Transfer the finished paste into a lidded container. It will keep almost indefinitely at room temperature, though it can stiffen in cold weather and may need a quick stir to loosen it back up.

Exact ratios vary by source, from roughly 2:1 sugar to iodine up to 9:1, because humidity and sugar grain size both affect how much liquid the mixture can absorb. Judge by texture, not by a rigid measurement.

How to Use Sugardine on a Wound

  • Clean the wound thoroughly with clean water or saline before applying anything. Sugardine is not a substitute for basic wound cleaning.
  • Pack a generous layer of sugardine directly into and over the wound, similar to spreading peanut butter on bread.
  • Cover with a clean bandage or gauze and secure it in place.
  • Change the dressing daily, or more often if the wound is draining heavily, since sugardine draws out fluid and will need to be replenished as it becomes saturated.
  • Keep the dressing dry. A wound dressing that gets waterlogged will do more harm than good and can trap bacteria against the skin instead of drawing it out.

Beyond fresh cuts and scrapes, this same approach is commonly used on minor burns, pressure sores, and slow-healing wounds. In the livestock world it remains a go-to treatment for hoof abscesses and thrush, worked deep into the affected area and wrapped for a day or two at a time.

Safety Limits You Need to Respect

Safety Warning:

Do not use sugardine, or any povidone-iodine product, on anyone with a known iodine allergy. Reactions are rare but can range from skin irritation to a serious allergic response.

Avoid packing sugardine into deep puncture wounds, animal bites, or major burns. These need proper irrigation and, when at all possible, professional medical evaluation rather than a field remedy.

Do not use it on or near the eyes.

If you or the person you are treating has a thyroid condition, understand that iodine absorbs through skin, and prolonged use over large areas can affect thyroid function. This risk grows with bigger wounds, more frequent application, and longer treatment periods.

Limit continuous unsupervised use to about one to two weeks. Past that point, seek medical care if the wound has not meaningfully improved, since ongoing iodine exposure and an unhealed wound both call for a closer look than a home remedy can give.

Use caution with pregnant or breastfeeding women and with infants, since iodine can affect a developing thyroid.

Watch for worsening redness, spreading warmth, fever, or red streaking near the wound. These are signs of a spreading infection that sugardine alone will not fix, and they call for medical attention, grid-down or not.

What About Diabetics?

A question that comes up often is whether diabetics can safely use a sugar-based remedy. Topically applied sugar in a wound dressing is not absorbed into the bloodstream the way sugar in food is, so it does not raise blood glucose the way eating sugar would. That said, diabetics tend to heal more slowly and are at higher risk for wound infection generally, so any diabetic wound that is not improving within a few days deserves a closer look from a medical professional rather than extended reliance on a home remedy.

Storage and Shelf Life

  • Store finished sugardine in a sealed container at room temperature, away from direct sunlight
  • It does not spoil the way a water-based preparation would, since the sugar and iodine combination is naturally resistant to bacterial growth
  • Expect it to stiffen in cold temperatures. A quick stir, or a few minutes near a warm surface, will loosen it back up
  • If separation occurs over long storage, simply re-stir before use
  • Keep your stock of dry sugar and a separate bottle of povidone-iodine on hand as well, since premixed sugardine can dry out over very long storage and fresh batches are quick to make on demand

Stocking This for Your Preps

  • A bag of plain white sugar takes up almost no space and never goes bad if kept dry
  • A bottle or two of 10% povidone-iodine solution is inexpensive and widely available at pharmacies and farm supply stores
  • Both ingredients double as general first aid or kitchen supplies, so there is no downside to keeping extra on hand
  • Consider premixing a small batch for your bug-out bag or truck kit, and keeping the raw ingredients separately in your main first aid stock for larger batches at home

If you want a second antiseptic option for your kit, look into honey-based wound dressings, which work on a similar osmotic principle and have their own long track record in wound care, particularly for burns.

🚑 Be Your Own First Responder When Help Isn’t Coming

A jar of sugardine is a valuable addition to any emergency kit – but treating a wound is only one small part of emergency medicine. When hospitals are overwhelmed, roads are blocked, or professional help is hours (or days) away, you’ll need to know far more than a single home remedy.

That’s where The Home Doctor becomes an invaluable resource.

Inside this practical survival medical guide, you’ll learn how to:

  • 🩹 Recognize which wounds can be safely treated at home – and which require urgent medical attention
  • 🦠 Identify the early warning signs of infection before they become life-threatening
  • 💉 Stop severe bleeding, clean wounds properly, and reduce the risk of complications
  • 🦴 Handle burns, fractures, sprains, bites, stings, and other everyday medical emergencies
  • 💊 Make the most of limited medical supplies when pharmacies are empty or unavailable
  • 🏕 Care for yourself and your family during power outages, natural disasters, and other grid-down situations
  • 📖 Follow easy-to-understand, step-by-step instructions written for ordinary people—not medical professionals

Whether you’re assembling a bug-out bag, stocking a homestead first aid cabinet, or simply preparing for unexpected emergencies, The Home Doctor provides the practical knowledge that could make all the difference when professional care isn’t immediately available.

👉 Click here to get your copy of The Home Doctor and build the confidence to handle medical emergencies when you’re on your own!

Final Thoughts

Sugardine will not replace a trauma kit, a suture kit, or a trip to the ER for a serious wound. What it will do is give you a cheap, shelf-stable, easy-to-make antiseptic for the day-to-day cuts, scrapes, and slow-healing sores that pop up whenever normal medical care is not an option. Two ingredients, no expiration date to worry about, and a track record that goes back over a century. That is exactly the kind of simple, redundant solution that belongs in a prepper’s first aid kit.

This article is for informational and preparedness purposes only and is not a substitute for professional medical care. Seek qualified medical attention for serious wounds, signs of infection, or any injury beyond your ability to safely treat.


You may also like:

how to make comfrey salve for shtfJoin Our Unique Prepping WhatsApp Channel!

DIY Back-Up Generator (Video)

Plantain Weed – The Survival Plant Growing in Your Own Backyard

Suture Kit: What It Is, How to Use It, and Why Every Prepper Needs One

Native American Medicine Wheel – Ancient Wisdom for Modern Preppers


The post How to Make Sugardine – A Prepper’s Homemade Antiseptic appeared first on Ask a Prepper.


from Ask a Prepper https://ift.tt/tfgIkRZ

Wednesday, July 29, 2026

How to Fake Your Death, Go Invisible and Survive SHTF

Disclaimer: This isn’t a guide to faking your death, forging paperwork, or disappearing from legal obligations like debts, court dates, or child support. That’s fraud; it’s illegal everywhere, and no collapse scenario changes that. What this article covers is something else entirely: the real skill preppers call going gray: making yourself hard to track, hard to notice, and hard to target when the normal rules of society stop holding.

If a riot, grid failure, or breakdown in law and order ever puts your family’s safety at risk, here’s what actually works.

Stop Being the Guy Everyone Points To

Going gray doesn’t start the night the grid goes down. It starts months earlier, in how much your street already knows about your business. Someone remembers the generator in your driveway last winter. Someone remembers the garage light on at 2 AM. Someone remembers the questions you asked about their well. You don’t need a bug-out bag if you’ve already spent years being the guy everyone points to first.

  • Buy in pieces, not bulk. One cart with six cases of water gets noticed. Spread purchases across weeks and stores.
  • Keep the garage closed. Solar panels, fuel cans, gear visible through a window turn your house into a landmark.
  • Stop being the answer man. When someone asks “you’d know what to do here, right?” — deflect. Let someone else be the local expert.
  • Watch what you post. A pantry photo, a proud caption about your water filter – strangers remember it.
  • Drive something forgettable. A rig loaded with racks draws eyes a plain sedan never will.

But staying invisible only solves half the problem. You can spend months becoming a ghost on your own street, and it still won’t matter if the guy three houses down has been watching you the whole time. Before things fall apart, take a hard look at 5 WARNING SIGNS YOUR NEIGHBOURS WILL BE TROUBLE WHEN SHTF.

Shut Down What Your Phone Is Reporting

Your phone keeps a record of you whether you touch it or not. Location history logs where you stopped and how long you stayed. Photos get stamped with coordinates the second you hit the shutter. Apps you forgot you installed are still pinging away in the background, and a lot of that data ends up sold to brokers you’ve never heard of.

So if the day comes when you need to drop off the radar, you should already know how to shut it down without thinking about it. Location services off, photo backups off, app permissions stripped back to nothing, and if it’s really bad, airplane mode or the battery out entirely.

Practice it once while things are calm. Watching how much of it you can actually kill in under a minute tells you a lot about how exposed you’ve been.

The other half of this is what happens to your phone when the grid takes a hit. It doesn’t automatically go dark with everything else. Satellites stay up, parts of the network limp along, and a phone that still works is a phone still reporting where you are.

That’s why you should check out the FS Plan, since it walks through comms after an EMP or a grid event and how a family stays reachable when normal service is gone. Worth reading now, before you need it.

Build a Cash Reserve Nobody Can Trace

Start with how the cash gets into your hands, because that’s the part that leaves a record. Any withdrawal over $10,000 gets reported to the government automatically, and splitting it into smaller trips to stay under that line is its own crime, so there’s no clever way around it.

Once you have it, the denominations decide whether you can actually use it quietly. During an outage nobody has change, so hundreds sit useless in your pocket while ones and fives keep moving. That’s also what keeps you unremarkable at the register, since paying for a tank of gas with exact bills looks like nothing at all. Keep it split between a few hiding spots while you’re at it, because one stash means one bad day wipes you out.

Cash only carries you so far, though. Six months into a serious disruption prices climb and paper money buys less, which is when silver starts doing the work instead. Pre-1965 dimes and quarters are the ones to get, since they’re 90% silver, already stamped with a face value, and familiar enough that nobody needs to test them.

The best advice I could give you is to… skip gold. A single coin runs past three thousand dollars, so every trade turns into a search for change that doesn’t exist and a conversation about what else you’re holding.


➡ How To Extract Useful Information Through Casual Conversation

First of all, you need to stop asking people questions if you want the truth! The CIA uses a technique called elicitation to get information without the target ever realizing they’re being interrogated. Click here to learn many other powerful methods just like this one.


Dress to Be Forgotten, Not Armed

Molle webbing, velcro patch panels and coyote brown boots tell anyone paying attention roughly what’s in your bag. What you want is whatever a working man in your area wears on a Tuesday, so jeans or canvas pants, a plain flannel, and boots with wear already on them. Colors matter too, since black reads as police, camo reads as militia depending on who’s looking, and faded grey or brown just disappears, including on doorbell cameras.

The bag gives you away faster than the clothes ever will, so a beat-up school backpack or a plain duffel gets a glance where a 5.11 pack with a hydration port gets a second look. Leave the good watch and anything with a brand name on it at home, and skip new clothing, because creases still in a jacket suggest it was bought for this exact purpose. 

Learn the Routes Nobody Else Is Watching

Main roads are the first place checkpoints and roadblocks go up, and they’re also where everyone leaving at once ends up sitting. The alternatives are worth learning while things are calm: service roads behind commercial strips, utility and rail easements, county gravel roads, drainage paths and the walking trails that connect neighborhoods without touching a highway.


➡ Here’s How to Find the Cardinal Points Using ONLY 2 Sticks


Drive or walk them at least once, ideally after dark, since a route that looks obvious on satellite view often turns out to be gated, flooded or fenced in person. Two or three of them in different directions is better than one perfect one, because the whole point is having somewhere to go when your first choice is already blocked.

Break Your Own Patterns

Same gas station, same store, same time every week. Predictable habits are easy to exploit by anyone paying attention for the wrong reasons, so during a tense stretch it helps to vary your routine even slightly and stay aware of who’s watching.

This is the core of what security professionals call situational awareness, noticing before you’re the one being noticed.

Make Your House Look Lived-In

An overflowing mailbox, packages piling up on the porch, and lights that never change tell anyone watching whether a house is occupied, empty, or worth checking out. I spent a long time treating this as part of my own gray man setup, testing timers, moving cars around, asking a neighbor to grab my mail, and getting it wrong more than once.

But this trick has a ceiling. It filters out the casual opportunist testing doors down the street, but it won’t fool someone actually watching the house. Sturdy doors and a layered fence handle the physical side, but none of that answers a question that kept nagging at me once I started thinking past the obvious threats: what happens if the thing watching your house isn’t a person walking a route, but a system that never blinks? 

That question is what sent me looking into how people plan for a surveillance-heavy, AI-driven SHTF scenario instead of just a chaotic one. I found a strategy built specifically around that problem, laid out as an AI defense guide, and it’s the first thing I’ve read that treats faking your absence, or your death, as a real technical challenge instead of a Hollywood plot point. Worth a look whether you’re prepping for next week or a scenario twenty years out.

Clean Up What Social Media Already Gave Away

Old posts, tagged photos, and years of check-ins add up to more than most people realize, enough to piece together your routine, your vehicle, your kids’ school, even your address, without anyone ever meeting you. Do this now, before things get bad:

  • Lock down privacy settings on every platform, not just the one you use most.
  • Go through old posts and delete or untag anything with a location attached.
  • Remove your address, workplace, and school info from public profile fields.
  • Stop posting travel plans, trips, or big purchases in real time, save it for after you’re back.
  • Ask family members to untag you from their posts too, since their privacy settings won’t protect you.
  • Search your own name and address online to see what’s already public before you try to fix it.

Set Up a Way to Talk Without Cell Towers

Cell networks are among the first systems to overload or fail outright during a major event. Have a backup that doesn’t depend on the regular grid, such as family radios, a ham radio setup if you’re licensed for it, or a simple pre-arranged meeting point if phones go dead. That way you’re never stuck relying on infrastructure that might not be there when it matters most.

Learn to Blend In Somewhere New

If circumstances force you to leave home and settle somewhere unfamiliar, even temporarily, the goal is to look like you’ve always belonged there. Pick up on local customs, dress the way people around you dress, and avoid anything that marks you as an outsider, like an accent, a bumper sticker, or gear that stands out. People remember what’s different, and they forget what fits in.

Keep Your Fallback Location to Yourself

There’s a habit of telling people where the backup location is, usually family first, then a friend, then somebody in the group chat who seemed solid at the time. A place ten people know about is just a place, and the goodwill holding that information in place tends not to survive the first hungry week.

The one that actually stays yours is the one you never mentioned, which is why I stopped thinking about a cabin somewhere and started thinking about what’s already under my own yard. That’s how I ended up building a cellar from this ingenious plan.

What sold me on it was who wrote it. He’s a historian and a prepper, and he served in Vietnam, where he watched people survive a war from inside hidden tunnel systems that soldiers walked over without ever knowing they were there. Concealed entrances, air handled properly, whole families living underground while the fighting happened above them. He took that and turned it into a root cellar plan that doubles as a fallout shelter, built on your own property, invisible to anyone standing on top of it.

If the whole point is not being found, that’s the version worth looking at.

The Discipline Behind Disappearing – A Case Study

Becoming a gray man isn’t a new idea, and the US has its own version of it: pseudocide, staging your own death to walk away from debt or legal trouble.

The best-documented case is Marcus Schrenker, an Indiana financial manager who put his plane on autopilot in January 2009 and parachuted out over Alabama, hoping the plane would crash into the Gulf and read as an accident while he vanished. He’d been hit with an investor fraud complaint and was facing divorce and a lapsed financial license right before the stunt. 

It fell apart fast. Investigators found no blood and an intact windshield, which immediately pointed to a staged jump instead of a crash, and he was tracked down and arrested within two days. He had a hidden motorcycle and an escape route planned, but skipped the part that actually mattered: no clean paper trail, no patience, no plan for the forensic team that would pick his story apart in hours. 

Everything Schrenker skipped is in the video below:

LSI video Stay Invisible

Being a gray man takes a tactical plan behind it. Skip it and you’re left guessing at the order of operations, which is exactly what decided this case in two days flat.


You may also like:

Lost skills of independence banner How to use plastic bottles to heat your home - Watch Now buttonHow Being a Gray Man Can Get You Killed

Why Your Electricity Bill Almost Doubled in Only 5 Years. This Expert Has the Solution for You (VIDEO)

What the “Prepping Experts” Are Hiding from You

How To Become Invisible In 9 Hours After SHTF

The post How to Fake Your Death, Go Invisible and Survive SHTF appeared first on Ask a Prepper.


from Ask a Prepper https://ift.tt/3wcjAZk

50 Ways to Earn Money With Your Homestead

Estimated reading time: 14 minutes

50 Ways to Earn Money With Your Homestead

Living the homestead lifestyle offers a sense of freedom and satisfaction. However, you may have taken a drastic cut in income to make your dream of self-sufficiency a reality.

Whether you are looking for a full-time salary or a supplemental income, there are many ways to make money as a homesteader. Your best bet is to think about your specific property and your individual talents and then brainstorm how you can combine them to offer a quality service or product to others.

Many urban dwellers are fascinated with homegrown, handcrafted items, and others will pay to live vicariously through your chosen lifestyle through your services and expertise.

We have compiled a list of 50 ideas for increasing your income as a homesteader. Look through them to see what piques your interest.

1. Become a Beekeeper

A time-honored homesteading profession, beekeeping is more important than ever with the population of honeybees decreasing. You can sell the bees themselves and/or their honey. Beyond honey, many beekeepers also earn money selling beeswax, propolis, and pollen, or by offering pollination services to nearby orchards and farms.

Getting started usually requires only a modest investment in hives and protective gear, which makes it an accessible side hustle for many homesteaders.

2. Become a Livestock Consultant

If you have a lot of experience raising livestock, people will pay you to visit their farm or homestead and give them advice. This can include help with breeding decisions, pasture management, herd health, or setting up fencing and shelter systems.

Building a reputation through word of mouth or a simple website can lead to steady referral business over time.

3. Board Horses

You can earn extra money by boarding horses on your homestead as well. Perhaps you could offer riding lessons, too. Many horse owners are also willing to pay extra for services like feeding, turnout, and basic grooming, so bundling these into your boarding fees can boost your income further.

4. Breed Livestock

An oldie but a goodie. Breeding animals is a tried and true way of making money as a homesteader. Popular options include goats, pigs, and rabbits, all of which reproduce quickly and have strong demand among other small farmers and homesteaders.

Keeping detailed breeding and health records can also help you charge premium prices for well-documented stock.

5. Breed Livestock Guardian Dogs

A livestock guardian dog is a great thing to have. If you like dogs, train them to herd and watch livestock then sell them. Breeds like Great Pyrenees and Anatolian Shepherds are especially sought after by homesteaders who need reliable protection for their flocks, and a dog with proven working experience can sell for a premium.

6. Create Your Own Soaps

If you like making soap, we have several posts on how to make various types including: castile soap, goat milk soap, olive/coconut oil soap, and 3 ingredient soap. Handmade soaps sell especially well when packaged attractively and marketed with natural or locally-sourced ingredients, and many soapmakers expand into seasonal scents or gift sets to boost sales around the holidays.

7. Create Your Own Toiletries

Homemade lotion, lip balm, and shampoo are popular items at farmers' markets and at natural foods stores. Because so many buyers are looking to avoid synthetic ingredients, labeling your products as all-natural or chemical-free can help them stand out on a crowded market table.

8. Cut and Sell Firewood

If you have land to be cleared, you can earn some extra bucks by selling the wood to others. Splitting and seasoning the wood properly before selling it typically commands a higher price than green or unsplit wood, and offering delivery can open up sales to customers without a truck or trailer.

9. Freelance

Offer your writing, editing and/or technical skills online. Many platforms exist to help you market your skills and find clients. In fact, we hired several of our writers on Upwork. Freelancing is especially appealing for homesteaders because it can be done entirely from home on a flexible schedule, fitting around chores and seasonal farm work.

10. Grow Mushrooms

Are mushrooms your thing? You may find a nice income source by selling your homegrown mushrooms to local restaurants. Here's how to grow them. Specialty varieties like oyster and shiitake mushrooms tend to fetch higher prices than common button mushrooms, and chefs are often willing to pay a premium for a consistent, fresh local supply.

11. Host Birthday Parties for Kids

Parents are often looking for new ways to celebrate their children's birthdays. You may find a niche for yourself as a birthday party location. Think about what you can offer. A petting zoo? Pony rides? Apple picking? There are many fun possibilities.

Offering package deals that include decorations, activities, and take-home treats can make your homestead a go-to destination and encourage repeat bookings for multiple children in the same family.

12. Make and Sell Clothing

If you're into sewing and knitting, try making your own clothes, towels, and blankets and putting them up for sale. Handmade, natural-fiber items like wool sweaters or quilted blankets often appeal to buyers looking for something more durable and unique than mass-produced retail goods.

13. Make Your Own Bread

If you like baking, you should know that there are many people out there who would be happy to purchase fresh, home-baked bread from you. You can make breads such as French bread, peasant bread, and Amish white bread.

Selling at a weekly farmers' market or setting up a simple pre-order system can help you gauge demand and reduce waste from unsold loaves.

14. Make Your Own Candles

Everybody likes candles. Heck, they have their own aisle in every Walmart. Here's how to make them. Using natural waxes like soy or beeswax and adding your own essential oil scent blends can help your candles stand out from mass-produced paraffin versions and justify a higher price point.

15. Make Your Own Cheese

Similarly, homemade, handcrafted cheese can command good prices. Here's how to make cheese. Aged cheeses in particular can be sold at a significant markup compared to fresh cheese, though be sure to research your state's regulations on selling dairy products before you start.

16. Make Your Own Grape Juice or Wine

Growing grapes can be a rewarding activity for both your soul and your wallet. Depending on your location, you may need a license to sell wine commercially, so check local regulations first, and consider starting with juice or jelly sales if you want a simpler entry point.

17. Open a Shooting Range

If you have a large property, your homestead may be perfect as an outdoor gun or archery range. Offering memberships or per-visit fees, along with basic safety instruction, can create a recurring revenue stream from local shooting enthusiasts.

18. Open Your Orchard

If you have a large orchard and more fruit than you need, why not try a season as a u-pick destination? U-pick operations also cut down on your own labor costs since customers do the harvesting themselves, and many owners add extras like hayrides or a small farm stand to increase revenue per visit.

19. Raise Bait

If there are a lot of fishermen in your area, try raising your own bait. Here's how to raise worms for fishing. Bait sales tend to be steady and seasonal, picking up heavily in spring and summer, and worms in particular require very little space or investment to raise in bulk.

20. Raise Chickens

Most homesteaders raise chickens for their own use. You can earn a little extra income by selling your surplus eggs to others. You also can sell your chickens. Here are the 8 best egg-laying chicken breeds. Selling to neighbors or through a small farm stand often earns more per dozen than wholesale prices, especially if your eggs are pasture-raised or from heritage breeds.

21. Raise Cows

Consider raising a cow for meat and selling the excess meat. Here's a beginner's guide. Selling meat by the quarter, half, or whole animal directly to buyers can be more profitable than selling individual cuts, and grass-fed or organic labeling often allows for a higher asking price.

22. Raise Fish

Turn your pond into income potential by raising and selling fish such as tilapia or catfish. You also could raise worms to sell for bait. Fish farming, or aquaculture, can be combined with a garden through aquaponics systems, giving you two income streams from the same water source.

23. Raise Rabbits

There are so many reasons to raise meat rabbits. The meat is healthy, they grow and reproduce quickly, but most importantly, you can sell rabbit meat or the rabbits themselves. Rabbits require relatively little space and feed compared to larger livestock, which makes them one of the more accessible meat animals for homesteaders just getting started with breeding for profit.

24. Raise Sheep

Sheep are valuable animals for the homestead. You can raise them for their meat, and/or you can sell their wool or the products you make from their wool. Some homesteaders also offer shearing services to other sheep owners, or turn raw wool into yarn and roving for sale to fiber crafters.

25. Raise Turkey

Because of Thanksgiving, turkey is guaranteed to be a popular food every year. Here's how to raise turkey for profit. Taking pre-orders in the months leading up to the holidays can help you plan how many birds to raise and guarantee buyers before you even start feeding them out.

26. Rent Your Home

If you have a beautiful home on picturesque property, consider listing your home on AirBnB. Guests are often drawn to the novelty of staying on a working farm, so highlighting nearby attractions or offering a farm tour as part of the stay can help your listing stand out and justify a higher nightly rate.

27. Rent Your Property

Offer your acreage as a location for weddings and family reunions or as a campsite. Rural, scenic properties are in high demand for outdoor weddings in particular, and you can charge significantly more for a venue rental than for basic camping fees.

28. RV or Boat Storage

Many urban dwellers will pay good money for a safe place to store their recreational equipment in the off-season. If you have an empty barn, you can charge an increased rental fee for indoor storage.

Offering added security like a locked gate or cameras can let you charge even more, since owners are often willing to pay a premium for peace of mind.

29. Sell Essential Oils

If you know how to make essential oils, you should know there are countless people out there who would prefer to buy them from individuals instead of from giant companies. Building a following on social media or at local markets can help you educate buyers on the sourcing and quality that sets your oils apart from mass-market brands.

30. Sell Home Remedies

Make your own home remedies for common ailments and sell them. Here are 5 homemade painkillers, and here are 5 homemade healing salves. Be aware that regulations around making health claims can be strict, so it's wise to research labeling laws in your area before selling these products commercially.

31. Sell Homemade Crafts

Make crafts, pottery, jewelry, birdhouses, or anything else you like making on Etsy or at Famers' Markets. Building an online shop alongside in-person sales lets you reach buyers well beyond your local area, which can be especially valuable during the off-season for farmers' markets.

32. Sell Homemade Furniture

If you're into woodworking, consider making furniture. People love having a piece of furniture that wasn't mass-produced in some factory. Using reclaimed or locally sourced wood can be a strong selling point, and custom or made-to-order pieces often command a significant premium over standard designs.

33. Sell Homemade Jams and Jellies

Another use for all that fruit is to make and market your own jams and jellies. Unique or unexpected flavor combinations, like a spicy pepper jelly or a mixed-berry jam, can help your products stand out on a shelf full of more traditional options.

34. Sell Homemade Maple Syrup

Do you have maple trees? Then you have a source of some extra income. Make some syrup and sell it. Maple syrup has a long shelf life and strong year-round demand, and selling in bulk to local stores or restaurants can move product faster than relying on individual retail sales alone.

35. Sell Homemade Pickles

Making your own pickles is fun, and they are really good for your health. Here are a couple of ways to make them. Fermented pickles in particular are gaining popularity for their probiotic benefits, so marketing them as a gut-healthy option can appeal to health-conscious buyers.

36. Sell Your Arts and Crafts

Whether it is woodworking, macramé, needlepoint, or you name it, you can reach potential customers for your handcrafted wares through online sites such as Etsy. Good photography and a clear, personal brand story can make a big difference in how well handmade items sell online, since buyers often want to know who made the piece and how.

37. Sell Your Compost

You are already making your own compost, right? Why not sell some of what you don't need to other gardeners? Bagging compost for easy transport, or offering bulk delivery to local gardeners and landscapers, can turn what would otherwise be a waste product into a steady source of income.

38. Sell Your Flowers

Market your beautiful fresh flowers at your own stand or at a farmers' market. Don't forget that dried flowers are popular too. Offering flowers by subscription, sometimes called a flower CSA, gives you predictable income throughout the growing season instead of relying only on one-off sales.

39. Sell Your Heirloom Seeds

Harvest your best seeds at the end of each growing season and dry them for sale. They can be a nice addition to your produce stand or you could sell them online. Heirloom and open-pollinated varieties tend to be especially popular with home gardeners who want to save and replant their own seeds year after year, which can turn first-time buyers into repeat customers.

40. Sell Your Herbs

Plant more herbs than you need for your family, then sell the rest in fresh or dried form. Culinary herbs sell well at farmers' markets, while dried herbs can also be bundled into teas or seasoning blends for a higher-value product.

41. Sell Your Milk

Fresh, unpasteurized cow's milk or goat milk is a sought-after commodity by many urban dwellers. Raw milk sales are regulated differently from state to state, so it's important to check your local laws before selling, and some homesteaders find it easier to sell shares in a dairy animal instead of the milk itself.

42. Sell Your Produce

If you harvest more than what your family needs, sell your bounty at your own produce stand or at a local farmers' market. Offering a mix of common and less common vegetables can help you stand out from other vendors, and building relationships with local restaurants can create a reliable wholesale outlet for your surplus.

43. Sell Your Rabbits' Poop

Who would want to buy that? Lots of people. It actually has many uses. Rabbit manure is considered one of the best natural fertilizers because it can be applied directly to plants without composting first, which makes it especially appealing to organic gardeners.

44. Serve as a Bed and Breakfast

Do you have a guest cottage or a spare room? You may find income potential by posting it for rental on Airbnb or other online sites. Adding a homemade breakfast featuring your own eggs, produce, or baked goods can make the experience feel more authentic and justify charging a higher nightly rate than a standard rental.

45. Start a Blog

If you're living the homestead life, there are countless people out there who would love to hear about your experience. Document your day-to-day life and the lessons you've learned, and publish it on a blog where you can earn money from ads.

Beyond ad revenue, many homestead bloggers also earn money through affiliate links, selling their own guides or courses, or sponsored posts once they build a loyal readership.

46. Start a Pick-Your-Own Farm

If you grow lots of food, save yourself the work of harvesting and let people come pick fruits and vegetables on a pick-your-own farm. This model works especially well for crops like berries and pumpkins, and adding family-friendly extras like a corn maze or petting area can increase the amount visitors spend per trip.

47. Start a Youtube Channel

There's even more opportunity on Youtube. Get a camera and start documenting your life on the homestead. You'd be surprised how many people will watch. Beyond ad revenue from YouTube itself, successful homestead channels often earn additional income through sponsorships, merchandise, or by directing viewers to their own products and online shop.

48. Teach What You Know

Host in-person weekend or online workshops on the art of homesteading. You can teach farming, gardening, raising sheep, or your specific area of expertise. Recording your workshops and selling them as an online course afterward can turn a single weekend of teaching into an ongoing source of passive income.

49. Watch People's Pets

If you have the space, set up a kennel to board dogs and cats while people are away. Offering extras like daily photo updates, outdoor playtime, or pickup and drop-off service can help you stand out from larger commercial boarding facilities and justify charging more per night.

50. Write a Book

If you've been homesteading for a long time, write a book about your experiences and the lessons you've learned. Nowadays, it's easy to self-publish on Amazon. People will find your book through the recommendations feature. Pairing your book with an email list or blog following can also help drive initial sales and reviews, which in turn boosts its visibility in Amazon's search results.

You May Also Like:

The post 50 Ways to Earn Money With Your Homestead appeared first on Homestead Survival Site.


from Homestead Survival Site https://ift.tt/8CZi4x1

Homemade Hamburger Buns In One Hour

Homemade Hamburger Buns In One Hour

Today, I’m sharing my homemade hamburger buns recipe with you. I really don’t like going to the grocery store, unless it’s for a case lot sale. You know by now I love making bread, any kind, anywhere. I love it! My friend from southern Utah got me started making hamburger buns.

She could mold them perfectly, me not so much. I kept trying and trying to make them look as beautiful as hers, but they never did. So, I ordered this pan to give me some help.

Plus, I don’t need a lot of hamburger buns, I only need a few, like six, maybe. Yes, six would be perfect. I would have some for lunch the next day. This recipe makes 12, so you can freeze some.

This hamburger bun recipe doesn’t require eggs in the dough, this is critical when we have issues getting eggs at the grocery store. Those of you who have chickens are so lucky to have fresh eggs. I tip my head to all of you.

You know how frustrating it is when you want to make sloppy joes and you have everything but the buns? Yeah, me too. Or pulled pork sandwiches? You know what I’m saying. We need a small recipe to make those buns, so here it is my friends.

These homemade hamburger buns are semi-soft on the outside and soft on the inside. They make the perfect bun for any filling!

Homemade Hamburger Buns In One Hour

Homemade Hamburger Buns In One Hour

Items You May Need In The Kitchen:

Homemade Hamburger Buns

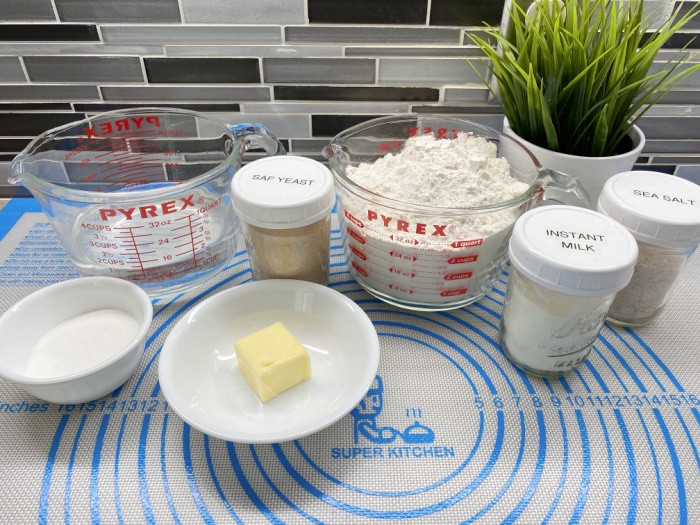
Step One: Gather Ingredients

The first step is to gather your ingredients which are so simple, and I love that this recipe doesn’t need eggs. This is the same recipe that makes two loaves of bread, or pizza dough, it’s so versatile!

Ingredients

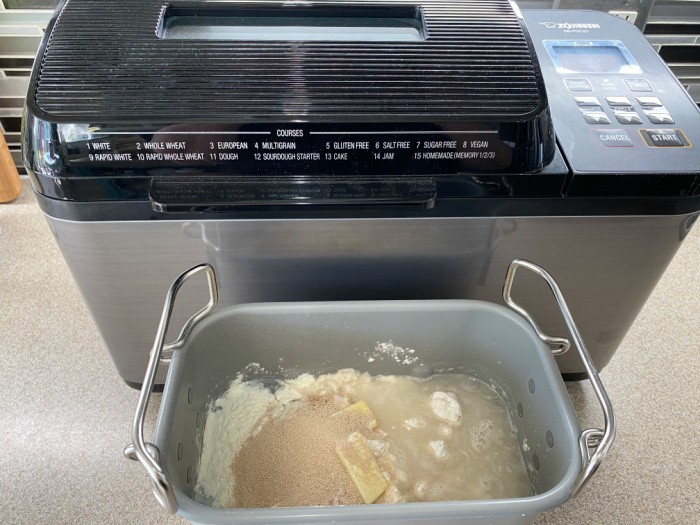
Step Two: Mix Ingredients

You can use a mixing bowl, a bread maker, or a bread mixer like I did. My Zojirushi bread maker is so easy to use! I love it even more than my Bosch? I still need my Bosch for making several loaves of bread and dozens of cinnamon rolls, but this machine is awesome. Just dump everything in and push a button to have it mix, knead, and rise. I don’t bake any bread in it, even though I could.

Mixing the Dough

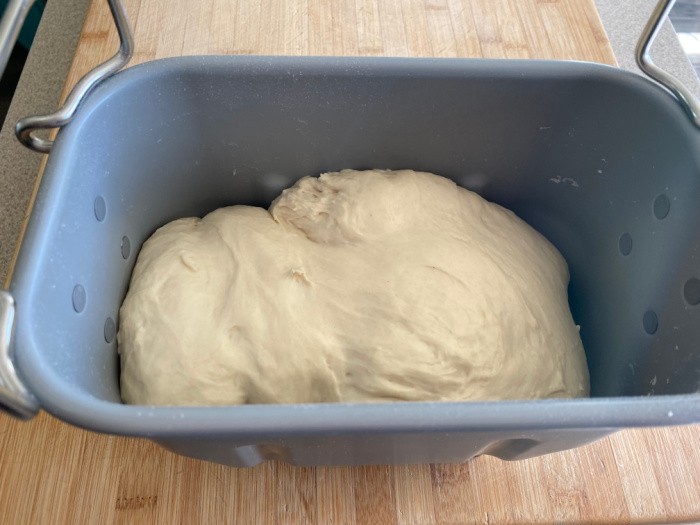
Step Three: Use Machine

I turned the machine to mix it, knead it, and let it rise. Here are instructions on how to make bread using the machine: Bread Machine Bread-How To Make It. Or you can mix this small batch by hand.

Let the Dough Rise

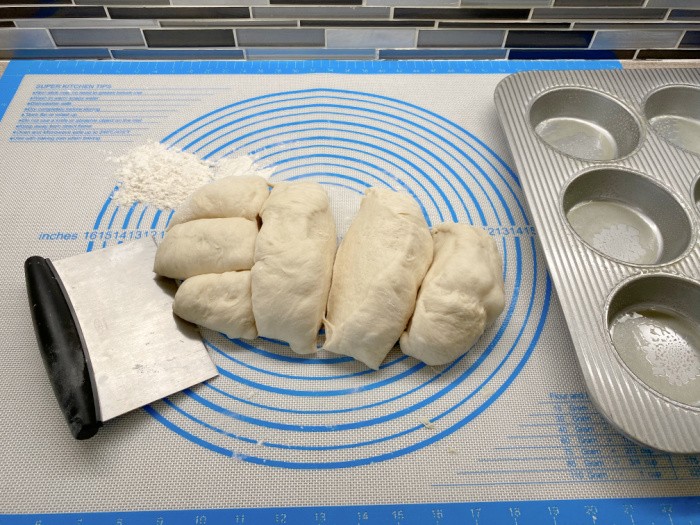
Step Four: Cut Bread Dough

I use a dough scraper to cut my bread dough instead of “pulling the sections” apart. I cut the dough into 12 pieces as evenly as I could.

Cut The Dough

Step Five: Mold Dough Pieces

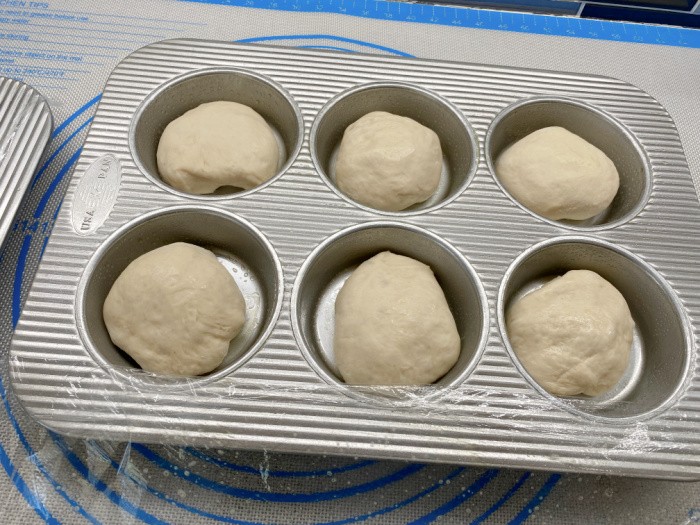
You mold them in a ball and push them down to flatten them in the hamburger bun pan, or on a cookie sheet. I really like to use the special pan since it helps keep the buns shaped the way you want them.

Hamburger Bun Pan

Step Six: Cover & Let Rise

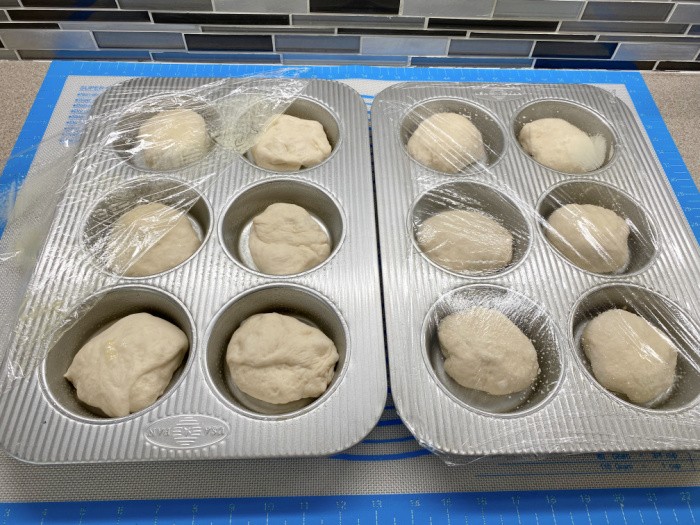
Cover the unbaked hamburger buns with greased plastic wrap and let them rise for about 30 minutes.

Cover and Let Rise Again

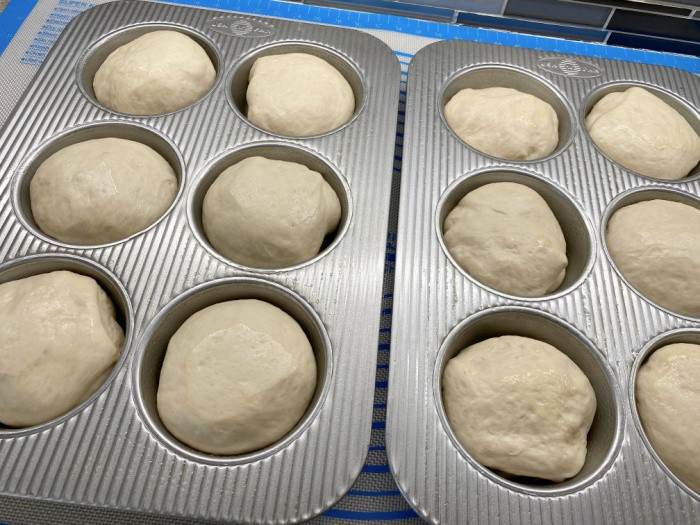
Step Seven: Bake

Remove the plastic wrap and bake them at  (425°F) = (218°C) degrees. Bake these for about 12 minutes, or until golden brown.

Ready To Bake

Step Eight: Remove & Cool

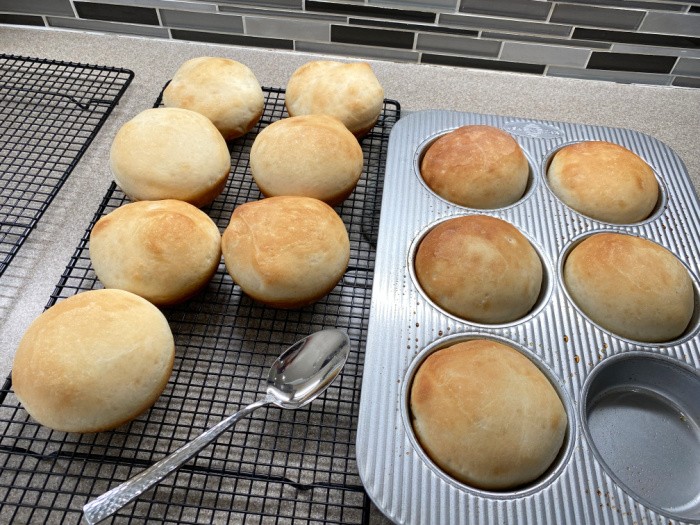
Remove the baked hamburger buns from the pans and let them cool on a cooling rack.

Finished Baking

Finished Product

A serrated knife works best for slicing hamburger buns, or bread for that matter. Slice these and use them for homemade hamburgers, pulled pork sandwiches, or whatever sounds good for dinner.

Homemade Hamburger Buns

Homemade Hamburger Buns Recipe

Homemade Hamburger Buns In One Hour
Print

Homemade Hamburger Buns

Course Main Course
Cuisine American
Prep Time 10 minutes
Cook Time 12 minutes
Let Rise 30 minutes
Total Time 52 minutes
Servings 12 buns
Author Linda Loosli

Ingredients

  • 1-1/2 cups water
  • 4 cups bread flour or white flour
  • 1/4 cup white granulated sugar
  • 2 tablespoons dry instant milk
  • 2 teaspoons salt
  • 2 tablespoons butter (softened)
  • 1 tablespoon SAF Instant yeast

Instructions

  • Preheat the oven to 425°F (218°C).
  • Now, you can make these in a large bowl, but I use my Bosch bread mixer or my Zojirushi bread maker. As you know, I dump everything in the mixer (yep, I'm a dumper). I wait until the bread dough pulls away from the mixer (using the Bosch).
  • I add just a little flour until the dough pulls away from the sides of the bowl (only if needed).
  • Now sprinkle some bread flour on the counter, knead the bread dough for about 2-3 minutes, and divide the dough into 12 pieces.
  • Grease a cookie sheet or hamburger bun pan and set it aside. Now you roll the pieces into balls and flatten them with your hands.
  • Place each flattened ball onto a greased or parchment-papered cookie sheet or in the hamburger bun pan.
  • Cover the pan(s) with greased plastic wrap and let rise for about 30 minutes. Bake at 425°F (218°C) for about 12 minutes, or until golden brown.

How do I store the leftover baked Hamburger buns?

I use my bread bags because they are cheaper than the boxed baggies. Bread Bags and Ties: These easily hold a full loaf of bread, or about 6 buns.

Can I freeze these after baking them?

Yes, you can. I have frozen them for up to two months in a freezer bag. With just the two of us, we often freeze loaves of bread and these buns.

Can I make these into Hot Dog bun shapes?

You sure can; I love hot dogs! This dough is so easy to make; you will love this recipe. I don’t have a hot dog bun cooking pan, but I’m sure they have them available. You creative cooks can get away with shaping them yourselves by hand.

Final Word

Please let me know if you make your own hamburger buns. This is one more way to teach our kids and grandkids to cook from scratch! May God Bless this world, Linda

The post Homemade Hamburger Buns In One Hour appeared first on Food Storage Moms.


from Food Storage Moms