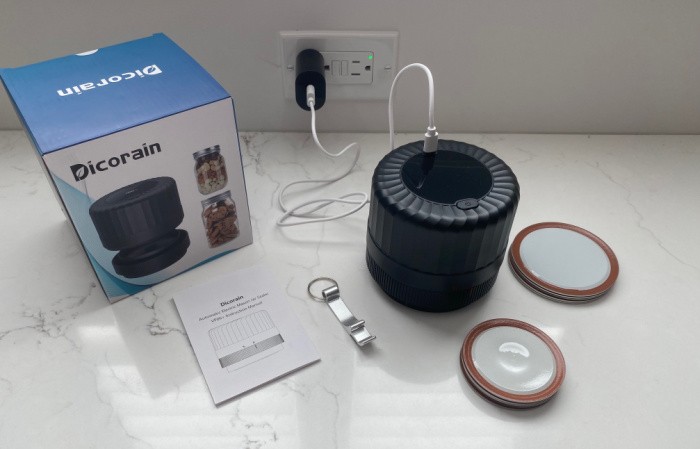
I love to take pictures to show how something works. So today, it’s about Dicorain™, a new way to vacuum seal bottled foods. Some of you were asking me about this Dicorain™. Ray mentioned it in a comment, and I decided to buy and try it. Matt mentioned I should post about it, so here we go, my friends. Please keep in mind I purchased this item myself.
Not all foods can be safely vacuum-sealed, so let’s discuss that. This unit is similar to a FoodSaver but without the machine. You can use it to remove the air from certain foods in a container to extend their shelf life. But remember, some foods should still be in the refrigerator or freezer.
I’m a Master Canner Preserver, and I’m cautious about how I store my food. I follow the USDA guidelines. Check out my archive of posts to read about food items that shouldn’t be canned; they aren’t safe, even though you may have a friend or neighbor who says otherwise. I follow the motto: “Better safe than sorry” when canning and storing foods.
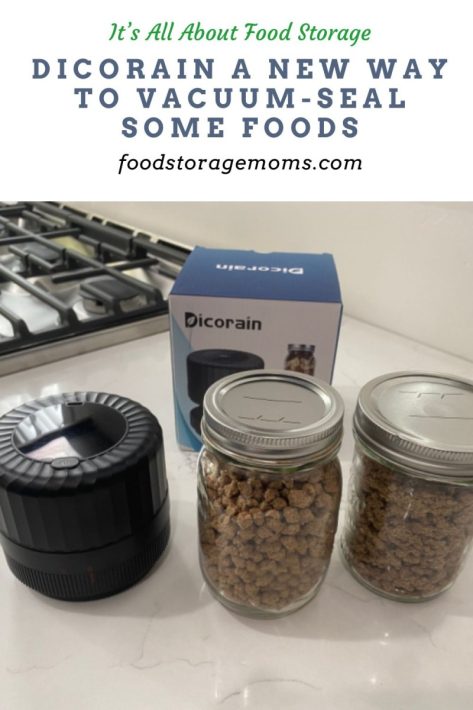
I’m not sure the USDA has anything to say about using a FoodSaver, but most of us know what we can and can’t put on the shelves when using a FoodSaver or Dicorain. Some of you’ll use oxygen absorbers, and I don’t. I also don’t live where it’s humid. It’s a personal decision. I haven’t stored my homemade dehydrated food for more than one year.
Dicorain-Mason-Jar-Vacuum-Sealer and Mason Jar Opener
How To Use The Dicorain Vacuum-Sealer
Dicorain™: Contents In Box
The unit comes in a relatively small box. It contains the sealer unit, a USB Type-C cord to charge its rechargeable battery, a lid opener, an instruction booklet, and some regular and wide-mouth mason jar lids to help you get started. You may want to keep the box to store the unit and its accessories easily when not in use.
Before using the Dicorain, you need to charge the battery. The contents picture shows the Type-C cable plugged into the top of the unit and then into a wall outlet using a USB transformer (not included). The cable is designed for a USB transformer or your USB-capable laptop. If fully discharged, recharging the unit may take over two hours. The LED screen on top shows the percentage charge until it reaches 100%. It’s suggested that you recharge the unit when it gets near the 20% charge level so it will work for the project you’re currently doing.
Dicorain™: The Red Line on the Right Shows the Locked Position
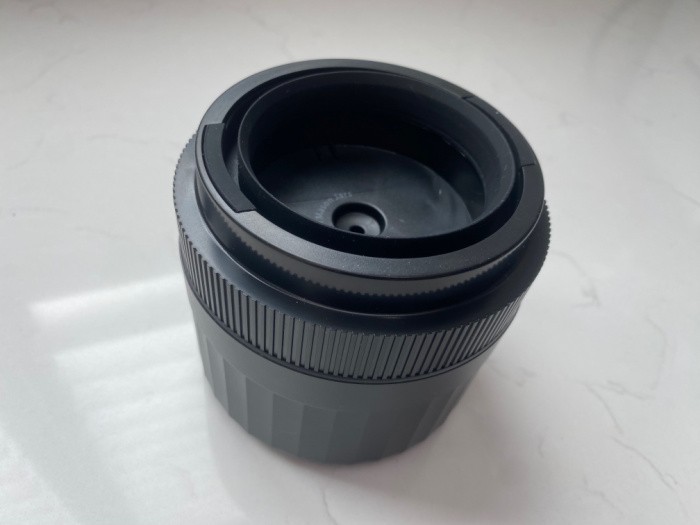
The unit is designed to vacuum seal both regular and wide-mouth mason jars. When in the locked position, it is ready to vacuum seal the regular-mouth jar lid. To remove the lower section of the unit to access the wide-mouth sealing converter, you turn the lower section counterclockwise.
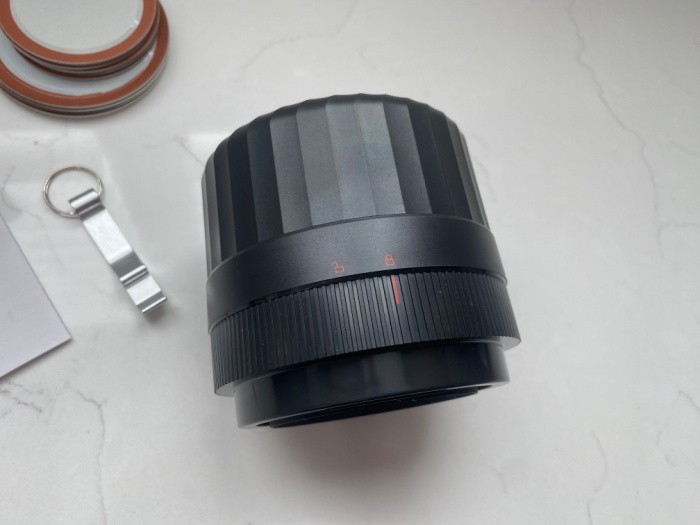
Dicorain™: The Unlocked Position of the Unit is to the Left
You can pull the two sections apart once you line up the red line with the picture of the “lock” with the latch open. This now allows you access to the silicone sealing ring that provides vacuum sealing for the large-mouth lids.
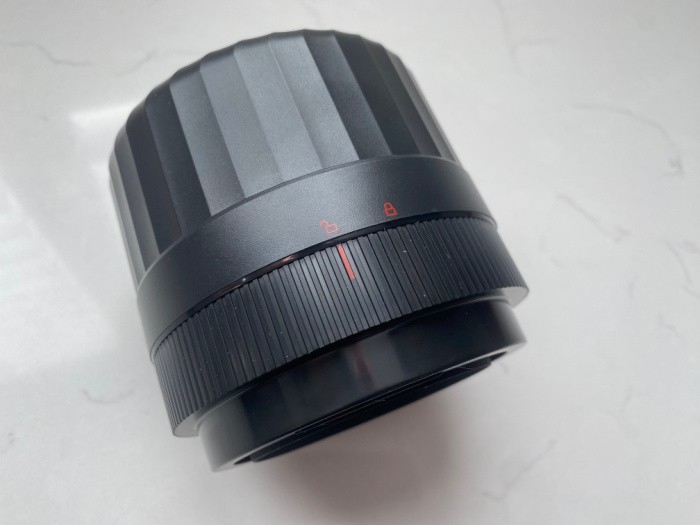
Dicorain™: Regular Size Jars
This picture shows the unit with both sections intact and ready to seal the regular-size lid. No matter which size lid you are placing on a jar, ensure the jar opening and the silicone seal of the Dicorain are clean.
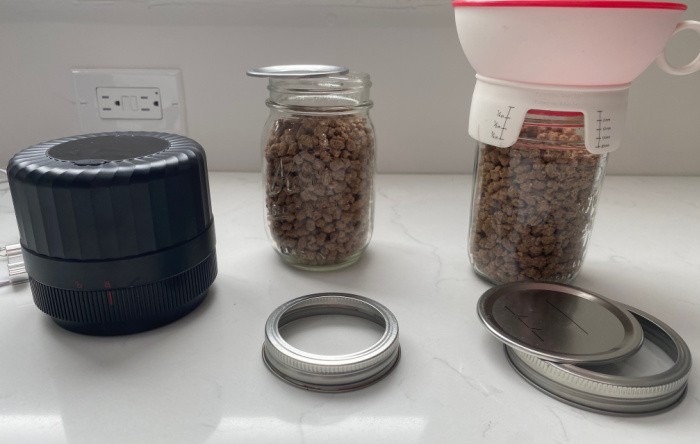
Dicorain™: Filling Jars With Funnel
My kitchen has many gadgets, including a funnel to help me fill mason jars. It works with both regular and wide-mouth jars and makes filling them easy without spilling. For best sealing results, fill the jars with the food product up to the narrow part of the jar, and before reaching the lid ring threads, as shown below.
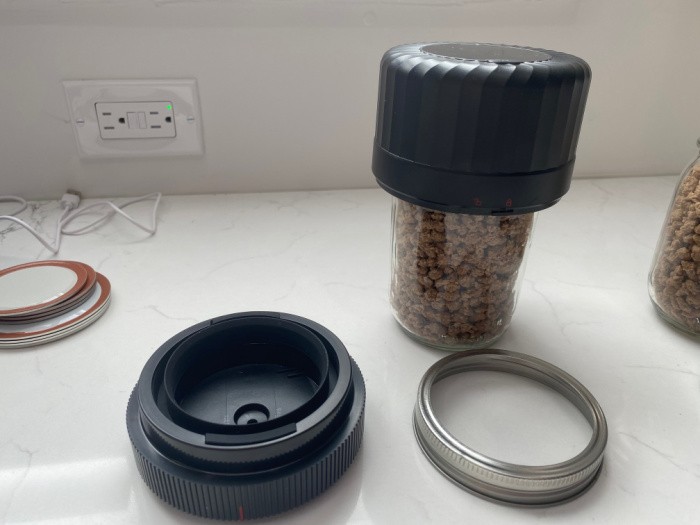
Dicorain™: Vacuum Sealing a Wide Mouth Jar
This picture shows the unit with the regular-mouth jar sealer section removed and the unit firmly seated on top of the filled wide-mouth jar. If not firmly seated, the vacuum can’t seal completely, and you’ll have to try again. When both sections are connected, you perform the same steps when sealing the regular-mouth jars.
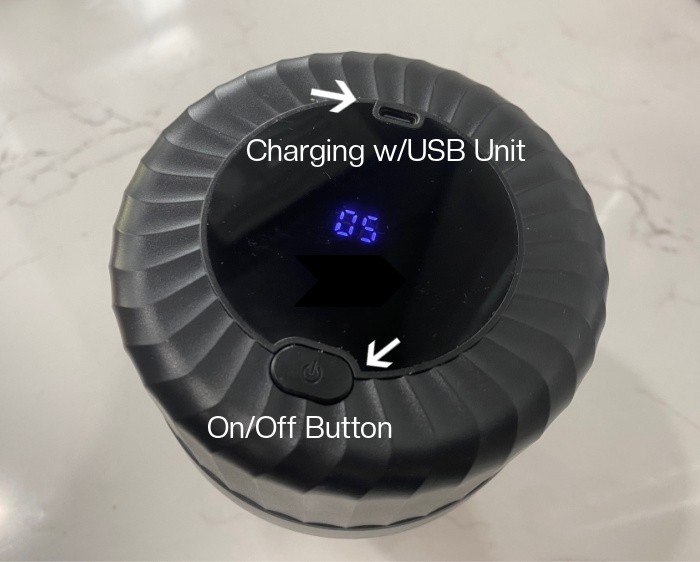
Dicorain™: USB Port and On/Off Button
The top of the unit has an LED display area with a light in the middle. The light shows the number of seconds the unit has used to seal the lid once you push the On/Off button. Both lid sizes should take 30-40 seconds to complete the job, and 40 seconds is recommended. It will automatically shut off when complete. You activate the vacuum sealer by pushing the On/Off button on the opposite side of the unit’s top. You can turn off the sealing process by pressing the button, but by doing so, you will interfere with the sealing process.
While charging, the LED light shows the percentage charge. If you push down the button for a few seconds, it will show the remaining charge when it is not plugged in.
Dicorain™: Put A Lid On Jar
Of course, you seal the jar with the lid before putting the jar ring on. Again, ensure the lid and the jar opening are clean and free of any debris from filling the jar with the food product.
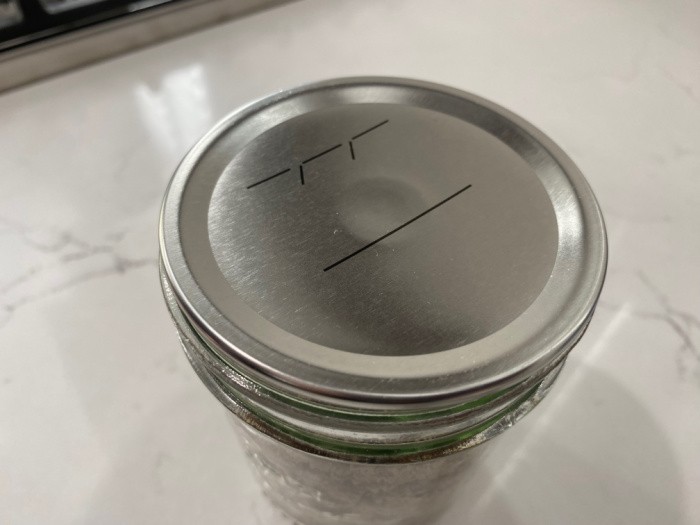
Dicorain™: Turn It On To Seal
Here, you see the number of seconds the unit has been running once the ON/Off button is activated.
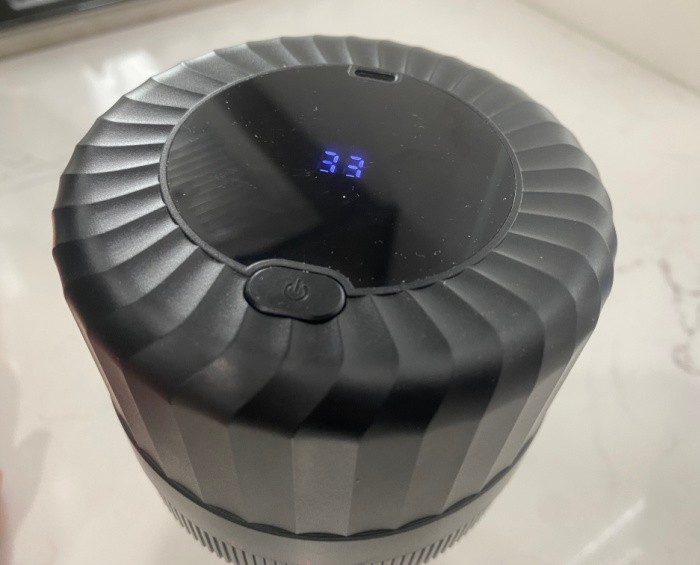
Dicorain™: Vacuum Sealed Jar
With both Ball and Kerr jar lids, the vacuum seal has succeeded because the lid’s middle is recessed. If the lid’s middle is still upright, you must repeat the sealing process. If it still hasn’t worked, you may have a faulty lid that needs to be discarded.
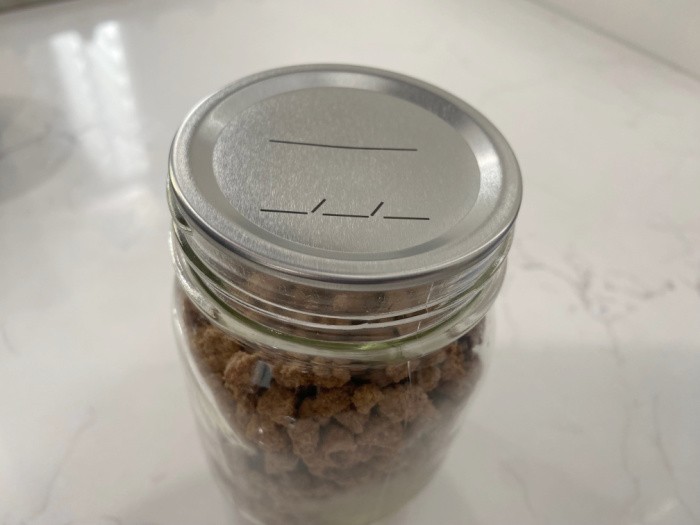
Dicorain™: Vacuum Sealed Jars with Rings
Once you’ve completed the vacuum sealing process, put the jar rings on the jars to help hold the lid in place. You don’t need to tighten them more than finger-tight.
Please note: When water bathing or pressure canning food, after 24 hours, you remove the rings.
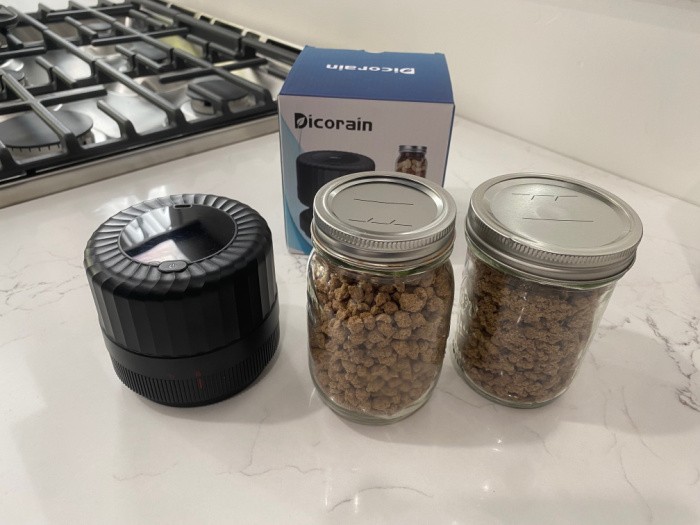
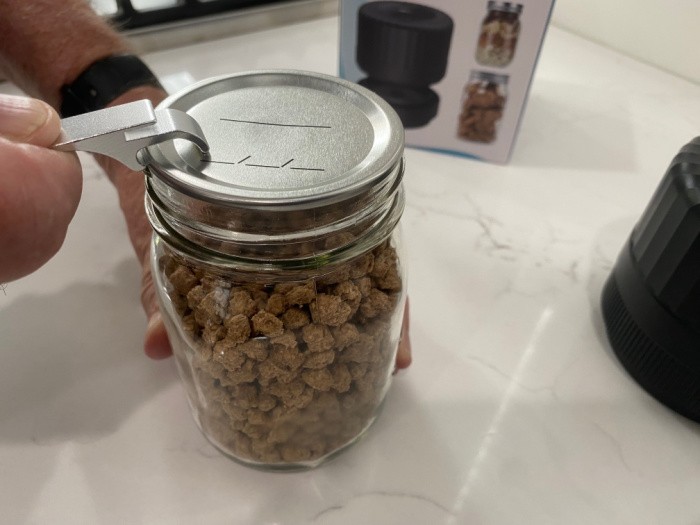
Dicorain™: Removing Lids
When it comes time to use the food product, you can use the provided lid remover or a regular manual bottle opener you use for soda bottles.
What You Can Vacuum Seal
The Dicorain™ can vacuum seal pretty much any food item. This unit isn’t designed to seal your mason jars for long-term food storage. I plan to use it for shorter-term storage of items I’ll keep in my fridge or pantry. In today’s post, the food you see in the jars is some freeze-dried meat from a #10 can that got damaged in our recent move. I put it in a couple of jars, and I’ll store it in the fridge over the next few weeks until I decide to use the food in a recipe.
- Fresh Fruits: like strawberries, blackberries, or blueberries (refrigerate)
- Grapes: Refrigerator
- Carrots and Celery: Refrigerator
- Shredded Cheese: Refrigerator or freezer
- Lettuce: Refrigerator
- Pasta: Pantry
- Nuts: Pantry or freezer (I freeze all my nuts)
- Stacked Salad: Refrigerator
- Popcorn: Pantry
- Cornmeal: Freezer
- Pancake Mix: Refrigerator or Freezer
Precautions for Safe Use
Some things to consider for safe and proper use:
- Fully charge the unit before each use.
- Don’t try to sanitize the unit or any accessories by running them in your microwave.
- Please don’t put the unit or parts in a dishwasher or submerged in liquids like your sink. Wash with a damp cloth.
- Don’t clean the unit or the silicone rings with steel wool, abrasive cleaners, or corrosive liquids.
- Don’t have wet hands when plugging the USB cord into the unit, laptop, or wall outlet.
- The unit comes with a 6-month warranty.
Why Removing Air Helps Preserve Your Food
Have you ever wondered why food stored in a sealed container seems to last so much longer than food left in a regular bag or an open container in the fridge? The answer comes down to one simple thing: oxygen. Air is full of oxygen, and while we need it to breathe, it is actually one of the biggest enemies of food storage.
When food is exposed to air, oxygen begins to interact with it right away. This process, called oxidation, is the same reaction that turns a sliced apple brown or makes nuts taste stale and bitter after sitting out for a while. Oxidation breaks down the natural fats, vitamins, and enzymes in food, changing the flavor, texture, and even nutritional value. The longer food sits exposed to air, the more oxidation takes place, and the faster it spoils.
Oxygen
Oxygen also feeds the growth of mold, yeast, and many types of bacteria. Most of the organisms that cause food to spoil need oxygen to survive and multiply. When you remove the air around your food using a vacuum sealer like Dicorain, you take away the environment these organisms need to thrive. Less oxygen means slower spoilage and a much longer shelf life, whether you are storing fresh produce, nuts, candy, or leftovers.
There is also the issue of moisture and freezer burn for families who store food in the freezer. Air pockets inside a bag or container allow moisture to escape from food and form ice crystals on the surface. This is what causes that dry, discolored, freezer-burned texture on meat or vegetables that have been frozen too long. Vacuum sealing removes that air pocket, which helps lock in moisture and keeps food tasting fresh even after months in the freezer.
Finally, removing air helps protect food from pests. Many pantry pests, like weevils in flour or grains, need oxygen and space to survive and lay eggs. A properly vacuum-sealed container makes it much harder for these unwanted visitors to move in.
When you think about it, removing air is not just a nice extra step; it is one of the most important things you can do to keep your food storage safe, tasty, and long-lasting for your family. That is exactly why a tool like Dicorain can make such a big difference in how long your food actually stays good to eat.
Sealed Versus Unsealed, How Much Longer Does Food Really Last
One of the questions I hear most often is simply this: how much longer will my food actually last if I remove the air from it? The difference is bigger than most people expect. Here is a general comparison of common foods stored the regular way versus vacuum sealed.
Fresh fruits and vegetables
Left in the fridge in a regular bag or container, most produce lasts about one to two weeks before it starts to soften, wilt, or grow mold. Vacuum sealed and refrigerated, many fruits and vegetables can last two to three times as long, often three to five weeks depending on the item.
Nuts
Stored in a pantry in their original bag, nuts usually stay fresh for about one to three months before the natural oils inside them turn rancid. Vacuum sealed and kept in a cool pantry, nuts can last six months to a year, and even longer in the freezer.
Candy and dried snacks
Candy left in an open bag can turn hard, sticky, or stale within a few weeks to a couple of months. Once vacuum sealed, most candy stays fresh for six months to a year, since the lack of air slows down the changes in texture and flavor.
Meat in the freezer
Meat wrapped in regular freezer paper or a zip bag often develops freezer burn within one to three months. Vacuum-sealed meat can stay in perfect condition in the freezer for one to two years, since there is no air pocket left for ice crystals to form.
Bread and baked goods
Left at room temperature, bread and baked goods usually last just three to seven days before mold sets in. Vacuum sealed and frozen, bread can stay fresh for three to six months.
Of course, these numbers can vary depending on the specific food, how fresh it was to begin with, and your storage temperature, but the pattern is always the same. Removing the air dramatically slows down spoilage no matter what you are storing. When you see numbers like these side by side, it becomes easy to understand why a tool like Dicorain is such a valuable addition to any kitchen or food storage plan.
Final Word
What I love about this unit is the price and convenience. I can get it out and make it much more accessible than my Food Saver unit with the needed vacuum seal accessories. Most of us have mason jars, which you can use, whether wide- or regular-mouth size, to seal and store food. This gives us one more way to preserve our food. Please remember that your vacuum-sealed food must be refrigerated or placed in the freezer. May God bless this World, Linda
The post Dicorain™ A New Way To Vacuum-Seal Some Foods appeared first on Food Storage Moms.
from Food Storage Moms
No comments:
Post a Comment