Estimated reading time: 16 minutes
Our Pioneer Ancestors Rendered Lard on a Regular Basis. Did They Know Something We Don’t?
A lot of people are quick to say “no” to lard as a cooking ingredient. That’s unfortunate. They certainly have their reasons, and some are well-founded, but lard isn’t the bad guy that many people make it out to be. Moderation is the key, and a well-timed fish fry or a deep-fried chicken dinner in lard will leave everyone smacking their lips. Let’s look at the facts.
Yes, lard is high in saturated fat, and saturated fats are high in LDL cholesterol (also known as “bad” cholesterol). But according to Harvard Health Publishing, trans fat is what you really need to worry about. You don't want to ingest a single gram of it.
Saturated fats, on the other hand, are all right in moderation. In fact, a meta-analysis of 21 studies was unable to find a significant link between saturated fat and heart disease. Doctors say you should still keep saturated fat at 10% of your calories or less just to be safe, but there is no reason to remove it altogether.
Lard: The Big Energy Booster
In my opinion, it's a good thing that lard is high in calories. It may seem odd to laud the benefits of calories from fat, but our bodies produce more internal heat from fat calories than from other types of calories. Our bodies also need fat for the proper functioning of many of our organs, including our brains. For the record, our brains are largely made of fat.
On the other hand, calories from carbohydrates offer a quick burst of energy and internal body heat but only for a short duration. In fact, it’s the high degree of carbohydrates in our diets that cause us to retain fat for the simple reason that it’s easier for our bodies to burn carbohydrates than fat.
This is why some of the high-fat/high-protein diets actually result in weight loss and cholesterol reduction. When we deny our bodies the easy luxury of carbohydrates like sugar and starches, we go into overdrive and burn the fat. That’s a good thing and that makes saturated fats less dangerous to health than some people assume. The telegram is simple: Enjoy the lard but skip the donut.
Lard: The Big Flavor Booster
Many people tout the flavor benefits of lard. Some people say it makes the best deep-fried chicken, is the perfect fat for a fish-fry, and adds a flavor to biscuits that a trans-fat like shortening can’t. In Belgium, French fries are traditionally deep fried in duck fat, but lard comes in a close second for the world’s best French fries.
Lard: The Money Saver
If you’re on a tight budget, skip the margarine and render the lard. It’s a great replacement for any recipe that calls for butter, shortening, or margarine and also saves you on the price of cooking oils. It makes a great pie crust and works with most any pastry recipe.
Raw Lard Sources
Finding raw lard for rendering can be a bit of a challenge. If you live in relatively close proximity to a pig farm, you’re in luck. They’ll often have an ample supply and it’s a low-cost commodity. Unfortunately, most of us don’t live close to a pig farm.
You would think butcher shops would have a good supply, but they either don’t have it or simply dispose of it because the low cost isn’t worth the effort of packaging or space in a refrigerator which can display higher margin meats.
Most grocery stores also present a dead-end, but there’s a solution at certain kinds of grocery stores. Look for the stores that appeal to a diverse and ethnic customer base. Many people from other countries and cultures aren’t averse to a coarse item like raw lard and appreciate its value as a flavor enhancer and calorie producer.
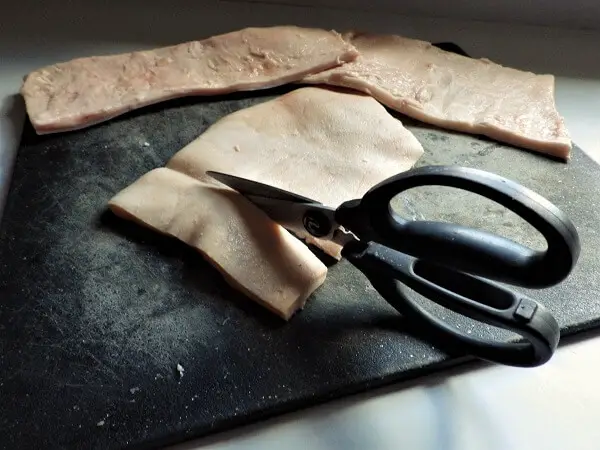
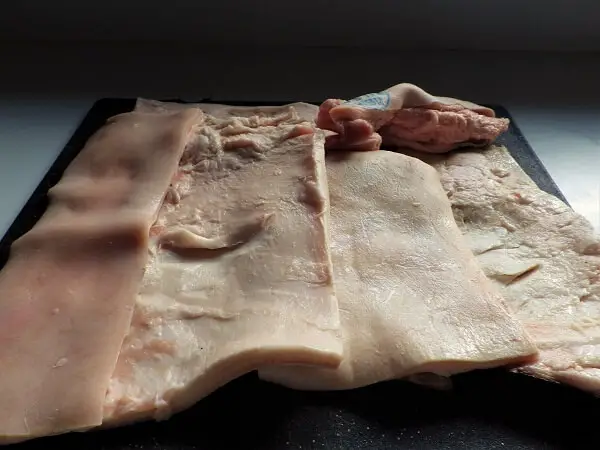
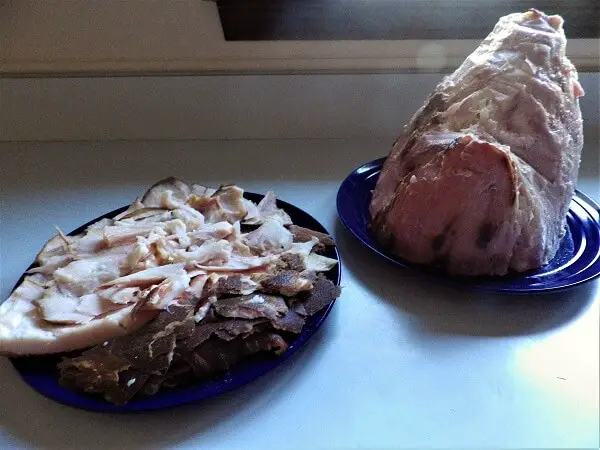
When you do find lard at an ethnic grocery store, it will typically be packaged with skin attached to the fat. You want that. The skin will surrender some lard during the rendering process and the skin can be further deep-fried to create some excellent pork rinds, usually referred to as cracklings. They’re not for everybody, but if you’ve never tried one, you’re missing the joy of a farm boy’s potato chip.
Not All Lard Is Created Equal
Here's something that'll make a real difference in your results: where the fat comes from on the pig matters quite a bit.
Leaf lard is the gold standard. It comes from the fat surrounding the pig's kidneys and internal organs, and it has a very mild, almost neutral flavor. This is what serious bakers are after. Roll it into a pie crust and you'll wonder why you ever used shortening. It's harder to find but worth the search.
Back fat is what you'll most commonly encounter, and it's what most of this guide is working with. It comes from — you guessed it — the pig's back, and it renders into a perfectly good cooking lard with a slightly more pronounced pork flavor. Great for frying, sautéing, and most savory cooking.
Fatback is similar to back fat but includes the skin and is often salt-cured. If you find it at an ethnic market, it works fine for rendering, just be aware that the cured variety will add a saltier, smokier note to whatever you cook.
The short version: if you're baking pies and pastries, track down some leaf lard. If you're frying chicken or seasoning a cast iron pan, back fat is your workhorse.
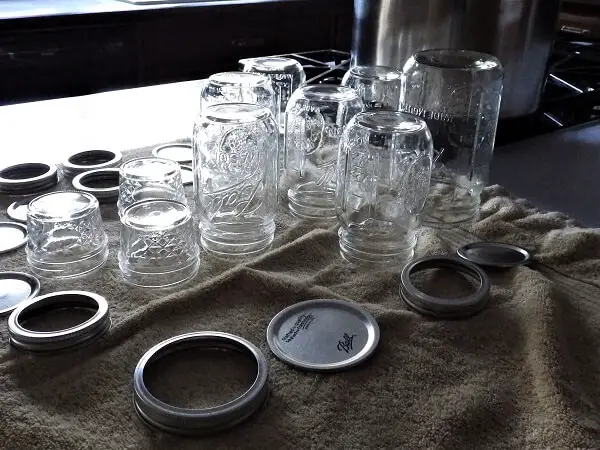
Lard Rendering Tools
These tools are tied to the process steps for rendering lard. They include:
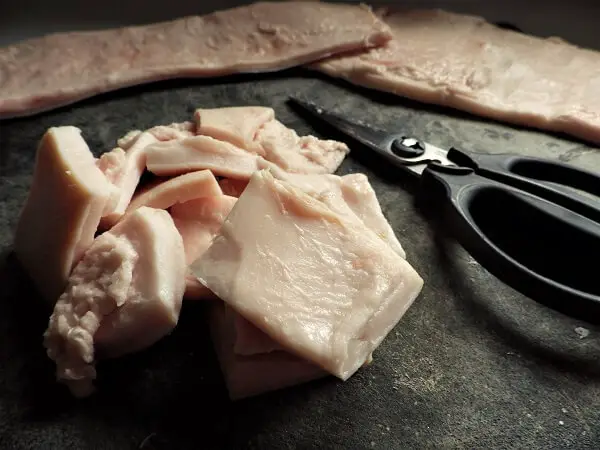
- Kitchen shears which do a better job of cutting through the pork fat and skin than even the sharpest knife, and a cutting board to protect any countertop from the cutting process.
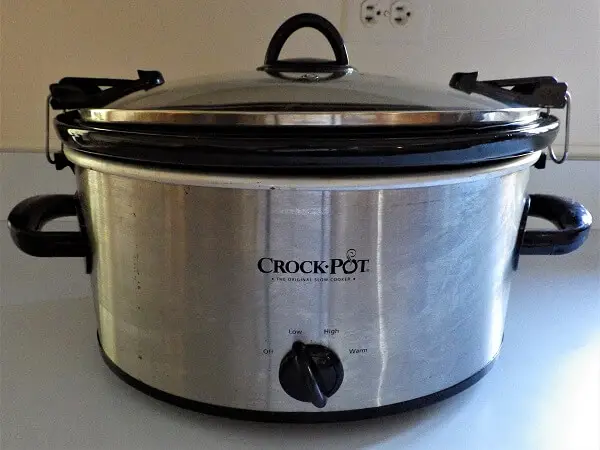
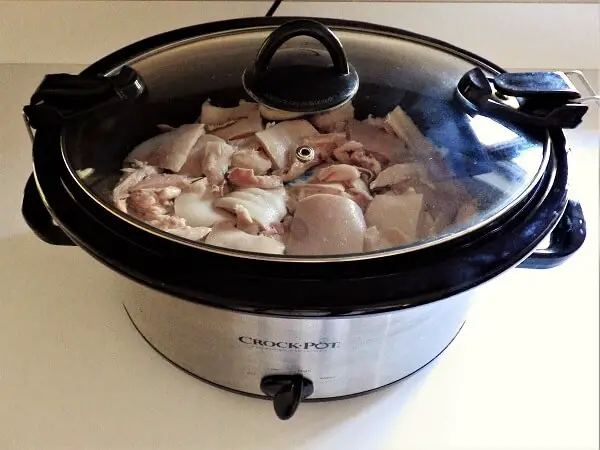
- A 7-quart crockpot or larger slow cooker to render the lard at a low temperature for a long period of time (24 to 72 hours or more depending on the quantity you are rendering).
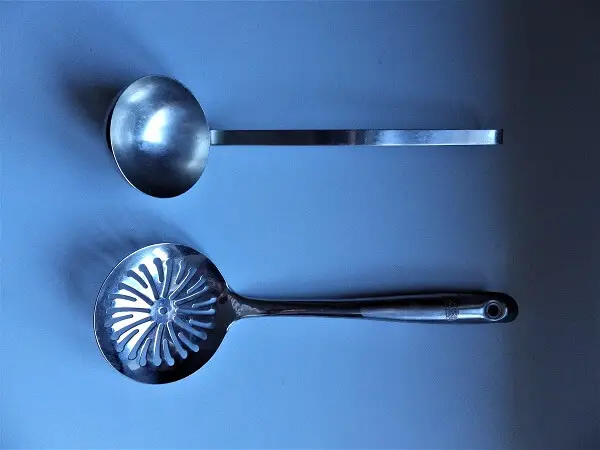
- A large, metal slotted spoon for stirring the lard while it renders and to remove bits of skin as you go, and a large, metal ladle for collecting and pouring the lard into jars.
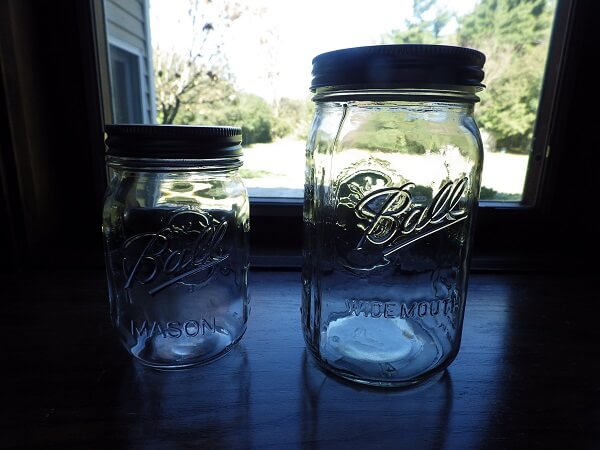
- Sufficient canning jars, either one quart or one pint in size, plus lids. You can use smaller jars if you want a smaller, meal-size portion.
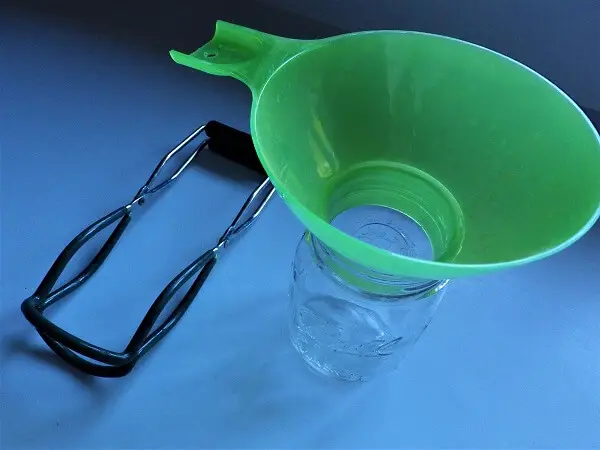
- A canning funnel to prevent the lard from dripping onto the sides of the jars or rim and Mason jar tongs for lifting the hots jars from the hot water bath.
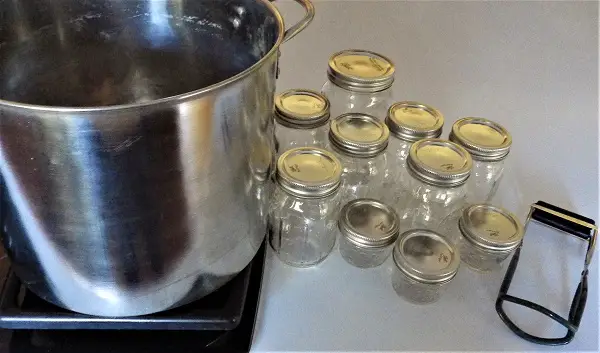
- A large pot for hot-water-bath processing to sterilize the jars before filling with lard.
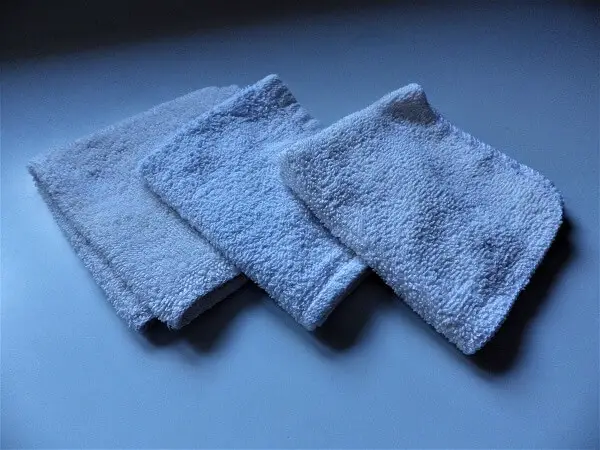
- A large, clean towel for draining and drying the sterilized jars, along with dry washcloths or paper towels to occasionally clean and dry your hands after handling a lot of raw fat.
- And don’t forget the raw lard.
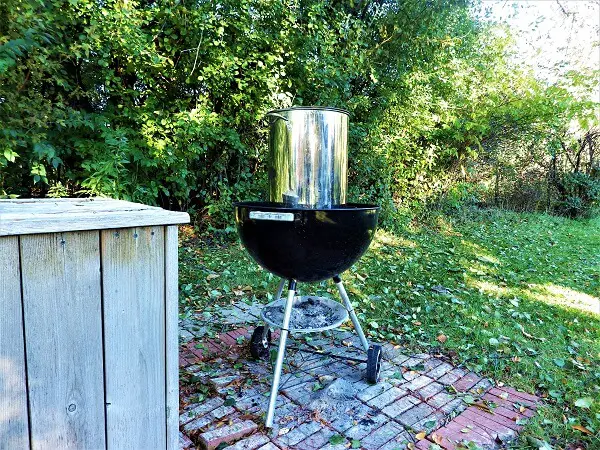
If you’re not using a crockpot, you can use a large stockpot over hot coals outside. A wood fire in a kettle grill burned down to coals is a good option.
Make sure you have a deep and large stock pot and don’t overfill it with raw lard. 2/3 full is the limit. A grease fire over open coals is serious stuff.
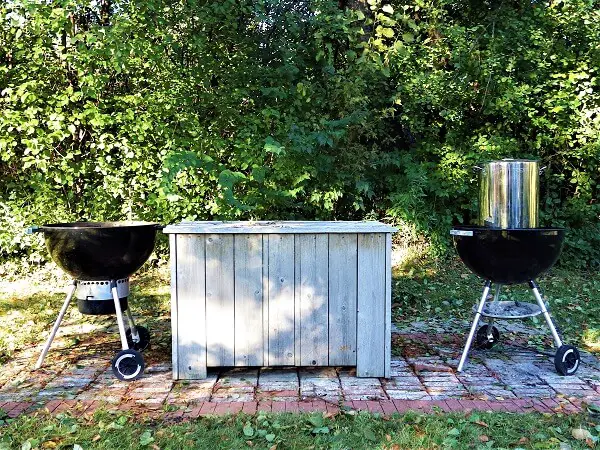
Go low and slow and burn your wood to coals in a separate area and transfer the coals under the pot with a shovel as you go. A second kettle grill could serve as your burning pit to keep you supplied with hot coals.
Kettle grills are a good option for outdoor lard rendering because it’s easier to manage the coals and the heat. You may need to tend the hot coal fire under the stock pot in the middle of the night to keep the heat going. If it cools down substantially, you may attract various animals who can’t resist the aroma of pork fat in the wind.
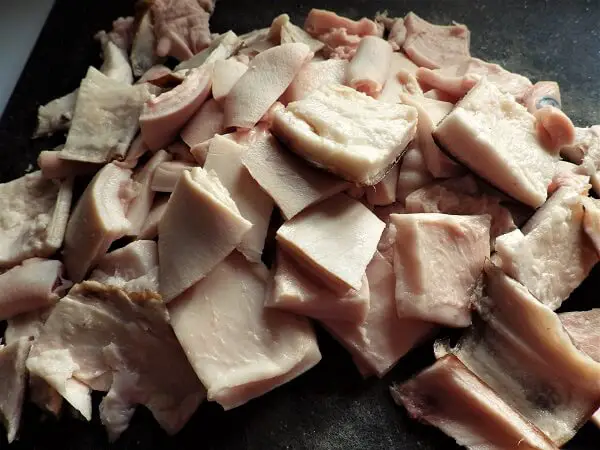
And here’s a big fat tip. Pork fat can be soft, loose, and very greasy. To firm it up and make your cutting job easier, freeze the thawed pork skins for 10 to 15 minutes to give it a bit more resistance to the edges of your kitchen shears.
Rendering The Lard
- Use kitchen shears to cut the pork skins into pieces around 1-inch square with the fat still attached.
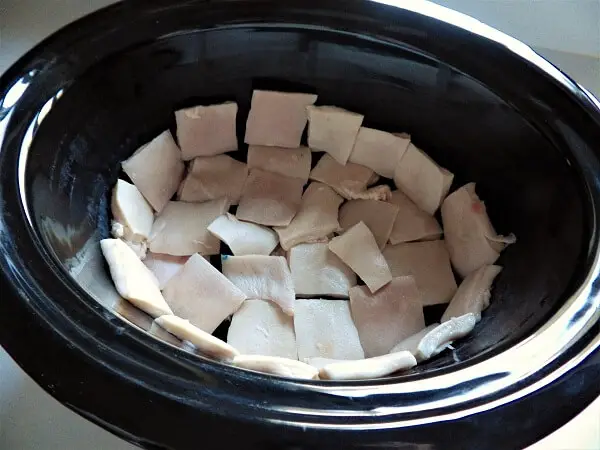
- Fill a 7-quart crockpot ¾ full of the pork fat chunks and set the heat for low. Take the time to put the first layer into the crockpot fat side down.

- If you want, you can start on high until the rendering lard starts to bubble and then turn the crockpot to low.
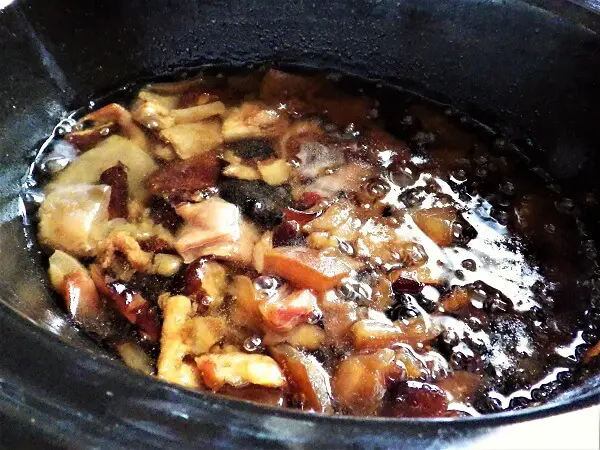
- Keep the pot covered while the lard renders. Bubbles can and will splatter grease.
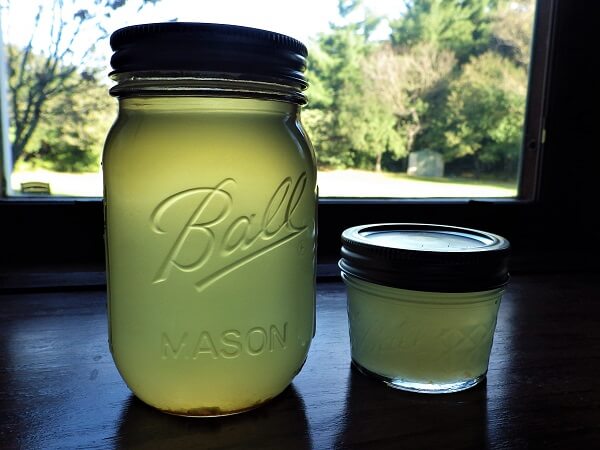
- As the lard renders it will assume a clear and light brown translucency.
- While the lard is rendering, it’s time to sterilize the jars. Add enough water to a large pot to cover the canning jars you are planning to use. Toss the lids into the pot with the jars and boil uncovered for 10-minutes.
- Stir the crockpot of lard chunks gently with the slotted spoon from time to time to allow each piece to be exposed to the heat of the lard for further rendering.
- Carefully remove the sterilized jars from the hot-water-bath with jar lifting tongs and allow to dry on a clean, dry towel with the open ends down.
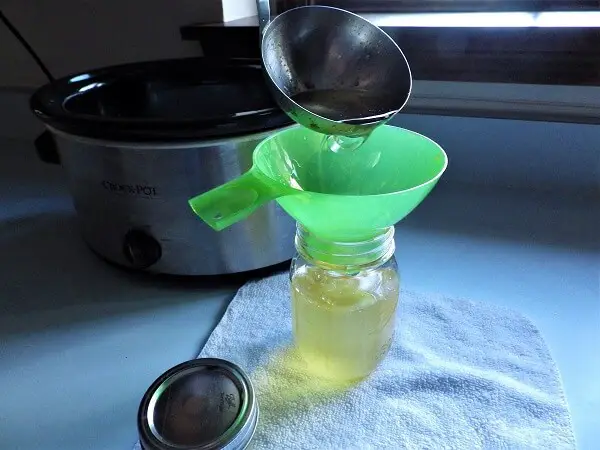
- When it appears that sufficient lard has rendered to fill a jar, carefully ladle it into a sterilized jar using the canning funnel to prevent drips. You don’t want any drips on the rims because that can compromise the seal of the lid. You may need one of your dry washcloths to protect your hands from the heat of the jar while you screw on the lid.
(If you are rendering over open, hot coals outdoors, remove the pot from the coals to some distance before ladling into a jar so that any drips don’t catch fire and ignite the lard in the pot).

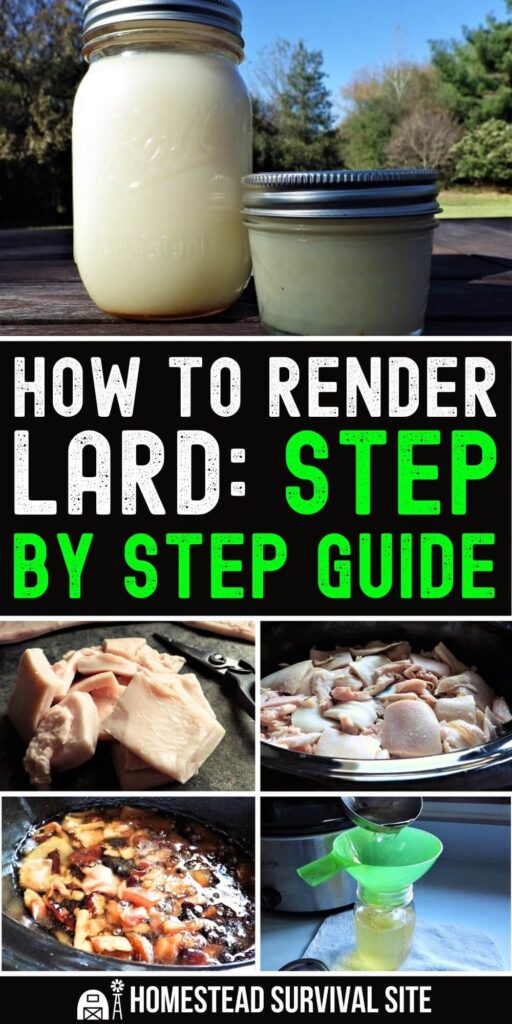
- Allow the jars to rest for 12 to 24 hours at room temperature. You can accelerate the process by refrigerating the jars. The translucent fat will solidify into a bright white.
The Oven Method: A Reliable Alternative
Don't have a large crockpot or just prefer a more hands-off approach? The oven does a beautiful job of rendering lard, and it's hard to argue with the simplicity.
Preheat your oven to 225–250°F. Cut your fat into 1-inch chunks just like you would for the crockpot method, and place them in a large, oven-safe Dutch oven or roasting pan. Slide it in uncovered and let the oven do the work. Every 30 minutes or so, give it a gentle stir. Depending on the quantity, you're looking at anywhere from 2 to 4 hours.
The oven method is a little faster than the crockpot, gives you slightly better control over the temperature, and doesn't require you to babysit it through the night. The tradeoff is that the house will smell very much like a pork processing facility for a few hours, which is either a wonderful thing or a problem depending on your household.
Once the fat chunks have rendered down to small, golden cracklings floating in clear liquid fat, you're done. Ladle it into your sterilized jars just like the crockpot method and you're on your way.
Don't Throw Away the Cracklings
After you've ladled off the rendered lard, you'll be left with a batch of small, browned bits of skin and connective tissue at the bottom of the pot. Don't even think about tossing them.
These are cracklings — or pork rinds, depending on where you grew up — and they're a legitimate food in their own right. If they came out of the crockpot on the softer side, spread them on a baking sheet and run them under the broiler for a few minutes until they puff up and crisp. Hit them with a little salt while they're still hot.
They won't win any beauty contests but they're high in protein, deeply savory, and completely shelf-stable for a day or two once cooled. In a homestead or survival context, that's bonus calories from something you would have otherwise discarded. Salt them heavy and they'll last a bit longer. Your pioneer ancestors didn't waste a thing, and neither should you.
Storing Your Lard
Canning
Lard can be stored up to 5 years if canned properly in sterilized jars, is unopened and stored in a cool, dark place like a dark pantry, basement, or root cellar. Whenever you open a stored jar of lard, smell the lard first. If it has an off color, odor, or a mildew smell, discard it. A refrigerator is an ideal choice, but lard must be refrigerated after opening and used within a month.
Freezing
You can also freeze your lard. A simple way to do this is with ice cube trays. Simply pour the lard directly into an ice cube tray, let it set up at room temperature, freeze, and then place the cubes into a resealable, plastic bag.
This is a great way to manage portion control. There are two tablespoons in the average ice cube, so you can easily determine the proper portion for any recipe. Better yet, partially thawed ice cubes can be cut up into slices and make the perfect addition for making a pie crust.
Can I Recycle Lard?
It’s not recommended to try and recycle lard that has been used for deep frying unless you filter it extremely well. This would include filtering through a mesh filter and either a layer of cheesecloth or even a coffee filter to remove any particulate matter floating in the yard after frying.
Most restaurants filter their oils and fats and re-use them, but their equipment and process are highly specialized. Lard is easily contaminated by anything that was deep fried. Once you’re done with the chicken frying or fish fry, either filter carefully before reuse or dispose of the used lard.
Now That You Know the Facts and the Fats, Give Lard Rendering a Try
If you want to try a low-impact approach to lard rendering, you can remove the fat from a shank or butt portion of ham and cut it into chunks and render it in your crockpot. You won’t get a lot of lard but enough to see what a difference the flavor of lard can make for anything you bake or fry.
Who knows, you may like it enough to search out that ethnic grocery store and really roll up your sleeves and surrender to the render.
You May Also Like:
The post How to Render Lard: Step by Step Guide appeared first on Homestead Survival Site.
from Homestead Survival Site https://ift.tt/Gf7inqD
No comments:
Post a Comment