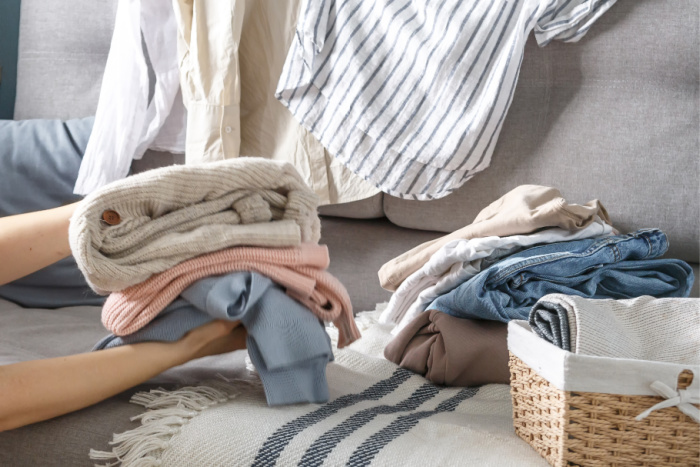
Today, my challenge to everyone, including me, is to take six weeks to declutter our homes. Clutter has a way of creeping into our lives slowly, one misplaced item at a time, until suddenly the garage is a maze, the pantry is a mystery, and the kitchen counter has become a permanent parking lot for things that belong somewhere else. The good news is that you don’t have to tackle all of it in a single overwhelming weekend. With a simple six-week plan that assigns one area of the home to each week, every member of the family can pitch in, progress feels manageable, and the results last because habits form gradually rather than all at once.
This post walks you through every major space in your home, from the living room to the garage, with practical strategies for sorting, deciding, donating, and organizing. By the end of week six, your home will feel lighter, calmer, and genuinely easier to live in.

Before You Begin: Three Rules That Make Decluttering Work
Before diving into the room-by-room plan, it helps to establish a few ground rules that apply everywhere.
The first rule is to sort before you organize. Many people buy storage bins and baskets before they have actually reduced the number of items they own. Organizing clutter isn’t the same as eliminating it. Sort first, donate or discard what you no longer need or love, and then find the right spot in your home for what remains.
The second rule is to involve the whole family. Children who participate in decisions about their own belongings are far more likely to respect the systems you put in place. Give kids age-appropriate choices and resist the urge to declutter their spaces without them.
The third rule is to have a donation station ready on day one. Place a box or bag in a central location where family members can drop items they are ready to release. When it fills up, take it to a local thrift store or donation center promptly. Letting donation bags sit for weeks creates doubt and backsliding.
Week One: The Living Room
The living room is where families gather, where guests spend time, and where clutter is most visible. Starting here gives you a motivating win right away.
Begin by doing a complete sweep of the room and removing anything that doesn’t belong there. This means toys belong in the playroom, mail belongs on a desk, dishes belong in the kitchen, and clothes belong in the closet or laundry. Don’t organize any of it yet; simply relocate it to its proper room for later.
Next, look at your surfaces. Most living rooms accumulate far too many decorative objects, remote controls without devices, expired magazines, charging cables without owners, and general miscellany. Clear every surface completely, wipe it down, and only return what genuinely belongs there and earns its place.
Take an honest look at your media collection. DVDs, Blu-rays, CDs, and video games that no one has touched in years can be donated, sold online, or recycled. If your family has moved to streaming, physical media may no longer need dedicated shelf space.
Tackle the furniture itself. If your living room has a storage ottoman, a console table with drawers, or a cabinet, empty each one completely and sort through its contents. Keep only what’s genuinely useful and relevant to the living room.
At the end of week one, the living room should feel visibly calmer. Reward the family with a movie night in your newly refreshed space.
Week Two: The Kitchen
The kitchen is the heart of the home and often one of the most cluttered spots in the house. It’s also one where decluttering makes a dramatic difference in daily life. Cooking is faster, meals are more enjoyable, and cleanup is easier when every item has a clear spot it can call home.
Start with the countertops. The goal is to keep only what you use daily, which for most families means the coffee maker, a wooden knife block, and perhaps a fruit bowl. Everything else can live inside a cabinet. A clear counter isn’t only easier to clean, but also signals calm and order the moment you walk into the room.
Move to the cabinets and drawers. Pull everything out of each one in turn. As you sort through, ask yourself whether each item is used regularly, whether you have duplicates, and whether it actually functions correctly. Broken appliances, mismatched lids without containers, single chopsticks, and gadgets used only once a year can all be let go of.
Pots and pans are a common source of kitchen overflow. Most families cook regularly with three to five pieces. If you have a cabinet that opens by avalanches, this is a good place to simplify. Donate extra pans that are in good condition.
Don’t forget the junk drawer. Every kitchen seems to have one. Empty it completely, discard what is broken or outdated, and return only the items that genuinely belong in a kitchen utility drawer. A small organizer insert or two goes a long way here.
Week Two Continued: The Pantry
The pantry deserves its own focused session during kitchen week because it brings its own category of chaos.
Start by pulling every single item off the shelves. As you go, check expiration dates and discard anything past their dates. You may be surprised by how much expired food you’ve been storing. While the shelves are empty, wipe them down.
Group everything into categories as you return items to the shelves: canned goods together, grains and pastas together, snacks together, baking supplies together, and so on. This grouping is what makes a pantry actually functional rather than merely a place where things get stacked.
Store the most frequently used items at eye level and within easy reach. Heavy items like large bags of flour or canned goods should be stored on lower shelves or on the floor. Items used rarely, like specialty baking tools or holiday supplies, can go up high.
If your pantry has deep shelves, consider using shelf risers or small pull-out bins so that items in the back aren’t perpetually lost. Labeling shelves or bins helps every family member put things back in the right place without having to guess.
Finally, do a quick inventory of what you have before your next grocery run. Decluttering the pantry often reveals that you own three bottles of the same spice, which saves money as much as it saves space.
Week Three: The Bedrooms
Bedrooms should feel like restful retreats. When they’re cluttered, sleep quality suffers, and the room never truly feels like a place to unwind. Tackle each bedroom separately, starting with the master bedroom and then moving through each child’s room.
In the master bedroom, start with the nightstands. These small surfaces tend to collect books, chargers, glasses, medications, old receipts, and anything that gets set down before sleep. Clear both nightstands completely and return only what you use nightly.
Move to the dressers. Pull every drawer open and sort through clothing. Remove anything that doesn’t fit, is worn out, has missing buttons, or simply isn’t being worn. Be honest about aspirational items, meaning the jeans from five years ago that haven’t fit since, or the sweater bought on sale that never quite felt right. Donate them and make room for what you actually wear.
The space under the bed is often overlooked and can store a surprising number of forgotten items. Pull everything out and assess it. Under-bed storage works well for seasonal clothing or extra linens when it’s organized intentionally, not when it becomes a default dumping ground.
For children’s bedrooms, work alongside your child rather than doing the job for them. Let them take the lead in deciding what to keep, being a supportive guide rather than the final authority. Remind them that toys they no longer play with can bring joy to other children. Keep the conversation positive and frame it as making room for the things they love most.
Week Four: The Bathrooms
Bathrooms are smaller spaces, but they can hold a remarkable volume of clutter. Expired medications, duplicate hygiene products, nearly empty bottles, and hair tools that no longer work can quietly fill every drawer and cabinet.
Begin under the sink, which is usually the most chaotic bathroom storage area. Pull everything out and sort through it. Discard expired medications properly by taking them to a pharmacy medication drop-off rather than flushing them. Dispose of products you haven’t used in a year and are unlikely to start using.
Go through your medicine cabinet or wall cabinet next. Keep current medications and in regular use, first aid supplies, and daily care items. Anything beyond that can likely be donated, disposed of, or removed from the bathroom entirely.
Tackle the shower and bathtub area. Families tend to accumulate more shampoo and body wash than anyone could reasonably use. Consolidate partially used bottles, rinse out and recycle empty ones, and keep the shower shelf limited to products that are actually in rotation.
Hair styling tools are worth a special mention. Straighteners, curling irons, and hair dryers that no longer heat evenly or have frayed cords should be retired. If you have extras that are in good shape, consider donating them.
Add a small hook or over-the-door organizer if your bathroom lacks storage, and make a habit of returning every item to its place after each use. That’s what Mark and I have done with our bathrobes. In a small space, that habit makes all the difference.
Week Five: The Guest Bedroom and Closets
Guest bedrooms and closets tend to become the home’s unspoken storage zones, where things are placed with the intention of dealing with them later. Week five is the moment to deal with them.
If your guest bedroom doubles as a storage room, start by removing everything unrelated to guest accommodations. All of those boxes, bags, and miscellaneous items need to be sorted elsewhere or donated. The goal is for the room to be ready for a guest on short notice without a frantic clean-up session beforehand.
For the guest bedroom closet, donate clothing that belongs to no one currently in the household and hasn’t been needed in over a year. Keep spare linens, a few extra hangers, and perhaps one shelf of occasionally used household items. Everything else belongs in a different space.
Now move on to the closets throughout the house, including hallway closets, linen closets, and any dedicated storage closets.
In the linen closet, keep towels and sheet sets to a reasonable number for your household. A good rule of thumb is two sets of sheets per bed and two towels per person. Donate extras. Old towels that are worn but serviceable can be donated to animal shelters, which often welcome them.
In the hallway coat closet, remove everything and return only what belongs to the current season. Off-season coats can be stored in a labeled bin on a high shelf. Shoes that have piled up on the floor belong back in bedroom closets or in a shoe rack near the entry door.
As you work through each closet, pay attention to the organizational systems in place. Sometimes a few additional hooks, shelf dividers, or labeled bins are all it takes to transform a chaotic closet into one the whole family can maintain.
Week Six: The Garage
The garage is often saved for last because it’s the most daunting space in the home. Many families haven’t touched certain corners of their garage in years. But after five weeks of practice, you’re ready, and the garage rewards a thorough effort more than almost any other space.
Start by pulling everything out onto the driveway or the area in front of the garage. Yes, everything. This step feels overwhelming, but it’s the only way to see what you actually own and to clean the garage floor before putting things back.
As you sort through items on the driveway, create clear categories. Tools should go together; sports and recreational equipment together; yard and garden supplies together; automotive supplies together; holiday decorations together; and camping or seasonal gear together.
Now look honestly at what you have. Duplicate tools can be donated or sold. Sports equipment for activities the family no longer pursues should go. If you haven’t gone camping in four years, assess whether the gear is worth the space it occupies. Broken items that you’ve been keeping with vague plans to fix them deserve an honest reckoning.
Seasonal and holiday items should be stored in clearly labeled, stackable bins on high shelves, out of the way but easy to find when the season arrives. The floor of the garage should be as clear as possible, reserved only for vehicles and perhaps a bike or two.
Use wall space intentionally. Pegboards for tools, wall-mounted bike hooks, and utility shelving mounted above the car line are all efficient ways to maximize storage in the garage without losing floor space.
After the garage is complete, take a moment to appreciate how far you’ve come. Six weeks ago, the project may have felt impossible. Now every major space in your home has been sorted, simplified, and set up for easier maintenance.
Maintaining What You’ve Built
Decluttering isn’t a one-time event. Without some simple maintenance habits, spaces tend to drift back toward clutter within months. The good news is that maintaining an organized home is far easier than creating one from scratch.
One habit that makes a significant difference is the one-in, one-out rule. When a new item comes into the home, something else leaves. This keeps accumulation in check without requiring another major decluttering effort.
A monthly five-minute sweep of high-traffic areas, surfaces, and entry points is enough to catch clutter before it builds up. You might assign one room to each family member to keep a sense of shared ownership over the home.
Seasonal transitions are natural checkpoints to revisit closets and storage areas. The shift from summer to fall and from winter to spring is a good time to rotate clothing, assess what’s worn out, and make small donations.
7 Rules of Living A Minimalist Lifestyle
How Can I Store Food Storage In A Small Home?
Final Word
Finally, shopping intentionally rather than impulsively is the most powerful long-term habit. Before bringing any new item home, pausing to ask where it will live and whether it replaces something else helps prevent the slow accumulation that got you here in the first place.
A decluttered home is not about achieving perfection. It’s about creating a space where your family can live easily, find things quickly, and spend more time enjoying your home than managing it. Six weeks of effort, one room at a time, is all it takes to get there. May God bless this world, Linda
Copyright Images: Declutter or Unclutter AdobeStock_421243937 By shintartanya, Declutter A Room AdobeStock_2027267784 By kittyfly
The post Six Weeks To Unclutter Your Home appeared first on Food Storage Moms.
from Food Storage Moms
No comments:
Post a Comment