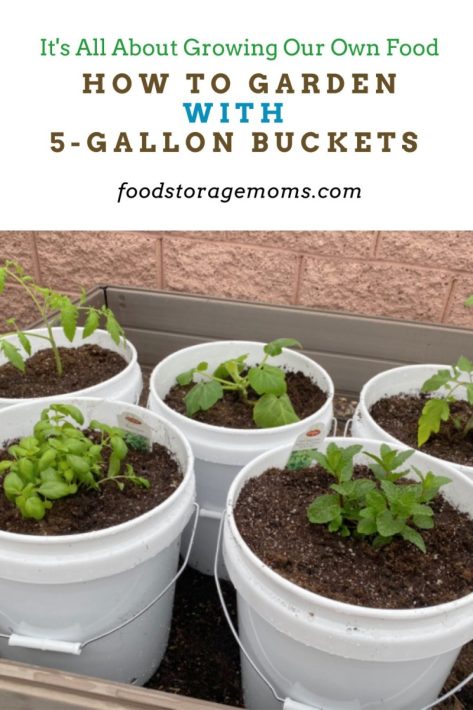
Today, it’s all about gardening with 5-gallon buckets and my new larger buckets that are 22 inches wide and 16-1/2 inches deep. Here’s the deal: We can’t all have 1-20 acres of land. Some of us have a postage-stamp-sized lot, like me; some have a porch; and others have a balcony or deck. But I’ll bet we all love picking those fresh, sweet tomatoes in the summer. If you have ever had a garden, big or small, that first red tomato is gold, my friends. Maybe not worth as much as gold, but I can smell the bacon cooking right now to go with those tomatoes, making the very best BLT!
In most neighborhoods, very few people have a garden. In my humble opinion, I’m not sure they love to garden as much as I do. I love getting my hands in the earth’s soil and experimenting with what I can grow in my area. The good thing about our time in Southern Utah is that I could have two gardens if I planned. I started seedlings inside while my garden was coming to an end outside. I had to cover the tomatoes with garden shade cloth to help modify the temperatures. This is the product I have used: Garden Shade Cloth. I think it’s essential to try to grow some of your food, whether inside, in a yard, in a bucket, or in a raised garden bed.
Raymond Dean White
I signed up for Ray’s newsletter years ago. He has great information on gardening and so much more. If you’re interested, please email Ray: wryter2012@gmail.com, and he’ll add you to his email list. I have learned so much from him, and you will as well.
Updating Post Today
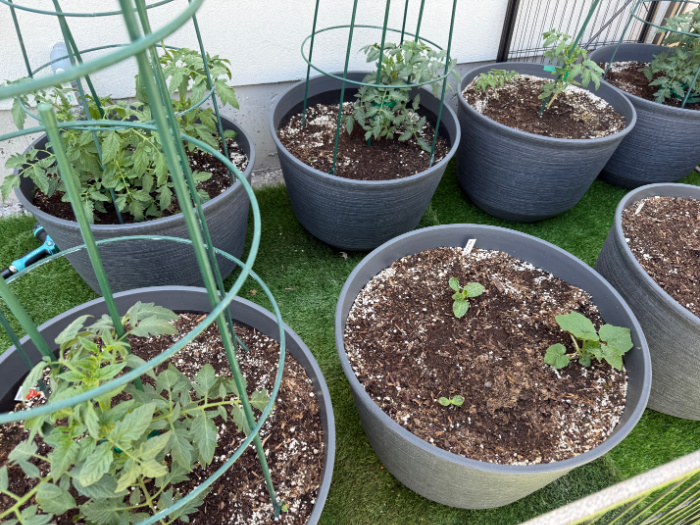
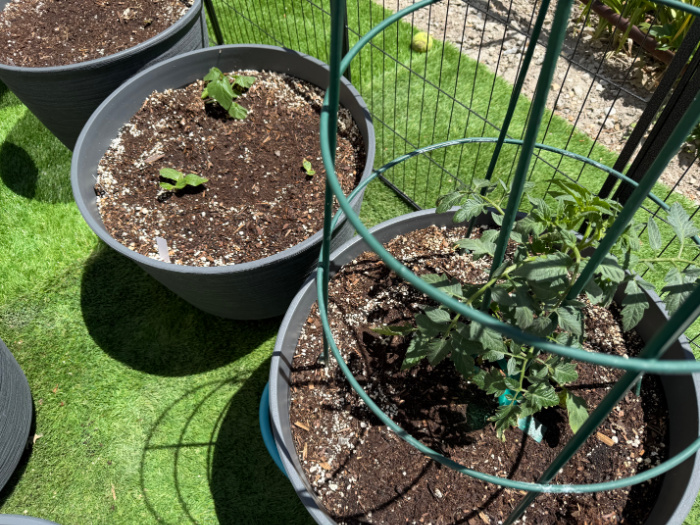
I’m updating this post today because, as you know, I moved to Northern Utah almost 5 years ago, where it’s cooler. I finally started some gardening here. I purchased some garden planters from Costco made out of resin. They are 22 inches wide and 16-1/2 inches tall. I will add a few pictures of my small backyard, which works fine for me in my current situation. I have them fenced in because we have a small Shih Tzu dog, oh, we love little Stella.
I have a friend 2 doors down who shares some vegetables with me every year; that’s such a blessing. Life is so good!
Why Plant Fruit and Vegetables in 5-Gallon Buckets?
You may be thinking, ” What in the world, why would I use a 5-gallon bucket to garden? Besides not having the space for an outdoor garden, there are various benefits to using 5-gallon buckets. Here are just a few:
- You don’t need a huge backyard. You can grow food whether or not you have a backyard. You can even set these buckets right on your front porch or deck.
- It saves space. You still get plenty of food, but the buckets save space in your yard or another growing spot.
- Plants don’t get trampled. I don’t know about you, but when I had little ones or pets running around, someone always seemed to trample something.
- They prevent rabbits and other small animals from eating your food. Although they could probably figure out how to get up into your plants, keeping them above ground level deters a lot of nibbling.
- No poor soil. When you put plants in a bucket, you know the potting soil is suitable for growing because you put the potting soil in the bucket. And you don’t have to deal with as many nasty weeds. I added amendments to mine.
- The buckets are portable. If you notice your tomato plants aren’t getting enough sun or need better drainage, you can pick up the bucket and move it to a better spot. UPDATE: Tomatoes did not work well in 5-gallon buckets in Southern Utah. My new buckets/planters are bigger.
5-Gallon Bucket Gardening Cons
As stated above, there are many benefits to gardening with a 5-gallon bucket. However, it is essential to note that there are also a few cons. Because the plants are in buckets, you may have to pay more attention to them than you would if they were planted in the ground. Here are a few cons that I found to bucket gardening:
- You have to water more often. Make sure you water your plants regularly. If they’re thirsty and need more moisture, the roots can’t dig into the ground to find more water. You do have to be careful not to overwater them. Having some drainage holes at the bottom of your bucket can help. You also need to consider drainage material at the bottom of the bucket, like small rocks, so the drainage holes don’t get clogged. UPDATE: I have since learned not to put rocks in the bottom of the buckets/pots. You decide what works for you.
- The soil has to be replenished and amended. The soil in the bucket can’t replenish its nutrients as it would in the ground. You must replenish and amend the soil with nutrients each time you plant new plants. Be careful when fertilizing to avoid applying too much and burning the plants. Using a compost pile and applying the compost is a gentler approach that eliminates the use of many chemicals.
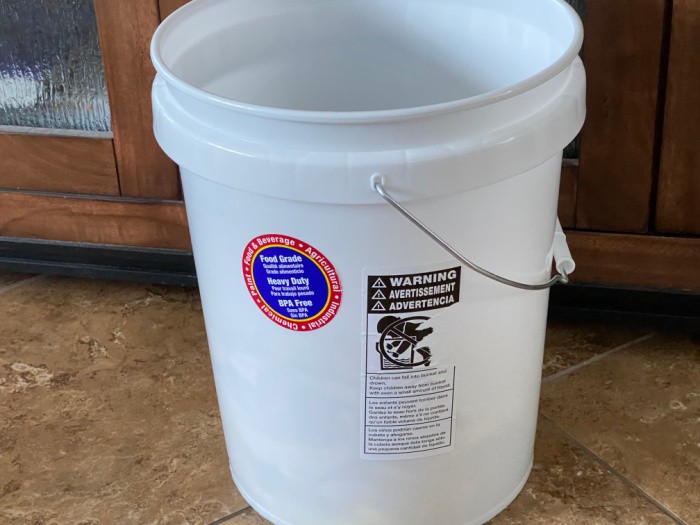
- There’s a cost to materials. You may need to buy seeds to grow a garden anywhere, but it costs a bit more than just planting in your yard due to the cost of buckets and potting soil. I suggest using safer food-grade buckets that could cost a little more.
How to Garden With 5-Gallon Buckets
Not everyone has a plot of land they can use to plant a garden. That said, you can still grow your food in plenty of ways! Instead of digging up your yard, you can use 5-gallon buckets to plant various vegetable plants that many people call container plants. You may find plenty of room to place a bucket planter where it gets the needed sun and has access to a handy hose.
Items You’ll Need:
- 5-Gallon Buckets (food grade and BPA-Free) or Larger 16 Inch Tall Planters.
- A drill with a 1/2-inch drill bit
- Gravel, pebbles, or small rocks called marble chips (I bought what was on sale at Home Depot)
- Potting Soil (I bought what was recommended for pots/containers)
- Plants, seeds, or seedlings
- Vermiculate (Regulates soil PH value and temperature of the soil)
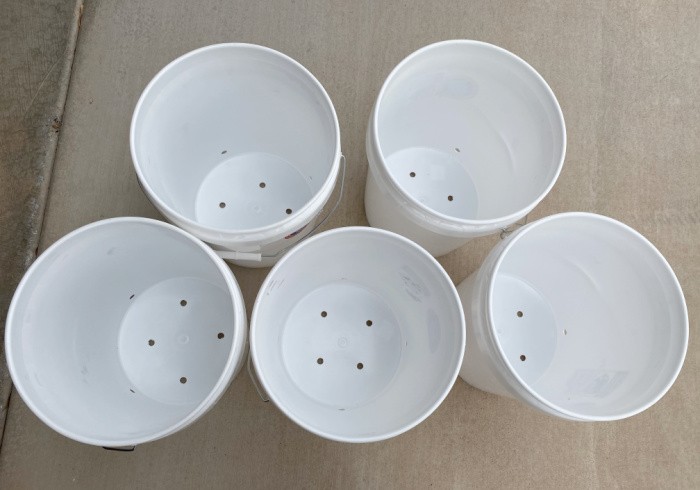
Step One: Purchase Your 5-Gallon Buckets – BPA Free
Mark and I picked up five 5-gallon buckets at a local grocery store. They were in the paint department and priced at $2.99 each. I made sure they were BPA-Free and food-grade. I didn’t need the lids, which saved me a dollar. UPDATE: I purchased some from Costco that are 22 inches wide and 16-1/2 inches tall. I got them half price for $10.00 each. They are made from Resin. They are called: Round Resin Planter 22.1″ Diameter on the Costco website (I got them in March when they were half price-I can’t see the price today).
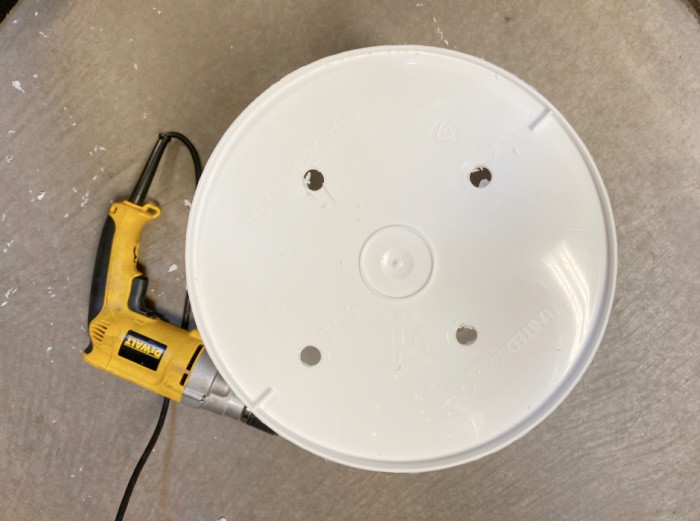
Step Two: Drill Four Holes in the Bottom for Drainage
We used a 1/2-inch drill bit to make four holes in the bottom of each bucket so the plants could drain after being watered. We just randomly drilled them with no specific spacing, but did spread them out. UPDATE on the new ones: we just popped out the circles at the bottom for drainage.
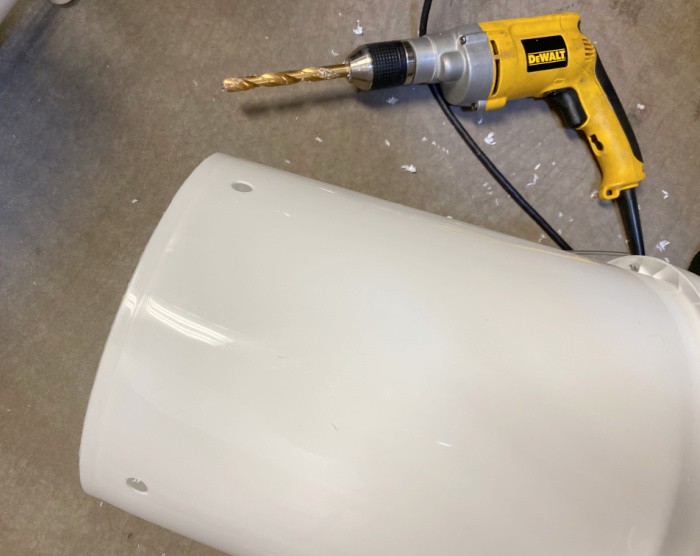
Step Three: Drill Additional Holes Around the Sides
Mark drilled four holes around the sides of the buckets about 1-2 inches from the bottom of each one to help circulate air to the roots within each container. After drilling them, we had to use pliers to break off some of the plastic residues.
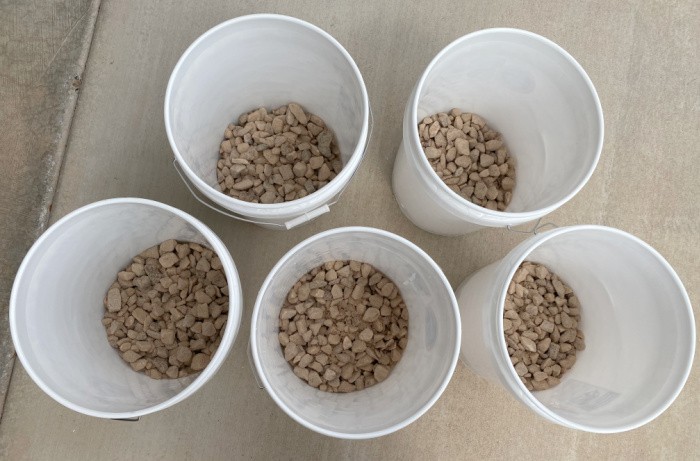
Step Four: Put Gravel or Small Rocks in the Buckets
When I went to find gravel, I couldn’t find any in a small quantity, so I opted for small rocks called marble chips. You need to fill each bucket with 2-3 inches of gravel or, in my case, small stones. I didn’t want small gravel because I was afraid it would fall out of the 1/2-inch holes I drilled.
Some gardeners suggest using perlite for nutrition and drainage in your container garden. Petlite is a naturally occurring volcanic glass that helps retain water, and it provides various nutrients. Do your research and learn how best to use this product and evaluate the added cost.
Step Five: Level Out the Gravel/Small Rocks
Before we added the soil, we put about 3 inches of rock (small rocks) in each 5-gallon bucket for proper drainage. UPDATE: I learned rocks are not necessary; you decide what works for you.
Step Six: Use Quality Potting Soil
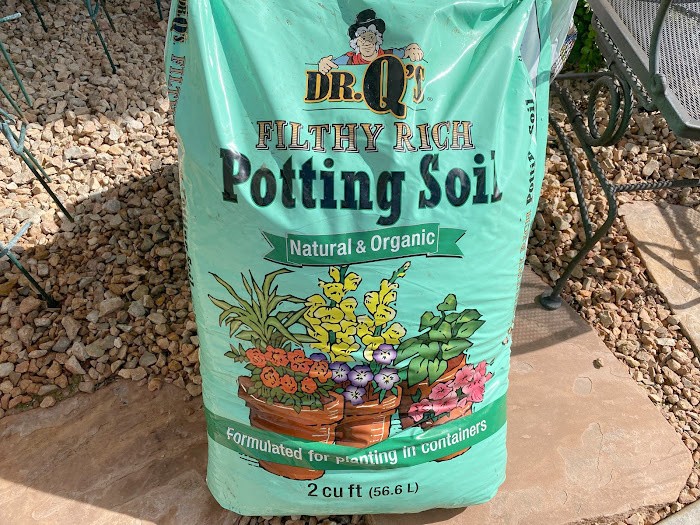
I purchased this soil because it’s made by Dr. Q, a company I’ve had good experience with. It’s organic and formulated for planting in all kinds of containers.
Step Seven: Fill Buckets with the Potting Soil
After filling the buckets with the rocks we purchased, we filled the 5-gallon buckets with the soil shown above.

Step 8: Plant Your Seeds, Seedlings, or More Mature Plants
After you have set up your 5-gallon bucket, you can plant your seeds, seedlings, or mature plants in it.
Why Do You Drill Holes in The 5-Gallon Bucket?
Don’t skip over drilling holes in your bucket. If you don’t drill holes, you may end up with dead plants. The holes help prevent water from pooling around the roots, especially during heavy rain or excessive watering. If there is too much water for the roots, they can rot. Additionally, the plant won’t get enough oxygen and nutrients from the soil.
What Food Grows Well in 5-Gallon Buckets?
Unfortunately, not everything you may want to plant will grow well in a 5-gallon bucket. Below, I give you a list of what foods I suggest you grow in your buckets and how many of each you should plant per bucket based on its diameter:
- Tomatoes. UPDATE: I could not grow tomatoes in the 5-gallon buckets in Southern Utah. Remember, you only want one tomato plant per bucket to prevent overcrowding. I must say, tomatoes are the hardest ones to grow in buckets or pots. You’ll need more vermiculite, a lot more water, and water each day. I lived in the desert, where summer temperatures would reach 115 degrees. I used shades to slightly lower the temperature, but they need a lot of water because the soil in the buckets can dry out quickly. My larger buckets from Costco this year are doing a lot better. Plus, the temperatures are cooler up north in Salt Lake City, Utah.
- Cucumbers. Cucumbers are great to grow because you can eat them in salads, pickle them, or just enjoy them with some ranch dressing. Plant only one plant per bucket. Space the buckets so that the plants have room to grow as they mature and get the sunlight they need.
- Melons. I love a good watermelon. These get rather big, so you only want one plant per bucket. Again, you’ll want to spread them out since watermelon plants can grow long vines.
- Squash. You can do all kinds of things with fresh squash. It grows well in a bucket, but you can only plant 1 plant per bucket.
- Eggplant. This is another one: you can only put one plant per bucket.
- Pepper Plants. Whether it’s hot or bell peppers, plant only two per bucket.
- Beans. Bush beans are the best kind of beans to plant in a bucket. You can plant three plants per bucket.
- Onions. Not only are onions a good source of nutrition, but they can also be expensive. You can plant four of them per bucket.
- Lettuce. We all need leafy greens to stay healthy and to get fiber. You can plant 4 per bucket.
- Carrots. Great for your eyes and perfect as snacks, you can plant 10 carrot plants per bucket.
- Radishes. I love radishes in a salad—plant radishes 10 per bucket.
- Herbs. You can plant many different kinds of herbs in your bucket. One herb plant will spread and fill the entire bucket.
- Potatoes. I’ve had mixed results growing potatoes. Since they are root plants, they need space beneath the soil surface to grow. Give them a try and see how it works in your area.
- Other Plants. Others I understand work well, but I haven’t tried to grow in the buckets; the ones I have are broccoli, cabbage, zucchini, and spinach.
5-Gallon Bucket Gardening Tips and Tricks
This gardening method is pretty straightforward, but you always learn a few tips and tricks along the way. Here are a few to keep in mind when using 5-gallon buckets for gardening:
- Companion plants. Companion plants are beneficial, helping keep nasty bugs away while attracting good ones.
- Give the buckets a quarter-twist every week. This helps the plants not grow lopsided, as they love to seek the sun.
- Insecticides. To make insecticide, combine four to five tablespoons of concentrated dish soap with one gallon of water. Mix it well and apply it with a spray bottle.
- You can reuse your potting mix. Once per year, amend and replace it with fresh ingredients, remove dead plants, and shake loose soil from the roots. Fill it back up, and use it again.
Seeds or Live Plants?
What is best to plant in your buckets, seeds, or live plants? I have used seeds, but many said live plants thrive best in buckets. I suggest buying live plants if you don’t have a green thumb. Today, I planted plants from the nursery. My seedlings are not big enough for a “picture” yet, Lol! I needed to get this post up for all to see.
I’ve found it best to plant heirloom NON-GMO organic seeds. You can save the seeds by drying them after harvesting and using them for the next season.
Other Posts to Read
There are so many vegetables you can grow outdoors, depending on where you live. Check out my posts on what to plant each month of the year!
- What To Plant In January
- What To Plant In February
- What To Plant In March
- What To Plant In April
- What To Plant In May
- What To Plant In June
- What To Plant In July
- What To Plant In August
- What To Plant In September
- What To Plant In October
Garden Gloves
These are my favorite garden gloves: DIGZ Garden Gloves. They come in different sizes, that’s what I love the most. These are the best rosebush gloves: DIGZ Rose Bush Garden Gloves. I have to get a large size for my hands. These are awesome! In case you missed this post, here’s a link: Container Gardens: Everything You Need To Know
Final Word
I hope you enjoyed my post today on gardening with 5-gallon buckets and my new Resin 22-inch by 16-1/2 wide buckets. I love growing a lot of my food, particularly the tomatoes, and I bet you will like it too! Life is good if we address food issues by increasing the amount of fruits and vegetables on our own property. You are so lucky to have a farmers’ market near you! Let’s grow as much food as we can and support local farmers, too, and we can do it! May God bless this world, Linda
The post How to Garden With 5-Gallon Buckets or Containers appeared first on Food Storage Moms.
from Food Storage Moms
No comments:
Post a Comment